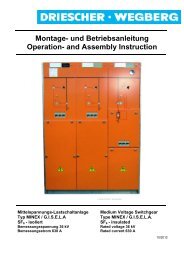
Montage- und Betriebsanleitung Operation- and Assembly Instruction
Montage- und Betriebsanleitung Operation- and Assembly Instruction
Montage- und Betriebsanleitung Operation- and Assembly Instruction

Sie wollen auch ein ePaper? Erhöhen Sie die Reichweite Ihrer Titel.
YUMPU macht aus Druck-PDFs automatisch weboptimierte ePaper, die Google liebt.
Kabelanschluss<br />
Entfernen Sie zum Anschließen der Kabel:<br />
MS–seitig<br />
1. Stirnblech (1) der F<strong>und</strong>amentwanne. Abdeckung<br />
der Kabelanschlussräume der MS–<br />
Schaltanlage gemäß der <strong>Montage</strong>- <strong>und</strong> <strong>Betriebsanleitung</strong>.<br />
2. a) Unteren Türholm (seitlich verschraubt).<br />
b) Vorderes Bodenblech (falls vorh<strong>and</strong>en).<br />
NS–seitig<br />
1. Stirnblech (1) der F<strong>und</strong>amentwanne.<br />
2. a) Unteren Türholm (seitlich verschraubt).<br />
b) Vorderes Bodenblech (falls vorh<strong>and</strong>en).<br />
Sollten bei einer der Stationen Kabeldurchführungen<br />
vorh<strong>and</strong>en sein, ist die <strong>Montage</strong>anleitung des<br />
entsprechenden Herstellers zu beachten!<br />
Erdung<br />
Stellen Sie die Erdverbindung zum Erdreich her,<br />
indem Sie das bauseits verlegte Erdungsb<strong>and</strong><br />
oder den Tiefenerder an die Erdungsanlage der<br />
Station anschließen.<br />
Inbetriebnahme<br />
<strong>Montage</strong>arbeiten prüfen<br />
Kontrollieren Sie, ob alle <strong>Montage</strong>arbeiten ordnungsgemäß<br />
durchgeführt wurden.<br />
18 KSP1130 / KSP1430<br />
2<br />
Cable connection<br />
DRIESCHER • WEGBERG<br />
To connect the cables remove:<br />
at MV side<br />
1. end plate (1) of fo<strong>und</strong>ation trough<br />
cover of cable connection compartments of<br />
the MV-switchgear according to the<br />
Operating <strong>and</strong> <strong>Assembly</strong> <strong>Instruction</strong>s<br />
2. a) lower door rail (laterally screwed)<br />
b) front bottom plate (if available).<br />
at LV side<br />
1. end plate (1) of fo<strong>und</strong>ation trough<br />
2. a) lower door frame (laterally screwed)<br />
b) front bottom plate (if available)<br />
© DRIESCHER • WEGBERG © DRIESCHER • WEGBERG<br />
1<br />
In case cable gl<strong>and</strong>s are available at the station,<br />
the assembly instructions of the corresponding<br />
manufacturer have to be observed too.<br />
Earthing<br />
Make an earth connection to the gro<strong>und</strong>, by<br />
connecting the factory installed gro<strong>und</strong> strap or on<br />
site the gro<strong>und</strong> rod to the earthing system<br />
Setting to work<br />
Check assembly works<br />
Check if all assembly works were made correctly.