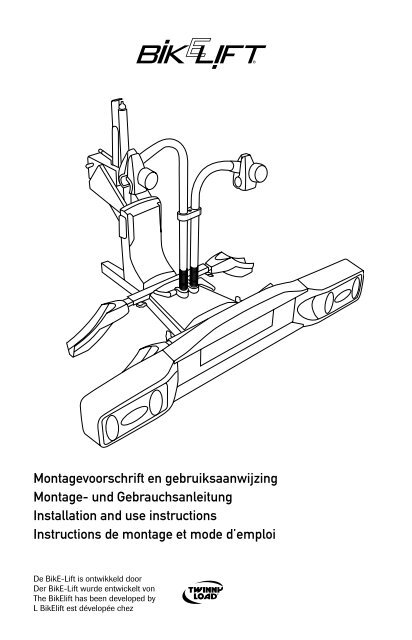
Montagevoorschrift en gebruiksaanwijzing Montage ... - Twinny Load
Montagevoorschrift en gebruiksaanwijzing Montage ... - Twinny Load
Montagevoorschrift en gebruiksaanwijzing Montage ... - Twinny Load

Sie wollen auch ein ePaper? Erhöhen Sie die Reichweite Ihrer Titel.
YUMPU macht aus Druck-PDFs automatisch weboptimierte ePaper, die Google liebt.
Noteer voor uw eig<strong>en</strong>administratie:Type drager:❏ <strong>Twinny</strong> <strong>Load</strong> BikE-LiftSeri<strong>en</strong>ummer:Aankoopdatum:Bitte notier<strong>en</strong> Sie zur eig<strong>en</strong><strong>en</strong>Erinnerung:Trägertyp:❏ <strong>Twinny</strong> <strong>Load</strong> BikE-LiftSeri<strong>en</strong>ummer:Kaufdatum:For your own administration,write down the following:Carrier type:❏ <strong>Twinny</strong> <strong>Load</strong> BikE-LiftSerial number:Purchase date:Notez pour votre dossier:Type du porte-vélos:❏ <strong>Twinny</strong> <strong>Load</strong> BikE-LiftNuméro de série:Date d’achat:
Onderdel<strong>en</strong> BikE-Lift- 1 x drager- 1 x lichtbalk 13/7 polig- 1 x zak onderdel<strong>en</strong>- 1 x afdekkap- 4 x wielgoot (2 x L; 2 x R)- 2 x frame-arm- 1 x zw<strong>en</strong>gel- 1 x hangslot- 1 x garantiekaartNLWaarschuwing<strong>en</strong>- Spindel altijd met de bijgeleverde zw<strong>en</strong>gel bedi<strong>en</strong><strong>en</strong>.- Ontvet altijd de kogel van de trekhaak vóór de fietsdrager wordt gemonteerd.- De fietsdrager moet volg<strong>en</strong>s de montagevoorschrift<strong>en</strong> in elkaar word<strong>en</strong> gezet.- Drager <strong>en</strong> fiets<strong>en</strong> moet<strong>en</strong> volg<strong>en</strong>s de <strong>gebruiksaanwijzing</strong> word<strong>en</strong> gemonteerd.- Er mog<strong>en</strong> ge<strong>en</strong> wijziging<strong>en</strong> word<strong>en</strong> aangebracht aan het product.- De verlichting is bestemd voor e<strong>en</strong> 12V-installatie.- Controleer na de eerste gered<strong>en</strong> kilometers de bevestiging van fietsdrager <strong>en</strong>fiets<strong>en</strong>.- Pas uw snelheid aan bij verkeersdrempels.- Gebruik nooit sjorband<strong>en</strong> of touw<strong>en</strong> om uw fiets extra vast te zett<strong>en</strong>, deze kunn<strong>en</strong>het frame van uw fiets onherstelbaar beschadig<strong>en</strong>.- Let op! Als het mistachterlicht constant blijft brand<strong>en</strong> als u uw fietsdrageraansluit, dan is de stekkerdoos van de auto niet conform de DIN aangeslot<strong>en</strong>.Laat dit bij uw garage herstell<strong>en</strong>.Controleer vóór u gaat rijd<strong>en</strong> of:- de fietsdrager goed op de trekhaak is bevestigd;- de borgklem (second lock) juist is aangedraaid;- de verlichting op de fietsdrager correct werkt;- de twee lichtunits op de juiste breedte zijn ingesteld <strong>en</strong> in de borging zijn geklikt;- er ge<strong>en</strong> kabel los hangt;- alle vleugelbout<strong>en</strong> van de wielgot<strong>en</strong> zijn aangedraaid;- de frameklemm<strong>en</strong> goed zijn aangedraaid;- alle wiel<strong>en</strong> met de riempjes zijn vastgezet;- er ge<strong>en</strong> losse spull<strong>en</strong> op de fiets<strong>en</strong> of op de fietsdrager ligg<strong>en</strong>;- de sleutels uit de slot<strong>en</strong> zijn g<strong>en</strong>om<strong>en</strong>.- het mistachterlicht in de linker lichtunit zit.5
Plaats<strong>en</strong> fietsdrager voor montageTip: De montage van de fietsdrager is het e<strong>en</strong>voudigst wanneer de fietsdrager op de kogelgeplaatst is.Fietsdrager op de kogel plaats<strong>en</strong> 1 , horizontaal aandraai<strong>en</strong> 2 , h<strong>en</strong>del overbr<strong>en</strong>g<strong>en</strong> 3 ,horizontaal vastdraai<strong>en</strong> 4 ; herhaal stap 2, 3 <strong>en</strong> 4.123 4<strong>Montage</strong> lichtbalk2 x2 xsteeksleutel 10 mminbussleutel 5 mmBeugels monter<strong>en</strong> 1 , kap plaats<strong>en</strong> 2 , bout<strong>en</strong> inbr<strong>en</strong>g<strong>en</strong> 3 , afstandsbuss<strong>en</strong> plaats<strong>en</strong> 4 , lichtbakpositioner<strong>en</strong> <strong>en</strong> aandraai<strong>en</strong> 5 .126
<strong>Montage</strong> lichtunitsLichunit inschuiv<strong>en</strong> 1 , breedte instell<strong>en</strong> (stapjes van 1 cm) 2 , stekker aansluit<strong>en</strong> <strong>en</strong> verlichtingcontroler<strong>en</strong> 3 , overtollige kabel opberg<strong>en</strong> 4 .max. 320 mm12 34AutobreedteTot 1,80 mTot 1,84 mTot 1,88 mTot 1,92 mTot 1,96 mTot 2,02 mUitschuiv<strong>en</strong> per kantniet uitschuiv<strong>en</strong>2 e klik4 e klik6 e klik8 e klik11 e klik (= max)De breedte van uw auto staat vermeld in het instructieboek vande auto.<strong>Montage</strong> wielgot<strong>en</strong>4 x 2 xFl<strong>en</strong>smoer invoer<strong>en</strong> <strong>en</strong> vleugelbout erin vastdraai<strong>en</strong>23binn<strong>en</strong>zijde , vleugelbout<strong>en</strong> aandraai<strong>en</strong> .1, wielgot<strong>en</strong> invoer<strong>en</strong> met de clips riching de4 x1 28
NL3<strong>Montage</strong> framebuiz<strong>en</strong>Framebuis invoer<strong>en</strong> 1 , klem van framebuis aandraai<strong>en</strong> op kartelgebied 2 , stapp<strong>en</strong> herhal<strong>en</strong> voorde tweede framebuis 3 , buisklem monter<strong>en</strong> 4 .123 49
Fiets<strong>en</strong> plaats<strong>en</strong>Riempje naar achter buig<strong>en</strong> <strong>en</strong> vastklemm<strong>en</strong> 1 , frameklemm<strong>en</strong> losdraai<strong>en</strong> 2 , eerste fiets oprijd<strong>en</strong>aan bestuurderszijde 3 , frameklemm<strong>en</strong> losvast aandraai<strong>en</strong> 4 , wielgot<strong>en</strong> afstell<strong>en</strong> <strong>en</strong> vleugelbout<strong>en</strong>vastdraai<strong>en</strong> 5 , framebuis vastdraai<strong>en</strong> 6 , frameklem vastdraai<strong>en</strong> 7 , tweede fiets oprijd<strong>en</strong> 8 ,stapp<strong>en</strong> 4 t/m 7 herhal<strong>en</strong> 9 .NL4 x 2 x1 2 370%4 5100%6 7 8100%911
Drager omhoog br<strong>en</strong>g<strong>en</strong> <strong>en</strong> borg<strong>en</strong>Zw<strong>en</strong>gel plaats<strong>en</strong> 1 , fietsdrager omhoog draai<strong>en</strong> 2 , eindpositie 3 . Second lock vastdraai<strong>en</strong> 4 ,let op de vergr<strong>en</strong>deling van het second lock, wielbandjes vastzett<strong>en</strong> 5 , frameklem op slot zett<strong>en</strong> 6 .1 2 34 5612
Fiets<strong>en</strong> afnem<strong>en</strong>Second lock losdraai<strong>en</strong> 1 , let op de ontgr<strong>en</strong>deling van het second lock, zw<strong>en</strong>gel plaats<strong>en</strong> 2 ,fietsdrager omlaag draai<strong>en</strong> 3 , fiets<strong>en</strong> loskoppel<strong>en</strong> <strong>en</strong> fiets<strong>en</strong> één voor één afnem<strong>en</strong> 4 .NL123413
GarantieOp vertoon van het garantiebewijs <strong>en</strong> de aankoopbon geeft <strong>Twinny</strong> <strong>Load</strong> ® zev<strong>en</strong> jaar garantie opde <strong>Twinny</strong> <strong>Load</strong> ® fietsdrager, te rek<strong>en</strong><strong>en</strong> vanaf de datum van aankoop, zoals vermeld op de aankoopbon.De garantie bestaat uit gratis reparatie of vervanging van onderdel<strong>en</strong> in geval van materiaal- <strong>en</strong>constructiefout<strong>en</strong>.De garantie gaat in nadat u het garantiebewijs heeft geactiveerd op de <strong>Twinny</strong> <strong>Load</strong> ® websitewww.twinnyload.com of via het verstur<strong>en</strong> van de bij het garantiebewijs geleverde antwoordkaart.Voorwaard<strong>en</strong>:- de fietsdrager moet volg<strong>en</strong>s de bijgeleverde montagevoorschrift<strong>en</strong> in elkaar zijn gezet;- de fietsdrager moet volg<strong>en</strong>s de bijgeleverde <strong>gebruiksaanwijzing</strong> op de auto word<strong>en</strong> gemonteerd;- de fiets<strong>en</strong> moet<strong>en</strong> volg<strong>en</strong>s de bijgeleverde <strong>gebruiksaanwijzing</strong> op de fietsdrager zijn geplaatst<strong>en</strong> vastgezet;- er mog<strong>en</strong> ge<strong>en</strong> wijziging<strong>en</strong> word<strong>en</strong> aangebracht aan het product;- elke verantwoordelijkheid voor persoonlijk letsel <strong>en</strong>/of schades aan eig<strong>en</strong>domm<strong>en</strong> <strong>en</strong> hieruitvoortvloei<strong>en</strong>de vermog<strong>en</strong>sschades die zijn veroorzaakt door foutieve montage of foutief gebruikword<strong>en</strong> uitgeslot<strong>en</strong>;- er is ge<strong>en</strong> garantie op defect<strong>en</strong> die veroorzaakt zijn door ongelukk<strong>en</strong>, onwettig <strong>en</strong> ondeskundiggebruik van het voertuig of defect<strong>en</strong> aan het voertuig waarop de fietsdrager is gemonteerd;- de garantietermijn wordt niet verl<strong>en</strong>gd of vernieuwd door uitvoering van garantiewerkzaamhed<strong>en</strong>;- reparer<strong>en</strong> of vervang<strong>en</strong> van het product binn<strong>en</strong> de gestelde garantietermijn is uitsluit<strong>en</strong>d mogelijkvoor de originele koper, volg<strong>en</strong>s het aankoopbewijs;- reclamaties di<strong>en</strong><strong>en</strong> ingedi<strong>en</strong>d te word<strong>en</strong> op het aankoopadres dat op de aankoopbon staat vermeld.De fietsdrager, inclusief alle bijgeleverde onderdel<strong>en</strong>, moet op dit adres word<strong>en</strong> achtergelat<strong>en</strong>;- de koper is verantwoordelijk voor de kost<strong>en</strong> van het retourner<strong>en</strong> <strong>en</strong> weer afhal<strong>en</strong> van het product<strong>en</strong>/of onderdel<strong>en</strong> op het aankoopadres;- de garantie vervalt indi<strong>en</strong> de fietsdrager onvoorzichtig <strong>en</strong> onjuist is behandeld of slecht isonder-houd<strong>en</strong>, ter beoordeling <strong>Twinny</strong> <strong>Load</strong> ® ;- de garantie vervalt indi<strong>en</strong> het seri<strong>en</strong>ummer is gewijzigd, beschadigd of verwijderd. De fietsdragermoet voldo<strong>en</strong> aan de technische specificatie;- de garantie vervalt indi<strong>en</strong> er ge<strong>en</strong> aankoopbon is, de bon is gewijzigd of onleesbaar;- defect<strong>en</strong> t<strong>en</strong> gevolge van slijtage bij normaal gebruik , ter beoordeling van <strong>Twinny</strong> <strong>Load</strong> ® , vall<strong>en</strong>niet onder de garantie.DisclamerNiet onder de garantie vall<strong>en</strong> niet door <strong>Twinny</strong> <strong>Load</strong> ® gemonteerde material<strong>en</strong>. De aansprakelijkheidvan de fabrikant uit hoofde van de overe<strong>en</strong>komst is nadrukkelijk beperkt tot de nakoming vande in dit bewijs omschrev<strong>en</strong> garantieverplichting<strong>en</strong>. Elke vordering tot schadevergoeding,behoud<strong>en</strong>s die ter zake van het niet nakom<strong>en</strong> van garantieverplichting<strong>en</strong>, is uitgeslot<strong>en</strong>. Metinachtneming van de dwing<strong>en</strong>drechtelijke bepaling<strong>en</strong> inzake (product-)aansprakelijkheid, kunn<strong>en</strong>nimmer meer recht<strong>en</strong> word<strong>en</strong> ontle<strong>en</strong>d ter zake van <strong>en</strong>ig bedrijfs- of gevolgschade, of welke(persoonlijke) schade dan ook, die zou voortvloei<strong>en</strong> uit defect<strong>en</strong> aan door <strong>Twinny</strong> <strong>Load</strong> ® geleverdematerial<strong>en</strong> of uitgevoerde werkzaamhed<strong>en</strong>.14
NLArtikelnummer: 37.99.09075 Versie 3 Februari 201115
AllgemeinesStützlastAuf dem Typ<strong>en</strong>schild der Anhängerkupplung ist die maximal zulässige Stützlastangegeb<strong>en</strong>. Das kombinierte Gewicht von Fahrradträger und Fahrrädern darf dieseStützlast nicht übersteig<strong>en</strong>. Der Fahrradträger mit Fahrrädern darf nie mehr als 75 kgwieg<strong>en</strong>. Das Gewicht des BikE-Lift beträgt 19,2 kg. Wie schwer Ihr Fahrrad ist,find<strong>en</strong> Sie in der Dokum<strong>en</strong>tation zum betreff<strong>en</strong>d<strong>en</strong> Rad oder ev<strong>en</strong>tuell im Internet.BeleuchtungDer Fahrradträger ist mit einer 12V-Beleuchtung ausgestattet.Gesetzliche Anforderung<strong>en</strong>Die in Europa gelt<strong>en</strong>d<strong>en</strong> gesetzlich<strong>en</strong> Anforderung<strong>en</strong> für d<strong>en</strong> Transport vonFahrrädern auf einem Fahrradträger find<strong>en</strong> Sie auf www.twinnyload.com.QualitätAll unsere Fahrradträger werd<strong>en</strong> d<strong>en</strong> höchst<strong>en</strong> Qualitätsanforderung<strong>en</strong> <strong>en</strong>tsprech<strong>en</strong>d<strong>en</strong>tworf<strong>en</strong> und gefertigt. Stabilität, Flexibilität, Gebrauchsfreundlichkeit, ein gutesFahrverhalt<strong>en</strong> und Langlebigkeit steh<strong>en</strong> bei uns an erster Stelle.ReinigungReinig<strong>en</strong> Sie d<strong>en</strong> Fahrradträger nach jedem Gebrauch und halt<strong>en</strong> Sie ihn frei vonSalz- und Dieselablagerung<strong>en</strong>.Verstau<strong>en</strong>Verstau<strong>en</strong> Sie d<strong>en</strong> Träger an einem trock<strong>en</strong><strong>en</strong> Ort.ZubehörFür d<strong>en</strong> Fahrradträger ist verschied<strong>en</strong>es Zubehör erhältlich. Geh<strong>en</strong> Sie zuwww.twinnyload.com für eine komplette Übersicht oder frag<strong>en</strong> Sie bei IhrerVerkaufsstelle nach.Rahm<strong>en</strong>durchmesserDer Rahm<strong>en</strong>halter ist für Sattelrohre mit einem Durchmesser von 28-38 mmgeeignet.Zusätzlich zu dieser gedruckt<strong>en</strong> Anleitung hab<strong>en</strong> wir auf unserer Website www.twinnyload.com auch ein Instruktionsvideo für Sie bereitgestellt. In diesem Instruktionsvideowird die Ingebrauchnahme und <strong>Montage</strong> des Fahrradträgers Schritt fürSchritt erläutert.16
Bestandteile des BikE-Lift- 1 Träger- 1 Lichtbalk<strong>en</strong> 13/7-polig- 1 Beutel Einzelteile- 1 Abdeckung- 4 Radkuf<strong>en</strong> (2 links, 2 rechts)- 2 Greifarme- 1 Schw<strong>en</strong>gel- 1 Bügelschloss- 1 GarantiekarteDSicherheitshinweise- Die Spindel immer mit dem mitgeliefert<strong>en</strong> Schw<strong>en</strong>gel bedi<strong>en</strong><strong>en</strong>.- Vor <strong>Montage</strong> des Fahrradträgers muss die Kugel der Anhänger kupplung immererst <strong>en</strong>tfettet werd<strong>en</strong>.- Der Fahrradträger muss d<strong>en</strong> <strong>Montage</strong>anweisung<strong>en</strong> gemäß montiert werd<strong>en</strong>.- Träger und Fahrräder müss<strong>en</strong> der Gebrauchanweisung gemäß angebrachtwerd<strong>en</strong>.- Es dürf<strong>en</strong> keine Änderung<strong>en</strong> am Produkt vorg<strong>en</strong>omm<strong>en</strong> werd<strong>en</strong>.- Die Beleuchtung ist für eine 12V-Anlage vorgeseh<strong>en</strong>.- Überprüf<strong>en</strong> Sie nach einig<strong>en</strong> Kilometern d<strong>en</strong> fest<strong>en</strong> Sitz des Fahrradträgers undder Fahrräder.- Pass<strong>en</strong> Sie bei Bod<strong>en</strong>well<strong>en</strong> die Geschwindigkeit an.- Das Fahrrad darf nie zusätzlich mit Zurrgurt<strong>en</strong> oder Seil<strong>en</strong> befestigt werd<strong>en</strong>,da diese irreparable Schäd<strong>en</strong> am Fahrradrahm<strong>en</strong> verursach<strong>en</strong> könn<strong>en</strong>.- Achtung! W<strong>en</strong>n die Nebelschlussleuchte beim Anschließ<strong>en</strong> des Fahrradträgersanhalt<strong>en</strong>d leuchtet, ist die Steckdose des Wag<strong>en</strong>s nicht DIN-konform angeschloss<strong>en</strong>.Lass<strong>en</strong> Sie dies in der Werkstatt reparier<strong>en</strong>.Vor der Abfahrt muss Folg<strong>en</strong>des überprüft werd<strong>en</strong>:- Fester Sitz des Fahrradträgers auf der Anhänger kupplung.- Fester Sitz der Fixierschraube.- Ordnungsgemäße Funktion der Beleuchtung des Fahrradträgers.- Beide Leuchteinheit<strong>en</strong> sind auf die richtige Breite eingestellt und in derSicherung eingerastet.- Keine loshäng<strong>en</strong>d<strong>en</strong> Kabel.- Alle Flügelschraub<strong>en</strong> der Radkuf<strong>en</strong> sind fest angezog<strong>en</strong>.- Fester Sitz der Klemm<strong>en</strong> an d<strong>en</strong> Pedalarm<strong>en</strong> der Fahrräder.- Alle Räder sind mit d<strong>en</strong> Radriem<strong>en</strong> festgesetzt.- Auf d<strong>en</strong> Fahrrädern oder dem Träger befind<strong>en</strong> sich keine los<strong>en</strong> Objekte.- Die Schlüssel sind abgezog<strong>en</strong>.- Die Nebelschlussleuchte befindet sich in der link<strong>en</strong> Leuchteinheit.17
Anbring<strong>en</strong> des Fahrradträgers zur <strong>Montage</strong>Tipp: Der Fahrradträger lässt sich am einfachst<strong>en</strong> montier<strong>en</strong>, w<strong>en</strong>n er auf der Kugel sitzt.Fahrradträger auf die Kugel setz<strong>en</strong> 1 , horizontal anzieh<strong>en</strong> 2 , Hebel umleg<strong>en</strong> 3 , horizontalfestzieh<strong>en</strong> 4 ; Punkt 2, 3 und 4 wiederhol<strong>en</strong>.123 42 x2 xSchlüssel 10 mmSechskantschlüssel 5 mmHalterung<strong>en</strong> montier<strong>en</strong> 1 , Abdeckung anbring<strong>en</strong> 2 , Schraub<strong>en</strong> einsteck<strong>en</strong> 3 , Distanzbuchs<strong>en</strong>anbring<strong>en</strong> 4 , Lichtbalk<strong>en</strong> in Stellung bring<strong>en</strong> und festzieh<strong>en</strong> 5 .1218
D3 4 5<strong>Montage</strong> des NummernschildsVier Fixierstücke aus dem Lichtbalk<strong>en</strong> herausbrech<strong>en</strong> 1 , in die Aussparung<strong>en</strong> einsetz<strong>en</strong> 2 .Nummernschild bis zum zweit<strong>en</strong> Anschlag in d<strong>en</strong> Lichtbalk<strong>en</strong> schieb<strong>en</strong> 3 .‘KLICK’ERSATZ1 2Achtung!Kurzes belgisches Nummernschildbis zum erst<strong>en</strong> Anschlageinschieb<strong>en</strong>.Österreichisches Nummernschildkann ohne Fixierstückemontiert werd<strong>en</strong>.319
<strong>Montage</strong> der Leuchteinheit<strong>en</strong>Leuchteinheit<strong>en</strong> in d<strong>en</strong> Lichtbalk<strong>en</strong> hineinschieb<strong>en</strong> 1 . Breit<strong>en</strong>einstellung: Die Lichteinheit<strong>en</strong>z<strong>en</strong>timeterweise heraus-schieb<strong>en</strong> 2 . Stecker anschließ<strong>en</strong> und die Beleuchtung überprüf<strong>en</strong> 3 .Kabelüberschuss verstau<strong>en</strong> 4 .max. 320 mm12 34FahrzeugbreiteBis 1,80 mBis 1,84 mBis 1,88 mBis 1,92 mBis 1,96 mBis 2,02 mAuszug pro Seit<strong>en</strong>icht auszieh<strong>en</strong>2. Klick4. Klick6. Klick8. Klick11. Klick (= Maximum)Die Breite Ihres Wag<strong>en</strong>s ist in der zugehörig<strong>en</strong> Betriebsanleitungangegeb<strong>en</strong>.<strong>Montage</strong> der Radkuf<strong>en</strong>4 x 2 x 2 xFlanschmutter einsteck<strong>en</strong> und die Flügelmutter darin fest dreh<strong>en</strong>23inn<strong>en</strong> anbring<strong>en</strong> , Flügelmuttern anzieh<strong>en</strong> .1, Radkuf<strong>en</strong> mit d<strong>en</strong> Clips nach4 x 4 x1 220
3D<strong>Montage</strong> der GreifarmeGreifarm einsetz<strong>en</strong> 1 , Greifarmklemme auf dem gekerbt<strong>en</strong> Bereich festdreh<strong>en</strong> 2 , mit dem zweit<strong>en</strong>Greifarm wiederhol<strong>en</strong> 3 , Rohrklemme montier<strong>en</strong> 4 .123 421
Anbring<strong>en</strong> des montiert<strong>en</strong> TrägersW<strong>en</strong>n der Fahrradträger fertigmontiert ist, muss er wiegezeigt angebracht werd<strong>en</strong> 1 .Fahrradträger verriegeln 2 .12Abs<strong>en</strong>k<strong>en</strong> des TrägersFixierschraube lös<strong>en</strong> 1 , Schw<strong>en</strong>gel ansetz<strong>en</strong> 2 , Fahrradträger nach unt<strong>en</strong> dreh<strong>en</strong> 3 , Endstellungauf dem Bod<strong>en</strong> 4 .1 23 4Achtung!W<strong>en</strong>n der Träger das erste Malohne Fahrräder nach ob<strong>en</strong> gebrachtwird, ist er noch nichtganz „ausjustiert“. Das Grundgestellfällt dann manchmalnicht in die Sicherungsaufnahme1 . Beim Hochdreh<strong>en</strong>muss darum Druck auf d<strong>en</strong>Lichtbalk<strong>en</strong> ausgeübt werd<strong>en</strong> 2damit dass Grundgestell in dieSicherungsaufnahme fällt 3 .✘✔1 2 322
Befestigung der FahrräderRiem<strong>en</strong> nach hint<strong>en</strong> bieg<strong>en</strong> und festklemm<strong>en</strong> 1 , Rahm<strong>en</strong>halter lös<strong>en</strong> 2 , das erste Rad auf derFahrerseite auffahr<strong>en</strong> 3 , Rahm<strong>en</strong>halter locker anbring<strong>en</strong> 4 , Radkuf<strong>en</strong> einstell<strong>en</strong> und Flügelschraub<strong>en</strong>festzieh<strong>en</strong> 5 , Greifarm festdreh<strong>en</strong> 6 , Rahm<strong>en</strong>halter festzieh<strong>en</strong> 7 , zweites Rad auffahr<strong>en</strong> 8 ,Punkt 4 bis 7 wiederhol<strong>en</strong> 9 .4 xD1 2 370%4 5100%6 7 8100%923
Heb<strong>en</strong> und Sichern des TrägersSchw<strong>en</strong>gel ansetz<strong>en</strong> 1 , Fahrradträger hochdreh<strong>en</strong> 2 , Endstellung 3 . Fixierschraube festdreh<strong>en</strong>4 , darauf acht<strong>en</strong>, dass das Fixierschraube verriegelt ist, Radriem<strong>en</strong> befestig<strong>en</strong> 5 , Rahm<strong>en</strong>halterabschließ<strong>en</strong> 6 .1 2 34 5624
Abnehm<strong>en</strong> der FahrräderFixierschraube lös<strong>en</strong> 1 , darauf acht<strong>en</strong>, dass das Fixierschraube <strong>en</strong>triegelt ist, Schw<strong>en</strong>gel ansetz<strong>en</strong>2 , Fahrradträger hochdreh<strong>en</strong> 3 , Fahrräder abkoppeln und eines nach dem ander<strong>en</strong> abnehm<strong>en</strong> 4 .D123425
Auflag<strong>en</strong> - D-WERT1 Das Fahrzeug muss mit einer bauartg<strong>en</strong>ehmigt<strong>en</strong> Anhängekupplung ausgerüstet sein.2 Die mindest zulässige Stützlast der Anhängekupplung muss gleich oder größer als 50 kg sein.3 Die Kugel und Kugelstange müss<strong>en</strong> einteilig geschmiedet sein. Der Bereich zwisch<strong>en</strong> Kugel undder Einspannstelle (Anbindung an das Querrohr, Aufnahmetasche bei abnehmbar<strong>en</strong> Kugelstang<strong>en</strong>)darf keine Schwächung<strong>en</strong> aufweis<strong>en</strong> (Bohrung<strong>en</strong>, Nut<strong>en</strong>, Anschweißteile, etc).4 Der Kugelstang<strong>en</strong>durchmesser an der Anbringungsstelle der Klemmschelle muss mindest<strong>en</strong>s32 mm betrag<strong>en</strong>.5 Die Kupplung muss ein<strong>en</strong> Mindest - D-Wert hab<strong>en</strong>, der sich in Abhängigkeit des hinter<strong>en</strong> Überstandes“L” und der Kröpfung “K” der Kugelstange (Vgl. Skizze) nach der unt<strong>en</strong> aufgeführt<strong>en</strong>Tabelle bestimmt.D-Werte in kN für Anhängekupplung<strong>en</strong> mit Stützlast<strong>en</strong> ab 50 kgK (mm)L (mm)20 40 60 80100 13,3 9,7 7,6 6,2150 10,1 7,8 6,4 5,4200 8,2 6,6 5,5 4,8Die Ergebnisse der Festigkeitsberechnung sind als “D-Werte” in Abhängigkeit von geometrisch<strong>en</strong>Bezugsgröß<strong>en</strong> der Anhängekupplung in der obig<strong>en</strong> Tabelle dargestellt.Der aus der Tabelle zu <strong>en</strong>tnehm<strong>en</strong>de D-Wert der am Fahrzeug vorhand<strong>en</strong><strong>en</strong> Anhängekupplungmuss gleich oder kleiner sein, als der Wert, der auf dem Typ<strong>en</strong>schild der Anhängekupplungangegeb<strong>en</strong> ist. Falls auf dem Typ<strong>en</strong>schild kein D-Wert angegeb<strong>en</strong> ist, so berechnet sich dieserWert aus d<strong>en</strong> dort alternativ angegeb<strong>en</strong>e Wert<strong>en</strong> von zulässiger Achslast (A) und zulässigemGesamtgewicht des Zugfahrzeuges (G) nach folg<strong>en</strong>der Formel:D =9,81 G* A: (D in kN:A und G in kg)1000 (D +A )26
6 Durch die Beladung des Heckträgers werd<strong>en</strong> die Heckbeleuchtungseinrichtung<strong>en</strong> desFahrzeuges ganz oder teilweise verdeckt. Der Träger ist daher mit einem Leucht<strong>en</strong>trägerausgerüstet, der die vorgeschrieb<strong>en</strong>e Fahrzeugbeleuchtung und das amtliche K<strong>en</strong>nzeich<strong>en</strong>wiederholt. Die Sicht auf die hinter<strong>en</strong> Beleuchtungseinrichtung<strong>en</strong> <strong>en</strong>tspricht d<strong>en</strong> Vorschrift<strong>en</strong>.Anbringungsvorschrift für das K<strong>en</strong>nzeich<strong>en</strong>:Das K<strong>en</strong>nzeich<strong>en</strong> ist mittig zwisch<strong>en</strong> d<strong>en</strong> K<strong>en</strong>nzeich<strong>en</strong>leucht<strong>en</strong> zu montier<strong>en</strong>.7 Fahrradträger für Fahrzeuge mit Erstzulassung vor dem 01.01.1987 könn<strong>en</strong> an einer 7polig<strong>en</strong> Anhänger-Steckdose angeschloss<strong>en</strong> werd<strong>en</strong> (Nebelschlussleuchte und Rückfahrscheinwerferbrauch<strong>en</strong> nicht angeschloss<strong>en</strong> sein). Sie gelt<strong>en</strong> in diesem Fall als „nicht betriebsbereit“im Sinne des § 49a StVZO.An Fahrradträgern für Fahrzeuge mit Erstzulassung ab 01.01.1987 bis 31.12.1990 mussder Rückfahrscheinwerfer zusätzlich betriebsbereit sein (7 polige Steckdose möglich beiVerzicht auf Dauerplus (Pol. 54g) bzw. Nebelschlussleuchte zugunst<strong>en</strong> des Rückfahrscheinwerfers).Zu dem Zeitpunkt der Erstzulassung des Fahrzeuges nicht vorgeschrieb<strong>en</strong>e, freiwilliginstallierte Leucht<strong>en</strong> brauch<strong>en</strong> am Träger nicht wiederholt zu werd<strong>en</strong>.An Fahrradträgern für Fahrzeuge mit Erstzulassung ab 01.01.1991 müss<strong>en</strong> alle Leucht<strong>en</strong>betriebsbereit sein. Die seri<strong>en</strong>mäßig am Fahrzeug vorhand<strong>en</strong><strong>en</strong> Nebelschlussleucht<strong>en</strong> müss<strong>en</strong>sich selbsttätig aus- und bei zieh<strong>en</strong> des Steckers wieder einschalt<strong>en</strong>. Hierzu muss ggf. einbesonderes Relais oder eine Steckdose mit Abschaltkontakt installiert werd<strong>en</strong> (Empfehlung:13 polige Steckdose).8 Für die Befestigung und d<strong>en</strong> Transport der Fahrräder gelt<strong>en</strong> die Vorschrift<strong>en</strong> der §§ 22 und 23StVO. Der<strong>en</strong> Einhaltung obliegt dem Fahrzeugführer. Insbesondere müss<strong>en</strong>:– die Fahrräder <strong>en</strong>tsprech<strong>en</strong>d der <strong>Montage</strong>anleitung mit d<strong>en</strong> dafür vorgeseh<strong>en</strong><strong>en</strong> Teil<strong>en</strong> sicherbefestigt werd<strong>en</strong>.– bei Beeinträchtigung der Sicht nach hint<strong>en</strong> geeignete Zusatzspiegel (z.B. Anhängerspiegel,rechter Auß<strong>en</strong>spiegel) am Fahrzeug angebracht werd<strong>en</strong>.9 Bod<strong>en</strong>freiheitDurch d<strong>en</strong> Heckgepäckträger reduziert sich der hintere Ramp<strong>en</strong>winkel des Fahrzeuges. BeimBefahr<strong>en</strong> von Bod<strong>en</strong>uneb<strong>en</strong>heit<strong>en</strong> kann es daher im Vergleich zum Seri<strong>en</strong>zustand zu Bod<strong>en</strong>berührung<strong>en</strong>des Trägers komm<strong>en</strong>.DFahrt mit Beladung:Das Fahrverhalt<strong>en</strong> des Fahrzeuges mit voll belad<strong>en</strong>em Heckträger gleicht dem bei voll belad<strong>en</strong>emKofferraum. An Fahrzeug<strong>en</strong>, bei d<strong>en</strong><strong>en</strong> die Fahrräder nicht im Windschatt<strong>en</strong> der Karosserie steh<strong>en</strong>,ist durch d<strong>en</strong> „Spoilereffekt“ mit einer zusätzlich<strong>en</strong> Entlastung der Vorderachse zu rechn<strong>en</strong>.Die Fahrgeschwindigkeit sollte dies<strong>en</strong> Umständ<strong>en</strong> angepasst werd<strong>en</strong>. Auf Autobahn<strong>en</strong> sollte dieRichtgeschwindigkeit nicht überschritt<strong>en</strong> werd<strong>en</strong>.Geg<strong>en</strong> Vorlage dieser EBE (europäische Betriebserlaubnis) ist vom zuständig<strong>en</strong> Landratsamtbzw. Straß<strong>en</strong>verkehrsamt die Bewilligung für ein drittes, ungestempeltesNummernschild zu erteil<strong>en</strong>.Artikelnummer: 37.99.09075 Versie 3 Februar 201127
GarantieAuf Vorlage des Garantiescheins und des Kaufbelegs gewährt die <strong>Twinny</strong> <strong>Load</strong> ® sieb<strong>en</strong> JahreGarantie auf d<strong>en</strong> <strong>Twinny</strong> <strong>Load</strong> ® -Fahrradträger ab dem Kaufdatum. Dabei gilt das auf demKaufbeleg angegeb<strong>en</strong>e Datum.Die Garantie besteht aus der kost<strong>en</strong>los<strong>en</strong> Reparatur oder einem kost<strong>en</strong>los<strong>en</strong> Austausch vonBestandteil<strong>en</strong> im Fall von Material- und Konstruktionsfehlern.Die Garantie gilt, sobald der Garantieschein auf der Website von <strong>Twinny</strong> <strong>Load</strong> ® www.twinnyload.comoder durch Eins<strong>en</strong>dung der zum Garantieschein gehörig<strong>en</strong> Antwortkarte aktiviert wurde.Bedingung<strong>en</strong>:- Der Fahrradträger muss d<strong>en</strong> mitgeliefert<strong>en</strong> <strong>Montage</strong>anweisung<strong>en</strong> gemäß montiert sein.- Der Fahrradträger muss der mitgeliefert<strong>en</strong> Gebrauchanweisung <strong>en</strong>tsprech<strong>en</strong>d auf demFahrzeug montiert werd<strong>en</strong>.- Die Fahrräder müss<strong>en</strong> der mitgeliefert<strong>en</strong> Gebrauchsanweisung <strong>en</strong>tsprech<strong>en</strong>d auf demFahrradträger angebracht und befestigt werd<strong>en</strong>.- Es dürf<strong>en</strong> keine Änderung<strong>en</strong> am Produkt vorg<strong>en</strong>omm<strong>en</strong> werd<strong>en</strong>.- Jegliche Haftung für durch falsche <strong>Montage</strong> oder B<strong>en</strong>utzung verursachte Person<strong>en</strong>- und/oderGeräteschäd<strong>en</strong> und daraus <strong>en</strong>tsteh<strong>en</strong>de Vermög<strong>en</strong>sschäd<strong>en</strong> wird ausgeschloss<strong>en</strong>.- Schäd<strong>en</strong>, die durch Unfälle, missbräuchliche und unsachgemäße Nutzung des Fahrzeugs oderMängel am Fahrzeug, an dem der Fahrradträger montiert ist, verursacht wurd<strong>en</strong>, sind von derGarantie ausgeschloss<strong>en</strong>.- Garantiearbeit<strong>en</strong> verlängern die Garantiefrist nicht.- Reparatur- oder Austauscharbeit<strong>en</strong> am Produkt innerhalb der Garantiefrist werd<strong>en</strong> ausschließlichdem ursprünglich<strong>en</strong> Käufer geg<strong>en</strong> Vorlage des Originalkaufbelegs gewährt.- Reklamation<strong>en</strong> sind der Verkaufsstelle an der auf dem Kaufbeleg angegeb<strong>en</strong><strong>en</strong> Adresse zumeld<strong>en</strong>. Der Fahrradträger muss einschließlich aller mitgeliefert<strong>en</strong> Teile an dieser Adressezurückgelass<strong>en</strong> werd<strong>en</strong>.- Die Kost<strong>en</strong> für die Ablieferung und Abholung des Produkts und/oder der Teile bei der Verkaufsstellesind vom Käufer zu trag<strong>en</strong>.- Bei nach Ermess<strong>en</strong> <strong>Twinny</strong> <strong>Load</strong> ® unsorgfältiger oder unsachgemäßer Behandlung oderunzureich<strong>en</strong>der Wartung des Fahrradträgers verfällt die Garantie.- W<strong>en</strong>n die Seri<strong>en</strong>nummer geändert, beschädigt oder <strong>en</strong>tfernt wurde, verfällt die Garantie.Der Fahrradträger muss d<strong>en</strong> technisch<strong>en</strong> Dat<strong>en</strong> <strong>en</strong>tsprech<strong>en</strong>.- Bei fehl<strong>en</strong>dem, geändertem oder unleserlichem Kaufbeleg verfällt die Garantie.- Schäd<strong>en</strong> als Folge von nach Ermess<strong>en</strong> <strong>Twinny</strong> <strong>Load</strong> ® normalem Verschleiß sind von der Garantieausgeschloss<strong>en</strong>.28HaftungsausschlussTeile und Zubehör, die nicht von der <strong>Twinny</strong> <strong>Load</strong> ® montiert wurd<strong>en</strong>, sind von der Garantieausgeschloss<strong>en</strong>. Die Haftung des Herstellers im Rahm<strong>en</strong> des Vertrags beschränkt sich ausdrücklichauf die Einhaltung der in diesem Garantieschein beschrieb<strong>en</strong><strong>en</strong> Garantieverpflichtung<strong>en</strong>. JeglicherSchad<strong>en</strong>sersatzanspruch, mit Ausnahme von Ansprüch<strong>en</strong> bezüglich nicht nachgekomm<strong>en</strong>erGarantieverpflichtung<strong>en</strong>, ist ausgeschloss<strong>en</strong>. Unter Beachtung der zwing<strong>en</strong>d<strong>en</strong> gesetzlich<strong>en</strong>Bestimmung<strong>en</strong> bezüglich der (Produkt-) Haftung könn<strong>en</strong> aufgrund von Betriebs- oder Folgeschäd<strong>en</strong>oder jeglicher anderer (persönlicher) Schäd<strong>en</strong>, die aus Mängeln an von der <strong>Twinny</strong> <strong>Load</strong> ® geliefert<strong>en</strong>Teil<strong>en</strong> bzw. geliefertem Zubehör oder durchgeführt<strong>en</strong> Arbeit<strong>en</strong> <strong>en</strong>tstand<strong>en</strong> sein soll<strong>en</strong>, keinerleiRechte gelt<strong>en</strong>d gemacht werd<strong>en</strong>. Für die vorlieg<strong>en</strong>d<strong>en</strong> Garantiebestimmung<strong>en</strong> gelt<strong>en</strong> die allgemein<strong>en</strong>Liefer- und Zahlungsbeding<strong>en</strong> in der von der <strong>Twinny</strong> <strong>Load</strong> ® bei der Industrie- und HandelskammerVeluwe <strong>en</strong> Tw<strong>en</strong>te unter Nummer 3302 hinterlegt<strong>en</strong> Fassung. Ein Exemplar dieser Bedingung<strong>en</strong> istfür Kund<strong>en</strong> auf Anfrage einmalig kost<strong>en</strong>los erhältlich.
D29
G<strong>en</strong>eralBall pressureThe type plate of the towing hook indicates the maximum permissible ball pressure.The total combined weight of the bicycle carrier and bicycles may not be higherthan this ball pressure and in no case may it be higher than 75 kg. The weight ofthe BikE-Lift is 19,2 kg. You can find the weight of your bicycle in the suppliedbooklet or perhaps on the Internet.LightingThe lighting of the bicycle carrier is 12V.Legal requirem<strong>en</strong>tsYou will find the legal requirem<strong>en</strong>ts that apply in Europe for the transport ofbicycles on a bicycle carrier at www.twinnyload.comQualityAll carriers are designed and produced in accordance with the highest qualitystandard. Stability, flexibility, ease of use, good driving behaviour and solidity areof paramount importance for us.CleaningClean the carrier after use and <strong>en</strong>sure that it is free from brine and diesel deposit.StorageStore the carrier at all times in dry condition.AccessoriesVarious accessories are available for your bicycle carrier. For a complete overviewgo to www.twinnyload.com or obtain information at the sales address.Frame diameterThe frame clamp is suitable for saddle tubes with a diameter of 28-38 mm.InstructionvideoBesides the paper manual before you, we also want to point out that there is aninstruction video on our Internet site www.twinnyload.com. This instruction videoexplains step-by-step how to assemble and use your bicycle carrier.30
Compon<strong>en</strong>ts of BikeE-Lift- 1 x carrier- 1 x light bar 13/7 pole- 1 x bag of parts- 1 x cover- 4 x wheel rails- 2 x frame arm- 1 x handle- 1 x padlock- 1 x warranty cardWarningsGB- Always operate the spindle with the supplied crank.- Always degrease the ball of the towing hook before installing the bicycle carrier.- The bicycle carrier must be assembled according to the installation instructions.- The carrier and bicycle must be installed according to the use instructions.- No changes may be made to the product.- The lighting is int<strong>en</strong>ded for a 12V installation.- After the first kilometres, check the attachm<strong>en</strong>t of the bicycle carrier and bicycles.- Adjust your speed at speed ramps.- Never use straps or ropes to fast<strong>en</strong> your bicycle. These can irreparably damagethe frame of your bicycle.- Att<strong>en</strong>tion! Wh<strong>en</strong> the fog rear light remains on constantly after connecting yourbicycle carrier, the socket of the car is not connected in accordance with the DIN.Have this repaired by your garage.Before driving, check that:- the bicycle carrier is well attached to the towing hook;- the second lock is properly tight<strong>en</strong>ed.- the lighting on the bicycle carrier functions properly;- the two light units are set at the correct width and are clicked into the securingdevice;- no cable is hanging loose;- all wing bolts of the wheel rails are tight<strong>en</strong>ed;- the clamps on the pedal arm of the bicycles are well tight<strong>en</strong>ed;- all wheels have be<strong>en</strong> fixed with the straps;- no loose items are on the bicycles or bicycle carrier;- the keys are removed from the locks.- the fog rear light is in the left light unit.31
Placing the bike carrier for assemblyTip: The assembly of the bicycle is easier wh<strong>en</strong> it is placed on the bullet.Place the bicycle carrier on the bullet 1 , tight<strong>en</strong> it horizontally 2 , raise the handle 3 , tight<strong>en</strong> ithorizontally 4 , repeat steps 2, 3 and 4.123 4Assembly of light bar2 x2 xspanner 10 mmallan key 5 mmAssemble the clamps 1 , place the cover 2 , insert the bolts 3 , place the bolt spacer 4 , positionand tight<strong>en</strong> the light bar 5 .1232
3 4 5GBInstallation of number plateBreak four lugs out 1 , place them in the cut-ways 2 , slide the number plate into the light bar 3 .‘CLICK’SPARE1 2Beware!Slide short Belgian numberplate up to the first stop.Austrian number plate can beinstalled without lugs.333
Installation of light unitsPlace the light units in the light bar 1 , width adjustm<strong>en</strong>t: slide the light units out in steps of 1 cm 2 .Connect the plug and check the lighting 3 , put away superfluous wiring 4 .max. 320 mm12 34Car widthUp to 1,80 mUp to 1,84 mUp to 1,88 mUp to 1,92 mUp to 1,96 mUp to 2,02 mSlide out per sidedo not slide out2 nd click4 th click6 th click8 th click11 th click (= max)The width of your car is listed in the car’s instruction manual.Assembly of wheel rails4 x 2 x 2 xInsert the flange nut and screw the wing bolt in it 1 , insert the wheel rails with the clips in the23direction of the inside , tight<strong>en</strong> the wing bolts .4 x 4 x1 234
3Assembly of frame tubesInsert the frame tube 1 , tight<strong>en</strong> the frame tube on the notched area 2 , repeat the steps for thesecond frame tube 3 , assemble the tube clamp 4 .GB123 435
Placing the Assembled carrierWh<strong>en</strong> the bicycle carrier isalready assembled, place it asfollows 1 .Lock the carrier 2 .12Lowering the carrierLoos<strong>en</strong> the second lock 1 , place the crank 2 , rotate the bicycle carrier down 3 , <strong>en</strong>d position onthe ground 4 .1 23 4Att<strong>en</strong>tion!Wh<strong>en</strong> it is rotated up for thefirst time without bicycles, thecarrier is not yet “set”. The baseframe will th<strong>en</strong> sometimes notfall into the second lock op<strong>en</strong>ing1 . To prev<strong>en</strong>t this, you mustapply pressure on the light barwh<strong>en</strong> rotating the carrier up 2 ,so that the base frame falls intothe second lock op<strong>en</strong>ing 3 .✘✔1 2 336
Placing of bicyclesB<strong>en</strong>d the strap backwards and clamp it 1 , loos<strong>en</strong> the frame clamps 2 , ride up the first bicycle onthe driver’s side 3 , tight<strong>en</strong> the frame clamps until they are finger tight 4 , adjust the wheel railsand tight<strong>en</strong> the wing bolts 5 , tight<strong>en</strong> the frame tube 6 , tight<strong>en</strong> the frame clamp 7 , ride up thesecond bicycle 8 , repeat steps 4 to 7 9 .4 x 2 x1 2 3GB70%4 5100%6 7 8100%937
Rotating the carrier up and securing itPlace the lever 1 , rotate the bicycle carrier up 2 , <strong>en</strong>d position 3 , tight<strong>en</strong> the second lock 4 ,make sure the second lock is locked, fast<strong>en</strong> the wheel straps 5 , lock the frame clamp 6 .1 2 34 5638
Taking the bicycle offLoos<strong>en</strong> the second lock 1 , make sure the second lock is unlocked, place the lever 2 , rotate thebicycle carrier down 3 , uncouple the bicycles and take them down one by one 4 .12GB3439
GuaranteeOn pres<strong>en</strong>tation of the guarantee certificate and purchase ticket, <strong>Twinny</strong> <strong>Load</strong> ® gives a sev<strong>en</strong>-yearguarantee on the <strong>Twinny</strong> <strong>Load</strong> ® bicycle carrier, counting from the date of purchase as listed on thepurchase ticket.The guarantee consists of free repair or replacem<strong>en</strong>t of parts in case of material and constructionerrors.The guarantee is effective after you have activated the guarantee certificate on the <strong>Twinny</strong> <strong>Load</strong>website www.twinnyload.com or via s<strong>en</strong>ding the reply card supplied with the guarantee certificate.Terms and conditions:- The bicycle carrier must be assembled according to the supplied installation instructions.- The bicycle carrier must be installed on the car according to the supplied use instructions.- The bicycles must be placed and fixed on the bicycle carrier according to the supplied useinstructions.- No changes may be made to the product.- Any responsibility for personal injury and/or damage to properties and <strong>en</strong>suing asset loss thatare caused by improper installation or improper use shall be excluded.- There shall be no guarantee on defects that are caused by accid<strong>en</strong>ts, illegal and incompet<strong>en</strong>tuse of the vehicle or defects of the vehicle on which the bicycle carrier is installed.- The term of guarantee shall not be ext<strong>en</strong>ded or r<strong>en</strong>ewed due to performance of guaranteeactivities.- Repair or replacem<strong>en</strong>t of the product within the specified term of guarantee shall only be possiblefor the original buyer in accordance with the purchase certificate.- Claims should be submitted at the purchasing address listed on the purchase ticket. The bicyclecarrier, including all supplied compon<strong>en</strong>ts, must be left behind at this address.- The buyer is responsible for the costs of returning and collecting the product and/or parts atthe purchasing address.- The guarantee shall be cancelled if the bicycle carrier has be<strong>en</strong> handled carelessly andimproperly or poorly maintained, such at the discretion of <strong>Twinny</strong> <strong>Load</strong> ® .- The guarantee shall be cancelled if the serial number has be<strong>en</strong> changed, damaged or removed.The bicycle carrier must meet the technical specifications.- The guarantee shall be cancelled if there is no purchase ticket, the ticket has be<strong>en</strong> changed oris illegible.- Defects as a result of wear due to normal use, such at the discretion of <strong>Twinny</strong> <strong>Load</strong> ® , shall notfall under the guarantee.DisclaimerThe guarantee does not cover materials not installed by <strong>Twinny</strong> <strong>Load</strong> ® . The manufacturer’s liabilitypursuant to the agreem<strong>en</strong>t is expressly limited to compliance with the guarantee obligationsdescribed in this certificate. Any claim for damages, except those in respect of non-compliancewith guarantee obligations, is excluded. Taking into account the mandatory provisions of lawconcerning (product) liability, more rights can never derived with respect to any business orconsequ<strong>en</strong>tial loss, or (personal) loss of whatever nature, <strong>en</strong>suing from defects to the materialsor activities delivered by <strong>Twinny</strong> <strong>Load</strong> ® .40
GBArticl<strong>en</strong>umber: 37.99.09075 Version 3 February 201141
GénéralitésPoids <strong>en</strong> flècheSur la plaque d’id<strong>en</strong>tification du crochet d’attelage est indiqué le maximum autorisédu poids <strong>en</strong> flèche. Le poids total combiné du porte-vélos et des vélos ne peut êtresupérieur à ce poids <strong>en</strong> flèche. Le poids du porte-vélo associé aux vélos ne peut,<strong>en</strong> toute hypothèse, dépasser les 75 kg. Le poids du BikE-Lift est 19,2 kg. Voustrouverez le poids de votre vélo dans le livret qui vous a été remis avec celui-ci oupeut-être sur Internet.Éclairagele système d’éclairage du porte-vélos est de 12V.Réglem<strong>en</strong>tationVous trouverez la réglem<strong>en</strong>tation applicable <strong>en</strong> Europe pour le transport de vélossur un porte-vélos sur le site Internet www.twinnyload.com.Normes de qualitéTous les porte-vélos ont été conçus et produits dans le respect des normes de qualitéde plus haut niveau. Stabilité, flexibilité, pratique d’usage, abs<strong>en</strong>ce de gêne pour laconduite et longévité sont pour nous les maître-mots.(voir norme on certification CE)NettoyageNettoyez le port de vélos après chaque usage et veillez à le débarrasser de la prés<strong>en</strong>cede sel et de gasoil.Rangem<strong>en</strong>tLors de son rangem<strong>en</strong>t, veillez à ce que le porte-vélo soit sec.AccessoiresDivers accessoires pour votre porte-vélos sont à votre disposition. Pour un panoramacomplet de ces accessoires, r<strong>en</strong>dez-vous sur le site www.twinnyload.com our<strong>en</strong>seignez-vous à ce sujet à l’adresse où vous avez acheté le porte-vélos.Diamètre du cadreLes bras de fixation convi<strong>en</strong>n<strong>en</strong>t à une tige de selle d’un diamètre de 28-38 mm.Vidéo d’instructionOutre le manuel <strong>en</strong> version papier dont vous disposez actuellem<strong>en</strong>t, nous souhaitonségalem<strong>en</strong>t vous signaler que notre site Internet www.twinnyload.com propose unevidéo d’instruction. Dans celle-ci, vous sont expliqués, étape par étape, la mise <strong>en</strong>service et le montage de votre porte-vélo.42
Accessoires du BikE-Lift- 1 x support porteur- 1 x rampe d’éclairage- 1 x sachet de pièces- 1 x capuchon de protection- 4 x gouttières de roues (2 x G; 2 x D)- 2 x bras de châssis- 1 x manivelle- 1 x cad<strong>en</strong>as- 1 x carte de garantieAvertissem<strong>en</strong>t- Toujours actionner l’axe avec la manivelle fournie- Veillez à dégraisser la boule du crochet d’attelage avant de monter le porte-vélo.- le porte-vélo doit être monté conformém<strong>en</strong>t aux instructions de montage.- Le porte-vélo et les vélos doiv<strong>en</strong>t être placés conformém<strong>en</strong>t au mode d’emploi.- Aucune modification ne doit être apportée au produit.- L’éclairage fonctionne avec une installation de 12V.- Contrôlez après avoir parcouru les premiers kilomètres que le porte-vélos et lesvélos sont bi<strong>en</strong> arrimés.- Adaptez votre vitesse aux limitations de vitesse.- N’utilisez jamais de sangles d’arrimages ou de cordes dans le but d’attacher<strong>en</strong>core mieux votre vélo. Celles-ci pourrai<strong>en</strong>t <strong>en</strong>dommager irrémédiablem<strong>en</strong>tle cadre de votre vélo.- Att<strong>en</strong>tion! Si le feu brouillard arrière reste <strong>en</strong> perman<strong>en</strong>ce allumé lorsque vousconnectez le porte-vélo, cela signifie que la prise électrique de l’automobile n’apas été raccordée conformém<strong>en</strong>t au DIN. Faites procéder à une réparation parvotre garagiste.FContrôler avant de partir que:- le porte-vélo est bi<strong>en</strong> fixé sur le crochet d’attelage;- la fixation (second lock) a été correctem<strong>en</strong>t serrée;- le bon fonctionnem<strong>en</strong>t de l’éclairage du porte-vélo;- les deux dispositifs d’éclairage ont été réglés à la bonne largeur et sont <strong>en</strong>cl<strong>en</strong>chésdans le cran de verrouillage;- aucun câble ne p<strong>en</strong>d;- toutes les vis papillons des gouttières de roues ont été serrées;- les systèmes de fermeture sur les bras des pédales de vélo ont été correctem<strong>en</strong>tserrés;- l’<strong>en</strong>semble des roues ont été attachées avec les sangles;- aucun objet non attaché n’est prés<strong>en</strong>t sur les vélos ou sur le porte-vélo;- les clés ont été retirées des verrous.- le feu brouillard arrière se trouve dans l’unité d’éclairage gauche.43
Placer le porte-vélo pour le montageConseil: le montage du porte-vélo sera plus facile lorsque celui-ci sera placé sur l’attelage.Placer le porte vélo sur la boule d’attelage 1 , le fixer horizontalem<strong>en</strong>t <strong>en</strong> tournant 2 , tirer lamanette 3 , serrer horizontalem<strong>en</strong>t 4 ; répéter les étapes 2, 3 et 4.123 4<strong>Montage</strong> de la rampe d’éclairage2 xclé de 10 mmclé coudée mâle 5 mmMonter les languettes d’arrimage 1 , placer le capuchon 2 , introduire des boulons 3 , placer lesdouilles 4 , positionner la rampe d’éclairage et serrer 5 .1244
3 4 5F<strong>Montage</strong> de la plaque d’immatriculationSortir <strong>en</strong> les rompant 4 clips d’arrimage 1 , les placer dans les embrasures 2 . Glisser la plaqued’immatriculation dans la rampe d’éclairage 3 .‘CLIC’RÉSERVE1 2Att<strong>en</strong>tion!Glisser la petite plaqued’immatriculation belgejusqu’à la première butée.La plaque d’immatriculationautrichi<strong>en</strong>nes peut êtremontées sans clips d’arrimage.345
<strong>Montage</strong> du dispositif d’éclairagePlacer les dispositifs d’éclairage 1 , Réglage de la largeur: <strong>en</strong>foncer le système par étapes d’1 cm 2 .Brancher la prise et contrôler que l’éclairage fonctionne. 3 . Cacher le surplus de câbles. 4 .max. 320 mm12 34Largeur de l’automobileJusqu’à 1,80 mJusqu’à 1,84 mJusqu’à 1,88 mJusqu’à 1,92 mJusqu’à 1,96 mJusqu’à 2,02Faire glisser de chaquecôté jusqu’au:Ne pas déplacer2ème clic4ème clic6ème clic8ème clic11ème clic (= max)La largeur de votre automobile est indiquée dans le manueld’instructions de votre automobile.<strong>Montage</strong>s des gouttières de roues4 x 2 xPlacer les écrous puis insérer les boulons papillons 1 , placer les gouttières de roues avec les23agrafes dirigées vers l’intérieur , serrer les boulons papillons .4 x 4 x1 246
3<strong>Montage</strong> des tubes de fixation du cadrePlacer le tube de fixation du cadre 1 , serrer la pince du tube de fixation de châssis au niveau de lacannelure 2 , répéter les étapes pour le deuxième tube 3 , monter le collier de mainti<strong>en</strong> des tubes4 .F123 447
Lorsque le porte-vélo a étémonté, vous devez <strong>en</strong>suite leplacer comme suit 1 .Verrouiller le porte-vélo 2 .12Abaisser le porte-véloDesserrer la fixation (second lock) 1 , placer la manivelle 2 , tourner le porte-vélo vers le bas 3 ,la position finale étant au sol 4 .1 23 4Att<strong>en</strong>tion!Lorsque vous relevez pour lapremière fois le porte-vélo à vide,le porte-vélo n’est pas <strong>en</strong>corefixé. Le châssis ne s’emboîteparfois pas dans le dispositif desécurité 1 . Pour cela, il estnécessaire lors du relèvem<strong>en</strong>td’exercer une pression sur larampe d’éclairage 2 de sorte àce que le châssis s’emboîte dansle dispositif de sécurité 3 .✘✔1 2 348
Placer les vélosTirer la sangle vers l’arrière et l’accrocher 1 , desserrer les pinces 2 , placer le premier vélo du côtéconducteur 3 , visser manuellem<strong>en</strong>t les pinces 4 , régler les rails de vélo et serrer les écrouspapillons 5 , verrouiller le tube de fixation du cadre 6 , verrouiller la pince 7 , placer le deuxièmevélo 8 , répéter les étapes de 4 à 7 compris 9 .2 x1 2 370%F4 5100%6 7 8100%949
Relever le porte-vélo et verrouillerPlacer la manivelle 1 , relever le porte-vélo <strong>en</strong> tournant 2 , position finale 3 . Verrouiller le Secondlock <strong>en</strong> tournant 4 , vérifier le verrouillage du second lock, accrocher les sangles de roues 5 ,fermer à clé la pince avec l’antivol 6 .1 2 34 5650
Retirer les vélosDéverrouiller <strong>en</strong> tournant le Second lock 1 , vérifier que le Second lock n’est plus verrouillé, placerla manivelle 2 , abaisser le porte-vélo <strong>en</strong> tournant 3 , détacher les vélos et les retirer l’un aprèsl’autre 4 .12F3451
GarantieEn prés<strong>en</strong>tant votre certificat de garantie et le bon d’achat, <strong>Twinny</strong> <strong>Load</strong> ® vous accorde unegarantie de sept ans sur le porte-vélo <strong>Twinny</strong> <strong>Load</strong> ® comm<strong>en</strong>çant à partir de la date d’achat tellequ’indiquée dans le bon d’achat.La garantie compr<strong>en</strong>d la réparation gratuite ou le remplacem<strong>en</strong>t des pièces détachées dans le casde l’apparition de défauts du matériel ou d’un vice de construction.La garantie comm<strong>en</strong>ce à partir du mom<strong>en</strong>t où vous avez activé le certificat de garantie sur le siteInternet du <strong>Twinny</strong> <strong>Load</strong> website www.twinnyload.com ou <strong>en</strong> <strong>en</strong>voyant la carte-réponse jointe aucertificat de garantie.Conditions:- le porte-vélo doit être monté conformém<strong>en</strong>t aux instructions cont<strong>en</strong>ues dans les instructions demontage livrées avec celui-ci;- le porte-vélo doit être placée sur l’automobile conformém<strong>en</strong>t aux instructions du mode d’emploijoint avec celui-ci;- les vélos doiv<strong>en</strong>t être placés et attachés sur le porteur-vélos conformém<strong>en</strong>t aux instructions dumode d’emploi joint avec celui-ci;- il ne peut être apporté aucune modification au produit;- nous ne sommes pas responsables des blessures personnelles et/ou des dommages causésaux bi<strong>en</strong>s ainsi que du préjudice matériel pouvant <strong>en</strong> découler lorsqu’ils ont été causés par unmontage incorrect ou une utilisation erronée du produit;- il n’y a pas de garantie pour les défauts résultants d’un accid<strong>en</strong>t, d’une utilisation illégale ouamateuriste du véhicule ou résultant des vices du véhicule sur lequel le porte-vélo est monté;- le délai de la garantie n’est pas prolongé ou r<strong>en</strong>ouvelé du fait de la réalisation de travauxcouverts par la garantie;- la réparation ou le changem<strong>en</strong>t du produit à l’intérieur du délai de garantie n’est possible qu’auprofit de l’acheteur originaire tel que m<strong>en</strong>tionné sur le bon d’achat;- les réclamations doiv<strong>en</strong>t être déposées à l’adresse de l’achat du porte-vélo et figurant sur le bond’achat. Le porte-vélo et tous ses accessoires doiv<strong>en</strong>t être déposés à cette adresse;- l’acheteur supporte les frais d’<strong>en</strong>voi et de réception du produit et/ou des pièces détachées àl’adresse d’achat;- la garantie est caduque lorsque le porte-vélo a été manié avec insuffisamm<strong>en</strong>t de précautionsou de manière incorrecte ou lorsqu’il a été mal <strong>en</strong>tret<strong>en</strong>u, ceci étant laissé à l’appréciation du<strong>Twinny</strong> <strong>Load</strong> ® ;- la garantie est caduque lorsque le numéro de série a été changé, abîmé ou lorsqu’il a disparu.Le porte-vélo doit satisfaire aux spécifications techniques.- la garantie est caduque lorsqu’il n’y a pas de bon d’achat, lorsque le bon d’achat a été modifiéou est illisible;- les défauts résultant d’une usure <strong>en</strong> raison d’un usage normal - ceci étant laissé à l’appréciationdu <strong>Twinny</strong> <strong>Load</strong> ® - ne sont pas couverts par la garantie.52DisclamerNe sont pas couverts par la garantie les matériaux n’ayant pas été montés par le <strong>Twinny</strong> <strong>Load</strong> ® .La responsabilité du fabricant <strong>en</strong> raison du contrat se limite expressém<strong>en</strong>t à l’exécution desobligations de garantie décrites dans le prés<strong>en</strong>t docum<strong>en</strong>t. Toute demande <strong>en</strong> dommages-intérêts,à l’exception de celle découlant du non-respect des obligations de garantie, ne peut être accueillie.En t<strong>en</strong>ant compte des dispositions légalem<strong>en</strong>t obligatoires concernant la responsabilité <strong>en</strong> matièrede produits, il ne peut être réclamé aucune réparation de dommages professionnels ou dedommages consécutifs ou de tout autre dommage (personnel) qui découlerai<strong>en</strong>t des défauts desmatériaux livrés au <strong>Twinny</strong> <strong>Load</strong> ® ou des activités effectuées à son profit.
FNuméro d’article: 37.99.09075 Version 2 Février 201153
www.twinnyload.com