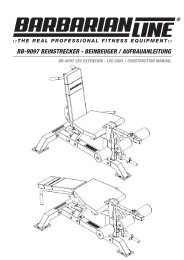
BB-9097 BEINSTRECKER - BEINBEUGER ... - Megafitness-Shop
BB-9097 BEINSTRECKER - BEINBEUGER ... - Megafitness-Shop
BB-9097 BEINSTRECKER - BEINBEUGER ... - Megafitness-Shop
- Keine Tags gefunden...

Erfolgreiche ePaper selbst erstellen
Machen Sie aus Ihren PDF Publikationen ein blätterbares Flipbook mit unserer einzigartigen Google optimierten e-Paper Software.
Nehmen Sie sich bitte vor dem Zusammenbau des Gerätes ausreichend Zeit um die Instruktionen für die Montage zu lesen. Verwenden Sie ausschließlichoriginal Ersatzteile um Ihre Garantieansprüche zu erhalten und ein Verletzungsrisiko zu vermeiden. Bei eigenmächtig vorgenommenen Umbauten amGerät, sowie bei nicht Einhaltung der Belastungsgrenzen erlöschen sämtliche Garantieansprüche. Prüfen Sie nach dem Zusammenbau alle Funktionen desGerätes auf ihre Richtigkeit. Sollten hierbei Probleme auftreten, dann prüfen Sie anhand der einzelnen Montageschritte das Gerät auf eventuelle Fehler imZusammenbau. Sollten Sie nicht in der Lage sein den Fehler zu beheben, dann wenden Sie sich bitte an Ihren Händler.VOR DER INBETRIEBNAHMEMachen Sie sich mit allen Funktionen des Gerätes vertraut.• Kontrollieren Sie regelmäßig sämtliche Schraubverbindungen.• Prüfen Sie täglich alle sichtbaren Teile auf Beschädigungen und Verschleiß.WARTUNG, PFLEGE und SICHERHEITSHINWEISE• Reinigen Sie das Gerät regelmäßig. Schweiß ist aggressiv und führt zu Rostbildung.• Prüfen Sie Rastbolzen, Steckbolzen, Carabinerhaken, Seilösen usw. auf Funktion und Verschleiß.• Die gehärteten Wellen der Linearsysteme sind nicht zwangsläufig rostfrei. Schmieren Sie diese wöchentlich mit einem klaren und geschmeidigem Fett(Fachhandel) von oben bis unten dünn ein. Vorher altes Fett und Schmutz entfernen.• Sollten die Linearlager nachgefettet werden müssen (wahrnehmbar rauerer Lauf!) müssen diese ausgebaut werden und die Kugelreihen mit einem Fingervoll klarem und geschmeidigem Fett eingeschmiert werden. Äußerste Vorsicht beim Aus- und Einfädeln der Wellen aus bzw. in die Lager. ZERSTÖRUNGS-GEFAHR!!• Gleit-Führungen von Gewichtsschlitten (verchromte Wellen/Profilrohre) 1-2 mal wöchentlich mit Feinmechaniköl oder Teflonspray (KEIN FETT) benetzen(vorher mit einem alten Lappen reinigen). Dies verringert die Reibung und fördert die Leichtlauf-Eigenschaften des Gerätes.• Die Stahlseile sind täglich gewissenhaft zu kontrollieren. Insbesondere die Anschlussbereiche an den Enden der Seile sind auf festen Sitz und Bruchbildungzu prüfen. Die Klemmverbindung an den Gummi-Puffern ist regelmäßig, aber insbesondere vor Inbetriebnahme des Gerätes nachzuziehen wennnötig (die Vorgehensweise hierzu wird in der bebilderten Montageanleitung beschrieben). Weist das Stahlseil Beschädigungen auf ist das Training einzustellenund das Seil umgehend auszutauschen. Bei nicht Einhaltung droht Verletzungsgefahr!Verschlissene oder defekte Teile bergen ein Sicherheitsrisiko und sind umgehend auszutauschen! Kein Workout bei Defekten am Gerät!Before you build up the unit please take enough time to read the instructions. To keep your warranty claim and to avoid injury risks only use originalspare parts. Arbitrarily made modifications to the equipment or non-compliance with load limits invalidate any warranty claim. After assembly check all thefunctions of the device to ensure accuracy. If there are problems check out the various assembly steps of the device for possible errors. Should you not beable to resolve the error contact your dealer.BEFORE USINGFamiliarize yourself with all the features of the device.• Check regularly all bolted assemblies.• Check daily all visible parts for damages and wear.• Clean regularly your equipment. Sweat is aggressive and leads to rust.MAINTENANCE, CARE and SAFETY• Check locking pin, detent pin, clipper, becket and so on for function and wear.• The hardened shafts of the linear systems are not necessarily stainless steel. Grease the hardened shafts weekly from top to bottom with a clear andsmooth fat (retailers).Previously remove old grease and dirt.• If the linear systems have to be regreased (noticeable turbulent current!) strengthen them. Grease the ball rows with a finger of clear and smooth fat. Takecare while unthreading and threading the shafts to the bearing. DANGER OF DEMOLITION!!• Wet one or two times a week (previously cleaned with an old rag) the sliding guides of the weight stacks (chrome shafts/profile pipes) with precisionmechanics oil or teflon spray (no fat). This reduces friction and promotes the smooth running characteristics of the device.• The steel wire should be checked daily conscientiously. In particular the following areas at the end of the ropes shall be tested for tightness and fractureformation. Tighten clamp connection regularly at the rubber buffer especially before starting up the unit (approach is described in the illustrated assemblyinstructions). If the steel cable shows damages stop training and exchange steel cable. Risk of injury for non-compliance!Worn or defective parts are a security risk and should be exchanged immediately!No workout for defects on the device!
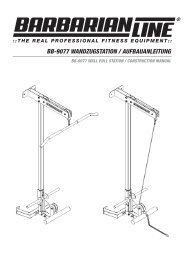
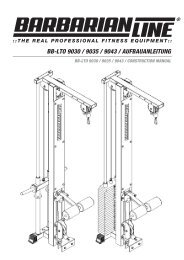
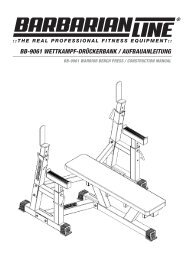
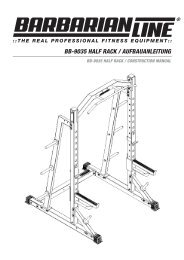
InformationINSTRUKTIONENBitte lesen Sie diese Hinweise vor dem Zusammenbau des Gerätes aufmerksam durch.Generelle Montage-HinweiseZum Aufbau dieses Gerätes sind mindestens zwei Personen erforderlich.Bauen Sie das Gerät in der Reihenfolge zusammen wie es in der Montageanleitung dargestellt wird. Alle Schrauben sind währendder einzelnen Montage-Schritte nur leicht (handfest) anzuziehen. Erst nachdem das Gerät komplett zusammengebaut ist und alleBauteile optimal zueinander ausgerichtet sind, werden die Schrauben Schritt für Schritt festgezogen. Zum Ausrichten der Bauteilenutzen Sie bitte die Langlochbohrungen in den Flanschen. Kontrollieren Sie unbedingt ob alle Schrauben der Werksseitig vormontiertenTeile ordnungsgemäß festgezogen sind. Bei Seilrollen und Hebelarmen ist darauf zu achten, dass diese drehbar bleiben undnicht durch übermäßiges Anzugsmoment festgeklemmt werden. Sorgfältige Vorgehensweise beim Ausrichten der Bauteile garantiertgute Laufeigenschaften und reduziert den Verschleiß Ihres Trainings-Gerätes. Sehr wichtig ist auch die Prüfung der Stahlseilanbindungan die Gummi-Puffer. Beachten Sie hierzu die entsprechenden Hinweise in der Montageanleitung, sowie die Hinweise unterWartung und Pflege bezüglich der Stahlseile generell.Sollten Sie dennoch Probleme haben, wenden Sie sich bitte an Ihren Händler.General assembly notesTo build this device at least two people are needed.INSTRUCTIONSPlease read these notes prior to assembly of the device carefully.Install the device in the sequence together as it is described in the installation instructions. All screws are to be tighten easily (handtight)during the single assembly steps. After the device is completely assembled and all components are optimally aligned to eachother, tighten the screws step by step. For alignment of the components please use the elongated mounting holes in the flanges.Absolutely control whether all screws of the factory-installed pre-mounted parts are duly tightened. With pulleys and lever arms itis to be made certain that these are clamped to remain swivelling and not by excessive torque. Careful approach to the alignmentof the components guarantees good operating characteristics and reduces the wasting of your training device. It´s very important tocheck the steel cable binding to rubber buffer. Please note the appropriate references in the assembly instruction, generally as wellas the references with maintenance and servicing concerning the steel cableIf you still have problems please contact your dealer.<strong>BB</strong>-<strong>9097</strong><strong>BEINSTRECKER</strong> - <strong>BEINBEUGER</strong> / LEG EXTENSION - LEG CURL
Übersicht<strong>BB</strong>-<strong>9097</strong><strong>BEINSTRECKER</strong> - <strong>BEINBEUGER</strong> / LEG EXTENSION - LEG CURL
Schrauben<strong>BB</strong>-<strong>9097</strong><strong>BEINSTRECKER</strong> - <strong>BEINBEUGER</strong> / LEG EXTENSION - LEG CURL
Step Teile exakt ausrichten und alleSchrauben voll anziehen!Justify all parts accurately andtighten all srews fully!<strong>BB</strong>-<strong>9097</strong><strong>BEINSTRECKER</strong> - <strong>BEINBEUGER</strong> / LEG EXTENSION - LEG CURL
Step Teile exakt ausrichten undSchrauben voll anziehen!Justify all parts accurately andtighten srews fully!<strong>BB</strong>-<strong>9097</strong><strong>BEINSTRECKER</strong> - <strong>BEINBEUGER</strong> / LEG EXTENSION - LEG CURL
Step <strong>BB</strong>-<strong>9097</strong><strong>BEINSTRECKER</strong> - <strong>BEINBEUGER</strong> / LEG EXTENSION - LEG CURL
Step <strong>BB</strong>-<strong>9097</strong><strong>BEINSTRECKER</strong> - <strong>BEINBEUGER</strong> / LEG EXTENSION - LEG CURL 10
Step <strong>BB</strong>-<strong>9097</strong><strong>BEINSTRECKER</strong> - <strong>BEINBEUGER</strong> / LEG EXTENSION - LEG CURL 11
Step <strong>BB</strong>-<strong>9097</strong><strong>BEINSTRECKER</strong> - <strong>BEINBEUGER</strong> / LEG EXTENSION - LEG CURL 13
Step <strong>BB</strong>-<strong>9097</strong><strong>BEINSTRECKER</strong> - <strong>BEINBEUGER</strong> / LEG EXTENSION - LEG CURL 14