BLUETOOTH OPTICAL MOUSE - Media-Tech
BLUETOOTH OPTICAL MOUSE - Media-Tech
BLUETOOTH OPTICAL MOUSE - Media-Tech
- Keine Tags gefunden...
Erfolgreiche ePaper selbst erstellen
Machen Sie aus Ihren PDF Publikationen ein blätterbares Flipbook mit unserer einzigartigen Google optimierten e-Paper Software.
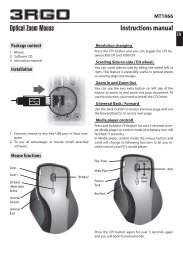
<strong>BLUETOOTH</strong><strong>OPTICAL</strong> <strong>MOUSE</strong>Hi-Res Wireless Optical MouseMT1074Instructions ManualENPackage contents■ Bluetooth Optical Mouse■ 2 AAA alkaline batteries■ User manualSystem requirements■ Windows ME, 2000, XP or Vista■ Built-in Bluetooth functionInstallationON/OFF switchSimultaneously press both Left and Right keys for5 seconds, the LED light in “DPI-adjusting key” willshine, it’s now searching the Bluetooth device. Andplease follow the below procedures to install themouse.1. Make sure that the Bluetoothfunction has been activated.Double click the BluetoothIcon on the Task Bar or in theControl Panel, click “Add aBluetooth device”.2. Select “My device is set upand ready to be found”, click“Next”.Diagram 1Battery cover3. Select Bluetooth mouse,click “Next”.4. Select „Don’t use a passkey”,click „Next” and then „Finish”.Installing batteries1. Remove the battery cover.2. Insert two AAA batteries into the battery compartment,make sure to properly orient the positive(+) and negative (-) ends as specified by themarks in the battery compartment. Replace thebattery cover and make sure it is locked.3. Switch on the mouse, LED light will blinkConnecting the Bluetooth mouseBefore you install the Bluetooth mouse, please makesure that your computer supports Bluetooth function,and finished the Bluetooth software installation.Software is available like Wincomm, IVT or the Microsoftbuilt-in software.ScrollingwheelRight keyDPI-adjustingkeyBackwardForwardLeft keyNote: If you use other Bluetooth software, the installingprocedure may be similar. You need to try andunderstand it by yourself.Description of keys and DPI AdjustmentUsing “DPI-adjusting key”, the resolution of mousecan be switched between 800DPI, 1000DPI and1200DPI in turn. That LED light in “DPI-adjusting key”blinks slowly indicates 800DPI, faster 1000DPI andfastest 1200DPI.Backward and ForwardBackward and Forward keys for your easily navigatingforward and backward on the Internet.Low-voltage alarming functionWhen batteries have been used for some time anddiscover the LED light in “DPI-adjusting key” blinksautomatically, which reminds you that batteries voltageis becoming low, suggested you replace the batterieswith new ones.
<strong>BLUETOOTH</strong><strong>OPTICAL</strong> <strong>MOUSE</strong>Hi-Res Wireless Optical MouseZawartość opakowania■ Optyczna mysz Bluetooth – 1 szt.■ Instrukcja obsługi – 1 szt.■ Bateria akaliczna AAA - 2 szt.Wymagania systemowe■ System operacyjny: Windows ME/2000/XP/Vista■ Komputer PC z zainstalowanym interfejsem BluetoothInstalacjaPrzełącznikzasilaniaMT1074Instrukcja obsługiWciśnij jednocześnie oba przyciski myszki (lewy i prawy)na około 5 sekund, dioda pod przyciskiem CPI zapalisię sygnalizując przejście w tryb parowania.1. W obszarze powiadomień systemowychna pasku zadań kliknijprawym przyciskiem ikonęBluetooth i wybierz “Add a Bluetoothdevice”2. Zaznacz opcję “My device is setup and ready to be found” i kliknij“Next”3. Z listy odnalezionych urządzeńwybierz “Bluetooth mouse” Ikliknij “Next”PLPokrywa bateriiRys. 1.Mysz widok od spoduInstalacja baterii1. Otwórz pokrywę baterii.2. Włóż dwie baterie AAA zgodnie ze znakami polaryzacji(+/-).3. Zamknij pokrywę baterii.4. Przesuń przełącznik zasilania w pozycję ON.Sparowanie myszki BluetoothUpewnij się, że Twój komputer posiada zainstalowanyi aktywny interfejs Bluetooth. Instrukcja objaśniasposób sparowania myszki za pomocą oprogramowaniawbudowanego w system Windows. Instalacjaza pomocą innego oprogramowania może przebiegaćinaczej, proszę zapoznać się z instrukcją dołączonądo tego oprogramowania.RolkaprzewijaniaPrzyciskprawyRys.2.Mysz - widok z góryPrzyciskCPIWsteczWprzódPrzycisklewy4. Na poniższym ekranie wybierz“Don’t use passkey” i kliknij“Next”5. Kliknij “Finish” aby zakończyc instalację.Zmiana rozdzielczościNaciśnij przycisk CPI aby zmienić rozdzielczość sensoramiędzy trybami 800, 1000 i 1200 CPI. Zmianęsygnalizuje dioda LED pod przyciskiem CPI. Powolnemruganie oznacza tryb 800 CPI, szybsze mruganieoznacza tryb 1000 CPI, najszybsze oznacza pracę wtrybie 1200 CPI.Przycisk wprzód/wsteczPodczas korzystanie z przeglądarki WWW przyciśnij„wstecz” aby przejść do poprzedniej strony lub„wprzód” aby przejść do następnej strony.Oszczędzanie energiiMyszka posiada zaawansowany system oszczędzaniaenergii. Niemniej jednak gdy nie używasz myszkiprzez dłuższy czas wyłącz ją przesuwając przełącznikzasilania w pozycję OFF.Gdy baterie są już wyczerpane dioda pod przyciskiemCPI będzie mrugała samoczynnie. Wymieńwtedy baterie na nowe baterie alkaliczne AAA.
<strong>BLUETOOTH</strong><strong>OPTICAL</strong> <strong>MOUSE</strong>Hi-Res Wireless Optical MouseMT1074GebrauchsanleitungLieferumfang■ 1x optische Bluetooth Maus■ 1x Gebrauchsanleitung■ 2x AAA Alkali-BatterienSystemvoraussetzung■ Benutzersystem: Windows ME, 2000, XP, Vista■ PC Computer mit einer Bluetooth AnbindungInstallationDrücken Sie gleichzeitig und über 5 Sekunden dielinke und rechte Maustaste bis die LED Statusanzeigeunterhalb des CPI Knopfs leuchtet – die Maus ist zuVerbindung bereit.1. Klicken Sie mit der rechten Maustaste inder Tastleiste auf das Bluetooth Symbolund wählen Sie “Add a Bluetooth device”(Bluetooth Gerät hinzufügen)2. Wählen Sie “My device is set up and readyto be found” (Mein Gerät steht zur Benutzungbereit und kann entdeckt werden)und klicken Sie auf “Next” (Weiter)DEEin-/Ausschalter3. Wählen Sie “Bluetooth mouse” aus derTrefferliste und klicken Sie auf “Next”(Weiter)Abb.1 Maus UnterseiteBatteriefachBatterien einlegen1. Öffnen Sie das Batteriefach2. Setzen Sie die zwei AAA Batterien in das Batteriefachein - Achten Sie bitte auf die Polarität (+/-).3. Schließen Sie das Batteriefach4. Stellen Sie den Schalter auf ON, um die Maus einzuschalten.Bluetooth Maus verbindenStellen Sie sicher, dass Ihr Computer Bluetooth-Verbindungenunterstützt und der Bluetooth-Anschlussaktiviert ist. Die Anleitung wird Ihnen erläutern, wieSie per Windows Bluetooth Software die Verbindungherstellen. Sollten Sie eine andere Software verwenden,dann kann das Schema anders aussehen – bittelesen Sie die Gebrauchsanleitung von der Software.ScrollRadrechteTasteCPI KnopfRückwärtsVorwärtslinke TasteAbb. 2.Frontansicht der Maus4. Auf folgendem Bildschirmhinweisswählen Sie „Don’t use passkey” (KeinSicherheitsschlüssel verwenden) undklicken Sie auf “Next”(Weiter)5. Klicken Sie auf “Finish” (Fertig), um mitder Installation abzuschließenCPI Auflösung ändernDrücken Sie den CPI Knopf, um zwischen einer Auflösungvon 800, 1000 und 1200 CPI zu wählen. Die LEDStatusanzeige unter dem CPI Knopf, wird ein paarmal blinken – langsames blinken = 800 CPI, schnelleresblinken = 1000 CPI, am schnellsten blinkend=1200CPI.Vor-/RückwärtstastenBeim surfen im Internet, können Sie sich entsprechenddie vorherige oder die nächste Seite anzeigenlassen.StromsparenDie Maus ist mit einem automatischen Stromsparmodusausgestattet. Wir empfehlen Ihnen, bei längerernicht Benutzung, den Schalter auf die Position„OFF“ zu stellen.Sobald die Batterien entladen sein sollte, wird Ihnendies durch eine blinkende CPI LED Statusanzeige signalisiert.Bitte ersetzen Sie die Batterien durch einneues paar Batterien.
<strong>BLUETOOTH</strong><strong>OPTICAL</strong> <strong>MOUSE</strong>Hi-Res Wireless Optical MouseMT1074Bruger manualPakken Indeholder■ Bluetooth optisk mus – 1 stk.■ Bruger manual – 1 stk.■ Alkaline AAA batterier - 2 stk.System krav■ Operations system: Windows ME, 2000, XP, Vista■ PC computer med Bluetooth interface installeretInstallationTryk samtidigt både venstre og højre muse knap i 5sekunder, LED indikator under DPI-knappen vil værepå - mus er nu i parring mode.1. Åbn Bluetooth-enheder i Kontrolpanelog Klik på Tilføj underfanen Enheder.2. Marker afkrydsningsfeltet Minenhed er installeret og er klartil at blive tilføjet, og klik derefterpå Næste.DKPic.1Mus set fra bundenON/OFF knapBatteri dæksel3. Klik på det ikon, der repræsentererBluetooth-musen, ogklik derefter på Næste.4. Klik på Brug ikke en adgangsnøgleog derefter på Næste.Isætning af batterier1. Åben batteri dæksel2. Isæt to AAA batterier i batterirummet ifølge polariseringmærker (+/-).3. Luk batteri dæksel4. Flyt ON/OFF knap til ON position.Parring af Bluetooth-musSørg for, at computeren understøtter Bluetooth,og Bluetooth interface er aktivt. Instruktion vil vise,hvordan man parrer musen ved brug af Windowsindbyggede Bluetooth software. Hvis du bruger andensoftware kan installationen være forskellig, derhenvises til vejledningen af den software.Scroll hjulHøjremuseknapPic. 2.Mus set fra ovenDPI knapTilbageFremVenstremuseknap5. Følg den resterende vejledningi guiden.Skift DPI opløsningTryk DPI-knappen for at skifte mellem 800, 1000 og1200 DPI opløsning. LED indikator under DPI knappenblinker par gange - langsomt blinkende for 800DPI, hurtigere for 1000 DPI og hurtigste for 1200 DPI.Frem/tilbage-knapNår du surfer på Internettet - tryk tilbage for at fåadgang til forrige side eller trykke på frem for at fåadgang til næste side.StrømbesparelseMusen er forsynet med automatisk strømspare system.Hvis du ikke bruger musen i længere tid anbefalesdet at slukke.Når batterierne er slidt op og skal udskiftes blinkerDPI LED automatisk. Udskift batterierne med noglenye.


