Dräger X-am 7000 - ancb.it
Dräger X-am 7000 - ancb.it
Dräger X-am 7000 - ancb.it

Erfolgreiche ePaper selbst erstellen
Machen Sie aus Ihren PDF Publikationen ein blätterbares Flipbook mit unserer einzigartigen Google optimierten e-Paper Software.
D<br />
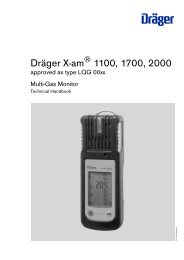
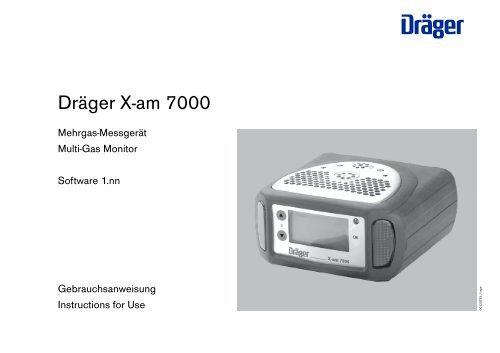
<strong>Dräger</strong> X-<strong>am</strong> <strong>7000</strong><br />
Mehrgas-Messgerät<br />
Multi-Gas Mon<strong>it</strong>or<br />
Software 1.nn<br />
Gebrauchsanweisung<br />
Instructions for Use<br />
00123725_1.eps
Inhaltsverzeichnis<br />
Zu Ihrer Sicherhe<strong>it</strong> . . . . . . . . . . . . . . . . . . . . . . . . . . . . . . . . . . . . . . . . 4<br />
Verwendungszweck . . . . . . . . . . . . . . . . . . . . . . . . . . . . . . . . . . . . . . . 6<br />
Prüfungen und Zulassungen . . . . . . . . . . . . . . . . . . . . . . . . . . . . . . . 7<br />
Ex-Zulassungen . . . . . . . . . . . . . . . . . . . . . . . . . . . . . . . . . . . . . . . . . . . 7<br />
Messfunktion für den Explosionsschutz . . . . . . . . . . . . . . . . . . . . . . . 7<br />
Messung von toxischen Gasen oder Sauerstoff . . . . . . . . . . . . . . . . 8<br />
Bei Geräten m<strong>it</strong> <strong>Dräger</strong>Sensor Smart CAT Ex . . . . . . . . . . . . . . . . . . 8<br />
Sicherhe<strong>it</strong>sanweisungen . . . . . . . . . . . . . . . . . . . . . . . . . . . . . . . . . . . . 9<br />
Betrieb . . . . . . . . . . . . . . . . . . . . . . . . . . . . . . . . . . . . . . . . . . . . . . . . . . 11<br />
Vor der ersten Gerätebenutzung . . . . . . . . . . . . . . . . . . . . . . . . . . . . 11<br />
Info-Mode aktivieren . . . . . . . . . . . . . . . . . . . . . . . . . . . . . . . . . . . . . . . 13<br />
Gerät einschalten . . . . . . . . . . . . . . . . . . . . . . . . . . . . . . . . . . . . . . . . . 15<br />
Gerät ausschalten . . . . . . . . . . . . . . . . . . . . . . . . . . . . . . . . . . . . . . . . 21<br />
Anzeigebeleuchtung einschalten . . . . . . . . . . . . . . . . . . . . . . . . . . . . 21<br />
Alarme erkennen . . . . . . . . . . . . . . . . . . . . . . . . . . . . . . . . . . . . . . . . . 22<br />
Konzentrations-Voralarm A1 . . . . . . . . . . . . . . . . . . . . . . . . . . . . 22<br />
Konzentrations-Hauptalarm A2 und A1 für O 2 . . . . . . . . . . . . . 22<br />
Expos<strong>it</strong>ionsalarm STEV . . . . . . . . . . . . . . . . . . . . . . . . . . . . . . . . . 23<br />
Expos<strong>it</strong>ionsalarm TWA . . . . . . . . . . . . . . . . . . . . . . . . . . . . . . . . . 24<br />
Batterie-Voralarm . . . . . . . . . . . . . . . . . . . . . . . . . . . . . . . . . . . . . . 25<br />
Batterie-Hauptalarm . . . . . . . . . . . . . . . . . . . . . . . . . . . . . . . . . . . 25<br />
Durchflussalarm im Pumpenbetrieb . . . . . . . . . . . . . . . . . . . . . . 26<br />
Alarm bei Geräte- und Sensorfehler . . . . . . . . . . . . . . . . . . . . . . 27<br />
Messungen m<strong>it</strong> Schlauchsonde / Schwimmersonde . . . . . . . . . . . 28<br />
Zusätzliche Spülze<strong>it</strong> abwarten . . . . . . . . . . . . . . . . . . . . . . . . . . . 29<br />
Pumpenbetrieb beenden . . . . . . . . . . . . . . . . . . . . . . . . . . . . . . . 29<br />
Versorgungseinhe<strong>it</strong> laden / wechseln . . . . . . . . . . . . . . . . . . . . . . . . 30<br />
M<strong>it</strong> Mehrfach-Ladestation laden . . . . . . . . . . . . . . . . . . . . . . . . . 32<br />
M<strong>it</strong> Lademodul und Steckernetzteil oder Kfz-Ladeadapter<br />
laden . . . . . . . . . . . . . . . . . . . . . . . . . . . . . . . . . . . . . . . . . . . . . . . . 35<br />
Contents<br />
For Your Safety . . . . . . . . . . . . . . . . . . . . . . . . . . . . . . . . . . . . . . . . . . . . 4<br />
Intended Use . . . . . . . . . . . . . . . . . . . . . . . . . . . . . . . . . . . . . . . . . . . . . . 6<br />
Tests and Approvals . . . . . . . . . . . . . . . . . . . . . . . . . . . . . . . . . . . . . . . 7<br />
Ex approvals . . . . . . . . . . . . . . . . . . . . . . . . . . . . . . . . . . . . . . . . . . . . . . . 7<br />
Measuring Function for Explosion Protection . . . . . . . . . . . . . . . . . . . 7<br />
Measuring of Toxic Gases or Oxygen . . . . . . . . . . . . . . . . . . . . . . . . . . 8<br />
For instruments equipped w<strong>it</strong>h the <strong>Dräger</strong>Sensor Smart CAT Ex . . 8<br />
Safety Instructions . . . . . . . . . . . . . . . . . . . . . . . . . . . . . . . . . . . . . . . . . . 9<br />
Operation . . . . . . . . . . . . . . . . . . . . . . . . . . . . . . . . . . . . . . . . . . . . . . . . 11<br />
Before using the instrument for the first time . . . . . . . . . . . . . . . . . . 11<br />
Activating Info Mode . . . . . . . . . . . . . . . . . . . . . . . . . . . . . . . . . . . . . . . 13<br />
Sw<strong>it</strong>ching on . . . . . . . . . . . . . . . . . . . . . . . . . . . . . . . . . . . . . . . . . . . . . . 15<br />
Sw<strong>it</strong>ching off . . . . . . . . . . . . . . . . . . . . . . . . . . . . . . . . . . . . . . . . . . . . . . 21<br />
Sw<strong>it</strong>ching on the display illumination . . . . . . . . . . . . . . . . . . . . . . . . . 21<br />
Recognising alarms . . . . . . . . . . . . . . . . . . . . . . . . . . . . . . . . . . . . . . . . 22<br />
Concentration warning A1 . . . . . . . . . . . . . . . . . . . . . . . . . . . . . . 22<br />
Concentration alarm A2 and A1 for O 2 . . . . . . . . . . . . . . . . . . . 22<br />
Exposure alarm STEV . . . . . . . . . . . . . . . . . . . . . . . . . . . . . . . . . . . 23<br />
Exposure alarm TWA . . . . . . . . . . . . . . . . . . . . . . . . . . . . . . . . . . . 24<br />
Battery warning . . . . . . . . . . . . . . . . . . . . . . . . . . . . . . . . . . . . . . . . 25<br />
Battery alarm . . . . . . . . . . . . . . . . . . . . . . . . . . . . . . . . . . . . . . . . . . 25<br />
Flow alarm in pumped mode . . . . . . . . . . . . . . . . . . . . . . . . . . . . . 26<br />
Alarms for instrument and sensor faults . . . . . . . . . . . . . . . . . . . 27<br />
Measurements w<strong>it</strong>h the hose probe / floating probe . . . . . . . . . . . . 28<br />
Flushing the hose probe . . . . . . . . . . . . . . . . . . . . . . . . . . . . . . . . 29<br />
Terminating pumped mode . . . . . . . . . . . . . . . . . . . . . . . . . . . . . . 29<br />
Charging / changing the power pack . . . . . . . . . . . . . . . . . . . . . . . . . 30<br />
Charging w<strong>it</strong>h the multiple charging station . . . . . . . . . . . . . . . . 32<br />
Charging w<strong>it</strong>h charging module and plug-in power supply un<strong>it</strong><br />
or vehicle adapter . . . . . . . . . . . . . . . . . . . . . . . . . . . . . . . . . . . . . . 35<br />
2
Alkali-Batterien wechseln . . . . . . . . . . . . . . . . . . . . . . . . . . . . . . . . . . . 36<br />
Frischluftkalibrierung durchführen . . . . . . . . . . . . . . . . . . . . . . . . . . . 38<br />
Gerät entsorgen . . . . . . . . . . . . . . . . . . . . . . . . . . . . . . . . . . . . . . . . . . 39<br />
Technische Daten . . . . . . . . . . . . . . . . . . . . . . . . . . . . . . . . . . . . . . . . 40<br />
Bestell-Liste . . . . . . . . . . . . . . . . . . . . . . . . . . . . . . . . . . . . . . . . . . . . . . 45<br />
Zum Betrieb erforderlich . . . . . . . . . . . . . . . . . . . . . . . . . . . . . . . . . . . 48<br />
Zubehör . . . . . . . . . . . . . . . . . . . . . . . . . . . . . . . . . . . . . . . . . . . . . . . . . 48<br />
Kalibrierzubehör . . . . . . . . . . . . . . . . . . . . . . . . . . . . . . . . . . . . . . . . . . 49<br />
Zubehör PID-Sensor . . . . . . . . . . . . . . . . . . . . . . . . . . . . . . . . . . . . . . . 49<br />
Konform<strong>it</strong>ätserklärung . . . . . . . . . . . . . . . . . . . . . . . . . . . . . . . . . . . . 50<br />
Eignungsuntersuchung . . . . . . . . . . . . . . . . . . . . . . . . . . . . . . . . . . . 51<br />
Replacing alkaline batteries . . . . . . . . . . . . . . . . . . . . . . . . . . . . . . . . 36<br />
Fresh-air calibration . . . . . . . . . . . . . . . . . . . . . . . . . . . . . . . . . . . . . . . 38<br />
Dispose of the Instrument . . . . . . . . . . . . . . . . . . . . . . . . . . . . . . . . . . 39<br />
Technical data . . . . . . . . . . . . . . . . . . . . . . . . . . . . . . . . . . . . . . . . . . . 40<br />
Ordering list . . . . . . . . . . . . . . . . . . . . . . . . . . . . . . . . . . . . . . . . . . . . . 45<br />
Required for operation . . . . . . . . . . . . . . . . . . . . . . . . . . . . . . . . . . . . . 48<br />
Accessories . . . . . . . . . . . . . . . . . . . . . . . . . . . . . . . . . . . . . . . . . . . . . . 48<br />
Calibration accessories . . . . . . . . . . . . . . . . . . . . . . . . . . . . . . . . . . . . 49<br />
Accessories PID sensor . . . . . . . . . . . . . . . . . . . . . . . . . . . . . . . . . . . 49<br />
Declaration of Conform<strong>it</strong>y . . . . . . . . . . . . . . . . . . . . . . . . . . . . . . . . . 50<br />
Su<strong>it</strong>abil<strong>it</strong>y Ex<strong>am</strong>ination . . . . . . . . . . . . . . . . . . . . . . . . . . . . . . . . . . . 51<br />
3
Zu Ihrer Sicherhe<strong>it</strong><br />
Gebrauchsanweisung beachten<br />
Jede Handhabung an dem <strong>Dräger</strong> X-<strong>am</strong> <strong>7000</strong> setzt die genaue Kenntnis<br />
und Beachtung dieser Gebrauchsanweisung sowie der Sensor-<br />
Datenblätter voraus.<br />
Das Gerät ist nur für die beschriebene Verwendung bestimmt.<br />
We<strong>it</strong>ere technische Informationen siehe "Technisches Handbuch<br />
<strong>Dräger</strong> X-<strong>am</strong> <strong>7000</strong>" und Sensor-Datenblätter sowie Gebrauchsanweisungen<br />
der Sonden.<br />
Bei Auslieferung des <strong>Dräger</strong> X-<strong>am</strong> <strong>7000</strong> ist das Betriebssignal aktiviert,<br />
welches die ungestörte Gerätefunktion anzeigt.<br />
For Your Safety<br />
Strictly follow the Instructions for Use<br />
Any use of the <strong>Dräger</strong> X-<strong>am</strong> <strong>7000</strong> requires full understanding and<br />
strict observation of these instructions and the sensor datasheets.<br />
The instrument is only to be used for purposes specified here.<br />
For further information, see the “Technical Handbook <strong>Dräger</strong> X-<strong>am</strong><br />
<strong>7000</strong>,” the sensor datasheets, and the instructions for probes.<br />
On delivery of the <strong>Dräger</strong> X-<strong>am</strong> <strong>7000</strong>, the life signal is activated, indicating<br />
that the device is functioning correctly.<br />
Instandhaltung<br />
Das <strong>Dräger</strong> X-<strong>am</strong> <strong>7000</strong> muss regelmäßig Inspektionen und Wartungen<br />
durch Fachleute unterzogen werden.<br />
Instandsetzung <strong>am</strong> <strong>Dräger</strong> X-<strong>am</strong> <strong>7000</strong> nur durch Fachleute.<br />
Für den Abschluss eines Service-Vertrages sowie für Instandsetzungen<br />
empfehlen wir den <strong>Dräger</strong>Service.<br />
Bei Instandhaltung nur Original-<strong>Dräger</strong>-Teile verwenden.<br />
Kap<strong>it</strong>el "Instandhaltungsintervalle" im "Technischen Handbuch<br />
<strong>Dräger</strong> X-<strong>am</strong> <strong>7000</strong>" beachten.<br />
Maintenance<br />
The <strong>Dräger</strong> X-<strong>am</strong> <strong>7000</strong> must be inspected and serviced by trained<br />
service personnel at regular intervals.<br />
Repair of the <strong>Dräger</strong> X-<strong>am</strong> <strong>7000</strong> may only be carried out by trained<br />
service personnel.<br />
We recommend that a service contract be obtained w<strong>it</strong>h<br />
<strong>Dräger</strong>Service and that all repairs are also carried out by them.<br />
Only authentic <strong>Dräger</strong> spare parts may be used for maintenance.<br />
See the chapter "Maintenance Intervals" in the "Technical Handbook<br />
<strong>Dräger</strong> X-<strong>am</strong> <strong>7000</strong>".<br />
Zubehör<br />
Nur das in der Bestell-Liste aufgeführte Zubehör verwenden.<br />
Accessories<br />
Do not use accessory parts other than those in the order list.<br />
4
Einsatz in explosionsgefährdeten Bereichen<br />
Geräte oder Bauteile, die nach den bergbehördlichen Verordnungen,<br />
der Verordnung über elektrische Anlagen in explosionsgefährdeten<br />
Räumen (ElexV) oder europäischen Explosionsschutz-Richtlinien<br />
geprüft und zugelassen sind, dürfen nur unter den angegebenen<br />
Bedingungen eingesetzt werden.<br />
Änderungen dürfen an den Betriebsm<strong>it</strong>teln nicht vorgenommen werden.<br />
Der Einsatz von defekten oder unvollständigen Teilen ist unzulässig.<br />
Bei Instandsetzung an diesen Geräten oder Bauteilen müssen die<br />
entsprechenden Bestimmungen (z. B. der ElExV und der EN 50014)<br />
beachtet werden.<br />
Nach Einwirkung eines Schlages oder Falles ist das Gerät einer<br />
Sichtprüfung zu unterziehen und bei Beschädigung m<strong>it</strong> gezogener<br />
Versorgungseinhe<strong>it</strong> aus dem Ex-bereich zu entfernen.<br />
Use in areas subject to explosion hazards<br />
Equipment or components which have been tested and approved<br />
according to national regulations for electrical equipment in rooms<br />
subject to explosion hazards, the national mining regulations or<br />
European explosion protection directives, may be used only under<br />
the cond<strong>it</strong>ions explic<strong>it</strong>ly specified.<br />
Modifications of components or the use of faulty or incomplete<br />
parts is not perm<strong>it</strong>ted.<br />
When making repairs to equipment or components of this type, the<br />
relevant national regulations must be adhered to.<br />
After a h<strong>it</strong> or a fall, the instrument must be sight-checked. When<br />
d<strong>am</strong>age has occured, then the instrument together w<strong>it</strong>h power supply<br />
must be removed from the Ex-area.<br />
Haftung für Funktion bzw. Schäden<br />
Die Haftung für die Funktion des <strong>Dräger</strong> X-<strong>am</strong> <strong>7000</strong> geht in jedem<br />
Fall auf den Eigentümer oder Betreiber über, sowe<strong>it</strong> das <strong>Dräger</strong><br />
X-<strong>am</strong> <strong>7000</strong> von Personen, die nicht dem <strong>Dräger</strong>Service angehören,<br />
unsachgemäß gewartet oder instandgesetzt wird oder wenn eine<br />
Handhabung erfolgt, die nicht der bestimmungsgemäßen Verwendung<br />
entspricht.<br />
Für Schäden, die durch die Nichtbeachtung der vorstehenden<br />
Hinweise eintreten, haftet <strong>Dräger</strong> nicht.<br />
Gewährleistungs- und Haftungsbedingungen der Verkaufs- und<br />
Lieferbedingungen von <strong>Dräger</strong> Safety werden durch vorstehende Hinweise<br />
nicht erwe<strong>it</strong>ert.<br />
<strong>Dräger</strong> Safety AG & Co. KGaA<br />
Liabil<strong>it</strong>y for proper functioning or d<strong>am</strong>age<br />
The liabil<strong>it</strong>y for the proper functioning of the <strong>Dräger</strong> X-<strong>am</strong> <strong>7000</strong> is<br />
irrevocably transferred to the owner or operator to the extent<br />
that the <strong>Dräger</strong> X-<strong>am</strong> <strong>7000</strong> is serviced or repaired by personnel not<br />
employed or authorized by <strong>Dräger</strong>Service or if the instrument<br />
is used in a manner not conforming to <strong>it</strong>s intended use.<br />
<strong>Dräger</strong> cannot be held responsible for d<strong>am</strong>age caused by<br />
non-compliance w<strong>it</strong>h the recommendations given above.<br />
The warranty and liabil<strong>it</strong>y provisions of the terms of sale and delivery<br />
of <strong>Dräger</strong> Safety are likewise not modified by the recommendations<br />
given above.<br />
<strong>Dräger</strong> Safety AG & Co. KGaA<br />
5
Verwendungszweck<br />
<strong>Dräger</strong> X-<strong>am</strong> <strong>7000</strong> ist ein tragbares Gasmessgerät für die kontinuierliche<br />
Überwachung der Konzentration mehrerer Gase in der Umgebungsluft<br />
<strong>am</strong> Arbe<strong>it</strong>splatz.<br />
Nicht für Messungen von Prozessgasen!<br />
— Unabhängige Messung von bis zu fünf Gasen entsprechend den<br />
eingebauten <strong>Dräger</strong>Sensoren.<br />
Kombinationsmöglichke<strong>it</strong>en:<br />
Bezeichnung<br />
im Menü:<br />
bis zu 2 <strong>Dräger</strong>Sensoren IR (InfraRot), und/oder IR – ...<br />
bis zu 2 <strong>Dräger</strong>Sensoren CAT Ex (CATalytisch), CA – ...<br />
bis zu 2 <strong>Dräger</strong>Sensoren PID<br />
PI – ...<br />
(Photo-Ionisations-Detektor),<br />
bis zu 3 <strong>Dräger</strong>Sensoren EC (ElektroChemisch) EC – ...<br />
— Automatische Konfiguration des Gerätes entsprechend den eingebauten<br />
Sensoren.<br />
— Die Messbereichsendwerte und die Alarmschwellen sind, abhängig<br />
von den eingebauten Sensoren, einstellbar *) .<br />
Für Messungen:<br />
— im Diffusionsbetrieb, im Pumpenbetrieb (optional),<br />
— Lecksuche (optional) m<strong>it</strong> Schlauchsonde.<br />
— Wahlweise m<strong>it</strong> Datenspeicher zum Auslesen und Anzeigen von<br />
Messwerten m<strong>it</strong> der PC-Software GasVison.<br />
Achtung: Hohe H 2 S-Konzentrationen (größer 100 ppm) können<br />
den <strong>Dräger</strong>Sensor Smart CAT Ex schädigen! Daher ist der<br />
gleichze<strong>it</strong>ige Einsatz des <strong>Dräger</strong>Sensoren Smart CAT Ex und<br />
XS EC H 2 S HC (Messbereich bis 1000 ppm) ist zu vermeiden **) .<br />
Intended Use<br />
<strong>Dräger</strong> X-<strong>am</strong> <strong>7000</strong> is a portable gas measuring Instrument for the<br />
continuous mon<strong>it</strong>oring of the concentrations of several gases in the<br />
<strong>am</strong>bient air in the workplace.<br />
It is not intended for measurement of process gases!<br />
— Independent measurement of up to five gases, depending on the<br />
installed <strong>Dräger</strong>Sensors.<br />
Possible combinations:<br />
Designation<br />
in the menu:<br />
up to 2 <strong>Dräger</strong>Sensors IR (InfraRed), and/or IR – ...<br />
up to 2 <strong>Dräger</strong>Sensors CAT Ex (CATalytic) CA – ...<br />
up to 2 <strong>Dräger</strong>Sensors PID<br />
PI – ...<br />
(Photo-Ionisation Detector)<br />
up to 3 <strong>Dräger</strong>Sensors EC (ElectroChemical) EC – ...<br />
— The instrument is automatically configured according to the<br />
installed sensors.<br />
— The measuring range lim<strong>it</strong>s and alarm settings are adjustable,<br />
depending on the type of sensor installed *) .<br />
For measurements:<br />
— in diffusion mode, in pumped mode (optional),<br />
— for leak detection (optional) w<strong>it</strong>h hose probe.<br />
— Optionally w<strong>it</strong>h data memory for reading and displaying the<br />
measured values on a PC w<strong>it</strong>h the aid of the progr<strong>am</strong> GasVison.<br />
Attention: High concentrations of H 2 S (greater than 100 ppm)<br />
may d<strong>am</strong>age the <strong>Dräger</strong>Sensor Smart CAT Ex! Simultaneous<br />
use of the <strong>Dräger</strong>Sensors Smart CAT Ex and XS EC H 2 S HC<br />
(max. measuring range 1000 ppm) should be avoided **) .<br />
*) Anzeigen und Verstellen der Expos<strong>it</strong>ions-Alarmschwellen sowie die Auswertung<br />
des Datenspeichers können zusätzlich auch m<strong>it</strong> der PC-Software<br />
GasVision und CC-Vision durchgeführt werden.<br />
** Wenn nicht vermeidbar, dann nur m<strong>it</strong> besonderen Maßnahmen (z. B. kurze,<br />
definierte Kalibrierintervalle) zu betreiben.<br />
*) The exposure alarm thresholds can also be adjusted w<strong>it</strong>h the PC software<br />
GasVision and CC-Vision, which is used for evaluation of the measured<br />
values stored in the data memory.<br />
**) If simultaneous use of these sensors is unavoidable, then special measures<br />
(such as short. defined calibration intervals) must be implemented.<br />
6
Prüfungen und Zulassungen<br />
Ex-Zulassungen<br />
ATEX: 0158<br />
I M2 EEx ia d I<br />
II 2G EEx ia d IIC T4<br />
BVS 03 ATEX E 371 X<br />
–20 o C ≤ Ta ≤ +60 o C (NiMH)<br />
–20 o C ≤ Ta ≤ +40 o C (Alkaline)<br />
IEC:<br />
UL:<br />
EEx ia d I/IIC T4<br />
–20 o C ≤ Ta ≤ +60 o C (NiMH)<br />
–20 o C ≤ Ta ≤ +40 o C (Alkaline)<br />
Class I, Div. 1, Groups A, B, C, D, Temp Code T4<br />
–20 o C ≤ Ta ≤ +60 o C (NiMH)<br />
–20 o C ≤ Ta ≤ +40 o C (Alkaline)<br />
CSA: Class I, Div. 1, Groups A, B, C, D, Ex ia T4 C22.2 No. 152<br />
–20 o C ≤ Ta ≤ +60 o C (NiMH)<br />
–20 o C ≤ Ta ≤ +40 o C (Alkaline)<br />
m<strong>it</strong> den Smart CAT Ex-Sensoren 68 10 410 und 68 10 710<br />
Messfunktion für den Explosionsschutz<br />
BVS 03 ATEX E 371 X<br />
<strong>Dräger</strong> X-<strong>am</strong> <strong>7000</strong> Messbereich Prüfnorm<br />
m<strong>it</strong> <strong>Dräger</strong>Sensor<br />
Smart CAT Ex 0 bis 100 % UEG C 3 H 8 EN 61779-1,<br />
(68 10 410) und CH 4 EN 61779-4<br />
Smart CAT Ex 0 bis 100 % UEG C 3 H 8 EN 61779-1,<br />
(68 10 710) und CH 4 EN 61779-4<br />
XS EC O 2 LS 0 bis 25 Vol.-% O 2 EN 50104 (Inertisierungsmessung)<br />
(68 09 130)<br />
Smart IR Ex 0 bis 100 % UEG C 3 H 8 EN 61779-1,<br />
(68 10 460) und CH 4 EN 61779-4<br />
Tests and Approvals<br />
Ex approvals<br />
ATEX: 0158<br />
I M2 EEx ia d I<br />
II 2G EEx ia d IIC T4<br />
BVS 03 ATEX E 371 X<br />
–20 o C ≤ Ta ≤ +60 o C (NiMH)<br />
–20 o C ≤ Ta ≤ +40 o C (Alkaline)<br />
IEC: EEx ia d I/IIC T4<br />
–20 o C ≤ Ta ≤ +60 o C (NiMH)<br />
–20 o C ≤ Ta ≤ +40 o C (Alkaline)<br />
UL: Class I, Div. 1, Groups A, B, C, D, Temp Code T4<br />
–20 o C ≤ Ta ≤ +60 o C (NiMH)<br />
–20 o C ≤ Ta ≤ +40 o C (Alkaline)<br />
CSA: Class I, Div. 1, Groups A, B, C, D, Ex ia T4 C22.2 No. 152<br />
–20 o C ≤ Ta ≤ +60 o C (NiMH)<br />
–20 o C ≤ Ta ≤ +40 o C (Alkaline)<br />
w<strong>it</strong>h the Smart CAT Ex sensors 68 10 410 and 68 10 710<br />
Measuring Function for Explosion Protection<br />
BVS 03 ATEX E 371 X<br />
<strong>Dräger</strong> X-<strong>am</strong> <strong>7000</strong> Measuring range Standards<br />
w<strong>it</strong>h <strong>Dräger</strong>Sensor<br />
Smart CAT Ex 0 to 100 % LEL C 3 H 8 EN 61779-1,<br />
(68 10 410) and CH 4 EN 61779-4<br />
Smart CAT Ex 0 to 100 % LEL C 3 H 8 EN 61779-1,<br />
(68 10 710) and CH 4 EN 61779-4<br />
XS EC O 2 LS 0 to 25 % O 2 by vol. EN 50104 (measurement<br />
(68 09 130)<br />
of inertisation)<br />
Smart IR Ex 0 to 100 % LEL C 3 H 8 EN 61779-1,<br />
(68 10 460) and CH 4 EN 61779-4<br />
7
Messung von toxischen Gasen oder Sauerstoff<br />
Measuring of Toxic Gases or Oxygen<br />
PFG-Nr. 41300404<br />
<strong>Dräger</strong> X-<strong>am</strong> <strong>7000</strong><br />
m<strong>it</strong> <strong>Dräger</strong>Sensor<br />
XS EC O 2 LS<br />
(68 09 130)<br />
XS EC CO<br />
(68 09 105)<br />
XS EC H 2 S<br />
(68 09 110)<br />
Smart IR CO 2<br />
(68 10 590)<br />
XS 2 H 2 S SR<br />
(68 10 575)<br />
Messbereich<br />
Prüfnorm<br />
0 bis 25 Vol.-% O 2 EN 50104, (Messung<br />
von O 2 -Mangel und<br />
O 2 -Überschuss)<br />
0 bis 500 ppm CO EN 45544-1,<br />
EN 45544-2<br />
0 bis 100 ppm H 2 S EN 45544-1,<br />
EN 45544-2<br />
0 bis 5 Vol.-% CO 2 EN 45544-1,<br />
EN 45544-2<br />
0 bis 100 ppm H 2 S EN 45544-1,<br />
EN 45544-2<br />
PFG No. 41300404<br />
<strong>Dräger</strong> X-<strong>am</strong> <strong>7000</strong> Measuring range Standards<br />
w<strong>it</strong>h <strong>Dräger</strong>Sensor<br />
XS EC O 2 LS 0 to 25 % O 2 by vol. EN 50104, (measurement<br />
(68 09 130)<br />
of oxygen deficiency and<br />
oxygen enhancement)<br />
XS EC CO 0 to 500 ppm CO EN 45544-1,<br />
(68 09 105)<br />
EN 45544-2<br />
XS EC H 2 S 0 to 100 ppm H 2 S EN 45544-1,<br />
(68 09 110)<br />
EN 45544-2<br />
Smart IR CO 2 0 to 5 % CO 2 by vol. EN 45544-1,<br />
(68 10 590)<br />
XS 2 H 2 S SR<br />
(68 10 575)<br />
EN 45544-2<br />
0 to 100 ppm H 2 S EN 45544-1,<br />
EN 45544-2<br />
Bei Geräten m<strong>it</strong> <strong>Dräger</strong>Sensor Smart CAT Ex<br />
Das Gerät darf nur in Gemischen brennbarer Gase und Dämpfe m<strong>it</strong><br />
Luft eingesetzt werden – nicht für die Benutzung in sauerstoffangereicherter<br />
Atmosphäre.<br />
Vorsicht:<br />
Besondere Vorsicht ist angebracht, z. B. bei Benutzung des<br />
Gerätes in der Nähe von Ethin-Sauerstoff-Schweißarbe<strong>it</strong>en<br />
(Ethin = Acetylen).<br />
Wenn ein nicht brennender, m<strong>it</strong> Sauerstoff angereicherter Ethinstrahl<br />
auf den <strong>Dräger</strong>Sensor Smart CAT Ex gerichtet wird, kann<br />
es zu einer unkontrollierten Entzündung kommen.<br />
Bei Verwendung des CAT Ex Sensors im X-<strong>am</strong> <strong>7000</strong> muss nach einer<br />
extremen Stoßbelastung im Falle einer Änderung des Nullpunktes um<br />
mehr als 3 % UEG eine Frischluftjustage durchgeführt werden.<br />
For instruments equipped w<strong>it</strong>h the <strong>Dräger</strong>Sensor<br />
Smart CAT Ex<br />
The instrument may only be used in mixtures of fl<strong>am</strong>mable gases<br />
and vapours w<strong>it</strong>h air. It may not be used in oxygen-enriched<br />
atmospheres.<br />
Caution:<br />
Particular care must be taken when, for ex<strong>am</strong>ple, the instrument<br />
is used in the vicin<strong>it</strong>y of acetylene-oxygen-welding operations.<br />
If an unl<strong>it</strong> oxygen-enriched acetylene jet is inadvertently directed<br />
towards the CAT Ex-sensor, an uncontrolled ign<strong>it</strong>ion may occur.<br />
When a Cat-Ex-sensor is used in the <strong>Dräger</strong> X-<strong>am</strong> <strong>7000</strong>, a fresh air<br />
calibration should be done after there has been a hard fall and the<br />
zero point changes to more than 3 % LEL.<br />
8
Sicherhe<strong>it</strong>sanweisungen<br />
Nach einem unbeabsichtigten Stoß oder Fall muss das Gerät einer<br />
Sichtinspektion unterzogen werden. Ist das Gerät beschädigt, muss<br />
die Versorgungseinhe<strong>it</strong> entfernt und der Gefahrenbereich sofort verlassen<br />
werden.<br />
Nur der Messkanal für explosible Gase wurde messtechnisch von der<br />
CSA geprüft.<br />
Für Geräte, die m<strong>it</strong> <strong>Dräger</strong>Sensor CAT Ex ausgestattet sind, gilt:<br />
Das Gerät darf nur in einem Gemisch von brennbaren Gasen oder<br />
Dämpfen m<strong>it</strong> Luft verwendet werden. Es darf nicht in einer m<strong>it</strong> Sauerstoff<br />
angereicherten Umgebung angewendet werden.<br />
Vorsicht:<br />
Die Empfindlichke<strong>it</strong> muss täglich vor Benutzung anhand einer<br />
bekannten Methankonzentration im Bereich von 25 bis 50 % des<br />
Messbereichsendwertes geprüft werden. Die Messgenauigke<strong>it</strong><br />
muss im Bereich zwischen –0 % und 20 % der angelegten Gaskonzentration<br />
sein.<br />
Eine schnell ansteigende Anzeige der Konzentration m<strong>it</strong> nachfolgender<br />
fallender Anzeige oder Fehlermeldung kann auf eine explosible<br />
Konzentration außerhalb des Messbereichs hinweisen.<br />
Die Anzeige von Messbereichsüberschre<strong>it</strong>ung kann auf eine explosible<br />
Konzentration hinweisen.<br />
Achtung:<br />
Hohe H 2 S-Konzentrationen (größer 100 ppm) können den <strong>Dräger</strong>-<br />
Sensor Smart CAT Ex beschädigen! Der gleichze<strong>it</strong>ige Einsatz der<br />
<strong>Dräger</strong>Sensoren CAT Ex und XS EC H 2 S HC (max. Messbereich<br />
1000 ppm) ist zu vermeiden.<br />
Safety Instructions<br />
In case of accidential impact or drop, inspect instrument visually. If<br />
instrument is d<strong>am</strong>aged, disconnect battery pack and leave hazardous<br />
area immediately.<br />
Only the combustible gas detection portion of the instrument has<br />
been assessed for performance by CSA.<br />
For instruments equipped w<strong>it</strong>h the <strong>Dräger</strong>Sensor CAT Ex:<br />
The instrument may only be used in mixtures of fl<strong>am</strong>mable gases or<br />
vapours w<strong>it</strong>h air. It may not be used in oxygen-enriched atmospheres.<br />
Caution:<br />
Before each day’s usage sens<strong>it</strong>iv<strong>it</strong>y must be tested on a known concentration<br />
of methane equivalent to 25 to 50 % of full scale concentration.<br />
Accuracy must be w<strong>it</strong>hin –0 to +20 % of actual gas<br />
concentration.<br />
Any rapid up-scale reading followed by a declining or erratic reading<br />
may indicate a gas concentration beyond upper scale lim<strong>it</strong> which<br />
may be hazardous.<br />
High off-scale readings may indicate an explosive concentration.<br />
Attention:<br />
High concentration of H 2 S (greater than 100 ppm) may d<strong>am</strong>age the<br />
<strong>Dräger</strong>Sensor Smart CAT Ex!<br />
Simultaneous use of the <strong>Dräger</strong>Sensor Smart CAT Ex and XS EC<br />
H 2 S HC (max. measuring range 1000 ppm) should be avoided.<br />
9
Versorgungseinhe<strong>it</strong>en<br />
Es gibt drei verschiedene Versorgungseinhe<strong>it</strong>en<br />
a) <strong>Dräger</strong> X-<strong>am</strong> <strong>7000</strong> NiMH-Versorgungseinhe<strong>it</strong> 4.8 V / 3.0 Ah<br />
b) <strong>Dräger</strong> X-<strong>am</strong> <strong>7000</strong> NiMH-Versorgungseinhe<strong>it</strong> Nennspannung<br />
4.8 V / 6.0 Ah<br />
c) <strong>Dräger</strong> X-<strong>am</strong> <strong>7000</strong> Alkali-Versorgungseinhe<strong>it</strong> 6.0 V<br />
NiMH-Versorgungseinhe<strong>it</strong>en<br />
Der Betriebstemperaturbereich eines Geräts m<strong>it</strong> NiMH-Versorgungseinhe<strong>it</strong><br />
liegt zwischen –20 o C und +60 o C.<br />
Das Auswechseln von NiMH-Versorgungseinhe<strong>it</strong>en in einem Gefahrenbereich<br />
ist erlaubt.<br />
Nicht in einem Gefahrenbereich laden.<br />
Alkali-Versorgungseinhe<strong>it</strong>en<br />
Der Betriebstemperaturbereich eines Geräts m<strong>it</strong> Alkali-Versorgungseinhe<strong>it</strong><br />
liegt zwischen –20 o C und +40 o C.<br />
Vorsicht:<br />
Alkali-Versorgungseinhe<strong>it</strong>en nicht in einem Gefahrenbereich auswechseln.<br />
Die Alkali-Versorgungseinhe<strong>it</strong> nicht in einem Gefahrenbereich öffnen.<br />
Die Alkali-Batterien nicht in einem Gefahrenbereich auswechseln!<br />
Explosionsgefahr!<br />
Nur eine der folgenden Batteriearten verwenden (Größe C, Baby<br />
und LR14):<br />
Energizer, E93 oder Duracell Plus, MN 1400.<br />
Power Packs<br />
Three different type of power supply un<strong>it</strong>s<br />
a) <strong>Dräger</strong> X-<strong>am</strong> <strong>7000</strong> NiMH-Battery Pack 4.8 V / 3.0 Ah<br />
b) <strong>Dräger</strong> X-<strong>am</strong> <strong>7000</strong> NiMH-Battery Pack Nominal voltage 4.8 V /<br />
6.0 Ah<br />
c) <strong>Dräger</strong> X-<strong>am</strong> <strong>7000</strong> Alkaline Battery Pack 6.0 V<br />
NiMH Battery-Packs<br />
The operating temperature range of an instrument equipped w<strong>it</strong>h a<br />
NiMH battery pack is –20 o C to +60 o C.<br />
Changing the NiMH Battery Packs inside a hazardous location is<br />
allowed.<br />
Do not charge in a hazardous location.<br />
Alkaline Battery-Packs<br />
The operating temperature range of an instrument equipped w<strong>it</strong>h a<br />
alkaline battery pack is –20 oC to +40 oC.<br />
Caution:<br />
Do not change the Alkaline Battery-Pack in a hazardous location.<br />
Do not open the Alkaline Battery Pack in a hazardous location.<br />
Do not change the alkaline cells in a hazardous location! Danger of<br />
explosion!<br />
Use only one of the following cell types (C-size, Baby and LR14):<br />
Energizer, E93 or Duracell Plus, MN 1400.<br />
10
Betrieb<br />
Vor der ersten Gerätebenutzung<br />
Wenn erforderlich:<br />
● Beiliegende Sensoren montieren, siehe "Technisches Handbuch<br />
<strong>Dräger</strong> X-<strong>am</strong> <strong>7000</strong>" – Sensoren wechseln.<br />
● Alkali Batterien in die Alkali-Versorgungseinhe<strong>it</strong> einsetzen, siehe<br />
Se<strong>it</strong>e 36 und Versorgungseinhe<strong>it</strong> an die Messeinhe<strong>it</strong> anbauen,<br />
siehe "Technisches Handbuch <strong>Dräger</strong> X-<strong>am</strong> <strong>7000</strong>".<br />
Bei Selbstentladung der NiMH-Versorgungseinhe<strong>it</strong> durch lange<br />
Lagerung:<br />
● Versorgungseinhe<strong>it</strong> voll laden, Se<strong>it</strong>e 30.<br />
Operation<br />
Before using the instrument for the first time<br />
If necessary:<br />
● Mount the enclosed sensors (see "Changing sensors" in the<br />
<strong>Dräger</strong> X-<strong>am</strong> <strong>7000</strong> Technical Manual).<br />
● Install the alkaline batteries in the alkaline power pack (see<br />
page 36) and mount the power pack on the measuring un<strong>it</strong><br />
(see the <strong>Dräger</strong> X-<strong>am</strong> <strong>7000</strong> Technical Manual).<br />
If the NiMH power pack is exhausted because <strong>it</strong> has been stored<br />
for a long time:<br />
● Fully charge the power pack, page 30.<br />
Die bei Lieferung eingebauten Sensoren und eingestellten Alarmschwellen<br />
werden angezeigt:<br />
siehe "Gerät einschalten", Se<strong>it</strong>e 15.<br />
The factory-installed sensors and the current alarm threshold settings<br />
are displayed:<br />
see "Sw<strong>it</strong>ching on", page 15.<br />
●<br />
Feststellung des Kalibrierzustandes durch Aufgabe von Nullgas<br />
und Prüfgas.<br />
Falls notwendig Gerät justieren (siehe EN 50073, EN 45544-4<br />
und nationale Regelungen *) ). We<strong>it</strong>ere Informationen siehe "Technisches<br />
Handbuch <strong>Dräger</strong> X-<strong>am</strong> <strong>7000</strong>".<br />
●<br />
Determine the calibration state of the instrument by exposing <strong>it</strong> to<br />
zero gas and test gas.<br />
If necessary, adjust the instrument (see EN 50073, EN 45544-4<br />
and national regulations *) ). For further information, refer to the<br />
<strong>Dräger</strong> X-<strong>am</strong> <strong>7000</strong> Technical Manual.<br />
Vor sicherhe<strong>it</strong>srelevanten Messungen:<br />
Kalibrierung überprüfen und gegebenenfalls justieren, siehe "Technisches<br />
Handbuch <strong>Dräger</strong> X-<strong>am</strong> <strong>7000</strong>".<br />
Before carrying out safety-relevant measurements:<br />
Check the calibration of the instrument and adjust as necessary<br />
(see the "<strong>Dräger</strong> X-<strong>am</strong> <strong>7000</strong> Technical Manual").<br />
*) EN 50073 – Le<strong>it</strong>faden für Auswahl, Installation, Einsatz und Wartung von<br />
Geräten für die Detektion und die Messung von brennbaren Gasen und<br />
Sauerstoff.<br />
EN 45544-4 – Elektrische Geräte für die direkte Detektion und direkte Konzentrationsmessung<br />
toxischer Gase und Dämpfe - Teil 4: Le<strong>it</strong>faden für die<br />
Auswahl, Installation, Einsatz und Instandhaltung.<br />
*) EN 50073 - Guide for the selection, Installation, use and maintenance of<br />
apparatus for the detection and measurement of combustible gases and<br />
oxygen.<br />
EN 45544-4 - Electrical apparatus used for the direct detection and direct<br />
concentration measurement of toxic gases and vapours - Part 4: Guide for<br />
selection, installation, use and maintenance.<br />
11
M<strong>it</strong> Frischluft das Gerät kalibrieren, wenn:<br />
— die Anzeige in schadstoffreier Luft von 0 bzw. beim O 2 -Sensor von<br />
20,9 bzw. beim CO 2 -Sensor von 0,030 Vol.-% abweicht.<br />
— für den <strong>Dräger</strong>Sensor Smart CAT Ex oder <strong>Dräger</strong>Sensor Smart IR<br />
die Aufforderung zur Frischluftkalibrierung angezeigt wird.<br />
— ein neuer Sensor in das Gerät eingesetzt wird.<br />
● Gerät m<strong>it</strong> Frischluft kalibrieren, siehe Se<strong>it</strong>e 38.<br />
Calibrate the instrument in fresh air in the following cases:<br />
— If the displayed value in pure air differs from 0 or, for O 2 sensors,<br />
from 20.9 or for CO 2 sensor from 0.030 % by vol.<br />
— If a <strong>Dräger</strong>Sensor Smart CAT Ex or <strong>Dräger</strong>Sensor Smart lR is<br />
f<strong>it</strong>ted and you are prompted to calibrate <strong>it</strong> in fresh air.<br />
— If you install a new sensor in the instrument.<br />
● Calibrate the instrument in fresh air, see page 38.<br />
Achtung: Das Gerät nicht ohne Versorgungseinhe<strong>it</strong> länger liegen<br />
lassen, da sich die interne Pufferbatterie verbrauchen kann und<br />
es som<strong>it</strong> zu Verlust der Datumsanzeige des internen Datenspeichers<br />
kommen kann.<br />
Caution: Do not leave the instrument lying around w<strong>it</strong>hout the<br />
power pack for long periods of time. The internal back-up battery<br />
may run out as a result and the date display of the internal data<br />
base may fail.<br />
Begasungstest der Sensoren<br />
— Der Begasungstest muss entsprechend<br />
den Richtlinien der jeweils zuständigen<br />
Berufsgenossenschaft durchgeführt werden.<br />
Sensor exposure test<br />
— Carry out the sensor exposure test according<br />
to the guidelines of the appropriate<br />
regulatory agency.<br />
Bei Verwendung in Bereichen der Kategorie<br />
M2 (Bergbau):<br />
● Betrieb nur m<strong>it</strong> Tragegestell und zusätzlichem<br />
Brustgurt.<br />
For use in category M2 areas (Mining):<br />
● Operating only w<strong>it</strong>h carrying fr<strong>am</strong>e and<br />
stomach belt.<br />
01223725_1.eps<br />
12
Info-Mode aktivieren<br />
Der Info-Mode dient der Informationsdarstellung zentraler Geräteeinstellungen<br />
und -zustände. Der Info-Mode kann sowohl vom eingeschaltetem<br />
Gerät im Messbetrieb als auch beim ausgeschalteten<br />
Gerät aktiviert werden. Abhängig vom Zustand des Gerätes variiert<br />
die Anzahl der angezeigten Screens.<br />
● Taste » q « gedrückt halten (länger als 1 Sekunde) – es werden<br />
Informationen über das Gerät in mehreren Screens angezeigt.<br />
— Wird die Taste » q « we<strong>it</strong>erhin gedrückt gehalten, wird alle<br />
3 Sekunden zum nächsten Screen gewechselt.<br />
— Wird die Taste » q « nicht gedrückt gehalten, kann m<strong>it</strong> einem<br />
kurzen Drücken der Taste zum nächsten Screen we<strong>it</strong>ergeschaltet<br />
werden.<br />
— Nach dem letztem Screen schaltet sich der Info-Mode ab und das<br />
Gerät ist wieder im vorherigen Zustand.<br />
— Durch Drücken der Taste » OK « kann der Info-Mode auch vorze<strong>it</strong>ig<br />
abgebrochen werden.<br />
— Nach 30 Sekunden ohne Betätigung der Tasten wird automatisch<br />
in den vorherigen Gerätezustand zurückgeschaltet.<br />
Activating Info Mode<br />
The Info-Mode serves to display information about central instrument<br />
settings and status values. Info Mode can be activated while the<br />
instrument is in use or when <strong>it</strong> is sw<strong>it</strong>ched off. The number of screens<br />
displayed depends on the status of the instrument.<br />
● Press and hold the » q « key (longer than one second).<br />
Information about the instrument is then displayed on several<br />
screens.<br />
— If the » q « key is held down, the next screen is displayed every<br />
three seconds.<br />
— If the » q « key is not held down, you can step to the next screen<br />
at any time by briefly pressing the key again.<br />
— After display of the last screen, the Info Mode is terminated and<br />
the instrument returns to <strong>it</strong>s previous state.<br />
— You can also terminate the Info Mode at any time by pressing the<br />
» OK « key.<br />
— If no key is pressed for 30 seconds, the instrument automatically<br />
returns to <strong>it</strong>s previous state.<br />
Beispiel Info Mode:<br />
Screen 1<br />
Angaben des Gerätezustandes (Störungen<br />
und Hinweise werden m<strong>it</strong> Text erklärt), z. B.:<br />
Erscheint nicht, wenn der Info-Mode bei<br />
ausgeschaltetem Gerät aktiviert wird.<br />
Screen 2<br />
Geräteinformationen (Ausstattung,<br />
Einstellungen).<br />
EC-H2S<br />
Sensor läuft<br />
ein !<br />
Statusbericht<br />
1/4<br />
ARUB0001 SW1.41<br />
1.1.2004 11:32<br />
Batterie 14:30<br />
Datenspeicher 0:45h<br />
Pumpe installiert<br />
2/3<br />
System info<br />
00423725_1_de.eps<br />
00223725_3_de.eps<br />
Ex<strong>am</strong>ple of Info Mode:<br />
Screen 1<br />
Details of the instrument status (faults and<br />
notes are explained in clear text), for ex<strong>am</strong>ple:<br />
This screen is not displayed if Info-Mode is<br />
activated w<strong>it</strong>h the instrument sw<strong>it</strong>ched off.<br />
Screen 2<br />
Instrument information (configuration,<br />
settings).<br />
EC-H2S<br />
Sensor warming up !<br />
Status report<br />
1/4<br />
ARUB0001 SW1.41<br />
1.1.2004 11:32<br />
Battery 14:30<br />
Datalogger 0:45h<br />
Pump installed<br />
2/3<br />
System info<br />
00423725_1_en.eps<br />
00223725_3_en.eps<br />
13
Screen 3<br />
Messbereichsendwerte für alle aktiven<br />
Sensoren.<br />
CO 2<br />
CH 4<br />
CO<br />
H 2 S<br />
O 2<br />
Messbereiche<br />
5.0 Vol.%<br />
100.0 %UEG<br />
500.0 ppm<br />
100.0 ppm<br />
25.0 Vol.%<br />
3/3<br />
00323725_1_de.eps<br />
Screen 3<br />
The full-scale values of the measuring<br />
ranges for all active sensors.<br />
CO 2<br />
CH 4<br />
CO<br />
H 2 S<br />
O 2<br />
5.0 Vol.%<br />
100.0 %LEL<br />
500.0 ppm<br />
100.0 ppm<br />
25.0 Vol.%<br />
Measuring range<br />
3/3<br />
00323725_1_en.eps<br />
Screen 4<br />
Informationen über Eigentümer oder<br />
Benutzer sowie Geräteeinsatzfeld, Uhrze<strong>it</strong><br />
und Datum.<br />
Firma XYZ<br />
Group : 123<br />
Field : 34<br />
Tag : 2M073Ø487A<br />
1/3<br />
Identifikation<br />
00123725_1_de.eps<br />
Screen 4<br />
Information about the owner or user of the<br />
instrument, together w<strong>it</strong>h <strong>it</strong>s application<br />
area and the date and time.<br />
Firma XYZ<br />
Group : 123<br />
Field : 34<br />
Tag : 2M073Ø487A<br />
1/3<br />
Identification<br />
00123725_1_en.eps<br />
Wenn anstelle von Datum und Uhrze<strong>it</strong> "xx.xx.xx xx:xx" erscheint<br />
oder falsche Datum und Uhrze<strong>it</strong>-Werte angezeigt werden:<br />
(nur nach einem Reset der Uhr – spannungslos)<br />
● Datum und Uhrze<strong>it</strong> einstellen, siehe "Technisches Handbuch<br />
<strong>Dräger</strong> X-<strong>am</strong> <strong>7000</strong>".<br />
Hinweis:<br />
Ohne Einstellung des richtigen Datums und der korrekten Uhrze<strong>it</strong><br />
arbe<strong>it</strong>en einige Funktionen, wie z. B. Kalibrieren, nicht.<br />
If "xx.xx.xx xx:xx" is displayed instead of the date and time, or<br />
if the date and time are incorrect:<br />
(possible only if the clock has been reset as the result of a power<br />
failure):<br />
● Set the date and time, see the "<strong>Dräger</strong> X-<strong>am</strong> <strong>7000</strong> Technical<br />
Manual".<br />
Note:<br />
If the date and time are not set correctly, some functions (such<br />
as calibration) are not possible.<br />
14
Gerät einschalten<br />
Sw<strong>it</strong>ching on<br />
●<br />
Taste » OK « gedrückt halten (länger als 3 Sekunden).<br />
– Zur Überbrückung der 3 Sekunden<br />
wird ein Count-down angezeigt:<br />
D<br />
X – <strong>am</strong> <strong>7000</strong><br />
_ 3 _<br />
D<br />
X – <strong>am</strong> <strong>7000</strong><br />
_ 2 _<br />
D<br />
X – <strong>am</strong> <strong>7000</strong><br />
_ 1 _<br />
00523725_1_de.eps<br />
01223725_1_de.eps<br />
01323725_1_de.eps<br />
●<br />
Press and hold the » OK « key (longer than 3 seconds).<br />
– A count-down is displayed to indicate<br />
when the three-second period has<br />
elapsed:<br />
D<br />
X – <strong>am</strong> <strong>7000</strong><br />
_ 3 _<br />
D<br />
X – <strong>am</strong> <strong>7000</strong><br />
_ 2 _<br />
D<br />
X – <strong>am</strong> <strong>7000</strong><br />
_ 1 _<br />
00523725_1_en.eps<br />
01223725_1_en.eps<br />
01323725_1_en.eps<br />
● Taste » OK « nach Ablauf der 3 Sekunden loslassen – das Gerät<br />
schaltet sich in drei Phasen ein.<br />
— Wird die Taste » OK « vor Ablauf der 3 Sekunden losgelassen,<br />
bleibt das Gerät ausgeschaltet.<br />
● When the count-down reaches zero, release the » OK « key.<br />
The instrument then sw<strong>it</strong>ches <strong>it</strong>self on in three phases.<br />
— If you release the » OK « key before the count-down reaches<br />
zero, the instrument remains in the off state.<br />
Phase 1 des Einschaltvorganges:<br />
– Anzeige von Produktinformation und<br />
Hinweis auf einen Selbsttest.<br />
–<br />
–<br />
–<br />
Ein Signalton begle<strong>it</strong>et die Einschaltphase<br />
des Gerätes.<br />
Die Alarmleuchte ist kurzze<strong>it</strong>ig an =<br />
Test der Alarmelemente.<br />
Die grüne Betriebs-LED wird eingeschaltet.<br />
D<br />
X – <strong>am</strong> <strong>7000</strong><br />
_ _ _ starte Selbsttest _ _ _<br />
01423725_1_de.eps<br />
Phase 1 of the power-on sequence<br />
– Product information and a message that<br />
the self-test is running are displayed.<br />
–<br />
–<br />
–<br />
During this phase, a signal tone sounds<br />
briefly.<br />
The red alarm l<strong>am</strong>p lights briefly (test of<br />
the alarm signals).<br />
The green operating-LED is sw<strong>it</strong>ched<br />
on.<br />
D<br />
X – <strong>am</strong> <strong>7000</strong><br />
_ _ _ starting selftest _ _ _<br />
01423725_1_en.eps<br />
15
– Individuelle Informationen (entsprechend<br />
der Konfiguration) werden angezeigt:<br />
N<strong>am</strong>e und Information über das<br />
Geräteeinsatzfeld. In der untersten<br />
Zeile Datum und Uhrze<strong>it</strong>.<br />
– Aktive Sensoren werden aufgelistet.<br />
Gegebenenfalls wird die verbleibende<br />
Ze<strong>it</strong> bis zum nächsten Kalibrierdatum<br />
angegeben (nur wenn unterhalb oder<br />
gleich 14 Tage).<br />
– Aktive Sensoren werden aufgelistet.<br />
Gegebenenfalls wird die verbleibende<br />
Ze<strong>it</strong> bis zum nächsten Bumptest-Intervall<br />
angegeben (nur wenn Bumptest-<br />
Intervall aktiviert wurde).<br />
– Der abgeschlossene Selbsttest wird<br />
angezeigt und die Ankündigung folgender<br />
Sensorinformationen (Phase 2).<br />
Firma XYZ<br />
Group : 123<br />
Field : 34<br />
Tag : 2M073Ø487A<br />
03.04.2003 10:45<br />
IR<br />
CA<br />
- CO 2<br />
- CH 4<br />
EC - CO<br />
EC - H 2 S<br />
EC - O2<br />
IR<br />
CA<br />
- CO 2<br />
- CH 4<br />
EC - CO<br />
EC - H 2 S<br />
EC - O2<br />
Kal in T 10<br />
Kal in T 10<br />
Bump. in T.3<br />
Bump. in T.3<br />
we<strong>it</strong>ere<br />
Sensorinformationen<br />
Abbruch m<strong>it</strong> OK<br />
00623725_1_de.eps<br />
00723725_1_de.eps<br />
04023725_1_de.eps<br />
00823725_1_de.eps<br />
– Instrument-specific information<br />
(depending on the configuration) is<br />
displayed: n<strong>am</strong>e and information about<br />
the area of use. The date and time are<br />
displayed on the bottom line.<br />
– The active sensors are listed. If<br />
applicable, the remaining time before<br />
the next calibration date is shown<br />
(only if this is 14 days or less).<br />
– The active sensors are listed. If<br />
applicable, the remaining time before<br />
the next BumpTest interval is shown<br />
(only if the BumpTest interval is<br />
activated).<br />
– A message indicating completion of the<br />
self-test is displayed. This message<br />
also announces the display of the<br />
following sensor information (Phase 2).<br />
Firma XYZ<br />
Group : 123<br />
Field : 34<br />
Tag : 2M073Ø487A<br />
03.04.2003 10:45<br />
IR<br />
CA<br />
- CO 2<br />
- CH 4 Cal in days 10<br />
EC - CO Cal in days 10<br />
EC - H 2 S<br />
EC - O2<br />
IR<br />
CA<br />
- CO 2<br />
- CH 4<br />
EC - CO<br />
EC - H 2 S<br />
EC - O2<br />
selftest ok<br />
Bump. in d.3<br />
Bump. in d.3<br />
more<br />
sensor-information<br />
00623725_1_en.eps<br />
00723725_1_en.eps<br />
04023725_1_en.eps<br />
00823725_1_en.eps<br />
Phase 2 des Einschaltvorganges:<br />
– Für jeden aktiven Sensor wird der<br />
Messbereichsendwert und die eingestellten<br />
Werte für die Alarmschwellen<br />
angezeigt. Beispiel: IR-CO 2<br />
IR–CO 2<br />
Messber: 5.00 Vol%<br />
Alarme: A1 0.50 Vol%<br />
A2 1.00 Vol%<br />
00923725_1_de.eps<br />
Phase 2 of the power-on sequence:<br />
– For each active sensor, the full-scale<br />
value of the measuring range and the<br />
alarm-threshold settings are displayed.<br />
S<strong>am</strong>ple display for IR-CO 2 :<br />
IR–CO 2<br />
Range:<br />
Alarms:<br />
5.00 Vol%<br />
A1 0.50 Vol%<br />
A2 1.00 Vol%<br />
00923725_1_en.eps<br />
Beispiel: EC-H 2 S<br />
EC–H 2 S<br />
Messber:<br />
Alarme:<br />
A1<br />
A2<br />
TWA<br />
STEL<br />
100.0 ppm<br />
10.00<br />
20.00<br />
10.00<br />
20.00<br />
ppm<br />
ppm<br />
ppm<br />
ppm<br />
01523725_1_de.eps<br />
S<strong>am</strong>ple display for EC-H 2 S:<br />
EC–H 2 S<br />
Range:<br />
Alarms:<br />
A1<br />
A2<br />
TWA<br />
STEL<br />
100.0 ppm<br />
10.00<br />
20.00<br />
10.00<br />
20.00<br />
ppm<br />
ppm<br />
ppm<br />
ppm<br />
01523725_1_en.eps<br />
16
Beispiel: CA-CH 4<br />
CA–CH 4<br />
Range:<br />
Alarms: A1<br />
A2<br />
100.00 %LEL<br />
20 %LEL<br />
40 %LEL<br />
03523725_1_en.eps<br />
S<strong>am</strong>ple display for CA-CH 4 :<br />
CA–CH 4<br />
Range:<br />
Alarms: A1<br />
A2<br />
100.00 %LEL<br />
20 %LEL<br />
40 %LEL<br />
03523725_1_en.eps<br />
Die Phase 2 des Einschaltvorganges kann durch drücken der Taste<br />
» OK « abgebrochen werden.<br />
Phase 2 of the power-on sequence can be terminated at any time by<br />
pressing the » OK « key.<br />
Phase 3 – Einlaufze<strong>it</strong> der Sensoren:<br />
– Alle Sensoren befinden sich in der Einlaufze<strong>it</strong>.<br />
Die verbleibende Ze<strong>it</strong> bis zur Messbere<strong>it</strong>schaft<br />
wird für jeden Sensor angezeigt.<br />
– Ein Sensor ist messbere<strong>it</strong>.<br />
Beispiel: CH 4<br />
CO2 0:57:30<br />
CH 4 0:00:09<br />
CO 0:22:40<br />
H2S 0:00:46<br />
O 2 1:32:10<br />
CO 2 0:57:10<br />
CH 4<br />
CO<br />
0 %UEG<br />
0:22:20<br />
H 2 S 0:00:37<br />
O 2 1:31:50<br />
01023725_1_de.eps<br />
01623725_1_de.eps<br />
Phase 3 – sensor warming-up period:<br />
– All sensors are warming up.<br />
The remaining time is displayed for<br />
each sensor.<br />
– One sensor is ready for use,<br />
Ex<strong>am</strong>ple: CH 4<br />
CO2 0:57:30<br />
CH 4 0:00:09<br />
CO 0:22:40<br />
H2S 0:00:46<br />
O 2 1:32:10<br />
CO 2 0:57:10<br />
CH 4<br />
CO<br />
0 %LEL<br />
0:22:20<br />
H 2 S 0:00:37<br />
O 2 1:31:50<br />
01023725_1_en.eps<br />
01623725_1_en.eps<br />
– Alle Sensoren sind messbere<strong>it</strong>.<br />
CO 2<br />
CH 4<br />
CO<br />
H 2 S<br />
O 2<br />
0.03 Vol.%<br />
0 %UEG<br />
0 ppm<br />
0 ppm<br />
20.9 Vol.%<br />
01123725_1_de.eps<br />
– All sensors are ready for use.<br />
CO 2<br />
CH 4<br />
CO<br />
H 2 S<br />
O 2<br />
0.03 Vol.%<br />
0 %LEL<br />
0 ppm<br />
0 ppm<br />
20.9 Vol.%<br />
01123725_1_en.eps<br />
— Die Einlaufphase ist abgeschlossen, das Gerät ist im Messbetrieb.<br />
Sind weniger als 5 Sensoren aktiv, werden die Anzeigen entsprechend<br />
größer angezeigt.<br />
Sensoren aktivieren/deaktivieren: siehe "Technisches Handbuch <strong>Dräger</strong><br />
X-<strong>am</strong> <strong>7000</strong>".<br />
— The warming-up period is completed and the instrument is in<br />
measuring mode.<br />
If the instrument has fewer than five active sensors, the information is<br />
displayed in a larger font.<br />
Activating/deactivating sensors: see the "<strong>Dräger</strong> X-<strong>am</strong> <strong>7000</strong><br />
Technical Manual".<br />
17
– Beispiel: 3 aktive Sensoren<br />
CO 2 0.03 Vol.%<br />
CH 4 0 %UEG<br />
O 2 20.9 Vol.%<br />
03223725_1_de.eps<br />
– Ex<strong>am</strong>ple: 3 active sensors<br />
CO 2 0.03 Vol.%<br />
CH 4 0 %LEL<br />
O 2 20.9 Vol.%<br />
03223725_1_en.eps<br />
– Beispiel: 1 aktiver Sensor<br />
O 2<br />
20.9<br />
Vol.%<br />
03323725_1_de.eps<br />
– Ex<strong>am</strong>ple: 1 active sensor<br />
O 2<br />
20.9<br />
Vol.%<br />
03323725_1_en.eps<br />
Alarm wird ausgelöst:<br />
— beim Überschre<strong>it</strong>en, bei O 2 auch beim Unterschre<strong>it</strong>en, der Alarmschwellen<br />
für Konzentrationsalarm,<br />
— beim Überschre<strong>it</strong>en der eingestellten Alarmschwellen für Expos<strong>it</strong>ionsalarm,<br />
— bei nicht mehr ausreichend geladener Batterie,<br />
— bei nicht ausreichendem Durchfluss im Pumpenbetrieb,<br />
— bei Geräte- und Sensorfehlern.<br />
Alarme erkennen, Se<strong>it</strong>e 22.<br />
Beim Überschre<strong>it</strong>en des Messbereichsendwertes:<br />
Anstelle des Messwertes wird das Sonderzeichen » Y Y Y Y « angezeigt.<br />
Beim Unterschre<strong>it</strong>en des Messbereiches:<br />
— Anstelle des Messwertes wird » – – – « angezeigt. Signalton und<br />
Alarmleuchte werden eingeschaltet.<br />
An alarm is generated:<br />
— if the measured value exceeds the threshold for the related<br />
concentration alarm (in the case of O 2 , also if the measured<br />
value is below the lower alarm threshold),<br />
— if the measured value exceeds the threshold for the related<br />
exposure alarm,<br />
— if the battery is exhausted,<br />
— if, in pumped mode, the rate of flow drops below the lim<strong>it</strong> value,<br />
— if an instrument or sensor fault is detected.<br />
Recognising alarms, page 22.<br />
If the full-scale value of the measuring range is exceeded:<br />
» Y Y Y Y « is displayed instead of the measured value.<br />
If the measured value is lower than the minimum scale value:<br />
— » – – – « is displayed instead of the measured value. Signal tone<br />
and the alarm l<strong>am</strong>p are swiched on.<br />
18
Folgende Sondersymbole (Icons), die den Gerätezustand anzeigen,<br />
können während des Messbetiebes auf der rechten Se<strong>it</strong>e<br />
angezeigt werden:<br />
Batteriekapaz<strong>it</strong>ät 75 bis 100 %<br />
Batteriekapaz<strong>it</strong>ät 50 bis 75 %<br />
Batteriekapaz<strong>it</strong>ät 25 bis 50 %<br />
Batteriekapaz<strong>it</strong>ät kleiner 25 %<br />
(blinkend) Batterie-Alarm, Se<strong>it</strong>e 25.<br />
Restliche Betriebsze<strong>it</strong> Voralarm ca. 15 Minuten<br />
Restliche Betriebsze<strong>it</strong> Hauptalarm ca. 2 Minuten<br />
Es liegt ein Hinweis vor – Anzeige der Hinweise, siehe "Technisches<br />
Handbuch <strong>Dräger</strong> X-<strong>am</strong> <strong>7000</strong>".<br />
Informationen sind im Info-Mode abrufbar, Se<strong>it</strong>e 13<br />
Es liegt eine Störung vor – Anzeige der Störung, siehe "Technisches<br />
Handbuch <strong>Dräger</strong> X-<strong>am</strong> <strong>7000</strong>"<br />
Der Messwertspeicher ist aktiv und arbe<strong>it</strong>et im Stackmodus<br />
(halten).<br />
Der Messwertspeicher stoppt, wenn der Datenspeicher voll ist.<br />
Der Messwertspeicher ist aktiv und arbe<strong>it</strong>et im Rollmodus (Überschreiben).<br />
Wenn der Messwertspeicher voll ist, werden die ersten Werte<br />
überschrieben.<br />
Messwertspeicher aktivieren und konfigurieren, siehe "Technisches<br />
Handbuch <strong>Dräger</strong> X-<strong>am</strong> <strong>7000</strong>".<br />
Die Sp<strong>it</strong>zenwertanzeige ist aktiv – aktivieren/deaktivieren, siehe<br />
"Technisches Handbuch <strong>Dräger</strong> X-<strong>am</strong> <strong>7000</strong>"<br />
Die Funktion "Messwert halten" ist aktiv – aktivieren/deaktivieren,<br />
siehe "Technisches Handbuch <strong>Dräger</strong> X-<strong>am</strong> <strong>7000</strong>"<br />
The following icons, which indicate the instrument status, may be<br />
displayed on the right when the instrument is in measuring mode:<br />
Battery capac<strong>it</strong>y 75 to 100 %<br />
Battery capac<strong>it</strong>y 50 to 75 %<br />
Battery capac<strong>it</strong>y 25 to 50 %<br />
Battery capac<strong>it</strong>y less than 25 %<br />
(blinking) Battery alarm, page 25.<br />
Remaining operating time after a battery warning: approx. 15<br />
minutes<br />
Remaining operating time after a battery alarm: approx. 2 minutes<br />
Information for the user is available. See the "X - <strong>am</strong> <strong>7000</strong><br />
Technical Manual" for further details.<br />
The information can be displayed in Info Mode, page 13<br />
A fault has been detected. See the "X - <strong>am</strong> <strong>7000</strong> Technical<br />
Manual" for further details<br />
The data memory is active in mode Stack.<br />
The data memory stops when <strong>it</strong> is full.<br />
The data memory is active in mode Roll.<br />
When the data memory is full, the first data will be overwr<strong>it</strong>ten.<br />
See the "<strong>Dräger</strong> X-<strong>am</strong> <strong>7000</strong> Technical Manual" for details of how to<br />
activate and configurate the data memory.<br />
Peak-value display is active. See the "<strong>Dräger</strong> X-<strong>am</strong> <strong>7000</strong><br />
Technical Manual" for details of how to activate and deactivate the<br />
peak-value display<br />
The "Hold" function is active. See the "<strong>Dräger</strong> X-<strong>am</strong> <strong>7000</strong><br />
Technical Manual" for details of how to activate and deactivate<br />
this function<br />
19
Die Alarm-Stummschaltung ist aktiv – aktivieren/deaktivieren,<br />
siehe "Technisches Handbuch <strong>Dräger</strong> X-<strong>am</strong> <strong>7000</strong>"<br />
Die schnelle Konfigurationsumschaltung, IR Sensor, ist aktiv –<br />
siehe "Technisches Handbuch <strong>Dräger</strong> X-<strong>am</strong> <strong>7000</strong>"<br />
Die schnelle Konfigurationsumschaltung, CAT Sensor, ist aktiv –<br />
siehe "Technisches Handbuch <strong>Dräger</strong> X-<strong>am</strong> <strong>7000</strong>"<br />
Die schnelle Konfigurationsumschaltung, EC Sensor, ist aktiv –<br />
siehe "Technisches Handbuch <strong>Dräger</strong> X-<strong>am</strong> <strong>7000</strong>"<br />
Die schnelle Konfigurationsumschaltung, PID Sensor, ist aktiv –<br />
siehe "Technisches Handbuch <strong>Dräger</strong> X-<strong>am</strong> <strong>7000</strong>"<br />
Das Gerät befindet sich im Applikations-Mode – siehe "Technisches<br />
Handbuch <strong>Dräger</strong> X-<strong>am</strong> <strong>7000</strong>"<br />
Das Gerät befindet sich im Datentransfer m<strong>it</strong> einem PC – siehe<br />
"Technisches Handbuch <strong>Dräger</strong> X-<strong>am</strong> <strong>7000</strong>"<br />
The "Alarm mute" function is active. See the "<strong>Dräger</strong> X-<strong>am</strong> <strong>7000</strong><br />
Technical Manual" for details of how to activate and deactivate<br />
this function<br />
Fast configuration sw<strong>it</strong>ching for the IR sensor is active. See the<br />
"<strong>Dräger</strong> X-<strong>am</strong> <strong>7000</strong> Technical Manual"<br />
Fast configuration sw<strong>it</strong>ching for the CAT sensor is active. See the<br />
"<strong>Dräger</strong> X-<strong>am</strong> <strong>7000</strong> Technical Manual"<br />
Fast configuration sw<strong>it</strong>ching for the EC sensor is active. See the<br />
"<strong>Dräger</strong> X-<strong>am</strong> <strong>7000</strong> Technical Manual"<br />
Fast configuration sw<strong>it</strong>ching for the PID sensor is active. See the<br />
"<strong>Dräger</strong> X-<strong>am</strong> <strong>7000</strong> Technical Manual"<br />
The instrument is in the application mode. See the "<strong>Dräger</strong> X-<strong>am</strong><br />
<strong>7000</strong> Technical Manual"<br />
The instrument is transferring data to a PC. See the "<strong>Dräger</strong> X-<br />
<strong>am</strong> <strong>7000</strong> Technical Manual"<br />
20
Gerät ausschalten<br />
Sw<strong>it</strong>ching off<br />
● Taste » q « und Taste » l « gedrückt halten<br />
(länger als 3 Sekunden).<br />
– Zur Überbrückung der 3 Sekunden<br />
wird ein Count-down angezeigt:<br />
D<br />
X – <strong>am</strong> <strong>7000</strong><br />
_ 3 _<br />
D<br />
X – <strong>am</strong> <strong>7000</strong><br />
_ 2 _<br />
D<br />
X – <strong>am</strong> <strong>7000</strong><br />
_ 1 _<br />
01723725_1_de.eps<br />
01823725_1_de.eps<br />
01923725_1_de.eps<br />
● Press and hold the keys » q « and » l «<br />
(longer than 3 seconds).<br />
– A count-down is displayed to show<br />
the required time:<br />
D<br />
X – <strong>am</strong> <strong>7000</strong><br />
_ 3 _<br />
D<br />
X – <strong>am</strong> <strong>7000</strong><br />
_ 2 _<br />
D<br />
X – <strong>am</strong> <strong>7000</strong><br />
_ 1 _<br />
01723725_1_en.eps<br />
01823725_1_en.eps<br />
01923725_1_en.eps<br />
Nach Ablauf der 3 Sekunden:<br />
Signalton und Alarmleuchte sind für ca. 1 Sekunde an –<br />
das Gerät schaltet sich aus.<br />
— Die grüne Betriebs-LED wird ausgeschaltet.<br />
— Werden die Tasten vor Ablauf der 3 Sekunden losgelassen, bleibt<br />
das Gerät im Messbetrieb.<br />
When the count-down reaches zero:<br />
The signal tone sounds and the alarm l<strong>am</strong>p lights for about one<br />
second and the instrument then sw<strong>it</strong>ches <strong>it</strong>self off.<br />
— The green operating-LED is sw<strong>it</strong>ched off.<br />
— If the keys are released before the count-down reaches zero, the<br />
instrument remains in measuring mode.<br />
Anzeigebeleuchtung einschalten<br />
Wenn während des Messbetriebs die Anzeigebeleuchtung eingeschaltet<br />
werden soll:<br />
● Beliebige Taste drücken, die Anzeigebeleuchtung wird für ca.<br />
30 Sekunden eingeschaltet.<br />
Wird ein Alarm aktiviert, schaltet sich die Beleuchtung ein.<br />
Sw<strong>it</strong>ching on the display illumination<br />
To sw<strong>it</strong>ch on the display illumination during measuring mode:<br />
● Press any key: the display illumination is sw<strong>it</strong>ched on for about<br />
30 seconds.<br />
The display illumination is also sw<strong>it</strong>ched on automatically if an<br />
alarm is generated.<br />
21
Alarme erkennen<br />
Alarm wird gegeben durch einen Signalton und eine rote Alarmleuchte<br />
im angegebenen Rhythmus sowie durch eine Information in<br />
der Anzeige.<br />
Recognising alarms<br />
An alarm is indicated by a signal tone and a red alarm light, both of<br />
which are activated in the specified rhythm for the alarm type, and by<br />
a message on the display.<br />
Konzentrations-Voralarm A1<br />
– Unterbrochener Signalton und blinkende<br />
rote Alarmleuchte.<br />
Anzeige: Gasart, Messwert 1) ,<br />
Einhe<strong>it</strong> / » A1 « im Wechsel<br />
A1<br />
ppm<br />
A1<br />
02123725_1_de.eps<br />
Concentration warning A1<br />
– Interm<strong>it</strong>tent signal tone and blinking red<br />
alarm l<strong>am</strong>p.<br />
Display: gas type, measured value 1) ,<br />
Un<strong>it</strong>s and » A1 «, displayed alternately<br />
A1<br />
ppm<br />
A1<br />
02123725_1_en.eps<br />
Voralarm qu<strong>it</strong>tieren:<br />
● Taste » OK « drücken – der Signalton wird abgeschaltet. Die rote<br />
Alarmleuchte sowie die wechselnde Anzeige von Einhe<strong>it</strong> und<br />
» A1 « verlöschen erst, wenn die Konzentration unter die Alarmschwelle<br />
gefallen ist.<br />
Der Voralarm A1 ist nicht selbsthaltend und erlischt, wenn die<br />
Konzentration unter die Alarmschwelle gefallen ist.<br />
Acknowledging the warning:<br />
● Press the » OK « key to sw<strong>it</strong>ch off the signal tone. The red alarm<br />
l<strong>am</strong>p and the alternating display of the un<strong>it</strong>s and » A1 « are<br />
sw<strong>it</strong>ched off only when the concentration drops below the alarm<br />
threshold.<br />
The warning A1 is not self-locking and disappears when the<br />
concentration drops below the alarm threshold.<br />
Konzentrations-Hauptalarm A2 und A1 für O 2<br />
– Unterbrochener Signalton und blinkende<br />
rote Alarmleuchte.<br />
Anzeige: Gasart, Messwert 1) ,<br />
Einhe<strong>it</strong> / » A2 « bzw. » A1 « für O 2 im<br />
Wechsel<br />
A2<br />
A2<br />
ppm<br />
Vol%<br />
A2<br />
A2<br />
02023725_1_de.eps<br />
Concentration alarm A2 and A1 for O 2<br />
– Interm<strong>it</strong>tent signal tone and blinking red<br />
alarm l<strong>am</strong>p.<br />
Display: gas type, measured value 1) ,<br />
Un<strong>it</strong>s and » A2 « (or » A1 « for O 2 ),<br />
displayed alternately<br />
A2<br />
A2<br />
ppm<br />
Vol%<br />
A2<br />
A2<br />
02023725_1_en.eps<br />
Nur für O 2 :<br />
— Hauptalarm A1 = untere Alarmschwelle unterschr<strong>it</strong>ten (Sauerstoffmangel).<br />
___________________<br />
1) Der Messwert wird fett dargestellt.<br />
For O 2 only:<br />
— Alarm A1 = measured value is below the lower alarm threshold<br />
(oxygen deficiency).<br />
___________________<br />
1) The measured value is displayed in a bold-face font.<br />
22
Bei einem Hauptalarm:<br />
Vorsicht:<br />
Bereich sofort verlassen, Lebensgefahr!<br />
Ein Hauptalarm ist selbsthaltend und nicht qu<strong>it</strong>tierbar.<br />
Nach dem Verlassen des Bereiches, wenn die Konzentration kleiner<br />
als der Hauptalarm A2 ist (bzw. bei O 2 größer als A1 ist):<br />
● Taste » OK « drücken –<br />
— Bei O 2 : Der Signalton und die rote Alarmleuchte werden abgeschaltet.<br />
— Bei allen anderen Messbereichen: Der Signalton wird abgeschaltet.<br />
Die rote Alarmleuchte sowie die wechselnde Anzeige von Einhe<strong>it</strong><br />
und » A1 « verlöschen erst, wenn die Konzentration unter die<br />
Alarmschwelle für Voralarm gefallen ist.<br />
In the case of an alarm:<br />
Caution:<br />
Leave the area immediately. Mortal danger!<br />
An alarm is self-locking and cannot be acknowledged.<br />
After leaving the area (when the concentration is less than the alarm<br />
threshold A2 or, for O 2 , greater than the lower threshold A1):<br />
● Press the » OK « key –<br />
— For O 2 : the signal tone and the red alarm l<strong>am</strong>p are sw<strong>it</strong>ched off.<br />
— For all other sensors: the signal tone is sw<strong>it</strong>ched off. The red alarm<br />
l<strong>am</strong>p and the alternating display of the un<strong>it</strong>s and » A1 « are<br />
sw<strong>it</strong>ched off only when the concentration drops below the warning<br />
threshold.<br />
Expos<strong>it</strong>ionsalarm STEV<br />
— Die Alarmschwelle für den Kurzze<strong>it</strong>wert STEV (M<strong>it</strong>telwert der Konzentration<br />
innerhalb der M<strong>it</strong>telwertdauer) ist überschr<strong>it</strong>ten.<br />
— Die Alarmschwelle für die Kurzze<strong>it</strong>wertdauer bzw. Dauer der erhöhten<br />
Expos<strong>it</strong>ion ist überschr<strong>it</strong>ten.<br />
– Unterbrochener Signalton und blinkende<br />
rote Alarmleuchte.<br />
Anzeige: Gasart, Messwert,<br />
STEV ppm STEV<br />
Einhe<strong>it</strong> / » STEV « im Wechsel<br />
02323725_1_de.eps<br />
Exposure alarm STEV<br />
— The alarm threshold for the short-term value STEV (mean value of the<br />
concentration over the mean-value period) has been exceeded.<br />
— The alarm threshold for the short-time exposure value or the<br />
duration of exposure to excess concentrations has been exceeded.<br />
— Interm<strong>it</strong>tent signal tone and blinking red<br />
alarm l<strong>am</strong>p.<br />
Display: gas type, measured value,<br />
STEV ppm STEV<br />
Un<strong>it</strong>s and » STEV «, displayed<br />
alternately<br />
02323725_1_en.eps<br />
23
Expos<strong>it</strong>ionsalarm TWA<br />
— Die Alarmschwelle für die Ges<strong>am</strong>texpos<strong>it</strong>ion TWA (bezogen auf<br />
eine einstellbare Schichtdauer) ist überschr<strong>it</strong>ten.<br />
– Unterbrochener Signalton und blinkende<br />
rote Alarmleuchte.<br />
Anzeige: Gasart, Messwert,<br />
TWA ppm<br />
Einhe<strong>it</strong> / » TWA « im Wechsel<br />
TWA<br />
02423725_1_de.eps<br />
Exposure alarm TWA<br />
— The alarm threshold for the total exposure TWA (over an<br />
adjustable shift duration) has been exceeded.<br />
— Interm<strong>it</strong>tent signal tone and blinking red<br />
alarm l<strong>am</strong>p.<br />
Display: gas type, measured value,<br />
TWA<br />
Un<strong>it</strong>s and » TWA «, displayed alternately<br />
ppm<br />
TWA<br />
02423725_1_en.eps<br />
Bei einem Expos<strong>it</strong>ionsalarm:<br />
Vorsicht:<br />
Bereich sofort verlassen!<br />
Der Arbe<strong>it</strong>seinsatz der Person muss nach diesem Alarm entsprechend<br />
den gültigen Vorschriften geregelt werden.<br />
Nach dem Verlassen des Bereiches, Alarm qu<strong>it</strong>tieren:<br />
● Taste » OK « drücken – nur der Signalton wird abgeschaltet.<br />
● Expos<strong>it</strong>ionsauswertung löschen – siehe "Technisches Handbuch<br />
X – <strong>am</strong>–<strong>7000</strong>".<br />
In the case of an exposure alarm:<br />
Caution:<br />
Leave the area immediately!<br />
After this alarm, the deployment of personnel is subject to the<br />
relevant regulations.<br />
After leaving the area, acknowledge the alarm:<br />
● Press the » OK « key: only the signal tone is sw<strong>it</strong>ched off.<br />
● Clear the exposure evaluation. See the "<strong>Dräger</strong> X-<strong>am</strong> <strong>7000</strong><br />
Technical Manual" for further details.<br />
24
Batterie-Voralarm<br />
– Unterbrochener Signalton und blinkende<br />
rote Alarmleuchte.<br />
Zusätzlich blinkt das Sonderzeichen<br />
» « <strong>am</strong> rechten Rand der Anzeige<br />
02523725_1_de.eps<br />
Battery warning<br />
— Interm<strong>it</strong>tent signal tone and blinking red<br />
alarm l<strong>am</strong>p.<br />
In add<strong>it</strong>ion, the icon » « blinks on<br />
the right of the display.<br />
02523725_1_den.eps<br />
● Versorgungseinhe<strong>it</strong> möglichst bald laden, Se<strong>it</strong>e 30.<br />
bzw.<br />
● Alkali-Batterien auswechseln, Se<strong>it</strong>e 36<br />
● Charge the power pack as soon as possible, page 30.<br />
or<br />
● replace the alkaline batteries, page 36<br />
Alarm qu<strong>it</strong>tieren:<br />
● Taste » OK « drücken – nur der Signalton wird abgeschaltet.<br />
Acknowledge the alarm:<br />
● Press the » OK « key. Only the signal tone is sw<strong>it</strong>ched off.<br />
Batterie-Hauptalarm<br />
– Unterbrochener Signalton und blinkende<br />
rote Alarmleuchte.<br />
Zusätzlich blinkt das Sonderzeichen<br />
» « <strong>am</strong> rechten Rand der Anzeige<br />
02623725_1_de.eps<br />
Battery alarm<br />
— Interm<strong>it</strong>tent signal tone and blinking red<br />
alarm l<strong>am</strong>p.<br />
In add<strong>it</strong>ion, the icon » « blinks on<br />
the right of the display<br />
02623725_1_en.eps<br />
— Das Gerät schaltet nach ca. 2 Minuten automatisch aus – zum<br />
Schutz der Versorgungseinhe<strong>it</strong> vor Tiefentladung.<br />
● Versorgungseinhe<strong>it</strong> laden, Se<strong>it</strong>e 30.<br />
bzw.<br />
● Alkali-Batterien auswechseln, Se<strong>it</strong>e 36<br />
— The instrument will sw<strong>it</strong>ch <strong>it</strong>self off automatically after about<br />
2 minutes to protect the battery from exhaustive discharge.<br />
● Charge the power pack as soon as possible, page 30.<br />
or<br />
● replace the alkaline batteries, page 36<br />
Alarm qu<strong>it</strong>tieren:<br />
● Taste » OK « drücken – nur der Signalton wird abgeschaltet.<br />
Acknowledge the alarm:<br />
● Press the » OK « key. Only the signal tone is sw<strong>it</strong>ched off.<br />
25
Durchflussalarm im Pumpenbetrieb<br />
– Signalton und rote Alarmleuchte dauernd.<br />
Alle Messbereiche zeigen keine Messwerte<br />
sondern » – – – « an.<br />
In der unteren Pumpenzeile erscheint<br />
eine Fehlermeldung.<br />
02723725_1_de.eps<br />
Flow alarm in pumped mode<br />
— The signal tone sounds and the red<br />
alarm l<strong>am</strong>p lights continuously.<br />
» – – – « is displayed instead of the<br />
measured value for all sensors.<br />
In the bottom row, where the pump<br />
information is shown, there will be an<br />
error message.<br />
02723725_1_en.eps<br />
— Der Durchfluss im Pumpenbetrieb ist nicht mehr ausreichend.<br />
— "Störungen, Ursache und Abhilfe", siehe "Technisches Handbuch<br />
<strong>Dräger</strong> X-<strong>am</strong> <strong>7000</strong>".<br />
— The pump is not drawing in a sufficient <strong>am</strong>ount of air.<br />
— See "Faults, causes and remedies" in the "<strong>Dräger</strong> X-<strong>am</strong> <strong>7000</strong><br />
Technical Manual".<br />
Alarm qu<strong>it</strong>tieren:<br />
● Ursache für die Störung beheben.<br />
● Taste » OK « drücken – Signalton und Alarmleuchte werden abgeschaltet.<br />
— Die Messung im Pumpenbetrieb ist wieder aktiv.<br />
Acknowledge the alarm:<br />
● Determine and rectify the cause of the fault.<br />
● Press the » OK « key to sw<strong>it</strong>ch off the signal tone and the<br />
alarm l<strong>am</strong>p.<br />
— Pumped mode is again active.<br />
26
Alarm bei Geräte- und Sensorfehler<br />
– Signalton und rote Alarmleuchte dauernd.<br />
Zusätzlich Sonderzeichen » « <strong>am</strong><br />
rechten Rand der Anzeige –<br />
bei Sensorfehlern für den entsprechenden<br />
Messbereich kein Messwert –<br />
bei Gerätefehlern werden für alle<br />
Messbereiche keine Messwerte angezeigt<br />
sondern » – – – «.<br />
02823725_1_de.eps<br />
Alarms for instrument and sensor faults<br />
— The signal tone sounds and the red<br />
alarm l<strong>am</strong>p lights continuously.<br />
The icon » « is displayed on the<br />
right side of the display.<br />
In the case of sensor faults, no<br />
measured value for the respective<br />
sensor.<br />
In the case of an instrument fault,<br />
» – – – « is displayed instead of the<br />
measured value for all sensors.<br />
02823725_1_en.eps<br />
— Das Gerät ist nicht mehr oder nur eingeschränkt funktionsfähig.<br />
— Anzeige der Störung im Klartext, siehe "Technisches Handbuch<br />
<strong>Dräger</strong> X-<strong>am</strong> <strong>7000</strong>".<br />
— The instrument is no longer (fully) functional.<br />
— See the "<strong>Dräger</strong> X-<strong>am</strong> <strong>7000</strong> Technical Manual" for details of how<br />
to display the fault in clear text.<br />
Alarm qu<strong>it</strong>tieren<br />
●<br />
Taste » OK « drücken – Signalton und Alarmleuchte werden abgeschaltet.<br />
● Gegebenenfalls Gerät ausschalten – Taste » q « und Taste » l «<br />
gedrückt halten (länger als 3 Sekunden).<br />
Acknowledge the alarm<br />
● Press the » OK « key to sw<strong>it</strong>ch off the signal tone and the alarm<br />
l<strong>am</strong>p.<br />
● If necessary, press and hold the » q « and » l « keys (longer than<br />
3 seconds) to sw<strong>it</strong>ch off the instrument.<br />
27
Messungen m<strong>it</strong> Schlauchsonde /<br />
Schwimmersonde<br />
Measurements w<strong>it</strong>h the hose<br />
probe / floating probe<br />
(Pumpenbetrieb)<br />
1 Adapter für Pumpenbetrieb<br />
(1 Schlauchtülle = Ansaugöffnung) auf<br />
die dafür vorgesehenen Löcher aufsetzen<br />
und m<strong>it</strong> den Schrauben festziehen. Verkanten<br />
des Adapters vermeiden und<br />
Dichtigke<strong>it</strong> visuell überprüfen.<br />
Das Gerät schaltet automatisch um auf<br />
Pumpenbetrieb.<br />
Auf der Anzeige erscheint zusätzlich zu<br />
den Messwerten in der unteren Zeile die<br />
Pumpenlaufze<strong>it</strong>.<br />
● Danach Dichtigke<strong>it</strong>stest vornehmen:<br />
Ansaugöffnung verschließen.<br />
Nach einigen Sekunden muss eine<br />
Fehlermeldung in der unteren Zeile erscheinen,<br />
die rote Alarmleuchte und der<br />
Signalton dauernd eingeschaltet sein.<br />
●<br />
●<br />
Ansaugöffnung freigeben.<br />
Taste » OK « drücken – Alarmleuchte und<br />
Signalton werden abgeschaltet.<br />
2 Am Anschluss eine Sonde – siehe "Bestell-Liste,<br />
Se<strong>it</strong>e 48" – anschließen.<br />
oder<br />
3 Am Anschluss eine Schwimmersonde –<br />
siehe "Bestell-Liste, Se<strong>it</strong>e 48" – anschließen<br />
und Schwimmersonde auf die Wasseroberfläche<br />
setzen.<br />
Bei stark ölhaltiger Umgebung wird der Einsatz<br />
des Wasser- und Staubfilters 83 13 648<br />
dringends empfohlen.<br />
1<br />
3<br />
2<br />
00723725_1.eps<br />
00823725_3.eps<br />
03823725_3.eps<br />
(pumped mode)<br />
1 Adapter for pumped mode<br />
Place the hose nozzle (1) (= inlet) on the<br />
holes provided for <strong>it</strong> and secure <strong>it</strong> w<strong>it</strong>h the<br />
screws. Do not cant the adapter and<br />
visually check for leaks.<br />
The instrument automatically sw<strong>it</strong>ches to<br />
pumped mode.<br />
The running time of the pump is shown on<br />
the bottom line of the display.<br />
●<br />
●<br />
●<br />
Then execute a leak test:<br />
Close off the inlet opening.<br />
After a few seconds, an error message<br />
will appear at the bottom of the display.<br />
The red alarm lights and the signal tone<br />
are constantly on.<br />
Release the inlet opening.<br />
Press the » OK « key to sw<strong>it</strong>ch off the<br />
alarm l<strong>am</strong>p and the signal tone.<br />
2 After this, connect a probe – see<br />
"Ordering list", page 48.<br />
or<br />
3 Connect a float probe – see “Ordering<br />
list”, page 48 – and place the float probe<br />
on the surface of the water.<br />
In a very oily environment, the use of the<br />
water and dust filter (part number 83 13 648)<br />
is strongly recommended.<br />
28
Zusätzliche Spülze<strong>it</strong> abwarten<br />
Die Spülphase ist notwendig, um alle Einflüsse<br />
bei Einsatz der Schlauchsonde zu<br />
minimieren, die insbesondere bei der Messung<br />
von Konzentrationen im ppm-Bereich<br />
sehr störend sein können.<br />
Die Pumpenlaufze<strong>it</strong> wird in der unteren Zeile<br />
der Anzeige angezeigt.<br />
Die Spülze<strong>it</strong> ist von Faktoren abhängig, wie<br />
Art und Konzentration des zu messenden<br />
Gases, Material, Länge, Durchmesser und<br />
Alter des Schlauches.<br />
Zu Beachten: Nach einer vollständigen<br />
Benetzung der weißen Membranen vor pumpenein-<br />
und -auslaß m<strong>it</strong> flüssigen Medien,<br />
sind vor Wiederaufnahme des Pumpbetriebs<br />
die Membranen zu trocknen. Verschmutzte<br />
Membranen sind auszutauschen<br />
(E-Set Pumpenmembrane 83 18 607).<br />
We<strong>it</strong>ere Informationen können dem Datenblatt<br />
des gewählten Sensors entnommen<br />
werden, oder wenden Sie sich an:<br />
ihren lokalen <strong>Dräger</strong>-Ansprechpartner<br />
oder FAX +49 (0)451 882 3152 oder<br />
e-mail: mmt.applic@draeger.com<br />
Pumpenbetrieb beenden<br />
4 Die Schrauben lösen und Adapter für<br />
Pumpenbetrieb abnehmen – das Gerät<br />
schaltet automatisch um auf Diffusionsbetrieb.<br />
3<br />
00923725_1.eps<br />
Flushing the hose probe<br />
The hose probe must be flushed before<br />
use in order to minimise the effects of any<br />
substances which may still be in the hose,<br />
since these effects may easily falsify the<br />
results, especially when measuring<br />
concentrations in the ppm range.<br />
The running time of the pump is shown<br />
on the bottom line of the display.<br />
The necessary flushing time depends on various<br />
factors such as the type and concentration of<br />
the gas to be measured, the material from which<br />
the hose is made, the length and di<strong>am</strong>eter of the<br />
hose and the age of the hose.<br />
Attention: Dry the wh<strong>it</strong>e pump membranes<br />
after moistening w<strong>it</strong>h any liquids before operating<br />
the un<strong>it</strong> in pump mode again.<br />
Cont<strong>am</strong>inated or dirty membranes need to<br />
be exchanged (Pump membrane set<br />
83 18 607).<br />
Further information on this subject can be<br />
found in the data sheet of the sensor being<br />
used. Alternatively, you can contact your local<br />
<strong>Dräger</strong> supply or contact <strong>Dräger</strong> w<strong>it</strong>h a fax on<br />
+49 (0)451 882 3152 or by email at<br />
mmt.applic@draeger.com.<br />
Terminating pumped mode<br />
4 Loosen the screws and remove the<br />
adapter for pumped mode. The<br />
instrument automatically returns<br />
to diffusion mode.<br />
29
Versorgungseinhe<strong>it</strong> laden / wechseln<br />
Es gibt drei Typen von Versorgungseinhe<strong>it</strong>en:<br />
a) NiMH-Versorgungseinhe<strong>it</strong> Nennspannung 4,8 V / Nennkapaz<strong>it</strong>ät<br />
3,0 Ah<br />
b) NiMH-Versorgungseinhe<strong>it</strong> Nennspannung 4,8 V / Nennkapaz<strong>it</strong>ät<br />
6,0 Ah<br />
c) Alkali-Versorgungseinhe<strong>it</strong> 6,0 V für Primärzellen Typ LR14<br />
Nur für NiMH-Versorgungseinhe<strong>it</strong>en bzw. Geräte m<strong>it</strong> NiMH-Versorgungseinhe<strong>it</strong><br />
(a und b).<br />
— m<strong>it</strong> Mehrfach-Ladestation, bestehend aus Netzteil (Bestell-Nr.<br />
83 15 805) und Lademodul <strong>Dräger</strong> X-<strong>am</strong> <strong>7000</strong> (Bestell-Nr.<br />
83 16 487),<br />
oder<br />
— m<strong>it</strong> Lademodul <strong>Dräger</strong> X-<strong>am</strong> <strong>7000</strong> (Bestell-Nr. 83 16 487) und<br />
Steckernetzteil (Bestell-Nr. 83 16 994) bzw. Kfz-Ladeadapter (Bestell-Nr.<br />
83 12 645).<br />
Charging / changing the power pack<br />
There are three types of power supplies:<br />
a) NiMH power supply nominal voltage 4.8 V / nominal capac<strong>it</strong>y<br />
3.0 Ah<br />
b) NiMH power supply nominal voltage 4.8 V / nominal capac<strong>it</strong>y<br />
6.0 Ah<br />
c) Alkali power supply 6.0 V for primary cells type LR14<br />
The following applies only to NiMH power packs or instruments<br />
equipped w<strong>it</strong>h such packs (a and b).<br />
— The power pack can be charged w<strong>it</strong>h the multiple charging station,<br />
consisting of the power supply un<strong>it</strong> (Part No. 83 15 805) and the<br />
charging module <strong>Dräger</strong> X-<strong>am</strong> <strong>7000</strong> (Part No. 83 16 487),<br />
or<br />
— w<strong>it</strong>h the charging module <strong>Dräger</strong> X-<strong>am</strong> <strong>7000</strong> (Part No. 83 16 487)<br />
and a plug-in power supply un<strong>it</strong> (Part No. 83 16 994) or a vehicle<br />
charging adapter (Part No. 83 12 645).<br />
Das Gerät bes<strong>it</strong>zt ein prozessorgesteuertes Lademanagement.<br />
Es wird eine Schnell-Ladung durchgeführt.<br />
Gerät nur bei Umgebungstemperaturen zwischen 5 und 35 o C laden.<br />
Bei extrem hohen oder niedrigen Temperaturen schaltet das Gerät<br />
den Ladevorgang zum Schutz der Versorgungseinhe<strong>it</strong> ab. Im Display<br />
erscheint eine entsprechende Meldung.<br />
Vorsicht:<br />
Nicht unter Tage oder in explosionsgefährdeten Bereichen<br />
laden! Explosionsgefahr!<br />
Die Ladegeräte sind nicht nach den Richtlinien für Schlagwetter<br />
und Explosionsschutz gebaut.<br />
The instrument has a processor-controlled charge management<br />
system which executes fast charging.<br />
Charge the power pack only at <strong>am</strong>bient temperatures between 5 and<br />
35 o C. Charging is sw<strong>it</strong>ched off automatically at extremely low or high<br />
temperatures to protect the power pack. If this happens, a su<strong>it</strong>able<br />
message appears on the display.<br />
Caution:<br />
Do not charge the power pack underground or in explosionhazard<br />
areas! Danger of explosion!<br />
The chargers are not constructed in accordance w<strong>it</strong>h the<br />
regulations for fired<strong>am</strong>p and explosion protection.<br />
30
Versorgungseinhe<strong>it</strong> wechseln<br />
— für we<strong>it</strong>ere Informationen siehe "Technisches Handbuch<br />
<strong>Dräger</strong> X-<strong>am</strong> <strong>7000</strong>".<br />
— Der Wechsel der NiMH-Versorgungseinhe<strong>it</strong>en im Ex-Bereich ist<br />
zulässig.<br />
Achtung!<br />
Der Wechsel der Alkali-Versorgungseinhe<strong>it</strong> im Ex-Bereich ist<br />
unzulässig. Explosionsgefahr!<br />
— Die Stecker der Versorgungseinhe<strong>it</strong> sind m<strong>it</strong> Staubschutzkappen<br />
zu versehen.<br />
Auch bei ausgeschaltetem Gerät werden die Sensoren m<strong>it</strong> Strom versorgt<br />
um eine schnellere Einlaufze<strong>it</strong> beim Einschalten zu gewährleisten.<br />
Außerdem verliert die Versorgungseinhe<strong>it</strong> durch längere Ze<strong>it</strong>en unbenutzter<br />
Lagerung an Ladung. Daher sollte das Gerät permanent an der<br />
Ladung aufbewahrt werden. Wird das Gerät ohne Ladung gelagert, ist<br />
— alle 3 Wochen (NiMH-Versorgungseinhe<strong>it</strong> 3,0 Ah)<br />
— alle 5 Wochen (NiMH-Versorgungseinhe<strong>it</strong> 6,0 Ah)<br />
eine vollständige Ladung durchzuführen.<br />
Changing the power pack<br />
— Refer to the "X <strong>am</strong> <strong>7000</strong> Technical Manual" for add<strong>it</strong>ional<br />
information about changing the battery pack.<br />
— Changing the NiMH-power supply can be done in Ex-areas.<br />
—<br />
Attention!<br />
Change the alkali batteries is prohib<strong>it</strong>ed in Ex-areas. Danger<br />
of explosion!<br />
— The plugs of the power supply must have protectice caps for dust.<br />
Even w<strong>it</strong>h the instrument sw<strong>it</strong>ched off, the sensors are supplied w<strong>it</strong>h<br />
power in order to reduce the warming-up period when the instrument<br />
is sw<strong>it</strong>ched on. Furthermore, the batteries in the power pack discharge<br />
themselves during storage, resulting in a loss of battery<br />
charge. For this reason, the instrument should be always be stored in<br />
<strong>it</strong>’s charger. If the instrument is stored w<strong>it</strong>h empty batteries, then a<br />
complete charge has to be done<br />
— every 3 weeks if <strong>it</strong> is equipped w<strong>it</strong>h an NiMH power pack 3.0 Ah)<br />
— every 5 weeks if <strong>it</strong> is equipped w<strong>it</strong>h an NiMH power pack 6.0 Ah)<br />
Anzeigen während des Ladevorgangs:<br />
– Versorgungseinhe<strong>it</strong> wird geladen.<br />
Der Ladezustand und die voraussichtliche<br />
Betriebsze<strong>it</strong> wird angezeigt, z. B.:<br />
Angabe: hochgerechnet auf den aktuellen<br />
Verbrauch/Konfiguration (CAT /<br />
IR / Pumpe / ...).<br />
In der unteren Zeile wird der Batterietyp<br />
angezeigt<br />
Lade Modus<br />
50 %<br />
2,5 Ah<br />
15 h<br />
NiMH 6,0 Ah<br />
02923725_1_de.eps<br />
Displays during charging:<br />
– The power pack is being charged.<br />
The state of charge of the battery and<br />
the expected operating time w<strong>it</strong>h this<br />
state of charge, calculated on the basis<br />
of the present current consumption and<br />
configuration (CAT / IR / pump /...) are<br />
displayed as shown in the ex<strong>am</strong>ple on<br />
the right. The battery type is shown in<br />
the bottom line of the display.<br />
Battery charging<br />
50 %<br />
2.5 Ah<br />
15 h<br />
NiMH 6.0 Ah<br />
02923725_1_en.eps<br />
– Das Gerät ist m<strong>it</strong> einer Ladeeinhe<strong>it</strong> verbunden,<br />
aber m<strong>it</strong> einer Alkali-Versorgungseinhe<strong>it</strong><br />
ausgestattet, die nicht<br />
wieder aufladbar sind.<br />
nicht ladbar<br />
Batterie Typ Alkali<br />
03123725_1_de.eps<br />
– The instrument is connected to a<br />
battery charger but equipped w<strong>it</strong>h<br />
an alkaline power whose batteries<br />
cannot be recharged.<br />
not charging<br />
Battery type alkaline<br />
03123725_1_en.eps<br />
31
Geräte m<strong>it</strong> tiefentladener Versorgungseinhe<strong>it</strong> laden<br />
● Gerät in das Lademodul stellen –<br />
je nach Entladezustand der Versorgungseinhe<strong>it</strong> kann es einige Minuten<br />
dauern, bis sich die Spannung der Versorgungseinhe<strong>it</strong> erholt<br />
hat. Wenn dies der Fall ist, geht das Gerät in den<br />
Messbetrieb; die Messwerte werden angezeigt.<br />
Danach kann das Gerät ausgeschaltet werden.<br />
M<strong>it</strong> Mehrfach-Ladestation laden<br />
M<strong>it</strong> der Mehrfach-Ladestation können maximal acht <strong>Dräger</strong> X-<br />
<strong>am</strong> <strong>7000</strong>-Geräte oder einzelne Versorgungseinhe<strong>it</strong>en gleichze<strong>it</strong>ig geladen<br />
werden.<br />
● Übereinstimmung der Netzspannung m<strong>it</strong> der Einstellung <strong>am</strong> Netzteil<br />
überprüfen (siehe Geräteunterse<strong>it</strong>e – Umstellung nur durch<br />
den <strong>Dräger</strong>Service).<br />
● Für den Anbau der Lademodule, Netzteil vom Netz trennen!<br />
Charging an instrument w<strong>it</strong>h a completely discharged power pack<br />
● Place the instrument in the charging module –<br />
depending on the state of charge of the power pack, <strong>it</strong> may take<br />
several minutes for <strong>it</strong>s output voltage to recover. After this, the<br />
instrument sw<strong>it</strong>ches to measuring mode and the measured values<br />
are displayed.<br />
After this the instrument can be sw<strong>it</strong>ched off.<br />
Charging w<strong>it</strong>h the multiple charging station<br />
Up to eight <strong>Dräger</strong> X-<strong>am</strong> <strong>7000</strong> instruments or power packs can be<br />
loaded simultaneously w<strong>it</strong>h the multiple charging station.<br />
● Check that the local mains voltage agrees w<strong>it</strong>h the value shown on<br />
the bottom of the power supply un<strong>it</strong>. (The input voltage for the<br />
power supply un<strong>it</strong> can be changed only by <strong>Dräger</strong>Service).<br />
● Disconnect the power supply un<strong>it</strong> from the mains before<br />
connecting the charging modules!<br />
32
Lademodule anbauen<br />
1 Schl<strong>it</strong>ze der Verriegelung m<strong>it</strong> Schraubendreher oder Münze<br />
waagerecht ausrichten.<br />
2 Befestigungszunge des Lademoduls (gleichze<strong>it</strong>ig Stromzuführung)<br />
bis zur Rasterung einschieben.<br />
1 Verriegelung m<strong>it</strong> einer Vierteldrehung schließen (Schl<strong>it</strong>z steht<br />
senkrecht).<br />
Mounting charging modules<br />
1 Turn the sl<strong>it</strong> of the lock to the horizontal pos<strong>it</strong>ion w<strong>it</strong>h a screwdriver<br />
or coin.<br />
2 Push in the fixing lug of the charging module as far as <strong>it</strong> will go (this<br />
lug also serves as current supply connector).<br />
1 Close the lock by turning <strong>it</strong> by 90 o (w<strong>it</strong>h the sl<strong>it</strong> vertical).<br />
1 2 1 2 1 2<br />
Lade Modus<br />
50 %<br />
2,5 Ah<br />
15 h<br />
NiMH 6,0 Ah<br />
Lade Modus<br />
50 %<br />
2,5 Ah<br />
15 h<br />
NiMH 6,0 Ah<br />
Lade Modus<br />
50 %<br />
2,5 Ah<br />
15 h<br />
NiMH 6,0 Ah<br />
OK<br />
OK<br />
OK<br />
●<br />
We<strong>it</strong>ere Lademodule in gleicher Weise anbauen.<br />
●<br />
Attach further charging modules in the s<strong>am</strong>e manner.<br />
00223725_1.eps<br />
Die Lademodule nicht in Gruppen, sondern nur einzeln anreihen oder<br />
abtrennen, um Beschädigungen an der Ladestation zu vermeiden.<br />
Auch während des Transports sollen das Netzteil sowie die Lademodule<br />
stets einzeln und ohne eingestellte Geräte gehandhabt werden.<br />
In order to avoid d<strong>am</strong>age to the charging station, always mount<br />
and remove the charging modules individually (never in groups).<br />
The power supply un<strong>it</strong> and the charging modules should also<br />
be transported separately and w<strong>it</strong>hout instruments inserted.<br />
33
Als Stellfläche ist eine ebene und waagerechte<br />
Fläche vorzusehen.<br />
Hinweis:<br />
Der Messbetrieb kann auch im Lademodul<br />
erfolgen.<br />
Place the multiple charging station on a<br />
smooth flat surface.<br />
Note: The measuring mode can still be<br />
used when the instrument is in the charging<br />
module.<br />
● Netzteil ans Netz anschließen.<br />
1 Die grüne LED "Netz" leuchtet.<br />
● <strong>Dräger</strong> X-<strong>am</strong> <strong>7000</strong> m<strong>it</strong> der Front nach<br />
rechts zeigend in das Lademodul stellen.<br />
Das vollständige Laden einer leeren Batterie<br />
dauert:<br />
— NiMH-Versorgungseinhe<strong>it</strong> 3,0 Ah –<br />
ca. 4 Stunden<br />
— NiMH-Versorgungseinhe<strong>it</strong> 6,0 Ah –<br />
ca. 8 Stunden<br />
1<br />
NiMH 6,0 Ah<br />
50 %<br />
2,5 Ah<br />
15 h<br />
OK<br />
Lade Modus<br />
00323725_1.eps<br />
● Connect the power supply un<strong>it</strong> to a mains<br />
outlet.<br />
1 The green "Mains" LED lights.<br />
●<br />
Place the <strong>Dräger</strong> X-<strong>am</strong> <strong>7000</strong> in the charging<br />
module w<strong>it</strong>h <strong>it</strong>s front panel pointing<br />
to the right.<br />
Charging of a completely discharged battery<br />
takes:<br />
— about 4 hours for a 3.0 Ah NiMH power<br />
pack<br />
— about 8 hours for a 6.0 Ah NiMH power<br />
pack<br />
Ein Kurzschließen der Ladekontakte in den<br />
Lademodulen, z. B. durch hineingefallene<br />
metallische Gegenstände, führt nicht zu<br />
Schäden an der Ladestation, sollte jedoch<br />
wegen möglicher Erh<strong>it</strong>zungsgefahr und Fehlanzeigen<br />
<strong>am</strong> Lademodul vermieden werden.<br />
Bei Kurzschluss oder Überlastung des Netzteils:<br />
2 Die rote LED "Überlastungsanzeige"<br />
leuchtet, und ein akustischer Alarm ertönt.<br />
— Nach Bese<strong>it</strong>igung der Störung wird automatisch<br />
der Alarm gelöscht und der Ladevorgang<br />
wieder aufgenommen.<br />
— Bei Ausfall der Netzspannung sind die<br />
bere<strong>it</strong>s geladenen Geräte gegen Entladung<br />
geschützt.<br />
2<br />
NiMH 6,0 Ah<br />
50 %<br />
2,5 Ah<br />
15 h<br />
OK<br />
Lade Modus<br />
00423725_1.eps<br />
A short-circu<strong>it</strong> of the charging contacts in the<br />
charging modules, e.g., due to metal objects<br />
that have fallen into the modules, will not<br />
cause any d<strong>am</strong>age to the charging station<br />
but should be avoided due to the danger of<br />
overheating and incorrect displays on the<br />
charging module.<br />
In the event of a short-circu<strong>it</strong> or an overload<br />
of the power pack:<br />
2 The red "Overload" LED lights and an<br />
audible alarm sounds.<br />
— After rectification of the fault, the alarm is<br />
sw<strong>it</strong>ched off automatically and the<br />
charging process is resumed.<br />
— In the event of a power failure, the<br />
instruments already charged are<br />
protected against discharging.<br />
34
M<strong>it</strong> Lademodul und Steckernetzteil oder Kfz-Ladeadapter<br />
laden<br />
— In dieser Kombination können maximal zwei <strong>Dräger</strong> X-<strong>am</strong> <strong>7000</strong><br />
bzw. eine einzelne NiMH-Versorgungseinhe<strong>it</strong> geladen werden.<br />
Charging w<strong>it</strong>h charging module and plug-in power supply un<strong>it</strong><br />
or vehicle adapter<br />
— A maximum of two <strong>Dräger</strong> X-<strong>am</strong> <strong>7000</strong> instruments or a single<br />
NiMH power pack can be charged in this manner.<br />
2<br />
NiMH 6,0 Ah<br />
50 %<br />
2,5 Ah<br />
15 h<br />
Lade Modus<br />
1<br />
OK<br />
83 16 994 (100 ... 240 V) 83 12 645<br />
01023725_1.eps<br />
Der Ladevorgang verläuft analog dem Laden m<strong>it</strong> der Mehrfach-Ladestation.<br />
The charging operation is similar to that for the multiple charging<br />
station.<br />
35
Alkali-Batterien wechseln<br />
Replacing alkaline batteries<br />
Vorsicht:<br />
Batterien oder Alkali-Versorgungseinhe<strong>it</strong><br />
nicht unter Tage oder in explosionsgefährdeten<br />
Bereichen wechseln.<br />
Explosionsgefahr!<br />
● Gerät ausschalten.<br />
1 Die zwei äußeren Schrauben an der<br />
Unterse<strong>it</strong>e des Gerätes lösen.<br />
● Die Alkali-Versorgungseinhe<strong>it</strong> aus dem<br />
Gerät herausnehmen.<br />
● Die vier Schrauben des Batteriefachs lösen<br />
und Batteriefach öffnen.<br />
● Alte Batterie gegen neue austauschen.<br />
Polar<strong>it</strong>ät beachten!<br />
● Alkali-Versorgungseinhe<strong>it</strong> in umgekehrter<br />
Reihenfolge wieder zus<strong>am</strong>menbauen<br />
und an das <strong>Dräger</strong> X-<strong>am</strong> <strong>7000</strong> montieren.<br />
1<br />
00523725_1.eps<br />
Caution:<br />
Do not change the batteries or Alkaline<br />
Battery Pack underground or in explosion-hazard<br />
areas. Danger of explosion!<br />
● Sw<strong>it</strong>ch off the instrument.<br />
1 Loosen the two screws on the bottom of<br />
the instrument.<br />
● Remove the alkaline power pack from the<br />
instrument.<br />
● Loosen the four screws on the battery<br />
compartment and open the cover.<br />
● Replace the exhausted batteries w<strong>it</strong>h new<br />
ones. Observe the polar<strong>it</strong>y when inserting<br />
the new batteries!<br />
● Assemble the alkaline power pack in<br />
the reverse order and insert <strong>it</strong> in the<br />
<strong>Dräger</strong> X-<strong>am</strong> <strong>7000</strong>.<br />
Für die Alkali-Versorgungseinhe<strong>it</strong> dürfen nur<br />
folgende Zellen (C-Size, Baby, LR14) verwendet<br />
werden:<br />
— Energizer, E93<br />
oder<br />
— Druracell Plus, MN140C<br />
Bei Benutzung anderer Batterien erlischt die<br />
Ex-Zulassung!<br />
Only the following batteries (C-Size, Baby,<br />
LR14) can be used w<strong>it</strong>h the alkaline power<br />
pack:<br />
— Energizer, E93<br />
or<br />
— Druracell Plus, MN140C<br />
The use of other batteries will invalidate the<br />
explosion-protection approval!<br />
01123725_1.eps<br />
36
●<br />
●<br />
Nach dem Wechsel:<br />
Einstellungen und Daten werden über<br />
den Batteriewechsel hinaus gesichert.<br />
Die Sensoren werden we<strong>it</strong>erhin m<strong>it</strong><br />
Strom versorgt.<br />
Wenn die Versorgungseinhe<strong>it</strong> längere<br />
Ze<strong>it</strong> vom Gerät getrennt war, laufen die<br />
Sensoren neu ein.<br />
●<br />
●<br />
After replacing the batteries:<br />
The settings and data remain stored while<br />
the batteries are being changed. The<br />
sensors are also supplied w<strong>it</strong>h power<br />
during this period.<br />
If the power pack is disconnected from<br />
the instrument for a long period, the<br />
sensors must warm up again when the<br />
power pack is connected again.<br />
Verbrauchte Alkali Batterien<br />
Vorsicht:<br />
— nicht ins Feuer werfen,<br />
— nicht wieder aufladen,<br />
— nicht gewalts<strong>am</strong> öffnen,<br />
Explosionsgefahr!<br />
— Verbrauchte Batterien nur als Sondermüll<br />
entsorgen, entsprechend den örtlichen<br />
Abfallbese<strong>it</strong>igungsvorschriften.<br />
Auskünfte erteilen die örtlichen Umweltund<br />
Ordnungsämter sowie geeignete<br />
Entsorgungsunternehmen.<br />
00623725_1.eps<br />
Handling of exhausted alkaline batteries:<br />
Caution:<br />
— never throw them into a fire,<br />
— never attempt to charge them,<br />
— never attempt to open them,<br />
danger of explosion!<br />
— Dispose of exhausted batteries only as<br />
special waste in accordance w<strong>it</strong>h the<br />
local regulations.<br />
37
Frischluftkalibrierung durchführen<br />
zum Steigern der Messqual<strong>it</strong>ät<br />
Fresh-air calibration<br />
for improved measuring accuracy<br />
— Zur Verbesserung der Nullpunkt-Genauigke<strong>it</strong> kann eine Frischluft-<br />
Kalibrierung durchgeführt werden.<br />
— Gerät an Frischluft kalibrieren, frei von Messgasen oder anderen<br />
Störgasen – nicht in Raumluft (Werstatt, Büro usw.), hier kann z.B.<br />
der CO 2 -Gehalt höher sein.<br />
— An der Frischluft-Kalibrierung nehmen alle Sensoren teil, die kalibrierbar<br />
sind – keine Warnungsanzeige » « im Display. Nicht<br />
eingelaufende oder fehlerhafte Sensoren werden übersprungen.<br />
— Bei der Frischluft-Kalibrierung wird der Nullpunkt aller Sensoren<br />
(m<strong>it</strong> Ausnahme des Sensors für Sauerstoff und CO 2 ) auf 0 gesetzt.<br />
Nur bei dem Sensor für Sauerstoff wird die Empfindlichke<strong>it</strong> auf<br />
20,9 Vol.-% O 2 .<br />
— Calibration in fresh air can be carried out in order to improve the<br />
zero-point accuracy of the instrument.<br />
— Calibrate the instrument in fresh air which is free of the gases to<br />
be measures and gases which could interfere w<strong>it</strong>h the calibration.<br />
Do not calibrate the instrument indoors (in a workshop, office,<br />
etc.), since the CO 2 level may be higher there.<br />
— All sensors which can be calibrated – no warning icon » « in<br />
the display – participate in the fresh-air calibration. Faulty sensors<br />
and sensors which have not yet warmed up are skipped.<br />
— Fresh-air calibration adjusts the zero-points of all sensors<br />
(except the sensors for oxygen and CO 2 ) to 0.<br />
For the oxygen sensor, the sens<strong>it</strong>iv<strong>it</strong>y is set to 20.9% by volume.<br />
●<br />
●<br />
Bei eingeschaltetem Gerät Taste » l « kurz drücken.<br />
M<strong>it</strong> der Taste » l « im jetzt angezeigtem "Quick Menü" die Funktion<br />
"Frischluft Justage" auswählen.<br />
— Der Umfang des Quick Menüs kann ausgewählt werden und kann<br />
im Auslieferungszustand je nach Land variieren, siehe "Technisches<br />
Handbuch <strong>Dräger</strong> X-<strong>am</strong> <strong>7000</strong>".<br />
●<br />
●<br />
W<strong>it</strong>h the instrument sw<strong>it</strong>ched on, briefly press the » l « key.<br />
In the "Quick menu" which then appears, use the » l « key to<br />
select "Fresh air cal".<br />
— The scope of the "Quick menu" can be selected and may be vary<br />
depending country (see the "<strong>Dräger</strong> X-<strong>am</strong> <strong>7000</strong> Technical<br />
Manual").<br />
●<br />
●<br />
Taste » OK « drücken, die Funktion wird aufgerufen.<br />
Anzeige:<br />
M<strong>it</strong> der Taste » l « "Bestätigen" auswählen<br />
und danach Taste » OK «<br />
drücken.<br />
Frischluft-Justage<br />
zurück<br />
Start Frischluft-<br />
Kalibrierung<br />
Bestätigen<br />
1/3<br />
03623725_1_de.eps<br />
●<br />
●<br />
Press the » OK « key to start the selected function.<br />
Display:<br />
Use the » l « key to select "Confirm"<br />
and then press the » OK « key.<br />
Fresh air cal.<br />
back<br />
starting Fresch air<br />
calibration<br />
Confirm<br />
1/3<br />
03623725_1_en.eps<br />
38
— Die Frischluftkalibrierung wird durchgeführt.<br />
Die Empfindlichke<strong>it</strong> des EC O 2 -Sensors wird auf 20,9 Vol.% gesetzt,<br />
der Nullpunkt aller anderen Sensoren wird auf 0 gesetzt.<br />
— Fresh-air calibration is now executed.<br />
The sens<strong>it</strong>iv<strong>it</strong>y of the EC O 2 sensor is set to 20.9 Vol.% and the<br />
zero point of all other sensors is set to 0.<br />
●<br />
●<br />
●<br />
●<br />
Nach Abschluss der Frischluftkalibrierung:<br />
Anzeige:<br />
Taste » OK « drücken, die Funktion wird<br />
beendet.<br />
Frischluft-Justage<br />
zurück<br />
IR-CO2 : ok<br />
CA-CH4 : ok<br />
EC-CO : ok<br />
EC-H2S : ok<br />
EC-O2 : ok<br />
Taste » q « solange drücken, bis "Ex<strong>it</strong> Quick Menü" erscheint.<br />
Taste » OK « drücken, das Gerät ist wieder im Messbetrieb.<br />
3/3<br />
03723725_1_de.eps<br />
●<br />
●<br />
●<br />
●<br />
After completion of fresh-air calibration:<br />
Display:<br />
Press the » OK « key to terminate the<br />
function.<br />
Fresh air cal.<br />
back<br />
IR-CO2 : ok<br />
CA-CH4 : ok<br />
EC-CO : ok<br />
EC-H2S : ok<br />
EC-O2 : ok<br />
Press and hold the » q « key until "Ex<strong>it</strong> Quick Menu" is displayed.<br />
Press the » OK « key to return to measuring mode.<br />
3/3<br />
03723725_1_en.eps<br />
Gerät entsorgen<br />
Ab August 2005 gelten EU-we<strong>it</strong>e Vorschriften zur Entsorgung<br />
von Elektro- und Elektronikgeräten, die in der EU<br />
Richtline 2002/96/EG und nationalen Gesetzen festgelegt<br />
sind und dieses Gerät betreffen.<br />
Für private Haushalte werden spezielle S<strong>am</strong>mel- und Recycling-Möglichke<strong>it</strong>en<br />
eingerichtet. Da dieses Gerät nicht für die Nutzung in<br />
privaten Haushalten registriert ist, darf es auch nicht über solche<br />
Wege entsorgt werden. Es kann zu seiner Entsorgung an ihre nationale<br />
<strong>Dräger</strong> Safety Vertriebsorganisation zurück gesandt werden, zu<br />
der Sie bei Fragen zur Entsorgung gerne Kontakt aufnehmen können.<br />
Dispose of the Instrument<br />
EU-wide regulations for the disposal of electric and electronic<br />
appliances which have been defined in the EU Directive<br />
2002/96/EC and in national laws are effective from August<br />
2005 and apply to this device.<br />
Common household appliances can be disposed of using special collecting<br />
and recycling facil<strong>it</strong>ies. However, as this device has not been<br />
registered for household usage, <strong>it</strong> must not be disposed of through<br />
these means. The device can be returned to your national <strong>Dräger</strong><br />
Safety Sales Organization for disposal. Please do not hes<strong>it</strong>ate to contact<br />
the above if you have any further questions on this issue.<br />
39
Technische Daten<br />
Umweltbedingungen:<br />
— bei Betrieb –20 bis 55 o C, kurzze<strong>it</strong>ig bis 60 o C.<br />
Zwischen 55 und 60 o C reduziert sich<br />
die Lebensdauer der EC-Sensoren, und<br />
der Messfehler erhöht sich.<br />
700 bis 1300 hPa, 10 bis 95 % r. F.<br />
— empfohlene Lagerbedingungen<br />
0 bis 30 o C<br />
30 bis 80 % r. F.<br />
Schutzart<br />
IP 67 (m<strong>it</strong> Sensor-Membrane)<br />
IP 54 (ohne Sensor-Membrane)<br />
Betriebsze<strong>it</strong>en bei 25 o C im Messbetrieb:<br />
— m<strong>it</strong> NiMH-<br />
Versorgungseinhe<strong>it</strong><br />
4,8 V / 3,0 Ah<br />
bis zu 27 Stunden m<strong>it</strong> 3 EC-Sensoren<br />
bis zu 13 Stunden m<strong>it</strong> 3 EC-Sensoren<br />
und 1 CAT Sensor<br />
bis zu 9 Stunden m<strong>it</strong> 3 EC-Sensoren,<br />
1 CAT- und 1 IR-Sensor bzw. 1 PID-Sensor<br />
typisch größer 7 Stunden m<strong>it</strong> 3 EC-, 1 CATund<br />
1 IR-Sensor bzw. 1 PID-Sensor im<br />
— m<strong>it</strong> NiMH-<br />
Versorgungseinhe<strong>it</strong><br />
4,8 V / 6,0 Ah<br />
— m<strong>it</strong> Alkali-Versorgungseinhe<strong>it</strong><br />
1)<br />
1) abhängig vom Batterietyp.<br />
Pumpenbetrieb<br />
bis zu 54 Stunden m<strong>it</strong> 3 EC-Sensoren<br />
bis zu 26 Stunden m<strong>it</strong> 3 EC-Sensoren<br />
und 1 CAT Sensor<br />
bis zu 18 Stunden m<strong>it</strong> 3 EC-Sensoren, 1<br />
CAT- und 1 IR-Sensor bzw. 1 PID-Sensor<br />
typisch größer 14 Stunden m<strong>it</strong> 3 EC-,<br />
1 CAT- und 1 IR-Sensor bzw. 1 PID-Sensor<br />
im Pumpenbetrieb<br />
bis zu 33 Stunden m<strong>it</strong> 3 EC-Sensoren<br />
bis zu 16 Stunden m<strong>it</strong> 3 EC-Sensoren<br />
und 1 CAT Sensor<br />
bis zu 12 Stunden m<strong>it</strong> 3 EC-Sensoren,<br />
1 CAT- und 1 IR-Sensor bzw. 1 PID-Sensor<br />
Technical data<br />
Ambient cond<strong>it</strong>ions:<br />
— For operation –20 to 55 o C, briefly up to 60 o C.<br />
Between 55 and 60 o C, the lifetime of<br />
the EC sensors is reduced and the<br />
measuring error is higher.<br />
700 to 1300 hPa, 10 to 95 % r. h.<br />
— Recommended storage 0 to 30 o C<br />
cond<strong>it</strong>ions<br />
30 to 80 % r. h.<br />
Degree of protection IP 67 (w<strong>it</strong>h sensor membrane)<br />
IP 54 (w<strong>it</strong>hout sensor membrane)<br />
Operating times in measuring mode at 25 o C:<br />
— W<strong>it</strong>h NiMH<br />
power pack<br />
4.8 V / 3.0 Ah<br />
up to 27 hours w<strong>it</strong>h 3 EC sensors<br />
up to 13 hours w<strong>it</strong>h 3 EC sensors and 1<br />
CAT sensor<br />
up to 9 hours w<strong>it</strong>h 3 EC sensors, 1 CAT<br />
sensor and 1 IR sensor or 1 PID sensor<br />
typically more than 7 hours w<strong>it</strong>h 3 EC, 1<br />
Cat-Ex and 1 IR sensor or 1 PID sensor<br />
— W<strong>it</strong>h NiMH<br />
power pack<br />
4.8 V / 6.0 Ah<br />
— W<strong>it</strong>h alkaline power<br />
pack 1)<br />
1) Depends on type of battery.<br />
and in pump mode<br />
up to 54 hours w<strong>it</strong>h 3 EC sensors<br />
up to 26 hours w<strong>it</strong>h 3 EC sensors and 1<br />
CAT sensor<br />
up to 18 hours w<strong>it</strong>h 3 EC sensors, 1 CAT<br />
sensor and 1 IR sensor or 1 PID sensor<br />
typically more than 14 hours w<strong>it</strong>h<br />
3 EC, 1 Cat-Ex and 1 IR sensor or 1 PID<br />
sensor and in pump mode<br />
up to 33 hours w<strong>it</strong>h 3 EC sensors<br />
up to 16 hours w<strong>it</strong>h 3 EC sensors and 1<br />
CAT sensor<br />
up to 12 hours w<strong>it</strong>h 3 EC sensors,<br />
1 CAT sensor and 1 IR sensor or 1 PID<br />
sensor<br />
40
erforderliche Ladefrequenz:<br />
— NiMH-Versorgungseinhe<strong>it</strong><br />
4,8 V / 3,0 Ah<br />
— NiMH-Versorgungseinhe<strong>it</strong><br />
4,8 V / 6,0 Ah<br />
Stellbereich für Alarm A2<br />
alle 3 Wochen<br />
alle 5 Wochen<br />
A1 kleiner A2 kleiner Messbereichsendwert;<br />
10 ppb kleiner = A1, kleiner = A2<br />
Akustischer Alarm Mehrfrequenzton<br />
— Lautstärke >90 dB A (30 cm Abstand)<br />
Pumpenbetrieb,<br />
– maximale Schlauchlänge<br />
– Volumenstrom max. 0,6 L/min<br />
min. 0,2 L/min<br />
Gewicht:<br />
— Gerät<br />
m<strong>it</strong> Gummischutz<br />
— integrierte Pumpe ca. 40 g<br />
— NiMH-Versorgungseinhe<strong>it</strong><br />
ca. 490 g<br />
4,8 V / 3,0 Ah<br />
— NiMH-Versorgungseinhe<strong>it</strong><br />
ca. 730 g<br />
4,8 V / 6,0 Ah<br />
— Alkali-Versorgungseinhe<strong>it</strong>,<br />
m<strong>it</strong> Batterien<br />
ca. 400 g<br />
30 m für Schlauchinnendurchmesser<br />
4 mm;<br />
zusätzliche Totze<strong>it</strong> größer 12 s<br />
45 m für Schlauchinnendurchmesser<br />
5 mm;<br />
zusätzliche Totze<strong>it</strong> größer 27 s<br />
ca. 600 g (ohne Sensoren und Versorgungseinhe<strong>it</strong>)<br />
Maximum charging<br />
intervals:<br />
— NiMH power pack<br />
4.8 V / 3.0 Ah<br />
— NiMH power pack<br />
4.8 V / 6.0 Ah<br />
Adjustable range for Alarm<br />
A2<br />
every 3 weeks<br />
every 5 weeks<br />
A1 less that A2 less than the measuring<br />
range’s end value; 10 ppb less than or<br />
equal to A1, less than or equal to A2<br />
Audible alarm<br />
Multi-frequency tone<br />
— Volume >90 dB A (at a distance of 30 cm)<br />
Pumped mode,<br />
– Maximum hose length 30 m for hose w<strong>it</strong>h an internal di<strong>am</strong>eter<br />
of 4 mm; add<strong>it</strong>ional down time more<br />
than 12 seconds<br />
45 m for hose w<strong>it</strong>h an internal di<strong>am</strong>eter<br />
of 5 mm; add<strong>it</strong>ional down time more<br />
than 27 seconds<br />
– Volume flow-rate max. 0.6 L/min<br />
min. 0.2 L/min<br />
Weights:<br />
— Instrument<br />
w<strong>it</strong>h rubber shockprotector<br />
— Integrated pump approx. 40 g<br />
— NiMH power pack approx. 490 g<br />
4.8 V / 3.0 Ah<br />
— NiMH power pack approx. 730 g<br />
4.8 V / 6.0 Ah<br />
— Alkaline power pack<br />
w<strong>it</strong>h batteries<br />
approx. 400 g<br />
approx. 600 g (w<strong>it</strong>hout sensors and<br />
w<strong>it</strong>hout power pack)<br />
41
Abmessungen<br />
– m<strong>it</strong> Versorgungseinhe<strong>it</strong><br />
(B x H x T)<br />
155 mm x 142 mm x 74 mm<br />
Dimensions<br />
– w<strong>it</strong>h power pack:<br />
(W x H x D)<br />
155 mm x 142 mm x 74 mm<br />
Gerätekennzeichnung nach 94/9/EG:<br />
<strong>Dräger</strong> X-<strong>am</strong> <strong>7000</strong><br />
0158<br />
I M2 EEx ia d I<br />
II 2G EEx ia d IIC T4<br />
BVS 03 ATEX E 371 X<br />
charging voltage Um ≤ 10 V DC<br />
Ta = –20 o C ... +60 o C<br />
<strong>Dräger</strong> Safety, D-23560 Lübeck<br />
Serial-No.: 1)<br />
Instrument markings in accordance w<strong>it</strong>h 94/9/EC:<br />
<strong>Dräger</strong> X-<strong>am</strong> <strong>7000</strong><br />
0158<br />
I M2 EEx ia d I<br />
II 2G EEx ia d IIC T4<br />
BVS 03 ATEX E 371 X<br />
charging voltage Um ≤ 10 V DC<br />
Ta = –20 o C ... +60 o C<br />
<strong>Dräger</strong> Safety, D-23560 Lübeck<br />
Serial-No.: 1)<br />
Kennzeichnung der Versorgungseinhe<strong>it</strong>en<br />
Versorgungseinhe<strong>it</strong> 6.0 Ah:<br />
<strong>Dräger</strong> X-<strong>am</strong> <strong>7000</strong><br />
Battery Pack NiMH 4.8 V 6.0 Ah<br />
0158<br />
I M2 EEx ia I<br />
II 2G EEx ia IIC T4<br />
BVS 03 ATEX E 371 X<br />
charging voltage Um ≤ 10 V DC<br />
Ta = –20 o C ... +60 o C<br />
<strong>Dräger</strong> Safety, D-23560 Lübeck<br />
Serial-No.: 1)<br />
1) Das Baujahr ergibt sich aus dem 3. Buchstaben der auf dem Typenschild<br />
befindlichen Seriennummer:<br />
T = 2003, U = 2004, W = 2005, X = 2006, Y = 2007, Z = 2008,<br />
A = 2009, B = 2010, C = 2011, usw.<br />
Beispiel:<br />
Seriennummer ARUH-0054, der 3. Buchstabe ist U, also Baujahr 2004.<br />
Markings of power packs<br />
Power pack 6.0 Ah:<br />
<strong>Dräger</strong> X-<strong>am</strong> <strong>7000</strong><br />
Battery Pack NiMH 4.8 V 6.0 Ah<br />
0158<br />
I M2 EEx ia I<br />
II 2G EEx ia IIC T4<br />
BVS 03 ATEX E 371 X<br />
charging voltage Um ≤ 10 V DC<br />
Ta = –20 o C ... +60 o C<br />
<strong>Dräger</strong> Safety, D-23560 Lübeck<br />
Serial-No.: 1)<br />
1) The year of manufacture is indicated by the third letter in the serial number<br />
shown on the rating plate:<br />
T = 2003, U = 2004, W = 2005, X = 2006, Y = 2007, Z = 2008,<br />
A = 2009, B = 2010, C = 2011, etc.<br />
Ex<strong>am</strong>ple:<br />
Serial number ARUH-0054, the 3rd cap<strong>it</strong>al letter is U, so the year of construction<br />
is 2004.<br />
42
Versorgungseinhe<strong>it</strong> 3.0 Ah:<br />
<strong>Dräger</strong> X-<strong>am</strong> <strong>7000</strong><br />
Battery Pack NiMH 4.8 V 3.0 Ah<br />
0158<br />
I M2 EEx ia I<br />
II 2G EEx ia IIC T4<br />
BVS 03 ATEX E 371 X<br />
charging voltage Um ≤ 10 V DC<br />
Ta = –20 o C ... +60 o C<br />
<strong>Dräger</strong> Safety, D-23560 Lübeck<br />
Serial-No.: 1)<br />
Power pack 3.0 Ah:<br />
<strong>Dräger</strong> X-<strong>am</strong> <strong>7000</strong><br />
Battery Pack NiMH 4.8 V 3.0 Ah<br />
0158<br />
I M2 EEx ia I<br />
II 2G EEx ia IIC T4<br />
BVS 03 ATEX E 371 X<br />
charging voltage Um ≤ 10 V DC<br />
Ta = –20 o C ... +60 o C<br />
<strong>Dräger</strong> Safety, D-23560 Lübeck<br />
Serial-No.: 1)<br />
Versorgungseinhe<strong>it</strong> Alkaline:<br />
<strong>Dräger</strong> X-<strong>am</strong> <strong>7000</strong><br />
Battery Pack Alkaline<br />
0158<br />
I M2 EEx ia I<br />
II 2G EEx ia IIC T4<br />
BVS 03 ATEX E 371 X<br />
Ta = –20 o C ... +40 o C<br />
<strong>Dräger</strong> Safety, D-23560 Lübeck<br />
Power pack Alkaline:<br />
<strong>Dräger</strong> X-<strong>am</strong> <strong>7000</strong><br />
Battery Pack Alkaline<br />
0158<br />
I M2 EEx ia I<br />
II 2G EEx ia IIC T4<br />
BVS 03 ATEX E 371 X<br />
Ta = –20 o C ... +40 o C<br />
<strong>Dräger</strong> Safety, D-23560 Lübeck<br />
Serial-No.: 1)<br />
Serial-No.: 1) 1) The year of manufacture is indicated by the third letter in the serial number<br />
1) Das Baujahr ergibt sich aus dem 3. Buchstaben der auf dem Typenschild<br />
befindlichen Seriennummer:<br />
S = 2002, T = 2003, U = 2004, W = 2005, X = 2006, Y = 2007, Z = 2008,<br />
A = 2009, B = 2010, C = 2011, usw.<br />
Beispiel:<br />
Seriennummer ARSH-0054, der 3. Buchstabe ist S, also Baujahr 2002.<br />
shown on the rating plate:<br />
S = 2002, T = 2003, U = 2004, W = 2005, X = 2006, Y = 2007, Z = 2008,<br />
A = 2009, B = 2010, C = 2011, etc.<br />
Ex<strong>am</strong>ple:<br />
Serial number ARSH-0054, the 3rd cap<strong>it</strong>al letter is S, so the year of construction<br />
is 2002.<br />
43
CE-Kennzeichnung<br />
Elektromagnetische Verträglichke<strong>it</strong> (Richtlinie 89/336/EWG)<br />
Beeinflussung bei IR CO 2 : ≤ ±0,07 Vol.%<br />
Beeinflussung bei IR Ex HC: ≤2 x Nullpunkt-Wiederholbarke<strong>it</strong><br />
Beeinflussung bei allen anderen Sensoren innerhalb der Nullpunkt-<br />
Wiederholbarke<strong>it</strong>.<br />
Wird gleichze<strong>it</strong>ig geladen und gemessen, können Fehlalarme beim<br />
Auftreten von le<strong>it</strong>ungsgebundenen Störungen ausgelöst werden.<br />
Unter EMV-Einfluss wird die geforderte Messgenauigke<strong>it</strong> der<br />
Sensoren aus Tabelle 6 der EN 50270 eingehalten.<br />
CE markings<br />
Electromagnetic compatibil<strong>it</strong>y (Directive 89/336/EEC)<br />
Influence on the IR CO 2 : ≤ ±0.07 % by volume<br />
Influence on the IR Ex HC: ≤2 x zero-point repeatabil<strong>it</strong>y<br />
Influence on all other sensors: w<strong>it</strong>hin zero-point repeatabil<strong>it</strong>y.<br />
If measurements are carried out while the battery is being charged,<br />
false alarms may triggered by interference on the power cables.<br />
The required measurement accuracy of the sensors is maintained<br />
under the influence of electromagnetic interference as set out in<br />
Table 6 of EN 50270.<br />
44
Bestell-Liste<br />
Benennung und Beschreibung<br />
(Baukasten-Auswahlsystem) 1)<br />
Versorgungseinhe<strong>it</strong>en:<br />
Bestell-Nr.<br />
NiMH-Versorgungseinhe<strong>it</strong> – 4,8 V / 3,0 Ah 83 17 408<br />
NiMH-Versorgungseinhe<strong>it</strong> – 4,8 V / 6,0 Ah 83 17 454<br />
Alkali-Versorgungseinhe<strong>it</strong> (Messtechnische 83 17 550<br />
Eigenschaften nicht geprüft)<br />
Ordering list<br />
Designation and description<br />
(modular system) 1)<br />
Power packs:<br />
Part No.<br />
NiMH power pack – 4.8 V / 3.0 Ah 83 17 408<br />
NiMH power pack – 4.8 V / 6.0 Ah 83 17 454<br />
Alkaline power pack (Technical measurement 83 17 550<br />
properties are not tested!)<br />
IR-Sensoren:<br />
<strong>Dräger</strong>Sensor Smart IR Ex 2)<br />
0 bis 100 % UEG<br />
<strong>Dräger</strong>Sensor Smart IR CO 2)<br />
2<br />
0 bis 5 Vol.-%<br />
68 10 460<br />
68 10 590<br />
IR sensors:<br />
<strong>Dräger</strong>Sensor Smart IR Ex 2)<br />
0 to 100 % LEL<br />
<strong>Dräger</strong>Sensor Smart IR CO 2)<br />
2<br />
0 to 5 % by volume<br />
68 10 460<br />
68 10 590<br />
<strong>Dräger</strong>Sensor Smart IR CO 2 HC<br />
0 bis 100 Vol.-%<br />
68 10 599<br />
<strong>Dräger</strong>Sensor Smart IR CO 2 HC<br />
0 to 100 % by volume<br />
68 10 599<br />
1) Ein komplettes <strong>Dräger</strong> X-<strong>am</strong> <strong>7000</strong> besteht aus <strong>Dräger</strong> X-<strong>am</strong> <strong>7000</strong> XXX Messeinhe<strong>it</strong><br />
+ Versorgungseinhe<strong>it</strong> + Sensoren.<br />
2) Geprüfte Sensoren nach EN 61779-1 in Verbindung m<strong>it</strong> EN 61779-4,<br />
EN 50104 sowie EN 45544-1 in Verbindung m<strong>it</strong> EN 45544-2.<br />
1) A complete <strong>Dräger</strong> X-<strong>am</strong> <strong>7000</strong> system consists of an <strong>Dräger</strong> X-<strong>am</strong> <strong>7000</strong> +<br />
power pack + sensors.<br />
2) Tested sensors in accordance w<strong>it</strong>h EN 61779-1 in combination w<strong>it</strong>h<br />
EN 61779-4, EN 50104 and EN 45544-1 in combination w<strong>it</strong>h EN 45544-2.<br />
45
Benennung und Beschreibung<br />
(Baukasten-Auswahlsystem) 1)<br />
Bestell-Nr.<br />
Designation and description<br />
(modular system) 1)<br />
Part No.<br />
CAT-Sensoren:<br />
<strong>Dräger</strong>Sensor Smart CAT Ex 2)<br />
0 bis 100 % UEG oder 0 bis 5 Vol.-%<br />
68 10 710<br />
CAT sensors:<br />
<strong>Dräger</strong>Sensor Smart CAT Ex 2)<br />
0 to 100 % LEL or 0 to 5 % by volume<br />
68 10 710<br />
<strong>Dräger</strong>Sensor Smart CAT Ex<br />
0 bis 100 % UEG 2) oder 0 bis 100 Vol.-%<br />
68 10 410<br />
<strong>Dräger</strong>Sensor Smart CAT Ex<br />
0 to 100 % LEL 2) or 0 to 100 % by volume<br />
68 10 410<br />
PID-Sensor:<br />
<strong>Dräger</strong>Sensor Smart PID 3)<br />
0 bis 2000 ppm<br />
83 19 100<br />
PID sensor:<br />
<strong>Dräger</strong>Sensor Smart PID 3)<br />
0 to 2000 ppm<br />
83 19 100<br />
EC-Sensoren: 4)<br />
<strong>Dräger</strong>Sensor XS EC COCl 2 68 08 582<br />
<strong>Dräger</strong>Sensor XS EC CO 2) 68 09 105<br />
<strong>Dräger</strong>Sensor XS EC H 2 S 100 ppm 2) 68 09 110<br />
<strong>Dräger</strong>Sensor XS EC Organic Vapors 68 09 115<br />
<strong>Dräger</strong>Sensor XS EC CO HC 68 09 120<br />
<strong>Dräger</strong>Sensor XS EC NO 68 09 125<br />
<strong>Dräger</strong>Sensor XS EC O 2 LS 2) 68 09 130<br />
<strong>Dräger</strong>Sensor XS EC Hydride 68 09 135<br />
<strong>Dräger</strong>Sensor XS EC NH 3 68 09 145<br />
1) Ein komplettes <strong>Dräger</strong> X-<strong>am</strong> <strong>7000</strong> besteht aus <strong>Dräger</strong> X-<strong>am</strong> <strong>7000</strong> XXX Messeinhe<strong>it</strong><br />
+ Versorgungseinhe<strong>it</strong> + Sensoren.<br />
2) Geprüfte Sensoren nach EN 61779-1 in Verbindung m<strong>it</strong> EN 61779-4,<br />
EN 50104 sowie EN 45544-1 in Verbindung m<strong>it</strong> EN 45544-2.<br />
3) Der PID Sensor darf nur in Geräten m<strong>it</strong> ausschließlich den auf Se<strong>it</strong>e 7 aufgeführten<br />
Zulassungen verwendet werden.<br />
4) Wegen begrenzter Lagerdauer empfehlen wir Bestellung nur für den aktuellen<br />
Bedarf.<br />
EC sensors: 4)<br />
<strong>Dräger</strong>Sensor XS EC COCl 2 68 08 582<br />
<strong>Dräger</strong>Sensor XS EC CO 2) 68 09 105<br />
<strong>Dräger</strong>Sensor XS EC H 2 S 100 ppm 2) 68 09 110<br />
<strong>Dräger</strong>Sensor XS EC Organic Vapors 68 09 115<br />
<strong>Dräger</strong>Sensor XS EC CO HC 68 09 120<br />
<strong>Dräger</strong>Sensor XS EC NO 68 09 125<br />
<strong>Dräger</strong>Sensor XS EC O 2 LS 2) 68 09 130<br />
<strong>Dräger</strong>Sensor XS EC Hydride 68 09 135<br />
<strong>Dräger</strong>Sensor XS EC NH 3 68 09 145<br />
1) A complete <strong>Dräger</strong> X-<strong>am</strong> <strong>7000</strong> system consists of an <strong>Dräger</strong> X-<strong>am</strong> <strong>7000</strong> +<br />
power pack + sensors.<br />
2) Tested sensors in accordance w<strong>it</strong>h EN 61779-1 in combination w<strong>it</strong>h<br />
EN 61779-4, EN 50104 and EN 45544-1 in combination w<strong>it</strong>h EN 45544-2.<br />
3) The PID sensor may only be used in devices that are provided w<strong>it</strong>h the<br />
approvals specified on page 7<br />
4) Because of a lim<strong>it</strong>ed storage time, we recommend that you order only for<br />
your current needs.<br />
46
Benennung und Beschreibung<br />
(Baukasten-Auswahlsystem) 1)<br />
Bestell-Nr.<br />
<strong>Dräger</strong>Sensor XS EC HCN 68 09 150<br />
<strong>Dräger</strong>Sensor XS EC NO 2 68 09 155<br />
<strong>Dräger</strong>Sensor XS EC SO 2 68 09 160<br />
<strong>Dräger</strong>Sensor XS EC Cl 2 68 09 165<br />
<strong>Dräger</strong>Sensor XS EC CO 2 68 09 175<br />
<strong>Dräger</strong>Sensor XS EC H 2 68 09 185<br />
<strong>Dräger</strong>Sensor XS EC Odorant 68 09 200<br />
<strong>Dräger</strong>Sensor XS EC PH 3 HC 68 09 535<br />
<strong>Dräger</strong>Sensor XS EC Amine 68 09 545<br />
<strong>Dräger</strong>Sensor XS EC O 2 100 68 09 550<br />
<strong>Dräger</strong>Sensor XS R CO 68 10 258<br />
<strong>Dräger</strong>Sensor XS R H 2 S 100 ppm 68 10 260<br />
<strong>Dräger</strong>Sensor XS R O 2 LS 68 10 262<br />
<strong>Dräger</strong>Sensor XS 2 CO 68 10 365<br />
<strong>Dräger</strong>Sensor XS 2 H 2 S 68 10 370<br />
<strong>Dräger</strong>Sensor XS 2 O 2 68 10 375<br />
<strong>Dräger</strong>Sensor XS 2 H 2 S SR 2)<br />
68 10 575<br />
1) Ein komplettes <strong>Dräger</strong> X-<strong>am</strong> <strong>7000</strong> besteht aus <strong>Dräger</strong> X-<strong>am</strong> <strong>7000</strong> XXX Messeinhe<strong>it</strong><br />
+ Versorgungseinhe<strong>it</strong> + Sensoren.<br />
2) Geprüfte Sensoren nach EN 61779-1 in Verbindung m<strong>it</strong> EN 61779-4,<br />
EN 50104 sowie EN 45544-1 in Verbindung m<strong>it</strong> EN 45544-2.<br />
Designation and description<br />
(modular system) 1)<br />
Part No.<br />
<strong>Dräger</strong>Sensor XS EC HCN 68 09 150<br />
<strong>Dräger</strong>Sensor XS EC NO 2 68 09 155<br />
<strong>Dräger</strong>Sensor XS EC SO 2 68 09 160<br />
<strong>Dräger</strong>Sensor XS EC Cl 2 68 09 165<br />
<strong>Dräger</strong>Sensor XS EC CO 2 68 09 175<br />
<strong>Dräger</strong>Sensor XS EC H 2 68 09 185<br />
<strong>Dräger</strong>Sensor XS EC Odorant 68 09 200<br />
<strong>Dräger</strong>Sensor XS EC PH 3 HC 68 09 535<br />
<strong>Dräger</strong>Sensor XS EC Amine 68 09 545<br />
<strong>Dräger</strong>Sensor XS EC O 2 100 68 09 550<br />
<strong>Dräger</strong>Sensor XS R CO 68 10 258<br />
<strong>Dräger</strong>Sensor XS R H 2 S 100 ppm 68 10 260<br />
<strong>Dräger</strong>Sensor XS R O 2 LS 68 10 262<br />
<strong>Dräger</strong>Sensor XS 2 CO 68 10 365<br />
<strong>Dräger</strong>Sensor XS 2 H 2 S 68 10 370<br />
<strong>Dräger</strong>Sensor XS 2 O 2 68 10 375<br />
<strong>Dräger</strong>Sensor XS 2 H 2 S SR 2)<br />
68 10 575<br />
1) A complete <strong>Dräger</strong> X-<strong>am</strong> <strong>7000</strong> system consists of an <strong>Dräger</strong> X-<strong>am</strong> <strong>7000</strong> +<br />
power pack + sensors.<br />
2) Tested sensors in accordance w<strong>it</strong>h EN 61779-1 in combination w<strong>it</strong>h<br />
EN 61779-4, EN 50104 and EN 45544-1 in combination w<strong>it</strong>h EN 45544-2.<br />
47
Benennung und Beschreibung<br />
Zum Betrieb erforderlich<br />
Mehrfach-Ladestation, bestehend aus:<br />
Lademodul, zum Laden von einem <strong>Dräger</strong> X-<br />
<strong>am</strong> <strong>7000</strong><br />
Netzteil (weltwe<strong>it</strong>),<br />
für bis zu 8 Lademodule <strong>Dräger</strong> X-<strong>am</strong> <strong>7000</strong><br />
Bestell-Nr.<br />
83 16 487<br />
83 15 805<br />
Designation and description<br />
Required for operation<br />
Multiple charging station, consisting of:<br />
Charging module for charging one <strong>Dräger</strong> X-<br />
<strong>am</strong> <strong>7000</strong><br />
Power supply un<strong>it</strong> (worldwide),<br />
for up to 8 charging modules <strong>Dräger</strong> X-<strong>am</strong> <strong>7000</strong><br />
Part No.<br />
83 16 487<br />
83 15 805<br />
Steckernetzteil (weltwe<strong>it</strong>),<br />
83 16 994<br />
für 2 Lademodule <strong>Dräger</strong> X-<strong>am</strong> <strong>7000</strong><br />
Kfz-Ladeadapter für Lademodul 83 12 645<br />
Zubehör<br />
Mobile Printer 83 19 310<br />
Alkaline-Batterien (4 Stück) 83 17 447<br />
Set Blindstopfen (4 Stück) 83 17 337<br />
Sensor-Membrane Set 83 17 805<br />
Ledertasche 83 17 683<br />
PUR-Schutz 83 17 397<br />
Tragegestell, inklusiv Tragegurt 83 16 878<br />
Brustgurt 83 17 682<br />
Set Trageclip 83 17 771<br />
Set Chassisdichtung 83 18 608<br />
Für den Pumpenbetrieb:<br />
Pumpenadapter 83 17 639<br />
Leckagesonde 70 83 16 531<br />
Stabsonde 90 83 16 532<br />
Teleskopsonde 100 83 16 530<br />
Plug-in power supply un<strong>it</strong> (worldwide),<br />
83 16 994<br />
for 2 charging modules <strong>Dräger</strong> X-<strong>am</strong> <strong>7000</strong><br />
Vehicle charging adapter for charging module 83 12 645<br />
Accessories<br />
Mobile Printer 83 19 310<br />
Alkaline batteries (pack of 4) 83 17 447<br />
Set sensor dummy (pack of 4) 83 17 337<br />
Sensor-membrane set 83 17 805<br />
Leather carrying case 83 17 683<br />
PUR protection 83 17 397<br />
Carrying fr<strong>am</strong>e, including strap 83 16 878<br />
Stomach belt 83 17 682<br />
Set carrying clip 83 17 771<br />
Set housing sealing 83 18 608<br />
For operation in pumped mode:<br />
Pump adapter 83 17 639<br />
Leak probe 70 83 16 531<br />
Rod probe 90 83 16 532<br />
Telescopic probe 100 83 16 530<br />
48
Benennung und Beschreibung<br />
Bestell-Nr.<br />
Set Pumpenmembrane 83 18 607<br />
Set Schwimmersonde 83 18 371<br />
Schlauch für Schwimmersonde, elektrisch le<strong>it</strong>fähig, 11 80 681<br />
laufende Meter (nicht geeignet für H 2 S)<br />
V<strong>it</strong>on-Schlauch (H 2 S-geeignet) 12 03 150<br />
Auswertezubehör:<br />
PC-Progr<strong>am</strong>m "GasVision" 83 14 034<br />
IrDA-Schn<strong>it</strong>tstelle für PC 64 08 140<br />
PC-Progr<strong>am</strong>m "CC-Vision" 64 08 515<br />
Designation and description<br />
Part No.<br />
Pump membrane set (pack per 2) 83 18 607<br />
Float probe set 83 18 371<br />
Hose for floating probe, electrically conductive, 11 80 681<br />
by the metre (not su<strong>it</strong>able for use w<strong>it</strong>h H 2 S)<br />
V<strong>it</strong>on hose (su<strong>it</strong>able for use w<strong>it</strong>h H 2 S) 12 03 150<br />
Evaluation accessories:<br />
PC progr<strong>am</strong> "GasVision" 83 14 034<br />
IrDA interface for PC 64 08 140<br />
PC progr<strong>am</strong> "CC-Vision" 64 08 515<br />
Kalibrierzubehör<br />
BumpTest Station, <strong>Dräger</strong> X-<strong>am</strong> <strong>7000</strong> 83 18 909<br />
Kalibrieradapter <strong>Dräger</strong> X-<strong>am</strong> <strong>7000</strong><br />
83 17 656<br />
zur Kalibrierung m<strong>it</strong> Prüfgasflasche<br />
Set Sensorverlängerungskabel<br />
83 17 970<br />
zur D<strong>am</strong>pfkalibrierung<br />
E-Cal Modul 83 17 705<br />
Kalibrierflasche 68 03 407<br />
Adapter, für Kalibrierflasche 68 04 620<br />
Handpumpe 68 01 933<br />
We<strong>it</strong>eres Kalibrierzubehör:<br />
siehe Datenblätter der eingebauten Sensoren<br />
Zubehör PID-Sensor<br />
Ersatzl<strong>am</strong>pe 83 19 110<br />
Reinigungsset 83 19 111<br />
Calibration accessories<br />
BumpTest Station, <strong>Dräger</strong> X-<strong>am</strong> <strong>7000</strong> 83 18 909<br />
Calibration adapter <strong>Dräger</strong> X-<strong>am</strong> <strong>7000</strong><br />
83 17 656<br />
for calibration w<strong>it</strong>h test-gas cylinder<br />
Set sensor extension cable<br />
83 17 970<br />
for ste<strong>am</strong> calibration<br />
E-Cal module 83 17 705<br />
Calibration cylinder 68 03 407<br />
Adapter for calibration cylinder 68 04 620<br />
Hand pump 68 01 933<br />
For further calibration accessories,<br />
see the data sheets for the installed sensors<br />
Accessories PID sensor<br />
Replacement l<strong>am</strong>p 83 19 110<br />
Cleaning k<strong>it</strong> 83 19 111<br />
49
Konform<strong>it</strong>ätserklärung<br />
Declaration of Conform<strong>it</strong>y<br />
50
Eignungsuntersuchung<br />
Abschn<strong>it</strong>t 5 des Berichts über die Eignungsuntersuchung der<br />
nicht ortsfesten Gaswarneinrichtung <strong>Dräger</strong> X-<strong>am</strong> <strong>7000</strong> –<br />
PFG-Nr. 41300404<br />
5. Einsatzhinweise<br />
Das tragbare Gaswarngerät <strong>Dräger</strong> X-<strong>am</strong> <strong>7000</strong> der Firma <strong>Dräger</strong><br />
Safety AG & Co. KGaA ist auf Grundlage der im Prüfbericht PFG-Nr.<br />
41300404P enthaltenen Messergebnisse und der in diesem Bericht<br />
enthaltenen Ausführungen zur Messung von Kohlenmonoxid bis<br />
500 ppm CO, Schwefelwasserstoff bis 100 ppm H 2 S, Kohlendioxid<br />
bis 5 % CO 2 sowie Sauerstoff bis 25 % O 2 (im Hinblick auf den Einsatzzweck<br />
zur Überwachung der Umgebungsluft auf Sauerstoffmangel<br />
oder -überschuss) geeignet, wenn es in seinen Eigenschaften<br />
und in der Ausführung den im Prüfbericht PFG-Nr. 41300404P<br />
genannten Unterlagen entspricht, dementsprechend betrieben wird<br />
und wenn folgende Auflagen eingehalten werden:<br />
— Die der EXAM vorgelegte und geprüfte Betriebsanle<strong>it</strong>ung ist genau<br />
zu beachten. Beim Einsatz des Gaswarngerätes ist sicherzustellen,<br />
dass die darin festgelegten Betriebsbedingungen<br />
eingehalten werden.<br />
— Vor dem Einsatz des Gaswarngerätes ist zu prüfen, ob die Einstellze<strong>it</strong>en<br />
insbesondere unter Berücksichtigung von angeschlossenen<br />
Sonden ausreichend gering sind, d<strong>am</strong><strong>it</strong> die durch das Gerät<br />
ausgelöste Warnfunktion so schnell ausgeführt wird, dass sicherhe<strong>it</strong>lich<br />
bedenkliche S<strong>it</strong>uationen vermieden werden. Erforderlichenfalls<br />
ist die Alarmschwelle deutlich unterhalb (bei Sauerstoff<br />
ggf. oberhalb) des sicherhe<strong>it</strong>stechnischen Grenzwertes einzustellen.<br />
— Falls eine Betriebsdauer über 7 Stunden im Pumpenbetrieb nicht<br />
ausgeschlossen werden kann, ist der 6,0 Ah Akku zu verwenden.<br />
— Die BG-Informationen BGI 836 (7) sind zu beachten.<br />
Su<strong>it</strong>abil<strong>it</strong>y Ex<strong>am</strong>ination<br />
Section 5 of the report on the su<strong>it</strong>abil<strong>it</strong>y ex<strong>am</strong>ination of the<br />
portable gas-warning device <strong>Dräger</strong> X-<strong>am</strong> <strong>7000</strong> --<br />
PFG No. 41300404<br />
5. Notes on use<br />
The portable gas-warning device <strong>Dräger</strong> X-<strong>am</strong> <strong>7000</strong> manufactured by<br />
Messrs. <strong>Dräger</strong> Safety AG & Co. KGaA is, on the basis of the<br />
measurement results shown in the Inspection Report<br />
PFG No. 41300404P and in the versions mentioned in this report,<br />
su<strong>it</strong>able for the measurement of carbon dioxide at concentrations up<br />
to 500 ppm CO, hydrogen sulphide at concentrations up to 100 ppm<br />
H 2 S, carbon dioxide at concentrations up to 5 % CO 2 and oxygen<br />
at concentrations up to 25 % O 2 (w<strong>it</strong>h respect to the purpose of<br />
mon<strong>it</strong>oring the <strong>am</strong>bient air for insufficient ore too much oxygen) if <strong>it</strong>s<br />
properties and design comply w<strong>it</strong>h the documents specified in the<br />
Inspection Report PFG No. 41300404P, if <strong>it</strong> is operated accordingly<br />
and if the following cond<strong>it</strong>ions are observed:<br />
— The user must observe and strictly comply w<strong>it</strong>h the Operating<br />
Instructions presented to and inspected by EXAM. When using<br />
the device, the user must ensure that the operating cond<strong>it</strong>ions laid<br />
down in the Operating Instructions are observed.<br />
— Before using the gas-warning device, the user that the times set in<br />
the device, particularly w<strong>it</strong>h respect to the sensors being used,<br />
are sufficiently short to ensure that warnings are generated by<br />
the device in good time to prevent hazardous s<strong>it</strong>uations from<br />
occurring. If necessary, the alarm threshold must be set<br />
considerably below (or, in the case of oxygen, above) the lim<strong>it</strong><br />
value required for safety.<br />
— If operation for more than seven hours in pumped mode cannot be<br />
precluded, the 6.0 Ah battery must be used.<br />
— BG Information Sheets BGI 836 (7) must be observed.<br />
51
— Die Geräte sind m<strong>it</strong> einem dauerhaften Typenschild zu versehen,<br />
das neben Angaben über Hersteller, Typ und Fertigungsnummer<br />
die Aufschrift enthält:<br />
"PFG-Nr. 41300404"<br />
Andere Kennzeichnungsvorschriften bleiben davon unberührt. M<strong>it</strong><br />
diesem Typenschild bestätigt die Herstellerfirma, dass die Geräte<br />
die in diesem Bericht beschriebenen Eigenschaften und technischen<br />
Merkmale aufweisen. Jedes Gerät, das nicht m<strong>it</strong> diesem<br />
Typenschild versehen ist, entspricht nicht dem vorliegenden<br />
Bericht.<br />
— Auf Anforderung ist dem Betreiber ein vollständiger Abdruck<br />
dieses Berichtes sowie des Prüfberichtes PFG-Nr. 41300404P<br />
zur Verfügung zu stellen.<br />
— The devices must have permanently attached rating plates which<br />
contain, in add<strong>it</strong>ion to the n<strong>am</strong>e of the manufacturer, the device<br />
type and the serial number, must carry the information<br />
"PFG No. 41300404"<br />
Other regulations for marking of the devices remain unaffected<br />
by this. W<strong>it</strong>h this rating plate, the manufacturer confirms that the<br />
devices possess the properties and technical features described<br />
in this report. Devices which do not carry this rating plate do not<br />
comply w<strong>it</strong>h this report.<br />
— On request, the user of the device must be provided w<strong>it</strong>h a<br />
complete print-out of this report and of the Inspection Report<br />
PFG No. 41300404P.<br />
52
<strong>Dräger</strong> Safety AG & Co. KGaA<br />
Revalstraße 1<br />
D-23560 Lübeck<br />
Germany<br />
Phone +49 451 8 82- 0<br />
Fax +49 451 8 82- 20 80<br />
www.draeger.com<br />
90 23 725 - GA 4638.100 de/en<br />
© <strong>Dräger</strong> Safety AG & Co. KGaA<br />
Ed<strong>it</strong>ion 08 - March 2009 (Ed<strong>it</strong>ion 01 - March 2003)<br />
Subject to alteration