TRIMAXX - Staubbeutel-direkt.de
TRIMAXX - Staubbeutel-direkt.de
TRIMAXX - Staubbeutel-direkt.de

Sie wollen auch ein ePaper? Erhöhen Sie die Reichweite Ihrer Titel.
YUMPU macht aus Druck-PDFs automatisch weboptimierte ePaper, die Google liebt.
<strong>TRIMAXX</strong><br />
Bo<strong>de</strong>nstaubsauger<br />
Bedienungsanleitung<br />
Cylin<strong>de</strong>r vacuum cleaner<br />
Operating Manual<br />
Aspirateur<br />
Mo<strong>de</strong> d‘emploi<br />
Vloerstofzuiger<br />
Bedieningshandleiding<br />
Aspiradora rodante<br />
Manual <strong>de</strong> instrucciones<br />
Aspirador <strong>de</strong> pó <strong>de</strong> piso<br />
Instrução <strong>de</strong> manuseamento<br />
Podlahovy vysávaè<br />
Návod na obsluhu<br />
Talni sesalec<br />
Navodila za uporabo<br />
Padló porszívó<br />
Kezelési útmutató<br />
Vysavaè<br />
Návod k obsluze<br />
Odkurzacz do podlóg<br />
Instrukcja obslugi<br />
Podni usisavaè<br />
Uputa za upotrebu
Bedienungsanleitung ................................................................................ 4 - 19<br />
Operating Manual ....................................................................................... 20 - 35<br />
Mo<strong>de</strong> d'emploi ............................................................................................. 36 - 51<br />
Bedieningshandleiding .............................................................................. 52 - 67<br />
Manual <strong>de</strong> instrucciones ............................................................................ 68 - 83<br />
Instrução <strong>de</strong> Manuseamento ..................................................................... 84 - 99<br />
Instrukcja obsługi ....................................................................................... 100 - 115<br />
Návod k obsluze.......................................................................................... 116 - 131<br />
Návod na obsluhu....................................................................................... 132 - 147<br />
Navodila za uporabo................................................................................... 148 - 163<br />
Uputa za upotrebu ...................................................................................... 164 - 179<br />
Kezelési útmutató ....................................................................................... 180 - 195<br />
Q P E O F G D<br />
o H o HR o SLO o SK o CZ<br />
2
D<br />
7<br />
9<br />
10<br />
5<br />
6<br />
12<br />
1<br />
11<br />
8<br />
2<br />
6<br />
3<br />
4<br />
5<br />
14<br />
13<br />
19<br />
20<br />
16<br />
15<br />
17<br />
18<br />
Abb. 1<br />
3
Übersicht über Ihren Trimaxx<br />
D<br />
Übersicht über Ihren Trimaxx<br />
Vielen Dank!<br />
Es freut uns, dass Sie sich für <strong>de</strong>n Bo<strong>de</strong>nstaubsauger <strong>TRIMAXX</strong> entschie<strong>de</strong>n haben!<br />
Wir wünschen Ihnen viel Freu<strong>de</strong> mit <strong>de</strong>m Gerät und danken Ihnen für <strong>de</strong>n Kauf!<br />
Der Trimaxx mit seiner integrierten mechanischen Mehrfachseparation sorgt bereits im Staubbehälter<br />
für eine vollständige Trennung <strong>de</strong>s Schmutzes von <strong>de</strong>r eingesaugten Luft.<br />
Der 3-stufige Schmutzseparator reinigt die Luft bereits im Staubbehälter so gründlich vor, so dass<br />
durch die zusätzlichen Hygienefilter eine reine (saubere) Ausblasluft gewährleistet wer<strong>de</strong>n kann.<br />
Durch dieses neuartige Staubseparationssystem entfällt ein Zentralfilter, welcher sich bei herkömmlichen<br />
beutellosen Staubsaugern schnell mit Staub zusetzt und ein aufwendiges Filterreinigen notwendig<br />
macht.<br />
Geräteteile/Lieferumfang<br />
1 Handgriff<br />
2 Zubehörhalterung<br />
3 Nebenluftregler<br />
4 2 in 1 Kombidüse*<br />
5 Fugendüse*<br />
6 Saugschlauch<br />
7 Kabelaufrolltaste<br />
8 Ein-/Ausschalter<br />
9 Staubbehälter<br />
Entriegelungstasten<br />
10 Tragegriff<br />
11 Parkhalterung<br />
Technische Daten<br />
12 Stecker mit Stromkabel<br />
13 Teleskoprohr-Arretierung<br />
14 Teleskoprohr<br />
15 Parkhaken<br />
16 Bo<strong>de</strong>ndüse<br />
17 Umschalter Teppich/Hartbo<strong>de</strong>n<br />
18 Staubbehälter<br />
19 Parkettbürste (optional)<br />
20 Turbobürste (optional)<br />
*Liegt lose in <strong>de</strong>r Verpackung bei.<br />
Geräteart : Bo<strong>de</strong>nstaubsauger (beutellos)<br />
Mo<strong>de</strong>ll : Trimaxx<br />
Spannung : 220 V - 240 V<br />
~50/60 Hz<br />
Leistung : 1400 W nom.<br />
1600 W max.<br />
Staubbehälter : 1,8 Liter, auswaschbar<br />
Filter : Lamellenvorfilter, auswaschbar<br />
Hygiene-Ausblasfilter<br />
Operationsradius : ca. 8,5 m<br />
Netzkabel mit Stecker : ca. 6,0 m Länge<br />
Gewicht : ca. 6,0 kg<br />
Im Zuge ständiger Produktverbesserungen behalten wir uns technische und gestalterische Än<strong>de</strong>rungen<br />
vor.<br />
© Royal ® Appliance International GmbH<br />
4
Inhaltsverzeichnis<br />
1 Sicherheitshinweise ................................................................. 6<br />
1.1 zur Bedienungsanleitung ............................................................................................. 6<br />
1.2 zu <strong>de</strong>n verwen<strong>de</strong>ten Symbolen ................................................................................... 6<br />
1.3 zur Stromversorgung ................................................................................................... 6<br />
1.4 zu Kin<strong>de</strong>rn .................................................................................................................. 7<br />
1.5 zur bestimmungsgemäßen Verwendung..................................................................... 7<br />
1.6 falls das Gerät <strong>de</strong>fekt ist .............................................................................................. 8<br />
D<br />
2 Auspacken und Anschließen................................................... 8<br />
2.1 Auspacken................................................................................................................... 8<br />
2.2 Montieren..................................................................................................................... 8<br />
2.3 Weitere Düsen (Zubehör) verwen<strong>de</strong>n ......................................................................... 9<br />
3 Bedienung ................................................................................. 11<br />
3.1 Staubsaugen ............................................................................................................... 11<br />
3.2 Ausschalten und Stromkabel aufrollen ........................................................................ 12<br />
3.3 Aufbewahren ............................................................................................................... 12<br />
3.4 Staubbehälter ausleeren ............................................................................................. 13<br />
4 Filter ........................................................................................... 14<br />
4.1 Lamellenvorfilter reinigen ............................................................................................ 14<br />
4.2 Filtersieb reinigen ........................................................................................................ 15<br />
4.3 Hygiene-Ausblasfilter austauschen ............................................................................. 16<br />
5 Fehlerbehebung ........................................................................ 17<br />
6 Reinigung .................................................................................. 17<br />
6.1 Gehäuse reinigen ........................................................................................................ 17<br />
6.2 Filter reinigen............................................................................................................... 17<br />
7 Entsorgung................................................................................ 18<br />
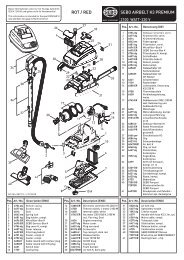
8 Ersatzteile .................................................................................. 18<br />
8.1 Verschleißteilliste......................................................................................................... 18<br />
8.2 Bezugsquellen ............................................................................................................. 18<br />
9 Garantie ..................................................................................... 19<br />
9.1 Garantiebedingungen .................................................................................................. 19<br />
9.2 Im Garantiefall ............................................................................................................. 19<br />
Inhaltsverzeichnis<br />
5
1 Sicherheitshinweise<br />
1 Sicherheitshinweise<br />
1.1 zur Bedienungsanleitung<br />
<br />
1.2 zu <strong>de</strong>n verwen<strong>de</strong>ten<br />
Symbolen<br />
Lesen Sie diese Bedienungsanleitung vollständig durch,<br />
bevor Sie mit <strong>de</strong>m Gerät arbeiten.<br />
Bewahren Sie die Anleitung gut auf. Falls Sie das Gerät an<br />
Dritte weitergeben, geben Sie auch die Bedienungsanleitung<br />
mit.<br />
Die Nichtbeachtung dieser Anleitung kann zu schweren<br />
Verletzungen o<strong>de</strong>r Schä<strong>de</strong>n am Gerät führen.<br />
Für Schä<strong>de</strong>n, die aufgrund <strong>de</strong>r Nichtbeachtung dieser Bedienungsanleitung<br />
entstehen, übernehmen wir keine Haftung.<br />
• Das Gerät darf nur im Haushalt eingesetzt wer<strong>de</strong>n. Es<br />
ist für eine gewerbliche Nutzung nicht geeignet.<br />
Wichtige Hinweise für Ihre Sicherheit sind beson<strong>de</strong>rs gekennzeichnet.<br />
Beachten Sie diese Hinweise unbedingt, um<br />
Unfälle und Schä<strong>de</strong>n am Gerät zu vermei<strong>de</strong>n:<br />
WARNUNG:<br />
Warnt vor Gefahren für Ihre Gesundheit und zeigt mögliche<br />
Verletzungsrisiken auf.<br />
ACHTUNG:<br />
Weist auf mögliche Gefährdungen für das Gerät o<strong>de</strong>r<br />
an<strong>de</strong>re Gegenstän<strong>de</strong> hin.<br />
HINWEIS:<br />
Hebt Tipps und Informationen für Sie hervor.<br />
1.3 zur Stromversorgung • Das Gerät wird mit elektrischem Strom betrieben, dabei<br />
besteht grundsätzlich die Gefahr eines elektrischen<br />
Schlags. Achten Sie daher beson<strong>de</strong>rs auf Folgen<strong>de</strong>s:<br />
- Fassen Sie <strong>de</strong>n Stecker niemals mit nassen Hän<strong>de</strong>n<br />
an.<br />
- Wenn Sie <strong>de</strong>n Stecker aus <strong>de</strong>r Steckdose herausziehen<br />
wollen, ziehen Sie immer <strong>direkt</strong> am Stecker. Niemals<br />
am Kabel, es könnte reißen.<br />
- Achten Sie darauf, dass das Stromkabel nicht geknickt,<br />
eingeklemmt, überfahren wird, o<strong>de</strong>r mit Hitzequellen<br />
in Berührung kommt.<br />
- Verwen<strong>de</strong>n Sie nur Verlängerungskabel, die für die<br />
Leistungsaufnahme <strong>de</strong>s Gerätes ausgelegt sind.<br />
- Tauchen Sie das Gerät niemals in Wasser o<strong>de</strong>r an<strong>de</strong>re<br />
Flüssigkeiten und halten Sie es vor Regen und<br />
Nässe fern.<br />
6
1 Sicherheitshinweise<br />
- Betreiben Sie das Gerät nur, wenn die auf <strong>de</strong>m Typenschild<br />
an <strong>de</strong>r Unterseite <strong>de</strong>s Gerätes angegebene<br />
elektrische Spannung mit <strong>de</strong>r Spannung Ihrer Steckdose<br />
übereinstimmt. Eine falsche Spannung kann<br />
das Gerät zerstören.<br />
D<br />
1.4 zu Kin<strong>de</strong>rn • Lassen Sie das Gerät nicht unbeaufsichtigt und verwen<strong>de</strong>n<br />
Sie es mit größter Vorsicht, wenn Kin<strong>de</strong>r o<strong>de</strong>r Personen,<br />
die die Gefahren nicht einschätzen können, in <strong>de</strong>r<br />
Nähe sind.<br />
• Kin<strong>de</strong>r o<strong>de</strong>r Personen, die die Gefahren nicht einschätzen<br />
können, dürfen das Gerät nicht benutzen. Bewahren<br />
Sie es unzugänglich auf.<br />
• Verpackungsmaterialien dürfen nicht zum Spielen verwen<strong>de</strong>t<br />
wer<strong>de</strong>n. Es besteht Erstickungsgefahr.<br />
1.5 zur bestimmungsgemäßen<br />
Verwendung<br />
Der Bo<strong>de</strong>nstaubsauger ist ausschließlich für das Reinigen<br />
von normalverschmutzten Bö<strong>de</strong>n, Teppichen und Gardinen<br />
zu verwen<strong>de</strong>n. Je<strong>de</strong> weitere Verwendung gilt als nicht bestimmungsgemäß<br />
und ist untersagt. Insbeson<strong>de</strong>re die im<br />
Folgen<strong>de</strong>n aufgeführten Tätigkeiten dürfen auf keinen<br />
Fall mit <strong>de</strong>m Bo<strong>de</strong>nstaubsauger ausgeführt wer<strong>de</strong>n:<br />
• Das Saugen von:<br />
- glühen<strong>de</strong>r Asche, brennen<strong>de</strong>n Zigaretten o<strong>de</strong>r<br />
Streichhölzern. Es kann zum Brand kommen.<br />
- spitzen Gegenstän<strong>de</strong>n, wie Glassplittern, Nägeln,<br />
etc. Diese Gegenstän<strong>de</strong> zerstören die Filter.<br />
- Wasser und an<strong>de</strong>ren Flüssigkeiten, insbeson<strong>de</strong>re<br />
feuchten Teppich-Reinigungsmitteln. Feuchtigkeit im<br />
Inneren kann zum Kurzschluss führen.<br />
- Toner (für Laserdrucker, Kopierer, etc.). Es besteht<br />
Brand und Explosionsgefahr.<br />
- Gips, Zement, etc. Die Filter können verstopfen.<br />
- Kleidungsstücken (z.B. Schuhbän<strong>de</strong>r, Schals, etc.).<br />
Sie könnten eingezogen wer<strong>de</strong>n und schwere Verletungen<br />
hervorrufen.<br />
- Haaren, Fingern und an<strong>de</strong>ren Körperteilen. Sie könnten<br />
eingezogen wer<strong>de</strong>n und schwere Verletzungen<br />
hervorrufen.<br />
• Die Verwendung in <strong>de</strong>r Nähe von explosiven o<strong>de</strong>r leicht<br />
entzündlichen Stoffen. Es besteht Brand o<strong>de</strong>r Explosionsgefahr.<br />
• Die Verwendung im Freien. Es besteht die Gefahr, dass<br />
Regen und Schmutz das Gerät zerstören.<br />
• Das Hineinstecken von Gegenstän<strong>de</strong>n in die Öffnungen<br />
<strong>de</strong>s Gerätes während <strong>de</strong>s Betriebs. Das Gerät könnte überhitzen.<br />
7
2 Auspacken und Anschließen<br />
1.6 falls das Gerät <strong>de</strong>fekt<br />
ist<br />
• Betreiben Sie niemals ein <strong>de</strong>fektes Gerät, o<strong>de</strong>r ein Gerät<br />
mit einem <strong>de</strong>fekten Kabel. Es besteht erhebliches Verletzungsrisiko.<br />
• Geben Sie ein <strong>de</strong>fektes Gerät zur Reparatur an einen<br />
Fachhändler o<strong>de</strong>r <strong>de</strong>n Royal ® Appliance Kun<strong>de</strong>ndienst.<br />
Adresse, Seite 19, „Garantie“.<br />
2 Auspacken und Anschließen<br />
2.1 Auspacken Packen Sie das Gerät und alle Zubehörteile aus und überprüfen<br />
Sie <strong>de</strong>n Inhalt auf Vollständigkeit. Informationen<br />
zum Lieferumfang, Seite 4, „Übersicht über Ihren<br />
Trimaxx“.<br />
ACHTUNG:<br />
Transportieren/versen<strong>de</strong>n Sie das Gerät grundsätzlich<br />
immer in <strong>de</strong>r Originalverpackung, damit es keinen Scha<strong>de</strong>n<br />
nimmt. Heben Sie dazu die Verpackung auf.<br />
Entsorgen Sie nicht mehr benötigtes Verpackungsmaterial<br />
entsprechend <strong>de</strong>n in Ihrem Land gelten<strong>de</strong>n Vorschriften.<br />
HINWEIS:<br />
Sollten Sie einen Transportscha<strong>de</strong>n bemerken, wen<strong>de</strong>n<br />
Sie sich umgehend an Ihren Händler.<br />
2.2 Montieren<br />
1<br />
WARNUNG:<br />
Montieren Sie das Gerät nur, wenn <strong>de</strong>r Stecker aus <strong>de</strong>r<br />
Steckdose ausgezogen ist. Es könnte versehentlich eingeschaltet<br />
wer<strong>de</strong>n.<br />
2<br />
2<br />
1<br />
3<br />
4<br />
Abb. 2<br />
1. Stecken Sie das En<strong>de</strong> <strong>de</strong>s Saugschlauchs (Abb. 2/1) in<br />
<strong>de</strong>n Anschluss (Abb. 2/2) und drehen Sie diesen bis<br />
dieser verriegelt.<br />
2. Stecken Sie <strong>de</strong>n Handgriff (Abb. 3/1) in das obere En<strong>de</strong><br />
<strong>de</strong>s Teleskoprohrs (Abb. 3/2).<br />
3. Stecken Sie die Bo<strong>de</strong>ndüse (Abb. 3/3) auf das untere<br />
En<strong>de</strong> <strong>de</strong>s Teleskoprohrs (Abb. 3/4).<br />
HINWEIS:<br />
Eventuell ist es erfor<strong>de</strong>rlich etwas fester zu drücken.<br />
Abb. 3<br />
8
2 Auspacken und Anschließen<br />
Abb. 4<br />
2.3 Weitere Düsen (Zubehör)<br />
verwen<strong>de</strong>n<br />
1<br />
1<br />
1 b<br />
a<br />
2<br />
2<br />
3<br />
3<br />
Abb. 5<br />
Abb. 6<br />
4. Stellen Sie die Länge <strong>de</strong>s Teleskoprohrs ein. Drücken<br />
Sie dazu die Teleskoprohr-Arretierung (Abb. 4/1) nach<br />
vorn (Abb. 4/a). Ziehen Sie dann das Teleskoprohr am<br />
Handgriff (Abb. 1/1) auf gewünschte Länge (Abb. 4/b).<br />
Zum Verriegeln, lassen Sie die Teleskoprohr-Arretierung<br />
während Sie ziehen los. Sie hören ein <strong>de</strong>utliches<br />
Klicken.<br />
Ihr Bo<strong>de</strong>nstaubsauger ist jetzt einsatzbereit.<br />
Neben <strong>de</strong>r soeben installierten Bo<strong>de</strong>ndüse können Sie mit<br />
weiteren Düsen <strong>de</strong>n Funktionsumfang Ihres Bo<strong>de</strong>nstaubsaugers<br />
erweitern.<br />
• Als Zubehör sind die Fugendüse und die 2 in 1 Kombidüse<br />
im Lieferumfang enthalten. Sie können an <strong>de</strong>r Zubehörhalterung<br />
(Abb. 5/1) befestigt wer<strong>de</strong>n.<br />
- Fugendüse (Abb. 5/2)<br />
Benutzen Sie diese, um Staub aus schwer zugänglichen<br />
Stellen zu saugen.<br />
- 2 in 1 Kombidüse (Abb. 6/1) zu verwen<strong>de</strong>n als:<br />
Möbelbürste (Abb. 6/1)<br />
Benutzen Sie diese, um Staub von Gegenstän<strong>de</strong>n zu<br />
saugen, die empfindliche Oberflächen haben (z.B.<br />
Schränke, Tische).<br />
Polsterdüse (Abb. 6/3)<br />
Durch einfaches Abschieben <strong>de</strong>s Bürstenaufsatzes<br />
(Abb. 6/2) können Sie aus <strong>de</strong>r 2 in 1 Kombidüse eine<br />
Polsterdüse (Abb. 6/3) machen. Verwen<strong>de</strong>n Sie diese<br />
zum Reinigen von weichen, kratzfesten Oberflächen<br />
(z.B. Polstermöbel).<br />
D<br />
Abb. 7<br />
• Optional erhältlich sind weiterhin:<br />
- Turbobürste (Abb. 7)<br />
Diese besitzt einen rotieren<strong>de</strong>n Bürstenkopf und eignet<br />
sich daher bestens zur Tiefenreinigung von Teppichen.<br />
Das Bürsten bewirkt zu<strong>de</strong>m ein Aufrichten<br />
<strong>de</strong>s Teppichflors.<br />
HINWEIS:<br />
Bei <strong>de</strong>r Verwendung <strong>de</strong>r Turbobürste, entsteht durch die<br />
hohe Drehzahl <strong>de</strong>r Bürste ein lauteres Geräusch. Dies ist<br />
normal.<br />
- Parkettbürste (Abb. 8)<br />
Diese ist mit langen Borsten ausgestattet und dient<br />
zum Absaugen beson<strong>de</strong>rs empfindlicher Oberflächen<br />
(z.B. Parkett, Laminat).<br />
Abb. 8<br />
9
2 Auspacken und Anschließen<br />
WARNUNG:<br />
Montieren Sie Düsen nur, wenn <strong>de</strong>r Stecker aus <strong>de</strong>r<br />
Steckdose ausgezogen ist. Der Bo<strong>de</strong>nstaubsauger<br />
könnte versehentlich eingeschaltet wer<strong>de</strong>n.<br />
1<br />
Zum Aufsetzen <strong>de</strong>r Düsen gehen Sie wie folgt vor:<br />
1. Schalten Sie das Gerät aus und ziehen Sie <strong>de</strong>n Stecker<br />
aus <strong>de</strong>r Steckdose.<br />
2. Ziehen Sie die vorhan<strong>de</strong>ne Düse vom Teleskoprohr<br />
(Abb. 9/1) ab.<br />
3. Stecken Sie die gewünschte Düse auf das untere En<strong>de</strong><br />
<strong>de</strong>s Teleskoprohrs (Abb. 9).<br />
Abb. 9<br />
ACHTUNG:<br />
Beim Einsatz <strong>de</strong>s Bo<strong>de</strong>nstaubsaugers ohne aufgesteckte<br />
Düse besteht erhöhte Gefahr, Gegenstän<strong>de</strong> versehentlich<br />
einzusaugen.<br />
4. Befestigen Sie nicht mehr benötigte Düsen, soweit<br />
möglich, wie abgebil<strong>de</strong>t in <strong>de</strong>r Zubehörhalterung:<br />
- Stecken Sie die 2in1-Kombidüse in die Zubehörhalterung<br />
(Abb. 10/A).<br />
- Stecken Sie die Fugendüse auf die Zubehörhalterung<br />
und klappen Sie sie an, bis sie hör- und spürbar einrastet<br />
(Abb. 10/B).<br />
5. Bewahren Sie die übrigen Düsen sicher und für Kin<strong>de</strong>r<br />
unzugänglich auf.<br />
A<br />
B<br />
Abb. 10<br />
10
3 Bedienung<br />
3 Bedienung<br />
3.1 Staubsaugen .<br />
WARNUNG:<br />
Prüfen Sie <strong>de</strong>n Bo<strong>de</strong>nstaubsauger und das Stromkabel<br />
vor je<strong>de</strong>r Benutzung. Ein beschädigtes Gerät darf nicht<br />
verwen<strong>de</strong>t wer<strong>de</strong>n. Es besteht ein Verletzungsrisiko.<br />
D<br />
ACHTUNG:<br />
Verwen<strong>de</strong>n Sie <strong>de</strong>n Bo<strong>de</strong>nstaubsauger nur, wenn alle<br />
Filter ordnungsgemäß eingesetzt sind und sichergestellt<br />
ist, dass keine Öffnungen verstopft sind. Die Filter dürfen<br />
keine Beschädigungen aufweisen und müssen trocken<br />
sein. Bei Nichtbeachtung kann <strong>de</strong>r Bo<strong>de</strong>nstaubsauger<br />
beschädigt wer<strong>de</strong>n.<br />
HINWEIS:<br />
Der Bo<strong>de</strong>nstaubsauger besitzt einen Überhitzungsschutz.<br />
Er schaltet sich bei Überhitzung (z.B. durch verstopfte<br />
Düsen o<strong>de</strong>r zu vollen Staubbehälter) automatisch<br />
ab. Ist dies <strong>de</strong>r Fall, schalten Sie <strong>de</strong>n Bo<strong>de</strong>nstaubsauger<br />
aus und ziehen Sie <strong>de</strong>n Stecker. Beseitigen Sie die Ursache<br />
<strong>de</strong>r Überhitzung. Warten Sie ca. 45 Minuten. Den<br />
dann abgekühlten Bo<strong>de</strong>nstaubsauger können Sie wie<strong>de</strong>r<br />
einschalten.<br />
1. Stecken Sie die gewünschte Düse auf, Kapitel 2.3,<br />
„Weitere Düsen (Zubehör) verwen<strong>de</strong>n“.<br />
2. Ziehen Sie das Kabel am Stecker (Abb. 1/12) bis zur<br />
gelben Markierung (Abb. 11/1) heraus.<br />
1<br />
2<br />
Abb. 11<br />
WARNUNG:<br />
Falls die rote Markierung (Abb. 11/2) sichtbar ist, ziehen<br />
Sie das Kabel wie<strong>de</strong>r soweit ein, bis diese nicht mehr zu<br />
sehen ist, Kapitel 3.2, „Ausschalten und Stromkabel<br />
aufrollen“. Ansonsten kann das Kabel abreißen. Es<br />
besteht die Gefahr eines elektrischen Schlages.<br />
3. Schalten Sie <strong>de</strong>n Bo<strong>de</strong>nstaubsauger am Ein-/Ausschalter<br />
(Abb. 12/1) ein.<br />
1<br />
Abb. 12<br />
11
3 Bedienung<br />
1<br />
A<br />
B<br />
Abb. 13<br />
Abb. 14<br />
4. Stellen Sie je nach Bo<strong>de</strong>nbelag <strong>de</strong>n Umschalter Teppich/Hartbo<strong>de</strong>n<br />
(Abb. 1/17) ein:<br />
- Hartbo<strong>de</strong>n (Abb. 13/A)<br />
Laminat, Fliesen, PVC, etc.<br />
- Teppich (Abb. 13/B)<br />
Lang- und kurzflorige Teppiche, Läufer, etc.<br />
5. Ziehen Sie zum Saugen <strong>de</strong>n Bo<strong>de</strong>nstaubsauger wie einen<br />
Schlitten hinter sich her. Beachten Sie zum Saugen<br />
die entsprechen<strong>de</strong>n Empfehlungen <strong>de</strong>r Bo<strong>de</strong>nbelaghersteller.<br />
HINWEIS:<br />
Mit <strong>de</strong>m Nebenluftregler (Abb. 14/1) können Sie die<br />
Saugleistung schnell reduzieren, z.B. um eingesaugte<br />
Gardinen wie<strong>de</strong>r freizugeben.<br />
3.2 Ausschalten und<br />
Stromkabel aufrollen<br />
1<br />
1. Schalten Sie <strong>de</strong>n Bo<strong>de</strong>nstaubsauger am Ein-/Ausschalter<br />
(Abb. 15/2) aus und ziehen Sie <strong>de</strong>n Stecker aus <strong>de</strong>r<br />
Steckdose.<br />
2. Nehmen Sie <strong>de</strong>n Stecker in die Hand und halten Sie ihn<br />
fest.<br />
2<br />
Abb. 15<br />
WARNUNG:<br />
Beim Einziehen <strong>de</strong>s Stromkabels kann dieses umherschlingern,<br />
zur Stolperfalle wer<strong>de</strong>n o<strong>de</strong>r Gegenstän<strong>de</strong><br />
umreißen.<br />
3. Drücken Sie die Kabelaufrolltaste (Abb. 15/1), um das<br />
Stromkabel einzuziehen. Führen Sie es auf <strong>de</strong>m letzten<br />
Stück mit <strong>de</strong>m Stecker in <strong>de</strong>r Hand.<br />
3.3 Aufbewahren<br />
2<br />
• Zum Aufbewahren, o<strong>de</strong>r bei Arbeitspausen können<br />
Sie die Parkhalterung (Abb. 16/1) verwen<strong>de</strong>n, um <strong>de</strong>n<br />
Parkhaken (Abb. 16/2) an <strong>de</strong>r Bo<strong>de</strong>ndüse einzuhaken<br />
(Abb. 16).<br />
WARNUNG:<br />
Wenn Sie <strong>de</strong>n Arbeitsplatz verlassen, schalten Sie das<br />
Gerät aus und beachten Sie die Hinweise unter Kapitel<br />
1<br />
3.2, „Ausschalten und Stromkabel aufrollen“. So vermei<strong>de</strong>n<br />
Sie Unfälle.<br />
Abb. 16<br />
12<br />
ACHTUNG:<br />
Stellen Sie das Gerät nie <strong>direkt</strong> neben Wärmequellen ab<br />
(z.B. Heizung, Ofen). Vermei<strong>de</strong>n Sie <strong>direkt</strong>e Sonneneinstrahlung.<br />
Die Hitze kann das Gerät beschädigen.
3 Bedienung<br />
• Wenn Sie das Gerät längere Zeit lagern möchten, leeren<br />
Sie <strong>de</strong>n Staubbehälter und reinigen Sie diesen sowie<br />
die Filter. Bewahren Sie das Gerät in einem kühlen, trockenen<br />
Raum auf.<br />
D<br />
3.4 Staubbehälter ausleeren<br />
• Leeren Sie <strong>de</strong>n Staubbehälter spätestens dann, wenn<br />
die aufgesaugte Staubmenge im Staubbehälter die MAX-<br />
Markierung (Abb. 17/1) erreicht hat, o<strong>de</strong>r die Saugwirkung<br />
nachlässt.<br />
2<br />
1<br />
Abb. 17<br />
ACHTUNG:<br />
Bevor Sie <strong>de</strong>n Staubbehälter leeren, schalten Sie das<br />
Gerät aus und beachten Sie die Hinweise unter Kapitel<br />
3.2, „Ausschalten und Stromkabel aufrollen“. So vermei<strong>de</strong>n<br />
Sie, dass Staub das Gerät zerstört.<br />
1. Ziehen Sie die Entriegelungstaste nach hinten<br />
(Abb. 18/1) und drücken Sie die Entnahmetaste<br />
(Abb. 18/2).<br />
1<br />
Abb. 18<br />
2. Heben Sie <strong>de</strong>n Staubbehälter (Abb. 19/1) nach vorne<br />
aus <strong>de</strong>m Bo<strong>de</strong>nstaubsauger.<br />
1<br />
1<br />
Abb. 19<br />
2<br />
Abb. 20<br />
3. Zum Entleeren, halten Sie <strong>de</strong>n Staubbehälter tief über<br />
einen Mülleimer.<br />
4. Drücken Sie die Öffnungstaste (Abb. 20/1). Der Bo<strong>de</strong>n<br />
(Abb. 20/2) öffnet sich und <strong>de</strong>r Staub rieselt in <strong>de</strong>n Mülleimer.<br />
5. Klopfen Sie Staubrückstän<strong>de</strong> vorsichtig aus.<br />
6. Schließen Sie <strong>de</strong>n Bo<strong>de</strong>n.<br />
7. Setzen Sie <strong>de</strong>n Staubbehälter auf <strong>de</strong>n Bo<strong>de</strong>nstaubsauger<br />
auf. Drücken Sie <strong>de</strong>n Staubbehälter fest, bis er hörbar<br />
einrastet.<br />
13
4 Filter<br />
4 Filter<br />
2<br />
1<br />
Abb. 21<br />
Der Bo<strong>de</strong>nstaubsauger besitzt die folgen<strong>de</strong>n Filter:<br />
- Lamellenvorfilter (Abb. 21/1)<br />
Dient zum Herausfiltern <strong>de</strong>r feinen Staubpartikel.<br />
Reinigen: alle 2 Monate<br />
- Hygiene-Ausblasfilter (Abb. 21/2)<br />
Filtert feinste Partikel aus <strong>de</strong>r ausgeblasenen Luft.<br />
Austauschen: alle 6 Monate<br />
• Die Filter können nach einiger Zeit verstopfen und so<br />
die Saugleistung reduzieren. Deshalb ist es wichtig, dass<br />
Sie die oben angegebenen Zeitabstän<strong>de</strong> einhalten.<br />
Falls Sie feststellen, dass ein Filter beschädigt ist, ersetzen<br />
Sie diesen umgehend.<br />
4.1 Lamellenvorfilter reinigen<br />
1<br />
1<br />
2<br />
Abb. 22<br />
Abb. 23<br />
Abb. 24<br />
1. Schalten Sie das Gerät aus und beachten Sie die Hinweise<br />
unter Kapitel 3.2, „Ausschalten und Stromkabel<br />
aufrollen“.<br />
2. Entnehmen Sie <strong>de</strong>n Staubbehälter, Kapitel 3.4,<br />
„Staubbehälter ausleeren“, Schritt 1 - 2.<br />
3. Drehen Sie <strong>de</strong>n Staubbehälter-Deckel gegen <strong>de</strong>n Uhrzeigersinn,<br />
bis die Markierung 1 (Abb. 22/1) senkrecht<br />
über <strong>de</strong>r Markierung auf <strong>de</strong>m Staubbehälter (Abb. 22/2)<br />
steht.<br />
4. Heben Sie nun <strong>de</strong>n Staubbehälter-Deckel ab.<br />
5. Nehmen Sie <strong>de</strong>n Lamellenvorfilter (Abb. 23/1) nach<br />
oben heraus.<br />
6. Zur Grobreinigung halten Sie <strong>de</strong>n Lamellenvorfilter über<br />
einen Mülleimer und klopfen Sie ihn dann mit leichten<br />
Schlägen aus.<br />
ACHTUNG:<br />
Die Lamellenvorfilter ist nicht spülmaschinengeeignet.<br />
HINWEIS:<br />
Falls <strong>de</strong>r Lamellenvorfilter stark verschmutzt ist, spülen<br />
Sie ihn mit einem Duschkopf gründlich aus (Abb. 24).<br />
Verwen<strong>de</strong>n Sie dabei keine Bürste.<br />
Lassen Sie <strong>de</strong>n Filter anschließend trocknen (ca.<br />
15 Stun<strong>de</strong>n bei Raumtemperatur). Setzen Sie ihn erst<br />
ein, wenn er vollkommen trocken ist.<br />
Falls sich die Verschmutzungen nicht entfernen lassen,<br />
setzen Sie einen neuen Lamellenvorfilter ein (Bestellnummer,<br />
Kapitel 8, „Ersatzteile“).<br />
14
4 Filter<br />
2<br />
1<br />
2<br />
Abb. 25<br />
1<br />
7. Setzen Sie <strong>de</strong>n trockenen Lamellenvorfilter wie<strong>de</strong>r in<br />
<strong>de</strong>n Staubbehälter ein.<br />
8. Setzen Sie <strong>de</strong>n Staubbehälter-Deckel so auf <strong>de</strong>n<br />
Staubbehälter auf, dass die Markierung 1 (Abb. 25/1)<br />
senkrecht über <strong>de</strong>r Markierung auf <strong>de</strong>m Staubbehälter<br />
(Abb. 25/2) steht.<br />
9. Drehen Sie <strong>de</strong>n Staubbehälter-Deckel im Uhrzeigersinn,<br />
bis die Markierung 2 (Abb. 26/1) senkrecht über<br />
<strong>de</strong>r Markierung auf <strong>de</strong>m Staubbehälter (Abb. 26/2)<br />
steht.<br />
10. Setzen Sie <strong>de</strong>n Staubbehälter auf <strong>de</strong>n Bo<strong>de</strong>nstaubsauger<br />
auf. Drücken Sie <strong>de</strong>n Staubbehälter fest, bis er hörbar<br />
einrastet.<br />
D<br />
Abb. 26<br />
4.2 Filtersieb reinigen 1. Schalten Sie das Gerät aus und beachten Sie die Hinweise<br />
unter Kapitel 3.2, „Ausschalten und Stromkabel<br />
1<br />
aufrollen“.<br />
2. Entnehmen und leeren Sie <strong>de</strong>n Staubbehälter,<br />
Kapitel 3.4, „Staubbehälter ausleeren“.<br />
3. Entnehmen Sie <strong>de</strong>n Lamellenvorfilter, Kapitel 4.1,<br />
„Lamellenvorfilter reinigen“.<br />
4. Entnehmen Sie die Staubseparationseinheit<br />
(Abb. 27/1) aus <strong>de</strong>m Staubbehälter.<br />
Abb. 27<br />
5. Halten Sie die Staubseparationseinheit über einen Mülleimer,<br />
drehen Sie <strong>de</strong>n oberen Trichter (Abb. 27/1) gegen<br />
1<br />
<strong>de</strong>n Uhrzeigersinn bis er hörbar entriegelt und he-<br />
ben Sie ihn ab.<br />
Abb. 28<br />
1<br />
2<br />
6. Entnehmen Sie das Filtersieb (Abb. 29/1). Drehen Sie<br />
dazu das Filtersieb, bis es sich in <strong>de</strong>r Entnahmeposition<br />
befin<strong>de</strong>t (Abb. 29/2).<br />
7. Zur Grobreinigung, halten Sie das Filtersieb über einen<br />
Mülleimer. Klopfen Sie es dann mit leichten Schlägen<br />
aus<br />
Abb. 29<br />
15
.<br />
4 Filter<br />
HINWEIS:<br />
Falls das Filtersieb stark verschmutzt ist, spülen Sie es<br />
mit einem Duschkopf gründlich aus. Benutzen Sie dabei<br />
keine Bürste.<br />
Lassen Sie das Filtersieb anschließend trocknen. Setzen<br />
Sie es erst ein, wenn es vollkommen trocken ist.<br />
8. Setzen Sie <strong>de</strong>n Filtersieb-Trichter wie<strong>de</strong>r auf und drehen<br />
Sie ihn fest bis er hörbar einrastet.<br />
9. Setzen Sie die Staubseparationseinheit wie<strong>de</strong>r in <strong>de</strong>n<br />
Staubbehälter ein.<br />
10. Gehen Sie weiter vor wie in Kapitel 4.1,<br />
„Lamellenvorfilter reinigen“ Schritt 9 - 12 beschrieben.<br />
4.3 Hygiene-Ausblasfilter<br />
austauschen<br />
1<br />
Abb. 30<br />
1. Schalten Sie das Gerät aus und beachten Sie die Hinweise<br />
unter Kapitel 3.2, „Ausschalten und Stromkabel<br />
aufrollen“.<br />
2. Entnehmen Sie <strong>de</strong>n Staubbehälter, Kapitel 3.4,<br />
„Staubbehälter ausleeren“.<br />
3. Ziehen Sie die Ausblasfilter-Halterung (Abb. 30/1) heraus.<br />
HINWEIS:<br />
Der Hygiene-Ausblasfilter ist nicht waschbar.<br />
Bei leichten Verschmutzungen kann es jedoch ausreichen,<br />
<strong>de</strong>n Ausblasfilter über einem Mülleimer auszuklopfen.<br />
Wir empfehlen aber, <strong>de</strong>n Filter regelmäßig auszutauschen.<br />
4. Setzen Sie abschließend die neue Ausblasfilter-Halterung<br />
mit Ausblasfilter wie<strong>de</strong>r ein (Bestellnummer,<br />
Kapitel 8, „Ersatzteile“).<br />
16
5 Fehlerbehebung<br />
5 Fehlerbehebung<br />
Bevor Sie das Gerät an <strong>de</strong>n Royal ® Appliance Kun<strong>de</strong>ndienst einschicken, überprüfen Sie anhand<br />
<strong>de</strong>r folgen<strong>de</strong>n Tabelle, ob Sie <strong>de</strong>n Fehler selbst beseitigen können.<br />
D<br />
WARNUNG:<br />
Bevor Sie sich auf Fehlersuche begeben, schalten Sie das Gerät aus und ziehen Sie <strong>de</strong>n Netzstecker.<br />
Verwen<strong>de</strong>n Sie niemals ein <strong>de</strong>fektes Gerät.<br />
Fehler mögliche Ursache Lösung<br />
Gerät läuft nicht Stecker ist nicht eingesteckt o<strong>de</strong>r<br />
Gerät ist nicht eingeschaltet.<br />
Stecker einstecken und Gerät einschalten,<br />
Kapitel 3.1, „Staubsaugen“.<br />
Steckdose führt keinen Strom. Testen Sie <strong>de</strong>n Bo<strong>de</strong>nstaubsauger an einer<br />
an<strong>de</strong>ren Steckdose, bei <strong>de</strong>r Sie sicher sind,<br />
dass diese Strom führt.<br />
Stromkabel ist beschädigt. Lassen Sie das Kabel durch <strong>de</strong>n Royal ® Appliance<br />
Kun<strong>de</strong>ndienst ersetzen, Adresse,<br />
Seite 19, „Garantie“.<br />
Gerät nimmt keinen<br />
Schmutz auf<br />
Gerät verursacht<br />
frem<strong>de</strong>s Geräusch<br />
Staubbehälter ist voll o<strong>de</strong>r verstopft.<br />
Filter ist verschmutzt.<br />
Düse, Teleskoprohr o<strong>de</strong>r Saugschlauch<br />
sind verstopft.<br />
Eingesaugte Partikel versperren<br />
<strong>de</strong>n Luftweg.<br />
Staubbehälter leeren/reinigen.<br />
Den entsprechen<strong>de</strong>n Filter reinigen,<br />
Kapitel 4, „Filter“.<br />
Entfernen Sie die Verstopfung. Benutzen<br />
Sie dazu falls erfor<strong>de</strong>rlich einen langen<br />
Holzstab (z.B. Besenstiel).<br />
Entfernen Sie die Partikel. Benutzen Sie<br />
dazu falls erfor<strong>de</strong>rlich einen langen Holzstab<br />
(z.B. Besenstiel).<br />
6 Reinigung<br />
WARNUNG:<br />
Bevor Sie das Gerät reinigen, schalten Sie das Gerät aus und ziehen Sie <strong>de</strong>n Netzstecker.<br />
6.1 Gehäuse reinigen<br />
Reinigen Sie das Gehäuse ausschließlich mit einem leicht angefeuchteten Tuch. Verwen<strong>de</strong>n Sie<br />
keine Reinigungsmittel, Scheuermittel o<strong>de</strong>r Alkohol, da diese das Gehäuse beschädigen können.<br />
6.2 Filter reinigen<br />
Zum Reinigen <strong>de</strong>r Filter, Kapitel 4, „Filter“.<br />
17
7 Entsorgung<br />
7 Entsorgung<br />
Die verwen<strong>de</strong>ten Filter sind aus umweltverträglichen Materialien hergestellt und können im Hausmüll<br />
entsorgt wer<strong>de</strong>n.<br />
Wenn das Gebrauchsen<strong>de</strong> erreicht ist, insbeson<strong>de</strong>re, wenn Funktionsstörungen auftreten,<br />
machen Sie das ausgediente Gerät unbrauchbar, in<strong>de</strong>m Sie <strong>de</strong>n Netzstecker aus <strong>de</strong>r<br />
Steckdose ziehen und das Stromkabel durchtrennen. Entsorgen Sie das Gerät entsprechend<br />
<strong>de</strong>r in Ihrem Land gelten<strong>de</strong>n Umweltvorschriften. Elektrische Abfälle dürfen nicht zusammen<br />
mit Haushaltsabfällen entsorgt wer<strong>de</strong>n. Wen<strong>de</strong>n Sie sich für Ratschläge bezüglich<br />
<strong>de</strong>s Recyclings an Ihre Kommunalbehör<strong>de</strong> o<strong>de</strong>r Ihren Händler.<br />
8 Ersatzteile<br />
8.1 Verschleißteilliste<br />
Artikel-Nr. Beschreibung Inhalt<br />
2887001 Lamellenvorfilter 1 Lamellenvorfilter<br />
2887002 Hygiene-Ausblasfilter 1 Hygiene-Ausblasfilter<br />
8.2 Bezugsquellen<br />
Zubehörteile sowie Ersatzteile können nachbestellt wer<strong>de</strong>n. Diese erhalten Sie bei <strong>de</strong>n Firmen:<br />
Zubehör-Ersatzteile-Service-Versand<br />
Ina Riedmüller<br />
Frankenstraße 34<br />
D-89233 Neu-Ulm<br />
Tel.: 0 73 07 / 51 75<br />
Fax: 0 73 07 / 41 56<br />
Riedmueller.service@t-online.<strong>de</strong><br />
Zubehör-Ersatzteile-Service-Versand<br />
Staubsauger-Center Feuerbach KG<br />
Corneliusstraße 75<br />
D-40215 Düsseldorf<br />
Tel.: 02 11 / 38 10 07<br />
Fax: 02 11 / 37 04 97<br />
Staubsaugercenter@t-online.<strong>de</strong><br />
18
9 Garantie<br />
9 Garantie<br />
9.1 Garantiebedingungen<br />
Wir übernehmen für das von uns vertriebene Gerät eine Garantie von 24 Monaten ab Kaufdatum.<br />
D<br />
Innerhalb dieser Garantiezeit beseitigen wir nach unserer Wahl durch Reparatur o<strong>de</strong>r Austausch<br />
<strong>de</strong>s Gerätes o<strong>de</strong>r <strong>de</strong>s Zubehörs (Schä<strong>de</strong>n an Zubehörteilen führen nicht automatisch zum Umtausch<br />
<strong>de</strong>s kompletten Gerätes) unentgeltlich alle Mängel, die auf Material- o<strong>de</strong>r Herstellungsfehlern<br />
beruhen. Von <strong>de</strong>r Garantie sind Schä<strong>de</strong>n ausgenommen, die auf unsachgemäßen Gebrauch (Betrieb<br />
mit falscher Stromart/-spannung, Anschluss an ungeeignete Stromquellen, Bruch, etc.) zurückzuführen<br />
sind, normaler Verschleiß und Mängel, die <strong>de</strong>n Wert o<strong>de</strong>r die Gebrauchstauglichkeit <strong>de</strong>s<br />
Gerätes nur unerheblich beeinflussen.<br />
Bei Eingriffen durch eine nicht von uns autorisierte Stelle o<strong>de</strong>r bei Verwendung an<strong>de</strong>rer als original<br />
Royal ® Appliance Ersatzteile erlischt die Garantie. Verschleißteile fallen nicht unter die Garantie und<br />
sind <strong>de</strong>shalb kostenpflichtig!<br />
Die Garantie tritt nur in Kraft, wenn das Kaufdatum durch Stempel und Unterschrift <strong>de</strong>s Händlers auf<br />
<strong>de</strong>r Garantiekarte bestätigt ist o<strong>de</strong>r eine Rechnungskopie <strong>de</strong>m eingeschickten Gerät beiliegt. Garantieleistungen<br />
bewirken we<strong>de</strong>r eine Verlängerung <strong>de</strong>r Garantiezeit, noch beginnt dadurch ein Anspruch<br />
auf eine neue Garantie!<br />
9.2 Im Garantiefall<br />
Versen<strong>de</strong>n Sie das Gerät mit entleertem Staubbehälter und einer kurzen Fehlerbeschreibung in<br />
Blockschrift. Versehen Sie das Anschreiben mit <strong>de</strong>m Vermerk „Zur Garantie“. Sen<strong>de</strong>n Sie es zusammen<br />
mit <strong>de</strong>r Garantiekarte o<strong>de</strong>r einer Rechnungskopie an folgen<strong>de</strong> Adresse:<br />
Royal ® Appliance International GmbH<br />
Abt. Kun<strong>de</strong>nservice<br />
Itterpark 7-9<br />
40724 Hil<strong>de</strong>n<br />
Germany<br />
Tel.: 02103 / 20 07 10<br />
Fax: 02103 / 20 07 77<br />
www.dirt<strong>de</strong>vil.<strong>de</strong><br />
19
An overview of your Trimaxx<br />
D<br />
An overview of your Trimaxx<br />
Many thanks!<br />
We are pleased that you <strong>de</strong>ci<strong>de</strong>d on the <strong>TRIMAXX</strong> cylin<strong>de</strong>r vacuum cleaner!<br />
We hope you enjoy using your appliance and we would like to thank you for your purchase!<br />
The Trimaxx, with its integrated mechanical multi-separation facility, ensures that dirt is completely<br />
separated from sucked in air in the dust container already.<br />
The 3-stage dirt separator pre-cleans air in the dust container in such a thorough way that blow-out<br />
air is guaranteed to be clean (pure) thanks to the additional hygienic filters.<br />
This new type of dust separation system means there is no need for a central filter which quickly<br />
becomes clogged on conventional bagless vacuum cleaners, making it necessary for you to clean<br />
the filter which can be troublesome work.<br />
Appliance parts/scope of <strong>de</strong>livery<br />
1 Handle<br />
2 Accessories mount<br />
3 Secondary air controller<br />
4 2 in 1 combi-nozzle*<br />
5 Crevice nozzle*<br />
6 Suction hose<br />
7 Cable retract button<br />
8 On/off button<br />
9 Dust container<br />
Release buttons<br />
10 Carry handle<br />
11 Parking hook mount<br />
12 Plug with power cable<br />
13 Telescopic tube lock<br />
14 Telescopic tube<br />
15 Parking hook<br />
16 Floor nozzle<br />
17 Carpet/hard floor switch<br />
18 Dust container<br />
19 Parquet brush (optional)<br />
20 Turbo brush (optional)<br />
*Inclu<strong>de</strong>d loose insi<strong>de</strong> the packaging.<br />
Technical data<br />
Type of appliance : Cylin<strong>de</strong>r vacuum cleaner (bagless)<br />
Mo<strong>de</strong>l : Trimaxx<br />
Voltage : 220 V - 240 V<br />
~50/60 Hz<br />
Output : 1400 W nom.<br />
1600 W max.<br />
Dust container : 1.8 litre, washable<br />
Filters : Laminar filter, washable<br />
Hygienic blow-out filter<br />
Operation radius : approx. 8.5 m<br />
Mains cable with plug : approx. 6.0 m long<br />
Weight : approx. 6.0 kg<br />
We reserve the right to make technical and <strong>de</strong>sign alterations in the course of ongoing product<br />
improvements.<br />
© Royal ® Appliance International GmbH<br />
20
List of contents<br />
1 Safety instructions.................................................................... 22<br />
1.1 Regarding the operating manual ................................................................................. 22<br />
1.2 Regarding the symbols used ....................................................................................... 22<br />
1.3 Regarding the power supply........................................................................................ 22<br />
1.4 Regarding children ..................................................................................................... 23<br />
1.5 Regarding inten<strong>de</strong>d use .............................................................................................. 23<br />
1.6 If the appliance is <strong>de</strong>fective ......................................................................................... 23<br />
G<br />
2 Unpacking and connecting ...................................................... 24<br />
2.1 Unpacking.................................................................................................................... 24<br />
2.2 Assembly ..................................................................................................................... 24<br />
2.3 Using other nozzles (accessories)............................................................................... 25<br />
3 Operating ................................................................................... 26<br />
3.1 Vacuuming................................................................................................................... 26<br />
3.2 Switching off and retracting the power cable............................................................... 28<br />
3.3 Storage ........................................................................................................................ 28<br />
3.4 Emptying the dust container ........................................................................................ 29<br />
4 Filters ......................................................................................... 30<br />
4.1 Clean laminar pre-filter ................................................................................................ 30<br />
4.2 Clean filter screen........................................................................................................ 31<br />
4.3 Replacing the hygienic blow-out filter .......................................................................... 32<br />
5 Correcting malfunctions .......................................................... 33<br />
6 Cleaning..................................................................................... 33<br />
6.1 Cleaning the housing................................................................................................... 33<br />
6.2 Cleaning the filters....................................................................................................... 33<br />
7 Waste disposal.......................................................................... 34<br />
8 Spare parts ................................................................................ 34<br />
8.1 List of wear parts ......................................................................................................... 34<br />
8.2 Supply sources ............................................................................................................ 34<br />
9 Warranty .................................................................................... 35<br />
9.1 Warranty conditions..................................................................................................... 35<br />
9.2 Making a warranty claim.............................................................................................. 35<br />
List of contents<br />
21
1 Safety instructions<br />
1 Safety instructions<br />
1.1 Regarding the<br />
operating manual<br />
<br />
1.2 Regarding the symbols<br />
used<br />
Read this operating manual through completely before<br />
working with the appliance.<br />
Keep the operating manual safe. If you pass the appliance<br />
on to a third party, give them the operating manual as well.<br />
Non-compliance with these instructions can lead to<br />
serious injuries or damage to the appliance.<br />
We assume no liability for damage that occurs as a result<br />
of non-compliance with this operating manual.<br />
• The appliance may only be operated in households. It is<br />
not suitable for industrial or commercial use.<br />
Important instructions for your safety are especially<br />
marked. You must observe these instructions to avoid<br />
acci<strong>de</strong>nts and damage to the appliance:<br />
WARNING:<br />
Warns against hazards for your health and indicates<br />
possible risks of injury.<br />
ATTENTION:<br />
Indicates possible hazards for the appliance or other<br />
objects.<br />
NOTE:<br />
Highlights tips and information for you.<br />
1.3 Regarding the power<br />
supply<br />
• The appliance is operated with electrical power which<br />
means there is in principle a risk of electric shock. Pay<br />
particular attention to the following:<br />
- Never touch the plug with wet hands.<br />
- If you want to pull the plug out of the socket then<br />
always pull directly on the plug. Never pull on the<br />
cable as it could break.<br />
- Make sure that the power cable is not bent, caught or<br />
run over, and that it does not come into contact with<br />
heat sources.<br />
- Only use an extension cable that is <strong>de</strong>signed for the<br />
power requirement of the appliance.<br />
- Never immerse the appliance in water or other fluids<br />
and keep it away from rain and moisture.<br />
22
1 Safety instructions<br />
- Only operate the appliance if the electrical voltage<br />
stated on the type plate beneath the appliance<br />
matches the voltage on your socket. Wrong voltage<br />
can <strong>de</strong>stroy the appliance.<br />
1.4 Regarding children • Never leave the appliance unatten<strong>de</strong>d, and use it with<br />
the greatest of care if children or persons who cannot<br />
assess the risks are nearby.<br />
• Children or persons who cannot assess the risks may<br />
not use the appliance. Store it so it is inaccessible.<br />
• Packing material must not be used to play with. There<br />
is a danger of suffocation.<br />
G<br />
1.5 Regarding inten<strong>de</strong>d<br />
use<br />
1.6 If the appliance is<br />
<strong>de</strong>fective<br />
The cylin<strong>de</strong>r vacuum cleaner must only be used for<br />
cleaning normally dirty floors, carpets and curtains. Any<br />
other use is consi<strong>de</strong>red non-inten<strong>de</strong>d use and is prohibited.<br />
In particular, the activities listed in the following may<br />
un<strong>de</strong>r no circumstances be carried out with the<br />
cylin<strong>de</strong>r vacuum cleaner:<br />
• Do not vacuum:<br />
- hot ash, burning cigarettes or matches. These can<br />
cause fire.<br />
- pointed objects such as glass fragments, nails, etc.<br />
These objects <strong>de</strong>stroy the filter.<br />
- water and other fluids, especially damp carpet<br />
cleaning agents. Internal dampness can lead to a<br />
short-circuit.<br />
- toner (for laser printers, copy machines, etc.). There<br />
is a risk of fire and explosion.<br />
- plaster, cement, etc. The filter can become blocked.<br />
- pieces of clothing (e.g. shoelaces, scarves, etc.).<br />
They could be pulled right in and cause severe<br />
injuries.<br />
- hair, fingers and other body parts. They could be<br />
pulled right in and cause severe injuries.<br />
• Do not use near explosive or easily flammable<br />
substances. There is a risk of fire or explosion.<br />
• Do not use in the open-air. There is a risk of the<br />
appliance being <strong>de</strong>stroyed by rain and dirt.<br />
• Do not push objects into the openings of the appliance<br />
while it is running. The appliance could overheat.<br />
• Never operate a <strong>de</strong>fective appliance or an appliance<br />
with a <strong>de</strong>fective cable. There is a consi<strong>de</strong>rable risk of injury.<br />
• Bring or send <strong>de</strong>fective appliances to a specialist <strong>de</strong>aler<br />
or to Royal ® Appliance Customer Services for repair.<br />
Address, Page 35, "Warranty".<br />
23
2 Unpacking and connecting<br />
2 Unpacking and connecting<br />
2.1 Unpacking Unpack the appliance and all accessory parts and check<br />
that the contents are complete. Information regarding the<br />
scope of <strong>de</strong>livery, Page 20, "An overview of your<br />
Trimaxx".<br />
ATTENTION:<br />
Always transport/send the appliance in its original<br />
packaging so that it does not become damaged. Keep<br />
the packing material for this purpose.<br />
Dispose of any packing material that is no longer<br />
required in accordance with the provisions applicable in<br />
your country.<br />
NOTE:<br />
If you should notice damage due to transport, then<br />
contact your <strong>de</strong>aler immediately.<br />
2.2 Assembly<br />
1<br />
WARNING:<br />
Only assemble the appliance if the plug has been pulled<br />
out of the socket. It could be switched on by acci<strong>de</strong>nt.<br />
2<br />
1<br />
4<br />
Fig.2<br />
1. Push the end of the suction hose (Fig. 2/1) into the<br />
connection point (Fig. 2/2) and turn it until it clicks into<br />
place.<br />
2. Push the handle (Fig. 3/1) into the upper end of the<br />
telescopic tube (Fig. 3/2).<br />
3. Push the floor nozzle (Fig. 3/3) onto the lower end of the<br />
telescopic tube (Fig. 3/4).<br />
3<br />
NOTE:<br />
It may be necessary to push a bit har<strong>de</strong>r.<br />
2<br />
Fig.3<br />
24
2 Unpacking and connecting<br />
Fig.4<br />
2.3 Using other nozzles<br />
(accessories)<br />
1<br />
1<br />
1 b<br />
a<br />
2<br />
2<br />
3<br />
3<br />
Fig.5<br />
4. Adjust the length of the telescopic tube. To do this,<br />
press the telescopic tube lock (Fig. 4/1) forwards<br />
(Fig. 4/a). Then pull the telescopic tube by the handle<br />
(Fig. 1/1) to the <strong>de</strong>sired length (Fig. 4/b). To lock it,<br />
release the telescopic tube lock when you let go. You<br />
will hear an audible click.<br />
Your cylin<strong>de</strong>r vacuum cleaner is now ready to use.<br />
Together with the floor nozzle just installed, you can<br />
expand the range of functions of your cylin<strong>de</strong>r vacuum<br />
cleaner with other nozzles.<br />
• Accessories in the scope of <strong>de</strong>livery inclu<strong>de</strong> the<br />
crevice nozzle and the 2 in 1 combi-nozzle. They can be<br />
secured to the accessories mount (Fig. 5/1).<br />
- Crevice nozzle (Fig. 5/2)<br />
Use this to vacuum dust from hard to reach places.<br />
- 2-in-1 combi-nozzle (Fig. 6/1) to be used as:<br />
Furniture brush (Fig. 6/1)<br />
Use this to vacuum dust off objects that have<br />
sensitive surfaces (e.g. cupboards, doors).<br />
Upholstery nozzle (Fig. 6/3)<br />
By simply pushing off the brush attachment (Fig. 6/2)<br />
you can turn the 2 in 1 combi-nozzle into an<br />
upholstery nozzle (Fig. 6/3). Use this to clean soft,<br />
scratch-resistant surfaces (e.g. upholstered<br />
furniture).<br />
G<br />
Fig.6<br />
Fig.7<br />
Fig.8<br />
• Also available as an option are the following:<br />
- Turbo brush (Fig. 7)<br />
This has a rotating brush head and is therefore most<br />
suitable for <strong>de</strong>ep-cleaning carpets. Brushing also<br />
causes the carpet pile to straighten up.<br />
NOTE:<br />
When using the turbo brush, a loud noise can occur as a<br />
result of the high speed of the brush. This is normal.<br />
- Parquet brush (Fig. 8)<br />
This is equipped with long bristles and is used for<br />
vacuuming particularly sensitive surfaces (e.g.<br />
parquet, laminate flooring).<br />
WARNING:<br />
Only assemble the nozzles if the plug has been removed<br />
from the socket. The cylin<strong>de</strong>r vacuum cleaner could be<br />
switched on by acci<strong>de</strong>nt.<br />
25
3 Operating<br />
1<br />
Proceed as follows to attach the nozzles:<br />
1. Switch the appliance off and pull the plug out of the<br />
socket.<br />
2. Remove the nozzle from the telescopic tube (Fig. 9/1).<br />
3. Push the <strong>de</strong>sired nozzle onto the lower end of the<br />
telescopic tube (Fig. 9).<br />
Fig.9<br />
ATTENTION:<br />
If you use the cylin<strong>de</strong>r vacuum cleaner without attached<br />
nozzles, there is a greater risk of acci<strong>de</strong>ntly vacuuming<br />
up objects.<br />
4. As illustrated, secure the nozzles no longer required<br />
onto the accessories mount, as far as this is possible.<br />
- Push the 2-in-1 combi-nozzle into the accessories<br />
mount (Fig. 10/A).<br />
- Push the crevice nozzle onto the accessories mount<br />
and attach it so it clicks audibly and noticeably into<br />
place (Fig. 10/B).<br />
5. Keep the other nozzles safe and inaccessible to<br />
children.<br />
A<br />
B<br />
Fig.10<br />
3 Operating<br />
3.1 Vacuuming<br />
WARNING:<br />
Check the cylin<strong>de</strong>r vacuum cleaner and the power cable<br />
before each use. A damaged appliance must never be<br />
used. There is a risk of injury.<br />
ATTENTION:<br />
Only use the cylin<strong>de</strong>r vacuum cleaner if all filters are<br />
correctly in place and once you have ensured that no<br />
openings are blocked The filters must not be damaged<br />
and must be dry. Non-compliance can damage the<br />
cylin<strong>de</strong>r vacuum cleaner.<br />
NOTE:<br />
The cylin<strong>de</strong>r vacuum cleaner has an overheating<br />
protection <strong>de</strong>vice. It automatically switches off if it is<br />
overheated (e.g. from blocked nozzles or if the dust<br />
container is too full). If this happens, then turn off the<br />
cylin<strong>de</strong>r vacuum cleaner and remove the plug. Remove<br />
the cause of overheating. Wait approx. 45 minutes. Once<br />
the cylin<strong>de</strong>r vacuum cleaner has cooled down you can<br />
switch it on again.<br />
26
3 Operating<br />
1. Push on the <strong>de</strong>sired nozzle, Chapter 2.3, "Using other<br />
nozzles (accessories)".<br />
2. Pull the cable holding the plug (Fig. 1/12) until the<br />
yellow mark (Fig. 11/1) is reached.<br />
1<br />
2<br />
Fig.11<br />
WARNING:<br />
If the red mark (Fig. 11/2) is visible, then retract the cable<br />
again until it is no longer visible, Chapter 3.2,<br />
"Switching off and retracting the power cable". Otherwise<br />
the cable can break off. There is a risk of electric shock.<br />
G<br />
3. Switch on the cylin<strong>de</strong>r vacuum cleaner using the on/off<br />
switch (Fig. 12/1).<br />
1<br />
Fig.12<br />
4. Adjust the carpet/hard floor switch (Fig. 1/17)<br />
<strong>de</strong>pending on the type of flooring:<br />
A<br />
B<br />
- Hard floor (Fig. 13/A)<br />
Laminate flooring, tiles, PVC flooring, etc.<br />
- Carpet (Fig. 13/B)<br />
Long and short pile carpets, runners, etc.<br />
1<br />
Fig.13<br />
5. To vacuum, pull the cylin<strong>de</strong>r vacuum cleaner behind<br />
you like a sledge. When vacuuming, observe the<br />
corresponding recommendations of the flooring<br />
manufacturer.<br />
Fig.14<br />
NOTE:<br />
You can quickly reduce the suction power with the<br />
secondary air controller (Fig. 14/1), e.g. to release<br />
curtains that have been sucked in.<br />
27
3 Operating<br />
3.2 Switching off and<br />
retracting the power<br />
cable<br />
1<br />
1. Switch off the cylin<strong>de</strong>r vacuum cleaner using the on/off<br />
switch (Fig. 15/2) and pull the plug out of the socket.<br />
2. Take the plug in your hand and hold it firmly.<br />
WARNING:<br />
The power cable can whip around when being pulled in,<br />
it can also trip you or somebody else up or knock down<br />
objects.<br />
2<br />
3. Press the cable retract button (Fig. 15/1) to pull in the<br />
power cable. Gui<strong>de</strong> the last part with the plug by hand.<br />
Fig.15<br />
3.3 Storage • For storage or during work breaks, you can use the<br />
parking hook mount (Fig. 16/1) to hook the parking hook<br />
(Fig. 16/2) onto the floor nozzle (Fig. 16).<br />
2<br />
1<br />
WARNING:<br />
If you leave your work area, switch off the appliance and<br />
observe the instructions un<strong>de</strong>r Chapter 3.2, "Switching<br />
off and retracting the power cable". This will help avoid<br />
acci<strong>de</strong>nts.<br />
Fig.16<br />
ATTENTION:<br />
Never position the appliance directly against heat<br />
sources (e.g. heating, oven). Avoid direct sunlight. Heat<br />
can damage the appliance.<br />
• If you want to store the appliance for a longer period of<br />
time, empty the dust container and clean it as well as the<br />
filters. Store the appliance in a cool, dry room.<br />
28
3 Operating<br />
3.4 Emptying the dust<br />
container<br />
• Empty the dust container at the latest when the amount<br />
of dust vacuumed into the dust container reaches the MAX<br />
mark (Fig. 17/1) or when the suction power drops.<br />
1<br />
ATTENTION:<br />
Before you empty the dust container, switch off the<br />
appliance and observe the instructions un<strong>de</strong>r Chapter<br />
3.2, "Switching off and retracting the power cable". This<br />
is how you will prevent dust from <strong>de</strong>stroying the<br />
appliance.<br />
G<br />
2<br />
Fig.17<br />
1. Pull the release button back (Fig. 18/1) and press the<br />
remove key (Fig. 18/2).<br />
1<br />
Fig.18<br />
2. Lift the dust container (Fig. 19/1) forwards out of the<br />
cylin<strong>de</strong>r vacuum cleaner.<br />
1<br />
1<br />
Fig.19<br />
2<br />
Fig.20<br />
3. When emptying the dust container, hold it low over a<br />
dustbin.<br />
4. Press the open button (Fig. 20/1). The base (Fig. 20/2)<br />
opens and the dust runs into the dustbin.<br />
5. Carefully knock the remaining dust loose.<br />
6. Close the base.<br />
7. Place the dust container onto the cylin<strong>de</strong>r vacuum<br />
cleaner. Press the dust container firmly until it clicks into<br />
place audibly.<br />
29
4 Filters<br />
4 Filters<br />
2<br />
1<br />
Fig.21<br />
The cylin<strong>de</strong>r vacuum cleaner has the following filters:<br />
- Laminar pre-filter (Fig. 21/1)<br />
Is used to filter out the fine dust particles.<br />
Clean: every 2 months<br />
- Hygienic blow-out filter (Fig. 21/2)<br />
Filters out the fine particles from the blow-out air.<br />
Replace: every 6 months<br />
• The filters can become blocked after some time and can<br />
thereby reduce the suction power. It is therefore important<br />
that the abovementioned intervals are adhered to.<br />
If you <strong>de</strong>termine that a filter is damaged then replace it<br />
immediately.<br />
4.1 Clean laminar pre-filter 1. Switch the appliance off and observe the instructions<br />
un<strong>de</strong>r Chapter 3.2, "Switching off and retracting the<br />
power cable".<br />
1<br />
2. Remove the dust container, Chapter 3.4, "Emptying<br />
the dust container", Steps 1 - 2.<br />
2<br />
3. Turn the dust container cover anti-clockwise until Mark<br />
1 (Fig. 22/1) stands vertically on the dust container<br />
(Fig. 22/2).<br />
Fig.22 4. Now lift off the dust container cover.<br />
1<br />
5. Pull the laminar pre-filter (Fig. 23/1) up and out.<br />
6. For a rough clean, hold the laminar pre-filter over a<br />
dustbin and then knock it gently.<br />
ATTENTION:<br />
The laminar pre-filter is not suitable for the dishwasher.<br />
Fig.23<br />
NOTE:<br />
If the laminar pre-filter is extremely dirty, rinse it<br />
thoroughly with a shower head (Fig. 24). Do not use any<br />
brushes for this.<br />
Then leave the filter to dry (approx. 15 hours at room<br />
temperature). Only use it again when it is completely dry.<br />
If the dirt cannot be removed insert a new laminar prefilter<br />
(or<strong>de</strong>r number, Chapter 8, "Spare parts").<br />
Fig.24<br />
30
4 Filters<br />
1<br />
2<br />
Fig.25<br />
7. Insert the dry laminar pre-filter back into the dust<br />
container.<br />
8. Put the dust container cover back onto the dust<br />
container so that Mark 1 (Fig. 25/1) stands vertically<br />
over the mark on the dust container (Fig. 25/2).<br />
9. Turn the dust container cover clockwise until Mark 2<br />
(Fig. 26/1) stands vertically over the mark on the dust<br />
container (Fig. 26/2).<br />
10. Place the dust container onto the cylin<strong>de</strong>r vacuum<br />
cleaner. Press the dust container firmly until it clicks into<br />
place audibly.<br />
G<br />
2<br />
1<br />
Fig.26<br />
4.2 Clean filter screen<br />
1<br />
1. Switch the appliance off and observe the instructions<br />
un<strong>de</strong>r Chapter 3.2, "Switching off and retracting the<br />
power cable".<br />
2. Remove and empty the dust container, Chapter 3.4,<br />
"Emptying the dust container".<br />
3. Remove the laminar pre-filter, Chapter 4.1, "Clean<br />
laminar pre-filter".<br />
4. Remove the dust separation unit (Fig. 27/1) from the<br />
Fig.27 dust container.<br />
5. Hold the dust separation unit over a dustbin, turn the<br />
1<br />
upper funnel (Fig. 27/1) anti-clockwise until it audibly<br />
unlocks and lift it off.<br />
Fig.28<br />
1<br />
2<br />
6. Remove the filter screen (Fig. 29/1). To do this, turn the<br />
filter screen until it is in the right position for removal<br />
(Fig. 29/2).<br />
7. For a rough clean, hold the filter screen over a dustbin.<br />
Then knock it gently.<br />
Fig.29<br />
31
4 Filters<br />
NOTE:<br />
If the filter screen is extremely dirty, rinse it thoroughly<br />
with a shower head. Do not use any brushes for this.<br />
Then leave the filter screen to dry. Only re-insert it once it<br />
is completely dry.<br />
8. Re-insert the filter screen funnel again and turn it firmly<br />
until it audibly clicks into place.<br />
9. Insert the dust separation unit back into the dust<br />
container.<br />
10. Continue to proceed as <strong>de</strong>scribed in Chapter 4.1,<br />
"Clean laminar pre-filter" steps 9 - 12.<br />
4.3 Replacing the hygienic<br />
blow-out filter<br />
1<br />
Fig.30<br />
1. Switch the appliance off and observe the instructions<br />
un<strong>de</strong>r Chapter 3.2, "Switching off and retracting the<br />
power cable".<br />
2. Remove the dust container, Chapter 3.4, "Emptying<br />
the dust container".<br />
3. Remove the blow-out filter hol<strong>de</strong>r (Fig. 30/1).<br />
NOTE:<br />
The hygienic blow-out filter is not washable.<br />
If it is only slightly dirty, it can also suffice to knock the<br />
blow-out filter over a dustbin However, we recommend<br />
you replace the filter regularly.<br />
4. Then re-insert the new blow-out filter hol<strong>de</strong>r with the<br />
blow-out filter (or<strong>de</strong>r number, Chapter 8, "Spare<br />
parts").<br />
32
5 Correcting malfunctions<br />
5 Correcting malfunctions<br />
Before sending the appliance to Royal ® Appliance Customer Services, use the following table to<br />
check whether you can correct the malfunctions yourself.<br />
WARNING:<br />
Before starting to troubleshoot, switch the appliance off and pull out the mains plug. Never use a<br />
<strong>de</strong>fective appliance.<br />
G<br />
Malfunction Possible cause Solution<br />
Appliance does<br />
not work<br />
Plug is not plugged in or the<br />
appliance is not switched on.<br />
Plug in plug and switch on appliance,<br />
Chapter 3.1, "Vacuuming".<br />
Socket does not carry any<br />
current.<br />
Test the cylin<strong>de</strong>r vacuum cleaner at another<br />
socket which you are sure carries current.<br />
Power cable is damaged. Have the cable replaced by Royal ®<br />
Appliance Customer Services, address,<br />
Page 35, "Warranty".<br />
Appliance does Dust container is full or blocked. Empty/clean dust container.<br />
not suck up any<br />
dirt<br />
Filter is dirty. Clean the corresponding filter, Chapter 4,<br />
"Filters".<br />
Appliance makes<br />
a strange noise<br />
Nozzle, telescopic tube or suction<br />
hose are blocked.<br />
Sucked in particles are blocking<br />
the air-way.<br />
Remove the blockage. If necessary, use a<br />
long woo<strong>de</strong>n rod for this (e.g. a broom<br />
handle).<br />
Remove the particles. If necessary, use a<br />
long woo<strong>de</strong>n rod for this (e.g. a broom<br />
handle).<br />
6 Cleaning<br />
WARNING:<br />
Before you clean the appliance, switch off the appliance and remove the mains plug.<br />
6.1 Cleaning the housing<br />
Only clean the housing with a slightly damp cloth. Do not use any cleaning agent, scouring agent or<br />
alcohol as these can damage the housing.<br />
6.2 Cleaning the filters<br />
To clean the filters, Chapter 4, "Filters".<br />
33
7 Waste disposal<br />
7 Waste disposal<br />
The filters used for the appliance are ma<strong>de</strong> from environmentally compatible materials and can be<br />
disposed of with the domestic waste.<br />
When the service life of the appliance has expired, in particular if malfunctions occur, make<br />
the finished appliance unusable by removing the mains plug from the socket and<br />
disconnecting the power cable. Dispose of the appliance according to the environmental<br />
provisions applicable in your country. Electrical waste must not be disposed of with<br />
domestic waste. Contact your municipal authority or your <strong>de</strong>aler for any advice regarding<br />
recycling.<br />
8 Spare parts<br />
8.1 List of wear parts<br />
Item No. Description Contents<br />
2887001 Laminar pre-filter 1 Laminar pre-filter<br />
2887002 Hygienic blow-out filter 1 hygienic blow-out filters<br />
8.2 Supply sources<br />
Accessory parts and spare parts can be reor<strong>de</strong>red Page 197, "Royal Appliance Int. GmbH<br />
International Service".<br />
34
9 Warranty<br />
9 Warranty<br />
9.1 Warranty conditions<br />
We offer a warranty of 24 months from the date of purchase for the appliances we sell.<br />
Within this warranty period, we will remove all <strong>de</strong>fects free of charge that are due to material or<br />
manufacturing faults, either by repair work or replacing the appliance or accessories, at our<br />
discretion (damage to accessory parts does not automatically lead to the entire appliance being<br />
replaced). The warranty does not cover damage due to improper use (operating with the wrong<br />
power type/voltage, connecting to unsuitable power sources, breakage, etc.), normal wear and<br />
<strong>de</strong>fects that only insignificantly affect the value or the ability of the appliance to be used.<br />
G<br />
The warranty is ma<strong>de</strong> null and void if any work is carried out by a site not authorized by us or if spare<br />
parts other than Royal ® Appliance spare parts are used. Wear parts are not inclu<strong>de</strong>d in the warranty<br />
and are therefore at the customer's expense!<br />
The warranty only comes into force if the purchase date is confirmed by a stamp and signature of<br />
the <strong>de</strong>aler on the warranty card or if a copy of the invoice is inclu<strong>de</strong>d with the appliance when it is<br />
sent in. Warranty work does not extend the warranty time nor does it constitute a claim for a new<br />
warranty!<br />
9.2 Making a warranty claim<br />
Send the appliance with an emptied dust container and a short <strong>de</strong>scription of the fault in block<br />
capitals. Write the comment "Regarding warranty" on the address label. Send it together with the<br />
warranty card or a copy of the invoice to the following address:<br />
Royal ® Appliance International GmbH<br />
Customer Service Dept.<br />
Itterpark 7-9<br />
40724 Hil<strong>de</strong>n<br />
Germany<br />
Tel.: 02103 / 20 07 10<br />
Fax: 02103 / 20 07 77<br />
www.dirt<strong>de</strong>vil.<strong>de</strong><br />
35
Royal Appliance Int. GmbH International Service<br />
o F o E o NL<br />
Royal Appliance Int. GmbH International Service<br />
Sona France<br />
21 rue Eugene Sue<br />
F-94700 Maisons Alfort<br />
Tel: +33 1 43 78 00 42<br />
Fax: +33 1 43 78 01 38<br />
Zmugg Elektronik Service<br />
und Vertriebges. M.b.H.<br />
Fabriksgasse 27<br />
A - 8020 Graz<br />
Tel: +43 316 772 120<br />
Fax: +43 316 772 120 10<br />
Royal Appliance Espana, SL<br />
Royal, Dirt Devil, Stellar<br />
C/ Jazmin, 66 - 3°<br />
E-28033 Madrid<br />
Tel: +34 902 430 663<br />
o A o CZ o SK o PL<br />
SERVICE-COOP<br />
Hegedus Gyula u. 35-37<br />
H-1136 Budapest<br />
Tel: +36 1 349 5972<br />
Fax: +36 1 350 1167<br />
Le Cygne electronic service<br />
spol. s r.o.<br />
Jablonecká 722/8<br />
190 00 Praha 9<br />
Tel: +420 286883940<br />
Fax: +420 286885064<br />
o H o DK o SK<br />
o SLO<br />
Strojinc Ciril s.p.<br />
Koseskega ul. 1a<br />
SLO - 1000 LJUBLJANA<br />
Tel: +386 -1- 422 8489<br />
Scandia Serviceteknik A/S<br />
He<strong>de</strong>ager 5<br />
DK - 2605 Brondby<br />
Tel: +45 432 02710<br />
Fax: +45 432 02719<br />
o P<br />
Portugies<br />
Famatecnica<br />
Rua Antonio Enes No. 20<br />
1050-025 Lisboa<br />
Tel: +351 213 14 3510<br />
Z.E.S. Goes B.V.<br />
T.a.v. afd. Service<br />
Pearyweg 1<br />
NL-4462 GT Goes<br />
Tel: +31 0113 240700<br />
Fax: +31 0113 240750<br />
Mail: dirt<strong>de</strong>vil@zesgoes.nl<br />
SERV-SERWIS Sp. z o.o.<br />
ul. Poniatowskiego 4/1<br />
45-049 Opole<br />
Tel: +77 453 61-39<br />
Fax: +77 453 61-38<br />
Mail: adabrowski<br />
@serv-serwis.pl<br />
EURO ELECTRONIC SERVIS<br />
SK s. r. o.<br />
Stefanikova 736<br />
908 73 Velke Levare<br />
Tel: +42 134 774 8051<br />
Mail: eessk@stonline.sk<br />
Garantiekarte<br />
Warranty Card<br />
Card <strong>de</strong> garantie<br />
Garantiekaart<br />
Certificado <strong>de</strong> garantía<br />
Certificado <strong>de</strong> garantia<br />
Karta gwarancyjna<br />
Garantikort<br />
Záruční list<br />
Trimaxx<br />
Garanclalevěl<br />
Záručný list<br />
Garancijski list<br />
Stempel und Unterschrift <strong>de</strong>s Händlers / Stamp and sign of <strong>de</strong>aler / Cachet et signatur du ven<strong>de</strong>ur / Stempel en handtekening van <strong>de</strong> han<strong>de</strong>laar / Sello y firma<br />
<strong>de</strong>l distribuidor / Carimbo e assinatura do reven<strong>de</strong>dor / Stempel i podpis sprzedającego / Selgers stempel og un<strong>de</strong>rskrift / Razítko a podpis obchodníka /<br />
A kereskedő pecsétje és aláírása / Pečiatka a podpis predajcu / Žig i podpis trgovca<br />
Fehlerbeschreibung / Description of fault / Description <strong>de</strong> l’erreur / Beschrijving van <strong>de</strong> fouten / Descripción <strong>de</strong>l error<br />
Descrição do problema / Opis usterki / Feilbeskrivelse / Popis závad / Hiba leírása / Popis chyby / Opis napak<br />
Kaufdatum / Date of purchase / Date d´achat / Koopdatum / Fecha <strong>de</strong> compra / Data da compra Data zakupu /<br />
Kjøpsdato / Datum koupě / Vásárlás napja / Dátum kúpy / Datum kupa