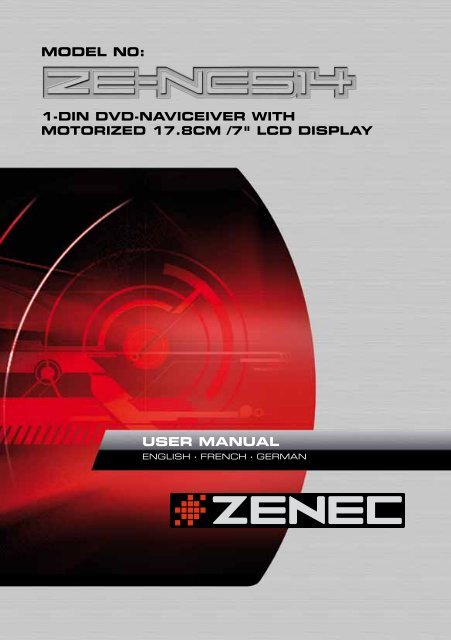
MODEL N0: USER MANUAL - Zenec
MODEL N0: USER MANUAL - Zenec
MODEL N0: USER MANUAL - Zenec

Erfolgreiche ePaper selbst erstellen
Machen Sie aus Ihren PDF Publikationen ein blätterbares Flipbook mit unserer einzigartigen Google optimierten e-Paper Software.
<strong>MODEL</strong> <strong>N0</strong>:<br />
1-DIN DVD-NAVICEIVER WITH<br />
MOTORIZED 17.8cm /7" LCD DISPLAY<br />
<strong>USER</strong> <strong>MANUAL</strong><br />
English · French · German
CONTENTS<br />
BEFORE USING<br />
START CODE ............................................................................................................................................................. 06<br />
FRONT PANEL ........................................................................................................................................................... 06<br />
AUXILIARY LCD ..........................................................................................................................................................07<br />
REMOTE CONTROL .................................................................................................................................................. 08<br />
BASIC OPERATIONS<br />
POWER ON/OFF .........................................................................................................................................................10<br />
NAV .............................................................................................................................................................................10<br />
VOLUME ADJUSTMENT ........................................................................................................................................... 10<br />
OPEN SOURCE MENU ..............................................................................................................................................10<br />
PLAYING SOURCE SELECTION ................................................................................................................................10<br />
DISPLAY SYSTEM TIME ............................................................................................................................................11<br />
USING THE TFT MONITOR .......................................................................................................................................11<br />
RESET THE UNIT .......................................................................................................................................................11<br />
RADIO MODE<br />
SELECT RADIO AS PLAYING SOURCE ....................................................................................................................12<br />
SELECT ONE RADIO BAND ..................................................................................................................................... 12<br />
AUTO TUNING ........................................................................................................................................................... 12<br />
<strong>MANUAL</strong> TUNING ......................................................................................................................................................12<br />
AUTO SAVE ...............................................................................................................................................................12<br />
<strong>MANUAL</strong> SAVE ...........................................................................................................................................................13<br />
PREVIEW SCAN .........................................................................................................................................................13<br />
RECALL THE STORED STATIONS ............................................................................................................................ 13<br />
LOCAL SEEKING ....................................................................................................................................................... 13<br />
RDS OPERATIONS<br />
AF FUNCTION ........................................................................................................................................................... 14<br />
TA FUNCTION .............................................................................................................................................................14<br />
PTY FUNCTION ..........................................................................................................................................................15<br />
PROGRAM SERVICE (PS) ......................................................................................................................................... 15<br />
CT (CLOCK TIME) .......................................................................................................................................................15<br />
RT (RADIO TEXT) .......................................................................................................................................................15<br />
DISC MODE<br />
INSERT A DISC ...........................................................................................................................................................16<br />
EJECT THE DISC ........................................................................................................................................................16<br />
TOUCH SCREEN CONTROLS ...................................................................................................................................16<br />
ONSCREEN CONTROL BUTTONS ..........................................................................................................................17<br />
SUSPEND PLAYBACK ...............................................................................................................................................18<br />
STOP PLAYBACK ......................................................................................................................................................18<br />
DISPLAY FILE LIST .....................................................................................................................................................18<br />
FAST PLAYBACK ....................................................................................................................................................... 18<br />
PREVIOUS/NEXT........................................................................................................................................................18<br />
CHANGE FOLDER ......................................................................................................................................................18<br />
REPEAT PLAYBACK ...................................................................................................................................................19<br />
REPEAT A-B ..............................................................................................................................................................19<br />
RANDOM PLAYBACK ............................................................................................................................................... 19<br />
INTRO PLAYBACK .....................................................................................................................................................20<br />
DIRECT SEARCH .......................................................................................................................................................20<br />
GOTO SEARCH ..........................................................................................................................................................20<br />
DVD MENU AND TITLE ..............................................................................................................................................21<br />
SELECT SUBTITLE LANGUAGE ................................................................................................................................21<br />
SELECT MULTI-ANGLE VIEWS .................................................................................................................................21<br />
SELECT AUDIO CHANNEL ........................................................................................................................................21<br />
PBC FUNCTION ........................................................................................................................................................21<br />
ZOOM IN/OUT ............................................................................................................................................................22<br />
ROTATE PICTURE ......................................................................................................................................................22<br />
PLAYBACK INFORMATION ........................................................................................................................................22<br />
2
ZE-NC514<br />
USB MODE<br />
SELECT USB AS PLAYING SOURCE .......................................................................................................................24<br />
TOUCH SCREEN CONTROLS ...................................................................................................................................24<br />
ONSCREEN CONTROL BUTTONS ..........................................................................................................................24<br />
SUSPEND PLAYBACK ...............................................................................................................................................24<br />
STOP PLAYBACK .......................................................................................................................................................24<br />
DISPLAY FILE LIST. ....................................................................................................................................................24<br />
FAST PLAYBACK ........................................................................................................................................................24<br />
PREVIOUS/NEXT........................................................................................................................................................24<br />
CHANGE FOLDER ......................................................................................................................................................25<br />
REPEAT PLAYBACK ..................................................................................................................................................25<br />
RANDOM PLAYBACK ................................................................................................................................................25<br />
INTRO PLAYBACK ....................................................................................................................................................25<br />
DIRECT SEARCH .......................................................................................................................................................25<br />
GOTO SEARCH ..........................................................................................................................................................25<br />
ZOOM IN/OUT. ...........................................................................................................................................................25<br />
ROTATE PICTURE .....................................................................................................................................................25<br />
PLAYBACK INFORMATION ........................................................................................................................................25<br />
IPOD MODE<br />
SELECT IPOD AS PLAYING SOURCE .....................................................................................................................26<br />
MUSIC PLAYBACK .....................................................................................................................................................26<br />
PHOTO PLAYBACK ....................................................................................................................................................26<br />
VIDEO PLAYBACK ......................................................................................................................................................27<br />
FAST PLAYBACK ........................................................................................................................................................27<br />
DIRECT SEARCH .......................................................................................................................................................27<br />
OTHER MODES<br />
AV-IN ...........................................................................................................................................................................29<br />
CAMERA .....................................................................................................................................................................29<br />
NAV .............................................................................................................................................................................29<br />
SETUP<br />
SETUP PROCEDURES ............................................................................................................................................. 30<br />
GENERAL ....................................................................................................................................................................31<br />
LANGUAGE .................................................................................................................................................................31<br />
AUDIO .........................................................................................................................................................................32<br />
RDS .............................................................................................................................................................................32<br />
RATING ......................................................................................................................................................................32<br />
HARDWARE .............................................................................................................................................................. 34<br />
P.VOL .......................................................................................................................................................................... 34<br />
METHOD OF CHANGING PASSWORT .................................................................................................................... 35<br />
TS CAL. ..................................................................................................................................................................... 35<br />
EQ .............................................................................................................................................................................. 36<br />
TROUBLESHOOTING .............................................................................................................................................. 37<br />
DEVICE CONNECTION<br />
NOTES OF CONNECTION ....................................................................................................................................... 39<br />
CONTROL CABLES ................................................................................................................................................... 40<br />
PARKING BRAKE CABLE CONNECTIONS ............................................................................................................. 41<br />
REVERSE DRIVE CABLE CONNECTIONS ................................................................................................................41<br />
INSTALLATION AND UNINSTALL<br />
NOTES OF INSTALLATION .......................................................................................................................................42<br />
UNIT INSTALLATION ..................................................................................................................................................42<br />
TRIM RING INSTALLATION ...................................................................................................................................... 44<br />
UNINSTALL ................................................................................................................................................................ 44<br />
SPECIFICATIONS ...................................................................................................................................................... 45<br />
APPENDIX<br />
REGION CODE ...........................................................................................................................................................47<br />
CAUTIONS OF DISC USING .....................................................................................................................................47<br />
WIRING CONNECTIONS ........................................................................................................................................... 48<br />
WARRANTY .............................................................................................................................................................. 49<br />
3
WARNINGS<br />
1. Only connect this unit to a 12V DC power supply with<br />
negative grounding.<br />
2. Never install this unit where the operation for safe driving is<br />
restrained.<br />
3. Never use the video display function in the front when<br />
driving to prevent the violation of laws & regulations and<br />
also to reduce the risk of traffic accident, except when<br />
using the rear view video camera.<br />
4. Never expose this unit, amplifier, speakers to moisture or<br />
water to prevent electronic sparks or fires.<br />
5. Please don‘t change the fuse in the power cord without<br />
professional guidance, improper fuse may cause damage<br />
to this unit or may even cause fire.<br />
6. Please power off this unit at once and send it back to the<br />
after-sales service center or the dealer/distributor you<br />
purchased from if one of the following symptoms is found:<br />
(a) No audio output;<br />
(b) No image output;<br />
(c) Water or other obstacle entered the unit;<br />
(d) Smoke;<br />
(e) Peculiar smell.<br />
7. To ensure safe driving, please adjust the volume to a safe<br />
and comfort level in case of emergency situations.<br />
4
ZE-NC514<br />
PRECAUTIONS<br />
1. Never disassemble or a djust the unit without any professional guide. For details,<br />
please consult an authorized ZENEC dealer for inquiry.<br />
2. lf the front panel or TFT monitor is squalid, please use a clean silicone cloth and neutral<br />
detergent to wipe off the spot. Using a rough cloth and non-neutral detergent such as<br />
alcohol for cleaning may result in scratching or discoloration.<br />
3. lf any abnormal behavior of the unit is found, please refer to trouble shooting guide of<br />
this manual. lf no relevant information is found, please press the [RESET] key on the<br />
front panel to resume factory default.<br />
4. lf you have parked the car in hot or cold weather for a long time, please wait until the<br />
temperature in the car becomes normal before operating the unit.<br />
5. Using in-car heater in low temperature environment may result in condensation inside the<br />
unit. DO NOT use the unit in this situation, eject the disc and wipe off the condensation<br />
on the disc. lf the unit still doesn't work after a few hours, please contact with after-sales<br />
service center.<br />
6. No fierce mechanical impact to the LCD monitor when it is in open position for preventing<br />
the damage to any mechanisms inside.<br />
7. To prevent damage to the screen, avoid touching it with sharp objects.<br />
8. The monitor employs auto motorizing mechanism, please don't push, pull, or swivel the<br />
monitor manually to prevent damage to the core mechanism.<br />
9. To provide a clear demonstration and an alternative for easy understanding to the<br />
operation of this unit, graphic illustrations are used. However, these illustrations may be<br />
different from the actual images displayed on the screen.<br />
10. During operating the unit, " " will display if the current operation is not available<br />
or illegal.<br />
11. Operate the unit correctly according to this manual to prevent unnecessary<br />
problems. The guarantee won't be valid if the problem is caused by<br />
inappropriate operation.<br />
DECLARATION<br />
This product incorporates copyright protection technology that is protected by U.S patents<br />
and other intellectual property rights. Use of this copyright protection technology must be<br />
authorized by Macrovision, and is intended for home and other limited viewing uses only<br />
unless otherwise authorized by Macrovision.<br />
Reverse engineering or disassembly is prohibited.<br />
5
BEFORE USING<br />
START CODE: 012345 (Description: Page 35)<br />
FRONT PANEL<br />
AV-IN<br />
1. [WIDE] Key: Change display mode<br />
2. [ ] Key: Next/Move cursor to the right<br />
3. [ ] Key: Previous/Move cursor to the left<br />
4. [NAV] Key: Enter/exit NAV source<br />
5. [VOL] Knob: Adjust volume/active/deactive mute function<br />
6. [Reset] Button: Reset the unit<br />
7. [ /SRC] Key: Unit power/Change operating mode/Open source menu<br />
8. AV-IN jack<br />
9. USB Slot<br />
14<br />
6
ZE-NC514<br />
BEFORE USING<br />
10. [ ] Key: Eject disc<br />
11. [OPEN/CLOSE] Key: Open/Close the TFT monitor<br />
12. [AS/TILT+] Key: Auto save/Preview scan/Increase display angle<br />
13. [BAND/TILT-] Key: Change radio band/Decrease display angle<br />
14. AUXILIARY LCD<br />
1. Disc indicator<br />
■ Light up when one disc is inside; Light off when no disc is inside.<br />
2. Repeat mode indicator<br />
■ Light up when repeat mode is on; Light off when repeat mode is off.<br />
3. Main display area<br />
■ Display characters, playback time, tuning frequency, clock and other text information.<br />
4. Radio status indicators<br />
■ Stereo indicator lights up when the radio broadcast is in stereo. Local indicator lights up<br />
when the local seeking function is activated.<br />
5. RDS function indicators<br />
■ AF: Alternative Frequency<br />
■ PTY: Program Type<br />
■ TA: Traffic Announcement<br />
■ TP: Traffic Program<br />
NOTES:<br />
■ Most information can be displayed on this LCD only when the TFT monitor is closed.<br />
■ Only English font support on this LCD.<br />
7
BEFORE USING<br />
<br />
REMOTE CONTROL <br />
lntroduce of key functions <br />
<br />
<br />
<br />
<br />
<br />
<br />
<br />
<br />
<br />
<br />
<br />
<br />
<br />
<br />
<br />
<br />
<br />
<br />
<br />
<br />
<br />
<br />
<br />
<br />
<br />
<br />
<br />
<br />
<br />
<br />
<br />
<br />
<br />
<br />
<br />
NOTE: <br />
■ Your remote control may differ<br />
slightly from the one pictured <br />
here. The above diagram is for<br />
illustrative purpose only.<br />
<br />
<br />
<br />
<br />
1. [SRC] Key: Select playing source<br />
2 [EJECT] Key: Eject disc<br />
3. [MENU] Key: DVD MENU/PBC<br />
<br />
4. [TITLE] Key: DVD TITLE<br />
<br />
5. [DISP] Key: Display information<br />
<br />
6. [ANGLE] Key: Select view angle<br />
<br />
7. [WIDE] Key: Change display mode<br />
8. [OPEN/CLOSE] Key: Open/Close<br />
the TFT monitor <br />
9. [PRESET /] Key: Select preset<br />
radio station <br />
10. [] Key: Fast forward/Move cursor up<br />
11. [/BAND] Key: Select radio band/<br />
stop playback<br />
12. [/ ] Key: Play/Pause/Enter<br />
<br />
13. [] Key: Auto search/Previous/Move <br />
cursor<br />
<br />
to the left<br />
<br />
14. [GOTO] Key: GOTO search<br />
15. [] Key: Fast reverse/Move cursor down<br />
16. [0-9] Key: Numeric keys<br />
<br />
17. [MUTE] Key: Mute audio outputs<br />
<br />
18. [POWER] Key: Unit power<br />
<br />
19. [AUDIO] Key: Select DVD dialogue<br />
language <br />
20. [SUBTITLE] Key: Select DVD subtitle<br />
language <br />
21. [REPT A-B] Key: A-B repeat<br />
22. [REPT] Key: Repeat playback <br />
<br />
23. [TILT ] Key: Adjusting display tilting angle<br />
<br />
24. [VOL+/-] Key: Adjust volume<br />
25. [SCN] Key: Scan playback<br />
26. [RDM] Key: Random playback <br />
27. [] Key: Auto search/Next/Move cursor to<br />
<br />
the right<br />
<br />
28. [SEL] Key: (EQ) <br />
29. [ZOOM] Key: lmage zoom in/out<br />
30. [PIC] Key: lmage setting<br />
31. [SETUP] Key: Setup menu<br />
32. [CLEAR] Key: Clear information<br />
8
ZE-NC514<br />
BEFORE USING<br />
NOTES FOR REMOTE CONTROL USE<br />
1. Aim the remote control at the remote sensor on the unit.<br />
2. Remove the battery from the remote control or insert a battery insulator if the battery has<br />
not been used for a month or longer.<br />
3. DO NOT store the remote control under direct sunlight or in high temperature<br />
environment, or it may not function properly.<br />
4. The battery can work for 6 months under normal conditions. lf the remote control does<br />
not work, please change the battery.<br />
5. Use "button shaped" lithium battery "CR2025" (3 V) only.<br />
6. DO NOT recharge, disassemble, heat or expose the battery in fire.<br />
7. lnsert the battery in proper direction according to the (+) and (-) poles.<br />
8. Store the battery in a place where children cannot reach it to avoid the risk of accident.<br />
Uninstall Battery<br />
■ Slide out the battery compartment tray at the bottom on the back of the remote control.<br />
Install Battery<br />
■ Use button-shaped lithium battery "CR2025" (3V) only. Insert the battery to the battery<br />
tray with proper direction according to the (+) and (-) poles.<br />
PULL OUT<br />
PULL IN<br />
9
BASIC OPERATIONS<br />
POWER ON/OFF<br />
■ Press any key on the front panel or the [POWER] key on the remote control to turn on<br />
the power under standby mode. The unit goes back to the last status after power on.<br />
■ Press and hold the [SRC] key on the front panel or press the [POWER] key on the the<br />
remote control to turn off the power under work mode.<br />
NAV<br />
■ Press the [NAV] key on the front panel to enter or exit navigation source. The current<br />
audio channel will keep playing, except the navigation voice comes up when navigation<br />
source is active.<br />
VOLUME ADJUSTMENT<br />
■ Turn the volume knob on the front panel or press the [VOL] key on the remote control.<br />
■ The adjustable range of volume is 0 to 40.<br />
■ Press [VOL] key or mute key on remote to active or deactive [MUTE] function.<br />
NOTES:<br />
■ Doing the operation above again or adjusting volume wlll release muting.<br />
■ Mute icon blinks on the TFT during muting.<br />
OPEN SOURCE MENU<br />
■ Press the [SRC] key on the front panel or remote control or touch the top left corner of<br />
the screen to open the SOURCE MENU. Do the above operation again to return to the<br />
original source.<br />
PLAYING SOURCE SELECTION<br />
■ Open the SOURCE MENU, and then touch the source you desired or select one source<br />
by moving the cursor and then confirm.<br />
NOTES:<br />
■ Playing source selection means selecting work mode, such as DVD mode, Radio mode,<br />
Camera mode, etc.<br />
■ When some devices are not ready or connected, they cannot be selected.<br />
10
ZE-NC514<br />
BASIC OPERATIONS<br />
DISPLAY SYSTEM TIME<br />
■ Press and hold the [DISP] key on the front panel to switch the display information<br />
between system time and playing source when the TFT monitor is closed.<br />
USING THE TFT MONITOR<br />
Open/Close monitor<br />
■ Press the [OPEN/CLOSE] key on the front panel or remote control to push the display<br />
panel out or in.<br />
Change the monitor tilt angle<br />
■ Due to the inherent character of LCD panels, you will get different vision impressions<br />
when you watch it from different angles. The display angle of this unit can be changed;<br />
hence you can select the best angle where you can get the best vision impression.<br />
■ Press the [TILT] key on the display panel or the remote control to adjust the tilt angle one<br />
step at a time.<br />
■ Press and hold the [TILT] key on the display panel or the remote control to adjust the tilt<br />
angle continuously.<br />
Change aspect ratio<br />
■ Press the [WlDE] key on the display panel or remote control to adjust the aspect ratio.<br />
lmage setting<br />
1. Enter image setting mode<br />
■ Press the [PIC] key on the remote control.<br />
2. Select one item to adjust<br />
■ Press the []/[] keys on the remote control.<br />
3. Adjust the value<br />
■ Press the []/[] keys on the remote control.<br />
4. Exit image setting mode<br />
■ To exit image setting mode, repeat the first step or stop operation for some seconds.<br />
RESET THE UNIT<br />
■ lf the unit can not work correctly, you should reset the unit by pressing the [RESET]<br />
button on the front panel.<br />
11
RADIO MODE<br />
SELECT RADIO AS PLAYING SOURCE<br />
■ Open the SOURCE MENU and then touch the RADlO icon.<br />
SELECT ONE RADIO BAND<br />
■ Press the [BAND] key on the display panel or on the remote control or touch the<br />
[BAND] icon on the user interface to select one radio band among FM1, FM2, FM3,<br />
AM1 and AM2.<br />
AUTO TUNING<br />
■ Press the []/[] key on the display panel or on the remote control or touch the []/[]<br />
icon on the user interface to seek a higher/lower station. To stop searching, repeat the<br />
operation above or press other keys having radio functions.<br />
NOTE:<br />
■ When a station is received, searching stops and the station is played. If the unit<br />
receives a stereo broadcasting, the indicator light of stereo 'ST' on the TFT or on the<br />
LCD display will be lighted.<br />
<strong>MANUAL</strong> TUNING<br />
■ During manual tuning, the frequency will be changed in steps. Press the []/[] key on<br />
remote control or touch the []/[] icon on the user interface to tune in a higher/lower<br />
station.<br />
■ Touch the numeric keypad icon [S] and then touch the numeric buttons to input the<br />
radio station frequency numbers.<br />
AUTO SAVE<br />
■ Only stations with sufficient signal strength will be detected and stored in the memory.<br />
When the monitor is closed, press and hold the [AS/PS] key on the display panel.<br />
■ When the monitor is opened, touch the [AS] icon on the user interface.<br />
■ To stop auto save, press other keys having radio functions.<br />
NOTES:<br />
■ After auto save, the previous saved stations will be overwritten.<br />
■ The unit has 5 bands, such as FM1, FM2, FM3, AM1, AM2, and each band can store 6<br />
stations; hence the unit can store 30 stations in total.<br />
12
ZE-NC514<br />
RADIO MODE<br />
<strong>MANUAL</strong> SAVE<br />
When one expected radio station has been detected ...<br />
1. Press the [MEM] icon on the user interface and the preset menu will be opened.<br />
2. Press one preset button among P1~P6.<br />
3. lf you want to abort, press the [Exit] button.<br />
PREVIEW SCAN<br />
■ Preview scan searching is such a process that the searching pauses when a station is<br />
received and then played for 5–10 seconds. After being played, the unit continues the<br />
process until the whole band is detected.<br />
■ When the monitor is closed, press the [AS/PS] key on the display panel.<br />
■ When the monitor is opened, touch the [PS] icon on the user interface. To stop the<br />
process, press other keys having radio functions.<br />
RECALL THE STORED STATIONS<br />
■ Press one numeric key among 1 to 6 on the remote control or touch an onscreen<br />
station button to select the corresponding stored station.<br />
LOCAL SEEKING<br />
■ When LOCAL seeking is on, only those radio stations with strong radio signal could be<br />
received.<br />
■ To open or close LOCAL function, press and hold the [NAV] key on the front panel.<br />
NOTES:<br />
■ When the local radio station searching is on, the indicator light 'LOC' lights up; where as<br />
the light goes off.<br />
■ The number of radio stations that can be received will decrease after the local seeking<br />
mode is on.<br />
13
RDS OPERATIONS<br />
The unit provides basic functions of RDS, including Pl (Program ldentification), radio<br />
station name, RT (Radio Text), CT (Clock Time), AF (Alternative Frequency), TA (Traffic<br />
Announcement) and PTY (Program Type) selection.<br />
AF FUNCTION<br />
■ Alternative frequencies lists are used for the same program service and used in<br />
conjunction with the Pl code (Program ldentification code) to assist automatic tuning.<br />
Using this information, a radio can automatically search another station that is playing<br />
the same material. This is useful when the station you are listening to is fading out.<br />
■ To activate AF function, touch the [AF] button on the user interface.<br />
■ To cancel this function, do the operation above again.<br />
NOTE:<br />
■ During auto switching radio frequency, some interference may be heard. Turning off<br />
AF function can settle this issue at the expense of AF switching.<br />
TA FUNCTION<br />
■ The TA (Traffic Announcement flag) function lets the unit receive traffic announcements<br />
automatically no matter what media source is playing back. The TA function can be<br />
activated by a TP (Traffic Program) station broadcasting traffic information.<br />
■ When TA is activated and a traffic announcement is received, the current playing source<br />
will be overridden by the traffic announcement if the current radio band is FM and the<br />
'TA' indicator lights up, indicating that the unit is waiting for traffic announcements.<br />
■ The unit returns to the original source after the traffic announcement has ended.<br />
■ To activate TA function, touch the [TA] button on the user interface.<br />
■ To cancel this function, do the operation above again.<br />
14
ZE-NC514<br />
RDS OPERATIONS<br />
PTY FUNCTION<br />
■ PTY is the abbreviation for Program Type which is a code defining the type of program<br />
being broadcasted (e.g. News or Rock).<br />
■ Six PTY options will display on the screen. To view more PTY options, touch the scroll<br />
bar and arrows on the screen.<br />
■ When one PTY option is touched (e.g. News), auto search for next available PTY by<br />
increasing tuning frequency will take place, until the PTY of the next station matches<br />
the current. lf no matched PTY has been found, the unit will return to the original radio<br />
frequency.<br />
PROGRAM SERVICE (PS)<br />
■ Used for receiver displays of an 8 character alpha numeric Program Service name<br />
which may use Upper or Lower case characters, e.g {BBC_4_FM}, {Classic_}.<br />
CT (CLOCK TIME)<br />
■ Some stations broadcast the time and date within the encoded RDS signal. The clock<br />
time is automatically adjusted when 'CT' is set to 'On'.<br />
RT (RADIO TEXT)<br />
■ When this function is activated, the unit will display short message data transmitted<br />
from the provider, such as station information, the name of the current broadcasting<br />
song and the artist name.<br />
15
DISC MODE<br />
<br />
INSERT A DISC <br />
<br />
■ Upon inserting a disc, the unit will switch to disc mode automatically.<br />
<br />
NOTES:<br />
<br />
■ Please confirm whether there is a disc in the unit before you insert another one.<br />
<br />
■ Some recorded discs, such as CD-R, CD-RW, DVD-R, DVD+R, DVD-RW, DVD+RW<br />
<br />
cannot be played back because of different recording status. Otherwise, the discs<br />
without being "finalized" can not be played back.<br />
<br />
■ About the cautions of disc using, please refer to the appendix.<br />
<br />
EJECT THE DISC<br />
<br />
■ Press the [EJECT] key on the front panel or remote control to eject the disc.<br />
■ You can eject a disc after the unit has been powered off. The unit remains off after the<br />
disc is ejected.<br />
<br />
TOUCH SCREEN CONTROLS<br />
■ The touch key areas for DVD playback are outlined below. <br />
<br />
<br />
<br />
A – Open SOURCE MENU<br />
B – Display playback <br />
information<br />
<br />
C – Display onscreen control menu<br />
<br />
16
ZE-NC514<br />
DISC MODE<br />
ONSCREEN CONTROL BUTTONS<br />
Disc type/<br />
Icon<br />
MP3/WMA CD VCD DVD MPEG Picture<br />
S<br />
Numeric<br />
keypad<br />
Numeric<br />
keypad<br />
Numeric<br />
keypad<br />
Numeric<br />
keypad<br />
Numeric<br />
keypad<br />
Numeric<br />
keypad<br />
N<br />
Setup<br />
menu<br />
Setup<br />
menu<br />
Setup<br />
menu<br />
Setup<br />
menu<br />
Setup<br />
menu<br />
Setup<br />
menu<br />
/ Fast forward Fast forward Fast forward Fast forward /<br />
/ Fast rewind Fast rewind Fast rewind Fast rewind /<br />
Previous Previous Previous Previous Previous Previous<br />
Next Next Next Next Next Next<br />
E<br />
Play/<br />
Pause<br />
Play/<br />
Pause<br />
Play/<br />
Pause<br />
Play/<br />
Pause<br />
Play/<br />
Pause<br />
Play/<br />
Pause<br />
Stop Stop Stop Stop Stop Stop<br />
/ /<br />
A second<br />
menu<br />
A second<br />
menu<br />
A second<br />
menu<br />
/<br />
Repeat Repeat Repeat Repeat Repeat Repeat<br />
Random Random Random Random Random /<br />
/ / / / / Rotate<br />
/ / Zoom / / Zoom<br />
EQ EQ setup EQ setup EQ setup EQ setup EQ setup EQ setup<br />
PBC / / PBC / / /<br />
A-B / / A-B repeat A-B repeat / /<br />
Back / / Exit menu Exit menu Exit menu Exit menu<br />
AUDIO / /<br />
Channel<br />
switching<br />
Dialog<br />
language<br />
Dialog<br />
language<br />
/<br />
SUBTITLE / / /<br />
Subtitle<br />
language<br />
Subtitle<br />
language<br />
/<br />
DISP / /<br />
Display<br />
information<br />
Display<br />
information<br />
Display<br />
information<br />
Display<br />
information<br />
MENU / / / DVD menu / /<br />
TITLE / / / DVD title / /<br />
DIR+ Next folder / / / / Next folder<br />
DIR-<br />
Previous<br />
folder<br />
/ / / /<br />
Previous<br />
folder<br />
17
DISC MODE<br />
SUSPEND PLAYBACK<br />
■ Press the [/] key on the front panel or remote control or open the onscreen control<br />
buttons menu and then touch the [/] button. To resume normal playback, repeat the<br />
above operation.<br />
STOP PLAYBACK<br />
■ To stop playback, press the [] key on the remote control or open the onscreen control<br />
buttons menu and then touch the [] button. When the above operation is executed for<br />
the first time, the current playback is paused and the break point is memorized and the<br />
playback will resume when you start playback again or switch back from other playing<br />
sources. The current playback will cancel if the above operation is executed twice and<br />
the playback will start over when you start playback again.<br />
DISPLAY FILE LIST<br />
■ To display the file list of a recorded disc, stop current playback.<br />
FAST PLAYBACK<br />
■ Press the []/[] key on the remote control repeatedly or open the onscreen control<br />
buttons menu and then touch the []/[] button repeatedly, to change the rate of fast<br />
forward/fast reverse.<br />
PREVIOUS/NEXT<br />
■ Press the []/[] key on the display panel or remote control or open the onscreen<br />
control buttons menu and then touch the []/[] button to play the next or previous<br />
file.<br />
CHANGE FOLDER<br />
■ Press the [DIR+]/[DIR-] icon on the user interface (you should stop playback first if a<br />
video or picture file is played back) to change folder during the playback of a recorded<br />
disc containing more than one folder.<br />
18
ZE-NC514<br />
DISC MODE<br />
REPEAT PLAYBACK<br />
■ Press the [RPT] key on the remote control repeatedly or open the onscreen control<br />
buttons menu and then touch the [ ] button repeatedly to alter repeat mode according<br />
to the following table.<br />
Disc type<br />
DVD<br />
VCD (PBC off)<br />
CD<br />
MP3/WMA<br />
MPEG<br />
Picture<br />
Repeat mode<br />
Repeat Chapter → Repeat Title → Repeat Off<br />
Repeat Single → Repeat All →Repeat Off<br />
Repeat Single → Repeat Off<br />
Repeat Single → Repeat Folder → Repeat Off<br />
Repeat Single → Repeat Folder → Repeat Off<br />
Repeat Single → Repeat Folder → Repeat Off<br />
NOTES:<br />
■ When a VCD is played back, this function is prohibited if the PBC function is active.<br />
■ Turning off the power or switching playing source to other modes and back will cancel<br />
this function.<br />
REPEAT A-B<br />
■ When a DVD, VCD or CD disc is played back, you can play back the contents between<br />
the time points from A to B repeatedly.<br />
■ Press the [RPT A-B] key on the remote control or open the onscreen control buttons<br />
menu and then touch the [A-B] button to set the start point (A) of the repeated section.<br />
Do the above operation again to set the end point of the repeated section. The selected<br />
portion will repeat continuously.<br />
■ Do the above operation for the third time to cancel this function.<br />
RANDOM PLAYBACK<br />
■ When this function is on, the contents in the disc will be played back randomly.<br />
■ Press the [RDM] key on the remote control repeatedly or open the onscreen control<br />
buttons menu and then touch the [ ] button repeatedly to alter random playback mode<br />
among 'Random', 'Random repeat', 'Repeat Off'.<br />
19
DISC MODE<br />
INTRO PLAYBACK<br />
■ When this function is on, the unit will play back the first 10 seconds of each track of a<br />
VCD or CD disc. You can search the file you desired using this function.<br />
■ Press the [SCN] key on the remote control to activate this function. Do the above<br />
operation again to cancel this function.<br />
DIRECT SEARCH<br />
■ When a DVD, VCD or CD disc is played back, you can search for a particular chapter/<br />
track by pressing the numeric keys of the remote control. For example, if you want to<br />
select the 15 th track, you should press numerical key [1] and [5].<br />
GOTO SEARCH<br />
1. Enter [GOTO] search mode<br />
■ Press the [GOTO] key on the remote control to open search menu.<br />
■ For DVD, you can search according to title, chapter and time.<br />
■ For VCD, if PBC function is off, you can search according to time; if PBC function is on,<br />
you can search according to track, time and disc time.<br />
■ For CD, you can search according to track.<br />
■ For MPEG files, you can search according to track and time.<br />
■ For record discs containing MP3 and/or JPG files, you can search according to track<br />
(file number).<br />
2. Enter search information<br />
■ Select items by pressing the direction keys on the remote control and enter search<br />
information by pressing the numeric keys, such as title, chapter and time.<br />
3. Confirm<br />
■ Press the [Enter] key on the remote control to confirm.<br />
4. Exit GOTO search mode<br />
■ Repeat the above operation until the search menu disappeared or touch the [Exit]<br />
button on the menu.<br />
20
ZE-NC514<br />
DISC MODE<br />
DVD MENU AND TLTLE<br />
■ This function is only available for the DVD discs having "MENU/TlTLE". Press the<br />
[MENU] key on the remote control or open the onscreen control buttons menu and<br />
then touch the [MENU] button to open DVD MENU. You can select audio language,<br />
subtitle language and so on for playback. Press the [TITEL] key on the remote control<br />
or open the onscreen control buttons menu and then touch the [TITEL] button to open<br />
DVD TlTLE. You can select a different title for playback.<br />
SELECT SUBTITLE LANGUAGE<br />
■ Press the [SUBTlTLE] key on the remote control repeatedly or open the onscreen<br />
control buttons menu and then touch the [SUBTlTLE] button repeatedly to choose a<br />
subtitle language.<br />
SELECT MULTI-ANGLE VIEWS<br />
■ Press the [ANGLE] key on the remote control repeatedly to choose a shooting angle<br />
during the playback of a DVD disc or video file containing multi-angle views.<br />
SELECT AUDIO CHANNEL<br />
■ For DVD containing multi-language audio files, press the [AUDlO] key on the remote<br />
control repeatedly or open the onscreen control buttons menu and then touch the<br />
[AUDlO] button repeatedly to change dialogue language.<br />
■ For VCD and CD, press the [AUDlO] key on the remote control repeatedly or open the<br />
onscreen control buttons menu and then touch the [AUDlO] button repeatedly to alter<br />
audio channel modes among Left vocal, Right vocal, Mono left, Mono right, Stereo.<br />
NOTE:<br />
■ Left channel and right channel cannot work properly if the audio files are not recorded<br />
correctly.<br />
PBC FUNCTION<br />
■ This function is available for the VCD discs with PBC function (Ver 2.0 or higher).<br />
■ Press the [MENU] key on the remote control to activate this function.<br />
■ Press again to cancel.<br />
21
DISC MODE<br />
NOTES:<br />
■ When PBC is on, playback goes back to the track list and starts from the first track.<br />
■ When PBC is on, fast motion playback, slow motion playback or skip search is available<br />
but repeat playback and searching for a particular chapter or track is prohibited.<br />
■ If you do the operation of random playback, scan playback or searching playback when<br />
PBC is on, PBC will be turned off automatically.<br />
ZOOM IN/OUT<br />
■ To zoom in/out the image being played, press the [ZOOM] key on the remote control or<br />
open the onscreen control buttons and then touch the [ ] icon.<br />
ROTATE PICTURE<br />
■ When one picture file is played back, you can rotate the picture to get proper view angle<br />
by pressing the [ ] icon on the onscreen control buttons.<br />
PLAYBACK INFORMATION<br />
■ Touch the top center area of TFT LCD when playing back DVD and VCD discs and the<br />
playback information will be displayed on the top area of the TFT.<br />
For DVD<br />
1. Disc type.<br />
2. DVD Title information. "5/8" indicates that this DVD has 8 titles and the title playing back<br />
now is the fifth title.<br />
3. DVD Chapter information. "2/18" indicates that current title has 18 chapters and the<br />
chapter playing back now is the second chapter.<br />
4. Elapsed time of the current title.<br />
5. " 2/6 Eng" indicates that the subtitle of this DVD has been recorded in 6 languages<br />
and the language displayed now is the second, that is English.<br />
22
ZE-NC514<br />
DISC MODE<br />
For VCD<br />
1. Disc type.<br />
2. PBC function indicator. "PBC On" indicates that PBC function has been activated.<br />
3. VCD Track information. "6/18" indicates that this VCD has 18 tracks and the track<br />
playing back now is the sixth title.<br />
4. Elapsed time of the current track.<br />
23
USB MODE<br />
SELECT USB AS PLAYING SOURCE<br />
■ Open the SOURCE MENU and then touch the USB icon.<br />
NOTES:<br />
■ The unit switches to USB mode once an USB device has been inserted.<br />
■ The unit supports hot swap.<br />
■ USB storage devices formatted with FAT 16/32 are supported by this player, but not<br />
NTFS format.<br />
TOUCH SCREEN CONTROLS<br />
■ The operation is the same as disc mode.<br />
ONSCREEN CONTROL BUTTONS<br />
■ Onscreen control buttons under SD/USB mode are the same as disc mode.<br />
SUSPEND PLAYBACK<br />
■ The operation is the same as disc mode.<br />
STOP PLAYBACK<br />
■ The operation is the same as disc mode.<br />
DISPLAY FILE LIST<br />
■ The operation is the same as disc mode.<br />
FAST PLAYBACK<br />
■ The operation is the same as disc mode.<br />
PREVIOUS/NEXT<br />
■ The operation is the same as disc mode.<br />
24
ZE-NC514<br />
USB MODE<br />
CHANGE FOLDER<br />
■ The operation is the same as disc mode.<br />
REPEAT PLAYBACK<br />
■ The operation is the same as disc mode.<br />
RANDOM PLAYBACK<br />
■ The operation is the same as disc mode.<br />
INTRO PLAYBACK<br />
■ The operation is the same as disc mode.<br />
DIRECT SEARCH<br />
■ The operation is the same as disc mode.<br />
GOTO SEARCH<br />
■ The operation is the same as disc mode.<br />
ZOOM IN/OUT<br />
■ The operation is the same as disc mode.<br />
ROTATE PICTURE<br />
■ The operation is the same as disc mode.<br />
PLAYBACK INFORMATION<br />
■ The operation is the same as disc mode.<br />
25
IPOD MODE<br />
SELECT IPOD AS PLAYING SOURCE<br />
■ The unit will switch to iPod mode automatically when an iPod player is plugged into the<br />
unit.<br />
■ To return to the iPod mode from any other sources, open the SOURCE MENU and then<br />
touch iPod.<br />
MUSIC PLAYBACK<br />
1. Enter iPod music mode<br />
■ Press the [TlTLE] key on the remote control or touch the music icon on the user interface.<br />
2. Select one music file<br />
■ Press the [Left]/[Right] key on the remote control.<br />
3. Play back the music file<br />
■ Press the [Down] key on the remote control or touch the [ ] button on the user interface.<br />
4. Return to the previous menu<br />
■ Press the [UP] key on the remote control or touch the button [MENU] on the user<br />
interface.<br />
NOTE:<br />
■ In the Music mode, the buttons on the iPod are disabled.<br />
PHOTO PLAYBACK<br />
1. Enter iPod photo mode<br />
■ Press the [MENU] key on the remote control or touch the picture icon on the user<br />
interface.<br />
2. Control photo files playback<br />
■ Use the keys on the iPod to control playback.<br />
NOTES:<br />
■ To exit PHOTO mode, press the [MENU] button on the iPod.<br />
■ Pictures can be displayed on the screen just when the picture playback mode of iPod<br />
player is set to "slide show".<br />
26
ZE-NC514<br />
IPOD MODE<br />
VIDEO PLAYBACK<br />
1. Enter iPod video mode<br />
■ Press the [AUDIO] key on the remote control or touch the video icon on the user interface.<br />
2. Control video files playback<br />
■ Use the keys on your iPod player to control playback.<br />
NOTES:<br />
■ To exit VIDEO mode, press the [MENU] button on the iPod.<br />
■ To transmit the images (including videos and pictures) from your iPod to the TFT<br />
screen, you must set the following options through the iPod video settings menu:<br />
TV Out = On, TV Signal = NTSC.<br />
FAST PLAYBACK<br />
■ To access fast forward or fast reverse playback, you should press and hold the<br />
[Left]/[Right] key on the remote control or the []/[] button on the user interface<br />
for 1 second and continue to hold the corresponding key. To resume normal<br />
play, release them.<br />
DIRECT SEARCH<br />
■ To select a file directly, touch the numeric button on the user interface to open the<br />
direct entry menu. Enter the desired file using the number pad of this menu. Touch the<br />
[Enter] button to confirm. To exit this menu, touch the [Exit] button.<br />
■ To clear the numbers you have entered, touch the [Clear] button.<br />
■ You can also use the numeric keys on the remote control to select files directly.<br />
27
DVB-T MODE<br />
SELECT DVB-T AS PLAYING SOURCE<br />
■ Open the SOURGE MENU and then select DVB-T, and<br />
touch the screen to POP UP control menu.<br />
■ Press the [] button to increase volume or press the [] button<br />
to decrease volume.<br />
TOUCH SCREEN CONTROLS<br />
■ The touch key areas for DVB-T mode are outlined below:<br />
A – Open the SOURCE MENU<br />
B – POP UP control menu<br />
C – POP UP SETUP and EQ<br />
QUICK SELECT<br />
■ Press the [OK] button to POP UP the [QUICKSELECT] menu and press the [] or []<br />
buttons, to shift cursor to select channel, or press the [] or [] buttons to select source<br />
mode.<br />
SEARCH CHANNEL<br />
■ Press MENU to POP UP [MAlN MENU], and press [] and [] buttons to shift cursor to<br />
select source and press the [OK] button to get in the sub menu. Press [EXIT] to exit.<br />
28
ZE-NC514<br />
OTHER MODES<br />
AV-IN<br />
■ External peripheral devices with RCA audio and video outputs can be connected with<br />
the unit.<br />
■ To enter AV-lN mode, open the SOURCE MENU and then touch AV-lN.<br />
CAMERA<br />
■ This player is "camera ready". Before accessing any camera features, you must<br />
purchase and install a rear video camera. Once the rear camera is connected and<br />
operating properly, the CAMERA source mode will become active. While the camera<br />
is not installed, the CAMERA option appears gray, indicating the function is not<br />
available.<br />
NAV<br />
The playing source will change to 'CAMERA' mode automatically when you reverse<br />
your car.<br />
■ This player is equipped with an internal navigation system. Before accessing any<br />
navigation feature, you must insert the micro-SD card containing the nav data first.<br />
The micro-SD card slot is located on the backside of the TFT panel.<br />
Operating instructions covering the navigation features are contained in a separate<br />
owner’s manual that is also part of the set content.<br />
29
SETUP<br />
SETUP PROCEDURES<br />
1. Enter setup mode<br />
■ Press the [SETUP] key on the remote control or touch the setup icon [<br />
interface.<br />
■ The following menu appears after entering the setup mode.<br />
■ The GENERAL sub-menu is highlighted by default.<br />
] on the user<br />
2. Select one sub-menu<br />
■ Press the direction keys on the remote control.<br />
3. Select one item<br />
■ Press the []/[] key on the remote control to select one item and then press the [<br />
] key to confirm.<br />
4. Select one value<br />
■ Press the []/[] key on the remote control to select one suitable value and then press<br />
the [ ] key to confirm.<br />
NOTE:<br />
■ All following settings can be done by touching the option directly.<br />
30
ZE-NC514<br />
SETUP<br />
GENERAL<br />
■ Clock mode<br />
12 Hr: the clock displays in the type of 12 hours such as 11:18 AM.<br />
24 Hr: the clock displays in the type of 24 hours such as 20:18.<br />
■ Clock<br />
Adjust the clock displayed on the top right corner of the TFT screen.<br />
■ Tuner Region<br />
The unit supports several radio systems and you can select a correct radio system<br />
according to your country.<br />
■ Beep<br />
On: Background sound of key-press is on.<br />
Off: Background sound of key-press is off.<br />
LANGUAGE<br />
■ OSD<br />
Select one language of system menu display.<br />
■ DVD Audio<br />
Select one dialogue language of DVD disc.<br />
NOTE:<br />
■ If the DVD disc does not contain the selected language, the dialogues you listening to<br />
will be in default language.<br />
■ DVD Subtitle<br />
Select one subtitle language of DVD disc.<br />
NOTE:<br />
■ If the DVD disc does not contain the selected language, the subtitle will be displayed in<br />
default language.<br />
■ Disc Menu<br />
Select one language of DVD MENU display.<br />
NOTE:<br />
■ If the DVD disc does not contain the selected language, the DVD MENU will be<br />
displayed in default language.<br />
31
SETUP<br />
AUDIO<br />
■ DRC<br />
Set the dynamic range of Dolby digital DVD discs.<br />
On: Playback more dynamic audio with Bass.<br />
Off: Normal output.<br />
■ Loudness<br />
On: Loud mode is on.<br />
Off: Loud mode is off.<br />
■ Subwoofer<br />
On: Open the subwoofer speaker.<br />
Off: Close the subwoofer speaker.<br />
■ Sub Filter<br />
You can get different bass effect when you set different cut off frequency of subfilter.<br />
According to the acoustics surroundings of your car, select a proper frequency.<br />
80Hz, 120Hz, 160Hz are available.<br />
RDS<br />
■ RDS<br />
On: RDS function is active.<br />
Off: RDS function is inactive.<br />
■ CT<br />
On: The clock time is on.<br />
Off: The clock time is off.<br />
■ TA VOL<br />
Set the relative volume of Traffic Announcements.<br />
RATING<br />
■ Some DVD discs have built-in parental lock which prevents children to watch some<br />
scenes containing violence or adult content especially.<br />
■ Set Password<br />
The original password of the unit is "0000".<br />
32
ZE-NC514<br />
SETUP<br />
You should set a new password ASAP.<br />
METHOD OF CHANGING PASSWORD:<br />
1. Locate the cursor on the 'password' option, press the numeric keys on the remote<br />
control or touch the 'Password' option directly to open the onscreen keypad, touch the<br />
numeric buttons to enter your password (original password for the first time) and then<br />
confirm.<br />
2. Repeat the operation above to enter a new 6-digit password and then confirm. The<br />
new password becomes effective and the parental lock is closed.<br />
RATING<br />
The unit has some watching level as followings:<br />
1. Kid safe: A movie rating that is condign to children.<br />
2. G: A movie rating that allows admission to persons of all ages.<br />
3. PG: A movie rating that allows admission of persons of all ages but suggests parental<br />
guidance in the case of children.<br />
4. PG-13: A movie rating that allows admission of persons of all ages but suggests<br />
parental guidance in the case of children under the age of 13.<br />
5. PG-R: PG-related.<br />
6. R: A movie rating that allows admission only to persons of a certain age, usually 17,<br />
unless accompanied by a parent or guardian.<br />
7. NC-17: A movie rating that allows admission to no one under the age of 17.<br />
8. Adult: A movie rating that is suitable to adult audiences only.<br />
PROCEDURES OF CHANGING THE RATING:<br />
1. Enter password to unlock the parental lock<br />
■ Locate the cursor on the 'password' option, press the numeric keys on the remote<br />
control or touch the 'Password' option directly to open the onscreen keypad, touch the<br />
numeric buttons to enter your password and then confirm.<br />
2. Change the rating<br />
■ Select an appropriate rating from the 'rating' list.<br />
33
SETUP<br />
3. Close the parental lock<br />
■ Repeat the operation of the first step to enter a 6-digit password (old or new) and then<br />
confirm.<br />
■ The parental lock is closed.<br />
■ Load Factory<br />
To restore the default settings relating with DVD playback (e.g.: DVD Audio, DVD<br />
Subtitle), press the [RESET] option.<br />
HARDWARE<br />
■ Camera ln<br />
Normal: Actual scenes shot by the camera display on the TFT monitor while reverse<br />
driving (just like what you are watching).<br />
Mirror: The mirror images of actual scenes display on the TFT monitor while reverse<br />
driving (just like observing things over the rearview mirror).<br />
■ TFT Auto Open<br />
Auto: The TFT panel automatically opens when the unit is turned on.<br />
Manual: When the ignition is turned off, the TFT panel remains open if it was opened<br />
previously.<br />
Off: The TFT panel opens only by pressing OPEN button when the unit is turned on.<br />
■ Video input<br />
NTSC: Set the color system of the TFT screen to NTSC.<br />
PAL: Set the color system of the TFT screen to PAL.<br />
AUTO: Set the color system of the TFT screen automatically by the unit according to the<br />
input video formats.<br />
■ Parking<br />
On: Image displays only after your car has been parked.<br />
Off: Image displays at all times.<br />
P.VOL<br />
■ P.VOL means Programmable Volume.<br />
You can balance the volume among different audio sources using this function.<br />
34
ZE-NC514<br />
SETUP<br />
■ Source<br />
Select one playing source that you want to set relative volume.<br />
■ Level<br />
You can set relative volume level from 0 to 6.<br />
METHOD OF CHANGING PASSWORT<br />
1. Locate the cursor on the “Anti-PSW” option, press the numeric keys on the remote<br />
control or touch the “Anti-PSW” option directly to open the onscreen keypad. Touch the<br />
numeric buttons to enter the factory default code “012345” to deactivate the anti theft<br />
function.<br />
2. Repeat the operation above to enter a new 6 digit password and confirm by pressing the<br />
enter button. Your new personal password becomes effective and the unit will be locked<br />
when disconnected from power.<br />
PLEASE NOTE:<br />
■ Do use a code you can easily remember. Unlock the unit is not free of charge and can<br />
only be done by an authorized ZENEC service center.<br />
TS CAL<br />
■ When the touch function is not sensitive or valid, you should calibrate the touch screen<br />
by this function.<br />
■ Calibrate the touch screen just following the screen introductions after entering the TS<br />
CAL mode.<br />
35
EQ<br />
■ Audio control allows you to easily adjust the audio system to get the best possible<br />
sound effect.<br />
1. Enter the EQ setup mode<br />
■ Press the [SEL] key on the remote control or touch the EQ icon in the user interface and<br />
the following interface will display on the screen.<br />
EQ selection<br />
EQ parameters<br />
Fader/Balance<br />
adjustment area<br />
2. Select EQ mode<br />
■ Touch the EQ selection bar repeatedly and the EQ mode will change.<br />
3. Adjust EQ parameters<br />
■ To adjust EQ parameters, touch and drag the EQ parameters adjustment bar.<br />
4. Adjust Front/Rear/Left/Right fader and balance<br />
■ You can adjust front/back/left/right balance of the speaker to a desirable listening effect<br />
according to the surroundings and your preference.<br />
■ To adjust Front/Rear/Left/Right fader and balance, touch and drag the small white point<br />
in the Fader/Balance adjustment area.<br />
NOTES:<br />
■ The unit provides some EQ modes: User, Rock, Hip Hop, Dance, Latin, Rave, Urban,<br />
Acoustic.<br />
■ Different EQ reflects in different Bass, Treble and Mid level. The parameters of the EQ<br />
modes has been preset and you can not change them besides 'User'.<br />
■ The EQ mode will change to 'User' automatically when you adjust the value of BASS,<br />
TREB or MID under the modes besides 'User'.<br />
■ The value of SUB is independent of EQ mode and can be adjusted solely.<br />
36
ZE-NC514<br />
TROUBLESHOOTING<br />
■ What appears to be trouble is not always serious. Please check the following points<br />
before calling a service center.<br />
Problem Cause Corrective action<br />
General<br />
Unit can not power on.<br />
Remote control does not work.<br />
No/low audio output.<br />
Poor sound quality<br />
or distortion.<br />
Unit fuse blown.<br />
Car battery fuse blown.<br />
lllegal operation.<br />
Battery depleted.<br />
Battery installed incorrectly.<br />
lmproper audio output connection.<br />
Volume set too low.<br />
Speakers damaged.<br />
Heavily biased volume balance.<br />
Speaker wiring is in contact with metal<br />
part of car.<br />
Pirated disc is in use.<br />
Speaker.<br />
Wrong connections.<br />
lnstall new fuse with correct rating.<br />
lnstall new fuse with correct rating.<br />
Reset the unit.<br />
Change the Battery.<br />
lnstall the battery correctly.<br />
Check wiring and correct.<br />
lncrease volume level.<br />
Replace speakers.<br />
Adjust the channel balance to center<br />
position.<br />
lnsulate all speaker wiring connections.<br />
Use original disc.<br />
Replace speakers.<br />
Check wiring and correct.<br />
Speaker is shorted.<br />
Check wiring and correct.<br />
Tel-Mute malfunction. MUTE wire is grounded. Check the 'MUTE' wiring and correct.<br />
Unit resets itself when engine is off.<br />
lncorrect connection.<br />
between ACC and BATT.<br />
TFT monitor<br />
Check wiring and correct.<br />
Monitor does not open automatically. TFT Auto Open is turned off. Turn TFT Auto Open on.<br />
Warning information is shown at all<br />
times.<br />
Flashing image or interference app<br />
ears<br />
on screen.<br />
Parking break wiring is not correct.<br />
The color system of DVD disc does not<br />
match the monitor.<br />
Pirated disc is in use.<br />
Video cable damaged.<br />
lmproper video signal connections.<br />
Check wiring and correct.<br />
Adjust the color system of the DVD disc<br />
playing back or the monitor in us.<br />
Use original disc.<br />
Replace cables.<br />
Check wiring and correct.<br />
37
TROUBLESHOOTING<br />
(Continued)<br />
Problem Cause Corrective action<br />
Disc playback<br />
Cannot insert disc. A disc inside the unit already. Eject current disc and insert new one.<br />
Disc does not play back.<br />
Disc is warped or scratched.<br />
Disc is dirty or wet.<br />
lncompatible disc is used.<br />
Disc is inserted upside down.<br />
Disc region code is not compatible with<br />
unit.<br />
Use disc in good condition.<br />
Clean disc with soft cloth.<br />
Use compatible disc.<br />
lnsert disc with label side up.<br />
Use disc with proper region code.<br />
PBC cannot be used during VCD<br />
playback.<br />
PBC is not available on the disc.<br />
Use disc with PBC available.<br />
Repeat or search function is invalid<br />
during VCD playback.<br />
PBC is on.<br />
Turn PBC off.<br />
No disc.<br />
Bad disc.<br />
Error messages<br />
Disc is dirty.<br />
Disc is upside down.<br />
No disc inside.<br />
Disc is dirty.<br />
Disc is upside down.<br />
Clean disc with soft cloth.<br />
lnsert disc with label side up.<br />
lnsert disc.<br />
Clean disc with soft cloth.<br />
lnsert disc with label side up.<br />
Unknown disc. Disc format is not compatible. Use disc with compatible format.<br />
Region Error.<br />
DVD region code is not compatible with<br />
this unit.<br />
Use disc with compatible region code.<br />
38
ZE-NC514<br />
DEVICE CONNECTIONS<br />
NOTES OF CONNECTION<br />
■ This unit is designed to be used in a vehicle with a 12-volt battery and negative<br />
grounding. Before installing this unit to a mobile home, a bus, or a truck, make sure the<br />
battery voltage is appropriate for this unit to be used, otherwise, install a transformer<br />
to convert the output voltage to 12 V.<br />
■ To avoid short circuit in the electrical system, ensure that the negative battery cable is<br />
disconnected before installation.<br />
■ To prevent short circuit in the wiring and damaging to this unit, secure all wirings with<br />
cable ties or adhesive tape. Route the wirings in a secured, out of heating place without<br />
touching any moving parts such as gear shift, handbrake, and seat rails to prevent the<br />
wiring insulation being melted/wore off.<br />
■ Never pass the yellow power cord through the installation hole into the engine<br />
compartment and connect to the car battery. Otherwise, a high possibility of serious<br />
short circuit to the electrical system may occur.<br />
■ Replacing a new fuse with 10 A rating when the old one is broken, using no fuse or<br />
fuse with improper rating may cause damage to this unit or even fires. lf a proper fuse<br />
is installed and electrical problems still occur, please contact with any professional car<br />
shops for inquiry.<br />
■ Please make sure all the wiring connections and the cables of the speakers are wellinsulated.<br />
Otherwise, this unit may be damaged by short circuit.<br />
■ lf there is no ACC available, please connect ACC lead to the power supply with a swit<br />
ch.<br />
■ lf an external power amplifier is connected, please don't connect P.CONT lead to the<br />
power lead of the external power amplifier, otherwise, electric spark or other damage<br />
may be resulted.<br />
■ Never ground the speaker output to prevent the damage to the built-in power amplifier.<br />
■ The minimum rating of the speakers connected to this unit is 50 W with 4 to 8 Ω<br />
impedance.<br />
39
DEVICE CONNECTIONS<br />
CONTROL CABLES<br />
Auto Brightness Control<br />
■ To avoid the display being too bright at night time, if the headlight cable is connected to<br />
lLLUMl, turning on the head light will dim the backlight of the TFT LCD and vice versa.<br />
TELEPHONE MUTE<br />
■ lf the MUTE cable is connected to a car phone, other audio outputs mute when one call<br />
is received by the car phone.<br />
REVERSE DRIVING<br />
■ lf a rear view camera is connected with the unit, the playing source switches to CAMERA<br />
automatically when you start reverse driving. With the reverse driving over, the playing<br />
source switches to the previous source.<br />
PARKING BRAKE<br />
1. lf "PRK SW" cable is connected to hand brake switch, video display on the TFT monitor<br />
will be controlled by this function. Parking cable function ceases when the playing<br />
source is CAMERA.<br />
2. The monitor displays the blue screen with warning information to prevent the driver<br />
watching video contents during driving, but the passengers at the rear seat can watch<br />
video content normally, when headrest monitors are installed.<br />
40
ZE-NC514<br />
DEVICE CONNECTIONS<br />
PARKING BRAKE CABLE CONNECTIONS<br />
REVERSE DRIVING CABLE CONNECTIONS<br />
Gearbox<br />
41
INSTALLATION AND UNINSTALLATION<br />
NOTES OF INSTALLATION<br />
1. Before installation, please make sure proper connections are conducted and the unit<br />
operates normally. lmproper connection may result in damage to the unit.<br />
2. Use only accessories designed and manufactured for this unit and other unauthorized<br />
accessories may result in damage to the unit.<br />
3. Before installation, please fasten all power cables.<br />
4. DO NOT install the unit in the place where close to hot area to prevent damage to<br />
electrical components such as the laser head.<br />
5. lnstall the unit horizontally. lnstalling the unit more than 30 degree inclined may result in<br />
worse performance.<br />
6. To prevent electric spark, connect the positive pole first and then the negative pole.<br />
7. DO NOT block the cooling fan exit to ensure sufficient heat dissipation of this unit, or it<br />
may result in damage to this unit.<br />
UNIT INSTALLATION<br />
Method A<br />
1. lnsert mounting bracket into dash board, choose appropriate mounting tab according<br />
to the gap width, bending the mounting tab outwards with a screw driver to fix the<br />
mounting bracket in place.<br />
2. Use 2 pieces of M5 x 5 cone shaped screw to fix two assemble bars on both sides of<br />
the unit (see picture 1).<br />
(Picture 1)<br />
3. Screw in 1 piece of M5 x 24 to the hole of the unit back and put on a rubber sheath over<br />
the screw (see picture 2).<br />
42
ZE-NC514<br />
INSTALLATION AND UNINSTALLATION<br />
Dashboard<br />
Rubber Sheath<br />
Mounting Bracket<br />
Long Assemble Bar<br />
(Picture 2)<br />
4. lnsert the unit into the bracket, fasten the M4 x 6 screw to the fireproofing board available<br />
at the back of the dashboard, and use 4 pieces of M2 x 2 screw to lock the assemble<br />
bars and the mounting bracket in position.<br />
NOTE:<br />
■ According to the depth of the opening, use different length of assemblebar accordingly.<br />
If the opening is too shallow, the monitor may be extended out 10 mm from the<br />
dashboard.<br />
METHOD B<br />
Mounting Frame<br />
Dashboard<br />
1. Insert this unit directly to the opening of the dash board.<br />
2. Place M4 x 3, M5 x 5 cylindrical screw or M5 x 5 cone shaped screw through the holes<br />
of the mounting frame located inside the opening to holes of the unit and fasten the<br />
screws to left & right.<br />
43
INSTALLATION AND UNINSTALLATION<br />
TRIM RING INSTALLATION<br />
■ Attach the trim ring around the front panel with two indentions on one side facing<br />
upwards.<br />
UNINSTALL<br />
Disassemble trim ring<br />
1. Push the trim ring upward and pull out the upper part.<br />
2. Push the trim ring downward and pull out the lower part.<br />
DISASSEMBLE THE UNIT<br />
1. Unscrew the 4 pieces M2 x 2 screws.<br />
2. Use a screw driver to bend straight the bended mounting tab and tip out the unit from<br />
the mounting bracket.<br />
Remove the rubber sheath<br />
Unscrew 4<br />
attached screws<br />
3. Pull out the unit from the mounting bracket with both hands.<br />
44
ZE-NC514<br />
SPECIFICATIONS<br />
General<br />
Reference Supply Voltage ....................................................................................... 12V (DC)<br />
Operating Voltage Range ............................................................................ 10.5~15.8V (DC)<br />
Max Operation Current .................................................................................................... 10A<br />
Grounding System ........................................................................Car Battery Negative Pole<br />
Installation Dimension (WxHxD) ......................................... 178mm x 50mm x (165+25) mm<br />
Installation Angle ........................................................................................................ 0°~30°<br />
Net Weight .................................................................................................................... 2.3kg<br />
FM<br />
Signal Noise Ratio .........................................................................................................55dB<br />
Residual Noise Sensitivity (S/N=30dB) .....................................................................20dBµV<br />
Frequency Response (±3dB)......................................................................... 40Hz~12.5KHz<br />
Station Seeking Level ......................................................................................... 20~30dBµV<br />
Distortion .......................................................................................................................1.5%<br />
Stereo Separation (1 KHz) .............................................................................................20dB<br />
Antenna Impedance ........................................................................................................75Q<br />
AM<br />
Residual Noise Sensitivity (S/N=20dB) .....................................................................40dBµV<br />
Selectivity (±9KHz) ........................................................................................................50dB<br />
DVD Player<br />
Signal/Noise Ratio .........................................................................................................90dB<br />
Dynamic Range .............................................................................................................90dB<br />
Distortion (line out) ........................................................................................................0.1%<br />
Frequency Response (±3dB)............................................................................ 20Hz~20KHz<br />
Max Output Power ..................................................................................................... 4x40W<br />
Load Impedance ...............................................................................................................4Ω<br />
AV-IN<br />
Distortion .......................................................................................................................0.5%<br />
Frequency Response (±3dB)............................................................................ 20Hz~20KHz<br />
Audio Input Level ...................................................................................................... 0.4Vrms<br />
Video Input Level ..........................................................................................................1Vp-p<br />
Audio<br />
Audio Output Impedance ..............................................................................................200Ω<br />
Audio Output Level .............................................................................................2Vrms (Max)<br />
(Under normal audio input level and maximum volume)<br />
45
SPECIFICATIONS<br />
Video<br />
Normal Video Input Level (CVBS)............................................................................ 1.0±0.2V<br />
Video Input Impedance ...................................................................................................75Ω<br />
Video Output Impedance ................................................................................................75Ω<br />
Video Output Level .................................................................................................. 1.0±0.2V<br />
TFT Monitor<br />
Screen Diagonal .........................................................................................17.8cm/ 7 inches<br />
Usable Display Area ................................................................................154.1(W) x 87.0 (H)<br />
Resolution ................................................................................................1440 (W) x 234 (H)<br />
Brightness ..............................................................................................................400cd/m2<br />
(Measure the centre brightness after 30 minutes)<br />
Contrast .................................................................................................................. 300(TYP.)<br />
Response Time<br />
Rise ..........................................................................................................................12ms<br />
Fall ...........................................................................................................................18ms<br />
Viewing Angle<br />
From Top .....................................................................................................................40°<br />
From bottom ...............................................................................................................65°<br />
Horizontally ...............................................................................................................±65°<br />
LCD Life Cycle .................................................................................... 10000 hours (at 25°C)<br />
Navigation<br />
Integrated navigation System<br />
Built-in SD card reader ...................................................................................4GB micro-SD<br />
GPS receiver included in set content<br />
Environment<br />
Operating Temperature ...................................................................................-10°C~ + 60°C<br />
Storing Temperature .......................................................................................-20°C~ + 70°C<br />
Operating Humidity ......................................................................................... 45%~80%RH<br />
Storing Humidity .............................................................................................. 30%~90%RH<br />
■ Specifications are subject to possible modifications for improvement without further<br />
notice.<br />
■ If at any time in the future you should need to dispose this product please note that waste electrical<br />
products should not be disposed of with household waste. Please recycle where facilities exist.<br />
Check with your Local Authority or retailer for recycling advice (Waste Electrical and Electronic<br />
Equipment Directive).<br />
This unit is manufactured under license from Dolby Laboratories. “Dolby” and the double-D<br />
symbol are trademarks of Dolby Laboratories.<br />
46
ZE-NC514<br />
APPENDIX<br />
REGION CODE<br />
According to DVD sale region, the whole world is divided into six regions. A DVD disc can<br />
be played back only when its region code is compatible with that of the player in use.<br />
Region 1:<br />
Region 2:<br />
Region 3:<br />
Region 4:<br />
Region 5:<br />
Region 6:<br />
USA, Canada, East Pacific Ocean lslands;<br />
Japan, West Europe, North Europe, Egypt, South Africa,<br />
Middle East;<br />
Taiwan of China, Hong Kong of China, South Korea, Thailand,<br />
lndonesia, South East Asia;<br />
Australia, New Zealand, Mid & South America, South Pacific,<br />
Ocean lslands/Oceania;<br />
Russia, Mongolia, lndia, Middle Asia, East Europe,<br />
North Korea, North Africa, North West Asia;<br />
Chinese Mainland.<br />
CAUTIONS OF DISC USING<br />
1. DO NOT use irregular shaped disc<br />
2. Disc Cleaning<br />
Use a dry, soft cloth to wipe the disc from center to edge, only neutral detergent can be<br />
used.<br />
3. When playing a new disc<br />
New disc may have some rough spots around the inner and outer edges. lf such a disc<br />
is used, remove these rough spots with a pencil or ball-point pen, etc.<br />
47
APPENDIX<br />
WIRING CONNECTIONS<br />
48
ZE-NC514<br />
2 YEARS LIMITED WARRANTY<br />
Dear customer<br />
Thank you for purchasing this ZENEC product. It is advisable to keep the original packing material<br />
for any future transporting of the product.<br />
Should your ZENEC product require warranty service, please return it to the retailer from whom<br />
it was purchased or the distributor in your country.<br />
This ZENEC product is warranted against defective materials or workmanship for a period of<br />
TWO years from date of purchase at retail.<br />
Warranty Limitations<br />
This warranty does not cover any damage due to:<br />
1. Improper installation, incorrect audio or mains connection(s).<br />
2. Exposure to excessive humidity, fluids, heat sun rays or excessive dirt or dust.<br />
3. Accidents or abuse, unauthorized repair attempts and modifications not explicitly<br />
authorized by the manufacturer.<br />
This warranty is limited to the repair or the replacement of the defective product at the<br />
manufacturer’s option and does not include any other form of damage, whether incidental,<br />
consequential or otherwise. The warranty does not cover any transport costs or damages<br />
caused by transport or shipment of the product. Warranty work will not be carried out<br />
unless this warranty certificate is presented fully completed with model, serial number,<br />
purchaser’s address, purchasing date and dealer stamp together with the original sales slip!<br />
ZENEC <strong>MODEL</strong>: ZE-NC514<br />
Serial number: ..............................................................................................................................<br />
Date of purchase: .........................................................................................................................<br />
Your name: ...................................................................................................................................<br />
Your address: ...............................................................................................................................<br />
City: ..............................................................................................................................................<br />
State: ................................... ZIP or postal code ........................................................................<br />
Country: .......................................................................................................................................<br />
Dealer’s address & stamp<br />
49
CONTENU<br />
PANNEAU DE COMMANDES<br />
START CODE ..................................................................................................................................................... 54<br />
PANNEAU AVANT .............................................................................................................................................. 54<br />
AFFICHAGE LCD AUXILIAIRE........................................................................................................................... 55<br />
TÉLÉCOMMANDE ............................................................................................................................................ 56<br />
OPÉRATIONS DE BASE<br />
SOUS /HORS TENSION ................................................................................................................................... 58<br />
NAV. .................................................................................................................................................................... 58<br />
RÉGLAGE DU VOLUME ................................................................................................................................... 58<br />
MENU SOURCE ............................................................................................................................................... 58<br />
SÉLECTION DE LA SOURCE DE LECTURE ................................................................................................... 58<br />
AFFICHAGE DE L’HEURE ................................................................................................................................ 59<br />
UTILISATION DE L’ÉCRAN TFT ....................................................................................................................... 59<br />
RÉINITIALISATION DE L'APPAREIL ................................................................................................................. 59<br />
MODE RADIO<br />
SÉLECTIONNER LA RADIO COMME SOURCE DE LECTURE ...................................................................... 60<br />
SÉLECTIONNER UNE BANDE RADIO ............................................................................................................ 60<br />
RECHERCHE AUTOMATIQUE ......................................................................................................................... 60<br />
RECHERCHE MANUELLE ................................................................................................................................ 60<br />
MÉMORISATION AUTOMATIQUE ................................................................................................................... 60<br />
MÉMORISATION MANUELLE .......................................................................................................................... 61<br />
BALAYAGE ........................................................................................................................................................ 61<br />
INDIQUER LES STATIONS MÉMORISÉES ...................................................................................................... 61<br />
RECHERCHE LOCALE ..................................................................................................................................... 61<br />
FONCTIONNEMENT DU RDS<br />
FONCTION AF .................................................................................................................................................. 62<br />
FONCTION TA .................................................................................................................................................. 62<br />
FONCTION PTY ................................................................................................................................................ 63<br />
PROGRAM SERVICE (PS) ................................................................................................................................ 63<br />
CT (CLOCK TIME) ............................................................................................................................................. 63<br />
RT (RADIO TEXT) ............................................................................................................................................. 63<br />
MODE DISQUE<br />
INSÉRER UN DISQUE ...................................................................................................................................... 64<br />
ÉJECTER LE DISQUE ...................................................................................................................................... 64<br />
COMMANDES DE L'ÉCRAN TACTILE ............................................................................................................. 64<br />
COMMANDES DU MENU À L'ÉCRAN (OSD) .................................................................................................. 65<br />
SUSPENDRE LA LECTURE ............................................................................................................................. 66<br />
ARRÊTER LA LECTURE ................................................................................................................................... 66<br />
AFFICHER LA LISTE DES FICHIERS ............................................................................................................... 66<br />
LECTURE ACCÉLÉRÉE .................................................................................................................................... 66<br />
PRÉCÉDENT / SUIVANT .................................................................................................................................. 66<br />
SÉLECTIONNER UN DOSSIER ........................................................................................................................ 66<br />
RÉPÉTER LA LECTURE ................................................................................................................................... 67<br />
RÉPÉTER A-B ................................................................................................................................................... 67<br />
LECTURE ALÉATOIRE ..................................................................................................................................... 67<br />
LECTURE D'INTRODUCTION .......................................................................................................................... 68<br />
RECHERCHE DIRECTE .................................................................................................................................... 68<br />
RECHERCHE « GOTO » ................................................................................................................................... 68<br />
DVD MENU ET TITRE ....................................................................................................................................... 69<br />
SÉLECTIONNER LA LANGUE DES SOUS-TITRES ........................................................................................ 69<br />
SÉLECTIONNER LES PRISES DE VUES MULTI-ANGLES ............................................................................. 69<br />
SÉLECTIONNER LE CANAL AUDIO ................................................................................................................ 69<br />
FONCTION PBC ............................................................................................................................................... 69<br />
ZOOM IN/OUT .................................................................................................................................................. 70<br />
ROTATION DE L’IMAGE .................................................................................................................................... 70<br />
INFORMATIONS DE LECTURE ........................................................................................................................ 70<br />
50
ZE-NC514<br />
MODE USB<br />
SÉLECTIONNER L'USB COMME SOURCE DE LECTURE ............................................................................. 72<br />
COMMANDES DE L'ÉCRAN TACTILE ............................................................................................................. 72<br />
COMMANDES DU MENU À L'ÉCRAN (OSD) .................................................................................................. 72<br />
SUSPENDRE LA LECTURE ............................................................................................................................. 72<br />
ARRÊTER LA LECTURE ................................................................................................................................... 72<br />
AFFICHER LA LISTE DES FICHIERS ............................................................................................................... 72<br />
LECTURE ACCÉLÉRÉE .................................................................................................................................... 72<br />
PRÉCÉDENT / SUIVANT .................................................................................................................................. 72<br />
SÉLECTIONNER UN DOSSIER ........................................................................................................................ 73<br />
RÉPÉTER LA LECTURE ................................................................................................................................... 73<br />
LECTURE ALÉATOIRE ..................................................................................................................................... 73<br />
LECTURE D’INTRODUCTION .......................................................................................................................... 73<br />
RECHERCHE DIRECTE .................................................................................................................................... 73<br />
RECHERCHE « GOTO » ................................................................................................................................... 73<br />
ZOOM IN/OUT .................................................................................................................................................. 73<br />
ROTATION DE L’IMAGE .................................................................................................................................... 73<br />
INFORMATIONS DE LECTURE ........................................................................................................................ 73<br />
MODE IPOD<br />
SÉLECTIONNER L'IPOD COMME SOURCE DE LECTURE .............................................................................74<br />
LECTURE DE MUSIQUE ...................................................................................................................................74<br />
LECTURE DE PHOTO .......................................................................................................................................74<br />
LECTURE VIDÉO .............................................................................................................................................. 75<br />
LECTURE ACCÉLÉRÉE .................................................................................................................................... 75<br />
RECHERCHE DIRECTE .................................................................................................................................... 75<br />
AUTRES MODES<br />
AV-IN. ................................................................................................................................................................ 77<br />
CAMERA ........................................................................................................................................................... 77<br />
NAV. .................................................................................................................................................................... 77<br />
RÉGLAGES<br />
PROCÉDURES DE RÉGLAGE ......................................................................................................................... 78<br />
GÉNÉRAL ......................................................................................................................................................... 79<br />
LANGUES ......................................................................................................................................................... 79<br />
AUDIO ............................................................................................................................................................... 80<br />
RDS ................................................................................................................................................................... 80<br />
BLOCAGE PARENTAL ...................................................................................................................................... 80<br />
HARDWARE ...................................................................................................................................................... 82<br />
P.VOL ................................................................................................................................................................. 82<br />
MÉTHODE POUR CHANGER LE MOT DE PASSE .......................................................................................... 83<br />
TS CAL .............................................................................................................................................................. 83<br />
ÉGALISEUR (EQ) ............................................................................................................................................. 84<br />
GUIDE DE DÉPANNAGE ................................................................................................................................ 85<br />
CONNEXION DE L’APPAREIL<br />
NOTES .............................................................................................................................................................. 87<br />
CÂBLAGE PRINCIPALE ................................................................................................................................... 88<br />
CONNEXION AU FREIN À MAIN ..................................................................................................................... 89<br />
CONNEXION MARCHE ARRIÈRE ................................................................................................................... 89<br />
INSTALLATION ET DÉSINSTALLATION<br />
NOTES POUR L'INSTALLATION ...................................................................................................................... 90<br />
INSTALLATION DE L’APPAREIL ....................................................................................................................... 90<br />
INSTALLATION DU CADRE DE FINITION ....................................................................................................... 92<br />
DÉSINSTALLATION .......................................................................................................................................... 92<br />
CARACTÉRISTIQUES TECHNIQUES .............................................................................................................. 93<br />
ANNEXE<br />
CODES RÉGION ............................................................................................................................................... 95<br />
CONSIGNES DE SÉCURITÉ POUR L’UTILISATION DES DISQUES .............................................................. 95<br />
PLAN DES CONNEXIONS ............................................................................................................................... 96<br />
GARANTIE ....................................................................................................................................................... 97<br />
51
CONSIGNES DE SÉCURITÉ<br />
1. Branchez cet appareil seulement à une source<br />
d’alimentation +12V (DC) avec une masse négative.<br />
2. Pour des raisons de sécurité, ne jamais installer cet<br />
appareil dans votre champ de vision.<br />
3. Il est défendu par la loi d’utiliser la fonction d'affichage<br />
vidéo (à l’avant) en conduisant (à l’exception d’une<br />
camera de recul). Visionner une vidéo en conduisant<br />
augmente le risque d'accident de la circulation.<br />
4. Pour éviter tout risque de court circuit ou d’incendie,<br />
veuillez ne jamais exposer cet appareil à l'humidité ou<br />
à tout autre liquide.<br />
5. Ne jamais remplacer le fusible du câble d'alimentation<br />
sans l’aide d’un professionnel. L’utilisation d’un fusible<br />
non conforme risque d’endommager cet appareil ou<br />
même de provoquer un incendie.<br />
6. Veuillez mettre immédiatement cet appareil hors tension<br />
et contacter le centre de service après-vente ou votre<br />
revendeur lors de l’apparition de l’un des symptômes<br />
suivants :<br />
(a) Pas de son ; (b) Pas d'image ;<br />
(c) Intrusion de liquide dans l’appareil ;<br />
(d) Dégagement de fumé ; (e) Odeur particulière.<br />
7. Pour votre sécurité, veuillez régler le volume sonore<br />
à un niveau confortable afin d’entendre tout véhicule<br />
d'urgence.<br />
52
ZE-NC514<br />
PRÉCAUTIONS<br />
1. Ne jamais désassembler cet appareil. Pour plus de détails, veuillez contacter le centre<br />
de service après-vente ou votre revendeur.<br />
2. Pour le nettoyage du panneau de commandes et de l’écran TFT, utilisez un chiffon<br />
doux et propre avec un peu de détergent neutre. L’utilisation d’un tissu rugueux ou d’un<br />
détergent non-neutre tel que l'alcool peut provoquer des éraflures ou la décoloration de<br />
l’écran.<br />
3. En cas de comportement anormal de l'appareil, se rapporter au guide de dépannage<br />
de ce manuel. Si aucune solution n'est trouvée, appuyez sur la touche [RESET] du<br />
panneau de commandes pour réinitialiser l’appareil en chargeant les paramètres d'usine<br />
par défaut.<br />
4. Si votre véhicule est resté exposé pendant longtemps à une température chaude ou<br />
froide, attendez jusqu'à ce que la température à l’intérieur du véhicule soit revenu à la<br />
normale avant de mettre l'appareil en fonction.<br />
5. L’utilisation du chauffage par temps froid peut provoquer la formation de buée à<br />
l'intérieur de l'appareil. N’utilisez pas l'appareil dans cette situation. Si un disque se<br />
trouve à l’intérieur, éjectez-le et séchez-le avec un chiffon doux et sec. Après quelques<br />
heures, si l'appareil ne fonctionne toujours pas, contactez le centre de service aprèsvente<br />
ou votre revendeur.<br />
6. Un impact violent sur l’écran TFT, quand il est en position ouverte, peut l’endommager.<br />
7. Pour éviter tout dommage, ne jamais toucher l’écran TFT avec des objets pointus.<br />
8. Cet appareil utilise un mécanisme de motorisation automatique, ne jamais pousser, tirer<br />
ou faire pivoter l’écran manuellement pour éviter tout dommage.<br />
9. Pour une compréhension plus facile du fonctionnement de cet appareil, des illustrations<br />
graphiques sont employées. Cependant, ces illustrations peuvent être différentes des<br />
images réellement affichées à l'écran.<br />
10. Pendant le fonctionnement de l'appareil, le sigle « » s’affiche à l’écran si l'opération<br />
en cours n'est pas disponible ou non autorisée.<br />
11. Pour éviter tout problème inutile, utilisez cet appareil correctement en suivant les<br />
indications de ce manuel. Tout problème dû à une mauvaise utilisation de l’appareil<br />
entrainera la perte de la garantie<br />
DÉCLARATION<br />
Ce produit intègre des technologies protégées par des brevets et autres droits de propriétés<br />
intellectuelles aux États-Unis.<br />
Toute utilisation de cette technologie doit être autorisée par Macrovision et est limitée à une<br />
utilisation personnelle.<br />
Le désassemblage ou le démontage est interdit.<br />
53
PANNEAU DE COMMANDES<br />
START CODE: 012345 (voir page : 83)<br />
PANNEAU DE COMMANDES<br />
AV-IN<br />
14<br />
1. Touche [LARGE] : Changer le mode d'affichage<br />
2. Touche [ ] : Suivant / déplace le curseur vers la droite<br />
3. Touche [ ] : Précédent / déplace le curseur vers la gauche<br />
4. Touche [NAV] : Entrée / sortie mode NAV<br />
5. Molette [Vol.] : Régler le volume /activer / désactiver la fonction sourdine<br />
6. Touche [Reset] : Réinitialisation de l'appareil<br />
7. Touche [ /SRC] : Mise sous tension de l'appareil / ouvrir menu source<br />
8. Jack d’entrée AV-IN<br />
9. Prise USB<br />
54
ZE-NC514<br />
PANNEAU DE COMMANDES<br />
10. Touche [ ] : Éjecter le disque<br />
11. Touche [OPEN/Close] : Ouverture / fermeture de l’écran TFT<br />
12. Touche [AS/TILT+] : Mémorisation automatique / balayage / augmentation de l’angle<br />
de l’écran TFT<br />
13. Touche [BAND/TILT-] : Sélectionner une bande radio / diminution de l’angle de l’écran<br />
14. AFFICHAGE LCD AUXILIAIRE<br />
1. Indicateur de disque<br />
■ Est allumé lorsqu’un disque est à l'intérieur ; Est éteint lorsqu’aucun disque n'est à<br />
l'intérieur.<br />
2. Indicateur du mode de répétition<br />
■ Est allumé lorsque le mode de répétition est actif ; Est éteint lorsque le mode de<br />
répétition est désactivé.<br />
3. Zone de principale visualisation<br />
■ Affiche les caractères, le temps de lecture, la fréquence radio, l’heure et tout autre texte<br />
d’information.<br />
4. Indicateurs du statut radio<br />
■ L’indicateur « stéréo » s’allume quand la diffusion radio est en stéréo ; L’indicateur «<br />
local » s’allume quand la fonction recherche locale est active.<br />
5. Indicateurs des fonctions RDS<br />
■ AF : Fréquence alternative<br />
■ PTY : Type de programme<br />
■ TA : Annonce routière<br />
■ TP : Programme d’annonce routière<br />
NOTE :<br />
■ La plupart des informations peuvent être affichées sur cet écran LCD seulement quand<br />
l’écran TFT est fermé.<br />
■ Cet affichage LCD auxiliaire ne support que la langue anglaise.<br />
55
PANNEAU DE COMMANDES<br />
TÉLÉCOMMANDE<br />
<br />
<br />
<br />
<br />
<br />
<br />
<br />
<br />
<br />
<br />
<br />
<br />
<br />
<br />
<br />
<br />
<br />
<br />
<br />
<br />
<br />
<br />
<br />
<br />
<br />
<br />
<br />
<br />
<br />
<br />
<br />
<br />
<br />
<br />
<br />
<br />
<br />
Fonctions principales<br />
<br />
<br />
NOTE :<br />
<br />
■ Votre télécommande peut<br />
légèrement différer de celle<br />
décrit ici. Le dessin cidessus<br />
est uniquement pour<br />
d'illustration.<br />
<br />
<br />
<br />
<br />
1. Touche [SRC] : Sélection de la source de<br />
lecture <br />
2. Touche {EJECT] : Éjecter le disque<br />
3. Touche [MENU] : MENU DVD/PBC<br />
4. Touche [TITRE] : TITRE DVD<br />
<br />
5. Touche [DISP] : Affichage des informations<br />
<br />
6. Touche (ANGLE] : Modifier l’angle d’affichage<br />
<br />
7. Touche [LARGE] : Modifier l’affichage<br />
<br />
8. Touche [OPEN/CLOSE] : Ouvrir/Fermer l’écran<br />
9. Touche [PRESET/] : Sélectionner les<br />
Stations de radio mémorisées<br />
<br />
10. Touche [] : Avance rapide/déplace le curseur<br />
vers le haut <br />
<br />
11. Touche [/BAND] : Sélectionner une bande<br />
<br />
radio/arrêt de lecture<br />
<br />
12. Touche [/ ] : Lecture/pause/Entrée<br />
13. Touche [] touche : Recherche automatique /<br />
précédent / déplace le curseur vers la gauche<br />
<br />
14. Touche [GOTO] : Recherche « GOTO »<br />
<br />
15. Touche [] touche : Retour rapide/déplace le<br />
<br />
curseur vers le bas<br />
<br />
16. Touche [0-9] : Touches numériques<br />
17. Touche [MUTE] : Mise en sourdine<br />
18. Touche [POWER] : Mise sous/hors tension<br />
<br />
19. Touche [AUDIO] : Sélectionner la langue de la<br />
<br />
bande son du DVD<br />
<br />
20. Touche [SUBTITLE] : Sélectionner la langue<br />
des sous-titres du DVD<br />
21. Touche [REPT A-B] : Répétition A-B<br />
22. Touche [REPT]: Répéter la lecture<br />
<br />
23. Touche (TILT ] : Réglage de l’inclinaison<br />
<br />
de l’écran TFT<br />
<br />
24. Touche [VOL+/-] : Réglage du volume<br />
25. Touche [SCN] : Lecture en mode balayage<br />
26. Touche [RDM] : Lecture aléatoire<br />
27. Touche [] : Recherche automatique/suivant/<br />
déplacer le curseur vers la droite<br />
28. Touche (SEL] : Égaliseur<br />
29. Touche [ZOOM] : Zoom in/out<br />
30. Touche [PIC] : Réglage de l’image<br />
31. [SETUP] : Menu réglages<br />
32. Touche [CLEAR] : Effacer<br />
56
ZE-NC514<br />
PANNEAU DE COMMANDES<br />
NOTES POUR L’UTILISATION DE LA TÉLÉCOMMANDE<br />
1) Orientez la télécommande vers le capteur infrarouge de l'appareil.<br />
2) Retirez la batterie de la télécommande ou insérez un isolant de batterie si vous ne<br />
l’utilisez pas pendant plus d’un mois.<br />
3) Ne pas exposer la télécommande en plein soleil ou dans un environnement sujet à de<br />
hautes températures.<br />
4) La batterie peut fonctionner pendant 6 mois dans des conditions normales. Si la<br />
télécommande ne fonctionne pas, changez la batterie.<br />
5) N’utilisez que des batteries au lithium « CR2025 (3V) ».<br />
6) Ne pas recharger, désassembler, chauffer ou jeter la batterie dans le feu.<br />
7) Insérer la batterie dans le sens approprié des pôles (+) et (-).<br />
8) Gardez la batterie hors de portée des enfants pour éviter tout risque d'accident.<br />
DÉSINSTALLER LA BATTERIE<br />
■ Faire glisser le couvercle du compartiment batterie au dos de la télécommande vers le<br />
bas.<br />
Installer la batterie<br />
■ N’utilisez que des batteries au lithium « CR2025 (3V) ». Insérez la batterie dans le sens<br />
approprié des pôles (+) et (-).<br />
TIRER<br />
POUSSER<br />
57
OPÉRATIONS DE BASE<br />
ALLUMER/ÉTEINDRE L’APPAREIL<br />
■ Appuyez sur n'importe quelle touche du panneau de commandes ou sur la touche<br />
[POWER] de la télécommande pour allumer l’appareil.<br />
■ Appuyez et maintenez la touche [SRC] du panneau de commandes ou appuyez sur la<br />
touche [POWER] de la télécommande pour éteindre l’appareil.<br />
NAV<br />
■ Appuyez sur la touche [NAV] du panneau de commandes pour entrer ou sortir de la<br />
source de navigation. Le son de la source de lecture actuelle est maintenu sauf lors<br />
d’une annonce de navigation.<br />
Réglage du volume<br />
■ Tournez la molette du volume du panneau de commandes ou appuyez sur la touche<br />
[vol.] de la télécommande.<br />
■ La plage de réglage du volume est de 0 à 40.<br />
■ Appuyez sur la touche [vol.] ou la touche [MUTE] de la télécommande pour activer ou<br />
désactiver la fonction sourdine.<br />
NOTE :<br />
■ Le réglage du volume désactive la fonction sourdine.<br />
■ L’icône « MUTE » clignote sur l’écran TFT lorsque la fonction sourdine est active.<br />
OUVRIR LE MENU SOURCE<br />
■ Appuyez sur la touche [SRC] du panneau de commandes ou de la télécommande<br />
ou touchez le coin supérieur gauche de l'écran pour ouvrir le menu source. Répétez<br />
l’opération ci-dessus pour retourner à la source initiale.<br />
SÉLECTIONNER UNE SOURCE DE LECTURE SOURCE<br />
■ Ouvrez le menu source et touchez l’icône de la source désirée, ou déplacez le curseur<br />
sur l’icône et confirmez.<br />
NOTE :<br />
■ La sélection d’une source de lecture permet d’activer celle-ci comme par exemple le<br />
mode DVD, le mode radio, le mode camera, …<br />
■ Si une source n’est pas active, elle ne peut être sélectionnée.<br />
58
ZE-NC514<br />
OPÉRATIONS DE BASE<br />
AFFICHER L’HORLOGE<br />
■ Appuyez et maintenez la touche [DISP] du panneau de commandes pour commuter<br />
entre l’affichage de l’horloge et la source de lecture quand l’écran TFT est fermé.<br />
UTILISATION DE L’ÉCRAN TFT<br />
Ouverture / Fermeture<br />
■ Appuyez sur la touche [OPEN/CLOSE] du panneau de commandes ou de la<br />
télécommande pour ouvrir ou fermer l’écran TFT.<br />
Réglage de l'inclinaison de l’écran TFT<br />
■ En raison du caractère inhérent de l'affichage TFT, vous obtiendrez une lisibilité différente<br />
suivant l’angle de visionnage.<br />
■ L’inclinaison de l’écran TFT peut être changée. Par conséquent, vous pouvez modifier<br />
l’angle pour une meilleure lisibilité.<br />
■ Appuyez sur la touche [TILT] du panneau de commandes de l’écran ou de la<br />
télécommande pour régler l’angle d'inclinaison par paliers.<br />
■ Appuyez et maintenez la touche [TILT] du panneau de commandes de l’écran ou de la<br />
télécommande pour régler l’angle d'inclinaison en continu.<br />
Changer le format de l’image (rapport hauteur/largeur)<br />
■ Appuyez sur la touche [WIDE] du panneau de commandes de l’écran ou de la<br />
télécommande pour changer le format de l’image (rapport hauteur/largeur).<br />
Réglage de l'image<br />
(1) Entrer dans le mode de réglage d'image<br />
Appuyez sur la touche [PIC] de la télécommande.<br />
(2) Sélectionner le paramètre à régler<br />
Appuyez sur la touche []/[] de la télécommande.<br />
(3) Régler la valeur<br />
Appuyez sur la touche []/[] de la télécommande.<br />
(4) Sortir du mode de réglage d'image<br />
Pour sortir du mode de réglage d'image, répéter la première opération ou patientez<br />
quelques secondes sans rien faire.<br />
Réinitialisation de l’appareil<br />
■ Une réinitialisation de l’appareil est possible si l’appareil ne fonctionne pas correctement.<br />
Appuyez alors sur le bouton [RESET] du panneau de commandes.<br />
59
MODE RADIO<br />
Sélectionner le mode radio en tant que source de lecture<br />
■ Ouvrez le menu source et touchez l’icône RADIO.<br />
Sélectionner une bande Radio<br />
■ Appuyez sur la touche [BAND] du panneau de commandes ou de la télécommande,<br />
ou touchez l’icône [BAND] de l'interface utilisateur pour sélectionner une bande radio<br />
parmi celles proposées (FM1, FM2, FM3, AM1 et AM2).<br />
Recherche automatique<br />
■ Appuyez sur la touche []/[] du panneau de commandes ou de la télécommande ou<br />
touchez l’icône []/[] de l'interface utilisateur pour rechercher une station suivante<br />
ou précédente. Pour cesser la recherche, répétez l’opération ci-dessus ou appuyez sur<br />
d'autres touches ayant des fonctions radio.<br />
NOTE :<br />
■ Quand une station est trouvée, la recherche s’arrête et la lecture commence. Si une<br />
station radio est diffusée en stéréo, le voyant « ST » (stéréo) s’affiche sur l’écran TFT ou<br />
l'écran LCD.<br />
Recherche manuelle<br />
■ La recherche manuelle permet de trouver une station radio en balayant les fréquences<br />
pas à pas.<br />
■ Appuyez sur la touche []/[]de la télécommande ou touchez l’icône []/[] de<br />
l'interface utilisateur pour passer à la fréquence suivante ou précédente. Touchez l’icône<br />
du pavé numérique [S] puis les boutons numériques pour entrer la fréquence d’une<br />
station radio.<br />
Mémorisation automatique<br />
■ Seul les stations avec un signal suffisamment puissant seront détectées et mémorisées.<br />
Quand l’écran TFT est fermé, appuyez et maintenez la touche [AS/PS] du panneau de<br />
commandes. Quand l’écran TFT est ouvert, touchez l’icône [AS] de l'interface utilisateur.<br />
Pour arrêter la mémorisation automatique, appuyez sur une autre touche ayant des<br />
fonctions radio.<br />
NOTE :<br />
■ A la fin de la mémorisation automatique, toutes les stations sauvegardées précédemment<br />
seront remplacées.<br />
■ Cet appareil dispose de 5 bandes radio (FM1, FM2, FM3, AM1, AM2). Chaque bande<br />
peut mémoriser jusqu’ à 6 stations (30 stations en totalité).<br />
60
ZE-NC514<br />
MODE RADIO<br />
MÉMORISATION MANUELLE<br />
Pour mémoriser une station manuellement :<br />
(1) Appuyez sur l’icône [MEM] de l'interface utilisateur afin d’ouvrir le menu de présélection.<br />
(2) Appuyez sur l’une des touches de présélection (P1à P6).<br />
(3) Pour sortir, appuyez sur la touche [EXIT].<br />
FONCTION DE BALAYAGE<br />
■ La fonction de balayage permet d’écouter 5 à 10 secondes de chaque station radio<br />
trouvée. Après l’écoute, la recherche continue jusqu’au balayage complet de toute la<br />
bande radio sélectionnée.<br />
■ Quand l’écran TFT est fermé, appuyez et maintenez la touche [AS/PS] du panneau de<br />
commandes.<br />
■ Quand l’écran TFT est ouvert, touchez l’icône [PS] de l'interface utilisateur.<br />
■ Pour arrêter le balayage, appuyez sur une autre touche ayant des fonctions radio.<br />
Écoute des stations mémorisées<br />
■ Appuyez sur une touche numérique de la télécommande (1 à 6) ou touchez le numéro<br />
de la station désirée pour l’écouter.<br />
Recherche locale<br />
■ Quand la recherche locale est activée, seul les stations de radio locale avec un signal<br />
radio puissant seront détectées.<br />
■ Pour activer ou désactiver la fonction de recherche locale, appuyez et maintenez la<br />
touche [NAV] du panneau de commandes.<br />
NOTE :<br />
■ Lorsque la recherche locale est activée, le voyant « LOC » s'affiche.<br />
■ Lorsque la recherche locale est activée, le nombre de stations de radio pouvant être<br />
détectées est diminué.<br />
61
FONCTION RDS<br />
Cet appareil dispose des fonctions de base du RDS, incluant la fonction PI (Program<br />
Identification), le nom de la station radio, RT (Radio Text), CT (Clock Time), AF (Alternative<br />
Frequency), TA (Traffic Announcement) et PTY (Program Type).<br />
FONCTION AF<br />
■ Les émetteurs diffusent la liste des fréquences des émetteurs voisins de la même<br />
station. L’appareil cherchera la meilleure fréquence disponible. Ainsi, on peut écouter la<br />
même station d'un bout à l'autre du pays sans changer de fréquence manuellement.<br />
■ Pour activer la fonction AF, touchez le bouton [AF] sur l'interface utilisateur. Pour<br />
désactiver cette fonction, répétez l’opération ci-dessus.<br />
NOTE :<br />
■ Certaines interférences peuvent être entendues pendant la commutation automatique<br />
entre les fréquences radio. Désactiver la fonction AF permet de résoudre ce problème.<br />
FONCTION TA<br />
■ La fonction TA (indicateur d'annonce routière) indique que la station émet une annonce<br />
routière (l’indicateur TA s’affiche). L’appareil commute alors automatiquement vers<br />
l’annonce indépendamment de la source de lecture ou station de radio actuelle. A la fin<br />
de l'annonce routière, l’appareil revient à sa source initiale.<br />
■ La fonction TA peut être activée par une station TP (station émettant des annonces<br />
routières).<br />
■ Pour activer la fonction de TA, touchez l’icone [TA] de l'interface utilisateur.<br />
■ Pour désactiver cette fonction, répétez l’opération ci-dessus.<br />
62
ZE-NC514<br />
RDS-FONCTION PTY<br />
■ PTY est l'abréviation pour le type de programme diffusé (par exemple infos ou Rock,<br />
POP…).<br />
■ Six options PTY sont affichées à l'écran. Pour accéder à davantage d'options, touchez<br />
la barre de défilement et les flèches sur l'écran TFT.<br />
■ Lorsqu’une option PTY est sélectionnée (par exemple infos), l’appareil recherche<br />
automatiquement la prochaine station radio diffusant ce type de programme. Si aucune<br />
station radio ne diffuse ce type de programme, l’appareil reviendra alors à la station<br />
radio initiale.<br />
PROGRAM SERVICE (PS)<br />
■ Le nom de la station, composée de huit caractères alphanumériques, peut être affiché<br />
sur l'écran (par exemple {BBC_4_FM}, {classique}).<br />
CT (CLOCK TIME)<br />
■ Certaines stations radio diffusent la date et heure par le signal RDS. L’heure est<br />
automatiquement réglée quand la fonction « CT » est placée sur "ON".<br />
RT (RADIO TEXT)<br />
■ Lorsque cette fonction est activée, des textes peuvent être diffusés par l'intermédiaire<br />
du RDS et affichés à l’écran, tel que le nom de la station, de la chanson actuelle et de<br />
l'artiste.<br />
63
MODE DISQUE<br />
<br />
INSÉRER UN DISQUE<br />
■ Lors de l’insertion d’un disque, l'appareil commute automatiquement sur le mode<br />
<br />
disque.<br />
<br />
NOTE :<br />
<br />
■ Avant d’insérer un disque, veuillez vérifier qu’aucun disque ne se trouve dans l'appareil.<br />
<br />
■ Certains disques enregistrés tels que des CD-R, CD-RW, DVD-R, DVD+R, DVD-<br />
<br />
RW, DVD+RW peuvent ne pas être lus en raison d’une différence dans le mode<br />
d'enregistrement ou parce qu’ils n’ont pas été finalisés lors de la gravure. <br />
<br />
■ Concernant les consignes de sécurité, pour l’utilisation des disques, veuillez vous<br />
référer à l'annexe. <br />
<br />
ÉJECTER LE DISQUE<br />
■ Appuyez sur la touche [EJECT] du panneau de commandes ou de la télécommande<br />
pour éjecter le disque.<br />
■ Vous pouvez éjecter un disque après que l'appareil soit éteint. <br />
<br />
CONTRÔLES DE L’ÉCRAN TACTILE<br />
<br />
■ Pendant la lecture d’un DVD, plusieurs zones de contrôle de l’écran tactile sont<br />
disponibles comme indiqué ci-dessous : <br />
<br />
<br />
<br />
A – Ouvrir menu source <br />
B – Affichages des informations de lecture<br />
<br />
C – Affichage du Menu de contrôle à l'écran (OSD)<br />
<br />
64
ZE-NC514<br />
MODE DISQUE<br />
BOUTONS DE COMMANDE À L'ÉCRAN (OSD)<br />
Disc type/<br />
Icon<br />
S<br />
N<br />
MP3/WMA CD VCD DVD MPEG Illustration<br />
Pavé<br />
numérique<br />
Menu<br />
Réglages<br />
/<br />
/<br />
Pavé<br />
numérique<br />
Menu<br />
Réglages<br />
Avance<br />
rapide<br />
Retour<br />
rapide<br />
Pavé<br />
numérique<br />
Menu<br />
Réglages<br />
Avance<br />
rapide<br />
Retour<br />
rapide<br />
Pavé<br />
numérique<br />
Menu<br />
Réglages<br />
Avance<br />
rapide<br />
Retour<br />
rapide<br />
Pavé<br />
numérique<br />
Menu<br />
Réglages<br />
Avance<br />
rapide<br />
Retour<br />
rapide<br />
Pavé<br />
numérique<br />
Menu<br />
Réglages<br />
Précédent Précédent Précédent Précédent Précédent Précédent<br />
Suivant Suivant Suivant Suivant Suivant Suivant<br />
E<br />
Lecture/<br />
Pause<br />
Lecture/<br />
Pause<br />
Lecture/<br />
Pause<br />
Lecture/<br />
Pause<br />
Lecture/<br />
Pause<br />
/<br />
/<br />
Lecture/<br />
Pause<br />
Arrêt Arrêt Arrêt Arrêt Arrêt Arrêt<br />
EQ<br />
/ /<br />
Lecture<br />
Répétée<br />
Lecture<br />
Aléatoire<br />
Lecture<br />
Répétée<br />
Lecture<br />
Aléatoire<br />
deuxième<br />
Menu<br />
Lecture<br />
Répétée<br />
Lecture<br />
Aléatoire<br />
deuxième<br />
Menu<br />
Lecture<br />
Répétée<br />
Lecture<br />
Aléatoire<br />
deuxième<br />
Menu<br />
Lecture<br />
Répétée<br />
Lecture<br />
Aléatoire<br />
/<br />
Lecture<br />
Répétée<br />
/ / / / / Rotation<br />
/ / Zoom / / Zoom<br />
Réglages<br />
Égaliseur<br />
Réglages<br />
Égaliseur<br />
Réglages<br />
Égaliseur<br />
Réglages<br />
Égaliseur<br />
Réglages<br />
Égaliseur<br />
/<br />
Réglages<br />
Égaliseur<br />
PBC / / PBC / / /<br />
A-B / /<br />
BACK / /<br />
AUDIO / /<br />
SOUS-<br />
TITRE<br />
Lecture<br />
Répétée A-B<br />
Quitter le<br />
menu<br />
Commutation<br />
canaux<br />
/ / /<br />
DISP / /<br />
Affichage<br />
informations<br />
Lecture<br />
Répétée A-B<br />
Quitter le<br />
menu<br />
Langue de la<br />
bande son<br />
Langues des<br />
sous-titres<br />
Affichage<br />
informations<br />
/ /<br />
Quitter le<br />
menu<br />
Langue de la<br />
bande son<br />
Langues des<br />
sous-titres<br />
Affichage<br />
informations<br />
Quitter le<br />
menu<br />
/<br />
/<br />
Affichage<br />
informations<br />
MENU / / / Menu DVD / /<br />
TITRE / / / Titre DVD / /<br />
DIR+<br />
DIR-<br />
Dossier<br />
suivant<br />
Fichier<br />
suivant<br />
/ / / /<br />
/ / / /<br />
Dossier<br />
suivant<br />
Fichier<br />
suivant<br />
65
MODE DISQUE<br />
SUSPENDRE LA LECTURE<br />
■ Appuyez sur la touche [/] du panneau de commandes ou de la télécommande ou<br />
ouvrez le menu de commande à l'écran et touchez l’icône [/] . Pour reprendre la<br />
lecture, répétez l’opération ci-dessus.<br />
ARRÊTER LA LECTURE<br />
■ Pour suspendre la lecture et mémoriser le point d’arrêt, appuyez une seule fois sur la<br />
touche [] de la télécommande ou ouvrez le menu de commande à l’écran et touchez<br />
une seule fois l’icône []. Lors de la reprise, la lecture reprend au même endroit.<br />
■ Pour arrêter la lecture, appuyez deux fois sur la touche [] de la télécommande ou<br />
ouvrez le menu de commande à l’écran et touchez deux fois l’icône []. Lors de la<br />
reprise de la lecture, celle-ci reprendra du début.<br />
AFFICHER LA LISTE DES FICHIERS<br />
■ Pour afficher la liste des fichiers d’un disque gravé, arrêtez la lecture actuelle.<br />
LECTURE RAPIDE<br />
■ Appuyez plusieurs fois sur la touche []/[] de la télécommande ou ouvrez le menu<br />
de commande à l’écran et touchez plusieurs fois l’icône []/[] afin de changer la<br />
vitesse de lecture rapide avant/arrière.<br />
PRÉCÉDENT/SUIVANT<br />
■ Appuyez sur la touche []/[] du panneau de commandes ou de la télécommande ou<br />
ouvrez le menu de commande à l’écran et touchez l’icône []/[] pour lire le fichier<br />
précédent ou suivant.<br />
CHANGER DE DOSSIER<br />
■ Appuyez sur la touche [DIR+]/[DIR-] de l'interface utilisateur (si vous lisez une vidéo<br />
ou un fichier image, arrêtez la lecture) pour changer de dossier pendant la lecture d'un<br />
disque gravé contenant plus d'un dossier.<br />
66
ZE-NC514<br />
MODE DE DISQUE<br />
LECTURE RÉPÉTÉE<br />
■ Appuyez plusieurs fois sur la touche [RPT] de la télécommande à ou ouvrez le menu<br />
de commande à l’écran et touchez plusieurs fois l’icône [ ] pour modifier le mode de<br />
lecture répétée selon le tableau suivant.<br />
Type de disque<br />
DVD<br />
VCD (PBC désactivé)<br />
CD<br />
MP3/WMA<br />
MPEG<br />
PHOTO<br />
Mode de lecture répétée<br />
Répéter Chapitre → Répéter Titre → Désactivé<br />
Répéter 1 x → Répéter tout → Désactivé<br />
Répéter 1 x → désactivé<br />
Répéter 1 x → Répéter Dossier → Désactivé<br />
Répéter 1 x → Répéter Dossier → Désactivé<br />
Répéter 1 x → Répéter Dossier → Désactivé<br />
NOTE :<br />
■ Lors de la lecture d’un VCD, cette fonction est inactive si le PBC est activé.<br />
■ Cette fonction est désactivée si vous éteignez l’appareil ou commutez ver une autre<br />
source.<br />
RÉPÉTER A-B<br />
■ Lors de la lecture d’un DVD, VCD ou CD, vous pouvez répéter la section A à B d’un titre.<br />
■ Appuyez sur la touche [RPT A-B) de la télécommande ou ouvrez le menu de commande<br />
à l’écran et touchez l’icone [A-B] pour sélectionner le début (A) de la section à répéter.<br />
Renouvelez l’opération pour sélectionner la fin (B) de la section à répéter.<br />
■ La section sélectionnée sera répétée en continue.<br />
■ Pour annuler cette fonction, renouvelez une troisième fois l’opération.<br />
LECTURE ALÉATOIRE<br />
■ Lorsque cette fonction est activée, le contenu du disque est lu de manière aléatoire.<br />
■ Appuyez plusieurs fois sur la touche [RDM] de la télécommande ou ouvrez le menu de<br />
commande à l’écran et touchez plusieurs fois l’icône [ ] pour commuter entre le mode<br />
« Lecture aléatoire », « Lecture répétée aléatoire » et « Désactivé ».<br />
67
MODE DE DISQUE<br />
BALAYAGE<br />
■ Lorsque cette fonction est activée, l'appareil lit les 10 premières secondes de chaque<br />
piste d'un disque VCD ou CD. Cette fonction vous permet de rechercher le titre désiré.<br />
■ Pour activer cette fonction, appuyez sur la touche [SCN] de la télécommande. Répétez<br />
l’opération pour la désactiver.<br />
RECHERCHE DIRECTE<br />
■ Lors de la lecture d’un DVD, VCD ou CD, vous pouvez rechercher un chapitre/piste<br />
particulier en appuyant sur les touches numériques de la télécommande. Par exemple,<br />
si vous souhaitez sélectionner la piste 15, appuyez sur la touche numérique [1] et [5] de<br />
la télécommande.<br />
RECHERCHE GOTO<br />
(1) Ouvrir le mode de recherche « GOTO »<br />
■ Appuyez sur la touche [GOTO] de la télécommande pour ouvrir le menu de recherche.<br />
■ Pour les DVD, vous pouvez rechercher selon le titre, chapitre et genre.<br />
■ Pour les VCD, si la fonction de PBC est désactivée, vous pouvez rechercher selon la<br />
durée ; si la fonction de PBC est activée, vous pouvez rechercher selon la piste, la durée<br />
de la piste et la durée du disque.<br />
■ Pour les CD, vous pouvez rechercher selon la piste.<br />
■ Pour les fichiers MPEG, vous pouvez rechercher selon la piste et la durée.<br />
■ Pour les disques gravés contenant des fichiers MP3 et/ou JPG, vous pouvez rechercher<br />
selon la piste (numéro de fichier).<br />
(2) Entrer l'information de recherche<br />
■ Sélectionnez un objet en appuyant sur les flèches de la télécommande et écrivez<br />
l'information de recherche en appuyant sur les touches numériques, telles que le titre, le<br />
chapitre ou la durée.<br />
(3) Confirmer<br />
■ Appuyez sur la touche [ENTER] de la télécommande pour confirmer.<br />
(4) Sortir du mode de recherche « GOTO »<br />
■ Répéter l’opération ci-dessus jusqu'à ce que le menu de recherche ait disparu ou<br />
touchez l’icône [EXIT] du menu.<br />
68
ZE-NC514<br />
MODE DE DISQUE<br />
MENU DVD ET TITRE<br />
■ Cette fonction est seulement disponible pour les DVD ayant « MENU /TITLE ». Appuyez<br />
sur la touche [MENU] de la télécommande ou ouvrez le menu de commande à l’écran et<br />
touchez l’icône [MENU] pour ouvrir le MENU DVD. Vous pouvez Sélectionner la langue<br />
de la bande son, des sous-titres et autres paramètres de lecture. Appuyez sur la touche<br />
[TITLE] de la télécommande ou ouvrez le menu de commande à l’écran et touchez<br />
l’icone [TITLE] pour ouvrir le Menu TITRE du DVD.<br />
Vous pouvez sélectionner un titre différent pour la lecture.<br />
SÉLECTIONNER LE LANGAGE DES SOUS-TITRES<br />
■ Appuyer à plusieurs reprises sur la touche [SUBTITLE] de la télécommande ou ouvrez<br />
le menu de commande à l’écran et touchez plusieurs fois l’icône [SUBTITLE] pour<br />
sélectionner la langue des sous-titres.<br />
SÉLECTIONNER UNE PRISE DE VUE « MULTI-ANGLE »<br />
■ Appuyez à plusieurs reprises sur la touche [ANGLE] de la télécommande pour<br />
sélectionner une prise de vue différente pendant la lecture d'un DVD ou d'un fichier<br />
vidéo contenant des prises de vues « multi-angle ».<br />
SÉLECTIONNER LA BANDE SONORE<br />
■ Pour les DVD contenant des bandes sonores multilingues, appuyez à plusieurs reprises<br />
sur la touche [AUDIO] de la télécommande ou ouvrez le menu de commande à l’écran<br />
et touchez plusieurs fois l’icône [AUDIO] pour changer la langue de la bande sonore.<br />
■ Pour les VCD et CD, appuyez à plusieurs reprises sur la touche [AUDIO] de la<br />
télécommande ou ouvrez le menu de commande à l’écran et touchez plusieurs fois<br />
l’icône [AUDIO] pour commuter entre les modes audio : gauche vocale, droite vocale,<br />
gauche mono, droite mono et stéréo.<br />
NOTE :<br />
■ Le canal gauche et droit ne peut pas fonctionner correctement si les fichiers audio n’ont<br />
pas été enregistrés correctement.<br />
FONCTION DE PBC<br />
■ Cette fonction est disponible pour les disques VCD avec la fonction PBC (Ver. 2.0 ou<br />
plus haut).<br />
■ Appuyez sur la touche [MENU] de la télécommande pour activer cette fonction.<br />
■ Appuyez à nouveau pour désactiver.<br />
69
MODE DISQUE<br />
NOTE :<br />
■ Lorsque la fonction PBC est activée, la lecture retourne à la liste des pistes et commence<br />
à partir de la première piste.<br />
■ Lorsque la fonction PBC est activée, la fonction lecture répétée et la recherche par<br />
chapitre ou piste n’est pas disponible.<br />
■ Si vous démarrez la fonction lecture aléatoire, balayage ou recherche, la fonction PBC<br />
sera automatiquement désactivée.<br />
ZOOM AVANT/ARRIÈRE<br />
■ Pour zoomer avant/arrière sur une image, appuyez sur la touche [ZOOM] de la<br />
télécommande ou ouvrez le menu de commande à l'écran et touchez l’icône [ ].<br />
ROTATION DE L’IMAGE<br />
■ Lors de la lecture d’un fichier photo, vous pouvez faire pivoter l'image pour obtenir une<br />
vue appropriée en touchant l’icône [ ] du menu de commande à l'écran.<br />
INFORMATIONS DE LECTURE<br />
■ Touchez la zone centrale de l’écran TFT lors de la lecture d’un DVD ou VCD pour afficher<br />
les informations de lecture sur la partie supérieure de l’écran TFT.<br />
POUR LE DVD<br />
(1) Type de disque.<br />
(2) Information sur les titres du DVD. « 5/8 » indique que ce DVD a 8 titres et que le titre en<br />
lecture est le cinquième.<br />
(3) Information sur les chapitres du DVD. « 2/16 » indique que le titre actuel a 16 chapitres<br />
et le chapitre en lecture est le deuxième.<br />
(4) Temps de lecture écoulé du titre actuel.<br />
(5) « 2/6 anglais » indique que les sous-titres de ce DVD ont été enregistrés dans 6<br />
langues et que la langue affichée est l’anglais et c’est la seconde.<br />
70
ZE-NC514<br />
MODE DE DISQUE<br />
POUR LE VCD<br />
(1) Type de disque.<br />
(2) Indicateur de fonction PBC. « PBC On » indique que la fonction de PBC est activée.<br />
(3) Informations sur les pistes du VCD. « 6/18 » indique que ce VCD a 18 pistes et la piste<br />
en lecture est la sixième.<br />
(4) Temps de lecture écoulé de la piste actuelle.<br />
71
MODE USB<br />
SÉLECTIONNER L'USB COMME SOURCE DE LECTURE<br />
■ Ouvrez le MENU SOURCE et touchez l’icône USB.<br />
NOTE :<br />
■ L’appareil commute automatiquement sur le mode USB lorsqu'un périphérique USB a<br />
été inséré.<br />
■ Cet appareil supporte la connexion et déconnexion à chaud.<br />
■ Cet appareil supporte uniquement des périphériques de stockage USB formatés en<br />
FAT16 ou 32. Format NTFS non supporté.<br />
COMMANDES DE L’ÉCRAN TACTILE<br />
■ Veuillez vous référer au chapitre « mode disque ».<br />
BOUTONS DE COMMANDE À L'ÉCRAN (OSD)<br />
■ Veuillez vous référer au chapitre « mode disque ».<br />
SUSPENDRE LA LECTURE<br />
■ Veuillez vous référer au chapitre « mode disque ».<br />
ARRÊTER LA LECTURE<br />
■ Veuillez vous référer au chapitre « mode disque ».<br />
AFFICHER LA LISTE DES FICHIERS<br />
■ Veuillez vous référer au chapitre « mode disque ».<br />
LECTURE RAPIDE<br />
■ Veuillez vous référer au chapitre « mode disque ».<br />
PRÉCÉDENT/SUIVANT<br />
■ Veuillez vous référer au chapitre « mode disque ».<br />
72
ZE-NC514<br />
MODE USB<br />
CHANGER DE DOSSIER<br />
■ Veuillez vous référer au chapitre « mode disque ».<br />
LECTURE RÉPÉTÉE<br />
■ Veuillez vous référer au chapitre « mode disque ».<br />
LECTURE ALÉATOIRE<br />
■ Veuillez vous référer au chapitre « mode disque ».<br />
BALAYAGE<br />
■ Veuillez vous référer au chapitre « mode disque ».<br />
RECHERCHE DIRECTE<br />
■ Veuillez vous référer au chapitre « mode disque ».<br />
RECHERCHE GOTO<br />
■ Veuillez vous référer au chapitre « mode disque ».<br />
ZOOM AVANT / ARRIÈRE<br />
■ Veuillez vous référer au chapitre « mode disque ».<br />
ROTATION DE L’IMAGE<br />
■ Veuillez vous référer au chapitre « mode disque ».<br />
INFORMATION DE LECTURE<br />
■ Veuillez vous référer au chapitre « mode disque ».<br />
73
MODE IPOD<br />
SÉLECTIONNER L'IPOD COMME SOURCE DE LECTURE<br />
■ L'appareil commute automatiquement sur le mode iPod lorsque celui-ci est connecté.<br />
■ Pour sélectionner le mode iPod d’une autre source, ouvrez le MENU SOURCE et<br />
touchez l’icône de l’iPod.<br />
LECTURE DE MUSIQUE<br />
(1) Ouvrir le mode musique de l’iPod<br />
■ Appuyez sur la touche [TITLE] de la télécommande ou touchez l’icône « musique » sur<br />
l'interface utilisateur.<br />
(2) Sélection d’un fichier de musique<br />
■ Appuyez la touche [Left]/[Right] de la télécommande.<br />
(3) Lecture du fichier musique<br />
■ Appuyez sur la touche [Down] de la télécommande ou touchez l’icône [ ] de l’interface<br />
utilisateur.<br />
(4) Retour au menu précédent<br />
■ Appuyer sur la touche [Up] de la télécommande ou touchez l’icone [MENU] de l’interface<br />
utilisateur.<br />
NOTE :<br />
■ En mode musique, les touches de l'iPod sont inactives.<br />
LECTURE DE PHOTO<br />
(1) Ouvrir le mode photo de l'iPod<br />
■ Appuyez sur la touche [MENU] de la télécommande ou touchez l’icône « Photo » de<br />
l'interface utilisateur.<br />
(2) Commandes de lecture des fichiers photo<br />
■ Utilisez les touches de l'iPod pour contrôler la lecture.<br />
NOTE :<br />
■ Pour sortir du mode PHOTO, appuyez sur l’icone [MENU] de l'iPod.<br />
■ Pour afficher les photos sur l'écran TFT, la fonction « diaporama » doit être activée sur<br />
l'iPod.<br />
74
ZE-NC514<br />
MODE IPOD<br />
LECTURE VIDÉO<br />
(1) Ouvrir le mode vidéo de l'iPod<br />
■ Appuyez sur la touche [AUDIO] de la télécommande ou touchez l’icône « Vidéo » de<br />
l'interface utilisateur.<br />
(2) Commandes de la lecture des fichiers vidéo<br />
Utilisez les touches de l'iPod pour contrôler la lecture.<br />
NOTE :<br />
■ Pour sortir du mode vidéo, appuyez sur la touche [MENU] de l'iPod.<br />
■ Pour pouvoir transmettre les images (vidéos et photos) de votre iPod vers l'écran TFT,<br />
vous devez régler les options suivantes dans le menu « réglages vidéo » de votre iPod :<br />
Sortie TV = On, Signal TV = NTSC.<br />
LECTURE RAPIDE<br />
■ Appuyez et maintenez la touche [Left]/[Right] de la télécommande ou touchez et<br />
maintenez l’icône []/[]de l’interface utilisateur. Pour reprendre la lecture normale,<br />
relâchez la touche.<br />
RECHERCHE DIRECTE<br />
■ Pour sélectionner un fichier directement, touchez l’icône numérique de l’interface<br />
utilisateur afin d’ouvrir le menu d'entrée directe.<br />
Sélectionnez le fichier désiré à l’aide du pavé numérique. Touchez l’icône [ENTER] pour<br />
confirmer.<br />
Pour quitter ce menu, touchez l’icone [EXIT].<br />
■ Pour effacer les numéros que vous avez entrés, touchez l’icône [CLEAR].<br />
■ Vous pouvez également utiliser les touches numériques de la télécommande pour<br />
sélectionner un fichier directement.<br />
75
MODE TUNER TV DVB-T (TNT)<br />
SÉLECTIONNER TUNER TV DVB-T (TNT) COMME SOURCE DE LECTURE<br />
■ Ouvrez le MENU SOURCE et sélectionnez DVB-T (TNT) et<br />
touchez l’écran pour afficher le menu des commandes.<br />
■ Appuyez pour augmenter le volume ou<br />
appuyez pour diminuer le volume.<br />
COMMANDES DE L’ÉCRAN TACTILE<br />
■ Dans le mode Tuner TV DVB-T (TNT), plusieurs zones de contrôle de l’écran tactile sont<br />
disponibles comme indiqué ci-dessous:<br />
A – Ouvrir le MENU SOURCE<br />
B – Afficher le menu des commandes<br />
C – Afficher le menu Réglages et Égaliseur<br />
SÉLECTION RAPIDE<br />
■ Appuyez sur [OK] pour afficher le menu [QUICK SELECT] (Sélection Rapide) et appuyez<br />
ou pour déplacer le curseur et sélectionner la chaine, ou appuyez ou pour<br />
sélectionner le mode source.<br />
RECHERCHER UNE CHAINE<br />
■ Appuyez sur MENU pour afficher [MAIN MENU] (Menu Principal), et appuyez ou <br />
pour déplacer le curseur et sélectionner la source. Appuyez sur [OK] pour ouvrir le menu<br />
secondaire. Appuyez [EXIT] pour quitter.<br />
76
ZE-NC514<br />
AUTRES MODES<br />
AV-IN<br />
■ Vous pouvez connecter à cet appareil tout périphérique externe disposant de sorties<br />
RCA audio/vidéo.<br />
■ Ouvrez le MENU SOURCE et touchez l’icône AV-IN pour ouvrir le mode AV-IN.<br />
CAMERA<br />
■ Cet appareil est préconfiguré pour une camera externe (« camera ready »). Avant<br />
d'accéder aux fonctions camera, vous devez acheter et installer une caméra de recul.<br />
Une fois la camera de recul correctement branchée et opérationnelle, le mode source<br />
CAMERA sera actif. Si aucune camera de recul n'est installée, l’icône CAMERA reste<br />
gris, indiquant que la source n'est pas disponible. La source de lecture commute<br />
automatiquement vers le mode « CAMERA » lorsque vous engagez la marche arrière.<br />
NAV<br />
■ Ce naviceiver est équipé avec un système de navigation interne. Avant d'accéder à<br />
n'importe quel dispositif de navigation, vous devez d’abord insérer la carte micro-SD qui<br />
contient les données de nav. Le logement pour carte micro-SD est situé sur le derrière<br />
du panneau TFT. Les consignes d'utilisation du système de navigation sont contenues<br />
sur un manuel séparé, qui fait partie du package.<br />
77
RÉGLAGES<br />
PROCÉDURES DE RÉGLAGE<br />
(1) Ouvrir le mode réglages<br />
■ Appuyez sur la touche [SETUP] de la télécommande ou touchez l’icône [<br />
utilisateur.<br />
■ Après ouverture du mode réglages, le menu suivant apparaît.<br />
■ Le sous-menu « General » est, par défaut, en surbrillance.<br />
] de l'interface<br />
(2) Sélectionner un sous-menu<br />
■ Appuyez sur les flèches de la télécommande.<br />
(3) Sélectionner une fonction<br />
■ Appuyez la touche []/[] de la télécommande pour sélectionner une fonction et<br />
appuyez sur [ ] pour confirmer.<br />
(4) Sélectionner une valeur<br />
■ Appuyez la touche []/[] de la télécommande pour sélectionner une valeur et<br />
appuyez sur la touche [ ] pour confirmer.<br />
NOTE :<br />
■ Tous les réglages décris ci dessus peuvent être effectués en touchant la fonction<br />
directement.<br />
78
ZE-NC514<br />
RÉGLAGES<br />
GÉNÉRAL<br />
■ Format Heure<br />
12Hr : Affichage au format 12 heures, ex. 11h18 du matin.<br />
24Hr : Affichage au format 24 heures, ex. 20h18.<br />
■ Horloge<br />
Règle l’heure de l'horloge affichée dans le coin supérieur droit de l'écran de TFT.<br />
■ Région du Tuner<br />
Règle le système radio correspondant à votre pays.<br />
■ Bip<br />
Activé : Le son des touches est activé.<br />
Désactivé : Le son des touches est désactivé.<br />
LANGUE<br />
■ OSD<br />
Sélectionner la langue du menu de commande à l’écran.<br />
■ DVD Audio<br />
Sélectionner la langue de la bande son d’un DVD.<br />
NOTE :<br />
■ La langue par défaut de la bande son sera lue si le DVD ne contient pas la langue<br />
sélectionnée.<br />
■ Sous-titre du DVD<br />
Sélectionner la langue des sous-titres du DVD.<br />
NOTE :<br />
■ La langue par défaut des sous-titres sera affichée si le DVD ne contient pas la langue<br />
sélectionnée.<br />
■ Menu du disque<br />
Sélectionner la langue du Menu du DVD.<br />
NOTE :<br />
■ La langue par défaut du Menu du DVD sera affichée si le DVD ne contient pas la langue<br />
sélectionnée.<br />
79
RÉGLAGES<br />
AUDIO<br />
■ DRC<br />
Règle la dynamique des DVD « dolby digital ».<br />
Activé : Une acoustique plus dynamique avec plus de graves.<br />
Désactivé : Acoustique normale.<br />
■ Loudness (correcteur physiologique)<br />
Activé : Le mode est activé.<br />
Désactivé : Le mode est désactivé.<br />
■ Subwoofer<br />
Activé : Sortie Subwoofer activée.<br />
Désactivé : Sortie Subwoofer désactivée.<br />
■ Sub Filter (Filtre passe-bas)<br />
Vous pouvez obtenir des effets de graves différents lorsque vous sélectionnez une<br />
fréquence de coupure du filtre passe-bas différente. Sélectionnez la fréquence<br />
appropriée à l’environnement acoustique de votre véhicule.<br />
Les fréquences disponibles sont : 80Hz, 120Hz, 160Hz.<br />
RDS<br />
■ RDS<br />
Activé : La fonction du RDS est activée<br />
Désactivé : La fonction du RDS est désactivée.<br />
■ CT<br />
Activé : La fonction « Clock Time » est activée.<br />
Désactivé : La fonction « Clock Time » est désactivée.<br />
■ TA VOL<br />
Réglage du volume des annonces routières.<br />
BLOCAGE PARENTAL<br />
■ Certains DVD intègrent un blocage parentale qui empêche les enfants de visionner des<br />
scènes violentes ou à caractère sexuel.<br />
■ Régler le mot de passe<br />
Le mot de passe initial de l’appareil est « 0000 ».<br />
80
ZE-NC514<br />
RÉGLAGES<br />
Choisissez un nouveau mot de passe DES QUE POSSIBLE.<br />
MÉTHODE POUR CHANGER LE MOT DE PASSE :<br />
(1) Déplacez le curseur sur l’option « mot de passe ». Appuyez sur les touches numériques<br />
de la télécommande ou touchez l'option « mot de passe » directement pour ouvrir le<br />
clavier numérique à l'écran. Touchez les touches numériques pour entrer votre mot de<br />
passe (la première fois, veuillez taper le mot de passe initial) et confirmez.<br />
(2) Répétez l’opération ci-dessus pour entrer un nouveau mot de passe à 4 chiffres<br />
et confirmez. Le nouveau mot de passe devient effectif et le blocage parental est<br />
verrouillé.<br />
BLOCAGE PARENTAL<br />
Cet appareil dispose de différents niveaux de blocage parental comme suit :<br />
(1) Kid safe : Peu être visionné par des enfants.<br />
(2) G : Pour personnes de tout âge.<br />
(3) PG : Pour personnes de tout âge et enfants sous contrôle des parents.<br />
(4) PG-13 : Pour personnes de tout âge. Enfants de moins de 13 ans, contrôle des parents<br />
exigé.<br />
(5) PG-R : Idem à PG.<br />
(6) R : Seulement pour personnes à partir d'un certain âge, habituellement âgé de plus de<br />
17ans, à moins d’être accompagné d'un adulte.<br />
(7) NC-17 : Pour personnes de plus de 17 ans.<br />
(8) Adult : Uniquement pour personnes adultes.<br />
PROCÉDURES POUR CHANGER LE NIVEAU DE BLOCAGE :<br />
(1) Entrez le mot de passe pour déverrouiller le blocage parental.<br />
■ Déplacez le curseur sur l’option « mot de passe ». Appuyez sur les touches numériques<br />
de la télécommande ou touchez l'option « mot de passe » directement pour ouvrir le<br />
clavier numérique à l'écran. Touchez les touches numériques pour entrer votre mot de<br />
passe et confirmez.<br />
(2) Changer le niveau de blocage<br />
■ Sélectionnez un niveau approprié à partir de la liste « Blocage Parental ».<br />
81
RÉGLAGES<br />
(3) Verrouiller le blocage parental<br />
■ Répétez la première opération pour entrer un mot de passe à 6 chiffres (ancien ou<br />
nouveau) et confirmez.<br />
■ Le blocage parental est maintenant verrouillé.<br />
■ Paramètres par défaut<br />
Pour revenir aux paramètres par défaut de la lecture des DVD (ex.: Bande Son des<br />
DVD, sous-titres des DVD), touchez l’icône [RESET].<br />
MATÉRIEL<br />
■ Camera In<br />
Normale : Affichage normal.<br />
Miroir : Affichage inversé.<br />
■ TFT Auto Open (Ouverture automatique de l’écran)<br />
Auto : L’écran TFT s'ouvre automatiquement lorsque vous allumez l’appareil et se ferme<br />
lorsque vous l’éteignez.<br />
Manuel : Lorsque vous coupez le contact du véhicule, l’écran TFT reste ouvert.<br />
Désactivé : L’écran TFT s'ouvre seulement en appuyant sur la touche « OPEN » lorsque<br />
celui-ci est allumé.<br />
■ Format vidéo<br />
NTSC : Règle le format vidéo de l'écran TFT sur NTSC.<br />
PAL : Règle le format vidéo de l'écran TFT sur PAL.<br />
Auto : Règle le format vidéo de l'écran TFT automatiquement.<br />
■ Parking<br />
Activé : Les vidéos ne peuvent être affichées que si le véhicule se trouve à l’arrêt, frein<br />
à main tiré.<br />
Désactivé : Les vidéos sont toujours affichées.<br />
P.VOL<br />
■ P.VOL signifie volume programmable.<br />
Vous pouvez régler le volume de chaque source séparément.<br />
82
ZE-NC514<br />
RÉGLAGES<br />
■ Source<br />
Sélectionner la source de lecture pour laquelle vous souhaitez régler le volume.<br />
■ Niveau<br />
Vous pouvez régler le niveau du volume de 0 à 6.<br />
MÉTHODE POUR CHANGER LE MOT DE PASSE :<br />
1. Déplacez le curseur sur l’option «Anti-vol MdP». Appuyez sur les touches numériques<br />
de la télécommande ou mieux, touchez l'option «Anti-vol MdP» directement pour ouvrir<br />
le clavier numérique à l'écran. Touchez les touches numériques pour entrer “012345”<br />
et confirmez avec touche Entrée.<br />
2. Répétez l’opération ci-dessus pour entrer un nouveau mot de passe à 4 chiffres et<br />
confirmez avec touche Entrée. Votre nouveau mot de passe devient effectif et le<br />
blocage Anti-vol est actif.<br />
VEUILLEZ NOTER:<br />
■ Employez un code que vous pouvez facilement se rappeler. Déverouillage n'est pas<br />
gratuite et peut seulement être effectuée par un centre autorisé de ZENEC.<br />
TS CAL<br />
■ Si l’écran tactile n’est pas assez précis ou sensible, vous pouvez le calibrer avec cette<br />
fonction.<br />
■ Ouvrez le mode « TS CAL » et veuillez suivre les instructions présentes à l’écran.<br />
83
ÉGALISEUR (EQ)<br />
■ L’égaliseur permet d’ajuster facilement l’acoustique afin de rendre le meilleur effet<br />
sonore possible.<br />
(1) Ouvrir le mode Égaliseur (EQ)<br />
■ Appuyez sur la touche [SEL] de la télécommande ou touchez l’icône « EQ » de l'interface<br />
utilisateur pour afficher le panneau de contrôle suivant.<br />
Sélection EQ<br />
Paramètres EQ<br />
Zone de réglage<br />
Fader/Balance<br />
(2) Sélectionner le mode Égaliseur (EQ)<br />
■ Touchez la barre de sélection EQ à plusieurs reprises pour changer le mode de<br />
l’égaliseur (EQ).<br />
(3) Régler les paramètres de l’égaliseur (EQ)<br />
■ Pour régler les paramètres de l’égaliseur (EQ), touchez et déplacez la barre de réglages<br />
de paramètres EQ.<br />
(4) Régler le Fader et la Balance avant/arrière/gauche/droit<br />
■ Vous pouvez régler le Fader et la Balance avant/arrière/gauche/droit du haut-parleur<br />
pour obtenir un meilleur effet sonore.<br />
■ Pour régler le Fader et la balance avant/arrière/gauche/droit, touchez et déplacez le<br />
petit point blanc dans la zone de réglage Fader/Balance.<br />
NOTE :<br />
■ L’appareil dispose de plusieurs modes d’égaliseur prédéfinis : Utilisateur, Rock, Hip<br />
Hop, Dance, Latin, Rave, Urban, Acoustic.<br />
■ Chaque mode d’égaliseur a son propre réglage des graves, des mediums et des<br />
aigues.<br />
■ Les paramètres des modes d’égaliseur sont prédéfinis et ne peuvent être changés sauf<br />
dans le mode « utilisateur ».<br />
■ Le mode d'égaliseur commutera automatiquement sur le mode « utilisateur » lorsque<br />
vous réglez le niveau des graves, des mediums et des aigues.<br />
■ Le niveau du Sub est indépendant du mode égaliseur et peut être réglé séparément<br />
84
ZE-NC514<br />
GUIDE DE DÉPANNAGE<br />
■ Veuillez contrôler les points suivants avant de contacter le centre de service aprèsvente.<br />
Problème Cause Solution<br />
Généralités<br />
L’appareil ne s’allume pas<br />
La télécommande ne fonctionne pas.<br />
Pas de son<br />
ou trop bas<br />
Mauvaise qualité sonore ou<br />
déformation<br />
Défaut de fonctionnement de la mise<br />
en sourdine Téléphone<br />
L’appareil se réinitialise après la<br />
coupure du contact du véhicule<br />
Fusible de l’appareil fondu.<br />
Fusible de la batterie du véhicule fondu.<br />
Mauvaise utilisation.<br />
Batterie vide.<br />
Batterie installée incorrectement.<br />
Connexion audio incorrecte<br />
Volume réglé trop bas.<br />
Haut-parleurs endommagés.<br />
Volume mal équilibré.<br />
Le câblage des haut-parleurs est en<br />
contact avec une pièce métallique du<br />
véhicule.<br />
Lecture d’un disque piraté.<br />
Puissance des haut-parleurs non adapté<br />
Mauvaises connexions.<br />
Haut-parleur en court-circuit.<br />
Fil TEL-MUTE (mise en sourdine) en courtcircuit.<br />
Fils +15 et +30 inversés.<br />
Installer un nouveau fusible avec le bon<br />
ampérage.<br />
Installer un nouveau fusible avec le bon<br />
ampérage.<br />
Réinitialiser l’appareil.<br />
Changer la batterie.<br />
Installer la batterie correctement.<br />
Contrôler le câblage et le rectifier.<br />
Augmenter le niveau du volume.<br />
Remplacer les haut-parleurs.<br />
Régler la balance sur la position centrale.<br />
Isoler toutes les connexions du câblage des<br />
haut-parleurs.<br />
Utilisez un disque original.<br />
Remplacer les haut-parleurs.<br />
Contrôler le câblage et le rectifier.<br />
Contrôler le câblage et le rectifier.<br />
Contrôler le câblage et le rectifier.<br />
Contrôler le câblage et le rectifier.<br />
Le moniteur ne s'ouvre pas<br />
automatiquement<br />
L'information d'avertissement<br />
s’affiché tout le temps<br />
clignotement de l'image ou<br />
l'interférence<br />
Moniteur de TFT<br />
La fonction ouverture automatique de<br />
l’écran est désactivée.<br />
Le câblage du frein à main n'est pas<br />
correct.<br />
Le format vidéo de l’écran ne correspond<br />
pas au format du DVD<br />
Lecture d’un disque piraté.<br />
Câbles video endommagés.<br />
Connexion incorrecte du signal vidéo.<br />
Activez la fonction ouverture automatique<br />
de l’écran.<br />
Contrôler le câblage et le rectifier.<br />
Régler le format video de l’écran<br />
Utilisez un disque original.<br />
Remplacer les câbles.<br />
Contrôler le câblage et le rectifier.<br />
85
GUIDE DE DÉPANNAGE<br />
(Suite)<br />
Problème Cause Solution<br />
Playback de disque<br />
Ne peut pas insérer le disque<br />
Le disque ne peut pas être lu<br />
PBC ne peut pas être utilisé pendant<br />
la lecture du VCD<br />
Un disque est déjà à l'intérieur de l’appareil.<br />
Le disque est faussé ou rayé.<br />
Le disque est sale ou humide.<br />
Un disque incompatible est utilisé.<br />
Le disque est inséré à l’ envers.<br />
Codes région du disque non compatible<br />
avec l'appareil.<br />
PBC n'est pas disponible sur le disque.<br />
Éjecter le disque actuel et insérer le<br />
nouveau.<br />
Utiliser un disque en bonne condition.<br />
Nettoyer le disque avec un chiffon doux.<br />
Utiliser un disque compatible.<br />
Insérer le disque avec le côté face vers le<br />
haut.<br />
Utiliser un disque avec un code région<br />
appropriés.<br />
Utiliser un disque avec PBC disponible.<br />
La répétition ou la fonction de<br />
recherche n’est pas disponible<br />
pendant la lecture du VCD<br />
PBC est activé.<br />
Désactiver PBC.<br />
Aucun disque<br />
Mauvais disque<br />
Disque inconnu<br />
Erreur de région<br />
Le disque est sale.<br />
Le disque est à l’ envers.<br />
Messages d'erreur<br />
Aucun disque à l'intérieur.<br />
Le disque est sale.<br />
Le disque est à l’envers.<br />
Le format du disque n'est pas compatible<br />
avec cet appareil.<br />
Code région du DVD n’est pas compatible<br />
avec cet appareil.<br />
Nettoyer le disque avec un chiffon doux.<br />
Insérer le disque avec le côté face vers le<br />
haut.<br />
Insérer un disque.<br />
Nettoyer le disque avec un chiffon doux.<br />
Insérer le disque avec le côté face vers le<br />
haut.<br />
Utiliser un disque avec un format<br />
compatible.<br />
Utiliser un disque avec un code région<br />
compatible.<br />
86
ZE-NC514<br />
CONNEXION DE L’APPAREIL<br />
NOTES<br />
■ Cet appareil est conçu pour un véhicule avec batterie de 12 volts et une masse<br />
négative. Avant d'installer cet appareil dans un camping-car, un Bus ou un camion,<br />
assurez-vous que le voltage de la batterie est approprié, dans le cas contraire faites<br />
installer par un professionnel un transformateur pour convertir le voltage en 12 Volt.<br />
■ Pour éviter tout court-circuit dans le système électrique, déconnectés la borne négative<br />
de la batterie avant l’installation.<br />
■ Pour éviter tout court-circuit dans le câblage et endommager cet appareil, fixez tous<br />
les câbles avec un collier ou du ruban adhésif. Évitez de passer les câbles prés des<br />
éléments de chauffage, de pièces mobiles telles que le levier de changement de<br />
vitesse, frein à main et glissières des sièges pour ne pas endommager les câbles.<br />
■ Ne jamais passer le fil jaune d'alimentation dans le compartiment moteur et le connecter<br />
à la batterie de la voiture, pour éviter toute possibilité de court-circuit sérieux.<br />
■ Remplacez le fusible défectueux par un fusible de 10A neuf. Brancher l’appareil<br />
sans fusible ou avec un ampérage inadapté peut endommager l’appareil ou causer<br />
un incendie. Si vous avez installé un fusible approprié et que le problème électrique<br />
persiste, contactés un professionnel pour rechercher l’origine de la panne.<br />
■ Pour éviter tout court circuit, assurer vous que toutes les connexions et câbles des<br />
haut-parleurs soient bien isolés.<br />
■ Si aucun +15 (plus après contact) n’est disponible, branchez le fil +15 à l’alimentation<br />
avec un interrupteur.<br />
■ Si un amplificateur audio externe est branché, ne connectes pas le fil P.CONT au<br />
fil d’alimentation de l'amplificateur, pour éviter tout risque d’étincelle ou d'autres<br />
dommages.<br />
■ Ne jamais brancher la sortie de haut-parleur a la masse pour éviter des dommages à<br />
l'amplificateur de puissance.<br />
■ Branchez uniquement des haut-parleurs avec une puissance minimale de 50W et une<br />
l’impédance entre 4 et 8Ω.<br />
87
CONNEXION DE L’APPAREIL<br />
Atténuation automatique de la luminosité<br />
■ Pour éviter un éclairage trop lumineux de l’écran le soir, connectez le fil « ILLUMI » au fil<br />
de l’allumage des feux pour atténuer automatiquement la luminosité de l’écran lorsque<br />
vous allumes vos feux.<br />
Telephone Mute (Mise en sourdine)<br />
■ Lorsque le fil « MUTE » est connecté à un téléphone de voiture ou a un kit mains-libres,<br />
l’appareil se met en sourdine quand vous recevez un appel téléphonique.<br />
Marche-arrière<br />
■ Lorsqu’une camera de recul est branché, l'appareil commute automatiquement sur la<br />
vue arrière quand vous enclenchez la marche-arrière.<br />
Frein à main<br />
1) Lorsque le fil « PRK SW » est branché au contacteur de frein de main, l'affichage vidéo<br />
sur l’écran de TFT sera contrôlé par cette fonction (sauf le mode camera de recul).<br />
2) En mode vidéo l’appareil affiche un écran bleu avec une information d'avertissement<br />
lorsque le véhicule est en mouvement pour éviter de distraire le conducteur. Les<br />
passagers arrière peuvent continuer à visionner normalement le contenu vidéo sur des<br />
écrans arrière.<br />
88
ZE-NC514<br />
CONNEXION DE L’APPAREIL<br />
CONNEXIONS DU CÂBLE DE FREIN À MAIN<br />
Câblage<br />
frein à main<br />
Fil Vert<br />
Batterie<br />
Feu de stationnement<br />
Carrosserie<br />
Contacteur de frein à main<br />
CONNEXIONS<br />
Carrosserie<br />
Feu de recul<br />
Fil Rose<br />
Câblage<br />
marche-arriére<br />
Batterie<br />
Carrosserie<br />
Levier de vitesse<br />
89
INSTALLATION ET DÉSINSTALLATION<br />
NOTES POUR L'INSTALLATION<br />
1) Avant l’installation, assurez vous que toutes les connexions sont correctes et que<br />
l'appareil fonctionne normalement. Une connexion incorrecte peut endommager<br />
l’appareil.<br />
2) Utilisez seulement des accessoires conçus pour cet appareil. L’utilisation d’accessoires<br />
non compatibles peut endommager cet appareil.<br />
3) Avant l’installation, attachez tous les câbles d'alimentation.<br />
4) Ne pas installer l’appareil proche d’une source de chaleur pour éviter des dommages<br />
aux composants électriques tels que la tête du laser.<br />
5) Installer l'unité horizontalement. Installant l'unité plus de 30 degrés verticalement<br />
peuvent avoir comme conséquence une plus mauvaise performance.<br />
6) Pour éviter toute étincelle électrique, branchez d'abord le pôle positif et en suite le pôle<br />
négatif de la batterie.<br />
7) N’obstruez pas la sortie du ventilateur de refroidissement pour assurer une dissipation<br />
thermique suffisante, pour éviter d’endommager l’appareil.<br />
INSTALLATION DE L’APPAREIL<br />
Méthode A<br />
(1) Insérez le support de montage dans le tableau de bord, avec un tournevis pliez les<br />
pattes de fixation pour maintenir le support en place.<br />
(2) Utilisez 2 vis M5X5 à tête conique pour fixer les deux pattes d’assemblage de chaque<br />
cote de l’appareil. (Voir l'illustration 1)<br />
Pattes d'<br />
assemblage<br />
(Illustration 1)<br />
(3) Vissez 1 vis de M5X 24 dans le trou derrière l’appareil et mettez la gaine en caoutchouc<br />
par-dessus la vis. (Voir l'illustration 2)<br />
90
ZE-NC514<br />
INSTALLATION ET DÉSINSTALLATION<br />
Tableau<br />
de bord<br />
Gaine en caoutchouc<br />
Support de montage<br />
Pattes d' assemblage<br />
(Illustration 2)<br />
(4) Insérez l'appareil dans le support de montage, vissez les 4 vis M2X2 pour fixer l’appareil<br />
au support de montage.<br />
NOTE :<br />
■ Selon la profondeur de l'ouverture du tableau de bord, utilisez des longueurs de pattes<br />
d’assemblage différentes. Si l'ouverture du tableau de bord n’est pas assez profonde,<br />
l’appareil peut être avancé jusque à 10mm.<br />
MÉTHODE B<br />
Supports<br />
Tableau<br />
de bord<br />
(1) Insérez cet appareil directement dans l'ouverture du tableau de bord.<br />
(2) Fixes les supports de chaque cote de l’appareil avec les vis M4X 3, M5X 5 ou M5X5 a<br />
tête conique.<br />
91
INSTALLATION ET DÉSINSTALLATION<br />
INSTALLATION DU CADRE DE FINITION<br />
■ Fixez le cadre de finition autour du panneau avant avec les deux renfoncements vers le<br />
haut.<br />
DÉSINSTALLER<br />
Démontage du cadre de finition<br />
(1) Poussez le cadre de finition vers le bas et tirez la partie inférieure.<br />
(2) Poussez le cadre de finition vers le haut et tirez la partie supérieure.<br />
DÉSINSTALLER L’APPAREIL<br />
(1) Dévissez les 4 vis M2x2 et retirez l'appareil du support avec les deux mains<br />
(2) Utilisez un tournevis pour déplier les pattes de fixation.<br />
Enlever la gaine en<br />
caoutchouc<br />
Dévisser les<br />
4 vis<br />
(3) Tirez sur le support pour le sortir du tableau de bord.<br />
92
ZE-NC514<br />
SPECIFICATIONS<br />
General<br />
Reference Supply Voltage ....................................................................................... 12V (DC)<br />
Operating Voltage Range ............................................................................ 10.5~15.8V (DC)<br />
Max Operation Current .................................................................................................... 10A<br />
Grounding System ........................................................................Car Battery Negative Pole<br />
Installation Dimension (WxHxD) ......................................... 178mm x 50mm x (165+25) mm<br />
Installation Angle ........................................................................................................ 0°~30°<br />
Net Weight .................................................................................................................... 2.3kg<br />
FM<br />
Signal Noise Ratio .........................................................................................................55dB<br />
Residual Noise Sensitivity (S/N=30dB) ....................................................................20dBμV<br />
Frequency Response (±3dB)......................................................................... 40Hz~12.5KHz<br />
Station Seeking Level ......................................................................................... 20~30dBμV<br />
Distortion .......................................................................................................................1.5%<br />
Stereo Separation (1 KHz) .............................................................................................20dB<br />
Antenna Impedance ........................................................................................................75Q<br />
AM<br />
Residual Noise Sensitivity (S/N=20dB) .....................................................................40dBμV<br />
Selectivity (±9KHz) ........................................................................................................50dB<br />
DVD Player<br />
Signal/Noise Ratio .........................................................................................................90dB<br />
Dynamic Range .............................................................................................................90dB<br />
Distortion (line out) ........................................................................................................0.1%<br />
Frequency Response (±3dB)............................................................................ 20Hz~20KHz<br />
Max Output Power ..................................................................................................... 4x40W<br />
Load Impedance ...............................................................................................................4Ω<br />
AV-IN<br />
Distortion .......................................................................................................................0.5%<br />
Frequency Response (±3dB)............................................................................ 20Hz~20KHz<br />
Audio Input Level ...................................................................................................... 0.4Vrms<br />
Video Input Level ..........................................................................................................1Vp-p<br />
Audio<br />
Audio Output Impedance ..............................................................................................200Ω<br />
Audio Output Level .............................................................................................2Vrms (Max)<br />
(Under normal audio input level and maximum volume)<br />
93
SPECIFICATIONS<br />
Video<br />
Normal Video Input Level (CVBS)............................................................................ 1.0±0.2V<br />
Video Input Impedance ...................................................................................................75Ω<br />
Video Output Impedance ................................................................................................75Ω<br />
Video Output Level .................................................................................................. 1.0±0.2V<br />
(Under normal video input level)<br />
TFT Monitor<br />
Screen Diagonal .........................................................................................17.8cm/ 7 inches<br />
Usable Display Area ...............................................................................154.1 (W) x 87.0 (H)<br />
Resolution ................................................................................................1440 (W) x 234 (H)<br />
Brightness ..............................................................................................................400cd/m2<br />
(Measure the centre brightness after 30 minutes)<br />
Contrast .................................................................................................................. 300(TYP.)<br />
Response Time<br />
Rise ..........................................................................................................................12ms<br />
Fall ...........................................................................................................................18ms<br />
Viewing Angle<br />
From Top .....................................................................................................................40°<br />
From bottom ...............................................................................................................65°<br />
Horizontally ...............................................................................................................±65°<br />
LCD Life Cycle .................................................................................... 10000 hours (at 25°C)<br />
Navigation<br />
Système de navigation intégré<br />
Lecteur de carte SD intégré ........................................................................... 4GB micro SD<br />
Récepteur GPS inclus dans les accessoires<br />
Environment<br />
Operating Temperature ...................................................................................-10°C~ + 60°C<br />
Storing Temperature .......................................................................................-20°C~ + 70°C<br />
Operating Humidity ......................................................................................... 45%~80%RH<br />
Storing Humidity .............................................................................................. 30%~90%RH<br />
NOTE: Les spécifications et la présentation de ce modèle sont sujettes à modification<br />
sans préavis.<br />
■ Si vous devez vous débarrasser définitivement de ce produit, veuillez respecter<br />
totalement les directives concernant les déchets en vigueur dans votre pays. Utilisez<br />
les procédures de recyclage si elles existent. Veuillez consulter les services officiels<br />
de votre pays pour de plus amples renseignements sur les procédures de recyclage.<br />
(Waste Electrical and Electronic Equipment Directive)<br />
Cet appareil est fabriqué sous licence des Dolby Laboratories. “Dolby” et le logo double-D<br />
sont des marques déposées de Dolby Laboratories.<br />
94
ZE-NC514<br />
ANNEXE<br />
CODES RÉGION<br />
Le monde entier est divisé en six régions par rapport à la région de vente des DVD. Un DVD<br />
ne peut être lu que si son code région<br />
Est compatible avec celui de l’appareil.<br />
Région 1 : Les États-Unis, Canada, îles de l'océan pacifique est ;<br />
Région 2 : Le Japon, l'Europe occidentale, l'Europe du nord, Égypte, Afrique du<br />
Sud, Moyen-Orient ;<br />
Région 3 : Taiwan de la Chine, Hong Kong de la Chine, Corée du Sud, Thaïlande,<br />
L'Indonésie, Asie du Sud-est ;<br />
Région 4 : L'Australie, la Nouvelle Zélande, mi et l'Amérique du Sud,<br />
South Pacific Îles d'océan/Océanie ;<br />
Région 5 : La Russie, Mongolie, Inde, Asie moyenne, l'Europe est, La Corée du<br />
Nord, Afrique du Nord, Asie du nord-ouest ;<br />
Région 6 : Continent chinois.<br />
CONSIGNES DE SÉCURITÉ POUR L’UTILISATION DES DISQUES<br />
1) Ne pas utiliser des disques avec une forme irrégulière<br />
2) Nettoyage du disque<br />
Utilisez un tissu sec et doux pour essuyer le disque du centre vers le bord. N’utilisez que<br />
du détergent neutre.<br />
3) Lecture d’un disque neuf<br />
Des nouveaux disques peuvent avoir quelques endroits rugueux autour des bords<br />
intérieurs et extérieurs. Si un tel disque doit être utilisé, retirez ces endroits rugueux<br />
avec un stylo bille ou un crayon.<br />
95
ANNEXE<br />
CONNEXIONS DE CÂBLAGE<br />
96
ZE-NC514<br />
GARANTIE 2 ANS<br />
Cher client,<br />
Nous vous remercions pour l’achat de cet appareil ZENEC. Conservez si possible<br />
l’emballage de ce produit pour tout envoi futur.<br />
Si cet appareil ZENEC requiert la mise en oeuvre de sa garantie, veuillez le retourner au<br />
revendeur qui vous l’a vendu, ou au distributeur agréé du pays d’achat.<br />
Ce produit ZENEC est garanti contre tout défaut matériel, pièces et main d’oeuvre pour une<br />
période de DEUX ANS après sa date d’achat.<br />
Limitations de la garantie<br />
Cette garantie ne couvre pas les dommages dus :<br />
1. Mauvaise installation, branchements audio ou alimentation incorrects.<br />
2. L’exposition à une humidité excessive, des liquides, la chaleur directe du soleil, des<br />
conditions boueuses ou poussiéreuses anormales.<br />
3. Des accidents ou utilisation non conforme, une réparation non conforme ou des<br />
modifications non explicitement autorisées par le constructeur.<br />
Cette garantie est limitée à la réparation ou au remplacement du produit défectueux, selon<br />
le choix du constructeur, et ne peut inclure la réparation de tout dommage que ce soit,<br />
suite à un accident, aux conséquences de la panne ou autre. La garantie ne couvre aucun<br />
frais de transport du produit. Cette garantie ne peut s’appliquer que sur présentation du<br />
certificat ci-dessous, dûment rempli indiquant notamment le modèle, son numéro de série,<br />
l’adresse de l’acheteur, la date d’achat et le tampon du revendeur, avec facture d’achat<br />
originale complémentaire.<br />
ZENEC MODÈLE : ZE-NC514<br />
Numéro de série : .........................................................................................................................<br />
Date de l’achat : ...........................................................................................................................<br />
Votre nom : ...................................................................................................................................<br />
Votre adresse :..............................................................................................................................<br />
Ville : .............................................................................................................................................<br />
État/département : ................................... ZIP ou code postal ...................................................<br />
Pays : ...........................................................................................................................................<br />
Adresse et cachet du revendeur<br />
97
INHALTSVERZEICHNIS<br />
BEDIENELEMENTE<br />
STARTCODE .................................................................................................................................................... 102<br />
BEDIENTEIL ..................................................................................................................................................... 102<br />
ZUSATZ-LCD ................................................................................................................................................... 103<br />
FERNBEDIENUNG ........................................................................................................................................... 104<br />
ALLGEMEINE BEDIENUNG<br />
GERÄT EIN- UND AUSSCHALTEN ................................................................................................................. 106<br />
NAVIGATION. ................................................................................................................................................... 106<br />
LAUTSTÄRKEEINSTELLUNG .......................................................................................................................... 106<br />
HAUPTMENÜ ................................................................................................................................................... 106<br />
AUSWAHL EINER WIEDERGABEQUELLE ..................................................................................................... 106<br />
SYSTEMZEIT ANZEIGEN ................................................................................................................................ 107<br />
BEDIENUNG DES TFT BILDSCHIRMS .......................................................................................................... 107<br />
GERÄT ZURÜCKSETZEN................................................................................................................................ 107<br />
RADIO MODUS<br />
RADIO ALS WIEDERGABEQUELLE AUSWÄHLEN........................................................................................ 108<br />
FREQUENZBAND AUSWÄHLEN .................................................................................................................... 108<br />
AUTOMATISCHER SUCHLAUF ...................................................................................................................... 108<br />
MANUELLER SUCHLAUF ............................................................................................................................... 108<br />
AUTOMATISCHES SPEICHERN VON SENDERN .......................................................................................... 108<br />
MANUELLES SPEICHERN VON SENDERN ................................................................................................... 109<br />
ANSPIELEN DER EMPFANGBAREN SENDER (PS) ....................................................................................... 109<br />
AUSWAHL EINES GESPEICHERTEN SENDERS ........................................................................................... 109<br />
REGIONALES SUCHEN (LOCAL) ................................................................................................................... 109<br />
RDS-FUNKTION<br />
ALTERNATIVE FREQUENZEN (AF) ..................................................................................................................110<br />
VERKEHRSANSAGE (TA) .................................................................................................................................110<br />
PROGRAMMTYP (PTY) ...................................................................................................................................111<br />
PROGRAMM-SERVICE (PS) ............................................................................................................................111<br />
UHRZEIT (CT) ...................................................................................................................................................111<br />
RADIOTEXT (RT) ..............................................................................................................................................111<br />
DISC-MODUS<br />
DISC EINSETZEN .............................................................................................................................................112<br />
DISC AUSWERFEN ..........................................................................................................................................112<br />
TOUCHSCREEN-BEDIENUNG ........................................................................................................................112<br />
OSD-STEUERTASTEN .....................................................................................................................................113<br />
WIEDERGABE (PLAY) ......................................................................................................................................114<br />
WIEDERGABE STOPPEN .................................................................................................................................114<br />
ABSPIELLISTE ANZEIGEN ...............................................................................................................................114<br />
SCHNELLER VOR- UND RÜCKLAUF..............................................................................................................114<br />
VORHERIGES/NÄCHSTES...............................................................................................................................114<br />
ORDNER WECHSELN ......................................................................................................................................114<br />
WIEDERGABE WIEDERHOLEN .......................................................................................................................115<br />
A-B WIEDERGABE ...........................................................................................................................................115<br />
ZUFALLSBEDINGTE WIEDERGABE (RANDOM) ............................................................................................115<br />
INTRO-WIEDERGABE ......................................................................................................................................116<br />
DIREKTE SUCHE ..............................................................................................................................................116<br />
GOTO-SUCHE ..................................................................................................................................................116<br />
DVD-MENÜ UND -TITEL ..................................................................................................................................116<br />
UNTERTITELSPRACHE AUSWÄHLEN ............................................................................................................117<br />
MULTIWINKEL-ANSICHTEN AUSWÄHLEN ....................................................................................................117<br />
AUDIOKANAL (DIALOGSPRACHE) AUSWÄHLEN .........................................................................................117<br />
PBC-FUNKTION ...............................................................................................................................................117<br />
ZOOM IN/OUT ..................................................................................................................................................118<br />
ABBILDUNG DREHEN .....................................................................................................................................118<br />
WIEDERGABEINFORMATIONEN .....................................................................................................................118<br />
98
ZE-NC514<br />
USB-MODUS<br />
USB ALS WIEDERGABEQUELLE AUSWÄHLEN ........................................................................................... 120<br />
TOUCHSCREEN-BEDIENUNG ....................................................................................................................... 120<br />
OSD-STEUERTASTENMENÜ .......................................................................................................................... 120<br />
WIEDERGABE UNTERBRECHEN ................................................................................................................... 120<br />
STOPP .............................................................................................................................................................. 120<br />
ABSPIELLISTE ANZEIGEN .............................................................................................................................. 120<br />
SCHNELLER VOR- UND RÜCKLAUF............................................................................................................. 120<br />
VORHERIGES/NÄCHSTES.............................................................................................................................. 120<br />
ORDNER WECHSELN. .....................................................................................................................................121<br />
WIEDERGABE WIEDERHOLEN .......................................................................................................................121<br />
ZUFALLSBEDINGTE WIEDERGABE (RANDOM) ............................................................................................121<br />
INTRO-WIEDERGABE ......................................................................................................................................121<br />
DIREKTE SUCHE ..............................................................................................................................................121<br />
GOTO-SUCHE ..................................................................................................................................................121<br />
ZOOM IN/OUT ..................................................................................................................................................121<br />
ABBILDUNG DREHEN .....................................................................................................................................121<br />
WIEDERGABEINFORMATIONEN .....................................................................................................................121<br />
IPOD-MODUS<br />
IPOD ALS WIEDERGABE AUSWÄHLEN ........................................................................................................ 122<br />
MUSIKWIEDERGABE ...................................................................................................................................... 122<br />
FOTOWIEDERGABE ........................................................................................................................................ 122<br />
VIDEOWIEDERGABE ....................................................................................................................................... 123<br />
SCHNELLER VOR- UND RÜCKLAUF............................................................................................................. 123<br />
DIREKTE SUCHE ............................................................................................................................................. 123<br />
ANDERE MODI<br />
AV-IN ................................................................................................................................................................ 125<br />
KAMERA .......................................................................................................................................................... 125<br />
NAVIGATION .................................................................................................................................................... 125<br />
SETUP<br />
EINSTELLUNGSMÖGLICHKEITEN................................................................................................................. 126<br />
GENERAL (ALLGEMEIN)................................................................................................................................. 127<br />
LANGUAGE (SPRACHE) ................................................................................................................................. 127<br />
AUDIO .............................................................................................................................................................. 128<br />
RDS .................................................................................................................................................................. 128<br />
RATING (JUGENDSCHUTZ-SICHERUNG) ..................................................................................................... 128<br />
HARDWARE ..................................................................................................................................................... 130<br />
P.VOL ................................................................................................................................................................ 130<br />
CODEEINGABE DES DIEBSTAHLSCHUTZES ................................................................................................131<br />
TS CAL (TOUCHSCREEN-KALIBRIERUNG)...................................................................................................131<br />
(EQ) EQUALIZER ............................................................................................................................................ 132<br />
FEHLERSUCHE .............................................................................................................................................. 133<br />
ANSCHLÜSSE<br />
ANMERKUNGEN ZUM ANSCHLUSS ............................................................................................................. 135<br />
STEUERLEITUNG ............................................................................................................................................ 136<br />
HANDBREMSE-KABEL ................................................................................................................................... 137<br />
ANSCHLÜSSE RÜCKWÄRTSGANG .............................................................................................................. 137<br />
EINBAU UND AUSBAU<br />
ANMERKUNGEN ZUR INSTALLATION .......................................................................................................... 138<br />
INSTALLATION ................................................................................................................................................ 138<br />
ABDECKZIERRAHMEN ................................................................................................................................... 140<br />
GERÄT AUSBAUEN ......................................................................................................................................... 140<br />
SPEZIFIKATIONEN .........................................................................................................................................141<br />
ANHANG<br />
REGIONALCODE ............................................................................................................................................ 143<br />
VORSICHTSMASSNAHMEN ZUR BENUTZUNG DER DISCS ...................................................................... 143<br />
VERKABELUNGS-ANSCHLÜSSE .................................................................................................................. 144<br />
GARANTIE ...................................................................................................................................................... 145<br />
99
SICHERHEITSHINWEISE<br />
1. Dieses Gerät ist nur für den Betrieb an einem Bordnetz mit<br />
+12V (DC) und Minus gegen Masse geeignet.<br />
2. Aus Sicherheitsgründen darf dieses Gerät nicht im Sichtfeld<br />
installiert werden. Wenn das nicht eingehalten wird, ist die<br />
Sicht auf das Verkehrsgeschehen eingeschränkt.<br />
3. Gemäß den in den verschiedenen Ländern der EU geltenden<br />
Verkehrsvorschriften darf ein Bildschirm, der in Sichtweite<br />
des Fahrers montiert ist, während der Fahrt nicht betrieben<br />
werden, da er den Fahrer vom Verkehrsgeschehen ablenkt.<br />
Beachten Sie unbedingt die geltenden Vorschriften in<br />
Ihrem Land, da ansonsten Regressansprüche von der Kfz-<br />
Versicherung geltend gemacht werden können.<br />
4. Schützen Sie das Gerät vor Wasser oder anderen<br />
Flüssigkeiten, die in das Innere des Gerätes eindringen<br />
können. Ein Kurzschluss mit Brandfolge könnte daraus<br />
resultieren.<br />
5. Bevor Sie eine defekte Sicherung austauschen, sollten<br />
Sie erst einmal überprüfen, was der Grund für den Kurzschluss<br />
war. Achten Sie dabei besonders auf die Kabel<br />
der Spannungsversorgung! Wenn der Kurzschluss nicht<br />
aus einen Fehler in der Spannungsversorgung resultiert,<br />
müssen Sie die defekte Sicherung gegen ein neues<br />
Exemplar mit identischen Werten austauschen. Sollte der<br />
Kurzschluss immer noch vorhanden sein, wenden Sie sich<br />
bitte an Ihren ZENEC-Händler.<br />
6. Wenn einer der unten genannten Fehler auftreten sollte,<br />
sollten Sie das Gerät sofort ausschalten und sich mit einem<br />
ZENEC-Händler oder dem Kundenservice in Verbindung<br />
setzen.<br />
(a) Kein Ton;<br />
(b) Kein Bild;<br />
(c) Wasser oder andere Flüssigkeiten oder Gegenstände,<br />
die in das Gerät eingedrungen sind;<br />
(d) Rauch;<br />
(e) Eigenartiger Geruch.<br />
7. Achten Sie darauf, dass die Lautstärke in Ihrem Fahrzeug<br />
nur so hoch ist, dass Sie Außengeräusche, wie z.B. eine<br />
Polizeisirene, noch klar wahrnehmen können.<br />
100
ZE-NC514<br />
VORSICHTSMASSNAHMEN<br />
1. Dieses Gerät darf nie geöffnet werden. Wenn ein Defekt vorliegt, darf das Gerät nur von<br />
dem Servicepersonal von ZENEC repariert werden. Bei einem nicht autorisierten Eingriff<br />
erlischt der Garantieanspruch. Für weitere Informationen wenden Sie sich bitte an einen<br />
autorisierten ZENEC-Händler.<br />
2. Da sich auf dem Bildschirm mit der Zeit Staub und Schmutz ansammeln können, sollten<br />
Sie das Gerät ab und zu mit einem weichen Tuch reinigen. Verwenden Sie dazu niemals<br />
Reinigungsbenzin, Alkohol, Verdünner oder Ähnliches, da dies zu einer Beschädigung<br />
des Bildschirms bzw. des Gehäuses führen kann.<br />
3. Wenn eine fehlerhafte Funktion des Gerätes auftritt, lesen Sie bitte als Erstes das<br />
Fehlersuche-Kapitel dieses Handbuches. Wenn keine Lösung gefunden wird, drücken<br />
Sie die [RESET]-Taste auf dem Bedienteil, um die Werkseinstellungen zurückzusetzen.<br />
4. Wenn Sie das Auto eine Zeit lang bei heißem oder kaltem Wetter geparkt haben, warten<br />
Sie bitte, bis die Temperatur im Auto wieder normal ist, bevor Sie das Gerät einschalten.<br />
5. Bei niedrigen Temperaturen kann sich bei der Benutzung der Heizung des Fahrzeuges,<br />
um das Fahrzeug zu erwärmen, im Inneren des Gerätes Kondenswasser bilden.<br />
Schalten Sie das Gerät in diesem Moment nicht an, um eine Beschädigung des Gerätes<br />
zu vermeiden. Wenn sich eine CD/DVD im Gerät befindet, werfen Sie diese bitte aus und<br />
wischen sie ab. Wenn das Gerät sich nach einigen Stunden noch nicht einschalten lässt,<br />
dann setzen Sie sich bitte mit dem Kundendienst oder Händler in Verbindung.<br />
6. Die Mechanik des Bildschirms ist vollautomatisch. Versuchen Sie niemals den Bildschirm<br />
manuell zu bedienen, da dies zu einer dauerhaften Beschädigung des Gerätes führen<br />
kann.<br />
7. Setzen Sie den Bildschirm keinen harten Stößen aus. Eine mechanische und<br />
elektronische Beschädigung des Gerätes könnte daraus resultieren.<br />
8. Für eine klare und einfache Vorführung zur Bedienung dieses Gerätes werden<br />
graphische Abbildungen benutzt. Jedoch können sich diese Abbildungen von den auf<br />
dem Bildschirm angezeigten unterscheiden.<br />
9. Während des Betriebs des Gerätes wird " " angezeigt, wenn die aktuelle Operation<br />
nicht vorhanden oder ungültig ist.<br />
10. Bitte bedienen Sie dieses Gerät entsprechend diesem Handbuch, um unnötige<br />
Probleme zu verhindern. Eine falsche Benutzung dieses Gerätes kann zu einem Verlust<br />
des Garantieanspruchs führen.<br />
ERKLÄRUNG<br />
Dieses Produkt enthält copyrightgeschützte Technologien, die durch US-Patente und andere<br />
geistige Eigentumsrechte geschützt sind.<br />
Die Verwendung dieser copyrightgeschützten Technologien muss durch Macrovision<br />
genehmigt werden und ist für den Haus- und anderen begrenzten Betrachtungsgebrauch<br />
bestimmt. Ein nicht autorisierter Eingriff in das Gerät ist verboten. Bei Nichtbeachten<br />
erlöschen jegliche Garantieansprüche.<br />
101
BEDIENELEMENTE<br />
STARTCODE: 012345 (s. Seite 131)<br />
BEDIENTEIL<br />
AV-IN<br />
14<br />
1. [WIDE]-Taste: Anzeigemodus ändern<br />
2. [ ]-Taste: Nächstes/Bewegt den Cursor nach rechts<br />
3. [ ]-Taste: Vorheriges/Bewegt den Cursor nach links<br />
4. [NAV]-Taste: Enter/Exit Navigation<br />
5. [VOL]-Drehknopf: Lautstärkeregelung/Stummschaltung aktivieren/deaktivieren<br />
6. [Reset]-Taste: Gerät zurücksetzen<br />
7. [ /SRC]-Taste: Wiedergabemodus auswählen/Gerät ein- bzw. ausschalten<br />
8. AV-IN-Anschluss<br />
9. USB-Port<br />
102
ZE-NC514<br />
10. [ ]-Taste: Eject-Taste (Disc auswerfen)<br />
11. [OPEN/CLOSE]-Taste: TFT-Bildschirm öffnen/schließen<br />
12. [AS/TILT+]-Taste: Auto Save/Preview Scan/Neigungswinkel des Bildschirms erhöhen<br />
13. [BAND/TILT-]-Taste: Frequenzband ändern/Neigungswinkel des Bildschirms verringern<br />
14. ZUSATZ-LCD<br />
1. Disc-Indikator<br />
■ Leuchtet, wenn sich eine Disc im Laufwerk befindet.<br />
2. Repeat-Mode-Indikator<br />
■ Leuchtet, wenn der Wiederholungs-Modus eingeschaltet ist.<br />
3. Hauptanzeigebereich<br />
■ Zeigt Titel, Laufzeit, Tuner-Frequenz, Uhrzeit und andere Text-Informationen an.<br />
4. Radiostatus-Indikator<br />
■ Stereo-Indikator leuchtet, wenn die Radiosendung in Stereo gesendet wird; Regional-<br />
Indikator leuchtet, wenn die Regional-Suchfunktion aktiv ist.<br />
5. RDS-Funktion-Indikator<br />
■ AF: Alternative Frequenzen<br />
■ PTY: Programmtyp<br />
■ TA: Verkehrsansage<br />
■ TP: Verkehrsprogramm<br />
BITTE BEACHTEN<br />
■ Die Hauptinformationen können auf diesem Zusatz-LCD angezeigt werden, aber nur,<br />
wenn das TFT-Bildschirm geschlossen ist.<br />
■ Dieses Zusatz-LCD kann die Informationen nur in englischer Sprache anzeigen.<br />
103
BEDIENELEMENTE<br />
FERNBEDIENUNG<br />
<br />
<br />
<br />
<br />
<br />
<br />
<br />
<br />
<br />
<br />
<br />
<br />
<br />
<br />
<br />
<br />
<br />
<br />
<br />
<br />
<br />
<br />
<br />
<br />
<br />
<br />
<br />
<br />
<br />
<br />
<br />
<br />
<br />
<br />
<br />
<br />
<br />
BITTE BEACHTEN<br />
<br />
■ Die oben illustrierte Fernbedienung<br />
kann sich optisch von <br />
<br />
<br />
der dem Zubehör beiliegenden<br />
Fernbedienung unterscheiden.<br />
Die Funktionen sind jedoch bei<br />
allen Fernbedienungen identisch.<br />
<br />
<br />
<br />
<br />
<br />
1. [SRC]-Taste: Wiedergabequelle auswählen.<br />
<br />
2 [EJECT]-Taste: Disc aus dem Laufwerk<br />
<br />
auswerfen.<br />
<br />
3. [MENU]-Taste: DVD MENU/PBC.<br />
<br />
4. [TITLE]-Taste: DVD TITLE.<br />
<br />
5. [DISP]-Taste: Informationen anzeigen.<br />
6. [ANGLE]-Taste: Ansichtswinkel ändern.<br />
7. [WIDE]-Taste: Anzeige-Modus ändern.<br />
<br />
8. [OPEN/CLOSE]-Taste: TFT-Bildschirm öffnen/<br />
<br />
schließen.<br />
<br />
9. [PRESET /]-Taste: Gespeicherten<br />
<br />
Radiosender auswählen.<br />
<br />
10. []-Taste: Schneller Vorlauf/Cursor<br />
hochschieben.<br />
<br />
11. [/BAND]-Taste: Frequenzband wählen.<br />
12. [/ ]-Taste: Play/Pause/Enter.<br />
<br />
13. []-Taste: Automatischer Sendersuchlauf/<br />
<br />
Vorheriges/Cursor nach links verschieben.<br />
<br />
14. [GOTO]-Taste: GOTO-Suchen.<br />
15. []-Taste: Schneller Rücklauf/Cursor nach<br />
unten bewegen.<br />
<br />
16. [0-9]-Taste: Numerische Tasten.<br />
<br />
17. [MUTE]-Taste: Stummschaltung der<br />
<br />
Audioausgänge.<br />
<br />
18. [POWER]-Taste: Gerät ein- und ausschalten.<br />
<br />
19. [AUDIO]-Taste: DVD-Tonspuren auswählen.<br />
20. [SUBTITLE]-Taste: DVD-Untertitelsprache<br />
<br />
auswählen. <br />
21. [REPT A-B]-Taste: A-B-Wiederholung.<br />
22. [REPT]-Taste: Wiederholen.<br />
<br />
23. [TILT ]-Taste: Bildschirmwinkel ändern.<br />
<br />
24. [VOL+/-]-Taste: Lautstärke einstellen.<br />
25. [SCN]-Taste: Scan-Wiedergabe.<br />
26. [RDM]-Taste: Random-Wiedergabe.<br />
<br />
27. []-Taste: Automatischer Sendersuchlauf/<br />
Nächstes/Cursor nach rechts verschieben.<br />
<br />
28. [SEL]-Taste: Equalizer (EQ).<br />
29. [ZOOM]-Taste: Bild vergrößern/verkleinern.<br />
30. [PIC]-Taste: Bildeinstellungen.<br />
31. [SETUP]-Taste: Einstellungen.<br />
32. [CLEAR]-Taste: Löschen.<br />
104
ZE-NC514<br />
BEDIENELEMENTE<br />
ANMERKUNGEN ZUR INFRAROT-FERNBEDIENUNG<br />
1. Die Fernbedienung soll in Richtung des IR-Empfängers des Gerätes benutzt werden,<br />
um einwandfrei zu funktionieren.<br />
2. Entfernen Sie die Batterie der Fernbedienung oder setzen Sie eine Batterieisolierung<br />
ein, wenn die Fernbedienung über einen längeren Zeitraum nicht benutzt wird.<br />
3. Setzen Sie die Fernbedienung nicht direktem Sonnenlicht oder hohen Temperaturen<br />
aus.<br />
4. Die Fernbedienung funktioniert mit einer Batterie, unter normalen Bedingungen, ca.<br />
6 Monate. Wenn die Fernbedienung nicht funktioniert, sollte die Batterie gewechselt<br />
werden.<br />
5. Benutzen Sie nur Lithium-Batterien „CR2025“ (3V).<br />
6. Sie sollten die Batterie unter keinen Umständen neu laden, öffnen oder erhitzen. Entladene<br />
Batterien sollten fachgerecht entsorgt werden.<br />
7. Setzen Sie die Batterie in der korrekten Polung (+)/(-) ein.<br />
8. Lagern Sie die Batterie nicht in Kinderreichweite, um das Risiko eines Unfalls zu vermeiden.<br />
Batterie wechseln<br />
■ Schieben Sie den Batteriedeckel an der unteren Rückseite der Fernbedienung heraus.<br />
■ Benutzen Sie nur Lithium-Batterien „CR2025“ (3V). Setzen Sie die Batterie in der<br />
korrekten Polung (+)/(-) ein.<br />
ZIEHEN<br />
DRÜCKEN<br />
105
ALLGEMEINE BEDIENUNG<br />
GERÄT EIN- UND AUSSCHALTEN<br />
■ Um das Gerät einzuschalten, drücken Sie die [SRC]-Taste auf dem Bedienteil oder die<br />
[POWER]-Taste auf der Fernbedienung. Nach dem Einschalten geht das Gerät auf den<br />
letzten Status zurück.<br />
■ Um das Gerät auszuschalten, halten Sie die [SRC]-Taste auf dem Bedienteil etwas<br />
länger gedrückt oder drücken Sie die [POWER]-Taste auf der Fernbedienung.<br />
NAVIGATION<br />
■ Betätigen Sie die [NAV]-Taste auf dem Bedienteil, um in den Navigations-Modus zu<br />
gelangen. Die aktuelle Audiowiedergabe wird fortgesetzt, es sei denn, eine Navigationsansage<br />
kommt, wenn die Navigationsquelle aktiv ist.<br />
LAUTSTÄRKEEINSTELLUNG<br />
■ Drehen Sie den Lautstärkedrehknopf auf dem Bedienteil oder drücken Sie die [VOL]-<br />
Taste auf der Fernbedienung.<br />
■ Der Einstellbereich der Lautstärke reicht von 0 bis 40.<br />
■ Um die Stummschaltung ein- bzw. auszuschalten, drücken Sie die [VOL]-Taste oder die<br />
[MUTE]-Taste auf der Fernbedienung.<br />
BITTE BEACHTEN<br />
■ Das Einstellen der Lautstärke schaltet die Stummschaltung aus.<br />
■ Das MUTE-Icon blinkt auf dem TFT-Bildschirm während der Stummschaltung.<br />
HAUPTMENÜ<br />
■ Um das HAUPTMENÜ zu öffnen, drücken Sie die [SRC]-Taste auf dem Bedienteil oder<br />
auf der Fernbedienung oder berühren Sie die oberste linke Ecke des Bildschirms.<br />
Wiederholen Sie diese Operation, um zur ursprünglichen Quelle zurückzugehen.<br />
AUSWAHL EINER WIEDERGABEQUELLE<br />
■ Um das HAUPTMENÜ zu öffnen, wählen Sie die Quelle, die Sie wünschen im Menü aus.<br />
Wählen Sie mit dem Cursor die gewünschte Quelle und bestätigen Sie diese mit der<br />
Fernbedienung.<br />
BITTE BEACHTEN<br />
■ Wenn die Wiedergabequelle nicht betriebsbereit ist, kann diese nicht ausgewählt<br />
werden.<br />
106
ZE-NC514<br />
ALLGEMEINE BEDIENUNG<br />
SYSTEMZEIT ANZEIGEN<br />
■ Bitte halten Sie die [DISP]-Taste länger gedrückt, um zwischen der Systemzeit und der<br />
Anzeige der Wiedergabequelle zu wechseln. Diese Funktion ist nur beim ausgefahrenen<br />
Monitor möglich.<br />
BEDIENUNG DES TFT-BILDSCHIRMS<br />
Bildschirm öffnen/schließen<br />
■ Drücken Sie die [OPEN/CLOSE]-Taste, um den Bildschirm herauszufahren.<br />
■ Drücken Sie die Taste erneut, um den Bildschirm wieder einzufahren.<br />
Neigungswinkel des TFT-Bildschirms ändern<br />
■ Drücken Sie die [TILT]-Tasten auf dem Bedienteil oder auf der Fernbedienung, um den<br />
Neigungswinkel des Bildschirms schrittweise einzustellen.<br />
■ Durch längeres Drücken der [TILT]-Tasten auf dem Bedienteil oder auf der Fernbedienung<br />
können Sie den Neigungswinkel des Bildschirms stufenlos einstellen.<br />
Bildformat ändern<br />
■ Drücken Sie die [WIDE]-Taste auf dem Bedienteil oder auf der Fernbedienung, um das<br />
Standby des Monitors zu aktivieren/deaktivieren.<br />
Bildeinstellung<br />
1. Drücken Sie die [PIC]-Taste auf der Fernbedienung, um in den Bildeinstellungs-Modus<br />
zu gelangen.<br />
2. Betätigen Sie die []/[]-Tasten auf der Fernbedienung, um ein Feld auszuwählen.<br />
3. Betätigen Sie die []/[]-Tasten auf der Fernbedienung, um den Einstellungswert zu<br />
ändern.<br />
4. Drücken Sie die [PIC]-Taste auf der Fernbedienung, um den Bildeinstellungs-Modus zu<br />
verlassen.<br />
Werden nach einigen Sekunden keine Veränderungen vorgenommen, wird der Modus<br />
automatisch verlassen.<br />
Gerät zurücksetzen<br />
■ Wenn das Gerät nicht richtig funktioniert oder blockiert, drücken Sie die [RESET]-Taste<br />
auf dem Bedienteil, um das Gerät zurückzusetzen.<br />
107
RADIO-MODUS<br />
RADIO ALS WIEDERGABEQUELLE AUSWÄHLEN<br />
■ HAUPTMENÜ öffnen und RADIO-Icon auswählen.<br />
Frequenzband auswählen<br />
■ Um ein Radioband unter FM1, FM2, FM3, AM1 oder AM2 auszuwählen, drücken Sie die<br />
[BAND]-Taste auf dem Bedienteil oder auf der Fernbedienung oder berühren Sie das<br />
[BAND]-Icon auf der Benutzerschnittstelle.<br />
Automatischer Suchlauf<br />
■ Drücken Sie die []/[]-Tasten auf dem Bedienteil oder auf der Fernbedienung oder<br />
berühren Sie die []/[]-Icons auf der Benutzerschnittstelle, um den automatischen<br />
Suchlauf zu starten. Durch Erhöhen bzw. Verringern der Empfangsfrequenz können Sie<br />
nach dem nächsten empfangbaren Sender suchen. Drücken Sie die Taste bzw. berühren<br />
Sie das Icon erneut, um den automatischen Suchlauf zu beenden.<br />
BITTE BEACHTEN<br />
■ Wenn eine Station empfangen wird, wird das Suchen gestoppt. Wenn das Gerät eine<br />
Stereosendung empfängt, leuchtet der Stereo-Indikator „ST“ auf dem TFT- oder LCD-<br />
Bildschirm.<br />
Manueller Suchlauf<br />
■ Drücken Sie die []/[]-Tasten auf dem Bedienteil oder auf der Fernbedienung oder<br />
berühren Sie die []/[]-Icons auf der Benutzerschnittstelle, um durch Erhöhen bzw.<br />
Verringern der Empfangsfrequenz manuell nach einem Sender zu suchen. Während<br />
des manuellen Suchlaufs wird die Frequenz schrittweise geändert. Berühren Sie das<br />
[S]-Icon des numerischen Tastaturblocks und dann die numerischen Tasten, um die<br />
Empfangsfrequenz einzugeben.<br />
Automatisches Speichern von Sendern (AS)<br />
■ Nur Stationen mit genügender Signalstärke werden gefunden und gespeichert.<br />
Bei geschlossenem TFT-Bildschirm halten Sie die [AS/PS]-Taste auf dem Bedienteil<br />
etwas länger gedrückt, um das automatische Speichern zu starten.<br />
Bei geöffnetem Bildschirm, berühren Sie das [AS]-Icon auf der Benutzerschnittstelle,<br />
um das automatische Speichern zu starten.<br />
Um das automatische Speichern zu stoppen, drücken Sie eine andere Taste mit<br />
Radiofunktion.<br />
BITTE BEACHTEN<br />
■ Nach dem automatischen Speichern werden die vorherigen gespeicherten Sender<br />
überschrieben.<br />
■ Das Gerät hat 5 Bänder, z.B. FM1, FM2, FM3, AM1, AM2. Jedes Band kann 6 Sender<br />
speichern. Insgesamt kann das Gerät 30 Sender speichern.<br />
108
ZE-NC514<br />
RADIO-MODUS<br />
MANUELLES SPEICHERN VON SENDERN<br />
Wenn Sie einen Radiosender gefunden haben und speichern wollen, verfahren Sie bitte<br />
wie folgt:<br />
1. Berühren Sie das [MEM]-Icon auf der Benutzerschnittstelle, um das Speicherplatz-<br />
Menü zu öffnen.<br />
2. Berühren Sie das entsprechende Icon (Speicherplatz) P1~P6, um den Sender auf einem<br />
der 6 Speicherplätze zu speichern.<br />
3. Wenn Sie abbrechen möchten, drücken Sie die [Exit]-Taste.<br />
ANSPIELEN DER EMPFANGBAREN SENDER (PS)<br />
■ Die empfangbaren Sender werden gesucht und für 5-10 Sekunden angespielt.<br />
Nachdem die Sender angespielt wurden, läuft die Suche weiter, bis das vollständige<br />
Band abgesucht ist.<br />
■ Bei geschlossenem TFT-Bildschirm, drücken Sie die [AS/PS]-Taste auf dem Bedienteil.<br />
■ Bei geöffnetem Bildschirm berühren Sie das [PS]-Icon auf der Benutzerschnittstelle. Um<br />
den Prozess zu stoppen, drücken Sie eine andere Taste mit Radiofunktion.<br />
AUSWAHL EINES GESPEICHERTEN SENDERS<br />
■ Drücken Sie eine Zifferntaste unter 1 bis 6 auf der Fernbedienung oder berühren Sie<br />
eines des Icons für die Speicherplätze auf dem Bildschirm, um die entsprechenden<br />
gespeicherten Sender auszuwählen.<br />
REGIONALES SUCHEN (LOCAL)<br />
■ Wenn die regionale Suche (LOCAL) eingeschaltet ist, werden nur Radiosender mit<br />
starkem Funksignal empfangen.<br />
■ Halten Sie die [NAV]-Taste auf dem Bedienteil etwas länger gedrückt, um die regionale<br />
Suche (LOCAL) einzuschalten.<br />
BITTE BEACHTEN<br />
■ Wenn die regionale Suche (LOCAL) eingeschaltet ist, leuchtet der „LOC“-Indikator.<br />
■ Die Zahl der empfangenen Sender ist geringer, solange die Regionale Suche (LOCAL)<br />
eingeschaltet ist.<br />
109
RDS-FUNKTION<br />
Das Gerät hat grundlegende RDS-Funktionen wie: PI (Programmbezeichnung), Radiosendername,<br />
RT (Radiotext), CT (Uhrzeit), AF (Alternative Frequenzen), TA (Verkehrs-<br />
Ansage) und PTY (Programmtyp).<br />
ALTERNATIVE FREQUENZEN (AF)<br />
■ Bei aktivierter AF-Funktion wählt das Gerät automatisch die am besten zu empfangende<br />
Frequenz des gehörten Radiosenders.<br />
■ Berühren Sie die [AF]-Taste auf der Benutzerschnittstelle.<br />
■ Um diese Funktion zu beenden, wiederholen Sie die Operation.<br />
BITTE BEACHTEN<br />
■ Während der automatischen Frequenzwechsel hören Sie unter Umständen Störungen.<br />
Um dieses Problem zu lösen, schalten Sie die AF-Funktion aus.<br />
VERKEHRSANSAGE (TA)<br />
■ Bei aktivierter TA-Funktion schaltet das Gerät automatisch auf die Radiostation um,<br />
welche die entsprechende Verkehrsdurchsage sendet. Dabei spielt es keine Rolle,<br />
welche Wiedergabequelle gerade aktiv ist.<br />
■ Wenn die TA-Funktion aktiv ist und eine Verkehrsansage ankommt, wird die Wiedergabequelle<br />
durch die Verkehrsansage ersetzt.<br />
■ Das Gerät geht zur ursprünglichen Quelle zurück, wenn die Verkehrsansage beendet ist.<br />
■ Berühren Sie die [TA]-Taste auf der Benutzerschnittstelle, um die TA-Funktion einzuschalten.<br />
■ Um diese Funktion zu beenden, wiederholen Sie die Operation.<br />
110
ZE-NC514<br />
RDS-FUNKTION<br />
PROGRAMMTYP (PTY)<br />
■ Bei PTY handelt es sich um eine RDS-Funktion, die von immer mehr Rundfunkanstalten<br />
unterstützt wird. Mit Hilfe der PTY-Funktion kann das Gerät gezielt nach Sendern mit<br />
bestimmten Programminhalten suchen (z.B. Nachrichten oder Rock).<br />
■ Sechs PTY-Optionen werden auf dem Bildschirm angezeigt. Um mehrere PTY-Optionen<br />
anzusehen, berühren Sie den Scrollbalken auf dem Bildschirm.<br />
■ Wenn eine PTY-Option (z.B. Nachrichten) berührt wird, schaltet sich die automatische<br />
Suche nach dem nächsten vorhandenen PTY ein. Wenn kein entsprechender PTY gefunden<br />
wurde, geht das Gerät zum ursprünglichen Sender zurück.<br />
PROGRAMM-SERVICE (PS)<br />
■ Ermöglicht die Übertragung des Sendernamens in bis zu 8 alphanumerischen Zeichen<br />
z.B. {BBC_4_FM}, {Classic_}.<br />
UHRZEIT (CT)<br />
■ Einige Sender senden die Uhrzeit und das Datum über das RDS-Signal. Die Uhrzeit wird<br />
automatisch eingestellt, wenn „CT“ auf „ON" eingestellt wird.<br />
RADIOTEXT (RT)<br />
■ Wenn die RT-Funktion eingeschaltet ist, zeigt das Gerät Zusatzinformationen, wie den<br />
aktuellen Musiktitel, den Namen des Interpreten oder die Kontaktdaten der Station.<br />
111
DISC-MODUS<br />
<br />
DISC EINSETZEN<br />
<br />
■ Nach dem Einsetzen einer Disc schaltet das Gerät automatisch auf den Disc-Modus.<br />
<br />
BITTE BEACHTEN <br />
■ Überprüfen Sie bitte, ob sich bereits eine Disc im Gerät befindet, bevor Sie eine andere<br />
Disc einsetzen.<br />
<br />
<br />
■<br />
<br />
Manche<br />
<br />
selbstgebrannten<br />
<br />
Discs,<br />
<br />
wie<br />
<br />
z.B. CD-R,<br />
<br />
CD-RW,<br />
<br />
DVD-R,<br />
<br />
DVD+R, DVD-RW,<br />
DVD+RW, können nicht abgespielt werden, weil sie einen unterschiedlichen Aufnahme-<br />
<br />
status haben oder nicht geschlossen sind.<br />
<br />
DISC AUSWERFEN<br />
<br />
■ Drücken Sie die [EJECT]-Taste auf dem Bedienteil oder auf der Fernbedienung, um die<br />
Disc auszuwerfen.<br />
<br />
<br />
■ Sie können eine Disc auswerfen, nachdem das Gerät ausgeschaltet wurde. Das Gerät<br />
schaltet sich wieder aus, nachdem die Disc ausgeworfen wurde. <br />
<br />
TOUCHSCREEN-BEDIENUNG<br />
<br />
■ Der Bildschirm des Gerätes ist in verschiedene Bereiche aufgeteilt, um die Bedienung<br />
per Touchscreen zu erleichtern. <br />
<br />
<br />
<br />
A – MENÜ öffnen <br />
B – Wiedergabeinformationen anzeigen<br />
<br />
C – OSD-Steuertastenmenü öffnen<br />
<br />
112
ZE-NC514<br />
DISC-MODUS<br />
OSD-STEUERTASTEN<br />
Disc-Typ/<br />
Icon<br />
S<br />
N<br />
MP3/WMA CD VCD DVD MPEG Foto<br />
Numerischer<br />
Tastaturblock<br />
/<br />
/<br />
Numerischer<br />
Tastaturblock<br />
Schneller<br />
Vorlauf<br />
Schneller<br />
Rücklauf<br />
Numerischer<br />
Tastaturblock<br />
Schneller<br />
Vorlauf<br />
Schneller<br />
Rücklauf<br />
113<br />
Numerischer<br />
Tastaturblock<br />
Schneller<br />
Vorlauf<br />
Schneller<br />
Rücklauf<br />
Numerischer<br />
Tastaturblock<br />
Schneller<br />
Vorlauf<br />
Schneller<br />
Rücklauf<br />
Vorheriges Vorheriges Vorheriges Vorheriges Vorheriges Vorheriges<br />
Nächstes Nächstes Nächstes Nächstes Nächstes Nächstes<br />
E<br />
Abspielen/<br />
Pause<br />
Abspielen/<br />
Pause<br />
Abspielen/<br />
Pause<br />
Abspielen/<br />
Pause<br />
Abspielen/<br />
Pause<br />
/<br />
/<br />
Abspielen/<br />
Pause<br />
Stopp Stopp Stopp Stopp Stopp Stopp<br />
EQ<br />
/ /<br />
Zweites<br />
Menü<br />
Zweites<br />
Menü<br />
Zweites<br />
Menü<br />
/<br />
Random Random Random Random Random /<br />
/ / / / / Drehen<br />
/ / Zoom / / Zoom<br />
Numerischer<br />
Tastaturblock<br />
Einstellungsmenü<br />
Einstellungsmenü<br />
Einstellungsmenü<br />
Einstellungsmenü<br />
Einstellungsmenü<br />
Einstellungsmenü<br />
Wiederholung<br />
Wiederholung<br />
Wiederholung<br />
Wiederholung<br />
Wiederholung<br />
Wiederholung<br />
Equalizer-<br />
Einstellung<br />
Equalizer-<br />
Einstellung<br />
Equalizer-<br />
Einstellung<br />
Equalizer-<br />
Einstellung<br />
Equalizer-<br />
Einstellung<br />
Equalizer-<br />
Einstellung<br />
PBC / / PBC / / /<br />
A-B / /<br />
Back / /<br />
AUDIO / /<br />
Menü<br />
beenden<br />
Kanal<br />
wechseln<br />
SUBTITLE / / /<br />
DISP / /<br />
Informationen<br />
anzeigen<br />
Menü<br />
beenden<br />
Informationen<br />
anzeigen<br />
/ /<br />
Menü<br />
beenden<br />
Informationen<br />
anzeigen<br />
Menü<br />
beenden<br />
/<br />
/<br />
Informationen<br />
anzeigen<br />
MENU / / / DVD-Menü / /<br />
TITLE / / / DVD-Titel / /<br />
DIR+<br />
A-B-Wiederholung<br />
A-B-Wiederholung<br />
Dialogsprache<br />
Dialogsprache<br />
Untertitelsprache<br />
Untertitelsprache<br />
DIR-<br />
Nächster<br />
Ordner<br />
Vorheriger<br />
Ordner<br />
/ / / /<br />
/ / / /<br />
Nächster<br />
Ordner<br />
Vorheriger<br />
Ordner
DISC-MODUS<br />
WIEDERGABE UNTERBRECHEN<br />
■ Drücken Sie die [/]-Taste auf dem Bedienteil oder auf der Fernbedienung oder<br />
öffnen Sie das OSD-Steuertastenmenü und berühren Sie die [/]-Taste. Wiederholen<br />
Sie diese Operation, um den Titel wieder abzuspielen.<br />
WIEDERGABE STOPPEN<br />
■ Um die Wiedergabe zu stoppen, drücken Sie die []-Taste auf der Fernbedienung oder<br />
öffnen Sie das OSD-Steuertastenmenü und berühren Sie die []-Taste. Nach einmaligem<br />
Drücken der Stop-Taste, wird der Abspielzeitpunkt gespeichert. Beim Drücken der<br />
Play-Taste, wird die Wiedergabe ab diesem Abspielzeitpunkt fortgesetzt. Wenn Sie die<br />
Stopp-Taste zweimal betätigen, wird der Abspielzeitpunkt nicht gespeichert.<br />
ABSPIELLISTE ANZEIGEN<br />
■ Um die Dateiliste von einer gebrannten Disc anzuzeigen, stoppen Sie die aktuelle<br />
Wiedergabe.<br />
SCHNELLER VOR- UND RÜCKLAUF<br />
■ Drücken Sie mehrmals die []/[]-Tasten auf der Fernbedienung oder öffnen Sie<br />
das OSD-Steuertastenmenü und berühren Sie mehrmals die []/[]-Tasten, um die<br />
Geschwindigkeit des schnellen Vor- und Rücklaufs zu ändern.<br />
VORHERIGES/NÄCHSTES<br />
■ Drücken Sie die []/[]-Tasten auf dem Bedienteil oder auf der Fernbedienung oder<br />
öffnen Sie das OSD-Steuertastenmenü und berühren Sie die []/[]-Tasten, um die<br />
vorherigen oder nächsten Dateien abzuspielen.<br />
ORDNER WECHSELN<br />
■ Wenn Sie zwischen den Ordnern blättern wollen, können Sie durch einmaliges Berühren<br />
des Touchscreens das Bedienfeld aktivieren. Danach können Sie mit dem [DIR+]-<br />
und [DIR-]-Icon die Ordner durchblättern. Bei der Wiedergabe von Videos und Fotos<br />
müssen Sie die Wiedergabe durch das Betätigen des [Stopp]-Icons unterbrechen, um<br />
die Ordnerliste anzeigen zu lassen.<br />
114
ZE-NC514<br />
DISC-MODUS<br />
WIEDERGABE WIEDERHOLEN<br />
■ Drücken Sie mehrmals die [RPT]-Taste auf der Fernbedienung oder öffnen Sie das OSD-<br />
Steuertastenmenü und berühren Sie mehrmals die [ ]-Taste, um den Wiederholungs-<br />
Modus entsprechend der folgenden Tabelle zu ändern.<br />
Disc-Typ<br />
DVD<br />
VCD (PBC aus)<br />
CD<br />
MP3/WMA<br />
MPEG<br />
Foto<br />
Wiederholungs-Modus<br />
Kapitel wiederholen → Titel wiederholen → Wiederholen ausschalten<br />
Einzeln wiederholen → Alle wiederholen → Wiederholen ausschalten<br />
Einzeln wiederholen → Wiederholen ausschalten<br />
Einzeln wiederholen → Ordner wiederholen → Wiederholen ausschalten<br />
Einzeln wiederholen → Ordner wiederholen → Wiederholen ausschalten<br />
Einzeln wiederholen → Ordner wiederholen → Wiederholen ausschalten<br />
BITTE BEACHTEN<br />
■ Ist die PBC-Funktion bei der VCD-Wiedergabe aktiv, sind die Wiederholfunktionen nicht<br />
möglich.<br />
■ Wenn Sie das Gerät ausschalten oder eine andere Wiedergabequelle wählen, wird der<br />
Wiederholungs-Modus beendet.<br />
A-B WIEDERHOLEN<br />
■ Wenn eine DVD, eine VCD oder eine CD abgespielt werden, können Sie den Inhalt<br />
zwischen dem Zeitpunkt A und B wiederholt abspielen.<br />
■ Drücken Sie die [RPT A-B]-Taste auf der Fernbedienung oder öffnen Sie das OSD-<br />
Steuertastenmenü und berühren Sie die [A-B]-Taste, um den Zeitpunkt A einzustellen.<br />
Drücken Sie die Taste nochmals, um den Zeitpunkt B einzustellen. Der ausgewählte Teil<br />
wird kontinuierlich wiederholt.<br />
■ Drücken Sie die Taste nochmals, um die Wiederholung zu beenden.<br />
ZUFALLSBEDINGTE WIEDERGABE (RANDOM)<br />
■ Wenn diese Funktion eingeschaltet ist, wird der Inhalt der Disc zufallsbedingt abgespielt.<br />
■ Drücken Sie mehrmals die [RDM]-Taste auf der Fernbedienung oder öffnen<br />
Sie das OSD-Steuertastenmenü und berühren Sie mehrmals die [ ]-Taste, um<br />
zwischen „zufallsbedingter“, „wiederholter zufallsbedingter“ oder „ausgeschalteter<br />
zufallsbedingter“ Wiedergabe zu wählen.<br />
115
DISC-MODUS<br />
INTRO-WIEDERGABE<br />
■ Wenn diese Funktion eingeschaltet ist, spielt das Gerät die ersten 10 Sekunden jeder<br />
Spur einer VCD oder einer CD an.<br />
■ Drücken Sie die [SCN]-Taste auf der Fernbedienung, um diese Funktion einzuschalten.<br />
Drücken Sie die Taste nochmals, um diese Funktion zu beenden.<br />
DIREKTE SUCHE<br />
■ Wenn eine DVD, eine VCD oder eine CD abgespielt werden, können Sie nach einem<br />
bestimmten Kapitel oder Titel suchen, indem Sie die Zifferntasten der Fernbedienung<br />
drücken. Wenn Sie z.B. den Titel 15 auswählen möchten, drücken Sie die numerischen<br />
Tasten [1] und [5].<br />
GOTO-SUCHE<br />
1. GOTO-Suchmodus aufrufen<br />
■ Drücken Sie die [GOTO]-Taste auf der Fernbedienung, um das Suchmenü zu öffnen.<br />
■ Bei DVDs können Sie nach Titel, Kapitel und Zeit suchen.<br />
■ Bei VCDs, wenn die PBC-Funktion ausgeschaltet ist, können Sie nach Zeit suchen;<br />
wenn die PBC-Funktion eingeschaltet ist, können Sie nach Spur, Zeit und Disc-Laufzeit<br />
suchen.<br />
■ Bei CDs können Sie nach Spur suchen.<br />
■ Bei MPEG-Dateien können Sie nach Spur und Zeit suchen.<br />
■ Bei selbstgebrannten Discs, die MP3- und/oder JPG-Dateien enthalten, können Sie<br />
nach der Spur (Dateien/Nummer) suchen.<br />
2. Suchinformation eingeben<br />
■ Wählen Sie ein Feld mit den Pfeiltasten auf der Fernbedienung und geben Sie mit den<br />
Zifferntasten die Suchinformationen ein, wie z.B. Titel, Kapitel und Zeit.<br />
3. Bestätigung<br />
■ Drücken Sie die [Enter]-Taste auf der Fernbedienung, um diese Funktion zu bestätigen.<br />
4. GOTO-Suchmodus verlassen<br />
■ Wiederholen Sie die obengenannte Operation, bis das Suchmenü verschwindet, oder<br />
drücken Sie die [Exit]-Taste im Menü.<br />
116
ZE-NC514<br />
DISC-MODUS<br />
DVD-MENÜ UND -TITEL<br />
■ Diese Funktion ist nur für DVDs vorhanden, die „MENÜ/TITEL“ haben. Drücken Sie die<br />
[MENÜ]-Taste auf der Fernbedienung oder öffnen Sie das OSD-Steuertastenmenü und<br />
berühren Sie die [MENÜ]-Taste, um das DVD-MENÜ zu öffnen. Sie können verschiedene<br />
Einstellungen für die Wiedergabe vornehmen, wie z.B. die Dialogsprache oder die<br />
Untertitelsprache. Drücken Sie die [TITEL]-Taste auf der Fernbedienung oder öffnen Sie<br />
das OSD-Steuertastenmenü und berühren Sie die [TITEL]-Taste, um den DVD-TITEL zu<br />
öffnen. Sie können dann einen anderen TITEL auswählen.<br />
UNTERTITELSPRACHE AUSWÄHLEN<br />
■ Drücken Sie mehrmals die [UNTERTITEL]-Taste auf der Fernbedienung oder öffnen<br />
Sie das OSD-Steuertastenmenü und berühren Sie die [UNTERTITEL]-Taste, um eine<br />
Untertitelsprache auszuwählen.<br />
MULTIWINKEL-ANSICHTEN AUSWÄHLEN<br />
■ Drücken Sie mehrmals die [WINKEL]-Taste auf der Fernbedienung, um während der<br />
Wiedergabe einer DVD oder von Videodateien mit Multiwinkel-Ansichten einen anderen<br />
Ansichtswinkel zu wählen.<br />
AUDIOKANAL (DIALOGSPRACHE) AUSWÄHLEN<br />
■ Bei DVDs mit mehrsprachigen Audiotonspuren drücken Sie mehrmals die [AUDIO]-<br />
Taste auf der Fernbedienung oder öffnen Sie das OSD Steuertastenmenü und berühren<br />
Sie mehrmals die [AUDIO]-Taste, um die Dialogsprache zu ändern.<br />
■ Bei VCDs und CDs drücken Sie mehrmals die [AUDIO]-Taste auf der Fernbedienung<br />
oder öffnen Sie das OSD-Steuertastenmenü und berühren Sie mehrmals die [AUDIO]-<br />
Taste, um den Audiokanal-Modus aus den Optionen "links vokal", "rechts vokal", "Mono<br />
links", "Mono rechts" oder "Stereo" zu wählen.<br />
BITTE BEACHTEN<br />
■ Linker Kanal und rechter Kanal können nicht richtig funktionieren, wenn die Audiotonspuren<br />
nicht richtig aufgenommen wurden.<br />
PBC-FUNKTION<br />
■ Diese Funktion ist nur für VCDs, auf denen die PBC-Funktion vorhanden ist (Ver. 2.0<br />
oder höher).<br />
■ Drücken Sie die [MENÜ]-Taste auf der Fernbedienung, um diese Funktion zu starten.<br />
■ Drücken Sie die [MENÜ]-Taste erneut, um diese Funktion zu beenden.<br />
117
DISC-MODUS<br />
BITTE BEACHTEN<br />
■ Wenn die PBC-Funktion eingeschaltet ist, geht die Wiedergabe zurück zur Spurliste und<br />
fängt wieder mit der ersten Spur an.<br />
■ Wenn die PBC-Funktion eingeschaltet ist, kann man die Wiedergabe nicht wiederholen<br />
und nach einem bestimmten Kapitel oder einer Spur suchen.<br />
■ Beim Aktivieren der PBC-Funktionen werden die Funktionen Random, Wiedergabe,<br />
Scan-Wiedergabe oder Such-Wiedergabe automatisch deaktiviert.<br />
ZOOM IN/OUT<br />
■ Um das gespielte Bild zu vergrößern, drücken Sie die [ZOOM]-Taste auf der<br />
Fernbedienung oder öffnen Sie das OSD-Steuertastenmenü und berühren Sie das [<br />
]-Icon.<br />
ABBILDUNG DREHEN<br />
■ Wenn ein Foto abgespielt wird, können Sie dieses drehen, um einen korrekten<br />
Ansichtswinkel zu erhalten, indem Sie das [ ]-Icon auf dem OSD-Steuertastenmenü<br />
berühren.<br />
WIEDERGABEINFORMATIONEN<br />
■ Berühren Sie die Mitte des TFT-Bildschirms, wenn Sie eine DVD oder eine VCD abspielen,<br />
um die Wiedergabeinformationen auf dem oberen Bereich des TFT Bildschirms anzeigen<br />
zu lassen.<br />
Für DVD<br />
1. Disc-Typ.<br />
2. DVD-Titelinformationen. „5/8“ zeigt an, dass diese DVD 8 Titel hat und dass der<br />
momentan abgespielte Titel der Titel 5 ist.<br />
3. DVD-Kapitelinformationen. „2/18“ zeigt an, dass der aktuelle Titel 18 Kapitel hat und<br />
dass das momentan abgespielte Kapitel das Kapitel 2 ist.<br />
4. Laufzeit des aktuellen Titels.<br />
5. „ 2/6 Eng“ zeigt an, dass diese DVD in 6 Sprachen aufgenommen wurde und dass<br />
momentan die Sprache 2 (Englisch) angezeigt wird.<br />
118
ZE-NC514<br />
DISC-MODUS<br />
Für VCD<br />
1. Disc-Typ.<br />
2. PBC-Funktionsanzeige. „PBC On“ zeigt an, dass die PBC-Funktion eingeschaltet ist.<br />
3. VCD-Spurinformationen. „6/18“ zeigt an, dass dieses VCD 18 Titel hat und dass der<br />
momentan abgespielte Titel der Titel 6 ist.<br />
4. Laufzeit der aktuellen Spur.<br />
119
USB-MODUS<br />
USB ALS WIEDERGABEQUELLE AUSWÄHLEN<br />
■ Öffnen Sie das Wiedergabequellen-Menü und berühren Sie das USB-Icon.<br />
BITTE BEACHTEN<br />
■ Das Gerät schaltet automatisch in den USB-Modus, sobald ein USB-Speichermedium<br />
eingesteckt wird.<br />
■ Das Gerät unterstützt Hot Swap (USB-Einheit ein- und ausstecken bei eingeschaltetem<br />
Gerät).<br />
■ Nur USB-Speichermedien, die mit FAT16/32 formatiert wurden, können von diesem<br />
Gerät unterstützt werden. Das NTFS-Format wird nicht unterstützt.<br />
TOUCHSCREEN-BEDIENUNG<br />
■ Die Bedienung ist identisch, mit der im Disc-Modus beschriebenen.<br />
OSD-STEUERTASTENMENÜ<br />
■ Die Bedienung des OSD-Steuertastenmenüs im SD/USB-Modus ist identisch, mit der<br />
im Disc-Modus beschriebenen.<br />
WIEDERGABE UNTERBRECHEN<br />
■ Die Bedienung ist identisch, mit der im Disc-Modus beschriebenen.<br />
WIEDERGABE STOPPEN<br />
■ Die Bedienung ist identisch, mit der im Disc-Modus beschriebenen.<br />
ABSPIELLISTE ANZEIGEN<br />
■ Die Bedienung ist identisch, mit der im Disc-Modus beschriebenen.<br />
SCHNELLER VOR- UND RÜCKLAUF<br />
■ Die Bedienung ist identisch, mit der im Disc-Modus beschriebenen.<br />
VORHERIGES/NÄCHSTES<br />
■ Die Bedienung ist identisch, mit der im Disc-Modus beschriebenen.<br />
120
ZE-NC514<br />
USB-MODUS<br />
ORDNER WECHSELN<br />
■ Die Bedienung ist identisch, mit der im Disc-Modus beschriebenen.<br />
WIEDERGABE WIEDERHOLEN<br />
■ Die Bedienung ist identisch, mit der im Disc-Modus beschriebenen.<br />
ZUFALLSBEDINGTE WIEDERGABE (RANDOM)<br />
■ Die Bedienung ist identisch, mit der im Disc-Modus beschriebenen.<br />
INTRO-WIEDERGABE<br />
■ Die Bedienung ist identisch, mit der im Disc-Modus beschriebenen.<br />
DIREKTE SUCHE<br />
■ Die Bedienung ist identisch, mit der im Disc-Modus beschriebenen.<br />
GOTO-SUCHE<br />
■ Die Bedienung ist identisch, mit der im Disc-Modus beschriebenen.<br />
ZOOM IN/OUT<br />
■ Die Bedienung ist identisch, mit der im Disc-Modus beschriebenen.<br />
ABBILDUNG DREHEN<br />
■ Die Bedienung ist identisch, mit der im Disc-Modus beschriebenen.<br />
WIEDERGABEINFORMATIONEN<br />
■ Die Bedienung ist identisch, mit der im Disc-Modus beschriebenen.<br />
121
IPOD-MODUS<br />
IPOD ALS WIEDERGABEQUELLE AUSWÄHLEN<br />
■ Das Gerät schaltet automatisch in den iPod Modus, wenn ein iPod eingesteckt wird.<br />
■ Um den iPod-Modus von einer anderen Wiedergabequelle auszuwählen, öffnen Sie das<br />
HAUPTMENÜ. Wählen Sie anschließend das iPod-Icon.<br />
MUSIKWIEDERGABE<br />
1. iPod-Musik-Modus aufrufen.<br />
■ Drücken Sie die [TITEL]-Taste auf der Fernbedienung oder berühren Sie das Musik-Icon<br />
auf der Benutzerschnittstelle.<br />
2. Eine Musikdatei auswählen.<br />
■ Drücken Sie die [links]/[rechts]-Taste auf der Fernbedienung.<br />
3. Musikdateien abspielen.<br />
■ Drücken Sie die [unten]-Taste auf der Fernbedienung oder berühren Sie die [ ]-Taste<br />
auf der Benutzerschnittstelle.<br />
4. Rückkehr zum vorhergehenden Menü.<br />
■ Drücken Sie die [oben]-Taste auf der Fernbedienung oder berühren Sie die [MENÜ]-<br />
Taste auf der Benutzerschnittstelle.<br />
BITTE BEACHTEN<br />
■ Im Musik-Modus funktionieren die Tasten auf dem iPod nicht.<br />
FOTOWIEDERGABE<br />
1. iPod-Foto-Modus aufrufen.<br />
■ Drücken Sie die [MENÜ]-Taste auf der Fernbedienung oder berühren Sie das Foto-Icon<br />
auf der Benutzerschnittstelle.<br />
2. Steuerung der Fotowiedergabe<br />
■ Verwenden Sie die Tasten auf dem iPod, um die Wiedergabe zu steuern.<br />
BITTE BEACHTEN<br />
■ Um den Fotowiedergabe-Modus zu verlassen, drücken Sie die [MENÜ]-Taste auf dem<br />
iPod.<br />
■ Fotos können auf dem Bildschirm nur angezeigt werden, wenn der Fotowiedergabe-<br />
Modus des iPod auf „Diavorführung“ eingestellt ist.<br />
122
ZE-NC514<br />
IPOD-MODUS<br />
VIDEOWIEDERGABE<br />
1. iPod-Video-Modus aufrufen<br />
■ Drücken Sie die [AUDIO]-Taste auf der Fernbedienung oder berühren Sie das Video-<br />
Icon auf der Benutzerschnittstelle.<br />
2. Steuerung der Video Wiedergabe.<br />
■ Verwenden Sie die Tasten auf Ihrem iPod, um die Wiedergabe zu steuern.<br />
BITTE BEACHTEN<br />
■ Um den Video-Modus zu verlassen, drücken Sie die [MENÜ]-Taste auf dem iPod.<br />
■ Um Bilder (inklusive Videos und Fotos) von Ihrem iPod auf den TFT-Bildschirm zu<br />
übertragen, müssen Sie zuerst die folgenden Optionen im Video-Einstellungsmenü des<br />
iPod einstellen:<br />
TV Out = On, TV Signal = NTSC.<br />
SCHNELLER VOR- UND RÜCKLAUF<br />
■ Um den schnellen Vor- oder Rücklauf zu benutzen, halten Sie die [links]/[rechts]-<br />
Taste auf der Fernbedienung gedrückt oder halten Sie die []/[]-Taste auf der<br />
Benutzerschnittstelle gedrückt. Um wieder in eine normale Wiedergabe zu wechseln,<br />
lassen Sie die Taste los.<br />
DIREKTE SUCHE<br />
■ Um eine Videodatei direkt auszuwählen, berühren Sie den numerischen Tastaturblock<br />
auf der Benutzerschnittstelle, um das direkte Eingabemenü zu öffnen. Geben Sie die<br />
gewünschte Videodatei mit den numerischen Tasten ein und bestätigen Sie mit der<br />
[Enter]-Taste. Um dieses Menü zu verlassen, berühren Sie die [Exit]-Taste.<br />
■ Um die Zahlen zu löschen, die Sie eingegeben haben, berühren Sie die [Clear]-Taste.<br />
■ Sie können auch die Zifferntasten der Fernbedienung verwenden, um die Videodateien<br />
direkt auszuwählen.<br />
123
DVB-T-MODUS<br />
DVB-T ALS WIEDERGABEQUELLE AUSWÄHLEN<br />
■ Öffnen Sie das HAUPTMENÜ und wählen Sie DVB-T aus.<br />
Berühren Sie den Bildschirm, um das STEUERMENÜ anzuzeigen.<br />
■ Drücken Sie die []-Taste, um die Lautstärke zu erhöhen,<br />
oder drücken Sie die []-Taste, um die Lautstärke zu verringern.<br />
TOUCHSCREEN-BEDIENUNG<br />
■ Die Tastenbereiche des Bildschirms für den DVB-T-Modus sind wie nachfolgend<br />
aufgeteilt:<br />
A – HAUPTMENU öffnen<br />
B – STEUERMENÜ anzeigen<br />
C – Einstellungs- und Equalizer-Menü anzeigen<br />
SCHNELLES AUSWÄHLEN<br />
■ Drücken Sie die [OK]-Taste, um das [QUICKSELECT]-Menü anzuzeigen. Betätigen Sie<br />
anschließend die []- oder []-Taste, um den Cursor zu bewegen und den Kanal auszuwählen,<br />
oder betätigen Sie die []- oder []-Taste, um den Quellmodus auszuwählen.<br />
KANAL-SUCHEN<br />
■ Drücken Sie auf MENÜ, um das [HAUPTMENÜ] anzuzeigen. Drücken Sie die []- oder<br />
[]-Taste, um den Cursor zu bewegen und die Quelle auszuwählen. Drücken Sie dann<br />
die [OK]-Taste, um das Sub-Menü zu öffnen. Drücken Sie die [EXIT]-Taste, um das Menü<br />
zu verlassen.<br />
124
ZE-NC514<br />
ANDERE MODI<br />
AV-IN<br />
■ Externe Einheiten mit RCA-Audio- und Videoausgänge können an das Gerät angeschlossen<br />
werden.<br />
■ Um den AV-IN-Modus einzuschalten, öffnen Sie das HAUPTMENÜ und berühren Sie<br />
das AV-IN-Icon.<br />
KAMERA<br />
■ Dieses Gerät ist „Camera Ready“ (kamerafähig). Bevor Sie die Kamerafunktionen<br />
benutzen, müssen Sie eine Video-Rückfahrkamera kaufen und installieren. Sobald<br />
die Rückfahrkamera richtig angeschlossen und in Betrieb ist, muss die Funktion<br />
"Reverse" im Setupmenü „Hardware“ aktiviert werden. Solange die Kamera nicht<br />
installiert ist, wird der KAMERA-Modus in Grau angezeigt (Funktion nicht vorhanden).<br />
Die Wiedergabequelle geht automatisch in den KAMERA-Modus, wenn Sie den<br />
Rückwärtsgang einlegen.<br />
NAVIGATION<br />
■ Dieses Gerät verfügt über ein integriertes Navigationssystem. Um dieses in vollem<br />
Umfang nutzen zu können, legen Sie bitte die 4 GB micro SDHC Karte, auf der sich die<br />
Navigationsdaten befinden, in den Kartenleser, welcher sich auf der Rückseite des TFT<br />
Monitors befindet, ein.<br />
■ Die Bedienungsanleitung des Navigationssystems liegt als separates Handbuch bei.<br />
125
SETUP<br />
EINSTELLUNGSMÖGLICHKEITEN<br />
1. Systemeinstellungsmenü aufrufen<br />
■ Drücken Sie die [SETUP]-Taste auf der Fernbedienung oder berühren Sie das Setup-<br />
Icon [ ] auf der Benutzerschnittstelle.<br />
■ Das folgende Menü erscheint nach dem Aufrufen des Systemeinstellungsmenüs.<br />
■ Das Unterprogramm "General" ist immer markiert.<br />
2. Ein Unterprogramm auswählen<br />
■ Drücken Sie die Pfeiltasten auf der Fernbedienung.<br />
3. Ein Feld auswählen<br />
■ Drücken Sie die []/[]-Tasten auf der Fernbedienung, um ein Feld auszuwählen.<br />
Drücken Sie anschließend die [ ]-Taste, um die Auswahl zu bestätigen.<br />
4. Einen Wert auswählen<br />
■ Drücken Sie die []/[]-Tasten auf der Fernbedienung, um einen Wert auszuwählen.<br />
Drücken Sie anschließend die [ ]-Taste, um die Auswahl zu bestätigen.<br />
BITTE BEACHTEN<br />
■ Alle folgenden Einstellungen können Sie vornehmen, indem Sie direkt die Option<br />
betätigen.<br />
126
ZE-NC514<br />
SETUP<br />
GENERAL (ALLGEMEIN)<br />
■ Clock Mode (Zeitformat)<br />
12Hr: Zeitanzeige im 12-Stunden-Format, z.B. 11:18 AM.<br />
24Hr: Zeitanzeige im 24-Stunden-Format z.B. 20:18.<br />
■ Clock (Uhrzeit)<br />
Einstellung der Uhrzeit, die in der oberen rechten Ecke des TFT-Bildschirms angezeigt<br />
wird.<br />
■ Tuner Region<br />
Das Gerät wird mit einigen vorprogrammierten Radiosystemen geliefert und Sie<br />
können die Ihrem Land entsprechenden auswählen.<br />
■ Beep (Signalton)<br />
Ein: Tastenton ist eingeschaltet.<br />
Aus: Tastenton ist ausgeschaltet.<br />
LANGUAGE (SPRACHE)<br />
■ OSD<br />
Sprache des OSD-Steuertastenmenüs auswählen.<br />
■ DVD-Audio<br />
Dialogsprache der DVD auswählen.<br />
BITTE BEACHTEN<br />
■ Wenn die DVD nicht die ausgewählte Sprache enthält, bleiben die Dialoge, die Sie<br />
hören, in der Standardsprache.<br />
■ DVD-Untertitel<br />
Untertitelsprache der DVD auswählen.<br />
BITTE BEACHTEN<br />
■ Wenn die DVD nicht die ausgewählte Sprache enthält, bleiben die angezeigten<br />
Untertitel in der Standardsprache.<br />
■ Disc-Menü<br />
Sprache der DVD-MENÜ-Anzeige auswählen.<br />
BITTE BEACHTEN<br />
■ Wenn die DVD nicht die ausgewählte Sprache enthält, wird das DVD-MENÜ in der<br />
Standardsprache angezeigt.<br />
127
SETUP<br />
AUDIO<br />
■ DRC<br />
Dynamikwerte der „Dolby Digital“-DVD-Discs einstellen.<br />
Ein: Verbesserung der Dynamik bei leiseren Lautstärken.<br />
Aus: Normale Audio-Ausgabe.<br />
■ Loudness (Gehörrichtige Lautstärke)<br />
Ein: Loudness-Modus ist eingeschaltet.<br />
Aus: Loudness-Modus ist ausgeschaltet.<br />
■ Subwoofer (Tiefbass-Lautsprecher)<br />
Ein: Subwoofer einschalten.<br />
Aus: Subwoofer ausschalten.<br />
■ Sub Filter (Tiefpassfilter)<br />
Sie können einen anderen Bass-Effekt erhalten, wenn Sie unterschiedliche Trennfrequenzen<br />
des Tiefpassfilters einstellen. Entsprechend der Akustik Ihres Autos wählen<br />
Sie die beste Frequenz aus.<br />
80Hz, 120Hz und 160Hz sind verfügbar.<br />
RDS<br />
■ RDS<br />
Ein: RDS-Funktion ist eingeschaltet.<br />
Aus: RDS-Funktion ist ausgeschaltet.<br />
■ CT (Uhrzeit)<br />
Ein: Uhrzeit ist eingeschaltet.<br />
Aus: Uhrzeit ist ausgeschaltet.<br />
■ TA VOL<br />
Lautstärke der Verkehrsansagen einstellen.<br />
RATING (JUGENDSCHUTZ-SICHERUNG)<br />
■ Das Gerät unterstützt die Jugendfreigabe beim Abspielen einer DVD, wenn die DVD<br />
diese Funktion unterstützt. Diese Funktion kann, wenn sie aktiviert ist, Filme mit<br />
Altersfreigaben abspielen oder sperren. Sie können die Altersfreigabe selbst einstellen.<br />
Verwenden Sie die Freigabe bis 16 Jahre und legen Sie einen Film ein, der keine<br />
Jugendfreigabe besitzt, dann wird die Wiedergabe des Films gesperrt.<br />
■ Kennwort einstellen<br />
Das ursprüngliche Kennwort des Gerätes ist "0000".<br />
128
ZE-NC514<br />
SETUP<br />
Sie sollten so schnell wie möglich ein neues Kennwort eingeben.<br />
KENNWORT ÄNDERN<br />
1. Bewegen Sie den Cursor auf die „Passwort“-Option, drücken Sie die Zifferntasten<br />
auf der Fernbedienung oder berühren Sie die „Passwort“-Option direkt auf dem<br />
Bildschirm, um den Bildschirmtastaturblock zu öffnen. Berühren Sie anschließend die<br />
numerischen Tasten, um Ihr Kennwort einzugeben und zu bestätigen (ursprüngliches<br />
Kennwort beim ersten Mal eingeben).<br />
2. Wiederholen Sie den Vorgang, um ein neues Kennwort mit 4 Ziffern einzugeben und<br />
zu bestätigen. Das neue Kennwort wird aktiv und der Jugendschutz-Sicherung ist<br />
aktiviert.<br />
RATING<br />
Das Gerät verfügt über verschiedene Jugendschutzstufen:<br />
1. Kid Safe: für Kinder geeignet.<br />
2. G: für alle Altersstufen geeignet.<br />
3. PG: Begleitung eines Erwachsenen empfohlen.<br />
4. PG-13: Begleitung eines Erwachsenen bei Kindern unter 13 Jahren empfohlen.<br />
5. PG-R: wie PG.<br />
6. R: unter 17 Jahren nur in Begleitung eines Erwachsenen.<br />
7. NC-17: ab 18 Jahren.<br />
8. Adult: nur für Erwachsene.<br />
JUGENDSCHUTZSTUFEN ÄNDERN<br />
1. Kennwort eingeben, um die Jugendschutz-Sicherung zu deaktivieren<br />
■ Bewegen Sie den Cursor auf die „Kennwort“-Option, drücken Sie die Zifferntasten<br />
auf der Fernbedienung oder berühren Sie die „Kennwort“-Option direkt auf dem<br />
Bildschirm, um den Bildschirmtastaturblock zu öffnen. Berühren Sie anschließend die<br />
numerischen Tasten, um Ihr Kennwort einzugeben und zu bestätigen.<br />
2. Jugendschutzstufe ändern<br />
■ Wählen Sie eine passende Stufe aus der „Jugendschutzstufen“-Liste aus.<br />
129
SETUP<br />
3. Jugendschutz-Sicherung aktivieren<br />
■ Wiederholen Sie den ersten Schritt, um ein Kennwort mit 6 Ziffern einzugeben (alt oder<br />
neu) und zu bestätigen.<br />
■ Der Jugendschutz-Sicherung ist aktiviert.<br />
■ Werkseinstellungen laden<br />
Um die Standardeinstellungen für die DVD-Wiedergabe (z.B.: DVD-Audio, DVD-Untertitel)<br />
wiederherzustellen, betätigen Sie die [RESET]-Option.<br />
HARDWARE<br />
■ Kamera-Eingang<br />
Normal: Das Kamerabild wird normal angezeigt.<br />
Spiegel: Das Kamerabild wird spiegelverkehrt angezeigt.<br />
■ TFT Auto öffnen<br />
Auto: Der TFT-Bildschirm öffnet sich automatisch, wenn das Gerät eingeschaltet wird.<br />
Manuell: Wenn die Zündung abgeschaltet wird, bleibt das TFT Bildschirm geöffnet,<br />
wenn er vorher geöffnet war.<br />
Aus: Der TFT-Bildschirm öffnet sich nur beim Drücken der OPEN-Taste, wenn das<br />
Gerät eingeschaltet ist.<br />
■ Video-Eingang<br />
NTSC: Die Verarbeitung des Videosignals erfolgt in NTSC.<br />
PAL: Die Verarbeitung des Videosignals erfolgt in PAL.<br />
AUTO: Die Verarbeitung des Videosignals erfolgt automatisch je nach Videomaterial<br />
(PAL oder NTSC).<br />
■ Reverse aktivieren<br />
Reverse aktivieren: Die Ansicht der Rückfahrkamera wird beim Einlegen des Rückwärtsgangs<br />
automatisch eingeblendet.<br />
Reverse deaktivieren: Die Ansicht der Rückfahrkamera wird beim Einlegen des Rückwärtsgangs<br />
nicht eingeblendet.<br />
P.VOL<br />
■ P.VOL (Programmierbare Lautstärke)<br />
Sie können die Lautstärke je nach Audioquelle anhand dieser Funktion anpassen.<br />
130
ZE-NC514<br />
SETUP<br />
■ Quelle<br />
Hier können Sie die Wiedergabequelle für die Lautstärkeeinstellung auswählen.<br />
■ Stufe<br />
Sie können die Lautstärke von 0 bis 6 einstellen.<br />
CODEEINGABE DES DIEBSTAHLSCHUTZES<br />
1. Bewegen sie den Cursor auf die „Diebst.Code“-Option, drücken sie die Zifferntaste<br />
der Fernbedienung oder berühren Sie die „Diebst.Code“-Option direkt auf den<br />
Bildschirm, um den Bildschirmtastaturblock zu öffnen. Berühren sie anschliessend die<br />
numerischen Tasten, um die Ziffernfolge „012345“ einzugeben und zu bestätigen. Der<br />
Diebstahlschutz ist nun deaktiviert.<br />
2. Wiederholen sie den Vorgang, um ein Kennwort mit 4 Ziffern einzugeben und zu<br />
bestätigen. Der Diebstahlschutz ist jetzt mit Ihrem persönlichen Code aktiviert.<br />
BITTE BEACHTEN<br />
■ Merken Sie sich den Code gut, das Entsperren des Gerätes ist kostenpflichtig und<br />
kann nur von einer autorisierten ZENEC-Servicestelle durchgeführt werden.<br />
TS CAL (TOUCHSCREEN-KALIBRIERUNG)<br />
■ Wenn sich der Bildschirm [durch Berührung] nicht genau oder nur eingeschränkt bedienen<br />
lässt, sollten Sie den Touchscreen mit dieser Funktion kalibrieren.<br />
■ Um den Touchscreen zu kalibrieren, folgen Sie den im Bildschirm angezeigten Einleitungen,<br />
nachdem Sie den TS CAL Modus aufgerufen haben.<br />
131
EQ (EQUALIZER)<br />
■ Diese Einstellungsmöglichkeiten ermöglichen den Klang nach eigenen Bedürfnissen<br />
bestmöglich anzupassen.<br />
1. EQ-Setup-Modus<br />
■ Drücken Sie die [SEL]-Taste auf der Fernbedienung oder berühren Sie das EQ-Icon<br />
in der Benutzerschnittstelle, um die folgende Schnittstelle auf dem Bildschirm<br />
anzuzeigen.<br />
EQ-Auswahl<br />
EQ-Parameter<br />
Fader-/Balance-<br />
Einstellungsbereich<br />
2. EQ-Modus auswählen<br />
■ Berühren Sie den EQ-Auswahlstab wiederholt, um den EQ-Modus zu verändern.<br />
3. EQ-Parameter einstellen<br />
■ Berühren und verschieben Sie den EQ-Parameter-Einstellungsstab, um die EQ-<br />
Parameter einzustellen.<br />
4. Fader und Balance für Vorne/Hinten/Links/Rechts einstellen<br />
■ Die Vorne/Hinten- und Links/Rechts-Balance der Lautsprecher-Wiedergabelautstärke<br />
lässt sich im Hinblick auf einen guten raumfüllenden Effekt im Fahrzeug oder an Ihre<br />
persönlichen Vorlieben anpassen.<br />
■ Um Fader und Balance für Vorne/Hinten/Links/Rechts einzustellen, berühren und verschieben<br />
Sie den kleinen weißen Punkt im Fader/Balance-Bereich.<br />
BITTE BEACHTEN<br />
■ Das Gerät wird mit vorprogrammierten Equalizer-(EQ)-Einstellungen geliefert: User,<br />
Rock, Hip Hop, Dance, Latin, Rave, Urban, Acoustic.<br />
■ Die verschiedenen Equalizer-(EQ)-Einstellungen haben unterschiedliche Bass-, Trebleund<br />
Middle-Stufen.<br />
■ Die Parameter des EQ-Modus sind voreingestellt und Sie können diese nur im „Benutzer“-(User)-Modus<br />
ändern.<br />
■ Der Equalizer-(EQ)-Modus wechselt automatisch auf „Benutzer“ (User), wenn Sie die<br />
Werte BASS, TREB oder MID ändern.<br />
■ Der SUB-Wert ist unabhängig vom Equalizer-(EQ-Modus und kann separat eingestellt<br />
werden.<br />
132
ZE-NC514<br />
FEHLERSUCHE<br />
■ Es muss nicht immer ein schwerer Defekt am Gerät vorliegen. Sie können anhand der<br />
Problembeschreibungen das vorliegende Problem gegebenenfalls selber beheben.<br />
Problem Ursache Lösung<br />
Allgemein<br />
Gerät schaltet sich nicht ein.<br />
Die Fernbedienung funktioniert nicht.<br />
Keine bzw. zu leise<br />
Audiowiedergabe.<br />
Schwache Tonqualität oder<br />
Verzerrung.<br />
Störung in der Telefon-<br />
Stummschaltung.<br />
Gerät setzt sich zurück, wenn der<br />
Motor aus ist.<br />
Gerätsicherung durchgebrannt.<br />
Autobatteriesicherung durchgebrannt.<br />
Ungültige Operation.<br />
Batterie leer.<br />
Batterie falsch eingelegt.<br />
Falscher Audioausgangsanschluss.<br />
Lautstärke zu niedrig.<br />
Lautsprecher beschädigt.<br />
Balance schlecht eingestellt.<br />
Lautsprecherverkabelung hat Kontakt mit<br />
einem Metallteil des Autos.<br />
Wiedergabe einer Raubkopie.<br />
Lautsprecherleistung zu schwach.<br />
Beschädigung am Anschluss-Stecker.<br />
Lautsprecher ist kurzgeschlossen.<br />
Kabel für Stummschaltung ist geerdet.<br />
Falscher Anschluss/Klemme<br />
+15 und +30 vertauscht.<br />
TFT-Bildschirm<br />
Neue Sicherung mit korrekten Wert<br />
installieren.<br />
Neue Sicherung mit korrektem Wert<br />
installieren.<br />
Das Gerät zurücksetzen.<br />
Die Batterie wechseln.<br />
Die Batterie richtig einlegen.<br />
Verkabelung überprüfen und beheben.<br />
Lautstärke erhöhen.<br />
Lautsprecher austauschen.<br />
Die Balance auf Mittelposition einstellen.<br />
Alle Lautsprecherverkabelungsanschlüsse<br />
isolieren.<br />
Original-CD/DVD benutzen.<br />
Lautsprecher austauschen.<br />
Verkabelung überprüfen und Mangel<br />
beheben.<br />
Verkabelung überprüfen und beheben.<br />
Die „Stummschaltungs-“ Verkabelung<br />
überprüfen und Mangel beheben.<br />
Verkabelung überprüfen und Mangel<br />
beheben.<br />
Bildschirm öffnet sich nicht<br />
automatisch.<br />
Warnende Informationen werden<br />
ständig angezeigt.<br />
Blinkendes Bild oder Störung<br />
erscheint auf dem Bildschirm.<br />
TFT AUTO ist ausgeschaltet.<br />
Handbremsverkabelung ist nicht korrekt<br />
angeschlossen.<br />
Das TV-System der DVD entspricht nicht<br />
dem des Bildschirms.<br />
Wiedergabe einer Raubkopie.<br />
Videokabel beschädigt.<br />
Schlechter Videosignalanschluss.<br />
TFT AUTO einschalten.<br />
Verkabelung überprüfen und Mangel<br />
beheben.<br />
Das TV-System der DVD einstellen.<br />
Original-CD/DVD benutzen.<br />
Kabel austauschen.<br />
Verkabelung überprüfen und Mangel<br />
beheben.<br />
133
FEHLERSUCHE<br />
Problem Ursache Lösung<br />
Disc-Wiedergabe<br />
Disc kann nicht eingelegt<br />
werden.<br />
Disc spielt nicht ab.<br />
Es befindet sich schon eine Disc im Gerät.<br />
Disc ist verkratzt.<br />
Disc ist schmutzig oder nass.<br />
Inkompatible Disc wurde benutzt.<br />
Disc ist verkehrt herum eingelegt.<br />
Region Code der Discs ist nicht mit dem<br />
Gerät kompatibel.<br />
Aktuelle Disc auswerfen und eine neue Disc<br />
einsetzen.<br />
Nur Discs in gutem Zustand benutzen.<br />
Disc mit weichem Tuch säubern.<br />
Kompatible Disc benutzen.<br />
Disc mit beschrifteter Seite nach oben<br />
einlegen.<br />
Disc mit korrektem Regionalcode benutzen.<br />
PBC kann nicht während des VCD-<br />
Wiedergabe verwendet werden.<br />
PBC ist nicht auf der Disc vorhanden.<br />
Disc mit vorhandenem PBC benutzen.<br />
Wiederholung oder Suchfunktion<br />
ist während des VCD-Wiedergabe<br />
unzulässig.<br />
PBC ist eingeschaltet.<br />
PBC ausschalten.<br />
Keine Disc.<br />
Falsche Disc.<br />
Unbekannte Disc.<br />
Region-Fehler.<br />
Disc ist schmutzig.<br />
Fehlermeldungen<br />
Disc ist verkehrt herum eingelegt.<br />
Keine Disc eingelegt.<br />
Disc ist schmutzig.<br />
Disc ist verkehrt herum eingelegt.<br />
Disc-Format ist nicht mit diesem Gerät<br />
kompatibel.<br />
Regionalcode der Discs ist nicht mit dem<br />
Gerät kompatibel.<br />
Disc mit weichem Tuch säubern.<br />
Disc mit beschrifteter Seite nach oben<br />
einlegen.<br />
Disc einlegen.<br />
Disc mit weichem Tuch säubern.<br />
Disc mit beschrifteter Seite nach oben<br />
einlegen.<br />
Disc mit kompatiblem Format benutzen.<br />
Disc mit korrektem Regionalcode benutzen.<br />
134
ZE-NC514<br />
ANSCHLÜSSE<br />
ANMERKUNGEN ZUM ANSCHLUSS<br />
■ Dieses Gerät ist nur in Fahrzeugen, die mit einem Bordnetz mit +12V (DC) und Minus<br />
gegen Masse geschaltet sind, zu benutzen. Bevor Sie dieses Gerät in einem PKW oder<br />
in einem LKW installieren, stellen Sie sicher, dass die Batteriespannung korrekt ist,<br />
sonst müssen Sie einen Spannungswandler durch einen Fachmann installieren lassen,<br />
um die Ausgangsspannung in +12V zu konvertieren.<br />
■ Um einen Kurzschluss in der elektrischen Anlage zu vermeiden, kontrollieren Sie, ob<br />
das negative Batteriekabel vor der Installation getrennt ist.<br />
■ Um einen Kurzschluss in der Verkabelung und Schaden an diesem Gerät zu vermeiden,<br />
befestigen und sichern Sie alle Kabel mit einem Kabel- oder Isolierband. Verlegen Sie<br />
die Kabel nicht in die Nähe der Heizung oder beweglicher Teile, wie z.B. Gangschaltung,<br />
Handbremse und Sitzschienen, um das Beschädigen der Kabel zu vermeiden.<br />
■ Führen Sie das gelbe Stromkabel nie durch das Installationsloch in den Motorraum, um<br />
es direkt an die Autobatterie anzuschließen. Andernfalls kann es zu einem Kurzschluss<br />
in der elektrischen Anlage kommen.<br />
■ Ersetzen Sie eine defekte Sicherung durch eine neue 10-A-Sicherung. Wenn Sie keine<br />
Sicherung oder Sicherungen mit falschem Wert einsetzen, kann dieses Gerät beschädigt<br />
werden oder sogar einen Brandschaden verursachen. Wenn eine korrekte<br />
Sicherung installiert ist und das elektrische Problem wieder auftritt, dann setzen Sie<br />
sich bitte mit einem Fachmann in Verbindung.<br />
■ Stellen Sie bitte sicher, dass alle Verkabelungsanschlüsse und Lautsprecherkabel<br />
gut isoliert sind. Andernfalls kann dieses Gerät durch einen Kurzschluss geschädigt<br />
werden.<br />
■ Wenn keine Klemme +15 vorhanden ist, dann schließen Sie das Gerät bitte mit einem<br />
Schalter an die Klemme +30 an.<br />
■ Wenn ein Verstärker angeschlossen ist, schließen Sie das P.CONT-Kabel bitte nicht<br />
an das Stromkabel des Verstärkers an, andernfalls können elektrische Funken oder<br />
andere Schäden entstehen.<br />
■ Schließen Sie Lautsprecheranschlüsse nicht an die Masse an, um Schäden an der<br />
eingebauten Endstufe zu verhindern.<br />
■ Die Leistung der Lautsprecher, sollte min. 50 W betragen (mit einer Impedanz zwischen<br />
4 und 8 Ω).<br />
135
ANSCHLÜSSE<br />
STEUERLEITUNG<br />
Automatische Helligkeitseinstellung<br />
■ Um eine zu helle Bildschirmanzeige während der Nacht zu vermeiden, schließen Sie das<br />
„ILLUMI“-Kabel an das Scheinwerfersteuerungskabel an. Wenn Sie die Scheinwerfer<br />
einschalten, verdunkelt sich die Hintergrundbeleuchtung des TFT-Bildschirms und<br />
umgekehrt.<br />
Telefon-Stummschaltung<br />
■ Wenn das Stummschaltungskabel an einem Autotelefon oder einer Freisprechanlage<br />
angeschlossen wird, schalten sich alle anderen Wiedergabequellen stumm, wenn ein<br />
Anruf empfangen wird.<br />
Rückfahrkamera<br />
■ Wenn eine Rückfahrkamera an diesem Gerät angeschlossen ist, schaltet die gerade<br />
abspielende Quelle automatisch auf das KAMERA-Bild der Rückfahrkamera, wenn<br />
Sie den Rückwärtsgang einlegen. Wenn der Rückwärtsgang nicht mehr eingelegt ist,<br />
schaltet das Gerät zur gerade abgespielten Quelle zurück.<br />
Handbremse<br />
1. Wenn der „PRK SW“-Kabel an dem Handbremsenschalter angeschlossen ist, wird<br />
die Videodarstellung auf dem TFT-Bildschirm über diese Funktion gesteuert. Die<br />
Handbremsfunktion hat keinen Einfluss auf den Rückfahrkamera-Modus.<br />
2. Der TFT-Bildschirm zeigt ein blaues Bild mit warnenden Informationen an, um die<br />
Wiedergabe von Videoinhalt während der Fahrt für den Fahrer zu verhindern. Passagiere<br />
auf dem hinteren Sitz können Videoinhalte weiter auf einem Zusatzbildschirm betrachten.<br />
136
ZE-NC514<br />
ANSCHLÜSSE<br />
VERBINDUNGEN HANDBREMSE-KABEL<br />
Kabel Handbremse Grünes Kabel<br />
Bremslicht<br />
Batterie<br />
Wagen<br />
Karosserie<br />
Schalter Handbremse<br />
Schalter Handbremse<br />
ANSCHLÜSSE RÜCKWÄRTSGANG<br />
Wagen<br />
Karosserie<br />
Rückfahrlicht-Indikator<br />
Rosa Kabel<br />
Rückfahrlicht-Kabel<br />
Batterie<br />
Wagen<br />
Karosserie<br />
Schalter<br />
Rückwärtsgang<br />
137
EINBAU UND AUSBAU<br />
ANMERKUNGEN ZUR INSTALLATION<br />
1. Vor dem Einbau stellen Sie bitte sicher, dass die Anschlüsse korrekt verlegt sind und<br />
dass das Gerät einwandfrei funktioniert. Unkorrekte Anschlüsse können zu einem<br />
Schaden des Gerätes führen.<br />
2. Schließen Sie an dieses Gerät ausschließlich kompatible Zusatzgeräte an. Nicht<br />
kompatible Zusatzgeräte können zum Schaden des Gerätes und zum Verlust der<br />
Garantieansprüche führen.<br />
3. Vor dem Einbau befestigen Sie bitte alle Stromkabel.<br />
4. Das Gerät sollte NICHT in der Nähe von Hitzequellen eingebaut werden, um Schäden an<br />
den elektrischen Bauteilen wie dem Laserkopf zu vermeiden.<br />
5. Bauen Sie das Gerät horizontal ein. Sollte das Gerät in einem Vertikalwinkel von mehr<br />
als 30° eingebaut werden, kann dies zu einer schlechten Wiedergabe von DVDs/CDs<br />
führen.<br />
6. Um elektrische Funken zu verhindern, schließen Sie den positiven Pol (+) zuerst und<br />
dann den negativen Pol (-) an.<br />
7. Decken Sie die Kühlungsventilatoröffnung NICHT zu, um eine gute und genügende<br />
Wärmeabführung für dieses Gerät zu gewährleisten; ansonsten kann es zu Hitzeschäden<br />
oder zu lauten Luftgeräuschen kommen.<br />
INSTALLATION<br />
Methode A<br />
1. Setzen Sie den Einbaurahmen des Gerätes in das Radiofach des Armaturenbrettes und<br />
verbiegen Sie die Einhängeläppchen mit einem Schraubenzieher, um die Halterung an<br />
der richtigen Stelle zu fixieren.<br />
2. Benutzen Sie zwei Schrauben der Größe M5 x 5, um die Seitenhalterungen auf beiden<br />
Seiten des Gerätes festzuschrauben (siehe Abbildung 1).<br />
Seitenhalterungen<br />
(Abbildung 1)<br />
3. Schrauben Sie eine Schraube der Größe M5 x 24 am hinteren Teil des Gerätes an und<br />
setzen Sie eine Gummihülle über die Schraube (siehe Abbildung 2).<br />
138
ZE-NC514<br />
EINBAU UND AUSBAU<br />
Armaturenbrett<br />
Gummihülle<br />
Einbaurahmen<br />
Seitenhalterungen<br />
(Abbildung 2)<br />
4. Setzen Sie das Gerät in den Einbaurahmen ein. Benutzen Sie die vier Schrauben der<br />
Größe M2 x 2, um die Seitenhalterungen und den Einbaurahmen in Position zu bringen.<br />
BITTE BEACHTEN<br />
■ Gemäß der Öffnungstiefe verwenden Sie die entsprechende Seitenhalterungslänge.<br />
Wenn die Öffnung nicht tief genug ist, kann das Gerät bis zu 10 mm über das Armaturenbrett<br />
herausragen.<br />
METHODE B<br />
Einbaurahmen<br />
Armaturenbrett<br />
1. Setzen Sie das Gerät direkt in die Öffnung des Armaturenbrettes ein.<br />
2. Schrauben Sie die Flachkopfschrauben der Größen M4 x 3 bzw. M5 x 5 oder die Senkkopfschrauben<br />
der Größen M5 x 5 durch die Löcher des Einbaurahmens im Gerät fest.<br />
139
EINBAU UND AUSBAU<br />
ABDECKZIERRAHMEN<br />
■ Bringen Sie den Abdeckzierrahmen um die Frontabdeckung mit den zwei Einrückungen<br />
aufwärts an.<br />
Den Abdeckzierrahmen entfernen.<br />
1. Drücken Sie den Abdeckzierrahmen aufwärts und ziehen Sie das obere Teil zu sich hin.<br />
2. Drücken Sie den Abdeckzierrahmen abwärts und ziehen Sie die das untere Teil zu sich<br />
hin.<br />
GERÄT AUSBAUEN<br />
1. Schrauben Sie die vier Schrauben der Größe M2 x 2 ab und ziehen Sie das Gerät aus<br />
dem Einbaurahmen heraus.<br />
2. Benutzen Sie einen Schraubenzieher, um die verbogenen Einhängeläppchen wieder<br />
geradezubiegen.<br />
Gummihülle abnehmen<br />
Die 4 Schrauben<br />
abschrauben<br />
3. Ziehen Sie den Einbaurahmen mit beiden Händen heraus.<br />
140
ZE-NC514<br />
SPECIFICATIONS<br />
General<br />
Reference Supply Voltage ....................................................................................... 12V (DC)<br />
Operating Voltage Range ............................................................................ 10.5~15.8V (DC)<br />
Max Operation Current .................................................................................................... 10A<br />
Grounding System ........................................................................Car Battery Negative Pole<br />
Installation Dimension (WxHxD) ......................................... 178mm x 50mm x (165+25) mm<br />
Installation Angle ........................................................................................................ 0°~30°<br />
Net Weight .................................................................................................................... 2.3kg<br />
FM<br />
Signal Noise Ratio .........................................................................................................55dB<br />
Residual Noise Sensitivity (S/N=30dB) .....................................................................20dBµV<br />
Frequency Response (±3dB)......................................................................... 40Hz~12.5KHz<br />
Station Seeking Level ......................................................................................... 20~30dBµV<br />
Distortion .......................................................................................................................1.5%<br />
Stereo Separation (1 KHz) .............................................................................................20dB<br />
Antenna Impedance ........................................................................................................75Q<br />
AM<br />
Residual Noise Sensitivity (S/N=20dB) .....................................................................40dBµV<br />
Selectivity (±9KHz) ........................................................................................................50dB<br />
DVD Player<br />
Signal/Noise Ratio .........................................................................................................90dB<br />
Dynamic Range .............................................................................................................90dB<br />
Distortion (line out) ........................................................................................................0.1%<br />
Frequency Response (±3dB)............................................................................ 20Hz~20KHz<br />
Max Output Power ..................................................................................................... 4x40W<br />
Load Impedance ...............................................................................................................4Ω<br />
AV-IN<br />
Distortion .......................................................................................................................0.5%<br />
Frequency Response (±3dB)............................................................................ 20Hz~20KHz<br />
Audio Input Level ...................................................................................................... 0.4Vrms<br />
Video Input Level ..........................................................................................................1Vp-p<br />
Audio<br />
Audio Output Impedance ..............................................................................................200Ω<br />
Audio Output Level .............................................................................................2Vrms (Max)<br />
(Under normal audio input level and maximum volume)<br />
141
SPECIFICATIONS<br />
Video<br />
Normal Video Input Level (CVBS)............................................................................ 1.0±0.2V<br />
Video Input Impedance ...................................................................................................75Ω<br />
Video Output Impedance ................................................................................................75Ω<br />
Video Output Level .................................................................................................. 1.0±0.2V<br />
TFT Monitor<br />
Screen Diagonal .........................................................................................17.8cm/ 7 inches<br />
Usable Display Area ................................................................................154.1(W) x 87.0 (H)<br />
Resolution ................................................................................................1440 (W) x 234 (H)<br />
Brightness ..............................................................................................................400cd/m2<br />
(Measure the centre brightness after 30 minutes)<br />
Contrast .................................................................................................................. 300(TYP.)<br />
Response Time<br />
Rise ..........................................................................................................................12ms<br />
Fall ...........................................................................................................................18ms<br />
Viewing Angle<br />
From Top .....................................................................................................................40°<br />
From bottom ...............................................................................................................65°<br />
Horizontally ...............................................................................................................±65°<br />
LCD Life Cycle .................................................................................... 10000 hours (at 25°C)<br />
Navigation<br />
Integrated navigation System<br />
Built-in SD card reader ...................................................................................4GB micro-SD<br />
GPS receiver included in set content<br />
Environment<br />
Operating Temperature ...................................................................................-10°C~ + 60°C<br />
Storing Temperature .......................................................................................-20°C~ + 70°C<br />
Operating Humidity ......................................................................................... 45%~80%RH<br />
Storing Humidity .............................................................................................. 30%~90%RH<br />
■ Durch spätere Verbesserungen am Gerät können sich die technischen Daten und<br />
Designs ändern.<br />
■ Sollten Sie dieses Gerät eines Tages entsorgen müssen, beachten Sie bitte, dass elektrische Geräte<br />
nicht mit dem Haushaltsmüll entsorgt werden sollten. Führen Sie das Gerät wenn möglich dem<br />
Recycling zu. Ihre lokalen Behörden oder Ihr Händler können Sie dementsprechend informieren<br />
(Richtlinie über die Entsorgung elektrischer und elektronischer Ausstattungen).<br />
Dieses Gerät ist von Dolby Laboratories lizenziert. Die Symbole „Dolby“, „Prologic II“ und „DD“<br />
sind markengeschützte Symbole der Firma Dolby Laboratories.<br />
142
ZE-NC514<br />
ANHANG<br />
REGIONALCODE<br />
Entsprechend der Verkaufsregion der DVD wird die ganze Welt in sechs Regionen unterteilt.<br />
Eine DVD kann nur abgespielt werden, wenn ihr Regionalcode mit dem Regionalcode des<br />
Gerätes kompatibel ist.<br />
Region 1:<br />
Region 2:<br />
Region 3:<br />
Region 4:<br />
Region 5:<br />
Region 6:<br />
USA, Kanada, US-Außenterritorien;<br />
Japan, Westeuropa, Nordeuropa, Ägypten, Südafrika,<br />
Naher Osten;<br />
Taiwan, Hongkong, Südkorea, Thailand,<br />
Indonesien, Südostasien;<br />
Australien, Neuseeland, Mittelamerika und Südamerika, Südpazifik,<br />
Ozeanien;<br />
Russland, Mongolei, Indien, Zentralasien, Osteuropa,<br />
Nordkorea, Nordafrika, Nordwestasien;<br />
Volksrepublik China.<br />
VORSICHTSMASSNAHMEN ZUR BENUTZUNG DER DISCS<br />
1. Unregelmäßig geformte Discs NICHT benutzen<br />
2. Disc-Reinigung<br />
Benutzen Sie ein trockenes und weiches Tuch, um die Disc von der Mitte zum Rand hin<br />
abzuwischen. Benutzen Sie nur neutrale Reinigungsmittel.<br />
3. Neue Discs abspielen<br />
Neue Discs können einige raue Punkte auf den inneren und äußeren Rändern haben.<br />
Wenn Sie solche Discs benutzen, dann entfernen Sie diese rauen Punkte bitte mit einem<br />
Bleistift oder Kugelschreiber.<br />
143
ANHANG<br />
VERKABELUNGS-ANSCHLÜSSE<br />
144
ZE-NC514<br />
2 JAHRE GARANTIE<br />
Sehr geehrter Kunde,<br />
vielen Dank, dass Sie sich zum Kauf dieses Produktes von ZENEC entschlossen haben. Wir<br />
bitten Sie, die Originalverpackung aufzuheben, z.B. für den Transport bei einem Garantiefall.<br />
Wenn Sie Garantie-Leistungen für dieses ZENEC-Produkt beanspruchen, wenden Sie sich bitte<br />
direkt an den Händler, bei dem das Gerät gekauft wurde.<br />
Dieses ZENEC Produkt ist durch eine Werksgarantie von 2 Jahren ab Kaufdatum im Fachhandel<br />
gegen Material- oder Herstellungsfehler geschützt.<br />
Garantie-Einschränkungen<br />
Nicht unter Garantie fallen Schäden infolge von:<br />
1. unsachgemäßem Einbau oder inkorrektem Audio- oder Stromanschluss.<br />
2. Einwirkung von übermäßiger Feuchtigkeit, Flüssigkeit, Hitze, Sonneneinstrahlung oder<br />
starker Verschmutzung.<br />
3. mechanischer Beschädigung durch Unfall, Fall oder Stoß; Schäden durch nicht autorisierte<br />
Reparaturversuche und/oder Modifikationen.<br />
Die Garantie dieses Produkts bleibt in jedem Fall auf die Reparatur bzw. den Ersatz (Entscheidung<br />
beim Hersteller) des ZENEC-Produktes beschränkt. Transportschäden und die Kosten des Rücktransportes<br />
sind durch diese Garantie nicht abgedeckt. Jeder über diese Garantie-Erklärung<br />
hinausgehende Anspruch und Haftung für direkte/indirekte Folgeschäden werden ausdrücklich<br />
abgelehnt. Garantie-Ansprüche können nur mit einer korrekt und vollständig ausgefüllten<br />
Garantie-Karte und dem Original-Kaufbeleg geltend gemacht werden.<br />
ZENEC <strong>MODEL</strong>L: ZE-NC514<br />
Seriennummer: .............................................................................................................................<br />
Kaufdatum: ...................................................................................................................................<br />
Vorname: ......................................................................................................................................<br />
Name: ...........................................................................................................................................<br />
Straße: ..........................................................................................................................................<br />
PLZ: ................................... Ort: ..................................................................................................<br />
Land: ...........................................................................................................................................<br />
Händleradresse & Stempel<br />
145
2 YEARS LIMITED WARRANTY (UK)<br />
Dear customer<br />
Thank you for purchasing this ZENEC product. It is advisable to keep the original packing material for any future<br />
transporting of the product.<br />
Should your ZENEC product require warranty service, please return it to the retailer from whom it was purchased or<br />
the distributor in your country.<br />
This ZENEC product is warranted against defective materials or workmanship for a period of TWO years from date<br />
of purchase at retail.<br />
Warranty Limitations<br />
This warranty does not cover any damage due to:<br />
1. Improper installation, incorrect audio or mains connection(s).<br />
2. Exposure to excessive humidity, fluids, heat sun rays or excessive dirt or dust.<br />
3. Accidents or abuse, unauthorized repair attempts and modifications not explicitly authorized by the manufacturer.<br />
This warranty is limited to the repair or the replacement of the defective product at the manufacturer’s option and does<br />
not include any other form of damage, whether incidental, consequential or otherwise. The warranty does not cover<br />
any transport costs or damages caused by transport or shipment of the product. Warranty work will not be carried<br />
out unless this warranty certificate is presented fully completed with model, serial number, purchaser’s address,<br />
purchasing date and dealer stamp together with the original sales slip!<br />
GARANTIE 2 ANS<br />
(Fr)<br />
Cher client,<br />
Nous vous remercions pour l’achat de cet appareil ZENEC. Conservez si possible l’emballage de ce produit pour<br />
tout envoi futur.<br />
Si cet appareil ZENEC requiert la mise en oeuvre de sa garantie, veuillez le retourner au revendeur qui vous l’a vendu,<br />
ou au distributeur agréé du pays d’achat.<br />
Ce produit ZENEC est garanti contre tout défaut matériel, pièces et main d’oeuvre pour une période de DEUX ANS<br />
après sa date d’achat.<br />
Limitations de la garantie<br />
Cette garantie ne couvre pas les dommages dus :<br />
1. Mauvaise installation, branchements audio ou alimentation incorrects.<br />
2. L’exposition à une humidité excessive, des liquides, la chaleur directe du soleil, des conditions boueuses ou<br />
poussiéreuses anormales.<br />
3. Des accidents ou utilisation non conforme, une réparation non conforme ou des modifications non explicitement<br />
autorisées par le constructeur.<br />
Cette garantie est limitée à la réparation ou au remplacement du produit défectueux, selon le choix du constructeur,<br />
et ne peut inclure la réparation de tout dommage que ce soit, suite à un accident, aux conséquences de la panne<br />
ou autre. La garantie ne couvre aucun frais de transport du produit. Cette garantie ne peut s’appliquer que sur<br />
présentation du certificat ci-dessous, dûment rempli indiquant notamment le modèle, son numéro de série, l’adresse<br />
de l’acheteur, la date d’achat et le tampon du revendeur, avec facture d’achat originale complémentaire.<br />
2 JAHRE GARANTIE (DE)<br />
Sehr geehrter Kunde,<br />
vielen Dank, dass Sie sich zum Kauf dieses Produktes von ZENEC entschlossen haben. Wir bitten Sie, die Originalverpackung<br />
aufzuheben, z.B. für den Transport bei einem Garantiefall.<br />
Wenn Sie Garantie-Leistungen für dieses ZENEC-Produkt beanspruchen, wenden Sie sich bitte direkt an den Händler,<br />
bei dem das Gerät gekauft wurde.<br />
Dieses ZENEC-Produkt ist durch eine Werksgarantie von 2 Jahren ab Kaufdatum im Fachhandel gegen Material- oder<br />
Herstellungsfehler geschützt.<br />
Garantie-Einschränkungen<br />
Nicht unter Garantie fallen Schäden infolge von:<br />
1. unsachgemäßem Einbau oder inkorrektem Audio- oder Stromanschluss.<br />
2. Einwirkung von übermäßiger Feuchtigkeit, Flüssigkeit, Hitze, Sonneneinstrahlung oder starker Verschmutzung.<br />
3. mechanischer Beschädigung durch Unfall, Fall oder Stoß; Schäden durch nicht autorisierte Reparaturversuche<br />
und/oder Modifikationen.<br />
Die Garantie dieses Produkts bleibt in jedem Fall auf die Reparatur bzw. den Ersatz (Entscheidung beim Hersteller)<br />
des ZENEC-Produktes beschränkt. Transportschäden und die Kosten des Rücktransportes sind durch diese Garantie<br />
nicht abgedeckt. Jeder über diese Garantie-Erklärung hinausgehende Anspruch und Haftung für direkte/indirekte<br />
Folgeschäden werden ausdrücklich abgelehnt. Garantie-Ansprüche können nur mit einer korrekt und vollständig<br />
ausgefüllten Garantie-Karte und dem Original-Kaufbeleg geltend gemacht werden.<br />
146
ZE-NC514<br />
ZENEC <strong>MODEL</strong>: ZE-NC514<br />
Serial number: ..............................................................................................................................<br />
Date of purchase: .........................................................................................................................<br />
Your name: ...................................................................................................................................<br />
Your address: ...............................................................................................................................<br />
City: ..............................................................................................................................................<br />
State: ................................... ZIP or postal code ........................................................................<br />
Country: .......................................................................................................................................<br />
Dealer’s address & stamp<br />
147
ZENEC by ACR AG · Bohrturmweg 1 · Bad Zurzach · Switzerland