DG1 - Ecolab Healthcare
DG1 - Ecolab Healthcare DG1 - Ecolab Healthcare
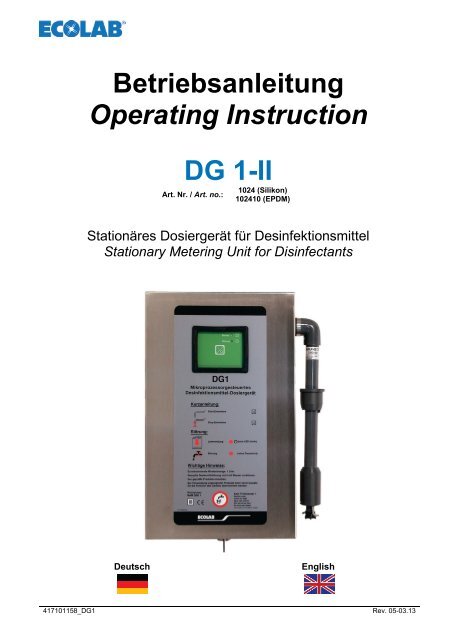
Betriebsanleitung Operating Instruction DG 1-II Art. Nr. / Art. no.: 1024 (Silikon) 102410 (EPDM) Stationäres Dosiergerät für Desinfektionsmittel Stationary Metering Unit for Disinfectants Deutsch English 417101158_DG1 Rev. 05-03.13
- Seite 2 und 3: Inhaltsverzeichnis 1 Allgemeines ..
- Seite 4 und 5: 1.3 Gewährleistungsumfang Gewährl
- Seite 6 und 7: 2.3 Allgemeine Hinweise zur Sicherh
- Seite 8 und 9: 2.8 Hervorhebungen / Aufzählungen
- Seite 10 und 11: 4 Funktionsbeschreibung und Bedienu
- Seite 12 und 13: 5.2 Wasseranschluss Eckventil mit
- Seite 14 und 15: 6.2 Einstellung der Konzentration E
- Seite 16 und 17: 6.2.4 Funktionsprüfung des Strömu
- Seite 18 und 19: 8 Wartungs- und Reparaturhinweise V
- Seite 20 und 21: 9 Technische Daten 9.1 Allgemeine D
- Seite 22 und 23: 9.3 Anschlussschema „Warmwasser
- Seite 24 und 25: 11 Konformitätserklärung HINWEIS
- Seite 26 und 27: 1 General This Operating Manual con
- Seite 28 und 29: 2 Safety ATTENTION CAUTION ATTENTIO
- Seite 30 und 31: 2.5.1 Trained person A person, who
- Seite 32 und 33: 3 Design Pos. Description 1 Cover 2
- Seite 34 und 35: 5 Connection and Installation The D
- Seite 36 und 37: 6 Settings and Start-Up 6.1 Start-U
- Seite 38 und 39: 6.2.1 Checking the Concentration Se
- Seite 40 und 41: 7 Troubleshooting NOTE Each time yo
- Seite 42 und 43: 8.2.1 Maintenance Table Component/M
- Seite 44 und 45: 9.2 Connection Diagram „Cold Wate
- Seite 46 und 47: 10 Dismantling / Disposal Dismantli
- Seite 48: Dokumenten Nr.: document no.: 41710
Betriebsanleitung<br />
Operating Instruction<br />
DG 1-II<br />
Art. Nr. / Art. no.:<br />
1024 (Silikon)<br />
102410 (EPDM)<br />
Stationäres Dosiergerät für Desinfektionsmittel<br />
Stationary Metering Unit for Disinfectants<br />
Deutsch<br />
English<br />
417101158_<strong>DG1</strong> Rev. 05-03.13
Inhaltsverzeichnis<br />
1 Allgemeines ....................................................................................................................... 3<br />
1.1 EBS Nummernreihe .............................................................................................................................. 3<br />
1.2 Transportschäden / Auspacken ............................................................................................................ 3<br />
1.3 Gewährleistungsumfang ....................................................................................................................... 4<br />
1.4 Kontaktadresse / Hersteller ................................................................................................................... 4<br />
2 Sicherheit ........................................................................................................................... 5<br />
2.1 Bestimmungsgemäße Verwendung ...................................................................................................... 5<br />
2.2 Mikrobiologische Überprüfung von dezentralen Desinfektionsmittel-Dosiergeräten ............................ 5<br />
2.3 Allgemeine Hinweise zur Sicherheit ...................................................................................................... 6<br />
2.4 Wartung und Reparatur ......................................................................................................................... 6<br />
2.5 Sicherheitsmaßnahmen (vom Betreiber durchzuführen) ...................................................................... 6<br />
2.5.1 Unterwiesene Person ........................................................................................................................................... 7<br />
2.5.2 Fachkraft .............................................................................................................................................................. 7<br />
2.6 Pflichten des Betreibers ........................................................................................................................ 7<br />
2.7 Systemtrennung .................................................................................................................................... 7<br />
2.8 Hervorhebungen / Aufzählungen .......................................................................................................... 8<br />
2.9 Sicherheitssymbole ............................................................................................................................... 8<br />
2.10 Gerätekennzeichnung ........................................................................................................................... 8<br />
3 Aufbau ................................................................................................................................ 9<br />
4 Funktionsbeschreibung und Bedienung ....................................................................... 10<br />
4.1 Beschreibung der Anzeigen und Bedienelemente .............................................................................. 10<br />
5 Montage und Anschluss ................................................................................................. 11<br />
5.1 Wandmontage ..................................................................................................................................... 11<br />
5.2 Wasseranschluss ................................................................................................................................ 12<br />
5.3 Elektrischer Anschluss ........................................................................................................................ 12<br />
5.4 Verlegung Sauglanze und Netzleitung an die linke Gehäuseseite ..................................................... 12<br />
6 Einstellung und Inbetriebnahme .................................................................................... 13<br />
6.1 Inbetriebnahme ................................................................................................................................... 13<br />
6.2 Einstellung der Konzentration ............................................................................................................. 14<br />
6.2.1 Überprüfung der Konzentrationseinstellung ........................................................................................................15<br />
6.2.2 Überprüfung der Sicherheitseinrichtungen ..........................................................................................................15<br />
6.2.3 Funktionsprüfung der Niveausauglanze ..............................................................................................................15<br />
6.2.4 Funktionsprüfung des Strömungswächters .........................................................................................................16<br />
6.2.5 Umstellung auf ein neues Produkt.......................................................................................................................16<br />
7 Störungsüberprüfung und -beseitigung........................................................................ 17<br />
8 Wartungs- und Reparaturhinweise ................................................................................ 18<br />
8.1 Mikrobiologische Überprüfung von dezentralen Desinfektionsmittel-Dosiergeräten .......................... 18<br />
8.2<br />
8.2.1<br />
Generelle Wartungsarbeiten ............................................................................................................... 18<br />
Wartungstabelle ..................................................................................................................................................19<br />
8.3 Empfehlungen zum Austausch von Verschleißteilen .......................................................................... 19<br />
8.4 Reparaturhinweise .............................................................................................................................. 19<br />
9 Technische Daten............................................................................................................ 20<br />
9.1 Allgemeine Daten ................................................................................................................................ 20<br />
9.2 Anschlussschema „Kaltwasser“ .......................................................................................................... 21<br />
9.3 Anschlussschema „Warmwasser“....................................................................................................... 22<br />
9.4 Anschlussmaterial und Zubehör .......................................................................................................... 22<br />
10 Demontage / Entsorgung ................................................................................................ 23<br />
11 Konformitätserklärung .................................................................................................... 24<br />
417101158_<strong>DG1</strong> 2 Rev. 05-03.13
1 Allgemeines<br />
Diese Betriebsanleitung enthält alle Anweisungen zur Installation, Einstellung,<br />
Inbetriebnahme, Wartung und Reparatur des Desinfektionsmittel-Dosiergerätes DG 1-II.<br />
Vor der Installation, der Inbetriebnahme und vor allen Wartungs- bzw. Reparaturarbeiten<br />
müssen die einschlägigen Kapitel des Handbuches gelesen und beachtet werden.<br />
Das DG 1-II ist ein Zumischgerät für Desinfektionsmittel.<br />
Es dient zur Herstellung einer gebrauchsfertigen Desinfektionsmittellösung.<br />
<strong>DG1</strong>- II / EPDM, Artikel Nr. 102410:<br />
Dosierpumpe, Strömungswächter und Schwenksauglanze mit EPDM-O-Ringen bestückt.<br />
Empfohlene Verwendung in Verbindung mit glukoprotaminhaltigen Produkten.<br />
<strong>DG1</strong>- II / SILIKON, Artikel Nr. 1024:<br />
Dosierpumpe, Strömungswächter und Schwenksauglanze mit Silikon-O-Ringen bestückt.<br />
Empfohlene Verwendung in Verbindung mit glukoprotamin-freien Produkten.<br />
HINWEIS<br />
Diese Betriebsanleitung ist Bestandteil der Anlage und muss für das Bedien- und<br />
Wartungspersonal jederzeit zur Verfügung stehen. Die darin enthaltenen<br />
Sicherheitshinweise sind zu beachten. Bei einem Weiterverkauf der Anlage ist die<br />
Betriebsanleitung immer mitzuliefern.<br />
Bei den deutschsprachigen Kapiteln dieser Anleitung handelt es sich um die<br />
ORIGINALBETRIEBSANLEITUNG, die rechtlich relevant ist. Alle anderen Sprachen sind<br />
Übersetzungen der ORIGINALBETRIEBSANLEITUNG.<br />
Bitte diese Anleitung sorgfältig lesen und als Referenz für Bedienung und Service<br />
aufbewahren. Bei Fragen kontaktieren Sie uns bitte wie in Kapitel 1.4 „Kontaktadresse“<br />
angegeben.<br />
1.1 EBS Nummernreihe<br />
Innerhalb dieser Betriebsanleitung werden sowohl Artikelnummern, als auch EBS<br />
Nummern dargestellt. EBS Nummern sind <strong>Ecolab</strong> interne Artikelnummern und werden<br />
„konzernintern“ verwendet.<br />
1.2 Transportschäden / Auspacken<br />
Beim Herausnehmen des <strong>DG1</strong>-II aus dem Karton ist unbedingt darauf zu achten, dass das<br />
Gerät nicht auf der Unterseite abgestellt wird, da sonst das Dosierrohr, welches aus dem<br />
Anschluss für den Schwenkauslauf herausragt, beschädigt wird.<br />
VORSICHT<br />
ACHTUNG<br />
Wird beim Auspacken ein Transportschaden festgestellt, darf das <strong>DG1</strong>-II nicht installiert<br />
werden! Das jeweilige Transportunternehmen ist unverzüglich zu verständigen und eine<br />
Schadensbestätigung zu beantragen. Eine Kopie der Schadensbestätigung ist umgehend<br />
an die Firma <strong>Ecolab</strong> Engineering GmbH zu senden.<br />
417101158_<strong>DG1</strong> 3 Rev. 05-03.13
1.3 Gewährleistungsumfang<br />
Gewährleistung in Bezug auf Betriebssicherheit, Zuverlässigkeit und Leistung des<br />
<strong>DG1</strong>-II wird vom Hersteller nur unter folgenden Bedingungen übernommen:<br />
• Montage, Anschluss, Einstellung, Wartung und Reparaturen werden von autorisiertem<br />
Fachpersonal durchgeführt.<br />
• Das Dosiergerät wird entsprechend dieser Betriebsanleitung verwendet.<br />
• Bei Reparaturen werden nur Original-Ersatzteile verwendet.<br />
• Es werden nur „validierte <strong>Ecolab</strong>-Produkte“ eingesetzt. Für den Fall, dass andere als<br />
<strong>Ecolab</strong>-Produkte eingesetzt werden, wird empfohlen, das Produkt gemäß<br />
BAM 2004- 47; 67 bis 72, mit dem Dosiergerät zu validieren.<br />
Im Übrigen gelten die allgemeinen Garantie- und Leistungsbedingungen der Firma<br />
<strong>Ecolab</strong> Engineering GmbH.<br />
1.4 Kontaktadresse / Hersteller<br />
<strong>Ecolab</strong> Engineering GmbH<br />
Raiffeisenstraße 7<br />
D-83313 Siegsdorf<br />
Telefon (+49) 86 62 / 61 0<br />
Telefax (+49) 86 62 / 61 2 35<br />
eMail: engineering-mailbox@ecolab.com<br />
417101158_<strong>DG1</strong> 4 Rev. 05-03.13
2 Sicherheit<br />
ACHTUNG<br />
Das <strong>DG1</strong>-II darf nur mit validierten Produkten verwendet werden.<br />
Bei Verwendung unvalidierter Produkte kann keine Gewährleistung übernommen werden!<br />
VORSICHT<br />
ACHTUNG<br />
Die Sicherheitshinweise und Hervorhebungen sind in jedem Fall zu beachten!<br />
2.1 Bestimmungsgemäße Verwendung<br />
Das DG 1-II ist ein Zumischgerät für Desinfektionsmittel.<br />
Es dient zur Herstellung einer gebrauchsfertigen Desinfektionsmittellösung und wurde<br />
ausschließlich für die industrielle und gewerbliche Nutzung entwickelt, konstruiert und<br />
gebaut. Eine private Nutzung der Anlage wird ausgeschlossen.<br />
Zur bestimmungsgemäßen Verwendung gehören auch die Einhaltung der vom Hersteller<br />
vorgeschriebenen Bedienungs- und Betriebsanweisungen sowie die Wartungs- und<br />
Instandhaltungsbedingungen.<br />
Die Lebensdauer des Dosiergerätes beträgt in Abhängigkeit zu den ordnungsgemäß<br />
durchgeführten Wartungen ca. 10 Jahre. Anschließend ist eine Revision<br />
(ggf. anschließende Generalüberholung) durch die Herstellerfirma oder eine Fachfirma<br />
notwendig.<br />
2.2 Mikrobiologische Überprüfung von dezentralen Desinfektionsmittel-<br />
Dosiergeräten<br />
Der Betreiber ist für den ordnungsgemäßen Betrieb des Dosiergerätes nach RKIRichtlinie<br />
„Anforderungen an Gestaltung, Eigenschaften und Betrieb von dezentralen<br />
Desinfektionsmittel-Dosiergeräten“ (Bundesgesundheitsblatt 2004 . 47: 67-72)<br />
verantwortlich.<br />
Die jährlich geforderten hygienisch-technischen Überprüfungen sind in der Betriebs- und<br />
Montageanleitung der Dosiergeräte im Punkt Wartung beschrieben.<br />
Sofern der Betreiber eine situationsbezogene hygienisch-mikrobiologische Überprüfung des<br />
Dosiergerätes nach RKI-Empfehlung „Anforderung an die Hygiene bei der Reinigung und<br />
Desinfektion von Flächen“ (Bundesgesundheitsblatt 2004-47: 51-61, Punkt 4.5) durchführt,<br />
sollte dies wie in Kapitel 8.1 „Mikrobiologische Überprüfung von dezentralen<br />
Desinfektionsmittel-Dosiergeräten“ Wartung beschrieben erfolgen.<br />
417101158_<strong>DG1</strong> 5 Rev. 05-03.13
2.3 Allgemeine Hinweise zur Sicherheit<br />
• Anschluss- und Reparaturarbeiten am <strong>DG1</strong>-II dürfen nur von autorisiertem und<br />
geschultem Fachpersonal ausgeführt werden.<br />
• Das <strong>DG1</strong>-II darf nur mit einer Versorgungsspannung von 230 V AC betrieben werden.<br />
• Vor allen Arbeiten an elektrischen Teilen unbedingt den Netzstecker ziehen.<br />
• Beim Wechseln des Desinfektionsmittelkanisters sind unbedingt die Gefahren- und<br />
Sicherheitshinweise auf dem Original-Desinfektionsmittelkanister zu beachten.<br />
• Die Sicherheitsbestimmungen im Umgang mit Chemikalien sind stets zu beachten.<br />
ACHTUNG<br />
Bei Gerät mit der Artikel Nr. 1024:<br />
Bei Einsatz von Produkten MIT Glukoprotamin (z.B.INCIDIN PLUS), sind die O-Ringe auf<br />
dem Kolben und Kolbenstange der Dosierpumpe, sowie die O-Ringe des<br />
Strömungswächters auf EPDM umzurüsten. (Umrüstsatz EPDM auf Anfrage).<br />
Bei Gerät mit der Artikel Nr. 102410:<br />
Bei Einsatz von Produkten OHNE Glukoprotamin, ist zu empfehlen die O-Ringe auf dem<br />
Kolben und Kolbenstange der Dosierpumpe, sowie die O-Ringe des Strömungswächters<br />
auf Silikon umzurüsten. (Umrüstsatz Silikon auf Anfrage)<br />
Bei Verwendung des Umrüstsatzes ist der beiliegende Aufkleber sichtbar am Dosiergerät<br />
anzubringen!<br />
2.4 Wartung und Reparatur<br />
Reparatur- und Wartungsarbeiten dürfen grundsätzlich nur von autorisiertem<br />
Fachpersonal durchgeführt werden.<br />
VORSICHT<br />
Bei allen Wartungs- und Reparaturarbeiten ist geeignete Schutzausrüstung (PSA) zu<br />
tragen.<br />
Elektroreparaturen dürfen nur durch Elektrofachkräfte ausgeführt werden! Beim Öffnen von<br />
Abdeckungen oder Entfernen von Teilen, außer wenn dies ohne Werkzeug möglich ist,<br />
können spannungsführende Teile freigelegt werden. Auch können Anschlussstellen<br />
spannungsführend sein.<br />
WICHTIG Bei Reparaturen dürfen nur Original-Ersatzteile verwendet werden.<br />
2.5 Sicherheitsmaßnahmen (vom Betreiber durchzuführen)<br />
Es wird darauf hingewiesen, dass der Betreiber sein Bedien- und Wartungspersonal:<br />
• über die Schutzeinrichtungen des Gerätes unterweist;<br />
• bezüglich der Einhaltung der Sicherheitsmaßnahmen überwacht;<br />
Diese Betriebsanleitung ist für die zukünftige Verwendung aufzubewahren.<br />
Die Häufigkeit von Inspektionen und Kontrollmaßnahmen muss eingehalten werden.<br />
Die hier beschriebenen Arbeiten sind so aufgeführt, dass sie:<br />
• in den Kapiteln Bedienung von einer unterwiesenen Person<br />
• in den Kapiteln Transport, Aufstellung und Montage, Wartung, Störung / Ursache /<br />
Behebung von einer Fachkraft verstanden werden.<br />
Die Kapitel Transport, Aufstellung und Montage, Wartung, Störung / Ursache /<br />
Behebung sind nur für Fachkräfte vorgesehen. Arbeiten, die in diesen Kapiteln<br />
beschrieben sind, sind nur von Fachkräften auszuführen.<br />
417101158_<strong>DG1</strong> 6 Rev. 05-03.13
2.5.1 Unterwiesene Person<br />
Eine Person, die durch eine Fachkraft über die ihr übertragenen Aufgaben und die<br />
möglichen Gefahren bei unsachgemäßem Verhalten unterrichtet und erforderlichenfalls<br />
angelernt sowie über die notwendigen Schutzeinrichtungen und Schutzmaßnahmen belehrt<br />
wurde.<br />
2.5.2 Fachkraft<br />
Eine Person mit geeignetem Training, geeigneter Ausbildung und Erfahrungen die sie in die<br />
Lage versetzt Risiken zu erkennen und Gefährdungen zu vermeiden.<br />
In der Definition angelehnt an die EN 60204-1:2007.<br />
2.6 Pflichten des Betreibers<br />
Der Betreiber muss:<br />
• die Sicherheit des Personals (BG- und Unfallverhütungsvorschriften, Arbeitsstätten-<br />
Richtlinien), z.B. Betriebsanweisungen, auch nach §20 GefStoffV, persönliche<br />
Schutzausrüstung (PSA), Vorsorgeuntersuchungen;<br />
• die Sicherheit der Arbeitsmittel (Schutzausrüstung, Arbeitsanweisungen,<br />
Verfahrensrisiken und Wartung);<br />
• die Produktbeschaffung (Sicherheitsdatenblätter, Gefahrstoffverzeichnis);<br />
• die Produktentsorgung (Abfallgesetz);<br />
• die Materialentsorgung (Außerbetriebnahme, Abfallgesetz);<br />
• die Reinigung (Reinigungsmittel und Entsorgung) einhalten,<br />
• sowie die aktuellen Umweltschutzauflagen beachten.<br />
Außerdem ist betreiberseitig:<br />
• die persönliche Schutzausrüstung (PSA) zur Verfügung zu stellen:<br />
Sicherheitsschuhe, Schutzhandschuhe, Schutzbrille, Schutzmaske, Schutzanzug.<br />
• die Ausbildung des Bedienpersonals zu gewährleisten;<br />
• es sind Arbeitsanweisungen zu erstellen;<br />
Anschlüsse:<br />
Vor dem Betreiben der Anlage ist vom Betreiber sicherzustellen, dass bei<br />
der Montage und Inbetriebnahme, wenn diese vom Betreiber selbst<br />
durchgeführt werden, örtliche Vorschriften (z.B. für Elektro-Anschluss)<br />
beachtet werden.<br />
2.7 Systemtrennung<br />
Durch die integrierte Systemtrennung gemäß DIN EN 1717 ist bei eventuell auftretendem<br />
Unterdruck in der Wasserzuleitung ein Eindringen von Desinfektionsmittel in das<br />
Trinkwasserleitungsnetz zuverlässig ausgeschlossen.<br />
417101158_<strong>DG1</strong> 7 Rev. 05-03.13
2.8 Hervorhebungen / Aufzählungen<br />
Die hier dargestellten Hervorhebungen folgende Bedeutung:<br />
VORSICHT<br />
ACHTUNG<br />
WICHTIG<br />
HINWEIS<br />
wird benutzt, wenn ungenaues Befolgen oder Nichtbefolgen von Bedienungsanweisungen,<br />
Arbeitsanweisungen, vorgeschriebenen Arbeitsabläufen und dergleichen zu Verletzungen<br />
oder Unfällen führen kann.<br />
wird benutzt, wenn ungenaues Befolgen oder Nichtbefolgen von Bedienungsanweisungen,<br />
Arbeitsanweisungen, vorgeschriebenen Arbeitsabläufen und dergleichen zur<br />
Beschädigung des Gerätes führen kann.<br />
wird benutzt, wenn auf eine besondere Aufmerksamkeit im Umgang mit dem Gerät<br />
geachtet werden muss.<br />
wird benutzt, wenn auf eine Besonderheit aufmerksam gemacht werden soll.<br />
Aufzählungen, die mit diesem Vorzeichen () markiert sind, beschreiben eine Tätigkeit,<br />
die durch den Monteur / Anwender durchgeführt werden muss.<br />
2.9 Sicherheitssymbole<br />
GEFAHR<br />
GEFAHR<br />
Gefahren durch elektrischen Strom sind mit nebenstehendem Symbol<br />
gekennzeichnet.<br />
Vor den Pausen und am Arbeitsschluss unbedingt Hände waschen. Die beim<br />
Umgang mit Chemikalien üblichen Vorsichtsmaßnahmen sind zu beachten. Das<br />
jeweilige Sicherheitsdatenblatt ist zu beachten.<br />
WARNUNG<br />
Bei Arbeiten in Bereichen, die mit nebenstehendem Symbol gekennzeichnet sind,<br />
ist eine Schutzbrille zu tragen.<br />
WARNUNG<br />
Bei Arbeiten in Bereichen, die mit nebenstehendem Symbol gekennzeichnet sind,<br />
ist ein Gesichtsschutz zu tragen.<br />
WARNUNG<br />
Bei Arbeiten in Bereichen, die mit nebenstehendem Symbol gekennzeichnet sind,<br />
ist entsprechende Schutzkleidung zu tragen.<br />
WARNUNG<br />
Bei Arbeiten in Bereichen, die mit nebenstehendem Symbol gekennzeichnet sind,<br />
sind entsprechende Schutzhandschuhe zu tragen.<br />
WARNUNG<br />
Bei Arbeiten in Bereichen, die mit nebenstehendem Symbol gekennzeichnet sind,<br />
sind entsprechende Sicherheitsschuhe zu tragen.<br />
HINWEIS<br />
Umweltzeichen kennzeichnet Maßnahmen des Umweltschutzes.<br />
2.10 Gerätekennzeichnung<br />
HINWEIS<br />
Wichtig für alle Rückfragen ist die richtige Angabe:<br />
• der Benennung<br />
• des Types<br />
• der fortlaufenden Gerätenummer<br />
Nur so ist eine einwandfreie und schnelle Bearbeitung möglich.<br />
Für die englische Ausführung der <strong>DG1</strong>-II ist ein entsprechender Frontaufkleber<br />
(auf Anfrage) erhältlich!<br />
417101158_<strong>DG1</strong> 8 Rev. 05-03.13
3 Aufbau<br />
Pos. Bezeichnung<br />
1 Haube<br />
2 Netzleitung mit Stecker<br />
Betriebsanzeige<br />
3<br />
(grüne LED)<br />
4<br />
Produktmangel- und Störungsanzeige<br />
(rote LED)<br />
5 EIN/AUS-Taste (I/0)<br />
6 Konsole<br />
7 Schwenkauslauf<br />
8 Schraube (2 x)<br />
Abb. 3.1<br />
Abb. 3.2 Pos. Bezeichnung<br />
1 Haube<br />
2 Netzleitung mit Stecker<br />
3<br />
Betriebsanzeige<br />
4<br />
(grüne LED)<br />
Produktmangel- und<br />
Störungsanzeige<br />
(rote LED)<br />
5 EIN/AUS-Taste (I/0)<br />
6 Konsole<br />
7 Schwenkauslauf<br />
8 Schraube (2 x)<br />
9 Gehäuserückwand<br />
10 Überwurfmutter<br />
11 Steuerung<br />
12 Sauglanze<br />
13 Wassermotor<br />
14<br />
Exenter “Einstellung<br />
Konzentration“<br />
15 Mischkammer<br />
16 Verschlussstopfen<br />
17 Befestigungsschraube<br />
18 Strömungswächter<br />
19 Dübel<br />
20 Magnetventil<br />
21 Dosierpumpe<br />
22 Rohrunterbrecher<br />
417101158_<strong>DG1</strong> 9 Rev. 05-03.13
4 Funktionsbeschreibung und Bedienung<br />
Das <strong>DG1</strong>-II ist ein Zumischgerät für Desinfektionsmittel. Es dient zur Herstellung einer<br />
gebrauchsfertigen Desinfektionsmittellösung.<br />
Das <strong>DG1</strong>-II arbeitet mit einer doppelwirkenden Kolbendosierpumpe, die von einem<br />
Wassermotor angetrieben wird. Das Desinfektionsmittel wird mengenproportional in das<br />
durchfließende Wasser dosiert. Die Konzentration der Desinfektionsmittellösung kann am<br />
Exzenter des Wassermotors zwischen 0,25 und 3 % eingestellt werden.<br />
WICHTIG<br />
Zur Gewährleistung der Einhaltung der Konzentration muss die minimale Entnahmemenge<br />
1 Liter betragen.<br />
4.1 Beschreibung der Anzeigen und Bedienelemente<br />
An der Frontseite des <strong>DG1</strong>-II befindet sich das Bedienfeld der Steuerung mit einer<br />
Folientastatur sowie einer Betriebsanzeige (grüne LED) und einer Störungsanzeige<br />
(rote LED). Über die Folientastur erfolgt die Bedienung des Gerätes.<br />
Die Entnahme wird gestartet bzw. unterbrochen, wenn die Taste EIN/AUS (I/0) gedrückt<br />
wird. Bei Wassermangel oder bei Störung im Gerät (Defekt der Dosierpumpe, Defekt des<br />
Strömungswächters etc.) wird die Dosierung sofort unterbrochen. Nach Beseitigung der<br />
Störungsursache muss die Taste (I/0) zur Entstörung (RESET) des Gerätes gedrückt<br />
werden.<br />
Anzeigen: Grüne LED: Betriebs-/Betriebsbereitschaftsanzeige (Abb. 3.1, Pos. 3)<br />
‣ Dauerlicht bei Betriebsbereitschaft<br />
‣ Blinklicht bei Dosierbetrieb<br />
Rote LED: Produktmangel- und Störungsanzeige (Abb. 3.1, Pos. 4)<br />
‣ Dauerlicht bei Betriebsstörung<br />
‣ Blinklicht bei Produktmangel<br />
Das DG 1-II verfügt über folgende Sicherheitseinrichtungen:<br />
Wassermangelsicherung:<br />
Die Elektronik überwacht durch intelligente Auswertung<br />
der Strömungswächterimpulse indirekt den<br />
Eingangsfließdruck.<br />
Durchflussmengenbegrenzung: Zur Begrenzung der max. zufließenden Wassermenge<br />
befindet sich im Magnetventil ein Mengenregler.<br />
Produktmangelsicherung:<br />
Der vor der Eindosierstelle eingebaute<br />
Strömungswächter mit Druckhalteventil überwacht den<br />
Desinfektionsmittelfluss. Bei Produktmangel infolge<br />
eines Defektes der Dosierpumpe, der Saugleitung, des<br />
Antriebs oder der Niveausauglanze sowie bei<br />
Verwendung eines falschen Produktes geht das Gerät<br />
auf Störung. Die Störungs-LED leuchtet auf (Dauerlicht).<br />
Sauglanze / Niveauelektroden: Bei leerem Kanister schaltet das Gerät ab, die rote<br />
Störungs-LED blinkt.<br />
Systemtrennung:<br />
Vor der Desinfektionsmitteleinspeisung befindet sich<br />
eine Systemtrennung gemäß DIN EN 1717.<br />
Hierdurch ist sichergestellt, dass kein<br />
Desinfektionsmittel in das Wasserleitungsnetz<br />
eindringen kann.<br />
417101158_<strong>DG1</strong> 10 Rev. 05-03.13
5 Montage und Anschluss<br />
Das <strong>DG1</strong>-II ist für eine rechtsseitige Plazierung des Produktvorratsbehälters vorbereitet.<br />
Bei Bedarf kann der Produktvorratsbehälter auch an der linken Gehäuseseite plaziert<br />
werden. Dazu muss die Sauglanze und der Ausgang für das Netzkabel an die linke<br />
Gehäuseseite verlegt werden.<br />
HINWEIS<br />
Nachfolgende Anschluss- und Montageanweisungen werden als bevorzugte Methode<br />
empfohlen. Die Umgebungsbedingungen bestimmen jedoch die tatsächlich anzuwendende<br />
Montage- und Installationsmethode. Die örtlichen Bestimmungen sind in jedem Fall zu<br />
berücksichtigen.<br />
Gehäuseabmessungen und Anschlussmaße:<br />
siehe Kapitel 9.2 „Anschlussschema „Kaltwasser““ bzw. Kapitel 9.3 „Anschlussschema<br />
Warmwasser“.<br />
Das <strong>DG1</strong>-II ist zur Wandmontage vorgesehen, vorzugsweise über bzw. in unmittelbarer<br />
Nähe eines Ablaufbeckens.<br />
Die Wasserzulauftemperatur darf max. 30° C betragen. Bei höheren Wassertemperaturen<br />
muss eine Mischbatterie vorgeschaltet werden.<br />
Der Wasserfließdruck muss min. 0,16 MPa (1,6 bar) betragen und darf 0,7 MPa (7 bar)<br />
nicht überschreiten.<br />
Beträgt der Wasserfließdruck > 0,4 MPa (4 bar) wird der Einbau eines Druckminderers in<br />
die Wasserzuleitung empfohlen!<br />
Die Spannungsversorgung beträgt AC 230 V.<br />
HINWEIS<br />
Lieferumfang:<br />
Vom Werk wird das Gerät mit rechtsseitig angeschlossener Sauglanze und Netzleitung<br />
ausgeliefert. Falls erforderlich, können die Sauglanze und Netzleitung an die linke<br />
Gehäuseseite verlegt werden (siehe Kapitel 5.4).<br />
Dies sollte vor der Wandmontage des Gerätes vorgenommen werden.<br />
• 1 St. Schwenkauslauf (Länge: 250 mm)<br />
• 1 St. Eckventil<br />
• 1 Satz Befestigungsmaterial<br />
• 1 St. Bohrschablone<br />
• 1 St. Technisches Handbuch<br />
5.1 Wandmontage<br />
ACHTUNG Je nach Wandbeschaffenheit sind spezielle Befestigungselemente zu verwenden.<br />
HINWEIS<br />
Die Montagehöhe ist so zu bemessen, dass ein Entnahmegefäß ohne Probleme unter den<br />
Schwenkauslauf gestellt werden kann. Die Einbauhöhe von ca. 130 cm Unterkante Gerät<br />
sollte dabei nicht überschritten werden (Unfallgefahr beim Wechseln des Kanisters ).<br />
Die Montage des DG 1-II ist wie folgt vorzunehmen:<br />
Mittels Bohrschablone (Beipack) Bohrlöcher für Gerät und Konsole markieren.<br />
Angezeichnete Löcher bohren.<br />
Haube (siehe Abb. 3.1, Pos. 1) abnehmen.<br />
Dazu müssen die zwei Deckelschrauben (siehe Abb. 3.1, Pos. 8) entfernt werden.<br />
Haube zum abnehmen anheben.<br />
Gerät und Konsole an der Wand befestigen.<br />
417101158_<strong>DG1</strong> 11 Rev. 05-03.13
5.2 Wasseranschluss<br />
Eckventil mit integriertem Schmutzsieb ggf. unter Verwendung eines T-Stückes an den<br />
bauseitigen Wasseranschluss anschließen.<br />
Verbindungsleitung (geeignet: Cu-Rohr, verchromt, ∅ 10 x 1) zwischen das Eckventil<br />
und den Wasseranschluss an der Geräteunterseite verlegen.<br />
Schwenkauslauf [im Beipack] an der Geräteunterseite befestigen.<br />
5.3 Elektrischer Anschluss<br />
Das Dosiergerät darf nur an 230 V Wechselspannung, 50/60 Hz, angeschlossen werden.<br />
Beim elektrischen Anschluss des <strong>DG1</strong>-II ist auf die Einhaltung der geltenden nationalen<br />
Vorschriften (VDE 0100) und örtlichen Vorschriften zu achten.<br />
Der im <strong>DG1</strong>-II integrierte Netztrafo versorgt das gesamte Gerät mit Spannung.<br />
Die Absicherung des Gerätes erfolgt durch eine Schmelzsicherung auf der Platine<br />
(630 mA, träge) und mittels einer Thermosicherung im Trafo.<br />
Zum Anschluss an die Stromversorung ist das <strong>DG1</strong>-II mit einer 2,4 m langen Netzleitung<br />
mit Stecker ausgerüstet. Die Netzleitung kann bei Bedarf in das Gehäuse zurückgezogen<br />
werden.<br />
HINWEIS<br />
Falls erforderlich, kann die Netzleitung an die linke Gehäuseseite verlegt werden<br />
(siehe Kapitel 5.4 „Verlegung Sauglanze und Netzleitung an die linke Gehäuseseite“).<br />
5.4 Verlegung Sauglanze und Netzleitung an die linke Gehäuseseite<br />
Sauglanze und Netzleitung wie folgt an die linke Gehäuseseite verlegen:<br />
Die Haube (siehe Abb. 3.1, Pos. 1) abnehmen.<br />
Dazu müssen die zwei Deckelschrauben (siehe Abb. 3.1, Pos. 8) entfernt werden.<br />
Haube zum abnehmen anheben.<br />
Die Schlauchschelle lösen, die Überwurfmutter (siehe Abb. 3.2, Pos. 10) von der<br />
Sauglanze abschrauben und die Sauglanze zusammen mit der Saugleitung und dem<br />
Anschlusskabel aus dem Gehäuse ziehen.<br />
Die Netzkabeldurchführung aus der Halterung ziehen und gemeinsam mit der<br />
Netzleitung in das Gehäuse zurückziehen.<br />
Die Abdeckplatte an der linken Gehäuseseite entfernen.<br />
Die Durchführung an der rechten Gehäuseseite mit der Abdeckplatte verschließen.<br />
Die Netzleitung durch die linksseitige Gehäuseöffnung ziehen und die<br />
Kabeldurchführung fixieren.<br />
Darauf achten, dass das Kabel nicht verletzt wird und keine scharfkantigen Teile<br />
berühren kann (Belassen der internen Netzleitungsfixierungen).<br />
Die Sauglanze an die linke Gehäuseseite montieren.<br />
417101158_<strong>DG1</strong> 12 Rev. 05-03.13
6 Einstellung und Inbetriebnahme<br />
6.1 Inbetriebnahme<br />
HINWEIS<br />
ACHTUNG<br />
Die in diesem Kapitel aufgeführten Positionsnummern beziehen sich auf die<br />
Explosionszeichnung soweit kein anderweitiger Verweis/Bezug vorgegeben wird.<br />
Bei Einsatz von Produkten die Glucoprotamin enthalten (z.B. INCIDIN PLUS ) sind die<br />
O-Ringe auf dem Kolben und auf der Kolbenstange gegen EPDM umzurüsten<br />
Nach Abschluss der Anschluss- und Montagearbeiten:<br />
Das Eckventil (G ½) ganz öffnen und auf Dichtheit prüfen.<br />
Desinfektionsmittelkanister anschließen:<br />
die Sauglanze nach vorne schwenken und in die Kanisteröffnung einführen,<br />
den Kanister auf der Konsole absetzen.<br />
<br />
<br />
<br />
<br />
Die Dosierpumpe wie folgt entlüften:<br />
den Strömungswächter (siehe Abb. 3.2, Pos. 18) abschrauben<br />
(schwarze Überwurfmutter) und in ein Gefäß führen,<br />
den Verschlussstopfen (siehe Abb. 3.2, Pos. 16) in die Öffnung der Mischkammer<br />
(siehe Abb. 3.2, Pos. 15) einsetzen,<br />
die Rändelmutter (Abb. 6.1, Pos. 3) abschrauben und den Exzenter<br />
(siehe Abb. 6.1, Pos. 1) von der Exzenteraufnahme des Wassermotors<br />
(siehe Abb. 6.1, Pos. 6) abziehen,<br />
das Pleuel mit der Kolbenstange (siehe Abb. 6.1 Pos. 7) so lange vor- und<br />
zurückbewegen, bis Desinfektionsmittel aus dem Strömungswächter austritt und<br />
keine Luftblasen in den Schlauchleitungen sichtbar sind,<br />
den Stopfen entfernen und Strömungswächter (VA-Stifte unten) wieder<br />
einschrauben,<br />
den Exzenter aufstecken und die Rändelmutter wieder aufschrauben.<br />
Die gewünschte Konzentration gemäß Kapitel 6.2 „Einstellung der Konzentration“<br />
einstellen und gemäß Kapitel 6.2.1 „Überprüfung der Konzentrationseinstellung“<br />
überprüfen.<br />
Die Sicherheitseinrichtungen gemäß Kapitel 6.2.2 „Überprüfung der<br />
Sicherheitseinrichtungen“ überprüfen.<br />
Alle Wasser- und Desinfektionsmittelführenden Leitungen und Bauteile auf Dichtheit<br />
überprüfen.<br />
417101158_<strong>DG1</strong> 13 Rev. 05-03.13
6.2 Einstellung der Konzentration<br />
Es lassen sich zwei Konzentrationsbereiche einstellen:<br />
‣ Konzentrationsbereich 1: 0,25 - 1 % (weisser Exzenter)<br />
‣ Konzentrationsbereich 2: 1,5 - 3 % (blauer Exzenter)<br />
Das Gerät ist werksseitig auf 0,5 % Konzentration eingestellt.<br />
HINWEIS<br />
Für den Konzentrationsbereich 2 muss der weisse Exzenter gegen den blauen Exzenter<br />
(im Beipack) ausgetauscht werden. Dazu muss die Rändelmutter (siehe Abb. 6.1, Pos. 3)<br />
und die Skalenscheibe (siehe Abb. 6.1, Pos. 4) entfernt werden.<br />
ACHTUNG Die Konzentration ist mit einem Sicherheitsfaktor von + 10 % einzustellen.<br />
Pos. Bezeichnung<br />
1 Exzenter<br />
2 Rote Markierung<br />
3 Rändelmutter<br />
4 Skalenscheibe<br />
5 Dosierpumpe<br />
6 Antrieb (Wassermotor)<br />
7 Kolbenstange<br />
Abb. 6.1<br />
Die Einstellung der Sollkonzentration ist wie folgt vorzunehmen:<br />
Rändelmutter (siehe Pos. 3) vom Exzenterrad (siehe Pos. 1) ca. 5 mm abschrauben.<br />
Skalenscheibe (siehe Pos. 4) aus der Verzahnung des Exzenters ziehen und festhalten.<br />
Konzentration voreinstellen: dazu das Exzenterrad mit der roten Markierung auf den<br />
gewünschten Konzentrationswert der Skalenscheibe drehen.<br />
Skalenscheibe in die Verzahnung des Exzenters stecken und die Rändelmutter<br />
festziehen.<br />
Konzentration gemäß Kapitel 6.2.1 „Überprüfung der Konzentrationseinstellung“<br />
überprüfen. Bei Abweichung vom Sollwert die Konzentrationseinstellung wiederholen.<br />
Pfeil der roten Markierung des Exzenterrads auf den entsprechenden<br />
Konzentrationswert der Skalenscheibe nachführen.<br />
Dazu die Arretierungsschraube am Exzenter lösen.<br />
417101158_<strong>DG1</strong> 14 Rev. 05-03.13
6.2.1 Überprüfung der Konzentrationseinstellung<br />
Benötigte Hilfsmittel:<br />
Eimer mit min. 10 l Fassungsvermögen zum Auffangen des<br />
Wassers<br />
Messmensuren zum Auffangen des Desinfektionsmittels:<br />
bis 100 ml bei Anwendungen bis 1 %<br />
bis 300 ml bei Anwendungen ab 1 % bis 3 %.<br />
Im nachfolgenden Beispiel zur Ermittlung der Sollkonzentration bezieht sich die Milliliter-<br />
Mengeneinstellung auf eine Wasserentnahme von exakt 8 Liter.<br />
Formeln für die Konzentrationseinstellung:<br />
Legende:<br />
K = Konzentration (%)<br />
VD = Volumen Desinfektionsmittel (ml)<br />
VW = Volumen Wasser (ml)<br />
Formel:<br />
K =<br />
VD x 100<br />
VW + VD<br />
K x VW<br />
VD =<br />
100 − K<br />
Beispiel: Gewünschte Konzentration = 0,5 %, plus Sicherheitsfaktor 10 % = 0,55 %<br />
Einzustellende Desinfektionsmittelmenge: VD = K x VW<br />
100−K<br />
Die Konzentrationseinstellung ist wie folgt zu überprüfen:<br />
=<br />
0,55 x 8.000<br />
100−0,55<br />
= 44, 24 ml<br />
Strömungswächter aus der Mischkammer herausschrauben und Öffnung der<br />
Mischkammer mit dem beiliegenden Verschlussstopfen abdichten.<br />
Strömungswächter in die bereitgestellte Messmensur führen und einen Eimer unter den<br />
Schwenkauslauf stellen.<br />
Taste EIN/AUS (I/0) drücken und ca. 2-3 Liter Wasser zapfen.<br />
Eimer und Messmensur entleeren.<br />
Strömungswächter wieder in die Messmensur führen und Eimer unter den<br />
Schwenkauslauf stellen.<br />
Gerät einschalten (Taste EIN/AUS (I/0) drücken).<br />
Genau 8 Liter Wasser zapfen. Gerät abschalten (Taste EIN/AUS (I/0) drücken).<br />
Desinfektionsmittelmenge in Messmensur ablesen.<br />
Konzentration gemäß Formel (siehe oben) errechnen.<br />
Bei Abweichungen zur gewünschten Konzentration (plus Sicherheitsfaktor) ist die<br />
Einstellung gemäß Kapitel 6.2 „Einstellung der Konzentration“ zu korrigieren.<br />
Stopfen aus Öffnung der Mischkammer entfernen und Strömungswächter einschrauben.<br />
6.2.2 Überprüfung der Sicherheitseinrichtungen<br />
Folgende Funktionen müssen überprüft werden:<br />
‣ Funktion der Niveausauglanze<br />
‣ Funktion des Strömungswächter<br />
6.2.3 Funktionsprüfung der Niveausauglanze<br />
Funktionsprüfung wie folgt durchführen:<br />
Sauglanze aus dem Produktvorratsbehälter entfernen.<br />
Nach ca. 3 Sekunden muss das Gerät auf Störung gehen (rote Störungsanzeige blinkt).<br />
417101158_<strong>DG1</strong> 15 Rev. 05-03.13
6.2.4 Funktionsprüfung des Strömungswächters<br />
Funktionsprüfung wie folgt durchführen:<br />
Haube abnehmen.<br />
Rändelmutter (siehe Abb. 6.1, Pos. 3) am Exzenter entfernen und den kompletten<br />
Exzenter von der Exzenteraufnahme des Wassermotors abziehen.<br />
Taste EIN/AUS (I/0) drücken. Das Gerät muss ca. 10 Sekunden nach dem Einschalten<br />
auf Störung gehen (rote LED Dauerlicht).<br />
Exzenter wieder installieren.<br />
Taste EIN/AUS (I/0) zur Entstörung (RESET) drücken.<br />
Taste EIN/AUS (I/0) erneut drücken (Gerät dosiert).<br />
Frischwasserzulauf langsam gegen 0 MPa (0 bar) drosseln.<br />
Das Gerät löst bei Unterschreitung von ca. 0,14 MPa (1,4 bar) Störung aus<br />
(rote LED Dauerlicht).<br />
Frischwasserzulauf wieder öffnen.<br />
Taste EIN/AUS (I/0) zur Entstörung (RESET) drücken.<br />
Haube aufsetzen.<br />
6.2.5 Umstellung auf ein neues Produkt<br />
ACHTUNG<br />
Bei Produktwechsel müssen vor Anschluss des neuen Kanisters die Sauglanze, die<br />
Pumpe und alle produktführenden Leitungen gründlich mit Wasser durchgespült werden.<br />
Bei Einsatz von Produkten die Glucoprotamin enthalten (z.B. INCIDIN PLUS) sind die<br />
O-Ringe auf dem Kolben und auf der Kolbenstange auf EPDM umzurüsten.<br />
Bei Einsatz von Produkten die KEIN Glucoprotamin enthalten sind die O-Ringe auf dem<br />
Kolben und auf der Kolbenstange auf SILIKON umzurüsten<br />
(siehe Kapitel 2.3 „Allgemeine Hinweise zur Sicherheit“).<br />
Umstellung wie folgt durchführen:<br />
Geeigneten Behälter mit Wasser füllen und die Sauglanze eintauchen.<br />
Sauglanze, Dosierpumpe und produktführenden Leitungen wie folgt durchspülen:<br />
‣ Strömungswächter (siehe Abb. 3.2, Pos. 12) abschrauben, Stopfen einsetzen und<br />
Strömungswächter in ein geeignetes Gefäß führen.<br />
‣ Rändelmutter (siehe Abb. 6.1, Pos. 3) vom Exzenter abschrauben und den Exzenter<br />
von der Exzenteraufnahme des Wassermotors abziehen.<br />
‣ Kolbenstange (siehe Abb. 6.1, Pos. 7) der Dosierpumpe manuell so lange vor- und<br />
zurückbewegen, bis klares Wasser ohne Produktrückstände aus dem<br />
Strömungswächter austritt<br />
Sauglanze in den neuen Kanister einsetzen.<br />
Dosierpumpe entlüften, bis Produkt blasenfrei aus dem Strömungswächter austritt.<br />
(siehe Kapitel 6.1 „Inbetriebnahme“)<br />
Exzenter aufstecken und Rändelmutter festziehen.<br />
Stopfen entfernen und Strömungswächter wieder einschrauben.<br />
Gerät auf Dichtheit und Funktion prüfen.<br />
Konzentrationseinstellung gemäß Kapitel 6.2 „Einstellung der Konzentration“<br />
durchführen oder nach Kapitel 6.2.1 „Überprüfung der Konzentrationseinstellung“<br />
überprüfen.<br />
417101158_<strong>DG1</strong> 16 Rev. 05-03.13
7 Störungsüberprüfung und -beseitigung<br />
HINWEIS<br />
Störungsanzeige<br />
Dauerlicht<br />
Nach jedem Abschalten und nach jeder behobenen Störung muss das Gerät durch<br />
Drücken der Taste EIN/AUS (I/0) (RESET) entstört werden.<br />
Störung Ursache Fehlerbehebung<br />
Versorgungsspannung fehlt<br />
Versorgungsspannung sicherstellen<br />
Steuerung ohne Funktion Sicherung der Steuereinheit defekt Sicherung erneuern<br />
(keine Lampe leuchtet, Steuerplatine defekt<br />
Steuerplatine austauschen<br />
keine Reaktion auf Temperatursicherung des Trafos<br />
Tastendruck<br />
spricht an<br />
Gerät abkühlen lassen<br />
Trafo defekt<br />
Trafo austauschen<br />
Desinfektionsmittelkanister leer Neuen Kanister anschließen<br />
Die Taste EIN/AUS (I/0)<br />
Sauglanze verschmutzt, Sauglanze<br />
gedrückt; keine Funktion;<br />
Fußventil der Sauglanze reinigen<br />
defekt<br />
Störungsanzeige blinkt<br />
Anschlusskabel der Sauglanze defekt Sauglanze austauschen<br />
Dosierpumpe undicht oder defekt Dosierpumpe austauschen<br />
Saug- und Dosierleitung:<br />
Schlauchschellen anziehen, ggf.<br />
Schlauchanschlüsse undicht; Schlauch Schlauch austauschen; Eckventil<br />
defekt Eckventil geschlossen<br />
öffnen<br />
Gerät ausgeschaltet;<br />
Wasseraustritt am<br />
Schwenkauslauf<br />
Eingestellte<br />
Konzentration wird nicht<br />
erreicht<br />
Produktmangelsicherung<br />
schaltet bei leerem<br />
Produktvorratsbehälter<br />
nicht ab<br />
Gerät lässt sich nicht<br />
entstören<br />
Wasserfließdruck:<br />
< 0,16 MPa (1,6 bar)<br />
Schmutzfänger verstopft<br />
Durchflussbegrenzer verkalkt oder<br />
verstopft<br />
Wassermotor undicht<br />
Wassermotor blockiert<br />
Spule des Magnetventils defekt<br />
Magnetventil verschmutzt oder defekt<br />
Dosierpumpe:<br />
Saug- und Druckventile verschmutzt<br />
bzw. defekt<br />
Sauglanze:<br />
Fußventil verschmutzt bzw. defekt<br />
Verschmutzung im Wasserzulauf<br />
Wassermotor defekt<br />
Elektroden der Sauglanze verschmutzt<br />
bzw. defekt, ggf. Anschlusskabel<br />
beschädigt<br />
Steuerplatine defekt<br />
Wasserfließdruck sicherstellen:<br />
> 0,16 MPa (1,6 bar)<br />
Schmutzfänger reinigen, ggf.<br />
austauschen<br />
Durchflussbegrenzer reinigen oder<br />
austauschen<br />
Gleitringdichtung austauschen<br />
Wassermotor austauschen<br />
Spule austauschen<br />
Magnetventil reinigen, defekte Teile<br />
austauschen<br />
Ventile reinigen, ggf. austauschen<br />
Fußventil reinigen, ggf. austauschen<br />
Schmutzfänger im Ventil und im<br />
Frischwasserzulauf reinigen, ggf.<br />
austauschen<br />
Wassermotor austauschen<br />
Sauglanze austauschen<br />
Platine austauschen<br />
417101158_<strong>DG1</strong> 17 Rev. 05-03.13
8 Wartungs- und Reparaturhinweise<br />
VORSICHT<br />
ACHTUNG<br />
Bei Wartungsarbeiten an Teilen, die mit Desinfektionsmittel in Berührung kommen, ist<br />
geeignete Schutzausrüstung zu tragen. Die Sicherheitsbestimmungen im Umgang mit<br />
Chemikalien sind stets zu beachten.<br />
Um die Betriebssicherheit und Funktionstüchtigkeit des DG 1 zu gewährleisten, müssen<br />
die vorgeschriebenen Wartungsintervalle eingehalten werden. Der Zeitraum zwischen<br />
Installation und der ersten Wartung oder zweier aufeinanderfolgenden Wartungen darf 12<br />
Monate nicht überschreiten.<br />
8.1 Mikrobiologische Überprüfung von dezentralen Desinfektionsmittel-<br />
Dosiergeräten<br />
Entfernung des Perlators am Schwenkauslauf des Gerätes<br />
Der Auslauf ist äußerlich mit einem alkoholischen Desinfektionsmittel zu desinfizieren<br />
(Incidin Liquid, Incides N) bzw. abzuflammen.<br />
Nach einem Vorlauf von ca. 1 Liter ist mindestens 1 Liter Desinfektionslösung in einem<br />
sterilen Gefäß aufzufangen<br />
(Achtung: 1 Liter ist die Mindestentnahmemenge, siehe auch Hinweis auf dem Gerät).<br />
Neutralisationsmittel (sogenannte "Enthemmer") sind erst nach Ablauf der Einwirkzeit<br />
des betreffenden Desinfektionsmittels in der entnommenen Konzentration für<br />
bakterizide und levurozide Wirksamkeit zuzusetzen (siehe Produktetikett).<br />
Geeignete Neutralisationsmittel (chemische Zusammensetzung und Konzentration)<br />
können gemäß den Vorgaben der EN 13727 oder der Standardmethoden DGHM/VAH<br />
ausgewählt und validiert oder beim Hersteller erfragt werden.<br />
Neutralisationsmittel müssen steril sein.<br />
Die Probe soll in einem mikrobiologischen Fachlabor durch Filtration auf ihre aerobe<br />
Gesamtkoloniezahl untersucht werden. Idealerweise wird dieser Wert<br />
pro 1 ml, pro 10 ml und pro 100 ml ermittelt.<br />
Ein gekühlter Transport (4°C) in lichtundurchlässigen Behältern ist wünschenswert,<br />
dies ist bei Transporten > 3h vorgeschrieben.<br />
Die Bearbeitung der Probe sollte 2 bis 3 Stunden nach Entnahme erfolgt sein.<br />
Neben der Anzahl der gefundenen Mikroben ist zur Bewertung auch die gefundene Art<br />
der Mikroorganismen zu berücksichtigen. Z.B. kann das Vorkommen von Sporen bei<br />
nicht sporiziden Mitteln nicht als Qualitätsmangel betrachtet werden.<br />
8.2 Generelle Wartungsarbeiten<br />
Nach Abschluss der Wartungsarbeiten sind folgende Arbeiten durchzuführen:<br />
Innenpflege des Gerätes:<br />
Geräteboden reinigen und Kalkrückstände entfernen.<br />
Aussenpflege des Gerätes: Haube feucht reinigen, trockenreiben und anschließend<br />
mit Edelstahlpfleger (z.B.: Chromol) behandeln.<br />
Konsole:<br />
Kanister - Standfläche reinigen<br />
Die Wartung des <strong>DG1</strong>-II ist gemäß der nachfolgenden Wartungstabelle<br />
(siehe Kapitel 8.2.1 „Wartungstabelle“) durchzuführen.<br />
417101158_<strong>DG1</strong> 18 Rev. 05-03.13
8.2.1 Wartungstabelle<br />
Geräteteil/Wartungsart;<br />
Prüfkriterium<br />
Strömungswächter:<br />
− Funktionsprüfung<br />
− Dichtheit des Druckhalteventils<br />
Überprüfung der<br />
Konzentrationseinstellung:<br />
Exzenter:<br />
Funktionskontrolle<br />
Dosierpumpe:<br />
Dichtheitsprüfung<br />
Wassermotor:<br />
Leistungskontrolle<br />
Systemtrennung:<br />
Rohrunterbrecher DB auf Dichtheit<br />
prüfen<br />
Sauglanze:<br />
Funktionsprüfung<br />
Sauglanze:<br />
Dichtheitsprüfung<br />
Schmutzfänger: (Abb. 3.3, Pos. 7)<br />
Betroffene Schmutzfänger<br />
verschmutzt<br />
Magnetventilschmutzfänger<br />
Ausführungshinweise/Verweise<br />
Siehe Kapitel 6.2.4 „Funktionsprüfung des Strömungswächters“<br />
Strömungswächter aus Verschraubung lösen, wenn<br />
Desinfektionsmittelaustritt am Strömungswächter ⇒<br />
Strömungswächter austauschen<br />
Siehe Kapitel 6.2.1 „Überprüfung der Konzentrationseinstellung“<br />
Zur Kontrolle der einwandfreien Funktion des Exzenters die<br />
Konzentation auf drei verschiedene Werte einstellen und mittels<br />
Auslitern überprüfen. Bei Abweichung Exzenter, Pleuel und ggf.<br />
komplette Dosierpumpe austauschen.<br />
Bei eingeschaltetem Gerät auf Konzentrataustritt an Kolbenstange<br />
achten. Wenn Konzentrat austritt ⇒ Kolben O-Ringe austauschen, ggf.<br />
Dosierpumpe austauschen<br />
Bei eingeschaltetem Gerät Exzenter umfassen. Wenn der<br />
Wassermotor mit geringem Kraftaufwand angehalten werden kann:<br />
Wassermotor defekt ⇒ Wassermotor austauschen<br />
Gummimembrane ggf. Rohrunterbrecher austauschen<br />
Siehe Kapitel 6.2.3 „Funktionsprüfung der Niveausauglanze“<br />
Becher mit Desinfektionsmittel bis unter die Elektroden der Sauglanze<br />
eintauchen; wenn die Dosierpumpe Luft ansaugt, ist der Schlauch in<br />
der Sauglanze defekt ⇒ Sauglanze bzw. Schlauch austauschen<br />
Siebe der entsprechenden Schmutzfänger ausbauen und reinigen<br />
Überwurfmutter des Schrägsitzfilters lösen<br />
8.3 Empfehlungen zum Austausch von Verschleißteilen<br />
Bauteil Arbeitsschritt Wartungsintervall<br />
Magnetventil: Wechsel des Schmutzfilters Jährlich<br />
Verbindungsschlauch/Wasser-Trennung & Ausgang<br />
Jährlich<br />
Systemtrennung (Rohrunterbrecher DB) Membrantausch alle 3 Jahre<br />
8.4 Reparaturhinweise<br />
Reparaturhinweise mit Ersatzteillisten und Explosionszeichnungen sind auf Anfrage<br />
erhältlich.<br />
VORSICHT<br />
ACHTUNG<br />
Bei Arbeiten an Teilen, die mit dem Produkt in Berührung kommen, sind die<br />
entsprechenden Gefahren- und Sicherheitshinweise unbedingt zu beachten.<br />
Es ist geeignete Schutzausrüstung zu tragen.<br />
Vor jeglichen Reparaturarbeiten ist das Gerät vom Stromnetz zu trennen.<br />
Dazu ist der Netzstecker zu ziehen.<br />
Vor Reparturarbeiten an Produkt- und Wasserführenden Bauteilen (z.B. Magnetventil)<br />
muss das Eckventil geschlossen und der Wasserdruck im Gerät abgebaut werden.<br />
Dazu ist die Taste EIN/AUS (I/0) zweimal zu drücken.<br />
Es dürfen nur Original-Ersatzteile verwendet werden!<br />
(siehe Kapitel 1.3 „Gewährleistungsumfang“).<br />
417101158_<strong>DG1</strong> 19 Rev. 05-03.13
9 Technische Daten<br />
9.1 Allgemeine Daten<br />
Versorgungsspannung:<br />
AC 230 V<br />
Leistungsaufnahme:<br />
15 W<br />
Schutzart Gerät / Steuerung: IP 24 / IP 65<br />
Schutzklasse: II nach EN 60335-1<br />
Vorsicherung:<br />
max. 16 A<br />
Betriebsspannung:<br />
AC 24 V<br />
Interne Absicherung:<br />
Feinsicherung 5 x 20, 630 mA Träge<br />
Wasseranschluss: Konusquetschverschraubung NW 10 (für Cu-Rohr, D. 10 x 1 )<br />
Wassereingangstemperatur: max. 30°C<br />
Fließdruck:<br />
min. 0,16 MPa (1,6 bar) - max. 0,7 MPa (7 bar)<br />
Dosierleistung:<br />
ca. 850 l/h (Gebrauchsverdünnung)<br />
Konzentrationseinstellung: Exzenter weiß: 0,25 % - 1 %, Exzenter blau: 1,5 % - 3 %<br />
Dosiertoleranz: Max. + 6 %<br />
Systemtrennung:<br />
DIN EN 1717 (Typ DB)<br />
Einbaumaße:<br />
Breite = 500 mm (mit Konsole), Höhe=425 mm, Tiefe=200 mm<br />
Gewicht:<br />
13,5 kg<br />
HINWEIS<br />
Technische Änderungen müssen wir uns vorbehalten, da unsere Produkte einer ständigen<br />
Weiterentwicklung unterliegen!<br />
417101158_<strong>DG1</strong> 20 Rev. 05-03.13
9.2 Anschlussschema „Kaltwasser“<br />
Abb. 9.1<br />
417101158_<strong>DG1</strong> 21 Rev. 05-03.13
9.3 Anschlussschema „Warmwasser“<br />
Abb. 9.2<br />
9.4 Anschlussmaterial und Zubehör<br />
Anschlussmaterial - Bezeichnung<br />
T-Stück G ½ , MS verchromt<br />
T-Stück R ¾/ R ½ / R ¾, MS verchromt<br />
Kupferrohr 10x1 verchromt<br />
Eckventil G ½ a x D 10 MS verchromt [ im Beipack]<br />
Zubehör - Bezeichnung<br />
Adapter 3/4 “ Innengewinde R1/2 Aussengewinde, MS verchromt<br />
Schwenkauslauf, 150 mm lang<br />
Schwenkauslauf, 200 mm lang<br />
Schwenkauslauf, 300 mm lang<br />
Thermomischbatterie mit Anschlussverschraubung<br />
Rückbausatz auf Freistrecke<br />
(nur Verwendung bei zu niedrigem Wasserdruck, bis 0,1 MPa (1 bar)<br />
Konsole für 10L-Behälter mit Ablagefach<br />
HINWEIS<br />
Artikelnummern bitte gegebenenfalls separat mit der Ersatzteilzeichnung anfordern!<br />
417101158_<strong>DG1</strong> 22 Rev. 05-03.13
10 Demontage / Entsorgung<br />
Demontage<br />
Die Demontage darf nur vom Fachpersonal durchgeführt werden. Achten Sie darauf, dass<br />
vor Beginn der Demontagearbeiten das <strong>DG1</strong>-II komplett von der Stromversorgung getrennt<br />
wurde. Das <strong>DG1</strong>-II muss sorgfältig durchgespült werden, um Chemiereste zu beseitigen.<br />
Entsorgung<br />
Das <strong>DG1</strong>-II ist überwiegend aus Stahl (in bestimmtem Umfang auch aus<br />
Aluminium) hergestellt (außer der Elektroausrüstung) und ist entsprechend<br />
den dann gültigen örtlichen Umweltvorschriften zu entsorgen.<br />
Entsorgen Sie je nach Beschaffenheit, existierenden Vorschriften und unter<br />
Beachtung aktueller Bestimmungen z.B. als:<br />
Elektroschrott (Leiterplatten), Kunststoffe (Gehäuse), Blech, Stahl, Kupfer,<br />
Aluminium (nach Sorten trennen). Vor dem Entsorgen sind alle<br />
medienberührten Teile zu dekontaminieren.<br />
Öle, Lösungs- und Reinigungsmittel und kontaminierte<br />
Reinigungswerkzeuge (Pinsel, Lappen usw.) müssen den örtlichen<br />
Bestimmungen entsprechend, gemäß dem geltenden Abfall- Schlüssel und<br />
unter Beachtung der Hinweise in den Sicherheitsdatenblättern der Hersteller<br />
entsorgt werden.<br />
417101158_<strong>DG1</strong> 23 Rev. 05-03.13
11 Konformitätserklärung<br />
HINWEIS<br />
Diese Konformitätserklärung entspricht dem Stand der Erstellung dieser<br />
Betriebsanleitung. Sollte sich in der Zwischenzeit eine hier benannte<br />
Norm geändert haben, können Sie die aktuellste Konformitätserklärung<br />
hier herunterladen:<br />
http://www.ecolab-engineering.de/uploads/media/CE_1024ff_<strong>DG1</strong>.pdf<br />
417101158_<strong>DG1</strong> 24 Rev. 05-03.13
CONTENTS<br />
1 General ............................................................................................................................. 26<br />
1.1 EBS Article numbers ........................................................................................................................... 26<br />
1.2 Transport damage / Unpacking the Device ......................................................................................... 26<br />
1.3 Scope of guarantee ............................................................................................................................. 27<br />
1.4 Contact Address / Manufacturer ......................................................................................................... 27<br />
2 Safety ............................................................................................................................... 28<br />
2.1 Intended use ........................................................................................................................................ 28<br />
2.2 Microbiological examination of decentralized disinfectant dispensers ................................................ 28<br />
2.3 General Safety Information ................................................................................................................. 29<br />
2.4 Maintenance and Repair ..................................................................................................................... 29<br />
2.5 Safety measures (to be performed by the owner/operator) ................................................................ 29<br />
2.5.1 Trained person ....................................................................................................................................................30<br />
2.5.2 Qualified person ..................................................................................................................................................30<br />
2.6 Responsibilities of the Owner .............................................................................................................. 30<br />
2.7 System Separation .............................................................................................................................. 30<br />
2.8 Emphases / Numberings ..................................................................................................................... 31<br />
2.9 Safety symbols .................................................................................................................................... 31<br />
2.10 Machine identification .......................................................................................................................... 31<br />
3 Design .............................................................................................................................. 32<br />
4 Functional Description and Operation ........................................................................... 33<br />
4.1 Description of Display Screen and Operating Controls ....................................................................... 33<br />
5 Connection and Installation ........................................................................................... 34<br />
5.1 Wall Mounting ...................................................................................................................................... 34<br />
5.2 Water connection ................................................................................................................................ 35<br />
5.3 Electrical Connection........................................................................................................................... 35<br />
5.4 Shifting Suction Pipe and Mains Cable to Left-Hand Side of Housing ............................................... 35<br />
6 Settings and Start-Up ...................................................................................................... 36<br />
6.1 Start-Up ............................................................................................................................................... 36<br />
6.2 Setting the Concentration .................................................................................................................... 37<br />
6.2.1 Checking the Concentration Setting ....................................................................................................................38<br />
6.2.2 Checking the Safety Equipment ..........................................................................................................................38<br />
6.2.3 Functional Check of the Level Suction Pipe ........................................................................................................38<br />
6.2.4 Functional Check of the Flow Control Device ......................................................................................................39<br />
6.2.5 Changing over to a New Product.........................................................................................................................39<br />
7 Troubleshooting .............................................................................................................. 40<br />
8 Maintenance and Repair Information ............................................................................. 41<br />
8.1 Microbiological examination of decentralized disinfectant dispensers ................................................ 41<br />
8.2<br />
8.2.1<br />
General maintenance work ................................................................................................................. 41<br />
Maintenance Table ..............................................................................................................................................42<br />
8.3 Recommendations for the replacement of wearing parts ................................................................... 42<br />
8.4 Repair Instructions .............................................................................................................................. 42<br />
9 Technische Daten............................................................................................................ 43<br />
9.1 Allgemeine Daten ................................................................................................................................ 43<br />
9.2 Connection Diagram „Cold Water“ ...................................................................................................... 44<br />
9.3 Connection Diagram „Hot Water“ ........................................................................................................ 45<br />
9.4 Connection Material and Accessories ................................................................................................. 45<br />
10 Dismantling / Disposal .................................................................................................... 46<br />
11 Declaration of Conformity .............................................................................................. 47<br />
417101158_<strong>DG1</strong> 25 Rev. 05-03.13
1 General<br />
This Operating Manual contains all the information required for the installation, start-up, and<br />
maintenance of the DG 1-II disinfectant metering unit.<br />
The relevant chapters of this manual must be read and noted before installing the device,<br />
using it for the first time, and before carrying out any maintenance or repair work.<br />
The DG 1-II is a metering unit for adding disinfectant in order to prepare a ready-to-use<br />
disinfecting solution.<br />
<strong>DG1</strong>- II / EPDM, Article No. 102410:<br />
Metering pump, Flow control and Suction pipe with EPDM O-Rings.<br />
Recommended use in connection with products without glucoprotamine.<br />
<strong>DG1</strong>- II / SILICONE, Article No. 1024:<br />
Metering pump, Flow control and Suction pipe with SILOCONE O-Rings.<br />
Recommended use in connection with products containing glucoprotamine.<br />
NOTE<br />
This Operating Manual is a component of the equipment and must be available at all<br />
times to the operating and maintenance staff. The safety information contained therein<br />
must be observed. In the event the equipment is resold, the Operating Manual must<br />
always be supplied with it.<br />
The German chapters of this manual constitute the ORIGINAL OPERATING<br />
INSTRUCTIONS and take legal precedence. All other languages are translations of the<br />
ORIGINAL OPERATING INSTRUCTIONS.<br />
If you have questions, please contact us as outlined in chapter 1.4 “Contact address /<br />
manufacturer”.<br />
1.1 EBS Article numbers<br />
Within this operating instruction article numbers, and EBS numbers are represented. EBS<br />
numbers are <strong>Ecolab</strong> internal article numbers and used only “concern internal”.<br />
1.2 Transport damage / Unpacking the Device<br />
When removing the DG 1-II from its box, make sure that you do not rest the device on its<br />
lower side, since this can damage the dosing pipe that protrudes from the connection for<br />
the swivel spout.<br />
CAUTION<br />
ATTENTION<br />
If transport damage is discovered at the time of unpacking, the <strong>DG1</strong>-II unit may not be<br />
installed! The carrier in question must be notified immediately and a damage<br />
confirmation slip must be requested. A copy of the damage confirmation slip must be<br />
sent to <strong>Ecolab</strong> Engineering GmbH immediately.<br />
417101158_<strong>DG1</strong> 26 Rev. 05-03.13
1.3 Scope of guarantee<br />
The manufacturer only guarantees the operational safety, reliability, and<br />
performance of the <strong>DG1</strong>-II under the following conditions:<br />
• The installation, connection, setting, maintenance, and repair work is carried out by<br />
qualified and authorised specialists.<br />
• The metering unit must be used in accordance with the specifications as given in the<br />
technical manual.<br />
• Only original equipment spare parts are used for repairs.<br />
• Only “validated” <strong>Ecolab</strong>-disinfectants are used. If other than <strong>Ecolab</strong> products are used, it<br />
is recommended that the disinfectant is validated for the dosing unit, according to<br />
BAM 2004-47;67-72.<br />
For the remainder the general warranty and service terms of <strong>Ecolab</strong> Engineering<br />
GmbH shall apply.<br />
1.4 Contact Address / Manufacturer<br />
<strong>Ecolab</strong> Engineering GmbH<br />
Raiffeisenstraße 7<br />
D-83313 Siegsdorf<br />
Telephone (+49) 86 62 / 61 0<br />
Fax (+49) 86 62 / 61 2 35<br />
eMail: engineering-mailbox@ecolab.com<br />
417101158_<strong>DG1</strong> 27 Rev. 05-03.13
2 Safety<br />
ATTENTION<br />
CAUTION<br />
ATTENTION<br />
The <strong>DG1</strong>-II system must be used with validated products<br />
No warranty for the unit function when using unvalidated products.<br />
Safety warnings and emphases must be observed in all cases!<br />
2.1 Intended use<br />
The DG 1-II is a mixing equipment for disinfectants.<br />
It is used for the production of a ready-to-use disinfectant solution and has been developed,<br />
designed and built exclusively for the industrial and commercial use. A private use of the<br />
equipment is excluded.<br />
It is part of the intended use of dosing system to follow the manufacturer´s instructions for<br />
maintenance, service, repair and disposal.<br />
The service life of the equipment according to the properly conducted maintenance work is<br />
approximately 10 years . An audit (potentially followed by a general overhaul) is required<br />
subsequently by the manufacturer or a specialist company.<br />
2.2 Microbiological examination of decentralized disinfectant dispensers<br />
The end user is responsible for the proper operation of the dosing device according to the<br />
recommended process from the RKI "requirements for design, features and operation of<br />
decentralized disinfectant dispensers "(Federal Health Bulletin 2004 47: 67-72.).<br />
In the device manual the annual required hygiene-technical checks are described in section<br />
related to maintenance.<br />
If the end user requires to test for a situation-related hygienic-microbiological verification of<br />
the dosing device <strong>Ecolab</strong> suggests the process described in RKI recommendation<br />
"requirement on hygiene in cleaning and disinfection of surfaces" (Federal Health Bulletin<br />
2004-47: 51-61, Item 4.5). Kindly follow the following process as described in<br />
chapter 8.1 “Microbiological examination of decentralized disinfectant dispensers “.<br />
417101158_<strong>DG1</strong> 28 Rev. 05-03.13
2.3 General Safety Information<br />
• Any connection and repair work on the DG 1-II may only be undertaken by<br />
authorised and trained experts.<br />
• The DG 1-II may only be operated with a supply voltage of 230 V AC.<br />
• Work on electrical equipment must, above all, be undertaken with the mains plug<br />
unplugged.<br />
• When changing the disinfectant canister, the warning and safety information on the<br />
original disinfectant canister must be observed.<br />
• Safety regulations covering the handling of chemicals must always be observed.<br />
ATTENTION<br />
At units with Article no. 1024:<br />
If using products that contain glucoprotamin (such as INCIDIN PLUS) the O-rings of the<br />
metering pump piston and piston rods and the O-rings of the flow monitor must be<br />
converted for EPDM. (conversion kit EPDM on request).<br />
At units with Article no. 102410:<br />
If using products that do not contain glucoprotamin, we recommend that you convert the<br />
O-rings of the metering pump piston and piston rod and the O-rings of the flow monitor<br />
for silicone (conversion kit Silicone on request).<br />
When using the conversion kit, the provided sticker must be attached to the metering<br />
unit in a visible position.<br />
2.4 Maintenance and Repair<br />
Repair and maintenance work must be carried out only by authorized, trained service<br />
technicians.<br />
CAUTION<br />
For maintenance and repair work suitable protective equipment (PSA) hast to be worn.<br />
Opening covers or removing parts, even if possible without tools, may expose hot wires.<br />
Connecting points may also carry an electrical current.<br />
IMPORTANT Only original spare and replacement parts may be used for repairs.<br />
2.5 Safety measures (to be performed by the owner/operator)<br />
Attention is drawn to the fact that the owner/operator has the following<br />
responsibilities towards his operating and maintenance personnel:<br />
• To provide briefing on the protective devices on the equipment;<br />
• Monitor observance of the safety measures;<br />
This operating manual must be retained for future use. The frequency of inspections and<br />
control measures must be observed.<br />
The tasks described in this Operating Manual are explained in such a way that:<br />
• any tasks outlined in the chapters Operation and Operating Modes are carried out by a<br />
trained person,<br />
• the tasks explained in the chapters Transportation, Setup and Assembly, Errors /<br />
Causes / Remedies are understood by a qualified person.<br />
The chapters Transportation, Setup and Assembly, Errors / Causes / Remedies are only<br />
intended for qualified personnel. Tasks that are described in these chapters may only be<br />
performed by qualified personnel.<br />
417101158_<strong>DG1</strong> 29 Rev. 05-03.13
2.5.1 Trained person<br />
A person, who has been trained in the tasks assigned to him/her by a skilled person in the<br />
possible dangers that improper handling can cause and has been taught about the<br />
necessary protective equipment and safety measures.<br />
2.5.2 Qualified person<br />
A person with suitable training, and having suitable education and experience, who is in the<br />
position of being able to recognize the risks and knows how to avoid hazards.<br />
The definition is based on EN 60204-1:2007.<br />
2.6 Responsibilities of the Owner<br />
The owner must observe that:<br />
• Personnel safety (Ordinance on Industrial Safety and Health and Accident Prevention<br />
Guidelines, Workplace Directives), e.g. operating manuals, also pursuant to §20<br />
GefStoffV, personal protective equipment (PPE)), preventive examinations;<br />
• the safety of the work equipment (protective equipment, instructions for work, process<br />
risks and maintenance);<br />
• the product condition (Safety Data Sheets, Register of Hazardous Substances);<br />
• product disposal (the Waste Act);<br />
• material disposal (de-commissioning, Waste Act);<br />
• cleaning (cleaning agents and disposal),<br />
• as well as the latest environmental protection requirements.<br />
In addition, the owner must:<br />
• provide the personal protective equipment (PPE): Safety footwear, safety gloves, safety<br />
eyewear, protective mask, protective clothing.<br />
• guarantee the training of the operating personnel;<br />
• prepare work procedures;<br />
Connections: Before operating the equipment, the owner/operator must ensure that local<br />
regulations (e.g. for the electrical connection) were observed during the<br />
assembly and commissioning, if this work was carried out by the<br />
owner/operator himself.<br />
2.7 System Separation<br />
The integrated system separation according to DIN EN 1717 prevents the intruding of<br />
disinfection fluids into the drinking water pipeline in the case of a vacuum in the water<br />
supply line.<br />
417101158_<strong>DG1</strong> 30 Rev. 05-03.13
2.8 Emphases / Numberings<br />
The emphases indicated here have the following meanings:<br />
<br />
CAUTION<br />
ATTENTION<br />
This heading is used where imprecise or non-adherence to the operating instructions,<br />
prescribed work processes or similar could lead to injuries or accidents.<br />
This heading is used where imprecise or non-adherence to the operating instructions,<br />
prescribed work processes or similar could lead to damage to the equipment.<br />
IMPORTANT Is used when special attention is required when for handling the equipment.<br />
NOTE<br />
This heading is used to indicate an aspect of particular importance.<br />
Numberings marked with this sign () describe an activity which must only be<br />
performed by the installer / user.<br />
2.9 Safety symbols<br />
DANGER<br />
Dangers due to electrical power are identified with the symbol shown here.<br />
DANGER<br />
Always wash hands before breaks or at the end of work. Observe the precautionary<br />
measures that are usual when handling chemicals. Observe the respective Safety<br />
Data Sheet.<br />
WARNING<br />
When working in areas that are identified by the symbol shown here, it is necessary<br />
to wear safety eyewear.<br />
WARNING<br />
When working in areas that are identified by the symbol shown here, it is necessary<br />
to wear safety face protection shield.<br />
WARNING<br />
When working in areas that are identified by the symbol shown here, it is necessary<br />
to wear protective clothing.<br />
WARNING<br />
When working in areas that are identified by the symbol shown here, it is necessary<br />
to wear protective gloves.<br />
WARNING<br />
When working in areas that are identified by the symbol shown here, it is necessary<br />
to wear safety footwear.<br />
NOTE<br />
Environment symbol identifies environmental safety measures.<br />
2.10 Machine identification<br />
NOTE<br />
The correct information is important for all queries:<br />
• the name<br />
• the type<br />
• the consecutive serial number of the unit<br />
All of this information is required for specific and fast processing.<br />
For the English version of <strong>DG1</strong>-II a corresponding front label can be obtained on request!<br />
417101158_<strong>DG1</strong> 31 Rev. 05-03.13
3 Design<br />
Pos. Description<br />
1 Cover<br />
2 Mains cable with plug<br />
Operation indicator<br />
3<br />
(green LED)<br />
4<br />
Product shortage and fault indicator<br />
(red LED)<br />
5 ON/OFF switch (I/0)<br />
6 Bracket<br />
7 Swivel drain outlet<br />
8 Screw (2 x)<br />
Fig. 3.1<br />
Fig. 3.2 Pos. Description<br />
1 Cover<br />
2 Mains cable with plug<br />
3<br />
Operation indicator<br />
4<br />
(green LED)<br />
Product shortage and<br />
fault indicator<br />
(red LED)<br />
5 ON/OFF switch (I/0)<br />
6 Bracket<br />
7 Swivel drain outlet<br />
8 Screw (2 x)<br />
9 Rear housing cover<br />
10 Coupling nut<br />
11 Control unit<br />
12 Suction pipe<br />
13 Hydraulic motor<br />
14<br />
Eccentric<br />
(concentration setting)<br />
15 Mixing chamber<br />
16 Sealing plug<br />
17 Fixing screw<br />
18 Flow control device<br />
19 Dowel Pin<br />
20 Solenoid valve<br />
21 Metering pump<br />
22 Flow interrupter<br />
417101158_<strong>DG1</strong> 32 Rev. 05-03.13
4 Functional Description and Operation<br />
<br />
The <strong>DG1</strong>-II is a mixing equipment for disinfectants. It is used for the production of a readyto-use<br />
disinfectant solution.<br />
The <strong>DG1</strong>-II metering unit includes a double-action piston metering pump driven by a<br />
hydraulic motor. The disinfectant is metered proportionally to the water flow rate. By means<br />
of an eccentric located at the hydraulic motor, you can set the concentration of the<br />
disinfecting solution to a value between 0.25 and 3 %.<br />
IMPORTANT<br />
To make sure that the concentration is maintained at its correct value, the minimum<br />
tapping quantity must be 1 liter.<br />
4.1 Description of Display Screen and Operating Controls<br />
On the front of the DG 1-II is a control panel. It has a membrane keypad and an error<br />
indicator (red LED). You use the membrane keypad to operate the unit.<br />
To start or stop the tapping process, press the ON/OFF (I/0) switch. In case of water<br />
shortage or a failure in the unit (metering pump defective, flow control device defective,<br />
etc.), the metering process is stopped immediately. After eliminating the cause of the<br />
trouble, press the (I/0) switch to reset the unit.<br />
Indicator: Green LED: Operation/standby indicator (Fig. 3.1, pos. 3)<br />
‣ Permanent light indicates standby mode<br />
‣ Flashing light indicates metering mode<br />
Red LED: Product shortage and fault indicator (Fig. 3.1, pos. 4)<br />
‣ Permanent light indicates a fault<br />
‣ Flashing light indicates product shortage<br />
The DG 1-II is equipped with the following safety devices:<br />
Water shortage monitoring:<br />
Flow rate limitation:<br />
Product shortage monitoring:<br />
The electronic system indirectly monitors the water flow<br />
pressure through intelligent evaluation of the pulses<br />
emitted by the flow control device.<br />
The maximum quantity of water supplied is controlled by<br />
a quantity regulator located inside the solenoid valve.<br />
The flow control device with its integrated pressure<br />
control valve which is fitted upstream from the metering<br />
point monitors the flow of the disinfectant product.<br />
If a failure of the metering pump, suction line, drive, or<br />
level suction pipe causes a product shortage, or if an<br />
unsuitable disinfection product is used, the metering unit<br />
changes to fault mode.<br />
The red fault LED lights up (permanent light).<br />
Suction pipe with integrated level electrodes:<br />
If the supply container is empty, the metering unit stops<br />
operating and the red fault LED flashes.<br />
Backflow preventer:<br />
Upstream from the disinfection metering point, a<br />
backflow preventer according to DIN EN 1717 is fitted.<br />
This is a safeguard against disinfectant penetrating into<br />
the water supply network in case of a backflow.<br />
417101158_<strong>DG1</strong> 33 Rev. 05-03.13
5 Connection and Installation<br />
The <strong>DG1</strong>-II is designed for the connection of the product reservoir on the right-hand side.<br />
If required, the product reservoir can be placed on the left-hand side of the housing.<br />
This involves moving the suction lance and the outlet for the power cable to the left-hand<br />
side of the housing.<br />
NOTE<br />
The following connection and installation instructions reflect the recommended method.<br />
The connection and installation method to be used, however, depends on the actual<br />
environmental conditions. All local regulations must be adhered to at all times.<br />
Housing measurements and connection diagram:<br />
see chapter 9.2 „Connection Diagram „Cold Water“ eg. chapter 9.3 „ Connection Diagram<br />
„Hot Water“.<br />
The <strong>DG1</strong>-II is designed to be mounted on a wall, preferably above or close to a sink.<br />
The water supply temperature must not exceed 30°C. In case of higher water temperatures,<br />
a thermal mixer valve must be fitted upstream.<br />
The water flow pressure should be at least 0.16 MPa (1.6 bar) and must not exceed<br />
0.7 MPa (7 bar).<br />
If the water flow pressure is > 0.4 MPa (4 bar), we urgently recommend to fit a pressure<br />
governor in the water supply line!<br />
The supply voltage is 230 V AC<br />
NOTE<br />
Delivery:<br />
Ex works, the unit is shipped with the suction pipe and mains cable fitted on the righthand<br />
side. If required, the suction pipe and the mains cable can be shifted to the lefthand<br />
side of the unit (see chapter 5.4).<br />
This operation should be carried out before the unit is mounted to the wall.<br />
• 1 pce. swivel drain outlet (length: 250 mm)<br />
• 1 pce. angled valve<br />
• 1 set of attachment parts<br />
• 1 pce. drilling jig<br />
• 1 pce. I & O Manual<br />
5.1 Wall Mounting<br />
ATTENTION Depending on the wall condition, the use of special attachment parts may be necessary.<br />
NOTE<br />
Be sure to mount the unit at a location high enough to be able to place a drain pan below<br />
the swivel drain outlet. The installation height of approx. 130 cm bottom line DG 1,<br />
should not overstep (risk of accident when changing the can).<br />
To mount the DG 1-II proceed as follows:<br />
Mark drilling holes for metering unit and bracket using the supplied drilling jig.<br />
Drill marked holes..<br />
Remove cover (see Fig. 3.1, pos. 1)<br />
for this purpose, unscrew the two cover screws (Fig. 3.1, pos. 8)<br />
Lift the cover to remove it.<br />
Mount unit and bracket on the wall.<br />
417101158_<strong>DG1</strong> 34 Rev. 05-03.13
5.2 Water connection<br />
Connect angled valve with its built-in strainer to the wall water supply using a T-union,<br />
if necessary.<br />
Route the connecting line (suitable type: chromium plated copper pipe, ∅ 10 X 1)<br />
between the angled valve and the water connector at the bottom of the unit.<br />
Attach the supplied swivel drain outlet to the bottom of the unit.<br />
5.3 Electrical Connection<br />
The metering unit may only be connected to a supply voltage of 230 V AC with 50/60 Hz.<br />
For the electrical connection of the DG 1-II, all valid national and local regulations must be<br />
complied with.<br />
The integrated power transformer of the DG 1-II supplies the entire unit with electric power.<br />
The unit is protected by a fuse which is located on the PCB (630 mA, slow blow) and by a<br />
thermal fuse inside the power transformer.<br />
For the connection to the power supply, the DG 1-II is equipped with a mains cable<br />
(length: 2.4 m) with an integrated plug. If necessary, the mains cable can be retracted<br />
into the housing.<br />
NOTE<br />
If required, the mains cable can be shifted to the left-hand side of the housing<br />
(see chapter 5.4 „Shifting Suction Pipe and Mains Cable to Left-Hand Side of Housing“).<br />
5.4 Shifting Suction Pipe and Mains Cable to Left-Hand Side of Housing<br />
To shift suction pipe and mains cable to the left-hand side of the housing, proceed<br />
as follows:<br />
Remove the cover (Fig. 3.1, pos. 1).<br />
For this purpose, unscrew the two cover screws (Fig. 3.1, pos. 8).<br />
Lift the cover to remove it.<br />
Detach the hose clamp, unscrew the coupling nut (Fig. 3.2, pos. 10) from the suction<br />
pipe, and pull the suction pipe, along with the suction line and the connecting cable, out<br />
of the housing.<br />
Pull the mains cable bushing out of its holder and retract it into the housing, together<br />
with the mains cable.<br />
Remove the cover plate at the left-hand side of the housing.<br />
Use the cover plate to close the cable opening at the right-hand side of the housing.<br />
Pull the mains cable through the left-hand opening of the housing and attach the cable<br />
bushing. Make sure that the cable is not damaged and cannot get in touch with any<br />
sharp-edged parts (leave the internal mains cable attachments in place).<br />
Fit the suction pipe to the left-hand side of the housing<br />
417101158_<strong>DG1</strong> 35 Rev. 05-03.13
6 Settings and Start-Up<br />
6.1 Start-Up<br />
NOTE<br />
ATTENTION<br />
All item numbers in this section refer to the exploded view unless otherwise stated.<br />
If products are used which contain glucoprotamine (e.g. INCIDIN PLUS), the O-rings on<br />
the piston and on the piston rod need to be replaced by EPDM O-rings.<br />
After connection and installation work proceed as follows:<br />
Open the angled valve (G ½) to its full open position, and check it for tightness.<br />
Connect the disinfectant supply container as follows:<br />
swivel suction pipe to front position and insert it into opening of supply container,<br />
place the supply container onto the bracket.<br />
<br />
<br />
<br />
<br />
Bleed the metering pump as follows:<br />
unscrew the flow control device (see Fig. 3.2, pos. 18)<br />
(black coupling nut) and place it in a suitable jar,<br />
Close the opening of the mixing chamber (see Fig. 3.2, pos. 16) by inserting the<br />
sealing plug (see Fig. 3.2, pos. 15),<br />
unscrew the knurled nut (see Fig. 6.1, pos. 3) and withdraw the eccentric<br />
(see Fig. 6.1, pos. 1) from its holder located on the hydraulic motor<br />
(see Fig. 6.1, pos. 6),<br />
move the connecting rod including the piston rod (see Fig. 6.1, pos. 7) forth and<br />
back until disinfectant runs out from the flow control device and no more bubbles<br />
are visible in the hoses,<br />
remove the sealing plug and screw in the flow control device again with the VA<br />
pins pointing downwards,<br />
plug in the eccentric back in and tighten the knurled nut.<br />
Set the desired concentration as described in chapter 6.2 „Setting the Concentration“<br />
and check it as described in chapter 6.2.1 „Checking the Concentration Setting“.<br />
Check the safety equipment as described in chapter 6.2.2 „Checking the Safety<br />
Equipment“.<br />
Check all lines and components which come in contact with water and/or disinfectant<br />
for tightness.<br />
417101158_<strong>DG1</strong> 36 Rev. 05-03.13
6.2 Setting the Concentration<br />
Two concentration ranges can be set:<br />
‣ Concentration range 1: 0,25 - 1 % (white eccentric)<br />
‣ Concentration range 2: 1,5 - 3 % (blue eccentric)<br />
Ex works, the unit is set to a concentration of 0.5 %.<br />
NOTE<br />
If you plan to use concentration range 2, the white eccentric must be replaced by the<br />
supplied blue eccentric. For this purpose, remove the knurled nut (see Fig. 6.1, pos. 3)<br />
and the graduated dial (see Fig. 6.1, pos. 4).<br />
ATTENTION When setting the concentration, allow for a safety margin of + 10 %.<br />
Pos. Description<br />
1 Eccentric<br />
2 Red mark<br />
3 Knurled nut<br />
4 Graduated dial<br />
5 Metering pump<br />
6 Drive unit (hydraulic motor)<br />
7 Piston rod<br />
Fig. 6.1<br />
To set the nominal concentration, proceed as follows:<br />
Unscrew knurled nut (see pos. 3) from eccentric (see pos. 1) by approx. 5 mm.<br />
Pull graduated dial (see pos. 4) from indented part of eccentric and hold it in place.<br />
Preset the concentration: for this purpose, turn the eccentric so that the red mark aligns<br />
with the desired concentration value on the graduated dial.<br />
Insert the graduated dial back into the indented part of the eccentric and tighten the<br />
knurled nut.<br />
Check the concentration as described in chapter 6.2.1 „Checking the Concentration<br />
Setting“. If it deviates from the nominal value, repeat the setting procedure.<br />
Align the arrow of the red mark on the eccentric with the appropriate concentration value<br />
on the graduated dial. For this purpose, loosen the locking screw on the eccentric.<br />
417101158_<strong>DG1</strong> 37 Rev. 05-03.13
6.2.1 Checking the Concentration Setting<br />
Required auxiliaries:<br />
Bucket with a minimum capacity of 10 l to collect the water<br />
Measuring jars to collect the disinfectant:<br />
up to 100 ml for concentrations of 1 % max.<br />
up to 300 ml for concentrations of 1 % to 3 %<br />
In the following example which shows how to determine the nominal concentration, the<br />
quantity settings given in millimeters refer to a tapped water quantity of exactly 8 liters.<br />
Formulas for setting the concentration:<br />
Explanantion:<br />
K = Concentration (%)<br />
VD = Volume of disinfectant (ml)<br />
VW = Volume of water (ml)<br />
Formula:<br />
K =<br />
VD x 100<br />
VW + VD<br />
Example: Desired concentration = 0.5 %, plus 10 % buffer = 0.55 %<br />
Disinfectant quantity to be set according to the above formula:<br />
VD = K x VW 0,55 x 8.000<br />
= = 44, 24 ml<br />
100 − K 100 − 0,55<br />
To check the concentration setting, proceed as follows:<br />
K x VW<br />
VD =<br />
100 − K<br />
Unscrew the flow control unit from the mixing chamber and seal the mixing chamber<br />
opening with the supplied sealing plug.<br />
Insert the flow control unit into the provided measuring jar and place a bucket below the<br />
swivel drain outlet.<br />
Press the ON/OFF (I/0) switch and tap approx. 2-3 liters of water.<br />
Empty the bucket and the measuring jar.<br />
Insert the flow control unit back into the measuring jar and place the bucket below the<br />
swivel drain outlet again.<br />
Start the unit by pressing the ON/OFF (I/0) switch.<br />
Tap exactly 8 liters of water. Switch off the unit (press the ON/OFF (I/0) switch).<br />
Read the disinfectant quantity collected in the measuring jar.<br />
Calculate the concentration according to the above formula. If it deviates from the<br />
desired concentration (plus buffer), adjust the setting as described<br />
in chapter 6.2 „Setting the Concentration“.<br />
Remove sealing plug from mixing chamber opening and screw flow control device in<br />
again.<br />
6.2.2 Checking the Safety Equipment<br />
A check of the safety equipment obligatory includes the following test procedures:<br />
‣ functional test of the level suction pipe<br />
‣ functional test of the flow control device<br />
6.2.3 Functional Check of the Level Suction Pipe<br />
For the functional test of the suction pipe "empty" signal device, proceed as follows:<br />
Pull suction pipe out of product supply container.<br />
After approx. 3 seconds, unit should change to fault mode (red fault indicator flashes).<br />
417101158_<strong>DG1</strong> 38 Rev. 05-03.13
6.2.4 Functional Check of the Flow Control Device<br />
For the functional check proceed as follows:<br />
Remove the cover.<br />
Unscrew the knurled nut (see Fig. 6.1, pos. 3) from the eccentric and remove the<br />
complete eccentric from its holder on the hydraulic motor.<br />
Press the ON/OFF (I/0) switch. Approx. 10 seconds after the unit has been started, it<br />
should change to fault mode (the red LED is permanently ON).<br />
Refit the eccentric.<br />
Press the ON/OFF (I/0) switch to reset the unit.<br />
Press the ON/OFF (I/0) switch again (unit starts metering).<br />
Slowly reduce the supply of fresh water to reach 0 MPa (0 bar) of pressure.<br />
When the pressure falls below 1.4 MPa (1.4 bar) the unit changes to fault mode<br />
(red LED is permanently ON).<br />
Reopen the fresh water supply.<br />
Press the ON/OFF (I/0) switch to reset the unit.<br />
Reposition the cover.<br />
6.2.5 Changing over to a New Product<br />
ATTENTION<br />
When changing over to a new product, make sure to thoroughly flush the suction pipe,<br />
the metering pump, and all lines in contact with the product before you connect the new<br />
supply container.<br />
If products are used which contain glucoprotamine (e.g. INCIDIN PLUS), the O-rings on<br />
the piston and on the piston rod need to be replaced by EPDM O-rings.<br />
If products are used which dont contain glucoprotamine, the O-rings on the piston and<br />
on the piston rod need to be replaced by SILICONE O-rings<br />
(see chapter 2.3 „General Safety Information“).<br />
To change over to a new product, proceed as follows:<br />
Fill an appropriate vessel with water and immerse the suction pipe<br />
Flush suction pipe, metering pump, and the lines in contact with the product as follows:<br />
‣ unscrew the flow control device (see Fig. 3.2, pos 12), insert the sealing plug, and<br />
place the flow control device in an appropriate vessel,<br />
‣ unscrew the knurled nut (see Fig. 6.1, pos 3) from the eccentric and pull the eccentric<br />
from its holder on the hydraulic motor,<br />
‣ manually move the piston rod (see Fig. 6.1, pos 7) forth and back until clear water<br />
without product residues is running from the flow control device.<br />
Insert the suction pipe into the new supply container.<br />
Bleed metering pump until product running out of flow control device is bubble-free<br />
(see chapter 6.1 „Start-Up“)<br />
Push the eccentric back onto its holder and tighten the knurled nut.<br />
Remove the sealing plug and screw the flow control device in again.<br />
Check the unit for leaks and malfunctions.<br />
Set the concentration as described in chapter 6.2 „Setting the Concentration“ or check it<br />
as described in chapter 6.2.1 „Checking the Concentration Setting“.<br />
417101158_<strong>DG1</strong> 39 Rev. 05-03.13
7 Troubleshooting<br />
NOTE<br />
Each time you stop the unit and/or take corrective action to eliminate a fault, make sure to<br />
reset the unit by pressing the ON/OFF (I/0) switch.<br />
Failure Cause Corrective Action<br />
No supply voltage available<br />
Restore power supply<br />
Control unit does not Fuse of control unit defective<br />
Replace fuse<br />
work (no LED lights up, Control PCB defective<br />
Replace control PCB<br />
pressing a button has no Thermal fuse of power transformer<br />
effect)<br />
blown<br />
Let metering unit cool down<br />
Power transformer defective<br />
Replace power transformer<br />
Disinfectant container empty<br />
Connect new supply container<br />
Pressing the ON/OFF (I/0)<br />
Suction pipe soiled, suction pipe<br />
switch does not start the<br />
Clean bottom valve of suction pipe<br />
defective<br />
unit; fault indicator is<br />
flashing<br />
Connecting cable of suction pipe<br />
Replace suction pipe<br />
defective<br />
Metering pump leaks or defective Replace metering pump<br />
Suction and metering line:<br />
Tighten hose clamps, replace hose, if<br />
Hose clamps leak; hose defective;<br />
necessary open angled valve<br />
angled valve closed<br />
Fault indicator<br />
Water flow pressure < 0.16 MPa bar<br />
(1.6 bar)<br />
Ensure that water flow pressure is ><br />
0.16 MPa (1.6 bar)<br />
permanently ON<br />
Strainer clogged<br />
Clean strainer, replace it, if necessary<br />
Flow limiter encrusted with lime or<br />
clogged<br />
Clean flow limiter, replace it, if<br />
necessary<br />
Hydraulic motor leaks<br />
Replace axial face seal<br />
Hydraulic motor blocked<br />
Replace hydraulic motor<br />
Coil of solenoid valve defective Replace coil<br />
Unit switched OFF; swivel<br />
drain outlet leaks<br />
Concentration does not<br />
reach the set value<br />
Product shortage<br />
monitoring device does<br />
not switch the unit off<br />
when the product<br />
container is empty<br />
Solenoid valve soiled or defective<br />
Metering pump:<br />
Suction and pressure valves soiled or<br />
defective<br />
Suction pipe:<br />
Bottom valve soiled or defective<br />
Water feed pipe soiled<br />
Hydraulic motor defective<br />
Suction pipe electrodes soiled or<br />
defective, connecting cable damaged<br />
Clean solenoid valve, replace<br />
defective parts<br />
Clean valves, replace, if necessary<br />
Clean bottom valve, replace, if<br />
necessary<br />
Clean strainers in valve and in fresh<br />
water supply pipe, replace, if<br />
necessary<br />
Replace hydraulic motor<br />
Replace suction pipe<br />
Unit cannot be reset Control PCB defective Replace control PCB<br />
417101158_<strong>DG1</strong> 40 Rev. 05-03.13
8 Maintenance and Repair Information<br />
CAUTION<br />
ATTENTION<br />
Suitable protective equipment must be worn when servicing or repairing parts which<br />
come into contact with disinfectant. The safety regulations which apply for handling<br />
chemicals must always be observed.<br />
To ensure operational safety and correct operation of the DG 1-II, the specified<br />
maintenance intervals must be respected. The interval between the installation and the<br />
first maintenance session or the period between two consecutive maintenance sessions<br />
must not exceed 12 months.<br />
8.1 Microbiological examination of decentralized disinfectant dispensers<br />
Unscrew nut from S- spout of unit and remove aerator.<br />
The outside of outlet has to be to disinfected with an alcoholic surface disinfectant<br />
(Incidin Liquid, Incides N) or to treated with a flame<br />
After flow of approx. 1 liter collect at least minimum 1 liter of disinfectant solution from<br />
the device in a sterile sampling container (Note: 1L is the minimum amount to be<br />
drawn, see also note on the device).<br />
Neutralizing agents must only be added after recommended contact time for the<br />
relevant use concentration of disinfectant against bacteria and yeast (see product<br />
label).<br />
Appropriate neutralizers (chemical composition and concentration) can be selected and<br />
validated according to EN 13727 ort the Standard Methods of DGHM/VAH or be asked<br />
from the disinfectant manufacturer<br />
Neutralizing agent must be sterile<br />
Sample has to be investigated in a microbiological laboratory by filtration<br />
method for total microbial count. Ideally, this value is determined per 1 ml, per<br />
10ml and per 100 ml<br />
A refrigerated transport (4 ° C) in lightproof containers is desirable; it is<br />
mandatory to transport the samples within 3 hours of sample collection.<br />
The treatment of the sample should be completed 2 to 3 hours after taking out.<br />
During the assessment process of the results, identification of the micro-organism is<br />
also recommended and not only the microbial count to allow assessment of results with<br />
regard to the efficacy spectrum of the disinfectant dosed.<br />
8.2 General maintenance work<br />
After completion of the maintenance work, perform the following tasks:<br />
Care of internal parts:<br />
Care of external parts:<br />
Bracket::<br />
clean bottom plate of unit and remove any lime residues.<br />
Clean the cover with a damp cloth, rub it dry, and then<br />
treat it with product for stainless steel care (e.g. Chromol).<br />
Clean surface where you place supply container<br />
To perform maintenance work on the DG 1-II, proceed as specified in the following<br />
Maintenance Table (see chapter 8.2.1 „Maintenance Table“).<br />
417101158_<strong>DG1</strong> 41 Rev. 05-03.13
8.2.1 Maintenance Table<br />
Component/Maintenance Task<br />
- Check Criterion-<br />
Flow control device:<br />
− Functional test<br />
− Tightness of pressure control<br />
valve<br />
Checking the concentration setting:<br />
Eccentric:<br />
Functional test<br />
Metering pump:<br />
Leak test<br />
Hydraulic motor:<br />
Performance test<br />
Backflow preventer:<br />
Leak test of DB-type flow interrupter<br />
Suction pipe:<br />
Functional test<br />
Suction pipe:<br />
Leak test<br />
Strainer: (Fig. 3.3, pos. 7)<br />
One or more strainers soiled<br />
Solenoid valve strainer<br />
Work Instructions/References<br />
See chapter 6.2.4 „Functional Check of the Flow Control Device“<br />
If disinfectant is running from the flow control device, unscrew it from<br />
the threaded union ⇒ replace flow control device<br />
See chapter 6.2.1 „Checking the Concentration Setting“<br />
To check the eccentric for correct operation, set the concentration to<br />
three different values and gauge them by liters. In case of deviation,<br />
replace eccentric, connecting rod, and – if necessary – complete<br />
metering pump<br />
With the unit running, watch for concentrate escaping at the piston rod.<br />
If yes ⇒ replace piston and O-rings or replace the complete metering<br />
pump, if necessary<br />
With the unit switched on, grasp the eccentric. If it is possible to block<br />
the hydraulic motor without applying force: Hydraulic motor defective<br />
⇒ replace hydraulic motor<br />
Replace rubber diaphragm or flow interrupter, if necessary<br />
See chapter 6.2.3 „Functional Check of the Level Suction Pipe“<br />
Immerse suction pipe end and electrodes in a beaker filled with<br />
disinfectant; if the metering pump sucks air, the suction pipe hose is<br />
defective ⇒ replace hose or suction pipe, if necessary<br />
Remove insets from the affected strainers and clean them. Remove<br />
the coupling nut from the slanted-seat filter.<br />
8.3 Recommendations for the replacement of wearing parts<br />
Component Work step Maintenance interval<br />
Solenoid valve: Exchange of the filter annual<br />
Connectinghose/Water -separation & outlet<br />
annual<br />
System separation (pipe interrupter DB) Exchange of the diaphragm every 3 years<br />
8.4 Repair Instructions<br />
Repair instructions including spare parts lists and exploded views you can get on request.<br />
CAUTION<br />
ATTENTION<br />
For any work on parts which come in contact with the product, the corresponding hazard<br />
information and safety instructions must be observed at all times. Always wear suitable<br />
protective equipment.<br />
Before carrying out any repair work, make sure to disconnect the metering unit from the<br />
mains. To do so, pull the mains plug out of the wall outlet.<br />
Before performing any repair work on parts which come in contact with the product<br />
and/or with water (e.g. solenoid valve), make sure that the angled valve is closed and that<br />
the water pressure inside the unit is down. To do so, press the ON/OFF (I/0) switch twice.<br />
Only original spare parts may be used!<br />
(see chapter 1.3 „Scope of guarantee“).<br />
417101158_<strong>DG1</strong> 42 Rev. 05-03.13
9 Technische Daten<br />
9.1 Allgemeine Daten<br />
Supply voltage:<br />
AC 230 V<br />
Power consumption:<br />
15 W<br />
Protection of metering unit/control unit: IP 24 / IP 65<br />
Protection class: II according to EN 60335-1<br />
Superposed fuse:<br />
max. 16 A<br />
Operating voltage:<br />
AC 24 V<br />
Internal fuse protection:<br />
Microfuse 5 x 20, 630 mA, slow blow<br />
Water connection: Conical coupling NW 10 (for copper pipe, D. 10x1 )<br />
Water supply temperature: max. 30°C<br />
Flow pressure::<br />
min. 0.16 MPa (1.6 bar) - max. 0.7 MPa (7 bar)<br />
Metering capacity:<br />
approx. 850 l/h (dilution for normal operation)<br />
Concentration setting: White eccentric: 0.25 % - 1 %, Blue eccentric: 1.5 % - 3 %<br />
Metering tolerance: Max. + 6 %<br />
Backflow preventer:<br />
DIN EN 1717 (Typ DB)<br />
Mounting dimensions:<br />
Width = 500 mm (with bracket), High =425 mm, Depth=200 mm<br />
Weight:<br />
13,5 kg<br />
NOTE<br />
Due to the company’s policy of continuous improvements to its products, the<br />
specifications may be changed without notice!<br />
417101158_<strong>DG1</strong> 43 Rev. 05-03.13
9.2 Connection Diagram „Cold Water“<br />
Fig. 9.1<br />
417101158_<strong>DG1</strong> 44 Rev. 05-03.13
9.3 Connection Diagram „Hot Water“<br />
Fig. 9.2<br />
9.4 Connection Material and Accessories<br />
Connection Material - Designation<br />
T-Union G ½ , MS chromium-plated brass<br />
T-Union R ¾/ R ½ / R ¾, MS chromium-plated brass<br />
Copper pipe 10 x 1 chromium-plated brass<br />
Angled valve G ½ a x D 10 MS chromium-plated brass [supplied]<br />
Accessories - Designation<br />
Adapter 3/4 “ internal thread R1/2 external thread, chromium-plated brass<br />
Swivel drain outlet, length 150 mm<br />
Swivel drain outlet, length 200 mm<br />
Swivel drain outlet, length 300 mm<br />
Thermal mixer valve unit including screw coupling<br />
Conversion kit for restoring the unit to a clearance pipe segment configuration<br />
(only for to low water pressure up to 0,1 MPa (1 bar)<br />
Bracket for 10L-Can<br />
NOTE<br />
If necessary please ask for part numbers together with the spare part drawing separately!<br />
417101158_<strong>DG1</strong> 45 Rev. 05-03.13
10 Dismantling / Disposal<br />
Dismantling<br />
The <strong>DG1</strong>-II may only be dismantled by specialist personnel. Before commencing<br />
dismantling, ensure that the <strong>DG1</strong>-II has been fully isolated from the power supply.<br />
The device must be flushed through with care in order to get rid of any residual chemicals.<br />
Disposal<br />
The <strong>DG1</strong>-II is predominantly made of steel (and also of aluminium to a<br />
certain extent) (apart from the electrical equipment) and is to be disposed of<br />
in accordance with the local environmental regulations prevailing at that<br />
time.<br />
Depending on the condition, existing regulations and with due regard for<br />
current requirements, dispose of it, for example, as<br />
electrical waste (printed circuit boards), plastics (housing), metal plates,<br />
steel, copper, aluminium (separate after sorting). Prior to disposal, all parts<br />
which are in contact with media must be decontaminated.<br />
Oils, solvents, detergents and contaminated cleaning tools (brushes, cloths,<br />
etc.) must be disposed of in compliance with local requirements, in<br />
accordance with the prevailing waste code and with due attention to the<br />
notes contained in the manufacturers' safety data sheets.<br />
417101158_<strong>DG1</strong> 46 Rev. 05-03.13
11 Declaration of Conformity<br />
NOTE<br />
This declaration of conformity corresponds to the status of this<br />
operating instruction. Should in the meantime one of those standards be<br />
subject of change, you can download the latest version here under:<br />
http://www.ecolab-engineering.de/uploads/media/CE_1024ff_<strong>DG1</strong>.pdf<br />
417101158_<strong>DG1</strong> 47 Rev. 05-03.13
Dokumenten Nr.:<br />
document no.: 417101158<br />
Version / Revision:<br />
version / review: 5<br />
Erstelldatum:<br />
date of issue: 2008<br />
Letzte Änderung:<br />
last changing: 07.03.2013<br />
© Copyright <strong>Ecolab</strong> Engineering GmbH, 2013<br />
Alle Rechte vorbehalten. All rights reserved<br />
Nachdruck, auch auszugsweise, nur mit Genehmigung<br />
der Firma <strong>Ecolab</strong> Engineering GmbH gestattet.<br />
Reproduction, also in part, only with permission of<br />
<strong>Ecolab</strong> Engineering GmbH.


