Bedienungsanleitungen
Bedienungsanleitungen
Bedienungsanleitungen

Sie wollen auch ein ePaper? Erhöhen Sie die Reichweite Ihrer Titel.
YUMPU macht aus Druck-PDFs automatisch weboptimierte ePaper, die Google liebt.
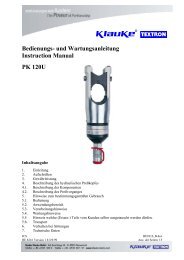
Instruction Manual LS 60 Plus page 18<br />
________________________________________________________________________________________________________________<br />
By actuating the retract button (Pos.-No. 2) once the pressure ring returns automatically<br />
into the starting position. After the remains of the sheet has been removed from the die<br />
the next punching cycle can be initiated.<br />
The automatic switch-off is controlled by the microprocessor when punching holes<br />
bigger than 1 mm. Punching thin sheets and soft materials (e.g. plastics) the automatic<br />
switch off can not be guaranteed and the user must switch off the unit manually.<br />
If the relief valve should open during the punching process the max. punching force has<br />
been reached and the punching process has to be terminated. In this case an automatic<br />
retraction returns the pressure ring into the starting position.<br />
4.4. Description of the automatic control of the punching procedure<br />
The LS 60 PLUS is equipped with a microprocessor controlling the procedure of<br />
punching cycles. The punching unit switches off automatically if the punching cycle does<br />
not start within 1,5 sec. This is the case when the punch is not screwed close enough to<br />
the sheet intended to be punched. The controller should make the user aware of this<br />
mistake. On top of that this avoids unnecessary idle saving battery power.<br />
After a punch is completed that means when the puncher completely penetrated the die<br />
the unit also switches off automatically. This function serves the safety of the user and<br />
prevents a fatal contact between the puncher and the die. Without this safety feature it<br />
can easily happen that the puncher is driven into the die with full strength destroying both<br />
puncher and die.<br />
4.5. Description of the light diode display<br />
This tool is equipped with a special circuit board incorporating several important features<br />
to inform the user about the current status of the unit. The diode (Pos.-No. 6) signals in<br />
the following cases:<br />
Signal Duration When it occures What it means<br />
a few seconds of battery insertion self check – O.K.<br />
flashing<br />
glowing for<br />
after crimp<br />
battery discharged<br />
20 seconds<br />
flashing for<br />
after crimp<br />
return for service<br />
1<br />
20 seconds (2Hz)<br />
flashing for<br />
During high<br />
unit too hot<br />
2<br />
20 seconds (5Hz) temperature<br />
20 sec. glowing and<br />
flashing intermittently<br />
after crimp<br />
service required<br />
and battery flat<br />
1 Remarks:<br />
- Does the diode signal periodically at the end of a working cycle for approx. 20 sec the unit must be returned to<br />
an authorised Service Center for Service as soon as possible.<br />
- In case of an error the light diode display also signals periodically at the end of a working cycle. The signal<br />
indicates in this case the circuit opening by the electronic fuse. A possible reason for that is that a cycle was<br />
performed with an incorrectly low battery. If the signal occurs even after changing the battery there must be a<br />
different error or a service is due. In these cases the tool must be returned to the manufacturer or an authorised<br />
service center.<br />
2 The unit switches off when it gets too hot. It switches on automatically after the unit cooled off.