9033-6 01.pdf - Hazet
9033-6 01.pdf - Hazet
9033-6 01.pdf - Hazet

Erfolgreiche ePaper selbst erstellen
Machen Sie aus Ihren PDF Publikationen ein blätterbares Flipbook mit unserer einzigartigen Google optimierten e-Paper Software.
HAZET-WERK<br />
HÖCHSTE TECHNOLOGIE IN DER WERKZEUGFERTIGUNG SEIT 1868<br />
HIGHEST TECHNOLOGY IN TOOL MANUFACTURE SINCE 1868<br />
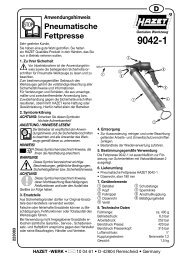
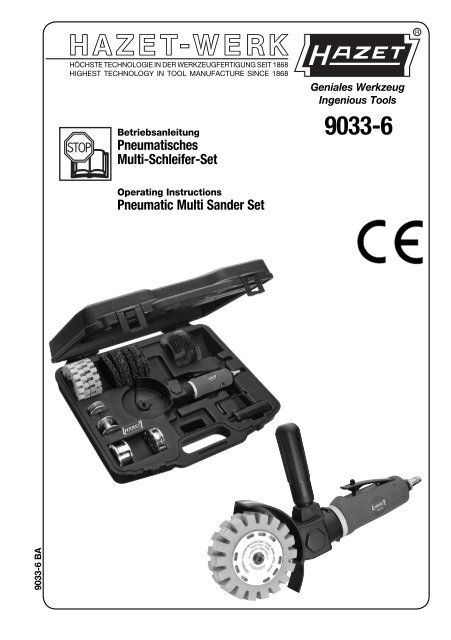
Betriebsanleitung<br />
Pneumatisches<br />
Multi-Schleifer-Set<br />
Geniales Werkzeug<br />
Ingenious Tools<br />
<strong>9033</strong>-6<br />
Operating Instructions<br />
Pneumatic Multi Sander Set<br />
<strong>9033</strong>-6 BA
D ........................................... 3 ... 11<br />
USA GB ......................... 12 ... 20<br />
Ursprungsprache deutsch – original language: German<br />
HAZET-WERK • Hermann Zerver GmbH & Co. KG • } 10 04 61 • D-42804 Remscheid • Germany<br />
[ +49 (0) 21 91 / 7 92-0 • \ +49 (0) 21 91 / 7 92-375 (Deutschland) -400 (International)<br />
^ hazet.de • ] info@hazet.de<br />
2
Zu Ihrer Information<br />
D<br />
Sehr geehrter Kunde,<br />
Sie haben gut gewählt, denn vor<br />
Ihnen liegt ein HAZET-Qualitäts-<br />
Produkt, das Ihren Arbeitsablauf<br />
optimieren wird.<br />
1. Allgemeine Informationen<br />
• Bitte stellen Sie sicher, dass der Benutzer<br />
dieses Werkzeugs die vorliegende Betriebsanleitung<br />
vor der ersten Inbetrieb nahme<br />
gründlich durchgelesen und verstanden hat.<br />
• Diese Betriebsanleitung enthält wichtige<br />
Hinweise, die zum sicheren und störungsfreien<br />
Betrieb Ihres HAZET-Werkzeuges<br />
erforderlich sind.<br />
• Zum bestimmungsgemäßen Gebrauch<br />
des Werkzeuges gehört die vollständige<br />
Beachtung aller Sicherheitshinweise und<br />
Informationen in dieser Betriebsanleitung.<br />
• Bewahren Sie deshalb diese Betriebs anlei<br />
tung immer bei Ihrem HAZET-Werkzeug<br />
auf.<br />
• Dieses Werkzeug wurde für bestimmte<br />
An wendungen entwickelt. HAZET weist ausdrücklich<br />
darauf hin, dass dieses Werkzeug<br />
nicht verändert und/oder in einer Weise eingesetzt<br />
werden darf, die nicht seinem vorgesehenen<br />
Verwendungs zweck entspricht.<br />
• Für Verletzungen und Schäden, die aus<br />
unsach gemäßer und zweckentfremdeter<br />
Anwendung bzw. Zuwiderhandlung gegen<br />
die Sicherheitsvorschriften resultieren,<br />
übernimmt HAZET keine Haftung oder<br />
Gewährleistung.<br />
• Darüber hinaus sind die für den Einsatzbereich<br />
des Werkzeugs geltenden<br />
Unfallverhütungs vorschriften und allgemeinen<br />
Sicherheits bestimmungen einzuhalten.<br />
2. Symbolerklärung<br />
ACHTUNG: Schenken Sie diesen Symbolen<br />
höchste Aufmerksamkeit!<br />
Betriebsanleitung lesen!<br />
Der Betreiber ist verpflichtet die<br />
Betriebsanleitung zu beachten<br />
und alle Anwender des Werkzeugs<br />
gemäß der Betriebs anleitung zu<br />
unterweisen.<br />
HINWEIS!<br />
Dieses Symbol kennzeichnet<br />
Hinweise, die Ihnen die Handhabung<br />
erleichtern.<br />
WARNUNG!<br />
Dieses Symbol kennzeichnet wichtige<br />
Beschreibungen, gefährliche<br />
Bedin gungen, Sicherheitsgefahren<br />
bzw. Sicherheitshinweise.<br />
ACHTUNG!<br />
Dieses Symbol kennzeichnet Hin weise,<br />
deren Nichtbeachtung Be schädigungen,<br />
Fehlfunktionen und/ oder<br />
den Ausfall des Gerätes zur Folge<br />
haben.<br />
3. Haftung und<br />
Gewährleistung<br />
• Jede über die bestimmungsgemäße<br />
Verwendung hinausgehende und/ oder<br />
andersartige Verwendung des Gerätes ist<br />
untersagt und gilt als nicht bestimmungsgemäß.<br />
• Ansprüche jeglicher Art gegen den Hersteller<br />
und/oder seine Bevollmächtigten<br />
wegen Schäden aus nicht bestimmungsgemäßer<br />
Verwendung des Gerätes sind<br />
ausgeschlossen.<br />
• Für alle Schäden bei nicht bestimmungsgemäßer<br />
Verwendung haftet allein der<br />
Betreiber.<br />
Immer persönliche Schutzausrüstung tragen!<br />
3
D<br />
Zu Ihrer Information<br />
4. Ersatzteile<br />
• Nur Original-Ersatzteile des Herstellers verwenden.<br />
• Falsche oder fehlerhafte Ersatzteile können<br />
zu Beschädigungen, Fehlfunktionen oder<br />
Totalausfall des Werkzeuges führen.<br />
• Bei Verwendung nicht freigegebener<br />
Ersatzteile erlöschen sämtliche Garantie-,<br />
Service-, Schadenersatz- und Haftpflichtansprüche<br />
gegen den Hersteller oder seine<br />
Beauftragten, Händler und Vertreter.<br />
5. Entsorgung<br />
• Zur Aussonderung, reinigen und unter<br />
Beachtung geltender Arbeits- und Umweltschutzvorschriften<br />
zerlegen.<br />
Bestandteile der Wiederverwertung zuführen.<br />
• Metallische Materialreste verschrotten.<br />
Die Verringerung von Umweltbelastungen<br />
und die Bewahrung der Umwelt, stehen<br />
im Mittelpunkt unserer Aktivitäten!<br />
Bei HAZET wird Umweltschutz groß<br />
geschrieben.<br />
Immer persönliche Schutzausrüstung tragen!<br />
4
Zu Ihrer Sicherheit<br />
D<br />
Dieser Abschnitt gibt einen Überblick<br />
über alle wichtigen Sicherheitsaspekte<br />
für einen optimalen Schutz des<br />
Personals sowie den sicheren und<br />
störungsfreien Betrieb des Gerätes.<br />
Zusätzlich beinhalten die einzelnen Kapitel<br />
kon krete, mit Symbolen gekennzeichnete<br />
Sicher heitshinweise zur Abwendung unmittelbarer<br />
Gefahren. Darüber hinaus sind am<br />
Gerät befindliche Piktogramme, Schilder und<br />
Beschrif tungen zu beachten und in ständig<br />
lesbarem Zustand zu halten.<br />
1. Allgemeines<br />
• Das Gerät ist zum Zeitpunkt seiner Entwick<br />
lung und Fertigung nach geltenden,<br />
anerkannten Regeln der Technik gebaut<br />
und gilt als betriebssicher. Es können<br />
vom Gerät jedoch Gefahren ausgehen,<br />
wenn es von nicht fachgerecht ausgebildetem<br />
Per sonal, unsachgemäß oder nicht<br />
bestimmungsgemäß, verwendet wird.<br />
Jede Per son, die mit Arbeiten am oder mit<br />
dem Gerät beauftragt ist, muss daher die<br />
Betriebsanleitung vor Beginn der Arbeiten<br />
gelesen und verstanden haben.<br />
• Veränderungen jeglicher Art sowie An- oder<br />
Umbauten am Gerät sind untersagt.<br />
• Alle Sicherheits-, Warn- und Bedienungshin<br />
weise am Gerät sind stets in gut lesbarem<br />
Zustand zu halten. Beschädigte<br />
Schil der oder Aufkleber müssen sofort<br />
erneuert werden.<br />
• Angegebene Einstellwerte oder -bereiche<br />
sind unbedingt einzuhalten.<br />
2. Verantwortung<br />
des Betreibers<br />
• Betriebsanleitung stets in unmittelbarer<br />
Nähe des Geräts aufbewahren.<br />
• Gerät nur in technisch einwandfreiem und<br />
betriebssicherem Zustand betreiben.<br />
• Sicherheitseinrichtungen immer frei er -<br />
reich bar vorhalten und regelmäßig prüfen.<br />
• Neben den Arbeitssicherheits-Hinweisen<br />
in dieser Betriebsanleitung sind die für den<br />
Einsatzbereich des Gerätes allgemein gültigen<br />
Sicherheits-, Unfallverhütungs- und<br />
Umweltschutzvorschriften zu beachten und<br />
einzuhalten.<br />
3. Bestimmungsgemäße<br />
Verwendung<br />
Die Betriebssicherheit ist nur bei bestimmungs<br />
gemäßer Verwendung entsprechend<br />
der Angaben in der Betriebsanleitung<br />
gewährleistet. Neben den Arbeitssicherheits-<br />
Hinweisen in dieser Betriebsanleitung sind die<br />
für den Ein satz bereich des Gerätes allgemein<br />
gültigen Sicherheits-, Unfallverhütungs- und<br />
Umwelt schutz-Vorschriften zu beachten und<br />
einzuhalten.<br />
Die Benutzung und Wartung muss immer<br />
entsprechend den lokalen staatlichen Landesoder<br />
Bundes bestim mungen erfolgen.<br />
• Das HAZET-Multi-Schleifer-Set dient<br />
zum Entfernen von Unterbodenschutz,<br />
Dichtmasse, Rost Anhaftungen, Lacken,<br />
Folien und Beschriftungen.<br />
• Der unsachgemäße Gebrauch des HAZET-<br />
Pneumatik-Werkzeugs oder der Gebrauch<br />
nicht entsprechend der Sicherheitshinweise<br />
kann zu schweren Verletzungen oder zum<br />
Tode führen.<br />
• Jede über die bestimmungsgemäße Verwendung<br />
hinausgehende und/oder andersartige<br />
Verwendung der Geräte ist untersagt und<br />
gilt als nicht bestimmungsgemäß.<br />
• Ansprüche jeglicher Art gegen den Hersteller<br />
und/oder seine Bevollmächtigten wegen<br />
Schäden aus nicht bestimmungsgemäßer<br />
Verwendung der Geräte sind ausgeschlossen.<br />
• Für alle Schäden bei nicht bestimmungsgemäßer<br />
Verwendung haftet allein der<br />
Betreiber.<br />
Immer persönliche Schutzausrüstung tragen!<br />
5
D<br />
Zu Ihrer Sicherheit<br />
4. Aufbewahrung / Lagerung<br />
Das Gerät ist unter folgenden<br />
Be ding ungen zu lagern und<br />
aufzubewahren:<br />
• Gerät trocken und staubfrei lagern.<br />
• Gerät keinen Flüssigkeiten und/oder<br />
aggressiven Substanzen aussetzen.<br />
• Gerät nicht im Freien aufbewahren.<br />
• Gerät für Kinder unzugänglich aufbewahren.<br />
• Lagertemperatur -10°C bis +40°C.<br />
• Relative Luftfeuchtigkeit max. 60%.<br />
5. Gefahren die vom<br />
Gerät ausgehen<br />
Vor jeder Benutzung ist das HAZET-<br />
Werkzeug auf seine volle<br />
Funk tions fähigkeit zu prüfen. Ist die<br />
Funk tions fähig keit nach dem Ergebnis dieser<br />
Prüfung nicht gewährleistet oder werden<br />
Schäden festgestellt, darf das Werkzeug nicht<br />
verwendet werden. Ist die volle Funktionsfähigkeit<br />
nicht gegeben und das Werkzeug<br />
wird dennoch verwendet, be steht die Gefahr<br />
von erheblichen Kör per-, Ge sund heits- und<br />
Sach schäden.<br />
• Keine Werkzeuge verwenden, bei denen der<br />
Ein-/Aus-Schalter defekt ist. Werkzeuge, die<br />
nicht mehr mit dem Ein-/Aus-Schalter einbzw.<br />
ausgeschaltet werden können, sind<br />
gefährlich und müssen repariert werden.<br />
• Alle Service- oder Repara turarbeiten immer<br />
durch Fachpersonal ausführen lassen. Um<br />
die Betriebssicherheit auf Dauer zu gewährleisten,<br />
dürfen nur Originalersatzteile verwendet<br />
werden.<br />
• Schutzvorrichtungen und/oder Gehäuseteile<br />
dürfen nicht entfernt werden.<br />
• Betätigen Sie das Werkzeug nie, wenn eine<br />
Schutzabdeckung fehlt oder wenn nicht alle<br />
Sicherheitseinrichtungen vorhanden und in<br />
einwandfreiem Zustand sind.<br />
• Aus Sicherheitsgründen sind Verän derungen<br />
an HAZET-Werkzeugen untersagt.<br />
Die Vornahme von Veränderungen am Gerät<br />
führt zum sofortigen Haftungs ausschluß.<br />
• Arbeitshandschuhe<br />
und Schutzbrille tragen.<br />
Werkzeuge mit pneumatischem<br />
Antrieb können<br />
Späne, Staub und anderen<br />
Abrieb mit hoher Geschwindigkeit<br />
aufwirbeln, was zu<br />
schweren Augenver letzungen<br />
führen kann. Druckluft<br />
ist gefährlich. Der Luftstrom<br />
kann empfindliche Körperteile<br />
wie Augen, Ohren<br />
etc. schädigen. Vom Luftstrom aufgewirbelte<br />
Gegenstände und Staub können zu<br />
Verletzungen führen.<br />
• Gehörschutz tragen. Lange<br />
Belastung durch die Arbeitsgeräusche<br />
eines Druckluftwerk<br />
zeuges kann zum dauerhaften<br />
Gehörverlust führen.<br />
• Gesichtsmaske oder<br />
Atem schutz tragen. Einige<br />
Materialien wie Klebstoffe und<br />
Teer enthalten Chemi kalien,<br />
deren Dämpfe, über einen<br />
längeren Zeitraum eingeatmet,<br />
schwere Schädigungen<br />
verursachen können.<br />
• Enganliegende Arbeits schutzkleidung tragen.<br />
Werkzeuge mit bewegenden<br />
Teilen können sich in<br />
Haaren, Kleidung, Schmuck<br />
oder anderen losen Gegenständen<br />
verfangen, was zu<br />
schweren Verletzungen führen<br />
kann. Tragen Sie niemals zu weite und/<br />
oder mit Bändern oder Schlaufen etc. versehene<br />
Kleidung, die sich in den bewegenden<br />
Werkzeugteilen verfangen kann. Legen Sie<br />
bei der Arbeit sämtlichen Schmuck, Uhren,<br />
Identifikations marken, Armbänder, Halsketten<br />
etc. ab, die sich am Werkzeug verfangen<br />
könnten. Fassen Sie niemals Werkzeugteile<br />
an, die in Bewegung sind. Lange Haare<br />
sollen zusammengebunden oder bedeckt<br />
werden.<br />
• Druckluftwerkzeuge gehören nicht in<br />
Kinderhände. Unbeaufsichtigte oder an die<br />
Druckluftzufuhr angeschlossene Werkzeuge<br />
können von nicht autorisierten Personen<br />
benutzt werden und zu deren oder zur<br />
Verletzung dritter Personen führen.<br />
Immer persönliche Schutzausrüstung tragen!<br />
6
Zu Ihrer Sicherheit<br />
D<br />
• Gerät nicht in explosionsgefährdeten<br />
Räumen verwenden. Werkzeuge wie<br />
Schleifer können Funkenschlag verursachen,<br />
der zur Entzündung brennbarer Materialien<br />
führen kann. Werkzeuge nie der Nähe von<br />
brennbaren Substanzen wie Benzin, Naphtha<br />
oder Reinigungsmitteln etc. betätigen. Nur in<br />
sauberen, gut gelüfteten Bereichen arbeiten,<br />
in denen sich keine brennbaren Materialien<br />
befinden. Niemals Sauerstoff, Kohlendioxid<br />
oder andere in Flaschen abgefüllte Gase<br />
zum Antrieb von Druckluftwerkzeugen verwenden.<br />
• Gerät nicht auf andere Personen richten.<br />
Bei Betrieb des Werkzeuges Kinder und<br />
andere Personen aus dem Arbeitsbereich<br />
fernhalten.<br />
• Gerät nicht im Leer lauf betreiben.<br />
• Druckluftwerkzeuge dürfen nicht in<br />
Kontakt mit Stromquellen kommen.<br />
• Auf Betriebsdruck achten, max. Luftdruck<br />
siehe Tabelle Seite 8. Das Überschreiten des<br />
zulässigen Maximaldrucks von Werkzeugen<br />
und Zubehörteilen kann Explosionen verursachen<br />
und zu schweren Verletzungen<br />
führen. Der Maximaldruck der Druckluft<br />
muss gleich oder unterhalb der zulässigen<br />
Druckbelastungsangaben der Schleifer liegen.<br />
• Schlauchverbindung auf festen Sitz prüfen.<br />
Keine schadhaften Druckschläuche<br />
verwenden. Umherschlagende Druckschläuche<br />
können zu schweren Verletzungen<br />
führen.<br />
• Druckluftwerkzeuge nur im drucklosen<br />
Zustand abklemmen. Umherschlagende<br />
Druckschläuche können zu schweren<br />
Verletzungen führen.<br />
• Nur trockene, saubere Luft verwenden.<br />
Verwenden Sie niemals Sauerstoff,<br />
Kohlendioxid oder andere in Flaschen<br />
abgefüllte Gase zum Antrieb von<br />
Druckluftwerkzeugen.<br />
• Verwenden Sie nur vom Hersteller empfohlene<br />
Ersatzteile, Befestigungen und<br />
Zubehör.<br />
• Das Werkzeug niemals am Druckluftschlauch<br />
tragen.<br />
• Das angeschlossene Werkzeug niemals<br />
mit dem Finger am Betätigungshebel<br />
tragen.<br />
• Unbeabsichtigte Betätigung vermeiden.<br />
• Griffe immer trocken, sauber, öl- und fettfrei<br />
halten.<br />
• Achten Sie auf einen sauberen, gut gelüfteten<br />
und stets gut beleuchteten Arbeitsbereich.<br />
• Das Werkzeug niemals unter Alkoholoder<br />
Drogeneinfluss benutzen.<br />
• Reparaturen nur von autorisierten<br />
Personen durchführen lassen.<br />
• Kennzeichnung des Gerätes muss<br />
immer gut lesbar sein. Der Bediener ist<br />
dafür verantwortlich, dass die Plakette<br />
mit Warnhinweis, Drehzahl, Serien- und<br />
Artikel-No. unbeschädigt und gut lesbar<br />
ist.<br />
• Verwenden Sie Schnellkupplungen nie<br />
direkt am Gerät. Die Schnellkupplung muß<br />
durch mindestens 20 cm Luftschlauch<br />
vom Gerät getrennt sein.<br />
• Schleifscheiben nur bei abgekuppeltem<br />
Luftschlauch auswechseln.<br />
• Nur das für das Gerät vorgesehene<br />
Zubehör verwenden.<br />
• Achten Sie darauf, dass das zu bearbeitende<br />
Werkstück sicher und fest aufliegt.<br />
• Verwenden Sie das Werkzeug nicht mit<br />
Gewalt, üben Sie keinen zu großen Druck<br />
aus.<br />
• Achten Sie auf einen sicheren und festen<br />
Stand.<br />
• Einseitige, monotone Arbeiten, angespannte<br />
Körperhaltung sowie die auftretende<br />
Vibration können gesundheitsschädlich<br />
für Hände und Arme sein. Sollte<br />
Taubheit, Kribbeln, Schmerzen oder ein<br />
Blasswerden der Haut auftreten, so ist die<br />
Arbeit sofort zu unterbrechen und ein Arzt<br />
aufzusuchen.<br />
Immer persönliche Schutzausrüstung tragen!<br />
7
D<br />
Aufbau und Funktion<br />
1. Technische Daten / Geräteelemente<br />
<strong>9033</strong>-6<br />
Luftanschluß Gewinde mm (˝) 6,3 ( 1 ⁄4)<br />
Schleif-/Polierteller mm (˝) 100 (4)<br />
Max. Leerlauf-Drehzahl U / min 3,500<br />
Gewicht kg 1,5<br />
Empf. Schlauchquerschnitt mm 10<br />
Luftverbrauch l / min 113<br />
Betriebsdruck bar 6,2<br />
Schall-Leistungspegel dB(A) 94<br />
Schall-Druckpegel dB(A) 88<br />
Vibrationsbeschleunigung m / s 2 4,4<br />
Geräte-Abmessungen mm 318 x 204 x 70<br />
Drehzahlregulierung -<br />
2. Lieferumfang<br />
<strong>9033</strong>-6: Set im Koffer: Multi-Schleifer,<br />
1 Adapter 23 mm<br />
fü r Folienradierer und Bü rstenband 23 mm,<br />
2 Radierer,<br />
1 Bü rstenband 23 mm fein gerade<br />
(fü r Lacke, Anhaftungen und Rost ohne Sandstrahleffekt),<br />
1 Bü rstenband 23 mm grob gebogen<br />
(fü r Unterbodenschutz und Dichtmassen sowie Entlackung mit grobem Sandstrahleffekt),<br />
1 Adapter fü r 11 mm Bü rstenband<br />
1 Bü rstenband 11 mm fein gerade<br />
(fü r Lacke, Anhaftungen und Rost ohne Sandstrahleffekt),<br />
1 Bü rstenband 11 mm grob gebogen<br />
(fü r Unterbodenschutz und Dichtmassen sowie Entlackung mit grobem Sandstrahleffekt),<br />
1 Adapter fü r Einzel-Eliminatorscheibe<br />
1 Adapter fü r Doppel-Eliminatorscheibe<br />
6 Eliminatorscheiben,<br />
Immer persönliche Schutzausrüstung tragen!<br />
8
Aufbau und Funktion<br />
D<br />
1 Adapter 23 mm<br />
für Folienradierer und<br />
Bürstenband 23 mm,<br />
1 Radierer für<br />
Wasserbasierende<br />
Farben<br />
1 Bürstenband 23 mm 1 Bürstenband 23 mm<br />
fein gerade<br />
grob gebogen<br />
für Lacke,<br />
für Unterbodenschutz,<br />
Anhaftungen und Rost Dicht massen sowie<br />
ohne Sandstrahleffekt Entlac kung mit grobem<br />
Sandstrahleffekt,<br />
1 Radierer<br />
1 Adapter für 11 mm<br />
Bürstenband<br />
1 Bürstenband 11 mm fein gerade<br />
für Lacke, Anhaftungen und Rost<br />
ohne Sandstrahleffekt<br />
1 Bürstenband 11 mm<br />
grob gebogen<br />
für Unterbodenschutz und<br />
Dichtmassen sowie Entlackung<br />
mit grobem Sandstrahleffekt<br />
1 Adapter für<br />
Einzel-<br />
Eliminatorscheibe<br />
1 Adapter für<br />
Doppel-<br />
Eliminatorscheibe<br />
6 Eliminatorscheiben,<br />
Immer persönliche Schutzausrüstung tragen!<br />
9
D<br />
Aufbau und Funktion<br />
3. Vor Inbetriebnahme<br />
Die Benutzung, Inspektion und<br />
Wartung von Pneumatik-Werkzeugen<br />
muss immer entsprechend<br />
der lokalen, staatlichen Landesoder<br />
Bundes bestimmungen erfolgen.<br />
• Kompressortank entwässern und Kondenswasser<br />
aus den Luftleitungen entfernen.<br />
Lesen Sie die Gebrauchsanweisung für den<br />
Kompressor ebenfalls gründlich durch.<br />
WICHTIG:<br />
Die Verwendung von Luftfiltern und<br />
eines Druckluft-Leitungsölers ist zu<br />
empfehlen.<br />
ACHTUNG!<br />
Vor dem Ölen, Anschließen oder<br />
Abkoppeln des Werkzeuges, die<br />
Druckluft-Zufuhr unterbrechen.<br />
• Werkzeug ölen, siehe Wartung in dieser<br />
Gebrauchsanweisung.<br />
• Entfernen Sie die Staubkappe am Druckluft-<br />
Einlaß.<br />
• Schließen Sie das Werkzeug an einen<br />
Schlauch passender Größe an.<br />
Tabelle Seite 8<br />
4. Inbetriebnahme<br />
• Schalten Sie den Kompressor ein, so dass<br />
sich der Lufttank füllen kann.<br />
• Stellen Sie den Kompressorregler auf ca. 90<br />
PSI oder 6.2 bar. Der maximale Betriebsdruck<br />
dieses Werkzeugs liegt bei ca. 90 PSI<br />
oder 6.2 bar.<br />
• Die Drehleistung kann abhängig von der<br />
Größe des Luftkompressors und des<br />
Volumens des Druckluft-Ausstoßes variieren.<br />
• Verwenden Sie keine beschädigten, abgenutzten<br />
oder minderwertigen Luftschläuche<br />
oder Verbindungsstücke.<br />
• Die Druckregelung zum Erreichen der richtigen<br />
Werkzeug-Geschwindigkeit erfolgt<br />
über den Kompressor-Regler, bzw. einen<br />
extra zu montierenden Druckregler.<br />
• Die Regelung der Geschwindigkeit erfolgt<br />
mit einem Luftzufuhr-Regler (nicht im<br />
Lieferumfang enthalten).<br />
• Die technischen Daten des Werkzeugs<br />
beziehen sich auf den Betrieb bei einem<br />
Druck von 6.2 Bar.<br />
• Beim Gebrauch der Schleifmaschine ist<br />
immer Vorsicht geboten. Bei nachlässigem<br />
Betrieb können Innenteile oder das Gehäuse<br />
beschädigt und die Arbeitsleistung eingeschränkt<br />
werden.<br />
• Zubehör-Auswahl und Montage<br />
1. Wählen Sie das korrekte Bürstenband<br />
aus (4 Typen verfügbar), wenn Sie z.B.<br />
Farbe oder Rost entfernen möchten oder<br />
verwenden Sie den entsprechenden<br />
Radierer, wenn Sie z.B. Aufkleber entfernen<br />
möchten.<br />
2. Zur Entfernung von Farbe<br />
bei feinen/glatten Oberflächen,<br />
verwenden Sie<br />
bitte die feinen Bürstenbänder.<br />
Verwenden Sie die groben<br />
und gebogenen Bürstenbänder<br />
entsprechend bei<br />
groben/rauen Oberflächen<br />
bzw. starkem Rost.<br />
3. Montieren Sie die Bänder mit den gebogenen<br />
Bürsten in Laufrichtung.<br />
4. Fügen Sie die beiden Hälften des entsprechenden<br />
Adapters durch das Bürstenband<br />
bzw. den Radierer zusammen. Achten Sie<br />
darauf, dass diese korrekt zusammengefügt<br />
werden. Setzen Sie nun den Adapter<br />
auf die Spindel des Schleifers und befestigen<br />
diesen mit der zugehörigen Schraube.<br />
Der Adapter wird über den Innen-6kt. auf<br />
der Spindel justiert -<br />
Immer persönliche Schutzausrüstung tragen!<br />
10
Aufbau und Funktion<br />
D<br />
• Zur Betätigung des Werkzeugs<br />
Betätigungshebel drücken.<br />
• Zum Stoppen des Werkzeugs Betätigungshebel<br />
loslassen.<br />
• Beachten Sie, dass das Werkzeug nach<br />
Loslassen des Betätigungshebels noch<br />
nachläuft.<br />
• Nach beendeter Arbeit Kompressor ausschalten<br />
und gemäß der Kompressor-<br />
Gebrauchsanweisung lagern.<br />
• Nur trockene, saubere Luft mit ca. 90 PSI<br />
oder 6.2 bar Maximaldruck verwenden.<br />
Staub, brennbare Dämpfe und eine zu hohe<br />
Feuchtigkeit können den Motor eines pneumatischen<br />
Werkzeugs zerstören.<br />
• Entfernen Sie keine Plaketten, ersetzen Sie<br />
beschädigte Plaketten.<br />
• Halten Sie Hände, weite Kleidung und<br />
lange Haare vom sich bewegenden Teil des<br />
Werkzeugs fern.<br />
5. Wartung und Pflege<br />
• Ölen:<br />
Druckluft-Werkzeuge müssen während<br />
ihrer gesamten Lebensdauer geölt werden.<br />
Der Motor und die Kugellager benötigen<br />
Druckluft, um das Werkzeug anzutreiben. Da<br />
die Feuchtigkeit in der Druckluft den Motor<br />
rosten lässt, muss der Motor täglich geölt<br />
werden. Hierfür ist die Verwendung eines<br />
integrierten Ölers zu empfehlen.<br />
• HAZET 9070-1 Öler zur Montage am<br />
Pneumatik-Werkzeug.<br />
• Ölen des pneumatischen Motors von<br />
Hand:<br />
Werkzeug von der Luftzufuhr abkoppeln<br />
und mit dem Lufteinlass nach oben halten.<br />
Ein bis zwei Tropfen Spezial-Druckluftöl in<br />
den Lufteinlass geben.<br />
Werkzeug an die Druckluftzufuhr<br />
anschließen, Luftauslass am Werkzeug<br />
mit einem Handtuch abdecken und einige<br />
Sekunden laufen lassen.<br />
Für das Ölen des Werkzeugs nie brennbare<br />
oder leicht verdampfbare Flüssigkeiten wie<br />
Kerosin, Diesel oder Benzin verwenden.<br />
ACHTUNG!<br />
Überschüssiges Öl im Motor wird<br />
sofort durch den Luftauslass ausgestoßen.<br />
WARNUNG!<br />
Auslassöffnung nie auf Menschen<br />
oder Objekte richten. Der Luftauslass<br />
befindet sich hinten am Handgriff.<br />
• Wartung<br />
Vor der Durchführung von Wartungsarbeiten<br />
das Gerät immer von der<br />
Druckluft-Zufuhr lösen.<br />
Bei täglicher Nutzung ist vierteljährlich eine<br />
Wartung durchzuführen, spätestens jedoch<br />
nach 1000 Betriebsstunden.<br />
Beschädigte oder abgenutzte Bauteile wie<br />
O-Ringe, Lager etc. sind zu ersetzen und<br />
alle beweglichen Teile zu ölen.<br />
Es sind ausschließlich vom Hersteller empfohlene<br />
Ersatzteile zu verwenden, andernfalls<br />
erlischt die Gewährleistung.<br />
Bitte achten Sie bei der Entsorgung von<br />
Einzelteilen, Schmiermitteln etc. darauf,<br />
dass die entsprechenden Richtlinien zum<br />
Umweltschutz eingehalten werden.<br />
Zur Reinigung des Werkzeugs oder seiner<br />
Einzelteile wird der Gebrauch von<br />
Waschbenzin empfohlen.<br />
Reinigen Sie nie mit Lösungsmitteln oder<br />
Säuren, Estern (organischen Verbindungen<br />
aus Säuren und Alkohol), Aceton (Keton),<br />
Chlorkohlenwasserstoffen oder nitrokarbonathaltigen<br />
Ölen. Verwenden Sie keine<br />
Chemikalien mit niedrigem Flammpunkt.<br />
Für die Inanspruchnahme des Kundendienstes<br />
setzen Sie sich bitte mit Ihrem<br />
Händler oder dem HAZET-Service Center in<br />
Verbindung.<br />
6. Störungen<br />
Bei Störungen bitte Prüfen:<br />
• Kompressionsanlage und Druckluft-<br />
Zuleitung Luftverbrauch l/min und Schlauchquerschnitt<br />
entsprechend den technischen<br />
Daten des Gerätes<br />
• Betriebsluft auf Staub und Rostanteile sowie<br />
Kondensat untersuchen<br />
• Überölung des Luftmotors<br />
Immer persönliche Schutzausrüstung tragen!<br />
11
GB<br />
For Your Information<br />
USA<br />
Dear Customer,<br />
You have made a good choice.<br />
This HAZET tool in front of you<br />
is a high-quality product that will<br />
make your work easier.<br />
1. General Information<br />
• Please make sure that the user of this tool<br />
carefully reads these operating instructions<br />
and fully understands all information given<br />
before it is used.<br />
• These operating instructions contain important<br />
advice that is necessary for a safe and<br />
trouble-free operation of your HAZET tool.<br />
• For effective use of the tool as intended, it<br />
is essential that all safety and other information<br />
in these operating instructions is<br />
adhered to.<br />
• For this reason, always keep these operating<br />
instructions together with your HAZET<br />
tool.<br />
• This tool has been designed exclusively for<br />
specific applications. HAZET emphasizes<br />
that any modification to the tool and/or<br />
use on an application not detailed to its<br />
intended application are strictly forbidden.<br />
• HAZET will not be liable for any injuries to<br />
persons or damage to property originating<br />
from improper application, misuse of the<br />
tool or a disregard of the safety instructions.<br />
• Furthermore, the general safety regulations<br />
and regulations for the prevention of accidents<br />
valid for the application area of this<br />
tool must be observed and respected.<br />
2. Explanation of Symbols<br />
ATTENTION : Please pay attention to these<br />
symbols!<br />
Read the Operating Instructions!<br />
The owner of this tool is obliged to<br />
observe the operating instructions<br />
and should ensure all users of this<br />
tool use it according to the information<br />
given in this manual.<br />
NOTICE!<br />
This symbol marks advice which is<br />
helpful when using the tool.<br />
CAUTION!<br />
This symbol marks important specifications,<br />
dangerous conditions, safety<br />
risks and safety advice.<br />
ATTENTION!<br />
This symbol marks advice which<br />
if disregarded results in damage,<br />
malfunction and/or functional failure<br />
of the tool.<br />
3. Liability and<br />
Warranty<br />
• Any deviation from the intended use and/<br />
or any misapplication of the tool is not<br />
allowed and will be considered as improper<br />
use.<br />
• Any claims against the manufacturer and/<br />
or its authorized agents because of damage<br />
caused by improper use of the tool are<br />
void.<br />
• Any personal injury or material losses<br />
caused by improper use of the tool are the<br />
sole responsibility of the owner.<br />
Always wear personal protective clothing and safety equipment!<br />
12
USA<br />
For Your Information<br />
GB<br />
4. Spare Parts<br />
• Only use the manufacturer’s original spare<br />
parts.<br />
• Unsuitable or defective spare parts may<br />
cause damage, malfunction or total failure of<br />
the tool.<br />
• The use of non approved spare parts will void<br />
all warranty, service and liability claims as<br />
well as all claims for compensation against<br />
the manufacturer or its agents, distributors<br />
and sales representatives.<br />
5. Disposal<br />
• For disposal, clean tool and disassemble it<br />
according to the regulations for work safety<br />
and environmental protection. Components<br />
can be recycled.<br />
• Metal components can be scrapped.<br />
The reduction of the pollution as well as the<br />
protection of the environment are the central<br />
points of our activities.<br />
HAZET - environmental protection is of funda -<br />
mental importance for us.<br />
Always wear personal protective clothing and safety equipment!<br />
13
GB<br />
For Your Safety<br />
USA<br />
This paragraph gives an overview of<br />
important security advice to help to<br />
ensure the optimal protection of the<br />
personnel as well as the safe and<br />
trouble-free operation of the tool.<br />
Additionally, the different chapters contain<br />
security advice that is marked with symbols in<br />
order to avert immediate danger. Furthermore,<br />
all stickers and labels on the tool must be<br />
observed and must be kept legible.<br />
1. General Aspects<br />
• This tool was developed and manufactured<br />
according to the technical norms<br />
and standards valid at the time and is<br />
considered to be operationally reliable.<br />
Nevertheless, the tool can present a danger<br />
when it is not used as intended or in an<br />
inappropriate way by unqualified personnel.<br />
Please make sure that any person using<br />
this tool or carrying out maintenance work<br />
carefully reads these operating instructions<br />
and fully understands all information given,<br />
before using the tool.<br />
• Any modification of the tool is strictly<br />
forbidden.<br />
• All security advices, warning and operation<br />
notices on the tool have to be kept legible.<br />
Replace all damaged labels or stickers.<br />
• All indications concerning setting values<br />
and setting ranges must be observed.<br />
2. Owner’s Liability<br />
• Keep the operating instructions together<br />
with the tool at all times.<br />
• The tool must only be used if it is in good<br />
working order.<br />
• All safety equipment, must always be within<br />
reach and should be checked regularly.<br />
• In addition to the safety advice given in<br />
these operating instructions, the general<br />
safety regulations, regulations for the prevention<br />
of accidents and regulations for<br />
environmental protection being valid for<br />
the application area of this tool have to be<br />
observed and respected.<br />
3. Appropriate Use<br />
Operational reliability can only be ensured, if<br />
the tool is used as intended and in compliance<br />
with the indications given in the operating<br />
instructions. In addition to the safety advice<br />
given in these operating instructions, the<br />
general safety regulations, regulations for<br />
the prevention of accidents and regulations<br />
for environmental protection being valid for<br />
the application area of this tool have to be<br />
observed and respected.<br />
Always ensure tools are used, inspected and<br />
maintained in com pliance with the respective<br />
local, state, national or federal regu lations.<br />
• The HAZET Pneumatic Multi Sander<br />
is used for the removal of underseal, sealing<br />
compound, rust, paint, plastic film and<br />
labels.<br />
• The improper use of the HAZET pneumatic<br />
tools or the disregard of the safety advice<br />
may cause severe injury or death.<br />
• Any deviation from the intended use and/<br />
or any misapplication of the tools is not<br />
allowed and will be considered as improper<br />
use.<br />
• Any claims against the manufacturer and/<br />
or its authorized agents because of damage<br />
caused by improper use of the tools will be<br />
void.<br />
• Any personal injury or material losses<br />
caused by improper use are the sole<br />
responsibility of the owner.<br />
Always wear personal protective clothing and safety equipment!<br />
14
USA<br />
For Your Safety<br />
GB<br />
4. Storage<br />
The tool has be stored according to<br />
the following conditions:<br />
• Keep tool in a dry and dust-free place.<br />
• Do not expose the tool to liquids or aggressive<br />
substances.<br />
• Do not store the tool outdoors.<br />
• Keep the tool out of reach of children.<br />
• Storage temperature: -10°C up to +40°C<br />
• Relative air humidity: max. 60%<br />
5. Dangers emanating<br />
from the tool<br />
Before each use, check the HAZET tool for full<br />
functional efficiency. Do not use the tool if its<br />
functional efficiency cannot be ensured or if<br />
damage is detected. If the tool is used, when<br />
it is not in full working order, you risk severe<br />
injuries to persons and damage to property.<br />
Defective tools may cause severe injury.<br />
• Do not use tools whose on/off-switch is<br />
defective. Tools that cannot be switched on<br />
or off with their on/off switch are dangerous<br />
and have to be repaired.<br />
• Any service or repair work must be carried<br />
out by qualified personnel only. In order<br />
to guarantee long term operational safety,<br />
only original spare parts of the manufacturer<br />
must be used.<br />
• Do not remove any safety devices and/or<br />
housing parts.<br />
• Do not operate the tool, if safety covers or<br />
safety devices are missing or defective.<br />
• For safety reasons any modification of<br />
HAZET tools is strictly forbidden. Any modification<br />
of the tool will result in immediate<br />
exclusion from warranty and liability.<br />
• Wear work gloves and<br />
eye protection. Pneumatic<br />
tools can raise chips, dust<br />
and other abraded particles<br />
at high speed what may<br />
result in severe eye injuries.<br />
Compressed air is dangerous.<br />
The air flow may cause<br />
harm to sensitive parts of<br />
the body like eyes, ears,<br />
etc. Dust and objects being<br />
raised by the air flow may<br />
cause injuries.<br />
• Use ear protection. Long<br />
exhibition to the working<br />
noise of pneumatic tools may<br />
result in a permanent hearing<br />
loss.<br />
• Wear face or dust mask.<br />
Breathing in the steam of<br />
some materials like adhesives<br />
and tar that contain<br />
dangerous chemicals can<br />
cause serious harms to the<br />
lungs and respiratory tracts.<br />
• Wear proper-fitting protective<br />
clothing. Tools with<br />
moving parts can get caught<br />
in the hair, clothing, jewellery<br />
or other loose objects<br />
what may result in severe<br />
injuries. Never wear too large clothing and/<br />
or clothing with bands or loops which may<br />
get caught in the moving parts of the tool.<br />
During the work, take off jewellery, watches,<br />
identification tags, bracelets, necklaces etc.<br />
that could get caught in the tool. Never<br />
touch the moving parts of a tool. Long hair<br />
should be covered or tied together.<br />
• Keep children away from pneumatic tools.<br />
Unattended tools or tools that are connected<br />
to the compressed air supply may be used<br />
by non-authorized persons and could injure<br />
them or other persons.<br />
Always wear personal protective clothing and safety equipment!<br />
15
GB<br />
For Your Safety<br />
USA<br />
• Do not use the tool in explosive atmosphere.<br />
Tools such as sanders can produce<br />
sparks that may ignite combustible materials.<br />
Never operate tools in proximity to combustible<br />
substances like petrol, naphtha,<br />
detergents etc. Work in well-cleaned and<br />
well-ventilated areas only. Keep combustible<br />
materials out of the work area. Never<br />
use oxygen, carbon dioxide or other bottled<br />
gases to power pneumatic tools.<br />
• Do not point the tool at any person. Keep<br />
children and other persons out of the work<br />
area when operating the tool.<br />
• Do not use the tool in no-load operation.<br />
• Pneumatic tools must not get in contact<br />
with sources of electricity.<br />
• Pay attention to the working pressure,<br />
(max. air pressure see table, page 17).<br />
Exceeding the approved maximum pressure<br />
of tools and accessories can cause explosions<br />
and may result in severe injuries. The<br />
maximum pressure of the compressed air<br />
must be equal or inferior to the approved<br />
pressure load indicated for the sander.<br />
• Check tight fit of the air hose connections/<br />
do not use defective pressure hoses.<br />
Uncontrollably moving pressure hoses may<br />
cause severe injuries.<br />
• Only disconnect pneumatic tools in an<br />
unpressurized state. Uncontrollably moving<br />
pressure hoses may cause severe injuries.<br />
• Use clean and dry air only. Never use<br />
oxygen, carbon dioxid or other bottled gases<br />
to power pneumatic tools.<br />
• Only use parts, attachments and accessories<br />
that are recommended by the manufacturer.<br />
• Never carry the tool by the air hose.<br />
• Do not carry the connected tool with a<br />
finger on the throttle lever.<br />
• Avoid unintentional starting.<br />
• Keep handles clean, dry and free of oil<br />
and grease.<br />
• Always keep the work area clean, well<br />
ventilated and well lit.<br />
• Do not use the tool under the influence of<br />
alcohol or drugs.<br />
• Any repairs must be carried out by authorized<br />
persons only.<br />
• The tool labelling must always be kept<br />
legible. The operator/user is responsible<br />
that the sticker indicating safety advice,<br />
speed (r.p.m.), serial no. and article no. is<br />
not damaged and well legible.<br />
• Do not use quick-release couplings<br />
direct ly at the tool. There must be a<br />
pressure hose of at least 20 cm length<br />
between the tool and the quick-release<br />
coupling .<br />
• Ensure air hose is disconnected when<br />
changing grinding wheels.<br />
• Only use accessories which are approved<br />
and allowed for the tool.<br />
• Make sure that the workpiece is firmly<br />
supported.<br />
• Do not grip the workpiece or tool too<br />
tightly and do not exert excessive pressure<br />
on the workpiece or tool.<br />
• Always keep proper footing and balance.<br />
• Continuous and monotonous work, a stiff<br />
posture as well as tool vibrations may<br />
cause injury to hands and arms. If tingling,<br />
pins and needles, numbness or pain<br />
is experienced, immediately stop working<br />
and seek medical advice.<br />
Always wear personal protective clothing and safety equipment!<br />
16
USA<br />
Design and Function<br />
GB<br />
1. Technical Data / Components of the Tool<br />
<strong>9033</strong>-6<br />
Air inlet thread mm (˝) 6.3 ( 1 ⁄4)<br />
Grinding disc mm (˝) 100 (4)<br />
Max. free speed rpm 3,500<br />
Weight kg 1.5<br />
Recommended hose diameter mm 10<br />
Air consumption l / min 113<br />
Working pressure bar 6.2<br />
Sound power level dB(A) 94<br />
Sound pressure level dB(A) 88<br />
Vibration acceleration m / s 2 4.4<br />
Dimensions mm 318 x 204 x 70<br />
Speed regulation -<br />
2. Included<br />
<strong>9033</strong>-6: Set in case<br />
Multi Sander,<br />
1 Adapter 23 mm,<br />
for eraser and 23 mm wire brushes<br />
2 Eraser<br />
1 Wire brush 23 mm, fine and straight,<br />
(for paint, rust, without sand-blasting effect)<br />
1 Wire brush 23 mm, coarse and bent,<br />
(for underseal, sealing compound, paint stripping, with coarse sand-blasting effect)<br />
1 Adapter for 11 mm wire brushes<br />
1 Wire brush 11 mm, fine and straight,<br />
(for paint, rust, without sand-blasting effect)<br />
1 Wire brush 11 mm, coarse and bent,<br />
(for underseal, sealing compound, paint stripping, with coarse sand-blasting effect)<br />
1 Adapter for single strip wheel<br />
1 Adapter for double strip wheel<br />
6 Black Strip Wheels<br />
Always wear personal protective clothing and safety equipment!<br />
17
GB<br />
Design and Function<br />
USA<br />
1 Adapter 23 mm<br />
for eraser and 23 mm<br />
wire brushes<br />
1 Eraser for waterbased<br />
paint<br />
1 Wire brush 23 mm,<br />
fine and straight<br />
for paint, rust, without<br />
sand-blasting effect<br />
1 Wire brush 23 mm<br />
coarse and bent,<br />
for underseal, sealing<br />
compound, paint<br />
stripping, with coarse<br />
sand-blasting effect<br />
1 eraser<br />
1 Adapter for 11 mm<br />
wire brushes<br />
1 Wire brush 11 mm<br />
fine and straight for paint, rust, without<br />
sand-blasting effect<br />
1 Wire brush 11 mm<br />
coarse and bent<br />
for underseal, sealing compound,<br />
paint stripping, with coarse sandblasting<br />
effect<br />
1 Adapter for<br />
single<br />
strip wheel<br />
1 Adapter for<br />
double<br />
strip wheel<br />
6 Black strip wheel<br />
Always wear personal protective clothing and safety equipment!<br />
18
USA<br />
Design and Function<br />
GB<br />
3. Prior to Operation<br />
Pneumatic tools have to be used,<br />
inspected and maintained always<br />
in compliance with the respective<br />
local, state, national or federal<br />
regulations.<br />
• Drain compressor tank and remove condensation<br />
water from the air hoses. Read thouroughly<br />
through the operating instructions of<br />
the compressor tank too.<br />
IMPORTANT:<br />
The use of an air filter and an air<br />
hose oiler is recommended.<br />
ATTENTION!<br />
Before oiling, plugging in/out the<br />
tool, disconnect the tool from the<br />
compressed air supply.<br />
• For oiling the tool, see chapter 5 “Maintenance<br />
and Cleaning” further on in these operating<br />
instructions.<br />
• Remove the dust cap at the air inlet.<br />
• Connect the tool to a correctly sized air hose.<br />
See table on page 17<br />
• The speed is adjusted by the use of an air<br />
inlet regulator (not included in delivery).<br />
• The technical information given for this tool<br />
refer to the use at 6.2 bar.<br />
• Always be cautious when working with<br />
sanders. Careless working with the tool<br />
might damage the inner parts and/or the<br />
housing and reducing the working performance.<br />
• Accessories - Choice and Installation<br />
1. Choose the correct wire brush (there are<br />
4 different types of wire brushes available)<br />
if you are stripping off paint or scaling off<br />
rust. Choose an appropriate rubber eraser<br />
for the removal of labels and stickers.<br />
2. For paint stripping from smooth<br />
surfaces please use a fine wire<br />
brush.<br />
Use a coarse wire brush for<br />
rough surfaces or for the<br />
removal of heavy rust.<br />
3. Install the coarse and bent wire brush with<br />
the wire tips headed in the direction of<br />
rotation.<br />
4. Operation<br />
• Turn on the compressor to start the filling of<br />
the air tank.<br />
• Adjust the air compressor regulator to<br />
90 PSI (6.2 bar). The maximum working<br />
pressure of this tool is 90 PSI (6.2 bar).<br />
• The rotation performance may vary depending<br />
on the size of the air compressor and on<br />
the output volume of compressed air.<br />
• Do not use damaged, worn-out or lowquality<br />
air hoses or connectors.<br />
• The pressure for the adjustment of the<br />
correct tool speed is either regulated by<br />
the use of the compressor’s regulator or by<br />
mounting an extra pressure regulator.<br />
4. Assemble both halves of the adapter<br />
through the wire brush or the eraser. Make<br />
sure that both halves engage correctly.<br />
Now place the adapter onto the tool’s spindle<br />
and secure in place with the corresponding<br />
screw. Use a hexagon wrench to<br />
adjust the adapter on the spindle -<br />
Always wear personal protective clothing and safety equipment!<br />
19
GB<br />
Design and Function<br />
USA<br />
• Push throttle lever to operate the tool.<br />
• Release throttle lever to stop tool operation.<br />
• Be aware of the fact that the tool continues<br />
moving for a while after the throttle lever has<br />
been released.<br />
• When the work is done, switch off compressor<br />
and store it as indicated in its<br />
operating instructions.<br />
• Use clean and dry air at 90 PSI (6.2 bar)<br />
maximum pressure only. Dust, combustible<br />
steams and a too high moisture can<br />
damage the motor of a pneumatic tool.<br />
• Do not remove any stickers; replace<br />
damaged stickers.<br />
• Keep hands, wide clothing and long hair<br />
away from the moving parts of the tool.<br />
5. Maintenance and Cleaning<br />
Oiling:<br />
• Pneumatic tools have to be oiled throughout<br />
their whole serviceable life. The motor and<br />
the (ball) bearings need compressed air to<br />
power the tool. As the moisture in the compressed<br />
air leads to rust of the motor, daily<br />
oiling of the motor is necessary. For this, the<br />
use of an integrated oiler is recommended.<br />
• HAZET 9070-1 Oiler can be fixed directly to<br />
the pneumatic tool.<br />
Oiling the pneumatic motor manually:<br />
• Disconnect tool from the air supply and<br />
hold with the air inlet showing upwards.<br />
Push button and put 1 or 2 drops of special<br />
pneumatic oil into the air inlet.<br />
• Connect the tool to the air supply; cover<br />
the air exit of the tool with a towel and<br />
operate a few seconds.<br />
• Never use combustible or easily evaporable<br />
liquids, e.g. kerosene, petrol, diesel, etc. to<br />
lubricate the tool.<br />
20<br />
ATTENTION!<br />
Excess oil in the motor will be<br />
exhausted immediately through the<br />
air exhaust.<br />
CAUTION!<br />
Never point the air exhaust at any person<br />
or at any object. The air exhaust is<br />
at the rear side of the handle.<br />
Maintenance:<br />
• Before executing any maintenance work,<br />
disconnect the appliance from the air<br />
supply.<br />
• If the tool is used daily, there should be<br />
carried out an inspection after every three<br />
month at the latest however after every<br />
1,000 operating hours.<br />
• All damaged or worn parts, such as<br />
O-rings, bearings etc. must be replaced. All<br />
moving parts must be oiled.<br />
• Only use spare parts recommended by the<br />
manufacturer, otherwise the warranty will be<br />
void.<br />
• When disposing of components, lubricants,<br />
etc. please take care that the valid regulations<br />
for environmental protection are<br />
observed.<br />
• Do not use solvents or acids, esters (organic<br />
compounds of acids and alcohol), acetone<br />
(ketone), chlorinated hydrocarbons or nitrocarbonic<br />
oils to clean the tool. Do not use<br />
chemicals with a low flashing point.<br />
• For after sales service please contact your<br />
distributor/retailer.<br />
6. Trouble Shooting<br />
In case of malfunctions, please check:<br />
• The compressor installation and air hoses<br />
(check whether the air consumption l/min<br />
and the hose diameter correspond to the<br />
technical specifications of the appliance);<br />
• The compressed air in regard to the<br />
occurence of dust, condensate and rust<br />
particles;<br />
• Whether the air motor is oiled too much.<br />
Always wear personal protective clothing and safety equipment!<br />
<strong>9033</strong>-6 BA II. 09.2010/∞ be/323