VGA 1 - Grundig-info.de
VGA 1 - Grundig-info.de
VGA 1 - Grundig-info.de
Erfolgreiche ePaper selbst erstellen
Machen Sie aus Ihren PDF Publikationen ein blätterbares Flipbook mit unserer einzigartigen Google optimierten e-Paper Software.
Umstellung <strong>de</strong>r Bildschirmauflösung <strong>de</strong>r<br />
Graphikkarte auf 640x480 Bildpunkte für<br />
Win 3.xx<br />
unter DOS:<br />
- Computer mit "DOS" starten.<br />
- In das Windows-Verzeichnis mit <strong>de</strong>r Eingabe "cd windows"<br />
wechseln.<br />
- Systemsteuerung mit <strong>de</strong>r Eingabe "setup" aufrufen<br />
- Mit <strong>de</strong>n Cursortasten die Anzeige auswählen, auf <strong>VGA</strong> stellen<br />
und abspeichern (siehe Anweisung letzte Zeile).<br />
unter Windows:<br />
- Windows-Setup aufrufen (zu fin<strong>de</strong>n in <strong>de</strong>r Hauptgruppe <strong>de</strong>s<br />
Programm-Managers).<br />
- Den Menüpunkt Optionen - "Systemeinstellung" än<strong>de</strong>rn aufrufen.<br />
Optionen<br />
(Options)<br />
- Unter <strong>de</strong>m Punkt Anzeige die Einstellung "<strong>VGA</strong>" wählen und mit<br />
OK abspeichern.<br />
Changing the Screen Resolution of the<br />
Graphics Card to 640x480 Pixels for<br />
Win 3.xx<br />
un<strong>de</strong>r DOS:<br />
- Start the computer with "DOS".<br />
- Enter "cd windows" to change to the Windows directory.<br />
- Enter "Setup" to call up the "Systemsteuerung" (System<br />
Control) option.<br />
- Select "Anzeige" (Display) with the cursor buttons, set it to <strong>VGA</strong><br />
and store this change (see instruction on the bottom line).<br />
un<strong>de</strong>r Windows:<br />
- Call up "Windows-Setup" (to be found in the main group within<br />
the programme manager).<br />
- Choose "Systemeinstellung än<strong>de</strong>rn" (change System setting)<br />
from the "Optionen" (Options) menu item.<br />
- Un<strong>de</strong>r "Anzeige" (Display), select "<strong>VGA</strong>" and store this setting<br />
with "OK".<br />
D Montageanleitung<br />
<strong>VGA</strong> Buchsenplatte<br />
<strong>VGA</strong> Buchsenplatte, Sachnr. G.AC 4200<br />
Montage :<br />
- Netzstecker ziehen und Gerät öffnen.<br />
- 2 Schrauben X am unteren Rand <strong>de</strong>r Ab<strong>de</strong>ckung herausschrauben.<br />
- Ab<strong>de</strong>ckung oben leicht nach hinten kippen, dadurch rasten die 2 Rastnasen Y (Abb. 1) aus und die Ab<strong>de</strong>ckung kann nach<br />
hinten weggezogen wer<strong>de</strong>n.<br />
- Buchsenab<strong>de</strong>ckungen ausbrechen.<br />
- <strong>VGA</strong> Buchsenplatte in die Ab<strong>de</strong>ckung einsetzen und mit 2 Schrauben Z festschrauben.<br />
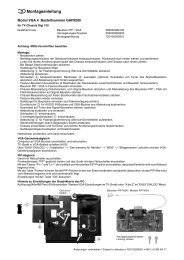
Bei<strong>de</strong> Jumper müssen so gesetzt sein, daß die Kontakte b verbun<strong>de</strong>n sind (Abb. 1A).<br />
- Kabelverbindungen (Abb. 2) herstellen.<br />
- Ab<strong>de</strong>ckung wie<strong>de</strong>r anschrauben.<br />
- Geräterückwand aufsetzen, Computer anschließen und dann Gerät mit <strong>de</strong>m Netz verbin<strong>de</strong>n.<br />
- Nach <strong>de</strong>m Einschalten über das DIALOGCENTER in Stellung AV5 Geometrie einstellen und abspeichern (Geometrie-<br />
Einstellung für normalen Empfang bleibt extra gespeichert).<br />
"" –> "OK" –> "SERVICE FÜR DEN FACHHANDEL" –> "OK" –> "Nur für <strong>de</strong>n Fachhändler" –> "OK" –> Kennzahl "8500"<br />
–> "Geometrie".<br />
Einstellungen speichern durch Been<strong>de</strong>n mit "With memory".<br />
Abb. 1<br />
Z<br />
X<br />
Abb. 1A<br />
a a<br />
b b<br />
b b<br />
c c<br />
Anzeige<br />
(Display)<br />
Y<br />
- Windows neu starten, damit die Än<strong>de</strong>rungen wirksam wer<strong>de</strong>n.<br />
- Restart Windows to make the changes take effect.<br />
Bei <strong>de</strong>n genannten Einstellungen ist darauf zu achten, daß<br />
kein zusätzliches Auflösungs- / Einstellprogramm aktiv ist<br />
(siehe auch z.B. Einstellungen in <strong>de</strong>r Autoexec.bat), da diese<br />
Programme die normalen Einstellungen beeinflussen können.<br />
Be sure that no additional resolution setting programme is<br />
active when making the above mentioned settings (see also<br />
settings in Autoexec.bat for example) because these<br />
programmes may influence the normal settings.<br />
Abb. 2 ST-<strong>VGA</strong> 2<br />
Chassis<br />
Steckerverbindungen:<br />
ST-<strong>VGA</strong>1 –> ST-<strong>VGA</strong>1 Chassis<br />
ST-<strong>VGA</strong>2 –> ST-<strong>VGA</strong>2 Chassis<br />
ST-<strong>VGA</strong>3 –> ST-<strong>VGA</strong>3 Chassis<br />
ST-AV3 –> ST-AV3 Chassis<br />
ST-AV3X –> ST-AV3X Buchsenplatte<br />
ST-V3 –> ST-V3 Chassis<br />
ST-<strong>VGA</strong> 3<br />
Chassis<br />
Jumper<br />
ST-<strong>VGA</strong> 1<br />
Chassis<br />
ST-V 3<br />
Chassis<br />
ST-AV 3X<br />
<strong>VGA</strong><br />
ST-AV 3<br />
Chassis<br />
ST-AV 3X<br />
Buchsenplatte<br />
72010 020 1001 KDZ 0998 VK 22
GB Fitting Instructions<br />
<strong>VGA</strong> Socket Board<br />
<strong>VGA</strong> Socket Board, part no. G.AC 4200<br />
Assembly :<br />
- Disconnect the mains plug and open the TV receiver.<br />
- Undo the 2 screws X at the lower edge of the cover.<br />
- Tilt the cover at its upper edge towards the back to disengage the 2 catches Y (Fig. 1) and pull off the cover towards the<br />
back.<br />
- Break off the socket covers.<br />
- Fit the <strong>VGA</strong> socket board to the cover and fasten it with 2 screws Z.<br />
The two jumpers must be set so that the contacts b are connected (Fig. 1A).<br />
- Connect the leads (Fig. 2).<br />
- Fasten the cover with the screws.<br />
- Fit the rear of the cabinet, connect the computer and connect the tv receiver to the mains.<br />
- Switch on and set the geometry via the DIALOGCENTER menu in AV5 position and store the setting (the geometry setting<br />
for normal reception remains stored separately).<br />
"" –> "OK" –> "SERVICE" –> "OK" –> "Only for the retailer" –> "OK" –> co<strong>de</strong> number "8500" –> "Geometry".<br />
Store the settings by entering "With memory".<br />
Umstellung <strong>de</strong>r Bildschirmauflösung<br />
<strong>de</strong>r Graphikkarte<br />
auf 640x480 Bildpunkte unter<br />
Win 95<br />
1. Anklicken <strong>de</strong>s "Start"-Fel<strong>de</strong>s mit <strong>de</strong>r<br />
linken Maustaste und Auswahl <strong>de</strong>r "System-Steuerung"<br />
unter <strong>de</strong>m Punkt "Einstellungen".<br />
2. Doppel-Klicken mit <strong>de</strong>r linken Maustaste<br />
auf das "Anzeige"-Icon.<br />
Changing the Screen Resolution<br />
of the Graphics Card to<br />
640x480 Pixels with Win 95<br />
1. Click on the "Start" box with the left<br />
mouse button and choose "Systemsteuerung"<br />
(System Control) from the<br />
"Einstellungen" (Settings) menu.<br />
2. Double-click in the "Anzeige" (Display)<br />
icon with the left mouse button.<br />
Fig. 1<br />
X<br />
Fig. 1A<br />
a a<br />
b b<br />
b b<br />
c c<br />
Z<br />
Y<br />
3. Einfach-Klicken (linke Maustaste) auf<br />
<strong>de</strong>n Unterpunkt "Einstellungen".<br />
3. Click (left mouse button) on the "Einstellungen"<br />
(Settings) option.<br />
Fig. 2 ST-<strong>VGA</strong> 2<br />
Chassis<br />
ST-<strong>VGA</strong> 3<br />
Chassis<br />
Jumper<br />
ST-<strong>VGA</strong> 1<br />
Chassis<br />
Plug connections:<br />
ST-<strong>VGA</strong>1 –> ST-<strong>VGA</strong>1 chassis<br />
ST-<strong>VGA</strong>2 –> ST-<strong>VGA</strong>2 chassis<br />
ST-<strong>VGA</strong>3 –> ST-<strong>VGA</strong>3 Chassis<br />
ST-AV3 –> ST-AV3 chassis<br />
ST-AV3X –> ST-AV3X socket board<br />
ST-V3 –> ST-V3 chassis<br />
ST-V 3<br />
Chassis<br />
4. Durch Ziehen <strong>de</strong>s Zeigers mit <strong>de</strong>r gedrückten<br />
linken Maustaste kann die Auflösung<br />
auf die erfor<strong>de</strong>rlichen 640x480 /<br />
16 Farben eingestellt wer<strong>de</strong>n.<br />
4. Hold down the left mouse button and<br />
drag the pointer to the required resolution<br />
of 640x480/16 colours pixels.<br />
ST-AV 3X<br />
<strong>VGA</strong><br />
5. Mit "OK" lassen sich die Verän<strong>de</strong>rungen<br />
abspeichern (gegebenenfalls muß<br />
Windows neu gestartet wer<strong>de</strong>n - siehe<br />
Computermeldung).<br />
5. The new setting can be stored with "OK"<br />
(it may be necessary to restart<br />
Windows<br />
- see message on the computer).<br />
ST-AV 3<br />
Chassis<br />
ST-AV 3X<br />
Socket Board


