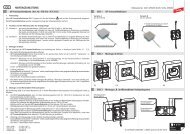
Installation Instructions - DEHN (UK)
Installation Instructions - DEHN (UK)
Installation Instructions - DEHN (UK)

Sie wollen auch ein ePaper? Erhöhen Sie die Reichweite Ihrer Titel.
YUMPU macht aus Druck-PDFs automatisch weboptimierte ePaper, die Google liebt.
Montageanleitung<br />
Dachsparrenhalter<br />
zur Aufnahme:<br />
- einer seitlichen Befestigung eines GFK/AI-Stützrohres 40 mm<br />
(<strong>DEHN</strong>con-H) oder 50 mm (<strong>DEHN</strong>iso-Combi) mit innenverlegter<br />
HVI -Leitung oder HVI light-Leitung<br />
- eines aufgesetzten GFK/AI-Stützrohres für Unterdachverlegung<br />
© COPYRIGHT 2011 <strong>DEHN</strong> + SÖHNE / protected by ISO 16016<br />
Blitzschutz<br />
Überspannungsschutz<br />
Arbeitsschutz<br />
<strong>DEHN</strong> + SÖHNE<br />
GmbH + Co.KG.<br />
Hans-Dehn-Straße 1<br />
Postfach 1640<br />
92306 Neumarkt<br />
Germany<br />
Tel. +49 91 81 / 9 06 - 0<br />
Fax +49 91 81 / 9 06 - 444<br />
www.dehn.de<br />
info@dehn.de<br />
Blitzschutz<br />
Publication No. 1759/DE / UPDATE 08.11 / Id-No. 059294
1. Anwendung / Aufbau<br />
Der Dachsparrenhalter dient zur Aufnahme der seitlichen Befestigung eines GFK/AI-Stützrohres oder<br />
eines GFK/AI-Stützrohres mit innenverlegter HVI ® -Leitung / HVI ® light-Leitung (isolierte Ableitung).<br />
Angewendet wird das System für Getrennte Fangeinrichtung von Sende-/Empfangsanlagen (Parabol-,<br />
terrestrische Antennen) oder z.B. für PV-, solarthermische Anlagen auf Steildächern. Im Auslieferungszustand<br />
ist der Dachsparrenhalter unmontiert (siehe Bild 1).<br />
Stellgelenke<br />
Rohrträger Regenschutzkappe<br />
Grundträger<br />
6 x Holzschraube,<br />
(Torx T40, 8 x120)<br />
Querstrebe<br />
Querstrebe<br />
Bild<br />
1<br />
Auslieferungszustand, Dachsparrenhalter<br />
2. Montage /Dachsparrenhalter<br />
Der Dachsparrenhalter kann nur auf geeignete, tragfähige Unterkonstruktionen montiert werden.<br />
Der Dachsparrenhalter ist für ein eingeleitetes Moment bis 485 Nm konzipiert. Dieses Moment<br />
wirkt entsprechend auf die Unterkonstruktion.<br />
Der Dachsparrenhalter kann nicht bei Aufdachdämmungen und nicht bei Biberschwanz-Dachziegel<br />
eingesetzt werden.<br />
Zur Montage des Dachsparrenhalters werden nachfolgende Werkzeuge benötigt:<br />
- Akku-Schrauber<br />
- Holzbohrer 5 mm<br />
- Bit-Einsatz, Torx T40<br />
- Gabel-/ Ringschlüssel, SW 13 u. SW 17 (2x)<br />
- Kreuzschlitz-Schraubendreher<br />
- Imbus-Schlüssel 4,5 mm<br />
- Wasserwaage<br />
- Zollstock<br />
- ggf. Winkelschleifer<br />
- ggf. Drahtbürste<br />
- Lappen (zum Reinigen der Klebeflächen)<br />
Seite 2<br />
1759_MO_0811_DE_GB_059294
In der nachfolgenden Bildfolge werden die einzelnen Montageschritte aufgezeigt:<br />
Vor der Montage des GFK/AI-Stützrohres, muss der Dachsparrenhalter auf das jeweilige Steildach<br />
montiert werden.<br />
Der Dachsparrenhalter kann bei Steildächern mit einer Dachneigung von 24° bis 53° Grad eingesetzt<br />
werden. Die Abstände der Dachsparren können dabei von 60 bis 75 cm variieren (siehe Bild 2).<br />
Dachsparrenabstand<br />
Bild<br />
2<br />
Dachsparrenhalter<br />
Seite 3<br />
1759_MO_0811_DE_GB_059294
1<br />
Montageschritt<br />
Zuerst wird der Rohrträger an den Grundträger herangeführt und eingesetzt (siehe Bild 3).<br />
Parallel dazu wird die rechte Querstrebe durch die beiden Durchführungen des Grundträgers und<br />
zugleich durch den eingesetzten Rohrträger geschoben.<br />
Alle Arretierungsschrauben müssen dabei aufgeschraubt sein (siehe Bild 3).<br />
Bei der Montage des Halters an den Dachsparren von unten können die Querstreben auch gedreht<br />
werden.<br />
Rohrträger<br />
2<br />
1<br />
2<br />
1<br />
2<br />
1<br />
2<br />
Arretierungsschrauben<br />
M8/<br />
Rohrträger<br />
1<br />
Arretierungsschrauben<br />
M8/<br />
Grundträger<br />
Rechte Querstrebe<br />
Grundträger<br />
Bild<br />
3<br />
Zur lotrechten Einstellung des Rohrträgers stehen zwei verschiedene Stellgelenke (Lochabstand, 57 mm<br />
oder 85 mm) zur Verfügung. Je nach Dachneigung (von 24° bis 53° Grad) muss das jeweilige Stellgelenk<br />
mit einer der vier Bohrungen der Positionshalterung des Grundträgers verschraubt werden.<br />
Das andere Ende des Stellgelenkes wird mit der am Rohrträger angebrachten Gleitführung (Feineinstellung<br />
mittels Langloch) verschraubt (siehe Bild 4).<br />
2 x Stellgelenk<br />
für Dachneigung von<br />
36° - 53°<br />
Zusammenbau Dachsparrenhalter<br />
Stellgelenk<br />
Positionshalterung<br />
Grundträger<br />
2<br />
Verstellbereich von 60 bis 75 cm<br />
1<br />
Rohrträger<br />
Gleitführung<br />
1<br />
1<br />
Arretierungsschrauben/<br />
Rohrträger<br />
für Dachneigung von<br />
24° - 41°<br />
2<br />
2<br />
2<br />
Arretierungsschrauben/<br />
Grundträger<br />
Bild<br />
4<br />
Rohrträger mit Gleitführung<br />
Seite 4<br />
1759_MO_0811_DE_GB_059294
Je nach Gegebenheit des Sparrenabstandes / Konterlattung kann nun eine Vorabeinstellung des Halters<br />
durchgeführt werden. Alle Arretierungsschrauben sollten dabei nur handfest angezogen werden<br />
(siehe Bild 3 und Bild 4, Seite 4 ).<br />
Montageschritt<br />
2<br />
Entsprechend der Voreinstellung (Dachsparrenabstand) wird der Dachsparrenhalter zwischen den<br />
beiden Dachsparren oder der Konterlattung eingesetzt. Die Platzierung hat so zu erfolgen, dass sich<br />
der Dachsparrenhalter (Grundträger) genau in der Mitte Eines der entfernten Dachziegel befindet.<br />
Die richtige Platzierung ist besonders wichtig, da später über den Grundträger der ALU-Dachziegel<br />
passen muss. Zur Vorabbefestigung empfiehlt es sich, die beiden Querstreben mit Schrauben (im<br />
Langloch) am jeweiligen Dachsparren zu befestigen. Nach genauer Platzierung wird der Dachsparrenhalter<br />
mit den restlichen, im Lieferumfang enthaltenen Schrauben (Torx TX40), festgeschraubt (siehe<br />
Bild 5 und Bild 6, Seite 6).<br />
2<br />
Verstellbereich<br />
von<br />
60 bis 75 cm<br />
Vorbohrung der<br />
Konterlattung<br />
Bild<br />
5<br />
Sparrenabstand mit Konterlattung<br />
Hinweis:<br />
Bei Dachsparren mit Konterlattung empfiehlt es sich an der jeweiligen Konterlattung vorzubohren,<br />
damit beim Festschrauben der Querstreben keine Beschädigungen (Risse, Brüche) an der Konterlattung<br />
entstehen (siehe Bild 5).<br />
Seite 5<br />
1759_MO_0811_DE_GB_059294
Zur horizontalen Ausrichtung kann der Grundträger je nach Bedarf nach links oder rechts verschoben<br />
werden. Der Grundträger muss sich auf jedem Fall in der Mitte des darunter und darüber liegenden<br />
Dachziegels befinden. Nach genauer Platzierung müssen nun die vier Arretierungsschrauben mit 10<br />
Nm festgeschraubt werden (siehe Bild 6).<br />
Ausrichten und Festschrauben des Rohrträgers siehe Montageschritt 3, Seite 12<br />
2<br />
Grundträger<br />
3<br />
3<br />
6 x Holzschraube,<br />
(Torx T40, 8 x120)<br />
2<br />
2<br />
1<br />
2<br />
2<br />
1<br />
Arretierungsschrauben<br />
M8/<br />
Grundträger<br />
Arretierungsschrauben<br />
M8/<br />
Rohrträger<br />
Anzugsdrehmoment für<br />
M8-Schrauben = 10 Nm!<br />
Bild<br />
6<br />
Seite 6<br />
1759_MO_0811_DE_GB_059294
2. Anschluss / Montage der HVI -Leitung<br />
Mit dem Dachsparrenhalter können zwei verschiedene Aufbauvarianten realisiert werden:<br />
Aufbauvariante 1<br />
Bei dieser Aufbauvariante wird die HVI -Leitung/<br />
HVI light-Leitung im Stützrohr (Länge 3,2 m mit<br />
Fangspitze) oder <strong>DEHN</strong>con-H oberhalb der Dachziegeleindeckung<br />
verlegt und über die Außenwand<br />
zur Erdungsanlage geführt (siehe auch Bild 16,<br />
Seite 15).<br />
Vor der Montage des Stützrohres an den Dachsparrenhalter<br />
muss zuerst die vorkonfektionierte<br />
HVI -Leitung / HVI light-Leitung durch das<br />
Stützrohr geführt werden (siehe Bild 7).<br />
Beispielhaft sind die nachfolgenden Montageschritte:<br />
- HVI light-Leitung so einführen (evtl. leicht<br />
drehen) dass der Gewindeanschluss (M10) aus<br />
dem Stützrohrkopf herausragt.<br />
- Kontermutter (M10) auf den Gewindebolzen<br />
fest aufschrauben.<br />
- Sechskantverbinder (M10/M10) mit Kontermutter<br />
fest verbinden.<br />
- Fangspitze mit Sechskantverbinder fest<br />
verbinden und kontern (siehe Bild 7).<br />
Fangspitze<br />
L=1000 mm<br />
Sechskantverbinder<br />
Kontermutter<br />
M10<br />
GFK/AI-<br />
Stützrohr<br />
Lieferzustand<br />
Kopfstück<br />
Gewinde M10<br />
HVI <br />
HVI -Leitung<br />
light-Leitung<br />
PA-Element<br />
PA-Leiter<br />
Montagezustand<br />
Anmerkung:<br />
Genauere Angaben können aus der jeweiligen<br />
zugeordneten Montageanleitung entnommen<br />
werden:<br />
- HVI -Leitung siehe Montageanleitung Nr. 1566<br />
- <strong>DEHN</strong>con-H siehe Montageanleitung Nr. 1632<br />
Seite 7<br />
Bild<br />
7<br />
1759_MO_0811_DE_GB_059294
Bevor das Stützrohr an den Rohrträger montiert<br />
werden kann, müssen noch die nachfolgend<br />
beschriebenen Montageschritte durchgeführt<br />
werden:<br />
- ALU-Dachziegel entsprechend der Form der<br />
Dacheindeckung (Dachziegel) vorformen<br />
- ALU-Dachziegel über den Rohrträger stülpen<br />
- Gummitülle an den Rohrträger anpassen<br />
bzw. entsprechend dem Durchmesser des<br />
Rohrträgers zuschneiden<br />
- Gummitülle über den Rohrträger stülpen<br />
- Regenschutzkappe auf den Rohrträger<br />
stülpen<br />
- Dichtband anbringen (siehe Bild 8).<br />
Regenschutzkappe<br />
Dichtband<br />
Gummitülle zuschneiden<br />
ALU-Dachziegel<br />
Rohrträger<br />
ALU-Dachziegel<br />
Rohrträger<br />
Dichtband<br />
Bild<br />
8<br />
Seite 8<br />
1759_MO_0811_DE_GB_059294
- 2 Stück Geländerbefestigung, (Art.-Nr. 105 354, Klemmbereich Stützrohr<br />
40 - 50 mm) mit max. möglichen Abstand an den Rohrträger anschrauben.<br />
Anzugsdrehmoment 10 Nm beachten!<br />
- Stützrohr mittels den beiden Geländerbefestigungen am Rohrträger<br />
anschrauben (siehe Bild 9).<br />
Erdung<br />
Der innenliegende Endverschluss ist<br />
mit einem PA-Leiter ausgestattet.<br />
Dieser wird direkt an eine Bandrohrschelle<br />
Art.-Nr. 540 100 oder Art.-Nr.<br />
540 103 an den Rohrträger angeschlossen.<br />
Gegebenenfalls kann diese<br />
Leitung gekürzt werden.<br />
Der Erdungsanschluss (Klemme) am<br />
Dachsparrenhalter dient zugleich für<br />
den direkten Anschluss an den<br />
Potentialausgleich (mind 6 mm 2 Cu).<br />
(siehe Bild 9 mit Detailbild).<br />
GFK/AL-Stützrohr<br />
Rohrträger<br />
2 x Geländerbefestigung<br />
Bandrohrschelle<br />
Detailbild<br />
PA-Leiter<br />
Potentialausgleich,<br />
(Klemme, Erdungsanschluss)<br />
Bild<br />
9<br />
Seite 9<br />
1759_MO_0811_DE_GB_059294
Aufbauvariante 2<br />
Bei dieser Aufbauvariante wird die HVI -Leitung<br />
/HVI light-Leitung unterhalb der Dachziegeleindeckung<br />
verlegt und z.B. unten durch das<br />
Lüftungsgitter der Dachschalung herausgeführt.<br />
Die zweite wasserführende Schicht (Dachunterspannbahnen)<br />
darf dabei nicht beschädigt werden<br />
(siehe Bild 10 und Bild 17, Seite 16).<br />
Vor der Montage des Stützrohres auf den Dachsparrenhalter<br />
muss die vorkonfektionierte<br />
HVI -Leitung zuerst durch den Dachsparrenhalter<br />
/Rohrträger geführt werden (siehe<br />
Bild 10).<br />
Dichtband<br />
Gummitülle zuschneiden<br />
ALU-Dachziegel<br />
Rohrträger<br />
Hinweis:<br />
Zum leichteren Einführen der HVI -Leitung<br />
kann der Rohrträger gekippt werden.<br />
(siehe auch Montageschritt 3, Bild 12, Seite 12).<br />
Die nachfolgend beschriebene Vorgehensweise<br />
ist zu beachten:<br />
- ALU-Dachziegel entsprechend der Form der<br />
Dacheindeckung (Dachziegel) vorformen<br />
- ALU-Dachziegel über den Rohrträger stülpen<br />
- Gummitülle an den Rohrträger anpassen<br />
bzw. entsprechend dem Durchmesser des<br />
Rohrträgers zuschneiden<br />
- Gummitülle über den Rohrträger stülpen<br />
- HVI -Leitung in den Rohrträger<br />
einführen<br />
Kopfstück Gewinde M10<br />
HVI -Leitung /<br />
HVI light-Leitung<br />
PA-Element<br />
Bild<br />
10<br />
Seite 10<br />
1759_MO_0811_DE_GB_059294
- HVI -Leitung durch das Stützrohr<br />
bis zum Anschlag der innenliegenden<br />
Buchse führen.<br />
Die Arretierungsschraube M8 vom<br />
Stützrohr muss dabei aufgeschraubt<br />
sein.<br />
- Fangstange in das Stützrohr einführen<br />
und mit Kopfstück der<br />
HVI-Leitung verschrauben.<br />
- seitliche Arretierungsschraube M8<br />
(10 Nm) festschrauben.<br />
- Stützrohr auf den Rohrträger<br />
aufsetzen und mittels den acht<br />
Madenschrauben (Gewindestifte<br />
mit Innensechskant, 10 Nm)<br />
anschrauben.<br />
- Dichtband anbringen<br />
HVI-Anschluss<br />
Arretierungsschraube<br />
M8<br />
Stützrohr<br />
Kopfstück<br />
Gewinde M10<br />
Fangstange 16/10 mm<br />
Erdung<br />
Der innenliegende Endverschluss ist mit<br />
einem PA-Leiter ausgestattet. Dieser wird<br />
direkt an eine Bandrohrschelle Art.-Nr.<br />
540 100 oder Art.-Nr. 540 103 an den<br />
Rohrträger angeschlossen. Gegebenenfalls<br />
kann diese Leitung gekürzt<br />
werden.<br />
Der Erdungsanschluss (Klemme) am<br />
Dachsparrenhalter dient zugleich für<br />
den direkten Anschluss an den<br />
Potentialausgleich<br />
(mind 6 mm 2 Cu).<br />
(siehe Bild 11 mit<br />
Detailbild).<br />
Detailbild<br />
HVI -Leitung<br />
Stützrohr mit acht<br />
Madenschrauben<br />
Dichtband<br />
Potentialausgleich (Klemme,<br />
Erdungsanschluss)<br />
PA-Leiter<br />
Bild<br />
11<br />
Seite 11<br />
1759_MO_0811_DE_GB_059294
Nachfolgende Komponenten<br />
können für diese Anwendung<br />
entsprechend der Windlastzone<br />
eingesetzt werden<br />
(siehe Tabelle 1).<br />
Art.-Nr. Bezeichnung Länge Windlastzone<br />
819 241 <strong>DEHN</strong>con-H, HVI-light I 3940 mm<br />
II, III und IV<br />
819 242 <strong>DEHN</strong>con-H, HVI-light III II, III und IV<br />
3<br />
819 245 HVI-Leitung I mit Stützrohr II und III<br />
4450 mm<br />
819 246 HVI-Leitung III mit Stützrohr II und III<br />
Tabelle 1<br />
Montageschritt<br />
Im Montageschritt 3 wird mittels einer Wasserwaage die exakte lotrechte Position des Rohrträgers<br />
ermittelt und entsprechend eingestellt.<br />
Dazu müssen die beiden Arretierungsschrauben 2 am Rohrträger sowie die an der Gleitführung des<br />
Rohrträgers 1 gelockert werden. Danach wird die exakte Einstellung mit der Wasserwaage<br />
vorgenommen. Nach der Einstellung müssen die drei Arretierungschrauben wieder festgeschraubt<br />
werden (siehe Bild 12).<br />
1<br />
Rohrträger<br />
Arretierungsschrauben /<br />
Gleiführung, M10, 20 Nm<br />
1<br />
2<br />
2<br />
2<br />
Arretierungsschrauben /<br />
Rohrträger, M8, 10 Nm<br />
Bild<br />
12<br />
Nach der Feinjustierung des Rohrträgers muss der ALU-Dachziegel eingepasst werden.<br />
Dabei sind die nachfolgenden Montagehinweise zu beachten:<br />
1. Vor der Montage des ALU-Dachziegels sind die Oberflächen der benachbarten Dachziegel , an<br />
denen der ALU-Dachziegel aufgeklebt wird zu überprüfen. Die Oberflächen müssen sauber, trocken,<br />
staub-, fett- und moosfrei sein.<br />
2. Den Rohrträger mittig zum Dachziegelverlauf positionieren, so dass der ALU-Dachziegel<br />
spannungsfrei und vollständig flächendeckend den Original-Dachziegel ersetzt.<br />
Der Rohrträger darf an keiner Stelle die Durchführung des ALU-Dachziegels berühren. Es darf weder<br />
Druck noch Zug auf den ALU-Dachziegel einwirken. Im Gegensatz zum Bleiziegel (der nur lose<br />
„schwimmend“ aufgelegt wird) ist der ALU-Dachziegel durch Butylklebestreifen fest mit dem Dach<br />
verbunden.<br />
Seite 12<br />
1759_MO_0811_DE_GB_059294
Durch die mittige Ausrichtung erhält der Rohrträger den notwendigen Raum zum „Schwingen“.<br />
Wird dieser Raum nicht gewährt, kann die dauerhafte Dichtigkeit des ALU-Dachziegels nicht<br />
sichergestellt werden (siehe Bild 13 und Bild 14).<br />
Platzierung,<br />
mittig<br />
Richtig<br />
Platzierung,<br />
unten<br />
Falsch<br />
Platzierung,<br />
oben<br />
Falsch<br />
Bild<br />
13<br />
3. Zur Montage auf den benachbarten Dachziegeln sind die drei Klebeschutzstreifen vom ALU-Dachziegel<br />
zu entfernen. Der ALU-Dachziegel wird nun an die benachbarten Dachziegel fest angedrückt.<br />
Durch die Sonneneinstrahlung vulkanisiert die Klebung des ALU-Dachziegels und verfestigt sich im<br />
Laufe der Zeit noch stärker (siehe Bild 14 und Bild 15, Seite 14).<br />
Anmerkung:<br />
Falls der überklebende Untergrund<br />
nicht ausreichend gereinigt wurde,<br />
haften die Klebestreifen nicht<br />
korrekt. In diesem Fall empfehlen<br />
wir den Einsatz von Ersatzklebestreifen.<br />
Die Gummitülle muss mit<br />
dem Dichtband umwickelt<br />
werden!<br />
Dichtband<br />
Der ALU-Dachziegel muss unterhalb<br />
der darüberliegenden<br />
Dachziegel so eingebördelt<br />
werden, dass kein Regenwasser<br />
(Schlagregen) unterhalb der<br />
Dachbedeckung eindringen<br />
kann.<br />
Ferner muss der ALU-Dachziegel<br />
den seitlich rechten und die<br />
darunterliegenden Dachziegel<br />
noch überdecken.<br />
An diesen Dachziegeln muss der<br />
ALU-Ziegel plan angebördelt<br />
sein (siehe Bild 14 und Bild 15,<br />
Seite 14).<br />
Bild<br />
14<br />
Gummitülle<br />
ALU-Dachziegel<br />
Seite 13<br />
1759_MO_0811_DE_GB_059294
Anmerkung:<br />
Zur besseren Auflage der Dacheindeckung müssen evtl. einzelne Rippen vom jeweiligen überdeckten<br />
Dachziegel vorsichtig entfernt werden.<br />
4. An der oberen Kante des ALU-Dachziegels (Kante ohne Klebeschutzstreifen) ist ein Falz als<br />
Wassersperre zu bilden (siehe Bild 15).<br />
Falz / Wassersperre<br />
Bild<br />
15<br />
Seite 14<br />
1759_MO_0811_DE_GB_059294
Aufbauvariante 1, Leitungsverlegung der HVI -Leitung oberhalb der Dachziegeleindeckung<br />
Die HVI -Leitung wird über die Erdeinführung direkt mit der Erdungsanlage verbunden<br />
(siehe Bild 16).<br />
HVI -Leitung<br />
1<br />
2<br />
Anschluss<br />
Erdeinführung<br />
1<br />
2<br />
Dachleitungshalter mit Strebe<br />
- Art.-Nr. 202 831<br />
- Art.-Nr. 202 830<br />
- Art.-Nr. 202 832<br />
Wandleitungshalter<br />
- Metall<br />
Art.-Nr. 275 120<br />
- Kunststoff<br />
Art.-Nr. 275 220<br />
Bild<br />
16<br />
Verlegung oberhalb der Ziegeleindeckung<br />
Seite 15<br />
1759_MO_0811_DE_GB_059294
Aufbauvariante 2, Leitungsverlegung der HVI -Leitung unterhalb der Dachziegeleindeckung<br />
Die HVI -Leitung wird über die Erdeinführung direkt mit der Erdungsanlage verbunden<br />
(siehe Bild 17).<br />
Konterlattung<br />
Dachsparren<br />
Dachlattung<br />
Biegeradius und evtl.<br />
Feuchtigkeitssperre<br />
beachten<br />
1<br />
Anschluss<br />
Erdeinführung<br />
1<br />
Wandleitungshalter<br />
- Metall<br />
Art.-Nr. 275 120<br />
- Kunststoff<br />
Art.-Nr. 275 220<br />
Bild<br />
17<br />
Verlegung unterhalb der Ziegeleindeckung<br />
Seite 16<br />
1759_MO_0811_DE_GB_059294
<strong>Installation</strong> <strong>Instructions</strong><br />
Rafter Holder<br />
For:<br />
- Attaching the side fixing clamps of a GRP/Al supporting tube (diameter of<br />
40 mm (<strong>DEHN</strong>con-H) or 50 mm (<strong>DEHN</strong>iso Combi)) with integrated HVI<br />
conductor or HVI conductor light to the tube support of the rafter holder<br />
- Installing a GRP/Al supporting tube under the roof<br />
© COPYRIGHT 2011 <strong>DEHN</strong> + SÖHNE / protected by ISO 16016<br />
Lightning Protection<br />
Surge Protection<br />
Safety Equipment<br />
<strong>DEHN</strong> + SÖHNE<br />
GmbH + Co.KG.<br />
Hans-Dehn-Straße 1<br />
Postfach 1640<br />
92306 Neumarkt<br />
Germany<br />
Tel. +49 91 81 / 9 06 - 0<br />
Fax +49 91 81 / 9 06 - 444<br />
www.dehn.de<br />
info@dehn.de<br />
Lightning Protection<br />
Publication No. 1759/GB / UPDATE 06.11 / Id-No. 059294
1. Application / Design<br />
The rafter holder serves to connect the side fixing clamps of a GRP/Al supporting tube or a GRP/Al<br />
supporting tube with integrated HVI conductor / HVI conductor light (insulated down conductor) to<br />
the tube support of the rafter holder. The system is used for isolated air-termination systems of transceivers<br />
(parabolic, terrestrial antennas) or e.g. for photovoltaic or solar thermal systems on gable roofs.<br />
The rafter holder is delivered in an unassembled condition (see Fig. 1).<br />
adjustable hinge<br />
tube support rain protection cap<br />
basic support<br />
6 wood screws<br />
(torx T40, 8 x 120)<br />
cross rod<br />
cross rod<br />
Fig.<br />
1<br />
Rafter holder (as delivered)<br />
2. <strong>Installation</strong> of the rafter holder<br />
Rafter holders can only be installed on a suitable, stable substructure. They are designed for a torque<br />
up to 485 Nm which accordingly acts on the substructure.<br />
Rafter holders must not be used for insulated roofs and plain tiles.<br />
The following tools are required to install a rafter holder:<br />
- Cordless screwdriver<br />
- Wood drill (diameter of 5 mm)<br />
- Bit insert, torx T40<br />
- Open-end/ring spanner, wrench size 13 and 17 (2x)<br />
- Phillips screwdriver<br />
- Allen key (4.5 mm)<br />
- Water level<br />
- Folding rule<br />
- Angle grinder, where necessary<br />
- Wire brush, where necessary<br />
- Cloth (for cleaning the adhesive surfaces)<br />
Page 2<br />
1759_MO_0811_DE_GB_059294
Prior to the actual installation of the GRP/Al supporting tube, the rafter holder has to be installed on<br />
the relevant gable roof.<br />
Rafter holders can be used for gable roofs with a roof inclination from 24° to 53°.<br />
Rafter spacing may vary from 60 to 75 cm (see Fig. 2).<br />
rafter spacing<br />
Fig.<br />
Rafter holder<br />
2<br />
Proceed as follows to install the rafter holder:<br />
Page 3<br />
1759_MO_0811_DE_GB_059294
<strong>Installation</strong> step<br />
1<br />
At first, the tube support is inserted into the basic support (see Fig. 3).<br />
Then, the right cross rod is led through both holes of the basic support and through the inserted tube<br />
support.<br />
All locking screws must be screwed down (see Fig. 3).<br />
The cross rods may also be turned in case the rafter holder is installed from the bottom.<br />
tube support<br />
2<br />
1<br />
M8 locking<br />
screws/tube<br />
support<br />
1<br />
1<br />
2<br />
1<br />
2<br />
2<br />
M8 locking<br />
screws/basic<br />
support<br />
basic support<br />
right cross rod<br />
Fig.<br />
3<br />
Two different adjustable hinges (hole spacing of 57 mm or 85 mm) are available to position the tube<br />
support at a right angle. Depending on the roof inclination (from 24° to 53°) the relevant adjustable<br />
hinge must be screwed into one of the four holes of the position holder of the basic support.<br />
The other end of the adjustable hinge is screwed into the sliding guide of the tube support (fine adjustment<br />
via long hole) (see Fig. 4).<br />
2 adjustable hinges<br />
for roof inclination from<br />
36° - 53°<br />
Assembly of the rafter holder<br />
position holder<br />
adjustable hinge<br />
2<br />
basic support<br />
adjustable range from 60 to 75 cm<br />
1<br />
tube support<br />
sliding guide<br />
1<br />
1<br />
locking screws/<br />
tube support<br />
for roof inclination from<br />
24° - 41°<br />
2<br />
2<br />
2<br />
locking screws/<br />
basic support<br />
Fig.<br />
4<br />
Tube support with sliding guide<br />
Page 4<br />
1759_MO_0811_DE_GB_059294
Depending on the rafter spacing / counter battens, the rafter holder can now be pre-adjusted. All locking<br />
screws should only be tightened by hand (see Fig. 3 and Fig. 4, page 4).<br />
<strong>Installation</strong> step<br />
2<br />
Depending on the pre-adjustment (rafter spacing), the rafter holder is placed in between the two<br />
rafters or the counter battens. The rafter holder must be positioned in such a way that the basic support<br />
of the rafter holder is located exactly in the centre of the removed roof tiles.<br />
The right position is particularly important since the aluminium roof tile will later be fitted over the<br />
basic support. For preliminary fixing it is advisable to fix both cross rods on the relevant rafter by<br />
means of screws (in the long hole). After the rafter holder has been exactly positioned, it is tightened<br />
using the remaining screws delivered with the rafter holder (see Fig. 5 and Fig. 6, page 6).<br />
2<br />
adjustable range<br />
from 60 - 75 mm<br />
pilot holes in<br />
counter battens<br />
Fig.<br />
5<br />
Rafter spacing with counter battens<br />
Note:<br />
For rafters with counter battens it is advisable to drill pilot holes in the relevant counter battens so<br />
that they are not damaged (cracked, broken) when fixing the cross rods (see Fig. 5).<br />
Page 5<br />
1759_MO_0811_DE_GB_059294
For horizontal positioning, the basic support can be shifted to the left or to the right as needed. The<br />
basic support must by all means be located in the centre of the roof tile above or underneath it. After<br />
the rafter holder has been exactly positioned, the four locking screws are tightened with a tightening<br />
torque of 10 Nm (see Fig. 6).<br />
For more detailed information on how to position and tighten the tube support,<br />
see installation step 3, page 12.<br />
3<br />
basic support<br />
3<br />
3<br />
6 wood screws<br />
(torx T40, 8 x 120)<br />
2<br />
2<br />
1<br />
2<br />
2<br />
1<br />
M8 locking<br />
screws/basic<br />
support<br />
M8 locking<br />
screws/tube<br />
support<br />
tightening torque for<br />
M8 screws = 10 Nm<br />
6<br />
Fig.<br />
Page 6<br />
1759_MO_0811_DE_GB_059294
2. Connection / installation of the HVI conductor<br />
The rafter holder allows two different installation options:<br />
<strong>Installation</strong> option 1<br />
The HVI conductor / HVI conductor light in the<br />
supporting tube (3.2 m in length with air-termination<br />
tip) or <strong>DEHN</strong>con-H is installed above the roofing and<br />
routed to the earth-termination system along the<br />
wall (see also Fig. 16, page 15).<br />
Before installing the supporting tube on the rafter<br />
holder, the prewired HVI conductor / HVI <br />
conductor light has to be led through the supporting<br />
tube (see Fig. 7).<br />
Proceed as follows:<br />
- Insert (if required, slightly turn) the HVI <br />
conductor light in such a way that the<br />
threaded head piece (M10) protrudes from the<br />
supporting tube.<br />
- Securely tighten the lock nut (M10) against<br />
the threaded bolt.<br />
- Firmly fix the hexagonal connector (M10/M10)<br />
with the lock nut.<br />
- Firmly connect the air-termination tip to the<br />
hexagonal connector and tighten (see Fig. 7).<br />
air-termination tip<br />
L=1000 mm<br />
hexagonal<br />
connector<br />
M10 lock nut<br />
GRP/Al<br />
supporting tube<br />
as-delivered state<br />
head piece with<br />
M10 thread<br />
HVI conductor<br />
HVI conductor light<br />
PA-Element<br />
equipotential<br />
bonding conductor<br />
installed state<br />
Note:<br />
For more detailed information, please refer to the<br />
relevant installation instructions:<br />
- HVI conductor, see installation instructions<br />
No. 1566<br />
- <strong>DEHN</strong>con-H, see installation instructions<br />
No. 1632<br />
Fig.<br />
7<br />
Page 7<br />
1759_MO_0811_DE_GB_059294
Before mounting the supporting tube to the tube<br />
support, proceed as follows:<br />
- Preform aluminium roof tile according to<br />
the shape of the roofing (roof tiles)<br />
- Put aluminium roof tile over the tube support<br />
- Adjust the rubber sleeve to the tube<br />
support / cut rubber sleeve to size according<br />
to the diameter of the tube support<br />
- Put the rubber sleeve over the tube support<br />
- Place the rain protection cap on the tube<br />
support<br />
- Attach the sealing tape around the tube<br />
support (see Fig. 8).<br />
rain protection cap<br />
sealing tape<br />
cut rubber sleeve to size<br />
aluminium roof tile<br />
tube support<br />
aluminium roof tile<br />
tube support<br />
sealing tape<br />
Fig.<br />
8<br />
Page 8<br />
1759_MO_0811_DE_GB_059294
- Screw 2 rail fixing clamps, Part No. 105 354,<br />
(clamping range of the supporting tube 40 to 50 mm) on the tube support.<br />
Apply a tightening torque of 10 Nm!<br />
- Screw supporting tube on the tube support using the two rail fixing<br />
clamps (see Fig. 9).<br />
Earthing<br />
An equipotential bonding conductor<br />
leads the special integrated sealing<br />
end out of the supporting tube and is<br />
directly connected to the tube support<br />
using a pipe clamp (Part No. 540 100<br />
or 540 103). Where necessary, the<br />
conductor can be cut to length.<br />
The earth connection (clamp) on the<br />
rafter holder also serves as direct<br />
connection to the equipotential<br />
bonding system (min. 6 mm2 Cu) (see<br />
Fig. 9, detail).<br />
Al supporting tube<br />
tube support<br />
2 rail fixing clamps<br />
pipe clamp<br />
detail<br />
equipotential<br />
bonding conductor<br />
equipotential bonding<br />
(clamp, earth connection)<br />
Fig.<br />
9<br />
Page 9<br />
1759_MO_0811_DE_GB_059294
<strong>Installation</strong> option 2<br />
The HVI conductor / HVI conductor light is<br />
installed underneath the roofing and led through<br />
e.g. the ventilation grille of the roofing (see also<br />
Fig. 10 and Fig. 17, page 16). The second<br />
water-bearing layer (sarking membranes) must<br />
not be damaged (see Fig. 10 and Fig. 17, page<br />
16).<br />
Before installing the supporting tube on the rafter<br />
holder, the prewired HVI conductor must be led<br />
through the rafter holder / tube support (see Fig.<br />
10).<br />
sealing tape<br />
cut rubber sleeve to size<br />
aluminium roof tile<br />
tube support<br />
Note:<br />
To facilitate installation, the angle of the tube<br />
support can be adjusted to the roof inclination.<br />
The installation steps are, however, shown in the<br />
installation position (see also installation step 3,<br />
Fig. 12, page 12).<br />
Proceed as follows:<br />
head piece with M10 thread<br />
HVI conducto /<br />
HVI conducto light<br />
PA-Element<br />
- Preform the aluminium roof tile according to<br />
the shape of the roofing (roof tiles)<br />
- Put the aluminium roof tile over the tube<br />
support<br />
- Adjust the rubber sleeve to the tube support /<br />
cut the rubber sleeve to size according to the<br />
diameter of the tube support<br />
- Put the rubber sleeve over the tube support<br />
- Insert HVI conductor into the tube support<br />
Fig.<br />
10<br />
Page 10<br />
1759_MO_0811_DE_GB_059294
- Lead the HVI conductor through<br />
the supporting tube as far as it will<br />
go up to the internal socket. The<br />
M8 locking screw of the supporting<br />
tube must be loosened.<br />
- Insert the air-termination rod into<br />
the supporting tube and tighten.<br />
- Tighten the M8 locking screw (10<br />
Nm).<br />
- Position the supporting tube onto<br />
the tube support and tighten using<br />
the eight headless screws (hexagon<br />
socket screws, 10 Nm)<br />
- Attach the sealing tape around the<br />
tube support<br />
Earthing<br />
An equipotential bonding conductor leads<br />
the special integrated sealing end out of<br />
the supporting tube for connection to the<br />
rafter holder.<br />
It also serves as direct connection to the<br />
the equipotneital bonding system (min. 6<br />
mm 2 Cu). Where necessary, the<br />
conductor can be cut to length<br />
(see Fig. 11, detail)<br />
M8 locking screw<br />
supporting tube<br />
air-termination rod<br />
16/10 mm<br />
head piece with<br />
M10 thread<br />
HVI conductor<br />
supporting tube with<br />
eight headless screws<br />
detail<br />
sealing tape<br />
Fig.<br />
11<br />
equipotential bonding<br />
(clamp, earth connection)<br />
Page 11<br />
equipotential<br />
bonding conductor<br />
1759_MO_0811_DE_GB_059294
The following components can<br />
be used for this purpose<br />
depending on the wind load<br />
zone (see Table 1).<br />
Part No. Item Length Wind load zone<br />
819 241 <strong>DEHN</strong>con-H, HVI light I II, III und IV<br />
3940 mm<br />
819 242 <strong>DEHN</strong>con-H, HVI light III II, III und IV<br />
<strong>Installation</strong> step<br />
3<br />
819 245 HVI conductor I with supporting tube II und III<br />
4450 mm<br />
819 246 HVI-Leitung III mit Stützrohr II und III<br />
Table 1<br />
he exact perpendicular position of the tube support is determined with a water level and adjusted<br />
accordingly. To this end, both locking screws at the tube support and at the sliding guide of the tube<br />
support have to be loosened.<br />
Then, the tube support is exactly positioned with a water level and the three locking screws are firmly<br />
tightened again (see Fig. 12).<br />
tube support<br />
1<br />
M10 locking screws/<br />
sliding guide, 20 Nm<br />
1<br />
2<br />
2<br />
2<br />
M8 locking screws/<br />
tube support, 10 Nm<br />
Fig.<br />
12<br />
After the fine adjustment of the tube support, the aluminium roof tile has to be fitted in place. Observe<br />
the following installation notes:<br />
1. Prior to installation, check the surfaces of the adjoining roof tiles to which the aluminium tile is to<br />
be adhered. These surfaces must be clean, dry as well as free of dust, grease and moss.<br />
2. Position the tube support in the centre of the roofing so that the aluminium roof tile completely<br />
replaces the original roof tile over the entire surface. The tube support must not contact any point<br />
of the hole in the aluminium roof tile.<br />
No pressure or stress must be applied to the aluminium roof tile. Compared with a lead tile (which<br />
is only loosely installed (“floating”)), the aluminium roof tile is firmly attached to the roof by butyl<br />
adhesive strips.<br />
Page 12<br />
1759_MO_0811_DE_GB_059294
Due to its centred position, the tube support has enough space for “swinging”. If this space is not<br />
provided, the aluminium roof tile might be damaged in the course of time (see Fig. 13 and 14).<br />
centred position<br />
correct<br />
bottom<br />
position<br />
incorrect<br />
top<br />
position<br />
incorrect<br />
Fig.<br />
13<br />
3. Remove the three adhesive protection strips from the aluminium roof tile and firmly press it on the<br />
adjoining roof tiles. The adhesive joint of the aluminium roof tile is vulcanised by solar radiation and<br />
will gradually harden (see Fig. 14 and Fig. 15, page 14).<br />
Note:<br />
If the surface to which the<br />
aluminium roof tile is adhered is<br />
not clean enough, the adhesive<br />
strips will not properly stick to the<br />
surface. In this case, it is advisable<br />
to use replacement adhesive<br />
strips.<br />
The sealing tape must<br />
be wrapped around the<br />
rubber sleeve!<br />
sealing tape<br />
The aluminium roof tile must be<br />
flanged underneath the roof tiles<br />
situated above, making it<br />
impossible for rain water (driving<br />
rain) to penetrate underneath the<br />
roofing.<br />
Moreover, the aluminium roof tile<br />
must cover the roof tile on the<br />
right side and the roof tiles<br />
underneath it.<br />
The aluminium roof tile must be<br />
flanged to these roof tiles in a<br />
plane way (see Fig. 14 and Fig. 15,<br />
page 14).<br />
rubber sleeve<br />
aluminium roof tile<br />
Fig.<br />
14<br />
Page 13<br />
1759_MO_0811_DE_GB_059294
Note:<br />
If necessary, individual ribs of the relevant covered roof tile must be carefully removed to better<br />
fit the aluminium tile into the roofing.<br />
4. Establish a seam at the top edge of the aluminium roof tile (edge without adhesive<br />
protection strip) as water barrier (see Fig. 15).<br />
seam / water barrier<br />
Fig.<br />
15<br />
Page 14<br />
1759_MO_0811_DE_GB_059294
<strong>Installation</strong> option 1, HVI conductor installed above the roofing<br />
The HVI -Leitung is directly connected to the earth-termination system via the earth entry<br />
(see Fig. 16).<br />
HVI conductor<br />
1<br />
2<br />
Earth entry<br />
connection<br />
1<br />
2<br />
Roof conductor holder with brace<br />
- Part No. 202 831<br />
- Part No. 202 830<br />
- Part No. 202 832<br />
Wall conductor holder<br />
- Metal<br />
Part No. 275 120<br />
- Plastic<br />
Part No. 275 220<br />
Fig.<br />
16<br />
<strong>Installation</strong> above the roofing<br />
Page 15<br />
1759_MO_0811_DE_GB_059294
<strong>Installation</strong> option 2, HVI conductor installed underneath the roofing<br />
The HVI conductor is directly connected to the earth-termination system via the earth entry (see<br />
Fig. 17).<br />
rafter<br />
counter battens<br />
roof battens<br />
Observe bending radius,<br />
moisture barrier might<br />
be required<br />
1<br />
Earth entry<br />
connection<br />
1<br />
Wall conductor holder<br />
- Metal<br />
Part No. 275 120<br />
- Plastic<br />
Part No. 275 220<br />
Fig.<br />
17<br />
<strong>Installation</strong> underneath the roofing<br />
Page 16<br />
1759_MO_0811_DE_GB_059294