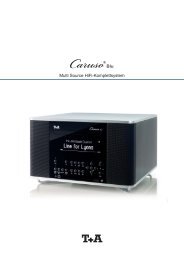
Bedienungsanleitung - T+A Elektroakustik
Bedienungsanleitung - T+A Elektroakustik
Bedienungsanleitung - T+A Elektroakustik

Sie wollen auch ein ePaper? Erhöhen Sie die Reichweite Ihrer Titel.
YUMPU macht aus Druck-PDFs automatisch weboptimierte ePaper, die Google liebt.
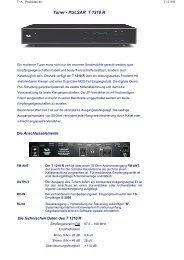
Screen<br />
brightness<br />
USB<br />
operation<br />
mode<br />
System settings<br />
The screen brightness can be adjusted in ten stages to suit your personal<br />
preference; a further option is to switch off the screen completely. The<br />
change in brightness simultaneously affects the screen, the illuminated<br />
symbols and all the source and status LEDs, with one exception: when<br />
screen brightness is set to ‘fully off’, the ‘ON’ LED is not switched off<br />
completely, so that the machine’s operating status is still evident.<br />
This is the procedure for adjusting screen brightness:<br />
• Hold the button pressed in until the message ‘Brgt’<br />
appears on the screen.<br />
• You can now adjust the brightness of the screen using the -<br />
+ buttons, within the range ‘fully off’ to ‘maximum<br />
brightness’.<br />
• Once you have set your preferred brightness, press the <br />
button briefly once more to save the set value.<br />
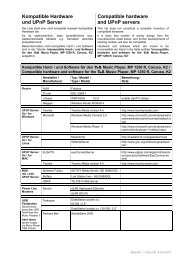
The DAC 8 can be connected to any computer with a USB 1.0 or USB<br />
2.0 interface. The DAC 8 is set up for connection to a USB 1.0 port by<br />
default. If you wish to operate the machine with a USB 2.0 port in USB<br />
Audio Class 2 mode (High-Speed mode, maximum sampling frequency<br />
192 kHz), you must switch the USB mode to USB2.<br />
The procedure for changing the USB mode is as follows:<br />
• Hold the button pressed in until the USB mode is<br />
displayed on the screen, e.g. USB1 for USB 1.0.<br />
• The setting can now be changed using the - + buttons.<br />
• Once you have selected the desired mode of operation, press the<br />
button again briefly to store the setting and quit.<br />
If you wish to make a connection in USB Audio Class 2 mode (to a USB<br />
2.0 port) you must first install the appropriate driver software on your<br />
computer (see section entitled ‘USB driver installation’).<br />
33