Einbauanleitung
Einbauanleitung
Einbauanleitung

Erfolgreiche ePaper selbst erstellen
Machen Sie aus Ihren PDF Publikationen ein blätterbares Flipbook mit unserer einzigartigen Google optimierten e-Paper Software.
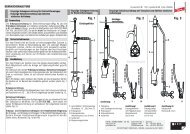
Installation step<br />
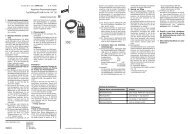
The exact perpendicular position of the air-termination rod/air-termination tip is determined with a<br />
water level and adjusted accordingly.<br />
To this end, the lower locking screw (bushing) is loosened. Then, the air-termination rod/airtermination<br />
tip is exactly aligned with a water level and the locking screw is tightened again with a<br />
tightening torque of 25 Nm (see Fig. 8).<br />
Fig.<br />
8<br />
3<br />
rubber sleeve<br />
aluminium roof tile<br />
10<br />
Detail view<br />
locking screw M10 x 16 mm<br />
for air-termination rod support<br />
25 Nm