LED - Strahler Large - Foliatec
LED - Strahler Large - Foliatec
LED - Strahler Large - Foliatec

Sie wollen auch ein ePaper? Erhöhen Sie die Reichweite Ihrer Titel.
YUMPU macht aus Druck-PDFs automatisch weboptimierte ePaper, die Google liebt.
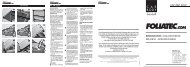
1 Batterie od. Sicherungskasten / Battery or Fuse Box<br />
2 Zwischensicherung / In line fuse<br />
3 Empfohlene Einbauposition eines Ein-/Ausschalters<br />
Recommended installation position of the On/Off switch<br />
Stand 07/11<br />
led<br />
strahler<br />
large<br />
MONAGEANLEITUNG • INSTALLATION INSTRUCTION<br />
led<br />
d o t s<br />
large<br />
FOLIATEC Böhm GmbH & Co Vertriebs KG<br />
Neumeyerstr. 70, 90411 Nürnberg, Germany<br />
Tel.: +49(0)911/97544-0<br />
Fax: +49(0)911/97544-333<br />
techsupport@foliatec.de<br />
www.foliatec.com
DEUTSCH<br />
Warnhinweise:<br />
Um elektrischen Schlägen und Verletzungen bei der Montage vorzubeugen,<br />
unbedingt die Massekabel der Fahrzeugbatterie vor der<br />
Montage abklemmen.<br />
1 a) Ankleben:<br />
Wählen Sie eine geeignete Position aus. Der Untergrund muß fett-<br />
und schmutzfrei sein. Entfernen Sie die Schutzfolie der Klebepads und<br />
drücken Sie die SMD-<strong>Strahler</strong> fest an.<br />
Hinweis:<br />
Klebepads nicht auf Leder, Stoff oder Holz anbringen.<br />
1 b) Anschrauben:<br />
Hebeln Sie das Oberteil des <strong>Strahler</strong>s vorsichtig aus den Haltenasen<br />
der Bodenplatte heraus. Wählen Sie eine geeignete Position und markieren<br />
Sie die Bohrlöcher. Bohren Sie die Löcher mit einem 2.0mm<br />
Bohrer vor und schrauben Sie das Unterteil des <strong>Strahler</strong>s mit mitgelieferten<br />
Blechtreibschrauben an. Clipsen Sie das Oberteil wieder<br />
vorsichtig auf.<br />
2 Verlegen Sie das Stromkabel (schwarz/schwarz (–), schwarz/<br />
weiß (+)). Wichtig: Kabel von Wärmequellen (Heizung etc.) fernhalten.<br />
Restkabellänge beachten, so dass die Kabel spannungsfrei verlegt<br />
sind. (Kabel dürfen nicht durchreissen bzw. scheuern!)<br />
3 Anschluss (Stromversorgung) über Sicherungskasten (Klemme<br />
15/30) oder Fahrzeugbatterie. Wir empfehlen, einen geeigneten<br />
Ein-/Ausschalter zwischenzuschalten (z.B. FOLIA TEC KILL-Switch).<br />
Tipp: Schließen Sie die Buttons über die Innenbeleuchtung<br />
oder den Türöffner an. Bei Fragen hilft Ihnen unsere<br />
Technik-Team gern weiter (Tel. +49/(0)911/975440).<br />
Sicherheitshinweis:<br />
Keine Gewährleistungsansprüche bei Verpolung, unsachmäßem<br />
Einbau, Manipulation der Bauteile etc.. An einer geschützten Stelle<br />
montieren, damit eine Beschädigung durch äußere Einflüsse, z.B.<br />
Fußberührung beim Einsteigen, vermieden wird. SMD-<strong>Strahler</strong> laufend<br />
auf festen Sitz sowie elektrische Verbindungsanschlüsse kontrollieren.<br />
Beachten Sie unbedingt, dass kein Kabel gequetscht oder geknickt<br />
werden darf und vor Ab- bzw. Durchscheuern geschützt wird.<br />
Hinweise:<br />
Die Montage ist im Bereich der StVZO nicht zulässig. Für Bereiche<br />
außerhalb der Bundesrepublik Deutschland: Bitte beachten Sie die<br />
landesspezifischen Zulassungsbedingungen.<br />
Hinweis für den Bereich der StVZO<br />
Für die Innenbeleuchtung ist §30 StVZO anzuwenden. Danach darf<br />
die Innenbeleuchtung die Sicht des Fahrers auf die Instrumente nicht<br />
beeinträchtigen. Dringt Licht nach aussen, so dürfen die vorgeschriebenen<br />
lichttechnischen Einrichtungen und der Begegnungsverkehr<br />
nicht beeinträchtigt werden. Die Innenbeleuchtung ist so anzuordnen,<br />
dass kein direktes Licht nach außen dringen kann. Auf keinen Fall darf<br />
weißes Licht nach hinten abgestrahlt werden.<br />
Blinklicht ist unzulässig.<br />
Nennspannung: 12V<br />
Nennstrom: 15mA, 0,18W<br />
3 SMD pro <strong>Strahler</strong><br />
ENGLISH<br />
Caution:<br />
To avoid electrical shocks and injuries during installation it is essential<br />
to disconnect the ground cable (negative pole) from the battery of<br />
the vehicle.<br />
1 a) Adhesion:<br />
Select a suitable location. The surface must be free of dirt and grease.<br />
Remove the protective foil of the adhesive pads and apply the spots by<br />
pressing firmly.<br />
Please note: Do not attach the adhesive pads to leather, fabric<br />
or wood.<br />
1 b) Fasten with screws:<br />
Carefully lever the upper part of the spotlight from the holding wedges<br />
of the base plate. Select a suitable position and mark the bore holes.<br />
Drill the holes with a 2.0 mm drill bit and screw on the bottom part<br />
of the spotlight with the included Parker screws. Carefully clip on the<br />
upper part.<br />
2 Lay the power supply cable (black/black (-), black/white (+)).<br />
Important: keep the cable away from heat sources (heater etc.). Note<br />
the remaining length of the cable so that the cable is run free of tension.<br />
(The cables should be placed so that they cannot fray or break!)<br />
3 Connection (power supply) over fuse box (terminal 15/30) or<br />
vehicle battery. We recommend interconnecting a suitable On/Off<br />
switch (e.g. FOLIATEC KILL-Switch).<br />
Tip: Connect the lamps via the interior lighting or the<br />
door opener. If you have questions, our Technical-Team<br />
will gladly assist you (Tel. +49 (0)911 975 440).<br />
Safety precautions:<br />
Reverse battery connection, improper installation, manipulation of<br />
components, etc. can constitute a danger and will void any and all<br />
warranty claims. Mount at a protected location so that damages<br />
through external influence such as foot contact when entering the<br />
vehicle are avoided. Check the spotlights to assure a secure fit as well<br />
as the electrical connections on a regular basis. Take special care that<br />
none of the cables are pinched or buckled and are protected from<br />
chafing or breakage.<br />
Note:<br />
The scope of the Federal Motor Vehicle Safety Standards does not<br />
allow installation. For jurisdiction outside of the Federal Republic of<br />
Germany: Please take the country specific vehicle registration codes<br />
into consideration.<br />
Rated voltage: 12V<br />
Rated current: 15mA, 0,18W<br />
3 SMD per spotlight


![DOWNLOAD: Zulassungsbestimmungen [PDF/ 1,5 MB] - Foliatec](https://img.yumpu.com/21056384/1/184x260/download-zulassungsbestimmungen-pdf-15-mb-foliatec.jpg?quality=85)