Trets Anleitung deutsch-englisch Version 1/12 (PDF ... - Hase Bikes
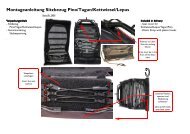
Trets Anleitung deutsch-englisch Version 1/12 (PDF ... - Hase Bikes
Trets Anleitung deutsch-englisch Version 1/12 (PDF ... - Hase Bikes

Sie wollen auch ein ePaper? Erhöhen Sie die Reichweite Ihrer Titel.
YUMPU macht aus Druck-PDFs automatisch weboptimierte ePaper, die Google liebt.
<strong>Trets</strong> Reh 3/<strong>12</strong>a<br />
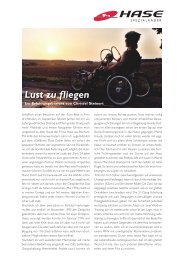
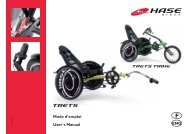
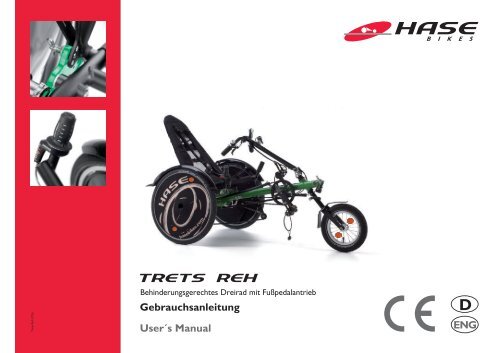
TRETS REH<br />
Behinderungsgerechtes Dreirad mit Fußpedalantrieb<br />
Gebrauchsanleitung<br />
User´s Manual<br />
D<br />
ENG
Rückstrahler<br />
Sitzverstellung<br />
Seat adjustment<br />
Sitz<br />
Seat<br />
Speichenschutzscheiben<br />
mit Reflektorstreifen nach<br />
StVZO §67 Abs.7 und<br />
ECE-Regularien 88<br />
<strong>Trets</strong> Reh 3/<strong>12</strong>a-D-ENG<br />
Reflektoren<br />
Bremsgriffe mit Feststellbremse<br />
Brake levers with parking brake<br />
Schaltriff<br />
Grip shifter<br />
Lenker<br />
Handlebar<br />
Beleuchtung<br />
Headlight<br />
Seriennummer<br />
Serial number<br />
Hauptrahmen<br />
Main frame<br />
Haltegriff<br />
Grip<br />
Längeneinstellung<br />
Length adjust<br />
Vorbau<br />
Front boom<br />
Reflektoren<br />
Gabelschnellausbau<br />
Fork quick release<br />
Fahrradkodierung<br />
Bike coding Pedale mit Haken und Riemen<br />
Pedal with Toe Clips and Straps<br />
Reflektorstreifen
TRETS REH<br />
Inhalt<br />
Optionen und Zubehör .................................. 2<br />
.<br />
Verpacken in einem Karton.................1<br />
Beschreibung .................................................. 3 Wartung und Reparatur..............................<br />
<br />
Was ist <strong>Trets</strong> Reh? ........................................................3 Wartungsintervalle ......................................................1<br />
Verwendungszweck .......................................................3 Rundlauf der Laufräder kontrollieren .....................<br />
Indikation .........................................................................3 Bereifung kontrollieren...............................................<br />
Kontraindikation ............................................................4 Reifen wechseln oder Reifenpanne reparieren .....<br />
Anpassbarkeit an Behinderungen ...............................4 Schutzbleche einstellen...............................................<br />
Wiedereinsatz .................................................................4 Scheibenbremsen kontrollieren................................<br />
Schutz vor Umwelteinflüssen ......................................4 Kette prüfen..................................................................2<br />
Reinigung und Desinfektion .........................................4 Kette reinigen und schmieren...................................2<br />
Berücksichtigte Normen und Richtlinien .................4 Kettenschutzrohr prüfen ...........................................2<br />
Sicherheitshinweise........................................ 5 <strong>Trets</strong> Reh reinigen und desinfizieren.......................2<br />
Gebrauchsanweisung beachten ...................................5 Anhang für Händler ..................................... <br />
Verwendete Symbole und Warnungen .....................5 Technische Daten.......................................................2<br />
Bevor Sie losfahren... .....................................................5 Drehmomenttabelle<br />
Verkehrszulassungsvorschriften beachten ...............5 Technische Daten Zubehörteile...............................24<br />
Kippen und überschlagen .............................................6 Technische Daten Zubehörteile...............................25<br />
.<br />
Bremsen ...........................................................................6 Auspacken und Lieferumfang prüfen.......................2<br />
Geeignete Kleidung und Helm ....................................6 <strong>Trets</strong> Reh montieren ..................................................2<br />
Schnellspanner ................................................................6 Hintere Laufräder demontieren...............................2<br />
Verletzungsgefahr durch rotierende Teile ...............6 Hintere Laufräder montieren....................................2<br />
Quetschgefahr ................................................................7 Nabenschaltung ausbauen ..........................................2<br />
Gefahr der Entflammbarkeit ........................................7 Nabenschaltung einbauen und einstellen................2<br />
Pedale ................................................................................7<br />
Anschnallen .....................................................................7<br />
Ersat <br />
Reh, komplett ....................................................<br />
Sichtbar sein für andere ................................................7<br />
Fahren in der Dunkelheit ............................................7<br />
Technischer Zustand .....................................................7<br />
Verwendung von Sitzkissen .........................................8<br />
Belastung des <strong>Trets</strong> Reh ...............................................8<br />
Seriennummer und Fahrradcodierung ......................8<br />
Anpassen an Körpergröße ............................ 9<br />
Prüfen der Sitzposition .................................................9<br />
Rahmenlänge einstellen.................................................9<br />
Lenkerhöhe- und neigung einstellen .......................10<br />
Bremsgriffe an Handgröße anpassen .......................11<br />
8-Gang Nabenschaltung..............................................<br />
Lenkrohr ........................................................................<br />
Laufradkomponente, links..........................................3<br />
Laufradkomponente, rechts.......................................3<br />
Rahmenschnellverstellung<br />
Halterung für Gehhilfe.................................................36<br />
Einhandbedienung.........................................................36<br />
Kurbelarmverkürzer.....................................................37<br />
Pedalpendel.....................................................................38<br />
Spezialpedale...................................................................39<br />
Spezialpedale mit Wadenhalter..................................40<br />
Sitzneigung einstellen ..................................................11 Abschaltbare Freilaufkassette.....................................41<br />
Sicherheitsgurt anpassen ............................................11 Blinkanlage LED ............................................................42<br />
Rund ums Fahren ......................................... <strong>12</strong> Beinablage einseitig.......................................................43<br />
Ein- und aussteigen ......................................................<strong>12</strong> Schubstange....................................................................44<br />
Fahne anbringen ...........................................................<strong>12</strong><br />
Der richtige Luftdruck ................................................<strong>12</strong><br />
Becken und Hosenträgergurt.....................................45<br />
Schaltung .......................................................................13<br />
Schalten mit Drehgriff .................................................13 Stilllegung und Entsorgung .........................<br />
Bremsen ........................................................................13 <strong>Trets</strong> Reh für längere Zeit stilllegen und<br />
Gepäck anbringen ........................................................1 wieder in Betrieb nehmen ........................................<br />
Schutzblechstrebentaschen<br />
<strong>Trets</strong> Reh entgültig stilllegen und entsorgen .........<br />
<strong>Trets</strong> Reh gegen Wegrollen sichern........................1<br />
Gewährleistung und Garantie-<br />
<strong>Trets</strong> Reh senkrecht parken......................................1<br />
bedingungen<br />
<strong>Trets</strong> Reh transportieren<br />
<strong>Trets</strong> Reh 3/<strong>12</strong>a-D-ENG 1
2<br />
Optionen und Zubehör Options and Accessories<br />
Starrer Antrieb<br />
Schiebestange<br />
<strong>Trets</strong> Reh<br />
Das Dreirad für Kinder mit 8-fach Nabenschaltung<br />
<strong>Trets</strong> Reh<br />
The children’s trike with 8-speed gear hub<br />
Hydraulische Scheibenbremsen (Option)<br />
Hydraulic disc brakes (optional)<br />
Einseitige Beinablage<br />
Rücktrittbremse<br />
back pedal break<br />
Hosenträger-Beckengurt<br />
LED-Blinkanlage<br />
LED blinker system<br />
Gepäcktasche<br />
Luggage Bag<br />
Einhandbedienung<br />
One-hand Controls<br />
Kurbelarmverkürzer<br />
Crank Shortener<br />
Spezialpedale mit Wadenhalter<br />
Special Pedals with Calf Support<br />
Halterung für Gehhilfen<br />
Holder for Walking Sticks<br />
Pedalpendel<br />
Pedal Pendulum<br />
Spezialpedale<br />
Special Pedals
TRETS REH<br />
Beschreibung<br />
Was ist <strong>Trets</strong> Reh?<br />
<strong>Trets</strong> Reh ist ein für Kinder und als medizinisches Gerät<br />
nach der Richtlinie 93/42 EWG zugelassen. Der Antrieb erfolgt über<br />
Beinmuskelkraft auf die Pedale,<br />
die mit einer Sicherung gegen Abrutschen der Füße ausgestattet<br />
sind. Die Kraftübertragung auf ein Hinterrad erfolgt<br />
über eine gekapselte 8-Gang Nabenschaltung. Der gepolsterte<br />
Sitz besitzt durch seine Bauart und Materialwahl eine federnde<br />
Wirkung und bietet höchsten Komfort. Gebremst wird <strong>Trets</strong><br />
Reh von zwei voneinander unabhängigen Scheibenbremsen.<br />
Verwendungszweck<br />
Das Dreirad ist zur Benutzung auf Straßen und befestigten<br />
Wegen bestimmt. Durch einen Umbau seitens eines Fachhändlers<br />
ist das <strong>Trets</strong> Reh auch für besonders kleine Erwachsene<br />
nutzbar.<br />
Das <strong>Trets</strong> Reh ist mit einer Beleuchtungsanlage und Zubehör<br />
nach der <strong>deutsch</strong>en Straßenverkehrs-Zulassungs-Ordnung<br />
ausgestattet.<br />
Kinder unter acht Jahren dürfen in Deutschland das <strong>Trets</strong> Reh<br />
nur unter Aufsicht Erwachsener auf Bürgersteigen benutzen,<br />
auch wenn ein Radweg vorhanden ist. Ab dem zehnten Lebensjahr<br />
dürfen Kinder unter Aufsicht im Straßenverkehr fahren. Zwischen<br />
dem achten und zehnten Lebensjahr ist das Fahren auf Bürgersteigen<br />
und Radwegen erlaubt. Beachten Sie die Vorschriften<br />
in anderen Staaten.<br />
Die Benutzung von <strong>Trets</strong> Reh im Gelände oder zur Wettbewerbszwecken<br />
ist nicht zulässig.<br />
Indikation<br />
Das <strong>Trets</strong> Reh ist für Kinder mit neuromuskulären Erkrankungen<br />
wie Celebralparese oder Muskeldystrophie, die Aufgrund<br />
von Behinderung keinerlei herkömmlichen Kinderfahrräder<br />
oder -Fahrzeuge, auch nicht mit Stützrädern, benutzen<br />
können. Weitere Indikationen sind: Koordinierungsschwierigkeiten,<br />
Balancestörungen, eingeschränkte Bewegungsabläufe<br />
z.B. bei Spastismus, Querschnittslähmung, Dysmelieschädigungen,<br />
Amputationen etc.<br />
Description<br />
What is the <strong>Trets</strong> Reh?<br />
The <strong>Trets</strong> Reh is a recumbent children’s trike and an approved<br />
medical device as per the European Directive 93/42/<br />
EEC (Medical Device Directive). The trike is driven by leg<br />
power via the pedals, which are specially designed to prevent<br />
the feet from slipping out when riding. The transmission is a<br />
fully enclosed 8-speed hub gear system that drives one rear<br />
wheel. The padded seat has been specially designed and constructed<br />
with flexible materials to cushion the ride and offer<br />
maximum comfort. The <strong>Trets</strong> Reh has a reliable brake system<br />
with two independently operated disc brakes.<br />
Intended use<br />
The trike is intended for use on paved roads and paths. It can<br />
also be adapted for use by adults of very short stature. The<br />
required technical adjustments, however, must be performed<br />
by an authorized retailer.<br />
<strong>Bikes</strong> and trikes should not be ridden in traffic unless they<br />
have been equipped with the accessories required by the applicable<br />
traffic regulations of the country in which they are<br />
being used. The <strong>Trets</strong> Reh comes with a lighting system and<br />
all safety features required by the German road traffic regulations<br />
(StVZO). In Germany, children under the age of eight<br />
may only ride the <strong>Trets</strong> Reh on sidewalks under adult supervision,<br />
even if the adjacent road has a bike path. Children ten<br />
years of age and older may ride in road traffic under adult supervision.<br />
Children from eight to ten years of age may ride on<br />
sidewalks and bike paths. Please observe the applicable regulations<br />
in other countries.<br />
The <strong>Trets</strong> Reh is not approved for off-road use or racing.<br />
Indications for use<br />
The <strong>Trets</strong> Reh has been designed for children with neuromuscular<br />
disorders, such as cerebral palsy or muscular dystrophy,<br />
who – owing to special physical conditions – are unable to<br />
ride standard children’s bicycles or vehicles, even with training<br />
wheels. Other indications include coordination disorders, balance<br />
disorders, and restricted movement associated, for example,<br />
with spasticity, paraplegia, dysmelia, amputations, etc.<br />
<strong>Trets</strong> Reh 3/<strong>12</strong>a-D-ENG 3
Beschreibung<br />
Description<br />
Kontraindikation<br />
Das <strong>Trets</strong> Reh ist für Kinder mit Sehstörungen nicht geeignet.<br />
Anpassbarkeit an Behinderungen<br />
Das <strong>Trets</strong> Reh kann mit Zubehörteilen an die jeweilige Behinderung<br />
angepasst werden. Zur Verfügung stehen u. a.: Einhandbedienung,<br />
Kurbelarmverkürzer, Spezialpedalen mit und<br />
ohne Wadenhalter, Pedalpendel, Gehhilfenhalter.<br />
Wiedereinsatz<br />
Bei bestimmungsgemässen Gebrauch ist das <strong>Trets</strong> Reh nach<br />
Kontrolle durch den Fachhandel für den Wiedereinsatz geeignet.<br />
Schutz vor Umwelteinflüssen<br />
Das <strong>Trets</strong> Reh ist auf Grund der verwendeten Materialien<br />
korrosionsgeschützt. Es werden pulverbeschichtete<br />
Aluminium Rahmenteile, Kunststoffe und Edelstahl verwendet.<br />
Reinigung und Desinfektion<br />
Die Handgriffe und der Sitz können mit haushaltsüblichen Reinigungs-<br />
und Desinfektionsmitteln gereinigt bzw. desinfiziert<br />
werden. Details finden Sie im Kapitel „Reinigung und Desinfektion“<br />
auf Seite 23.<br />
Berücksichtigte Normen und Richtlinien<br />
Bei der Konstruktion und Herstellung wurden folgende Richtlinien<br />
und Normen berücksichtigt:<br />
Richtlinie 93/42/EWG über Medizinprodukte<br />
4<br />
<strong>Trets</strong> Reh 3/<strong>12</strong>a-D-ENG<br />
Contraindications<br />
The Trix is not suitable for children with visual impairment.<br />
Adaptability to individual needs<br />
The <strong>Trets</strong> Reh can be equipped to accommodate riders with<br />
various physical impairments. The following are just a few<br />
examples of available accessories: single-hand controls, crank<br />
shorteners, special pedals with or without calf support, pedal<br />
pendulums, and holders for walking sticks.<br />
Multiple users<br />
<strong>Trets</strong> Reh trikes that have been used in accordance with their<br />
intended use can be reused by a new rider after the trike has<br />
undergone an inspection by an authorized retailer.<br />
Protection against environmental influences<br />
The <strong>Trets</strong> Reh is constructed using special materials that protect<br />
it from corrosion: powder-coated aluminum frame parts,<br />
plastics, and stainless steel.<br />
Cleaning and disinfection<br />
The handlebar grips and seat can be cleaned and disinfected<br />
using household cleaning agents and disinfectants. For more<br />
information, see the section “Cleaning and disinfecting your<br />
<strong>Trets</strong> Reh” on page 23.<br />
Applicable standards and regulations<br />
The <strong>Trets</strong> Reh has been designed and manufactured in compliance<br />
with the following regulations and standards:<br />
European Directive 93/42/EEC (Medical Device Directive)
TRETS REH<br />
Sicherheitshinweise<br />
Gebrauchsanweisung beachten<br />
Lesen Sie diese Gebrauchsanweisung sorgfältig und machen<br />
Sie sich mit dem Fahrzeug praktisch vertraut. Beziehen Sie das<br />
Kind mit ein und geben Sie die gelesenen Informationen weiter.<br />
Achten Sie darauf, dass es alle für die Sicherheit wichtigen<br />
Funktionen verstanden hat.<br />
Verwendete Symbole und Warnungen<br />
Achtung!<br />
Dieses Symbol weist auf eine mögliche Gefahr für Leben<br />
und Gesundheit hin, falls entsprechende Handlungsaufforderungen<br />
nicht befolgt werden.<br />
Hinweis:<br />
Dieses Symbol gibt Informationen und Tipps zur Handhabung<br />
und Umgang mit dem Fahrzeug.<br />
Bevor Sie losfahren...<br />
Ihr Fachhändler hat das <strong>Trets</strong> Reh montiert und auf die gewünschte<br />
Körpergröße des Kindes eingestellt. Wenn das<br />
<strong>Trets</strong> Reh für eine andere Person eingestellt werden soll,<br />
lesen Sie im Kapitel: „Anpassen an Körpergröße“, Seite 9. Machen<br />
Sie sich vor der ersten Fahrt zuerst mit dem Fahrzeug<br />
vertraut und erklären Sie dem Kind ausführlich alle relevanten<br />
Funktionen wie Schaltung, Bremsen etc. und machen Sie es<br />
auf eventuelle Risiken und Gefahren aufmerksam. Vor der Benutzung<br />
im Straßenverkehr, empfehlen wir das Verhalten des<br />
Fahrzeugs auf einem ruhigen unbefahrenen Gelände zu testen.<br />
Verkehrszulassungsvorschriften beachten<br />
Das <strong>Trets</strong> Reh ist mit einer Beleuchtungsanlage und Zubehör<br />
nach der <strong>deutsch</strong>en Straßenverkehrs-Zulassungs-Ordnung<br />
ausgestattet und darf nur mit dieser Austattung im Straßenverkehr<br />
benutzt werden. Machen Sie sich mit den Vorschriften<br />
vertraut und lassen Sie sich von ihrem Fachhändler<br />
beraten, bevor Sie Änderungen an der Beleuchtungsanlage<br />
vornehmen.<br />
Beachten Sie, dass die Verkehrszulassungsvorschriften in verschiedenen<br />
Staaten unterschiedlich sind. Deshalb muss das<br />
<strong>Trets</strong> Reh den jeweiligen Vorschriften des Landes entsprechen,<br />
in dem es benutzt wird.<br />
Safety information<br />
Read User’s Manual<br />
Read the User’s Manual carefully and familiarize yourself with<br />
the construction and function of the vehicle in practice. Involve<br />
your child in this process and share with her the information<br />
you have read. Be sure that your child has understood<br />
all safety-related functions.<br />
Symbols used for notes and warnings<br />
Caution!<br />
This symbol indicates that there is a risk to life and<br />
health if the respective instructions are not followed.<br />
Note:<br />
This symbol is used for information and tips on the<br />
handling and use of the vehicle.<br />
Before your first ride...<br />
Your authorized retailer has assembled your new <strong>Trets</strong> Reh<br />
and adjusted it to the specified size requirements of the child.<br />
Please refer to the section “Adjusting your <strong>Trets</strong> Reh” on<br />
page 9 if you need to make adjustments for another rider. Before<br />
the first ride, please take some time to familiarize yourself<br />
with the vehicle; give the child a thorough explanation of<br />
all important functions, such as gear-shifting, braking, etc., and<br />
discuss potential risks and dangers. We recommend letting<br />
the child familiarize himself with the vehicle’s handling in a quiet,<br />
open area away from traffic before riding on public roads.<br />
Observing traffic regulations<br />
The <strong>Trets</strong> Reh comes with a lighting system and all safety<br />
features required by the German road traffic regulations<br />
(StVZO) and may only be used in road traffic with this equipment.<br />
Be sure to study the applicable regulations and consult<br />
your authorized retailer before making any changes to the<br />
lighting system.<br />
Traffic regulations are different in every country. The <strong>Trets</strong><br />
Reh and its equipment must be in compliance with the regulations<br />
of the country in which it is used.<br />
<strong>Trets</strong> Reh 3/<strong>12</strong>a-D-ENG 5
Sicherheitshinweise<br />
Safety information<br />
Kippen und überschlagen<br />
Liegeräder haben einen tiefen Schwerpunkt. Dadurch lassen<br />
sich hohe Kurvengeschwindigkeiten erreichen. Auf Grund der<br />
Fliehkräfte kann das <strong>Trets</strong> Reh jedoch in zu schnell gefahrenen<br />
Kurven aus der Spur hinausgetragen werden oder gar umkippen<br />
und Verletzungen des fahrenden Kindes oder anderer<br />
verursachen. Durch hektische Lenkbewegungen oder Bremsen<br />
in Kurven erhöht sich ebenfalls die Kippneigung. Auch<br />
beim Anhalten auf Steigungen besteht eine besondere Gefahr:<br />
Das <strong>Trets</strong> Reh könnte rückwärts rollen und sich beim plötzlichen<br />
Bremsen rückwärts überschlagen. Machen Sie das zu<br />
fahrende Kind auf diese Gefahren aufmerksam. Ein geeigneter<br />
Fahrradhelm kann vor Kopfverletzungen schützen.<br />
Bremsen<br />
Die Scheibenbremsen des <strong>Trets</strong> Reh sind sehr leistungsfähig<br />
und gut dosierbar. Trotzdem kann es zur Blockierung der Räder<br />
kommen. Das zu fahrende Kind sollte sich vor der ersten<br />
Fahrt im Straßenverkehr mit der Bremskraft durch Bremsproben<br />
auf einem unbefahrenen Gelände vertraut machen.<br />
Geeignete Kleidung und Helm<br />
Der Benutzer von <strong>Trets</strong> Reh sollte eng anliegende Kleidung<br />
tragen, damit sie sich nicht in den Laufrädern oder Antrieb<br />
verfangen kann. Achten Sie auf herunterhängende Bänder<br />
von Jacken oder Schal. Ein Fahrradhelm kann vor Kopfverletzungen<br />
bei eventuellen Stürzen schützen.<br />
Schnellspanner<br />
Prüfen Sie vor jeder Fahrt, ab alle Schnellspanner korrekt<br />
geschlossen sind. Fahren mit nicht korrekt geschlossenen<br />
Schnellspannern kann zu Unfällen mit lebensgefährlichen Verletzungen<br />
führen.<br />
Verletzungsgefahr durch rotierende Teile<br />
Die Laufräder sind mit Speichenschutzscheiben ausgestattet,<br />
die Eingreifen in die Speichen verhindern. Von weiteren rotierenden<br />
Teilen gehen trotzdem Gefahren aus. Der Benutzer<br />
von <strong>Trets</strong> Reh darf nicht in die Scheibenbremsen oder in<br />
den Antrieb greifen. Dieses kann zu gefährlichen Verletzungen<br />
führen. Der Dynamo darf nur im Stand eingeschaltet werden.<br />
Machen Sie den Benutzer von <strong>Trets</strong> Reh auf diese Gefahr aufmerksam.<br />
6<br />
<strong>Trets</strong> Reh 3/<strong>12</strong>a-D-ENG<br />
Tipping and overturning<br />
Recumbent trikes have a low center of gravity. This allows<br />
for cornering at higher speeds. If the rider’s speed is too high,<br />
however, the centrifugal force can cause the <strong>Trets</strong> Reh to<br />
skid or even tip over, which could cause injury to the young<br />
rider or others. The likelihood of tipping over while cornering<br />
is increased by hectic steering movements and braking.<br />
Special care must also be taken when stopping on inclines.<br />
The <strong>Trets</strong> Reh could roll backwards and, if the brakes are applied<br />
abruptly, even overturn. Be sure to discuss this danger<br />
with the young rider. A suitable helmet can protect the rider<br />
from head injury.<br />
Braking<br />
The disc brakes of the <strong>Trets</strong> Reh are very powerful and have<br />
good modulation. However, it is still possible for the wheels to<br />
become locked. Before his first ride in public traffic, the rider<br />
should take time to familiarize himself with the braking force by<br />
test-riding the trike in an open area away from traffic.<br />
Suitable clothing and helmet<br />
The <strong>Trets</strong> Reh rider should never wear loose clothing that<br />
could get caught in the wheels or gears. Beware of scarves<br />
and clothing strings/cords that hang down. A bicycle helmet<br />
can protect the rider from head injury in the case of accidents.<br />
Quick-release mechanisms<br />
Prior to every ride, be sure to check whether all quick-release<br />
mechanisms are securely locked. Riding with loose or<br />
open quick-release mechanisms can lead to accidents with<br />
life-threatening injuries.<br />
Risk of injury from rotating parts<br />
The wheels are equipped with spoke guards that eliminate the<br />
risk of spoke-related injury. However, there are other rotating<br />
parts that pose hazards. The <strong>Trets</strong> Reh rider should be<br />
advised never to touch the disc brakes or gears, which could<br />
cause severe injuries. Never engage the dynamo when the<br />
trike is in motion. Be sure to discuss these dangers with the<br />
<strong>Trets</strong> Reh rider.
TRETS REH<br />
Quetschgefahr<br />
Aufgrund der vielfälltigen Einstellmöglichkeiten des <strong>Trets</strong> Reh<br />
lassen sich Klemmstellen nicht gänzlich vermeiden. Achten Sie<br />
bei der Benutzung und bei allen Einstellungen darauf, dass Sie<br />
ihre Hände und Füße nicht einklemmen. Machen Sie den Benutzer<br />
von <strong>Trets</strong> Reh auf diese Gefahr aufmerksam.<br />
Gefahr der Entflammbarkeit<br />
Der Sitzbezug besteht aus einem entflammbaren Material.<br />
Durch eine offene Flamme, z.B. die eines Feuerzeugs, kann<br />
der Sitzbezug Feuer fangen, was zu schweren Verbrennungen<br />
des Benutzers des <strong>Trets</strong> Reh führen kann. Vermeiden Sie<br />
daher jeglichen Feuergebrauch in der Nähe des Sitzbezugs.<br />
Machen Sie den Benutzer von <strong>Trets</strong> Reh auf diese Gefahr aufmerksam.<br />
Pedale<br />
Durch die liegende Position können die Füße leichter von den<br />
Pedalen rutschen. Benutzen Sie daher immer die vorhandenen<br />
Pedalhaken mit Abrutschsicherung.<br />
Anschnallen<br />
Schnallen Sie Kinder mit dem Dreipunkt-Sicherheitsgurt an.<br />
Damit vermeiden Sie Verletzungen bei starken Bremsungen<br />
oder Unfällen.<br />
Sichtbar sein für andere<br />
Das <strong>Trets</strong> Reh ist ein relativ niedriges Fahrzeug. Deshalb wird<br />
es möglicherweise von anderen Verkehrsteilnehmern schlechter<br />
gesehen. Benutzen Sie immer die mitgelieferte Fahne.<br />
Dieses erhöht die Aufmerksamkeit der anderen Verkehrsteilnehmer.<br />
Fahren in der Dunkelheit<br />
Fahren Sie bei Dunkelheit und in der Dämmerung immer mit<br />
Licht. Überprüfen Sie vor jeder Fahrt die Beleuchtungsanlage<br />
auf eine korrekte Funktion.<br />
Technischer Zustand<br />
Führen Sie vor jeder Fahrt eine Sichtprüfung auf eventuelle<br />
Schäden durch. Lassen Sie das <strong>Trets</strong> Reh regelmäßig von einer<br />
Fachwerkstatt warten. Wartungsintervalle entnehmen Sie Kapitel<br />
„Wartungsintervalle“ Seite 19.<br />
Sicherheitshinweise<br />
Safety information<br />
Crushing hazard<br />
The <strong>Trets</strong> Reh has been designed with numerous adjustment<br />
sites to make it adaptable to many different riders. Therefore,<br />
it was not possible to completely avoid joints that pose<br />
a crushing hazard. To prevent injury, be careful not to get<br />
your hands or feet caught or pinched in the trike’s parts when<br />
riding or adjusting the trike. Be sure to discuss these dangers<br />
with the <strong>Trets</strong> Reh rider.<br />
Risk of flammability<br />
The seat cover is made of a flammable material. If exposed to<br />
an open flame, such as a lighter, the seat cover could catch<br />
fire, which could cause severe burns to the <strong>Trets</strong> Reh rider.<br />
Therefore, avoid any use of fire near the seat cover. Be sure<br />
to Risk of flammabilityfire, which could cause severe burns to<br />
the <strong>Trets</strong> Reh rider. Therefore, avoid any use of fire near the<br />
seat cover. Be sure to Risk of flammability discuss these dangers<br />
with the <strong>Trets</strong> Reh rider.<br />
Pedals<br />
In a recumbent position, it is especially easy for the feet to<br />
slip from the pedals. Therefore, be sure to use the toe clips<br />
and straps (slip protection) that come with the trike.<br />
Safety belt<br />
Secure the child in his seat using the three-point safety belt.<br />
This prevents injury in the case of abrupt braking or accidents.<br />
Being visible for others<br />
The <strong>Trets</strong> Reh is a relatively low vehicle. As a result, the trike<br />
is less visible to other road users. The <strong>Trets</strong> Reh comes with<br />
a safety flag that improves the trike’s visibility to other road<br />
users. Be sure to ride with this flag at all times.<br />
Riding at night<br />
Always use lights when riding at night or in conditions of low<br />
visibility, such as dusk and dawn. Before each ride, be sure to<br />
check whether the lighting system is functioning properly.<br />
Technical condition<br />
Before each trip, be sure to check the condition of the trike<br />
for possible faults or damage. Take the <strong>Trets</strong> Reh to your<br />
bike shop for regular maintenance. The recommended main-<br />
<strong>Trets</strong> Reh 3/<strong>12</strong>a-D-ENG 7
Sicherheitshinweise<br />
Safety information<br />
Belastung des <strong>Trets</strong> Reh<br />
Beachten Sie, dass das zulässige Gesamtgewicht von Fahrzeug,<br />
Fahrer und Gepäck 65 kg nicht überschreiten darf.<br />
Transportieren Sie Gepäck nur auf dem dafür vorgesehenen<br />
Gepäckträger und in den von uns empfohlenen Taschen (Zubehör)<br />
oder Taschen anderer Hersteller.<br />
Seriennummer und Fahrradcodierung<br />
Die Seriennummer finden Sie am Ende des Hauptrahmens<br />
(Bild auf der Innenseite des Umschlags). An dieser Stelle darf<br />
auch eine Fahrradcodierung vorgenommen werden. Diese<br />
hilft nach Diebstahl oder Verlust den Besitzer zu ermitteln.<br />
tenance intervals can be found in the section “Maintenance<br />
intervals” on page 19.<br />
Use only the replacement parts and accessories recommended<br />
by HASE for the <strong>Trets</strong> Reh. Consult your bike shop for<br />
more information.<br />
Use of a seat pad<br />
Please keep in mind that using a seat pad to raise the sitting<br />
position can change the center of gravity and thus also the<br />
handling of the <strong>Trets</strong> Reh. Therefore, before riding in traffic,<br />
the rider should take time to familiarize herself with the handling<br />
of the <strong>Trets</strong> Reh with the seat pad in an open area away<br />
from traffic.<br />
Load carrying capacity of the <strong>Trets</strong> Reh<br />
The maximum permissible combined weight for vehicle, rider,<br />
and luggage is 65 kg (143 lbs). If the <strong>Trets</strong> Reh is used as a<br />
trailer, the respective weight limit is 45 kg (99 lbs). In Germany,<br />
a combined weight of 45 kg (99 lbs) is permissible for<br />
trailers with no overrun brake. Be sure to observe the regulations<br />
that apply in the country of use. All luggage must be<br />
transported on the luggage rack in luggage bags recommended<br />
by HASE (accessories) or in equivalent bags from other manufacturers.<br />
Serial number and bike coding<br />
The serial number can be found on the end of the main frame<br />
(see illustration on the inside cover of this manual). This is the<br />
only place where bike coding can be engraved. Such coding<br />
makes it easier to locate the bicycle owner in the case of theft<br />
or loss.<br />
<strong>Trets</strong> Reh 3/<strong>12</strong>a-D-ENG 8
TRETS REH<br />
Anpassen an Körpergröße<br />
Die richtige Einstellung des <strong>Trets</strong> Reh ist wichtig für das<br />
Wohlbefinden und die Leistungsfähigkeit beim Fahren. Das<br />
<strong>Trets</strong> Reh lässt sich individuell auf die Körpergröße der fahrenden<br />
Person von ca. 1,10 bis 1,50 m Größe einstellen.<br />
Prüfen der Sitzposition<br />
Setzen Sie das Kind auf den Sitz des <strong>Trets</strong> Reh mit den Füßen<br />
auf den Pedalen und mit den Ballen über der Mitte der Pedalachsen.<br />
Wenn sich die Kurbeln in einer Linie mit dem Vorbau<br />
befinden, sollte ein Bein fast ganz ausgestreckt sein (Bild<br />
rechts). Lässt sich dieses Bein nicht ausstrecken oder der Fuß<br />
erreicht nur sehr schwer die Pedale, dann müssen Sie die Länge<br />
neu einstellen. Der Verstellbereich beträgt 26 cm.<br />
Rahmenlänge einstellen<br />
1. Lösen Sie die Innensechskantschraube zwischen Vorbau und<br />
Hauptrahmen (1) mit einem Innensechskantschlüssel 6 mm.<br />
2. Schieben Sie den Vorbau in den Hauptrahmen oder ziehen<br />
Sie den Vorbau aus dem Rahmen heraus.<br />
Hinweis:<br />
Wenn sich der Rahmen nicht mehr weiter zusammenschieben<br />
lässt, prüfen Sie ob das Rohr der Rahmenschnellverstellung<br />
an die Verschraubung stößt.<br />
Achtung!<br />
Der Vorbau darf nur bis zur Markierung, einer Bohrung<br />
auf der Oberseite des Vorbaus, herausgezogen werden.<br />
Diese Bohrung darf nicht sichtbar sein. Wenn sie sichtbar<br />
wird, ist der Vorbau zu weit herausgezogen.<br />
Es drohen Unfallgefahr und Rahmenschaden.<br />
3. Ziehen Sie die Innensechskantschraube (1) leicht an.<br />
4. Prüfen Sie die Sitzposition. Sind noch Änderungen notwendig,<br />
dann wiederholen Sie die Schritte 1 bis 3.<br />
5. Richten Sie die Tretlagerachse parallel zur Fahrbahn aus.<br />
6. Ziehen Sie die Innensechskantschraube (1) zwischen<br />
Vorbau und Hauptrahmen mit einem 6 mm Innensechskantschlüssel<br />
mit <strong>12</strong> Nm fest.<br />
Achtung!<br />
Diese Schraube muss unbedingt mit <strong>12</strong> Nm fest angezogen<br />
werden. Bei Fahrten mit loser Schraube droht<br />
Unfallgefahr und Beschädigung des Rahmens.<br />
STOP<br />
<strong>Trets</strong> Reh 3/<strong>12</strong>a-D-ENG 9<br />
1<br />
Adjusting your <strong>Trets</strong> Reh<br />
The proper adjustment of the <strong>Trets</strong> Reh is important for riding<br />
comfort and performance. The <strong>Trets</strong> Reh can be adjusted to fit<br />
riders between approx. 1.10 and 1.50 m (3’7”- 5’) in height.<br />
Checking the seat position<br />
Have the child sit in the seat of the <strong>Trets</strong> Reh and place her<br />
feet on the pedals with the balls of her feet over the middle<br />
of the pedal axles. When the crank arms are lined up with<br />
the front boom, one leg should be almost straight (see photo,<br />
left). If the leg cannot be straightened or the foot does not<br />
fully reach the pedal, then the length must be readjusted. The<br />
adjustment range is 26 cm (10¼”).<br />
Adjusting the frame length<br />
1. Loosen the Allen bolt between the front boom and the<br />
main frame (1) using a 6mm Allen key.<br />
2. Push the front boom further into the main frame or pull<br />
the front boom further out of the frame.<br />
Note:<br />
If the front boom seems to jam before it reaches the point of<br />
complete insertion, check whether the tube of the quick-adjust<br />
frame assembly is hitting against the screw connection. In this<br />
case, do not try to force the front boom past this point.<br />
Caution!<br />
The front boom cannot be extended past the minimum<br />
insertion mark, which is a small hole located on the top<br />
of the boom. This hole should not be visible. If the hole is<br />
visible, the front boom has been extended past its minimum<br />
insertion length. Riding with an over-extended<br />
boom could cause accidents or damage to the frame.<br />
3. Tighten the Allen bolt (1) lightly.<br />
4. Check the seat position. If further adjustment is required,<br />
repeat steps 1 to 3.<br />
5. Position the bottom bracket axle so that it is parallel to<br />
the surface of the ground.<br />
6. Tighten the Allen bolt (1) between the front boom and<br />
the main frame using a 6mm Allen key and a torque of<br />
<strong>12</strong> Nm (8.9 ft-lbs).<br />
Caution!<br />
It is absolutely necessary to tighten these bolts with a<br />
torque of <strong>12</strong> Nm (8.9 ft-lbs). Riding with loose bolts<br />
poses a high risk of accident and damage to the frame.
Anpassen an Körpergröße<br />
Adjusting your <strong>Trets</strong><br />
7. Passen Sie die Länge des Kettenschutzrohrs der Länge<br />
des Rahmens an, indem Sie das Innenrohr im Außenrohr<br />
verschieben.<br />
Lenkerhöhe- und neigung einstellen<br />
Sie können die Lenkerhöhe anpassen, indem Sie den Lenkervorbau<br />
herauf- oder herabsetzen. Der Winkel lässt sich durch<br />
Neigung des Lenkrohrs und die Griffposition durch Drehung<br />
des Lenkers verändern.<br />
Lenkerhöhe<br />
1. Lösen Sie die Schraube (1) mit einem Innensechskantschlüssel<br />
5 mm.<br />
2. Ziehen Sie den Lenkervorbau heraus, um den Lenker zu<br />
erhöhen oder schieben Sie ihn hinein, für eine niedrigere<br />
Position des Lenkers.<br />
Achtung!<br />
Der Lenkervorbau darf nur bis zur Markierung herausgezogen<br />
werden. Bei Belastung könnte sonst das Lenkerrohr<br />
brechen. Unfallgefahr!<br />
3. Ziehen Sie die Schraube (1) mit einem Innensechskantschlüssel<br />
5 mm fest.<br />
Lenkerneigung<br />
4. Lösen Sie die Mutter (2) mit einem Maulschlüssel 13 mm.<br />
Halten Sie die Schraube mit einem Innensechskantschlüssel<br />
6 mm fest. Neigen Sie das Lenkrohr in die gewünschte<br />
Stellung.<br />
5. Ziehen Sie die Mutter (2) wieder fest.<br />
Griffposition<br />
6. Lösen Sie die beiden Lenker-Klemmschrauben (3) im<br />
Lenkervorbau mit einem Innensechskantschlüssel 5 mm.<br />
7. Drehen Sie den Lenker in die gewünschte Stellung.<br />
8. Ziehen Sie die Beiden Lenker-Klemmschrauben mit einem<br />
Innensechskantschlüssel 5 mm fest.<br />
9. Lösen Sie anschließend die beiden Schrauben der<br />
Bremsgriffe mit einem Innensechskantschlüssel 4 mm und<br />
richten Sie die Bremsgriffe neu aus.<br />
10. Ziehen Sie die beiden Schrauben der Bremsgriffe wieder<br />
fest.<br />
10<br />
1 3<br />
2<br />
7. Adjust the length of the chain tube to the frame length by<br />
sliding the inside tube further into (or out of) the outside<br />
tube.<br />
Adjusting the handlebar height/angle<br />
You can adjust the height of the handlebar by raising or lowering<br />
the handlebar stem. The handlebar angle can be adjusted<br />
by either changing the angle of the handlebar stem or tilting<br />
the handlebar itself.<br />
Height<br />
1. Loosen the bolt (1) using a 5mm Allen key.<br />
2. Reposition the handlebar by sliding the handlebar stem in<br />
or out.<br />
Caution!<br />
Never ride the trike with the handlebar stem extended<br />
beyond the minimum insertion mark. Otherwise, the<br />
steering tube could break under pressure. Major risk of<br />
accident!<br />
3. Tighten the bolt (1) using a 5mm Allen key.<br />
Handlebar angle<br />
4. Loosen the nut (2) with a 13mm open-end wrench. Brace<br />
the bolt using a 6mm Allen key. Adjust the position of the<br />
handlebar stem.<br />
5. Retighten the nut (2).<br />
Position of the grips<br />
6. Loosen the two handlebar clamp bolts (3) in the handlebar<br />
stem using a 5mm Allen key.<br />
7. Tilt the handlebar into the desired position.<br />
8. Retighten the two handlebar clamp bolts using a 5mm Allen<br />
key.<br />
9. Finally, loosen the two bolts of the brake levers using a<br />
4mm Allen key and reposition the brake levers as appropriate.<br />
10. Retighten the two bolts of the brake levers.<br />
<strong>Trets</strong> Reh 3/<strong>12</strong>a-D-ENG
TRETS REH<br />
Bremsgriffe an Handgröße anpassen<br />
1. Drehen Sie die Schraube (1) mit einem Innensechskantschlüssel<br />
2 mm im Uhrzeigersinn, um den Bremsgriff<br />
näher an den Lenkergriff zu bringen. Drehen Sie die<br />
Schraube gegen den Uhrzeigersinn, um den Bremsgriff<br />
vom Lenkergriff zu entfernen.<br />
Sitzneigung einstellen<br />
1. Entriegeln Sie die beiden Arretierungen (2) der Sitzstreben.<br />
2. Neigen Sie den Sitz in die gewünschte Position.<br />
3. Verriegeln Sie die beiden Arretierungen (2) so, dass sie in<br />
einer der drei Bohrungen in beiden Sitzstreben einrasten.<br />
Sicherheitsgurt anpassen<br />
Der Sicherheitsgurt ist in der Höhe und Weite einstellbar.<br />
Stellen Sie den Sicherheitsgurt so ein, dass er eng anliegt, jedoch<br />
nicht einschneidet.<br />
1<br />
Anpassen an Körpergröße<br />
Adjusting your <strong>Trets</strong> Reh<br />
Adjusting the brake levers to hand size<br />
1. To position the brake lever closer to the handlebar grip,<br />
turn the adjusting bolt (1) clockwise using a 2mm Allen<br />
key. To position the brake lever further from the handlebar<br />
grip, turn the bolt counterclockwise.<br />
Adjusting the seat angle<br />
1. Release the two locking mechanisms (2) on the seat stays.<br />
2. Adjust the seat angle to the desired position.<br />
3. Attach the two locking mechanisms (2) so that they engage<br />
in one of the three holes in the seat stays.<br />
Adjusting the safety belt<br />
The safety belt can be adjusted to the dimensions of the rider<br />
(width and height). Adjust the safety belt so that the straps<br />
hold the rider snugly but are not uncomfortably tight.<br />
<strong>Trets</strong> Reh 3/<strong>12</strong>a-D-ENG<br />
11<br />
2
R<br />
<br />
<br />
<br />
1.<br />
TRETS REH<br />
Ziehen Sie das Seil (1) zwischen Lenkervorbau und dem<br />
Steuerlager ein wenig zu sich. Die Arretierung (2) gibt<br />
nach.<br />
2. Schwenken Sie den Lenker zum leichteren Einstieg nach<br />
vorne.<br />
3. Schwenken Sie den Lenker zurück in die Fahrposition.<br />
Er rastet automatisch ein.<br />
Fahne anbringen<br />
Achtung!<br />
Das <strong>Trets</strong> Reh ist ein relativ niedriges Fahrzeug. Deshalb<br />
wird es möglicherweise von anderen Verkehrsteilnehmern<br />
schlechter gesehen. Benutzen Sie immer die mitgelieferte<br />
Fahne. Dieses erhöht die Aufmerksamkeit der anderen<br />
Verkehrsteilnehmer.<br />
Führen Sie die Stange der mitgelieferten Fahne durch die<br />
Schlaufe (3) an der linken Seite der Sitzbespannung (Bei Linksverkehr<br />
an der rechten Seite) und klemmen Sie sie im unteren<br />
Teil der Sitzstrebe (4) fest.<br />
Der richtige Luftdruck<br />
Fahren Sie nur mit dem richtigen Luftdruck. Der Luftdruckbereich<br />
ist auf der Reifenflanke angegeben. Die beiden hinteren<br />
Räder sind mit Speichenschutz abgedeckt. Ziehen Sie das<br />
Klettband auseinander, um an das Ventil zu gelangen.<br />
Achtung!<br />
Der Reifendruck wirkt sich auf das Fahrverhalten und die<br />
Fahrsicherheit des <strong>Trets</strong> Reh aus. Fahren Sie daher immer<br />
mit dem an der Reifenflanke angegebenem Luftdruck.<br />
<strong>Trets</strong> Reh 3/<strong>12</strong>a-D-ENG<br />
2<br />
3<br />
4<br />
1<br />
Riding your <strong>Trets</strong> Reh<br />
Mounting and dismounting<br />
The handlebar stem can be folded forward to allow for easier<br />
mounting and dismounting.<br />
1. Gently pull the wire cable (1) between the stem and the<br />
headset towards you to disengage the locking mechanism (2).<br />
2. Raise the handlebar stem to make additional space for<br />
mounting or dismounting.<br />
3. After you have mounted or dismounted the trike, lower<br />
the handlebar stem and lock it back into place.<br />
Attaching the flag<br />
Caution!<br />
The <strong>Trets</strong> Reh is a relatively low vehicle. As a result, the<br />
trike is less visible to other road users. The <strong>Trets</strong> Reh<br />
comes with a safety flag that improves the trike’s visibility<br />
to other road users. Be sure to ride with this flag at all<br />
times.<br />
Guide the pole of the flag through the loop (3) on the left side<br />
of the seat cover (or on the right side when riding in countries<br />
with left-hand traffic), and secure the end by wedging it<br />
in the lower part of the seat stay (4).<br />
Correct tire pressure<br />
The <strong>Trets</strong> Reh should only be ridden with the correct tire<br />
pressure. The tire pressure range is specified on the tire sidewalls.<br />
The two rear wheels are equipped with spoke guards.<br />
In order to reach the valve, pull apart the Velcro closures.<br />
Caution!<br />
Tire pressure affects the handling and safety of the<br />
<strong>Trets</strong> Reh. Therefore, always ride with the tire pressure<br />
indicated on the side of the tire.
TRETS REH<br />
Schaltung<br />
Die Schaltung ermöglicht die Anpassung der eigenen Leistungsfähigkeit<br />
an die Geländeform und die gewünschte Fahrgeschwindigkeit.<br />
Der Krafteinsatz pro Kurbelumdrehung kann<br />
durch die Wahl eines geeigneten Ganges verringert werden.<br />
So lassen sich steile Berge in einem kleineren Gang wesentlich<br />
leichter befahren als in einem hohen Gang. Der Gang<br />
sollte so gewählt werden, dass die Trittfrequenz mehr als 70<br />
Umdrehungen der Kurbel pro Minute beträgt. So lässt es sich<br />
am kraftsparendsten fahren und die Kniegelenke werden geschont.<br />
Das <strong>Trets</strong> Reh ist serienmäßig mit einer 8-Gang Nabenschaltung<br />
mit Drehgriff ausgestattet. Der Gang lässt sich somit<br />
auch im Stand wechseln.<br />
Hinweis:<br />
Beachten Sie auch die beigefügte Betriebsanleitung des<br />
Schaltungsherstellers.<br />
Achtung!<br />
Machen Sie sich vor der ersten Fahrt im Straßenverkehr<br />
mit der Schaltung auf einem unbefahrenen Gelände<br />
vertraut. Im Straßenverkehr könnte die Einübung des<br />
Schaltens die Aufmerksamkeit vom Straßenverkehr ablenken<br />
und zu lebensgefährlichen Unfällen führen.<br />
Schalten mit Drehgriff<br />
Drehen Sie den Drehgriff (1) am rechten Haltegriff im Uhrzeigersinn,<br />
dann schalten Sie auf höhere Gänge für schnellere<br />
Fahrten um. Drehen Sie den Drehgriff gegen den Uhrzeigersinn,<br />
dann schalten Sie auf niedrigere Gänge für langsameres<br />
Fahren um.<br />
Bremsen<br />
Das <strong>Trets</strong> Reh ist serienmäßig mit mechanischen Scheibenbremsen<br />
ausgestattet. Die Bremsgriffe (2) sind jeweils links<br />
und rechts an den Lenkerenden angebracht. Mit dem linken<br />
Hebel lässt sich das linke Rad und mit dem rechten Hebel das<br />
rechte Rad bremsen.<br />
Achtung!<br />
Die Scheibenbremsen des <strong>Trets</strong> Reh sind sehr leistungsfähig<br />
und gut dosierbar. Trotzdem kann es zur Blockierung<br />
der Räder kommen. Führen Sie mit dem Kind<br />
Bremsproben auf einem unbefahrenem Gelände durch.<br />
1<br />
2<br />
Rund ums Fahren<br />
Riding your <strong>Trets</strong> Reh<br />
Shifting<br />
Shifting gears allows you to adjust pedaling strength to the<br />
terrain and desired speed. The force required per pedal revolution<br />
can be decreased by selecting the appropriate gear. In<br />
this way, it is much easier to ride up a steep hill in a lower<br />
gear than in a high gear. In a lower gear, however, you are<br />
slower and have to pedal faster. High gears are best suited<br />
for riding at higher speeds on flat terrain or riding downhill.<br />
Select a gear that allows you to pedal at more than 70 pedal<br />
revolutions per minute. This cadence is optimal for producing<br />
sustained power and preventing excessive strain on the knee<br />
joints.<br />
In its standard version, the <strong>Trets</strong> Reh is equipped with an<br />
8-speed internal gear hub with twist shifter. The gear hub allows<br />
you to shift gears even when the trike is stationary.<br />
Caution!<br />
Please note the information provided in the enclosed<br />
manual from the gear system manufacturer.<br />
Caution!<br />
Before riding the <strong>Trets</strong> Reh on public roads, the rider<br />
should familiarize herself with gear shifting in an open<br />
area away from traffic. Shifting gears takes practice,<br />
which could distract the rider from navigating road traffic.<br />
Shifting gears with the twist shifter<br />
Turn the twist shifter (1) on the right grip clockwise to shift<br />
to a higher gear for faster riding or counterclockwise to shift<br />
to a lower gear for slower riding.<br />
Brakes<br />
All standard model <strong>Trets</strong> Reh trikes are equipped with mechanical<br />
disc brakes. The brake levers (2) are mounted on<br />
the left and right grips of the handlebar. The left-wheel brake<br />
is controlled with the left brake lever, and the right-wheel<br />
brake, with the right brake lever.<br />
Caution!<br />
The disc brakes of the <strong>Trets</strong> Reh are very powerful and<br />
have good modulation. However, it is still possible for the<br />
wheels to become locked. Before the child’s first ride in<br />
traffic, be sure to have her test-ride the trike in an open<br />
area away from traffic.<br />
<strong>Trets</strong> Reh 3/<strong>12</strong>a-D-ENG<br />
13
14<br />
TRETS REH<br />
Rund ums Fahren<br />
! " # $ %<br />
& ' ( $<br />
' ) )# % *<br />
+ , % - <br />
, ! % $<br />
+ % $ .<br />
/ ) + )<br />
' # 0 ) % $<br />
% * '<br />
0 ' %<br />
+ 1 )<br />
2 3 ) , - $ # 4 $<br />
# ) 1 %<br />
) <br />
5 $ 4 ' ) '<br />
! ' # )<br />
% 3 ( )% ) ' )<br />
, 1 1 $ ' 6 %<br />
' 6<br />
1 7 % * ' 0<br />
% 3 ' & + #<br />
1 # # ) 0 4<br />
5 ' ! #<br />
8 )<br />
8 ) + '<br />
#6 ( 1 %<br />
8 ' $ ! 1 )<br />
- % '<br />
) ) 0 3 )<br />
1 %<br />
8 3 ' ) !! ) $ , !<br />
%<br />
8 . ' , ! %<br />
8 + # ! 1 ) #<br />
) %<br />
8 + +, 9 # ) %<br />
<br />
<strong>Trets</strong> Reh 3/<strong>12</strong>a-D-ENG
Rund ums Fahren<br />
Riding your <strong>Trets</strong> Reh<br />
Gepäck anbringen<br />
Hinter dem Sitz sind Befestigungen (1) für eine Fahrradtasche<br />
angebracht. Sie können daran verschiedene Modelle befestigen.<br />
Wir empfehlen unsere passende <strong>Hase</strong> Gepäcktasche.<br />
Auch andere Taschen mit Hakenbefestigung wie z.B. Ortlieb,<br />
VauDe etc. können Sie anbringen.<br />
Schutzblechstrebentaschen<br />
An den Schutzblechstreben (2) können optional eine oder<br />
zwei weitere Taschen für kleine Gegenstände angebracht<br />
werden. Diese sind für das <strong>Hase</strong> Kettwiesel Trike bemessen,<br />
so dass wegen des geringeren Abstandes zwischen Sitz und<br />
Schutzblechstrebe nicht das gesamte Volumen genutzt werden<br />
kann.<br />
<strong>Trets</strong> Reh gegen Wegrollen sichern<br />
Damit das abgestellte <strong>Trets</strong> Reh auf einem Gefälle nicht wegrollen<br />
kann, ist es mit einer Feststellbremse ausgestattet. Bei<br />
mechanischen Scheibenbremsen befindet sich am linken Lenkergriff<br />
ein Hebel (1).<br />
1. Bewegen Sie den Hebel nach vorne.<br />
2. Die Bremse ist blockiert.<br />
3. Bewegen Sie den Hebel zurück. Die Bremse ist frei.<br />
1<br />
<strong>Trets</strong> Reh 3/<strong>12</strong>a-D-ENG<br />
1<br />
2<br />
1<br />
Transporting luggage<br />
Special mounts (1) for a bicycle bag are located behind the<br />
seat. These mounts are suitable for various models of bags.<br />
We recommend our <strong>Hase</strong> Luggage Bag. Other hook-mounted<br />
bicycle bags, such as Ortlieb or VauDe bags, can also be used.<br />
Fender-stay pouches<br />
One or two additional pouches (optional) can be mounted<br />
to the fender stays (2) for transporting small items. These<br />
pouches have been designed for use with the HASE Kettwiesel<br />
trike; they are also compatible with the <strong>Trets</strong> Reh but cannot<br />
be filled to their full capacity due to the restricted space<br />
between the seat and the fender stays.<br />
Parking brake<br />
The <strong>Trets</strong> Reh is equipped with a parking brake to prevent it<br />
from rolling when parked on a slope. Trikes with mechanical<br />
disc brakes have a lever (1) on the right handlebar grip.<br />
1. Move the lever forward.<br />
2. The brake is now engaged.<br />
3. Move the lever back. The brake is disengaged.
TRETS REH<br />
<strong>Trets</strong> Reh senkrecht parken<br />
Das <strong>Trets</strong> Reh lässt sich senkrecht mit dem Vorderrad nach<br />
oben aufstellen. Es braucht somit weniger Platz zum parken<br />
als ein herkömmliches Fahrrad. Zum Parken wird es vorne<br />
hochgezogen, bis es aufrecht steht.<br />
<strong>Trets</strong> Reh transportieren<br />
Sollte es notwendig sein, das <strong>Trets</strong> Reh Trike im Auto, Zug<br />
oder einem anderen Fahrzeug zu transportieren, dann können<br />
Sie die Gesamtmaße verkürzen (siehe auch Seite 9, Rahmenlänge<br />
einstellen), den Lenker zum Rahmen schwenken, den<br />
Sitz nach Vorne kippen und die Gabel ausbauen.<br />
1. Markieren Sie (z.B. mit einem wasserfesten Filzstift) die<br />
Position des Vorbaus im Hauptrahmen auf der Unterseite<br />
des Rohres. Es erleichtert die ursprüngliche Einstellung<br />
wiederherzustellen.<br />
2. Stellen Sie den Rahmen auf die kürzeste Länge ein. Beschreibung<br />
finden Sie im Kapitel „Rahmenlänge einstellen“<br />
auf Seite 9.<br />
3. Ziehen Sie das Seil (1) zwischen Lenkervorbau und dem<br />
Steuerlager ein wenig in Richtung Sitz. Die Arretierung<br />
gibt nach.<br />
4. Schwenken Sie den Lenker zum Hauptrahmen hin.<br />
5. Lösen Sie die beiden Sitzarretierungen (2) und kippen Sie<br />
den Sitz nach vorne. Rasten Sie den Sitz in der Transportstellung<br />
ein.<br />
6. Lösen Sie den Schnellspanner an der Gabel (4), drücken<br />
Sie den „Snap Button“ (5) und nehmen Sie die Gabel mit<br />
dem Vorderrad heraus.<br />
Achtung!<br />
Schützen Sie empfindliche Teile wie z.B. die Scheibenbremsen<br />
und Kettenspanner vor Beschädigung.<br />
Für einen umfangreicheren Transport im Flugzeug oder mit<br />
einem Transportunternehmen, empfehlen wir das <strong>Trets</strong> Reh<br />
in einem Karton zu verpacken.<br />
4<br />
5<br />
1<br />
Rund ums Fahren<br />
Riding your <strong>Trets</strong> Reh<br />
Parking the <strong>Trets</strong> Reh upright<br />
The <strong>Trets</strong> Reh can be parked upright with the front wheel elevated.<br />
In this position, it requires less space than a standard<br />
bicycle. To park the <strong>Trets</strong> Reh upright, simply lift the front<br />
wheel until the trike balances in this position.<br />
Transporting the <strong>Trets</strong> Reh<br />
If you need to transport the <strong>Trets</strong> Reh by car, train, or other<br />
vehicle, you can make it more compact by reducing the frame<br />
length (see also page 9, “Adjusting the frame length”), folding<br />
the handlebar down and the seat forward, and removing the<br />
fork.<br />
1. Mark (for example, with a permanent marker) the position<br />
of the front boom in the main frame on the bottom<br />
of the tube. This makes it easier to reassemble the trike<br />
with its original dimensions.<br />
2. Adjust the frame to its minimal length. For more information,<br />
see the section “Adjusting the frame length” on page 9.<br />
3. Pull the wire cable (1) between the stem and the head-<br />
set gently towards the seat to disengage the locking<br />
mechanism.<br />
4. Fold the handlebar down against the frame.<br />
5. Release the two locking mechanisms (2) of the seat and<br />
fold the seat forward. Lock the seat in the transport position.<br />
6. Open the quick release on the fork (4), press the “Snap<br />
Button” (5), and remove the fork with the front wheel.<br />
Caution!<br />
Be sure to protect all sensitive parts, such as the disc<br />
brakes and chain tensioner, from damage.<br />
If you are planning to take the <strong>Trets</strong> Reh on an airplane or<br />
have it shipped by a forwarding company, we recommend<br />
packing it in a cardboard box for protection.<br />
<strong>Trets</strong> Reh 3/<strong>12</strong>a-D-ENG<br />
1<br />
2
Rund ums Fahren<br />
Riding your <strong>Trets</strong> Reh<br />
Verpacken in einem Karton<br />
Der Karton sollte die Innenmaße von mindestens 93 cm x<br />
87 cm x 52 cm haben. Reduzieren Sie die Größe und legen Sie<br />
das <strong>Trets</strong> Reh in den Karton und fixieren Sie es gegen Verrutschen<br />
mit Verpackungsmaterial. Schützen Sie alle empfindlichen<br />
Teile gegen Beschädigung.<br />
Bedienung der Lichtanlage<br />
Das <strong>Trets</strong> Reh wird werkseitig mit Vorderlampe<br />
und Rücklicht ausgeliefert. Die Lichtanlage wird<br />
über einen Seitenläuferdynamo am rechten Hinterrad betrieben.<br />
Dynamo einschalten:<br />
Roten Knopf nach unten drücken.<br />
Dynamo ausschalten:<br />
Dymotec vom Reifen wegziehen.<br />
Andruckkraft einstellen:<br />
Die Andruckkraft muss so groß sein, dass die Laufrolle<br />
am Reifen gerade nicht durchrutscht. Das hängt ab von dem<br />
Reifentyp und der Witterung. Flackert das Licht, muss die<br />
Andruckkraft erhöht werden.<br />
Andruckkraft kleiner: Drehknopf von Hand nach links drehen.<br />
Andruckkraft größer: Drehknopf von Hand nach rechts drehen.<br />
1<br />
<strong>Trets</strong> Reh 3/<strong>12</strong>a-D-ENG<br />
Packing the <strong>Trets</strong> Reh in a cardboard box<br />
Use a cardboard box with internal measurements of at least<br />
93 cm x 87 cm x 52 cm (37 x 35 x 21 in). Prepare the <strong>Trets</strong><br />
Reh for transport as described above. Then place it in the<br />
box, and secure it with packing material to prevent movement.<br />
Be sure to protect all sensitive parts from damage.
TRETS REH<br />
Wartung und Reparatur<br />
Wartungsintervalle<br />
Hinweis:<br />
Lassen Sie alle Inspektions- und Wartungsarbeiten von<br />
ihrem <strong>Hase</strong>-Fachhändler durchführen.<br />
Die erste Inspektion erfolgt nach den ersten 300 km. Alle<br />
weiteren im Abstand von 3000 km oder in einem jährlichen<br />
Abstand.<br />
Bauteil Tätigkeit<br />
Vor jeder<br />
Fahrt<br />
Beleuchtung Funktion prüfen X<br />
Bereifung Luftdruck prüfen<br />
Profiltiefe und Seitenflanken prüfen<br />
Bremsen Belagstärke prüfen<br />
Position zur Bremsscheibe prüfen<br />
Bremsprobe durchführen<br />
Bremszüge Auf Beschädigung prüfen X<br />
Dynamobefestigung Auf Festigkeit prüfen X<br />
Kette Auf Verschleiß prüfen<br />
schmieren<br />
X<br />
X<br />
X<br />
Monatlich Jährlich<br />
Kurbelbefestigung Schrauben prüfen X<br />
Laufräder Rundlauf prüfen<br />
Speichenspannung prüfen<br />
Lenker prüfen X<br />
Steuerlager Spiel prüfen X<br />
Naben Spiel prüfen X<br />
Pedale Spiel prüfen X<br />
Schaltzüge Auf Beschädigung prüfen X<br />
Schnellspanner Festigkeit prüfen X<br />
Schrauben und Muttern Festigkeit prüfen X<br />
Tretlager Spiel prüfen X<br />
X<br />
X<br />
X<br />
X<br />
X<br />
X<br />
Component Action<br />
Maintenance and repair<br />
Maintenance intervals<br />
Note:<br />
Please have all inspection and maintenance work performed<br />
by your authorized <strong>Hase</strong> retailer.<br />
The first inspection should be performed after 300 km (200<br />
miles). All additional inspections should be performed in<br />
3000km (2000-mile) intervals or every <strong>12</strong> months.<br />
Lighting Check function X<br />
Tires Check tire pressure<br />
Check tread wear and sidewalls<br />
Brakes Check pad thickness<br />
Check alignment to the brake disc<br />
Test braking effectiveness<br />
Brake cables Check for damage X<br />
Dynamo mounting Check for tightness X<br />
Chain Check for wear<br />
Oil<br />
<strong>Trets</strong> Reh 3/<strong>12</strong>a-D-ENG 1<br />
Before<br />
every<br />
ride<br />
X<br />
X<br />
X<br />
Once a<br />
month<br />
Crank bracket Check bolts X<br />
Wheels Check for lateral/radial true<br />
Check spoke tension<br />
Handlebar Inspect X<br />
Headset Check for play X<br />
Hubs Check for play X<br />
Pedals Check for axle play X<br />
Gear cables Check for damage X<br />
Quick releases Check for tightness X<br />
Bolts and nuts Check for tightness X<br />
Bottom bracket assembly Check for play X<br />
X<br />
X<br />
X<br />
X<br />
X<br />
X<br />
Once a<br />
year
Wartung und Reparatur<br />
Maintenance and repair<br />
Rundlauf der Laufräder kontrollieren<br />
Die Laufräder wurden werkseitig sorgfältig zentriert. Aufgrund<br />
der Belastung setzen sich die Speichen in den Felgensitzen<br />
nach einer ersten Einfahrphase so, dass die Speichenspannung<br />
unterschiedlich sein kann und das Laufrad unrund läuft.<br />
Lassen Sie die Laufräder bei der ersten Inspektion von Ihrer<br />
Fachwerkstatt nach ca. 300 km nachzentrieren. Danach ist<br />
das Nachspannen in der Regel nur noch selten notwendig. Ob<br />
eine Felge rund läuft können Sie feststellen, indem Sie an der<br />
Gabel oder an der Schutzblechstrebe einen Draht befestigen,<br />
der die Felge kaum berührt. Heben Sie das <strong>Trets</strong> Reh und<br />
lassen Sie das Laufrad drehen. Entfernt sich die Felgenflanke<br />
an einigen Stellen mehr von dem Draht oder berührt sie ihn,<br />
dann muss das Laufrad in einer Fachwerkstatt nachzentriert<br />
werden.<br />
Hinweis:<br />
Die Hinterräder brauchen zum Zentrieren nicht ausgebaut<br />
zu werden. Der Speichenschutz muss entfernt<br />
werden.<br />
Bereifung kontrollieren<br />
Überprüfen Sie die Reifen auf Beschädigungen und auf intaktes<br />
Profil. Tauschen Sie poröse oder abgefahrene Reifen aus.<br />
Überprüfen Sie vor jeder Fahrt den Luftdruck und fahren Sie<br />
stets mit dem auf der Reifenflanke angegebenen Luftdruck.<br />
Achtung!<br />
Fahren Sie nie mit einem höheren als dem angegebenen<br />
Luftdruck. Der Reifen könnte platzen. Unfall- und Verletzungsgefahr!<br />
Reifen wechseln oder Reifenpanne reparieren<br />
Das Vorderrad des <strong>Trets</strong> Reh ist mit einem Schnellspanner<br />
befestigt. Lösen Sie diesen, um das Vorderrad auszubauen.<br />
Um die Reifen der Hinterräder zu wechseln oder um eine<br />
Reifenpanne zu reparieren brauchen Sie die Hinterräder nicht<br />
auszubauen. Die Reifen lassen sich im eingebauten Zustand<br />
mit herkömmlichen Reifenhebern de- und montieren. Achten<br />
Sie bei der Reifendemontage und -montage, darauf, dass die<br />
Felgen nicht beschädigt werden und das Felgenband korrekt<br />
auf der Felge liegt. Der Speichenschutz aus flexiblem Material<br />
wird zwischen die Reifenflanke und die Felge geklemmt.<br />
<br />
<br />
<br />
<br />
<br />
<strong>Trets</strong> Reh 3/<strong>12</strong>a-D-ENG<br />
<br />
Checking wheels for lateral/radial true<br />
The wheels have been carefully trued prior to shipment. During<br />
the break-in period, stress on the wheels may cause the<br />
spokes to settle into the rims so that the spoke tension is no<br />
longer uniform and the wheels untrue. Have your wheels retrued<br />
by your authorized retailer at the first inspection after<br />
approx. 300 km (200 miles). Subsequent tensioning is seldom<br />
necessary.<br />
You can check whether a rim is true by attaching a wire to<br />
the fork or fender stay, positioned so that it almost touches<br />
the rim. Then lift the <strong>Trets</strong> Reh, and rotate the wheel. If portions<br />
of the rim move away from or come in contact with the<br />
wire, the wheel must be taken to a qualified bicycle mechanic<br />
for re-truing.<br />
Note:<br />
The rear wheels do not have to be removed for the truing<br />
process. The spoke guards must be removed.<br />
Checking tires<br />
Check the tires for damage and tread wear. Tires with cuts,<br />
cracks, or worn tread should be replaced. Check tire pressure<br />
before each ride and always ride with the pressure specified<br />
on the tire sidewalls.<br />
Caution!<br />
Never ride with excessive tire pressure (higher than<br />
specified on the sidewall). The tire could burst. Risk of<br />
accident and injury!<br />
Changing tires or repairing a flat<br />
The front wheel of the <strong>Trets</strong> Reh is mounted with a quick<br />
release. Simply release it to remove the front wheel. You do<br />
not have to remove the back wheels for changing a tire or<br />
repairing a flat. The tires can be removed and re-mounted<br />
using a standard tire lever with the wheels attached. When<br />
removing and remounting tires, take care not to damage the<br />
fenders, and check that the rim tape is positioned correctly<br />
on the rim. The spoke guards must be clamped between the<br />
tire and the rim.
TRETS REH<br />
Hinweis:<br />
Wenn Sie eine andere als die originale Reifengröße<br />
verwenden, kann es notwendig sein die Schutzbleche und<br />
die Position des Dynamos neu einzustellen.<br />
Schutzbleche einstellen<br />
1. Lösen Sie die beiden Innensechskantschrauben (1) mit<br />
einem Innensechskantschlüssel 5 mm.<br />
2. Verschieben Sie die Schutzblechhalterung im Langloch in<br />
die gewünschte Position, so dass die Schutzbleche nicht an<br />
den Reifen schleifen.<br />
3. Ziehen Sie die beiden Schrauben (1) mit einem Innensechskantschlüssel<br />
5 mm fest.<br />
Scheibenbremsen kontrollieren<br />
Beachten Sie die beigefügte Betriebsanleitung des Bremsenherstellers.<br />
Lassen Sie die Belagstärke regelmäßig von ihrer<br />
Fachwerkstatt kontrollieren. Bei ungewöhnlichen Bremsgeräuschen<br />
oder einer unzureichenden Bremswirkung, wenden<br />
Sie sich unverzüglich an ihre Fachwerkstatt.<br />
Wartung und Reparatur<br />
Maintenance and repair<br />
Note:<br />
If you replace the original tire with a tire of a different<br />
size, it may be necessary to readjust the fenders and the<br />
position of the dynamo.<br />
Adjusting the fenders<br />
1. Loosen the two Allen bolts (1) using a 5mm Allen key.<br />
2. Slide the fender stay in the slot until it reaches the desired<br />
position, ensuring that the fender does not rub against the<br />
tire.<br />
3. Tighten the two bolts (1) using a 5mm Allen key.<br />
Checking disc brakes<br />
Please note the information provided in the enclosed manual<br />
from the brake manufacturer. Have a qualified bicycle mechanic<br />
check the pad thickness regularly. If you notice any unusual<br />
braking sounds or inadequate braking strength, consult<br />
your bicycle mechanic immediately.<br />
<strong>Trets</strong> Reh 3/<strong>12</strong>a-D-ENG <br />
1
Wartung und Reparatur<br />
Maintenance and repair<br />
Kette prüfen<br />
Beim <strong>Trets</strong> Reh wird eine längere Kette als bei einem herkömmlichen<br />
Fahrrad verwendet. Der Verschleiß ist geringer<br />
und somit braucht sie nicht so oft ausgewechselt werden. Den<br />
Zustand können Sie mit einer Kettenverschleißlehre aus dem<br />
Fachhandel überprüfen. Wir empfehlen Ihnen dieses von einer<br />
Fachwerkstatt überprüfen zu lassen und die Kette, eventuell<br />
auch das Kettenblatt und Ritzel wechseln zu lassen.<br />
Die Kette für die längste Einstellung des <strong>Trets</strong> Reh beträgt mit<br />
Verbindungsglied 2336,8 mm. Das entspricht 92 Kettengliedern.<br />
Kette reinigen und schmieren<br />
Damit die Kette ihre maximale Lebensdauer erreicht, muss<br />
sie regelmäßig gereinigt und geschmiert werden.<br />
1. Reinigen Sie die Kette mit einem trockenen und sauberen<br />
Lappen.<br />
Achtung!<br />
Verwenden Sie keine Lösungsmittel und keine Druckreiniger.<br />
Diese könnten die Schmierstoffe aus den Lagern der<br />
Kettenglieder auswaschen und die Lebensdauer der Kette<br />
verkürzen.<br />
2. Tragen Sie gleichmäßig Kettenöl, -fett oder -wachs auf die<br />
Kettenglieder, während Sie die Kurbel drehen.<br />
<br />
Hinweis:<br />
Bei Regenfahrten wird ein Teil des Schmierstoffes<br />
abgewaschen und gelangt somit in die Umwelt. Wir empfehlen<br />
biologisch abbaubare Schmierstoffe.<br />
Achtung!<br />
Der Kettenschmierstoff darf nicht auf die Bremsscheiben<br />
oder Reifen gelangen. Die Bremswirkung könnte beeinträchtigt<br />
werden oder die Räder könnten beim Fahren<br />
wegrutschen.<br />
3. Treten Sie einige Umdrehungen, damit sich der Schmierstoff<br />
verteilen kann.<br />
4. Lassen Sie den Schmierstoff einige Minuten einwirken und<br />
wischen Sie anschließend den überschüssigen Schmierstoff<br />
mit einem sauberen und trockenen Lappen ab.<br />
<strong>Trets</strong> Reh 3/<strong>12</strong>a-D-ENG<br />
Checking the chain<br />
The chain of the <strong>Trets</strong> Reh is longer than that of a standard<br />
upright bicycle. A long chain is generally subject to less wear.<br />
Therefore, it does not have to be changed as often as shorter<br />
chains. You can check the condition of the chain using a chain<br />
wear gauge from a bike shop. We recommend that you have<br />
a qualified bicycle mechanic check the condition of the chain<br />
and, if necessary, replace the chain, and possibly also the<br />
chainring and sprocket.<br />
The chain required for the longest frame adjustment of a<br />
<strong>Trets</strong> Reh is 2336.8 mm (92 in) in length. This is equivalent to<br />
92 chain links.<br />
Cleaning and oiling the chain<br />
In order to ensure that the chain does not wear out before<br />
the end of its maximum working life, it must be cleaned and<br />
oiled on a regular basis.<br />
1. Clean the chain using a clean, dry cloth.<br />
Caution!<br />
Never use solvents or pressure cleaners. These could<br />
wash the lubricants out of the chain bearings and<br />
shorten the life of the chain.<br />
2. Apply chain oil, grease, or wax evenly to the chain links<br />
while slowly rotating the crank.<br />
Note:<br />
Rain can wash off traces of lubricant, releasing it into the<br />
environment. We recommend biodegradable lubricants.<br />
Caution!<br />
Never allow chain lubricant to come in contact with the<br />
brake discs or tires. This could significantly reduce braking<br />
performance or, in the case of lubricant on tires, wheel<br />
traction.<br />
3. Continue rotating the crank to distribute the lubricant.<br />
4. Wait several minutes to allow the lubricant to penetrate.<br />
Then wipe off all excess lubricant using a clean, dry cloth.
TRETS REH<br />
Kettenschutzrohr prüfen<br />
Das Kettenschutzrohr (1) hat die Aufgabe Kleidung vor Kettenschmierstoff<br />
zu schützen. Im Laufe des Gebrauchs verschleißt<br />
dieses Rohr durch Reibung mit der laufenden Kette.<br />
Kontrollieren Sie das Kettenschutzrohr an den Enden auf<br />
Verschleißspuren. Sind die Enden vollständig verschlissen,<br />
lassen Sie das Kettenschutzrohr von ihrer Fachwerkstatt austauschen.<br />
Hinweis:<br />
Für den Austausch des Kettenschutzrohres muss die<br />
Kette am Verbindungsglied getrennt werden.<br />
<strong>Trets</strong> Reh reinigen und desinfizieren<br />
Reinigen Sie das <strong>Trets</strong> Reh regelmässig. Schmutz oder Salz<br />
vom Winterbetrieb könnten Schäden verursachen. Zum Reinigen<br />
benutzen Sie am besten Wasser mit etwas biologisch<br />
abbaubaren Haushaltsreinigungsmittel und einen Schwamm.<br />
Sie können Ihr Dreirad auch mit einem weichen Wasserstrahl<br />
reinigen. Verwenden Sie auf keinen Fall Hochdruckreiniger.<br />
Durch den hohen Druck könnte Wasser in die Lager eindringen<br />
und sie beschädigen. Pflegen Sie anschließend die Kette.<br />
Wischen Sie Oberflächen mit einem feuchten nicht fusselndem<br />
Tuch ab.<br />
Die Handgriffe und den Sitz können Sie mit haushaltsüblichen<br />
Reinigungs- und Desinfektionsmitteln reinigen bzw. desinfizieren.<br />
Verwenden Sie Desinfektionsmittel, die den Kunsstoff<br />
nicht angreifen z.B. auf Aldehyd basierte Desinfektionsmittel.<br />
Wartung und Reparatur<br />
Maintenance and repair<br />
Checking the chain tube<br />
The purpose of the chain tube (1) is to protect the clothing<br />
from chain lubricant. Over time, friction from the moving<br />
chain will cause the tube to wear. Check the ends of the chain<br />
tube for any signs of wear. If the ends are completely worn,<br />
have your bicycle mechanic replace the chain tube.<br />
Note:<br />
In order to replace the chain tube, the chain must be<br />
opened at the connecting link.<br />
Cleaning and disinfecting your <strong>Trets</strong> Reh<br />
Clean your <strong>Trets</strong> Reh regularly. Dirt, as well as salt from<br />
winter roads, can damage the trike. Clean the trike using a<br />
sponge and soapy water (ideally with a biodegradable household<br />
cleaning product). You can also clean your trike using<br />
a gentle stream of water. However, do not use a pressure<br />
washer. The pressurized water can penetrate bearings and<br />
damage them. After cleaning the trike, clean and lubricate the<br />
chain. Wipe all surfaces with a moist, lint-free cloth.<br />
The handlebar grips and seat can be cleaned and disinfected<br />
using household cleaning agents and disinfectants. Only use<br />
disinfectants that do not damage plastic parts, e.g. aldehydebased<br />
disinfectants.<br />
<strong>Trets</strong> Reh 3/<strong>12</strong>a-D-ENG 2
SPECIAL NEEDS<br />
Halterung für Gehhilfe<br />
Verwendung<br />
Für Personen, die eine Gehhilfe mit sich führen.<br />
Merkmale<br />
Die Gehhilfe kann bequem mit einer Hand in einen Köcher<br />
(1) und mit dem Stockhalter (2) gesichert werden.<br />
Montage und Einstellung<br />
Die Halterungen können an Rohre mit einem Durchmesser<br />
von 15 bis 60 mm montiert werden.<br />
1. Legen Sie das Spannband (3) um das Rohr am Fahrzeug,<br />
stecken Sie das Ende durch den Schlitz im Spannstück (4),<br />
ziehen Sie es straff und biegen Sie es um. Kürzen Sie das<br />
Spannband auf ca. 10 mm.<br />
2. Stecken Sie den Sockel (5) auf das Spannstück (4).<br />
3. Pressen Sie die Klemmscheibe (6) mit der Verzahnung<br />
durch die Bohrung im Köcher (1) bzw. Stockhalter (2).<br />
4. Stecken Sie den Köcher (1) bzw. Stockhalter (2) mit der<br />
Klemmscheibe (6) auf den Sockel (5) und schrauben Sie<br />
ihn mit der Schraube (7) handfest an.<br />
5. Richten Sie den Köcher (1) bzw. den Stockhalter (2) aus<br />
und schrauben Sie ihn mit der Schraube (7) fest.<br />
Einhandbedienung<br />
Verwendung<br />
Für Schlaganfall- oder halbseitig gelähmte Personen.<br />
Merkmale<br />
Zwei unabhängige Bremssysteme mit zwei Bremsgriffen sind<br />
an einem Lenkerende angebracht. Somit wird Lenken und<br />
Bremsen mit einer Hand möglich. In Deutschland sind zwei<br />
unabhängige Bremssysteme vorgeschrieben.<br />
<strong>Trets</strong> Reh 3/<strong>12</strong>a-D-ENG<br />
1<br />
2<br />
4<br />
6<br />
7<br />
4<br />
2<br />
1<br />
3<br />
5<br />
1<br />
2<br />
3<br />
Holder for Walking Sticks<br />
Intended Application<br />
For people who use a walking aid.<br />
Features<br />
One hand is all the rider needs to place the walking stick in<br />
the cup (1) and fasten it using the stick holder (2).<br />
Assembly and Adjustment<br />
The holders could be mounted to tubes with 15 bis 60 mm in<br />
diameter.<br />
1. Place the strap (3) around the tube, lay the end of the<br />
strap trough the slot of the tension plate (4) and band it.<br />
Cut it 10 mm after the tension plate (4).<br />
2. Put the socket (5) on the tension plate (4).<br />
3. Press the clamp plate (6) through the hole in the cup (1)<br />
or the stick holder (2).<br />
4. Put the cup (1) or the stick holder (2) with the clamp<br />
plate (6) to the the socket (5) and tighten the bolt (7)<br />
lightly.<br />
5. Adjust the cup (1) or the stick holder (2) and tighten the<br />
bolt (9).<br />
One-Hand Controls<br />
Intended Application<br />
For stroke patients or hemiplegics.<br />
Features<br />
Two independent braking systems with separate brake levers<br />
are mounted to a single handlebar end, making it possible to<br />
steer and brake using a single hand. German law requires two<br />
independent braking systems.<br />
3
Kurbelarmverkürzer<br />
Verwendung<br />
Geeignet für Personen mit eingeschränkter Streckung eines<br />
Beins, Personen mit ungleichen Beinlängen, Anpassung an<br />
Beinlänge bei Kindern.<br />
Merkmale<br />
Der Kurbelarmverkürzer verringert den Pedalkreis. Dieser ist<br />
einstellbar. Somit lässt sich die Beweglichkeit der Beine trainieren,<br />
in dem der Pedalkreis almählich vergrößert wird.<br />
Montage und Einstellung<br />
1. Schrauben Sie die Original-Pedale aus dem Kurbelarm.<br />
Im Kurbelarmverkürzer befinden sich zwei Bohrungen für die<br />
Pedale, so dass er universell auf beiden Seiten montiert werden<br />
kann. Beachten Sie: die Bezeichnung: „L“ bedeutet Linksgewinde<br />
und ist für die linke Pedale vorgesehen. Die Bohrung<br />
ohne Bezeichnung ist für die rechte Pedale vorgesehen.<br />
Verwechseln der beiden Bohrungen kann zur Beschädigung<br />
des Kurbelarmverkürzers führen!<br />
2. Schrauben Sie die Pedale („L“: Linksgewinde) in die Bohrung<br />
im Kurbelarmverkürzer.<br />
Achtung!<br />
Falls der Gewindezapfen der Pedale nach dem Einschrauben<br />
aus dem Kurbelarmverkürzer herausragt, dann<br />
setzen Sie eine Unterlegscheibe zwischen die Pedale und<br />
den Kurbelarmverkürzer. Sonst kann der Kurbelarmverkürzer<br />
nicht fest genug montiert werden und die Kurbel<br />
könnte beschädigt werden.<br />
3. Setzen Sie den Kurbelarmverkürzer (1) auf den Kurbelarm<br />
(2) und schrauben Sie ihn mit den beiden Innensechskantschrauben<br />
(3) an die Kurbel handfest an.<br />
<br />
Hinweis:<br />
Soll die Kurbel stark verkürzt werden, dann schrauben Sie<br />
den Kurbelarmverkürzer mit der Pedale nach Innen (A).<br />
Soll die Verkürzung geringer ausfallen, dann drehen Sie den<br />
Kurbelarmverkürzer mit der Pedale nach Außen (B).<br />
Achtung!<br />
Der Kurbelarmverkürzer darf nicht an gebogene, konisch<br />
zulaufende, mit Kunststoff überzogene Kurbeln oder<br />
im gebogenen Bereich der Kurbel montiert werden. Die<br />
Innensechskantschrauben müssen mindestens 5 mm tief<br />
3<br />
A<br />
B<br />
2<br />
1<br />
Crank Shortener<br />
Intended Application<br />
Designed for people with restricted leg mobility or with legs<br />
of different lengths. Can also be used for adjusting the crank<br />
to fit children.<br />
Features<br />
The crank shortener reduces the pedal radius. The pedal radius<br />
is adjustable, allowing the rider to train leg mobility and<br />
increase pedal radius gradually as mobility increases.<br />
Assembly and Adjustment<br />
1. Unscrew the original pedal from the crank arm.<br />
The crank shortener has two threaded holes for the pedals,<br />
making it possible to mount the shortener on either side.<br />
Please pay attention to the markings: “L” stands for left-hand<br />
thread and is intended for the left pedal. The threaded hole<br />
with no marking is intended for use with the right pedal.<br />
Please use the appropriate hole. Mounting errors can<br />
damage the crank shortener!<br />
2. Screw the pedal into the appropriate hole (“L”: left-hand<br />
thread) of the crank shortener.<br />
Caution!<br />
If the end of the threaded pedal stem is protruding from<br />
the crank shortener after the pedal has been screwed<br />
on, then reattach the pedal, using a washer between<br />
the pedal and the crank shortener. Otherwise, the crank<br />
shortener cannot be attached securely enough, and the<br />
crank could become damaged.<br />
3. Place the crank shortener (1) over the crank arm (2) and<br />
tighten the two Allen screws (3) lightly.<br />
Note:<br />
If you intend to shorten the crank significantly, then<br />
mount the crank shortener with the pedal inwards (closer<br />
to the axle) (see A). If you only wish to shorten the crank<br />
by a small amount, mount the shortener with the pedal<br />
outwards (further from the axle) (see B).<br />
Caution!<br />
The crank shortener cannot be mounted to curved,<br />
tapering, or plastic-coated cranks. It also cannot be<br />
mounted in the curved section of the crank. The two Allen<br />
screws must extend at least 5 mm into the rear section<br />
<strong>Trets</strong> Reh 3/<strong>12</strong>a-D-ENG
SPECIAL NEEDS<br />
eingeschraubt werden. Wenn nicht möglich, ersetzen Sie<br />
die mitgelieferten durch längere Schrauben der Festigkeitsklasse<br />
8.8.<br />
4. Verschieben Sie den Kurbelarmverkürzer (1) auf dem<br />
Kurbelarm (2), um eine optimale Position zu finden und<br />
ziehen Sie anschließend die beiden Innensechskantschrauben<br />
(3) fest an.<br />
Pedalpendel<br />
Verwendung<br />
Geeignet für Personen mit eingeschränkter Beugung eines<br />
Beins.<br />
Merkmale<br />
Das Pedalpendel verringert den Pedalkreis, wobei die untere<br />
Position der Pedale erhalten bleibt. Der Pedalkreis ist einstellbar.<br />
Somit lässt sich die Beweglichkeit der Beine trainieren, in<br />
dem der Pedalkreis almählich vergrößert wird.<br />
Montage und Einstellung<br />
1. Schrauben Sie die Original-Pedale aus der Kurbel.<br />
Das Pedalpendel mit der Bezeichnung: „L“ (Linksgewinde)<br />
wird auf der linken Kurbel montiert. Das Pedalpendel mit der<br />
Bezeichnung „R“ (Rechtsgewinde) wird auf der rechten Kurbel<br />
montiert.<br />
Verwechseln der beiden Montageseiten kann zur Beschädigung<br />
des Pedalpendels führen!<br />
2. Setzen Sie das Pedalpendel (1) auf den Kurbelarm (2) und<br />
schrauben Sie es mit den beiden Innensechskantschrauben<br />
(3) an der Kurbel fest.<br />
Achtung!<br />
Das Pedalpendel darf nicht an gebogene, konisch<br />
zulaufende, mit Kunststoff überzogene Kurbeln oder im<br />
gebogenen Bereich der Kurbel montiert werden. Das<br />
Pedalpendel darf nicht beim Treten mit der Fahrbahn<br />
oder Fahrradteilen kollidieren.<br />
3. Schrauben Sie die Pedale („L“: Linksgewinde, „R“: Rechtsgewinde)<br />
in eine der drei Bohrungen im Pedalpendel. Die<br />
äußere Bohrung ergibt einen großen Pedalkreis, die innere<br />
Bohrung einen kleinen Pedalkreis.<br />
<strong>Trets</strong> Reh 3/<strong>12</strong>a-D-ENG<br />
3<br />
4<br />
1<br />
2<br />
of the shortener. If this is not possible, replace the screws<br />
that came with the shortener by longer screws with a<br />
strength rating of 8.8.<br />
4. Slide the crank shortener (1) along the crank arm (2)<br />
to find the optimal position. Then tighten the two Allen<br />
screws (3) securely.<br />
Pedal Pendulum<br />
Intended Application<br />
Designed for people with limited flexibility in one leg.<br />
Features<br />
The pedal pendulum reduces the pedal radius while maintaining<br />
the lower position of the pedal. The pedal radius is adjustable.<br />
This allows the rider to train leg mobility and gradually<br />
increase the pedal radius as mobility increases.<br />
Assembly and Adjustment<br />
1. Unscrew the original pedal from the crank arm.<br />
Please pay attention to the markings: “L” stands for left-hand<br />
thread and is intended for the left crank. The pedal pendulum<br />
with marking “R” is intended for use with the right crank.<br />
Please be sure to use the correct pedal pendulum.<br />
Mounting errors can cause damage to the pedal pendulum!<br />
2. Slide the pedal pendulum (1) onto the crank arm (2) and<br />
tighten the two Allen bolts (3) lightly.<br />
Caution!<br />
The pedal pendulum cannot be mounted to curved,<br />
tapering, or plastic-coated cranks. It also cannot be<br />
mounted in the curved section of the crank. Please<br />
ensure that the pedal pendulum does not collide with the<br />
ground or other bicycle parts when pedaling.<br />
3. Screw the pedal (“L”: left-hand thread, “R”: right-hand<br />
thread ) into one of the three holes in the pedal pendulum.<br />
Use of the outer hole will produce a larger pedal<br />
radius, and use of the inner hole will produce a smaller<br />
pedal radius.
Spezialpedale<br />
Verwendung<br />
Diese Pedale findet Verwendung bei Fehlstellungen und motorischen<br />
Störungen des Fußes.<br />
Merkmale<br />
Sie wird an der Stelle einer serienmäßigen Pedale in die Tretkurbel<br />
geschraubt. Auf der Unterseite der Spezialpedale befinden<br />
sich vier M 5 Klemmschrauben in Langlöchern. Jedes dieser<br />
Langlöcher bietet einen Verstellbereich von 20 mm. Der<br />
Fuß kann auf dem Pedal beliebig vor- und zurückgeschoben<br />
werden und in einem Winkel von 35° gedreht werden. Damit<br />
ist die Anpassung an beliebige Schuhform- und größe und<br />
an Stellung des Fußes möglich ist. Der Gebrauch ist einfach:<br />
Der Fuß wird auf das Pedal gesetzt, zurück in die keilförmig<br />
angeordneten Stützschienen geschoben und mit der Schnalle<br />
fixiert. Falls notwendig können die Bohrungen am Pedal für<br />
zusätzliche Riemen genutzt werden.Es ist auch eine kleine Variante<br />
für Kinder erhältlich.<br />
Ein-aussteigen<br />
1. Lösen Sie die Schnalle. Setzen Sie den Fuß auf die Spezialpedale<br />
und schieben Sie ihn nach hinten, so dass der<br />
Schuh zwischen den Stützschienen eingekeilt wird.<br />
2. Ziehen Sie die Schnalle fest.<br />
3. Zum Aussteigen lösen Sie die Schnalle und ziehen den Fuß<br />
aus den Stützschienen.<br />
Montage<br />
Die Spezialpedale wird an der Stelle einer serienmäßigen Pedale<br />
in die Tretkurbel (1) geschraubt.<br />
Einstellung<br />
Wir empfehlen die Einstellung bei eingebauter Pedale durchzuführen.<br />
1. Lösen Sie die vier Klemmschrauben (2).<br />
2. Setzen Sie den Fuß (des Fahrers oder der Fahrerin) auf die<br />
Pedale so, dass der Ballen auf der Pedalachse liegt.<br />
3. Schieben Sie die Stützschienen eng bis an den Schuh und<br />
ziehen Sie die vier Klemmschrauben (2) mit einem Gabelschlüssel<br />
8 mm fest an.<br />
<br />
Hinweis:<br />
Sollte der Fuß trotz einer richtigen Einstellung aus der<br />
Pedale rutschen, dann können Sie zu dem vorhandenen<br />
Halteriemen (3) noch einen zweiten Halteriemen (4)<br />
montieren.<br />
2<br />
2<br />
1<br />
4<br />
3<br />
Special Pedals<br />
Intended Application<br />
These pedals have been designed for riders with mal-alignment<br />
or motor disorders of the feet.<br />
Features<br />
The Special Pedals are screwed into the crank arms, replacing<br />
the standard pedals. Each pedal has four M5 clamp screws located<br />
inside special adjustment slots on its base. Each of these<br />
slots offers an adjustment range of 20 mm (3/4”). The foot<br />
can be slid forward or backward in the pedal, as required,<br />
and rotated by a max. angle of 35°. This makes it possible to<br />
adjust the pedal to the type and size of shoe and the position<br />
of the foot. Easy to use: The strap is unbuckled. The foot is<br />
placed on the pedal, slid back and wedged into the tapered<br />
side braces, and secured with a Velcro strap. If necessary, the<br />
holes in the pedal can be used for additional straps. A smaller<br />
model for children is also available.<br />
Mounting and Dismounting<br />
1. Unbuckle the strap. Place the foot on the Special Pedal<br />
and slide it backwards until the shoe is wedged between<br />
the two side braces.<br />
2. Tighten the strap(s).<br />
3. For dismounting unbuckle the strap and slide the foot out<br />
from the braces.<br />
Assembly<br />
The Special Pedals are screwed into the crank arms (1) in<br />
place of the standard pedals.<br />
Adjustment<br />
We recommend performing these adjustments after the pedals<br />
have been mounted.<br />
1. Loosen the four clamp screws (2).<br />
2. Place the foot (of the rider) on the pedal so that the ball<br />
of the foot is aligned with the axle of the pedal.<br />
3. Pull the side braces tightly against the sides of the shoe,<br />
and tighten the four clamp screws (2) using an 8mm openend<br />
wrench.<br />
Note:<br />
If the pedal has been properly adjusted but the foot still<br />
slips out, a second strap (4) can be mounted in addition<br />
to the existing strap (3)<br />
<strong>Trets</strong> Reh 3/<strong>12</strong>a-D-ENG
SPECIAL NEEDS<br />
Spezialpedale mit Wadenhalter<br />
Verwendung<br />
Diese Pedale findet Verwendung bei Spastikern, Peronäuslähmung<br />
(Fallfuß), bei Lähmungen an Füßen und Waden.<br />
Merkmale<br />
Gleiche Funktion wie bei der Spezialpedale mit der zusätzlichen<br />
Möglichkeit der Wadenfixierung. Die Wadenhalterung<br />
lässt sich in der Höhe, im Abstand zum Rahmen und in der<br />
Fußlänge verstellen. Sie ist so konstruiert, dass der Abstand<br />
des Fußes zur Rahmenmitte nicht vergrößert wird.<br />
Ein-aussteigen<br />
1. Lösen Sie die Schnalle. Setzen Sie den Fuß auf die Spezialpedale<br />
und schieben Sie ihn nach hinten, so dass der<br />
Schuh zwischen den Stützschienen eingekeilt wird.<br />
2. Ziehen Sie die Schnalle fest.<br />
3. Fixieren Sie die Wade mit dem Klettband.<br />
Montage und Einstellung<br />
Montage wie bei der Spezialpedale<br />
1. Lösen Sie die Klemmschraube (1). Sie können den Wadenhalter<br />
an die Größe des Fußes anpassen.<br />
2. Lösen Sie die Schraube (2). Sie können die Höhe und<br />
Winkel des Wadenhalters anpassen.<br />
<strong>Trets</strong> Reh 3/<strong>12</strong>a-D-ENG<br />
Achtung!<br />
Diese Einstellungen dürfen nur vom Fachkundigen Personal<br />
durchgeführt werden. Falsche Einstellung kann zu<br />
ernsthaften Erkrankungen oder Verletzungen führen.<br />
1<br />
2<br />
Special Pedals with Calf Support<br />
Intended Application<br />
These pedals have been designed for riders with spasticity,<br />
peroneal paralysis (drop foot), or paralysis of the foot and<br />
calf.<br />
Features<br />
Functions like the Special Pedals but with additional lower-leg<br />
support. The calf brace can be adjusted in height, proximity<br />
to the frame, and foot length. These pedals do not change the<br />
original orientation of the foot: i.e. the distance between the<br />
foot and the center of the frame is maintained.<br />
Mounting and Dismounting<br />
1. Unbuckle the strap. Place the foot on the Special Pedal<br />
and slide it backwards until the shoe is wedged between<br />
the two side braces.<br />
2. Tighten the strap(s).<br />
3. Tighten the velcro strap(s) of the Calf Support.<br />
Assembly and Adjustment<br />
Same Assembly Procedure as Special Pedals<br />
1. Loosen the clamp screw indicated in the photo as (1).<br />
Now you can adjust the calf brace to the size of the foot.<br />
2. Loosen the screw indicated in the photo as (2). You can<br />
now adjust the height and angle of the calf brace.<br />
Caution!<br />
These adjustments should only be performed by a trained<br />
professional. Incorrect adjustments could lead to serious<br />
medical complications or injury.
3 "" ,/--@<br />
3 3 77<br />
7<br />
6<br />
6 6 7 7 "8 "8 "<br />
"<br />
" " " " 9 9 :<br />
:<br />
6 6 ( ( " " 9 9 "<br />
"<br />
9 9 : : ! ! "8<br />
"8<br />
( ( 9 9 0" 0" 9 9 "<br />
"<br />
( ( 9 9 + + &<br />
&<br />
$ $ 9 9<br />
3 3 9<br />
7 ,/A2/ )<br />
)* + ,)<strong>12</strong>) ,<br />
! 9 ,),@) &<br />
! 9 9 ,),2@ ,<br />
A "" ;: & )<br />
1 - "" ;: & ,<br />
3 7 & )<br />
-B/- C & ,CA<br />
*B/@ C & )C)<br />
> = ,)-2/ )<br />
;<br />
6 7<br />
%3 " '<br />
6 7 " 0"<br />
6 " 0"<br />
: 9<br />
; 5 ! 9<br />
%*' " 0 9 %5 '<br />
)*+ ! 9 %,' ;: %- .' " "<br />
9 ! 9 %/' "<br />
<strong>12</strong> " 0 9<br />
9 3 %1' - %*'<br />
9 - ?<br />
! " * %2' 9<br />
* "<br />
0" 7 9 8 "<br />
9 * 7 "<br />
! 9 9 + "<br />
41<br />
3<br />
9<br />
1<br />
2<br />
7<br />
4<br />
8<br />
5<br />
10<br />
0" "<br />
"<br />
6<br />
D D C<br />
C<br />
6 3 3<br />
"<br />
,/A2/ )<br />
)* + ,)<strong>12</strong>) ,<br />
,),@) &<br />
,),2@ ,<br />
A "" & )<br />
1 - "" & ,<br />
3 & )<br />
$ -B/-C & ,CA<br />
$ *B/@C & )C)<br />
5 ,)-2/ )<br />
! "<br />
#<br />
$ % &<br />
' ( )*+ %,'<br />
%- .' (<br />
%/'<br />
0 "<br />
%*' <strong>12</strong> " &<br />
( %1' - %*' &<br />
- 3 4 * %2'<br />
*<br />
5 *<br />
"<br />
<strong>Trets</strong> Reh 3/<strong>12</strong>a-D-ENG
+&CD9<br />
3 452<br />
2 3 452 6 5 ,7 8<br />
4 7 % !<br />
4,9& :<br />
3 ; ;<br />
3 452 +&CD9 E<br />
+&+%# E<br />
,F= 3 +&%D# %<br />
= +9C+E %<br />
!% . &9 ? +9C+( %<br />
><br />
!<br />
!% ? +9C+# %<br />
4 ;<br />
< 3 ;<br />
; =<br />
6 3<br />
; ; ! = 8 "#$<br />
! 7 3 ; !<br />
"'$ > "($ "%$<br />
3 "&$ = 8 "#$ .<br />
, 3 ;<br />
2 ; ! 7 !<br />
"+$ 7 -<br />
? =<br />
4 : ; . = =<br />
" , / 2<br />
; $<br />
- =<br />
; ; 7<br />
@ 3<br />
A 4 -<br />
!8 ; 5 ; % 3<br />
B < 7 *<br />
; 8<br />
<strong>Trets</strong> Reh 3/<strong>12</strong>a-D-ENG<br />
452<br />
* 452 6 5<br />
% !<br />
4,9&<br />
!<br />
"#$<br />
"%$ "&$<br />
"#$ "'$ "($ )<br />
*<br />
! "+$ )<br />
, - .<br />
" /<br />
$<br />
,<br />
0<br />
1<br />
2 G<br />
E 452 +&CD9 E<br />
+ +&+%# E<br />
& ,F= ! ! +&%D# %<br />
% +&+%% %<br />
' 6 . !% . &9 ? +9C+( %<br />
( @ !% ? +9C+# %<br />
, %<br />
42
43<br />
7 ( )A A<br />
B B C<br />
C<br />
% ( 2 3 %<br />
4 56 . 7 8 ( 9<br />
% 9 7 6<br />
1 = 7 1 7 7 = =<br />
=<br />
; ( A<br />
; *+.) )+<br />
) & ' >$ )AA#<br />
, & ' -C@ )<br />
* ( ! *
%<br />
: = % />)<br />
! " !<br />
# ! $ ! %<br />
&'( ) ! * + , !<br />
!<br />
! + -.!<br />
$ &/(/) !<br />
+ ) !<br />
0 & 1 !<br />
&/(/) ! $ ! +<br />
1 ! &/( / ! ) !<br />
2$ 3$ / ! 1 !<br />
!<br />
! '4 ! 3$<br />
5 ! 6 +$ ! 3.<br />
! " !"<br />
! 1(* '* 2<br />
"#$%& "<br />
" "'&%' !<br />
' !#( "#$)% "<br />
* "'&%! "<br />
& + "'&%" !<br />
) , "&-* "'&&. !<br />
$ ""'%' !<br />
- / - 0(<br />
<strong>Trets</strong> Reh 3/<strong>12</strong>a-D-ENG<br />
& 4 , !<br />
? 4 5 !<br />
<<br />
, !<br />
? 5 !<br />
/<br />
&'( ) %(<br />
'<br />
6<br />
%<br />
&/(/) %(<br />
&/( / %(<br />
# 5 7 !<br />
! 8 ! # 5 *<br />
8<br />
9 +<br />
# : ! 7 ! 5 +<br />
!: #<br />
% + &'( ) ! + ! 5 8 /<br />
: 8 ; ! 5 ! 2<br />
! 7 < +<br />
! 7 &/(/) ! +<br />
% 9 +<br />
2 ! 5 ! & 55<br />
! 5 + &/(/) ! +<br />
+ &/( / ! + ! 5 ; /<br />
+ 55 ! 5 ! + 8<br />
: 8<br />
; ! 5 '4 5 8 < 5<br />
5 6<br />
! # ! " " $ !<br />
! 3- 1(* '*<br />
"#$%& "<br />
" "'&%' !<br />
' 3- !#<br />
"#$)% "<br />
* 33 3<br />
"'&%! "<br />
& "'&%" !<br />
) 3 "&-*<br />
"'&&. !<br />
$ 3<br />
""'%' !<br />
- 3<br />
44
SPECIAL NEEDS<br />
Becken- und Hosenträgergurt<br />
Verwendung<br />
Für alle Personen, bei denen die Gefahr besteht, während der<br />
Fahrt oder bei Bremsmanövern vom Sitz zu rutschen oder zu<br />
kippen.<br />
Merkmale<br />
Der Beckengurt (1) hält nur den Beckenbereich. Die Bewegungsfreiheit<br />
des Oberkörpers bleibt erhalten. Der Hosenträgergurt<br />
(2) sichert zusätzlich den gesamten Oberkörper.<br />
Montage und Einstellung<br />
1. Legen Sie den Beckengurt (1) um das Sitzgestell (3) und<br />
befestigen Sie ihn mit den Kunsstoffschnallen (4).<br />
2. Legen Sie die Enden des Hosenträgergurtes um das hintere<br />
Sitzrohr oder die Abspannungen des Sitzbezuges und<br />
befestigen Sie ihn mit den Kunststoffschnallen (5).<br />
3. Öffnen Sie den Verschluss des Beckengurtes und ziehen<br />
Sie die Schlaufen (6) des Hosenträgergurts über den<br />
Beckengurt.<br />
Durch Lösen oder Festziehen der Gurtenden in den Kunsstoffschnallen<br />
kann der Gurt gelockert oder verengt werden.<br />
45<br />
4<br />
3<br />
2<br />
1<br />
5<br />
6<br />
Lap and Shoulder Belts<br />
Intended Application<br />
For all riders whose physical condition puts them in danger of<br />
slipping or falling out of the seat when riding or braking.<br />
Features<br />
The Lap Belt (1) only secures the lower torso. Full mobility<br />
for the upper torso remains. The Shoulder Belt (2) secures<br />
both the upper and lower torsos.<br />
Assembly and Adjustment<br />
1. Wrap the Lap Belt (1) around the seat frame (3) and<br />
secure it using the plastic buckles (4).<br />
2. Wrap the ends of the Shoulder Belt around the back seat<br />
tube or the rear bracing of the seat cover, and secure it<br />
using the plastic buckles (5).<br />
3. Open the clasp of the Lap Belt and slide the loops (6) of<br />
the Shoulder Belt over the ends of the Lap Belt.<br />
The belt can be loosened or tightened by adjusting the length<br />
with the plastic buckles.<br />
<strong>Trets</strong> Reh 3/<strong>12</strong>a-D-ENG
TRETS REH<br />
Stilllegung und Entsorgung<br />
<strong>Trets</strong> Reh für längere Zeit stilllegen und wieder<br />
in Betrieb nehmen<br />
Sollten Sie über eine längere Zeit das <strong>Trets</strong> Reh nicht benutzen<br />
z.B. über den Winter, dann beachten Sie folgende Hinweise:<br />
1. Reinigen Sie das <strong>Trets</strong> Reh, wie im Kapitel „<strong>Trets</strong> Reh<br />
reinigen“ auf Seite 23 beschrieben.<br />
2. Schmieren Sie bzw. wachsen Sie die Kette.<br />
3. Während längerer Standzeiten verlieren Schläuche almählich<br />
Luft. Sollte das <strong>Trets</strong> Reh längere Zeit auf platten<br />
Reifen stehen, dann könnten die Reifen Schaden nehmen.<br />
Hängen Sie deshalb das <strong>Trets</strong> Reh am besten auf, so dass<br />
kein Kontakt der Reifen zum Boden besteht. Ansonsten<br />
kontrollieren Sie regelmäßig den Luftdruck.<br />
4. Schalten Sie auf den kleinsten Gang. So entlasten Sie den<br />
Schaltzug.<br />
5. Bewahren Sie das <strong>Trets</strong> Reh in trocknen und staubfreien<br />
Räumen auf. Decken Sie es eventuell mit einer geeigneten<br />
Abdeckplane ab.<br />
6. Kontrollieren Sie vor der Wiederinbetriebnahme das<br />
<strong>Trets</strong> Reh auf einwandfreien technischen Zustand und<br />
lassen Sie von Ihrem Händler eine Wartung durchführen.<br />
<strong>Trets</strong> Reh entgültig stilllegen und entsorgen<br />
Das <strong>Trets</strong> Reh ist äußerst langlebig und robust gebaut. Sollte<br />
es trotzdem notwendig sein z.B. nach einem Unfall etc. das<br />
<strong>Trets</strong> Reh endgültig außer Betrieb zu nehmen, dann setzen Sie<br />
sich mit Ihrem Fachhändler in Verbindung. Er wird Ihnen helfen<br />
das <strong>Trets</strong> Reh oder einige Teile davon umweltgerecht zu<br />
entsorgen. Entsorgen Sie ebenfalls Verschleißteile wie Reifen,<br />
Kette, Bremsbeläge etc. umweltgerecht. Wenden Sie sich im<br />
Zweifelsfall an Ihren Fachhändler.<br />
<strong>Trets</strong> Reh 3/<strong>12</strong>a-D-ENG<br />
Long-term storage and disposal<br />
Preparing the <strong>Trets</strong> Reh for long-term storage,<br />
and for use after long-term storage<br />
If you plan to store the <strong>Trets</strong> Reh for a longer period of time,<br />
e.g. during the winter months, then prepare the trike for storage<br />
as follows:<br />
1. Clean the <strong>Trets</strong> Reh as described in the section “Cleaning<br />
your <strong>Trets</strong> Reh” on page 23.<br />
2. Lubricate or wax the chain.<br />
3. Tires gradually lose air when in storage. Storing the <strong>Trets</strong><br />
Reh on flat tires for an extended period may damage the<br />
tires. Therefore, it is advisable to hang the <strong>Trets</strong> Reh so<br />
that the tires are not in contact with the floor. Otherwise,<br />
be sure to check the tire pressure of the stored trike<br />
regularly.<br />
4. Store the trike in its lowest gear. This ensures that the<br />
gear cable is under minimal tension.<br />
5. Store the <strong>Trets</strong> Reh in a dry and dust-free room. It may<br />
be wise to cover the trike with a tarp or similar dust<br />
cover.<br />
6. Before using a <strong>Trets</strong> that has been in storage, be sure to<br />
check that the trike is in perfect working order, and have<br />
your authorized retailer perform a maintenance inspection.<br />
Preparing the <strong>Trets</strong> Reh for disposal<br />
The construction of the <strong>Trets</strong> Reh is extremely durable and<br />
robust. However, if the trike must be disposed of, e.g., owing<br />
to irreparable damage following an accident, then contact<br />
your authorized retailer, who will help you dispose of the<br />
<strong>Trets</strong> Reh, or individual parts, in an environmentally sound<br />
manner. Furthermore, be sure to dispose of any replaced<br />
parts – such as tires, chains, brake pads, etc. – in an environmentally<br />
acceptable manner. In case of doubt, contact your<br />
authorized retailer.<br />
46
Gewährleistung und Garantie-<br />
bedingungen<br />
Es gilt die gesetzliche Gewährleistung. Ausgenommen sind<br />
Verschleißteile wie z.B. Kette, Reifen, Bremsen etc.. Der Gewährleistungzeitraum<br />
von (gesetzlich) 24 Monaten beginnt mit<br />
dem Kaufdatum. Während dieser 2 Jahre ist der Fachhändler<br />
der das <strong>Hase</strong>rad verkauft hat verpflichtet dafür zu sorgen,<br />
dass das Fahrrad keine Fehler hat die den Wert oder die<br />
Tauglichkeit aufheben oder erheblich mindern. Daher darf der<br />
Fachhändler das <strong>Hase</strong>rad nur in einem sicheren und fahrbereiten<br />
Zustand übergeben. Zusätzlich gewährt die Firma <strong>Hase</strong><br />
Spezialräder eine Garantie von 3 Jahren - ab Kaufdatum - auf<br />
Bruch des Rahmens gemäß den nachstehenden Bedingungen.<br />
Bei Einsendung der Registrierkarte verlängert sich diese Garantie<br />
auf 5 Jahre.<br />
Die Firma <strong>Hase</strong> haftet nur für Mängel, die durch ihr Verschulden<br />
am Rahmen und der Montage entstanden sind. Für Montageteile<br />
haftet der jeweilige Hersteller.<br />
Diese zusätzliche Garantie gilt nur für den Ersterwerber, sofern<br />
er die Bedienungsanleitung befolgt.<br />
Innerhalb der Garantiezeit von 3 Jahren ab Kaufdatum wird ein<br />
gebrochenes Rahmenteil kostenlos instandgesetzt, oder sollte das<br />
nicht möglich sein, durch ein neuwertiges Teil ersetzt. Ausgetauschte<br />
Teile gehen in das Eigentum der Fa. <strong>Hase</strong> über.<br />
Weitergehende Ansprüche bestehen aufgrund dieser Garantie<br />
nicht. Insbesondere werden etwaige Demontage- oder Montagekosten<br />
(z.B. beim Fachhändler) und Versandkosten von Fa. <strong>Hase</strong><br />
nicht erstattet. Sendungen an uns sind stets ausreichend zu frankieren,<br />
da sie sonst nicht angenommen werden können.<br />
Die Zuladung (Fahrer und Gepäck) darf 65 kg, im Anhängerbetrieb<br />
45 kg, nicht übersteigen.<br />
Bei Wettbewerbseinsatz, Fahrten im off Road Bereich oder<br />
Fahrten die nicht dem Nutzungsprofil eines Fahrrades entsprechen,<br />
erlischt die Garantie und die gesetzliche Gewährleistung.<br />
Von der Garantie ausgeschlossen sind Schäden durch Unfälle.<br />
Keine Garantie erhält, wer für das <strong>Trets</strong> Reh ungeeignetes Zubehör<br />
montiert, oder Zubehör unsachgemäß montiert. Deshalb<br />
lassen Sie den Austausch und die Montage von Teilen nur durch<br />
den Fachhändler vornehmen.<br />
Keine Garantie erhält, wer am Rahmen schleift, bohrt, biegt, oder<br />
sonstige Modifikationen vornimmt.<br />
Durch eine Garantieleistung wird die Garantiezeit weder verlängert<br />
noch eine neue Garantiefrist in Lauf gesetzt.<br />
Die Abwicklung der Garantieleistung erfolgt ausschließlich durch<br />
das Fachgeschäft, bei dem das Rad gekauft wurde oder durch einen<br />
unserer Vertriebspartner.<br />
Von Kindern darf das <strong>Trets</strong> Reh nur unter Aufsicht der Eltern<br />
gefahren werde<br />
<br />
47<br />
TRETS REH<br />
<strong>Trets</strong> Reh 3/<strong>12</strong>a-D-ENG<br />
Conditions of warranty and liability<br />
The terms and conditions are based on the statutory warranty.<br />
This excludes parts that wear, such as the chain, tires,<br />
brakes, etc. The warranty period (statutory) of 24 months<br />
commences from the date of purchase. During this 2-year period,<br />
the dealer from whom the <strong>Hase</strong> bike or trike was purchased<br />
is obligated to ensure that the vehicle has no fault that<br />
could destroy or significantly reduce its value or suitability for<br />
use. Therefore, the <strong>Hase</strong> bike or trike must be in a safe condition<br />
and fit for use when handed over by the dealer.<br />
In addition, the company <strong>Hase</strong> Spezialräder offers a 3-year<br />
warranty (from date of purchase) against breakage of the<br />
frame in accordance with the following conditions. By sending<br />
in the enclosed registration card, you can extend this warranty<br />
period to 5 years.<br />
<strong>Hase</strong> will only be held liable for defects resulting from faulty<br />
frame manufacturing and assembly. For other assembly parts, the<br />
respective manufacturer is liable.<br />
This additional warranty only applies to the original owner and to<br />
usage in accordance with the user’s manual.<br />
Within the warranty period of 3 years, <strong>Hase</strong> will repair, or if necessary<br />
replace, any broken frame part free of charge. Any defective<br />
parts replaced by <strong>Hase</strong> become the property of <strong>Hase</strong>.<br />
Any further claims beyond the scope of this warranty are excluded.<br />
<strong>Hase</strong> will not cover the costs of assembly or disassembly<br />
(e.g., by the retailer) or shipping. We will not accept postal deliveries<br />
with insufficient postage.<br />
The maximum permissible load (rider and luggage) of 65kg (143<br />
lbs) specified for the <strong>Trets</strong> Reh – or 45 kg (99 lbs) when used as<br />
a trailer – may not be exceeded.<br />
If the <strong>Trets</strong> Reh is used in competition, ridden on rough terrain,<br />
or subjected to abnormally excessive stress, the statutory and<br />
additional warranty becomes void.<br />
Damage caused by accidents is not covered by the warranty.<br />
The warranty becomes void if the <strong>Trets</strong> Reh has been fitted with<br />
incompatible accessories or if accessories are installed incorrectly.<br />
Therefore, always have components replaced and installed by<br />
an authorized retailer.<br />
The warranty becomes void if improper modifications or alterations<br />
(e.g., grinding, drilling, bending) are made to the frame.<br />
Repairs or replacements made during the term of this warranty<br />
do not extend or renew the warranty term.<br />
Warranty claims can only be handled by the authorized <strong>Hase</strong><br />
retailer from whom the trike was purchased or by one of our<br />
distribution partners.<br />
Children may only ride the <strong>Trets</strong> Reh under parental supervision.
<strong>Hase</strong> Spezialräder · Hiberniastraße 2 · 45731 Waltrop · Germany · Phone ++49 (0) 23 09 / 93 77-0 · Fax ++49 (0) 23 09 / 93 77-201 · info@hasebikes.com · www.hasebikes.com<br />
<strong>Trets</strong> Reh 3/<strong>12</strong>a-D-ENG<br />
erstellt von:<br />
www.technik-transparent.de