Faltverdeck Gebrauchsanleitung Foldable Fairing User ... - Hase Bikes
Faltverdeck Gebrauchsanleitung Foldable Fairing User ... - Hase Bikes
Faltverdeck Gebrauchsanleitung Foldable Fairing User ... - Hase Bikes

Erfolgreiche ePaper selbst erstellen
Machen Sie aus Ihren PDF Publikationen ein blätterbares Flipbook mit unserer einzigartigen Google optimierten e-Paper Software.
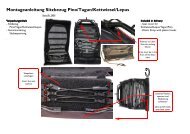
FALTVERDECK<br />
Montage<br />
Im Lieferumfang befindet sich das <strong>Faltverdeck</strong>, zwei Steckschnallen<br />
und eine Steckhülse. Die beiden Steckschnallen (1)<br />
werden an den hinteren Schutzblechstreben und die Steckhülse<br />
( ) an der Deichselklemmung befestigt.<br />
Achtung!<br />
Die Montage muss fachgerecht durchgeführt werden.<br />
Lassen Sie deshalb das <strong>Faltverdeck</strong> von einer Fachwerkstatt<br />
montieren. Fehlerhafte Montage oder Einstellungen<br />
können zu Unfällen führen..<br />
1. Schrauben Sie die vorhandene Schraube (3) der hinteren<br />
Schutzblechklemme (4) mit einem Torx TX 5-Schlüssel<br />
heraus.<br />
. Schrauben Sie das mitgelieferte Band der Steckschnalle<br />
(1) mit der mitgelieferten Schraube (5) und der Unterlegscheibe<br />
(6) an die Schutzblechklemme (4), an die Stelle wo<br />
Sie die Schraube ( 3) entfernt haben.<br />
3. Schrauben Sie das zweite Band mit der Steckschnalle auf<br />
die gleiche Weise an die hintere Schutzblechstrebe auf<br />
der anderen Seite des Fahrzeugs.<br />
4. Markieren Sie (z.B. mit einem Bleistift oder einem<br />
wasserlöslichen Filzstift) die Stellung der Deichsel an der<br />
Deichselklemmung und der Deichsel.<br />
5. Schrauben Sie die beiden Klemmschrauben (7) der Deichselbefestigung<br />
mit einem Innensechskantschlüssel 6 mm<br />
heraus.<br />
6. Stecken Sie die beiden mitgelieferten längeren Schrauben<br />
(7) von oben in die Bohrungen der Deichselklemmung.<br />
Schrauben Sie anschließend die Steckhülse ( ) von<br />
unten mit den beiden Klemmschrauben (7) und Muttern<br />
(9) handfest an die Deichselklemmung.<br />
7. Richten Sie die Deichsel mit Hilfe der vorher angebrachten<br />
Markierung an der Deichselklemmung und der<br />
Deichsel aus. Beachten Sie auch Kapitel: „Deichsel einstellen“<br />
in der Trets-<strong>Gebrauchsanleitung</strong>.<br />
8. Ziehen Sie die beiden Klemmschrauben (7) mit 1 Nm<br />
fest.<br />
4<br />
3<br />
8<br />
7<br />
RV-TRETS 5/11 D-ENG 5<br />
1<br />
6<br />
7<br />
5<br />
1<br />
Mounting the fairing mounts<br />
The <strong>Foldable</strong> <strong>Fairing</strong> comes with two snap buckles and one<br />
mounting sleeve. The two snap buckles (1) are mounted to<br />
the rear fender stays, and the mounting sleeve ( ) is fastened<br />
to the drawbar attachment socket.<br />
Caution!<br />
The fairing mounts must be mounted properly. Therefore,<br />
<strong>Hase</strong> recommends having a qualified bicycle mechanic<br />
mount the <strong>Foldable</strong> <strong>Fairing</strong> hardware. An improperly<br />
mounted or adjusted fairing can cause accidents.<br />
1. Unscrew the bolt (3) of the rear fender stay (4) using a<br />
TX 5 torx key.<br />
. Screw the bolt (5) with the strap of the snap buckle (1)<br />
and washer (6) (all hardware included with the fairing)<br />
into the fender clip (4) in place of the removed bolt (3).<br />
3. Repeat steps 1 and for the second strap with snap<br />
buckle, mounting it to the rear fender stay on the other<br />
side of the trailer.<br />
4. Record the position of the drawbar by making a mark<br />
across the edge of the drawbar tube and drawbar attachment<br />
socket (using a pencil or non-permanent marker) as<br />
shown.<br />
5. Unscrew the two clamp bolts (7) of the drawbar attachment<br />
socket using a 6mm Allen key.<br />
6. Insert the two longer bolts (7) (included with the fairing)<br />
from above into the holes of the drawbar attachment<br />
socket. Then attach the mounting sleeve ( ) from below<br />
to the two clamp bolts (7) by tightening the nuts (8) with<br />
light hand pressure.<br />
7. Return the drawbar to its original position by aligning the<br />
marks on the drawbar attachment socket and drawbar<br />
tube. See the section “Adjusting the drawbar” in the Trets<br />
<strong>User</strong>’s Manual.<br />
8. Now tighten the two clamp bolts (7) with a torque of 1<br />
Nm (8.9 ft-lbs).