CrossDisplay-Switching Config Tool - Guntermann und Drunck GmbH
CrossDisplay-Switching Config Tool - Guntermann und Drunck GmbH CrossDisplay-Switching Config Tool - Guntermann und Drunck GmbH
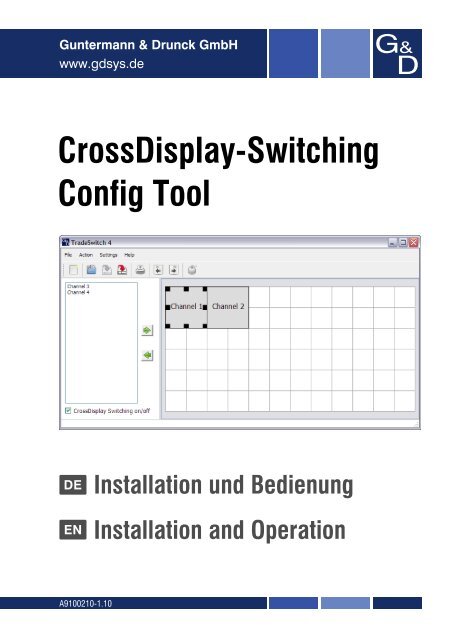
Guntermann & Drunck GmbH www.gdsys.de CrossDisplay-Switching Config Tool DE Installation und Bedienung EN Installation and Operation A9100210-1.10
- Seite 2 und 3: Zu dieser Dokumentation Diese Dokum
- Seite 4 und 5: Einleitung Einleitung Die Funktion
- Seite 6 und 7: Installation Installation So instal
- Seite 8 und 9: Die Benutzeroberfläche Arbeitsbere
- Seite 10 und 11: Erste Schritte Erste Schritte In di
- Seite 12 und 13: Konfigurationen verwalten Konfigura
- Seite 14 und 15: Konfigurationen verwalten So lesen
- Seite 16 und 17: Anordnung und Größenverhältnisse
- Seite 18 und 19: Anordnung und Größenverhältnisse
- Seite 20 und 21: Mausgeschwindigkeit anpassen Mausge
- Seite 22 und 23: About this manual This manual has b
- Seite 24 und 25: Introduction Introduction With Cros
- Seite 26 und 27: Installation Installation How to in
- Seite 28 und 29: User interface Workspace The right
- Seite 30 und 31: Getting started Getting started Thi
- Seite 32 und 33: Administrating configurations Admin
- Seite 34 und 35: Administrating configurations Loadi
- Seite 36 und 37: Order and ratio of monitors Arra
- Seite 38 und 39: Adjusting the mouse speed Adjusting
- Seite 40 und 41: NOTES
- Seite 42 und 43: NOTES
- Seite 44: Das Handbuch wird fortlaufend aktua
<strong>Guntermann</strong> & <strong>Drunck</strong> <strong>GmbH</strong><br />
www.gdsys.de<br />
<strong>CrossDisplay</strong>-<strong>Switching</strong><br />
<strong>Config</strong> <strong>Tool</strong><br />
DE Installation <strong>und</strong> Bedienung<br />
EN Installation and Operation<br />
A9100210-1.10
Zu dieser Dokumentation<br />
Diese Dokumentation wurde mit größter Sorgfalt erstellt <strong>und</strong> nach dem Stand der<br />
Technik auf Korrektheit überprüft.<br />
Für die Qualität, Leistungsfähigkeit sowie Marktgängigkeit des G&D-Produkts zu<br />
einem bestimmten Zweck, der von dem durch die Produktbeschreibung abgedeckten<br />
Leistungsumfang abweicht, übernimmt G&D weder ausdrücklich noch stillschweigend<br />
die Gewähr oder Verantwortung.<br />
Für Schäden, die sich direkt oder indirekt aus dem Gebrauch der Dokumentation<br />
ergeben, sowie für beiläufige Schäden oder Folgeschäden ist G&D nur im Falle des<br />
Vorsatzes oder der groben Fahrlässigkeit verantwortlich.<br />
Gewährleistungsausschluss<br />
G&D übernimmt keine Gewährleistung für Geräte, die<br />
nicht bestimmungsgemäß eingesetzt wurden.<br />
nicht autorisiert repariert oder modifiziert wurden.<br />
schwere äußere Beschädigungen aufweisen, welche nicht bei Lieferungserhalt<br />
angezeigt wurden.<br />
durch Fremdzubehör beschädigt wurden.<br />
G&D haftet nicht für Folgeschäden jeglicher Art, die möglicherweise durch den<br />
Einsatz der Produkte entstehen können.<br />
Warenzeichennachweis<br />
Alle Produkt- <strong>und</strong> Markennamen, die in diesem Handbuch oder in den übrigen<br />
Dokumentationen zu Ihrem G&D-Produkt genannt werden, sind Warenzeichen<br />
oder eingetragene Warenzeichen der entsprechenden Rechtsinhaber.<br />
Impressum<br />
© <strong>Guntermann</strong> & <strong>Drunck</strong> <strong>GmbH</strong> 2012. Alle Rechte vorbehalten.<br />
Version 1.10 – 09.10.2012<br />
Software: 1.0.000<br />
<strong>Guntermann</strong> & <strong>Drunck</strong> <strong>GmbH</strong><br />
Dortm<strong>und</strong>er Str. 4a<br />
57234 Wilnsdorf<br />
Germany<br />
Telefon +49 (0) 2739 8901-100<br />
Telefax +49 (0) 2739 8901-120<br />
http://www.GDsys.de<br />
sales@GDsys.de<br />
i · <strong>CrossDisplay</strong>-<strong>Switching</strong> <strong>Config</strong> <strong>Tool</strong>
Inhaltsverzeichnis<br />
Inhaltsverzeichnis<br />
Einleitung ......................................................................................................... 1<br />
Unterstützte KVM-Switches ............................................................................... 1<br />
Umschaltung via »<strong>CrossDisplay</strong>-<strong>Switching</strong>« ....................................................... 1<br />
Systemvoraussetzungen ..................................................................................... 2<br />
Installation ....................................................................................................... 3<br />
Deinstallation ................................................................................................... 3<br />
Die Benutzeroberfläche .................................................................................... 4<br />
Auflistung der Kanäle ........................................................................................ 4<br />
Arbeitsbereich ................................................................................................... 5<br />
Menü- <strong>und</strong> Symbolleiste .................................................................................... 5<br />
Erste Schritte .................................................................................................... 7<br />
Software starten ................................................................................................. 7<br />
Sprache der Software einstellen .......................................................................... 7<br />
Umschaltung via »<strong>CrossDisplay</strong>-<strong>Switching</strong>« (de)aktivieren .................................. 7<br />
Konfiguration erstellen <strong>und</strong> an den KVM-Switch übertragen ............................... 8<br />
Software beenden .............................................................................................. 8<br />
Konfigurationen verwalten ............................................................................... 9<br />
Neue Konfiguration erstellen ............................................................................. 9<br />
Konfiguration übertragen oder auslesen ............................................................ 10<br />
Konfiguration speichern oder laden .................................................................. 11<br />
Ansicht des Arbeitsbereichs drucken ................................................................ 12<br />
Anordnung <strong>und</strong> Größenverhältnisse der Monitore ......................................... 13<br />
Beispielanordnungen ....................................................................................... 13<br />
Kanäle im Arbeitsbereich anordnen ................................................................. 14<br />
Größenverhältnisse der Monitore anpassen ...................................................... 16<br />
Mausgeschwindigkeit anpassen ...................................................................... 17<br />
Einstellen der Mausgeschwindigkeit ................................................................. 17<br />
Korrektur der horizontalen <strong>und</strong> vertikalen Mausgeschwindigkeit ...................... 17<br />
<strong>CrossDisplay</strong>-<strong>Switching</strong> <strong>Config</strong> <strong>Tool</strong> · ii
Einleitung<br />
Einleitung<br />
Die Funktion <strong>CrossDisplay</strong>-<strong>Switching</strong> (CDS) ermöglicht die Umschaltung zwischen den<br />
am KVM-Switch angeschlossenen Rechnern durch die Bewegung des Mauszeigers.<br />
Mit der Software <strong>CrossDisplay</strong>-<strong>Switching</strong> <strong>Config</strong> <strong>Tool</strong> konfigurieren Sie die Anordnung<br />
sowie die Größenverhältnisse der Monitore am TradeSwitch-Arbeitsplatz.<br />
TIPP: Haben alle Monitore die gleiche Größe <strong>und</strong> sind sie nebeneinander am<br />
Arbeitsplatz angeordnet, kann die »<strong>CrossDisplay</strong>-<strong>Switching</strong>«-Funktion sofort<br />
nach der Aktivierung (s. Seite 7) eingesetzt werden.<br />
Unterstützte KVM-Switches<br />
Folgende KVM-Switches der TradeSwitch-Serie unterstützen die Umschaltung via<br />
<strong>CrossDisplay</strong>-<strong>Switching</strong>:<br />
TradeSwitch2-USB<br />
TradeSwitch4-USB<br />
TradeSwitch8-USB (ab Hardware-Version 2.00)<br />
Umschaltung via »<strong>CrossDisplay</strong>-<strong>Switching</strong>«<br />
Die Funktion <strong>CrossDisplay</strong>-<strong>Switching</strong> (CDS) ermöglicht die Umschaltung zwischen den<br />
am KVM-Switch angeschlossenen Rechnern durch die Bewegung des Mauszeigers.<br />
Bewegen Sie den Mauszeiger an einen Rand des aktiven Monitors, neben dem ein<br />
weiterer Monitor platziert ist, schaltet der KVM-Switch auf den Rechner des angrenzenden<br />
Monitores.<br />
<br />
BEISPIEL: Bewegen Sie den Mauszeiger an den rechten Rand von Monitor 2, schaltet<br />
der KVM-Switch auf Kanal 3, an dessen Rechner Monitor 3 angeschlossen ist.<br />
Bewegen Sie den Mauszeiger an den linken Rand von Monitor 2 schaltet der<br />
KVM-Switch auf Kanal 1, an dessen Rechner Monitor 1 angeschlossen ist.<br />
Bei Erreichen der äußeren Ränder (linker Rand von Monitor 1 bzw. rechter Rand von<br />
Monitor 3) erfolgt keine Umschaltung.<br />
1 · <strong>CrossDisplay</strong>-<strong>Switching</strong> <strong>Config</strong> <strong>Tool</strong>
Einleitung<br />
Halten Sie eine Maustaste während der Mausbewegung gedrückt, erfolgt ebenfalls<br />
keine Umschaltung. Die Ausführung von »Drag and Drop«-Operationen wird so nicht<br />
beeinflusst.<br />
WICHTIG: Die Umschaltung via <strong>CrossDisplay</strong>-<strong>Switching</strong> ist im Auslieferungszustand<br />
des KVM-Switches deaktiviert.<br />
Systemvoraussetzungen<br />
Die Installation <strong>und</strong> der Betrieb der Software ist auf Windows-Rechnern möglich,<br />
die folgende Systemvoraussetzungen erfüllen:<br />
Betriebssystem: Windows XP SP3 (32/64 Bit), Windows 7 (32/64 Bit)<br />
Festplattenspeicher: mindestens 15 MB freier Festplattenspeicher<br />
Die Kommunikation der Software mit dem KVM-Switch erfolgt über das mitgelieferte<br />
Datenkabel.<br />
Für diese Kabelverbindung ist eine freie RS232-Schnittstelle (TradeSwitch2-USB <strong>und</strong><br />
TradeSwitch4-USB) bzw. eine freie USB-Schnittstelle (TradeSwitch8-USB ab Hardware-<br />
Version 2.00) des Rechners erforderlich.<br />
WICHTIG: Installieren Sie bei Einsatz der Variante TradeSwitch8-USB des KVM-<br />
Switches den Gerätetreiber CP210x USB to UART Bridge VCP.<br />
Der Treiber stellt die per Datenkabel verb<strong>und</strong>ene Service-Buchse des KVM-Switches<br />
als virtuelle serielle Schnittstelle (COM-Port) zur Verfügung. Die virtuelle<br />
Schnittstelle kann im <strong>CrossDisplay</strong>-<strong>Switching</strong> <strong>Config</strong> <strong>Tool</strong> zum Verbindungsaufbau<br />
ausgewählt werden.<br />
Der Treiber steht auf der Website www.gdsys.de im Bereich Downloads > Treiber zum<br />
Download zur Verfügung.<br />
<strong>CrossDisplay</strong>-<strong>Switching</strong> <strong>Config</strong> <strong>Tool</strong> · 2
Installation<br />
Installation<br />
So installieren Sie die Software auf einem kompatiblen Windows-Rechner:<br />
1. Legen Sie die Installations-CD in das CD-Laufwerk des Rechners ein.<br />
2. Führen Sie die Datei Setup.exe durch einen Doppelklick aus.<br />
3. Lesen Sie die Hinweise des Installations-Assistenten <strong>und</strong> klicken Sie auf Weiter.<br />
4. Entscheiden Sie, ob eine Desktop-Verknüpfung <strong>und</strong>/oder eine Schnellstart-Verknüpfung<br />
erstellt wird.<br />
Aktivieren bzw. deaktivieren Sie die entsprechenden Kontrollkästchen <strong>und</strong><br />
klicken Sie auf Weiter.<br />
5. Geben Sie den gewünschten Zielordner auf einem lokalen Laufwerk an.<br />
HINWEIS: Klicken Sie auf Durchsuchen, um die Baumstruktur der Laufwerke des<br />
Rechners zu öffnen. Das Erstellen <strong>und</strong> Auswählen des Zielverzeichnisses ist so<br />
komfortabel möglich.<br />
6. Bestätigen Sie den festgelegten Ordner durch einen Klick auf Weiter.<br />
7. Bestimmen Sie den Startmenü-Ordner, in welchem eine Verknüpfung auf die<br />
Software <strong>und</strong> das Deinstallationsprogramm erstellt wird.<br />
HINWEIS: Falls Sie keinen Eintrag im Startmenü wünschen, aktivieren Sie das<br />
Kontrollkästchen Keine Verknüpfungen erstellen.<br />
8. Starten Sie den Installationsvorgang durch Klick auf Installieren.<br />
9. Nach dem Abschluss des Installationsvorgangs klicken Sie auf Fertig stellen.<br />
HINWEIS: Ist das Kontrollkästchen Konfigurator ausführen aktiviert, wird die Software<br />
automatisch gestartet, sobald der Installations-Assistent beendet wird.<br />
Deinstallation<br />
So deinstallieren Sie die Software:<br />
1. Öffnen Sie im Windows-Startmenü den Ordner <strong>Guntermann</strong> & <strong>Drunck</strong> <strong>GmbH</strong> ><br />
<strong>CrossDisplay</strong>-<strong>Switching</strong> <strong>Config</strong> <strong>Tool</strong>.<br />
HINWEIS: Falls Sie während der Installation auf die Erstellung einer Verknüpfung<br />
im Windows-Startmenü verzichtet haben, starten Sie die Deinstallation über die<br />
Windows-Systemsteuerung.<br />
2. Klicken Sie auf Uninstall.<br />
3. Folgen Sie den Hinweisen des Assistenten.<br />
3 · <strong>CrossDisplay</strong>-<strong>Switching</strong> <strong>Config</strong> <strong>Tool</strong>
Die Benutzeroberfläche<br />
Die Benutzeroberfläche<br />
Die Benutzeroberfläche ist in zwei Bereiche unterteilt. In den folgenden Abschnitten<br />
werden diese Bereiche detailliert erläutert.<br />
Auflistung der Kanäle<br />
Auf der linken Seite werden die Kanäle des KVM-Switches aufgelistet, die nicht im<br />
Arbeitsbereich (rechts) platziert sind.<br />
Diese Kanäle können nicht via <strong>CrossDisplay</strong>-<strong>Switching</strong> umgeschaltet werden. Die Einstellungen<br />
zur Mausgeschwindigkeit (s. Seite 17 f.) wirken sich auf diese Kanäle<br />
ebenfalls nicht aus.<br />
Durch einen Klick auf das Symbol (Pfeil rechts) verschieben Sie den markierten<br />
Kanal in den Arbeitsbereich.<br />
TIPP: Verwenden Sie alternativ »Drag and Drop«-Mausoperationen oder das<br />
Kontextmenü des Kanals, um diesen in den Arbeitsbereich zu verschieben.<br />
<strong>CrossDisplay</strong>-<strong>Switching</strong> <strong>Config</strong> <strong>Tool</strong> · 4
Die Benutzeroberfläche<br />
Arbeitsbereich<br />
Im Arbeitsbereich auf der rechten Seite werden die Monitore der Kanäle angezeigt,<br />
die Sie via <strong>CrossDisplay</strong>-<strong>Switching</strong> umschalten können.<br />
Die Monitore werden als Rechtecke dargestellt. Der Name des Kanals wird innerhalb<br />
des Rechtecks angezeigt. Die Höhe <strong>und</strong> Breite der Rechtecke können Sie über<br />
die Anfasser verändern.<br />
Im Screenshot sehen Sie solche Anfasser in Form kleiner, schwarzer Kästchen am<br />
Rahmen von Kanal 1.<br />
Durch einen Klick auf das Symbol (Pfeil links), entfernen Sie das markierte Rechteck<br />
aus dem Arbeitsbereich.<br />
TIPP: Verwenden Sie alternativ »Drag and Drop«-Mausoperationen oder das Kontextmenü<br />
des Kanals, um das Rechteck aus dem Arbeitsbereich zu entfernen.<br />
HINWEIS: Die maximale Größe der Arbeitsfläche wird dynamisch angepasst,<br />
wenn Sie ein Element über die verfügbare Arbeitsfläche hinaus ziehen.<br />
Menü- <strong>und</strong> Symbolleiste<br />
Alle Funktionen der Software sind über die Menüleiste erreichbar. Die folgende<br />
Tabelle listet diese Funktionen auf.<br />
Die wichtigsten Funktionen können Sie zusätzlich über die Symbolleiste aufrufen.<br />
Die Symbole dieser Funktionen sind in der Tabelle abgebildet.<br />
DATEI-MENÜ<br />
Neu Neue Konfiguration erstellen<br />
Öffnen Konfiguration von einem lokalen Laufwerk laden<br />
Speichern<br />
Speichern unter<br />
5 · <strong>CrossDisplay</strong>-<strong>Switching</strong> <strong>Config</strong> <strong>Tool</strong><br />
Konfiguration unter dem bekannten<br />
Dateinamen speichern<br />
Dialog zur Auswahl des Speicherorts <strong>und</strong><br />
des Dateinamens öffnen<br />
Drucken Ansicht des Arbeitsbereich drucken<br />
Beenden Software beenden
AKTION-MENÜ<br />
Gerätekonfiguration auslesen<br />
Gerätekonfiguration übertragen<br />
EINSTELLUNGEN-MENÜ<br />
HILFE-MENÜ<br />
<strong>CrossDisplay</strong>-<strong>Switching</strong> an/aus<br />
Die Benutzeroberfläche<br />
Konfiguration des KVM-Switches über eine<br />
serielle Datenverbindung auslesen<br />
Konfiguration via serieller Datenverbindung an<br />
den KVM-Switch übertragen<br />
Umschaltung via »<strong>CrossDisplay</strong>-<strong>Switching</strong>«<br />
an- oder ausschalten<br />
Mausgeschwindigkeit Mausgeschwindigkeit einstellen<br />
Sprache Sprache auswählen (Englisch oder Deutsch)<br />
Über Informationen über die Software anzeigen<br />
<strong>CrossDisplay</strong>-<strong>Switching</strong> <strong>Config</strong> <strong>Tool</strong> · 6
Erste Schritte<br />
Erste Schritte<br />
In diesem Kapitel lernen Sie die gr<strong>und</strong>legende Bedienung der Software kennen.<br />
Software starten<br />
So starten Sie die installierte Software:<br />
Öffnen Sie im Windows-Startmenü den Ordner <strong>Guntermann</strong> & <strong>Drunck</strong> <strong>GmbH</strong> ><br />
<strong>CrossDisplay</strong>-<strong>Switching</strong> <strong>Config</strong> <strong>Tool</strong> <strong>und</strong> klicken Sie auf <strong>CrossDisplay</strong>-<strong>Switching</strong> <strong>Config</strong> <strong>Tool</strong>.<br />
Doppelklicken Sie die Desktop-Verknüpfung der Software.<br />
HINWEIS: Sie können mit der Software Konfigurationen für verschiedene Varianten<br />
der KVM-Switches der TradeSwitch-Serie erstellen.<br />
Wählen Sie nach dem Start der Software die von Ihnen verwendete Variante des<br />
KVM-Switches aus.<br />
Sprache der Software einstellen<br />
Die Sprache der Software können Sie zwischen Deutsch <strong>und</strong> Englisch umschalten.<br />
So wählen Sie die Sprache der Software:<br />
1. Klicken Sie auf Einstellungen in der Menüleiste.<br />
2. Bewegen Sie den Mauszeiger auf den Eintrag Sprache.<br />
3. Klicken Sie auf die Sprache Deutsch oder English.<br />
HINWEIS: Die aktive Sprache wird durch einen Haken angezeigt.<br />
Umschaltung via »<strong>CrossDisplay</strong>-<strong>Switching</strong>«<br />
(de)aktivieren<br />
In der Standardeinstellung des KVM-Switches ist die Umschaltung via <strong>CrossDisplay</strong>-<br />
<strong>Switching</strong> deaktiviert. Sie können diese Funktion direkt in der Software aktivieren<br />
bzw. deaktivieren.<br />
So aktivieren Sie die Umschaltung via »<strong>CrossDisplay</strong>-<strong>Switching</strong>«:<br />
1. Aktivieren Sie das Kontrollkästchen <strong>CrossDisplay</strong>-<strong>Switching</strong> an/aus unterhalb der<br />
Auflistung der Kanäle.<br />
So deaktivieren Sie die Umschaltung via »<strong>CrossDisplay</strong>-<strong>Switching</strong>«:<br />
1. Deaktivieren Sie das Kontrollkästchen <strong>CrossDisplay</strong>-<strong>Switching</strong> an/aus unterhalb der<br />
Auflistung der Kanäle.<br />
HINWEIS: Im Setup-Menü des KVM-Switches können Sie die Umschaltung via<br />
»<strong>CrossDisplay</strong>-<strong>Switching</strong>« ebenfalls (de)aktivieren.<br />
7 · <strong>CrossDisplay</strong>-<strong>Switching</strong> <strong>Config</strong> <strong>Tool</strong>
Konfiguration erstellen <strong>und</strong> an den KVM-Switch<br />
übertragen<br />
Erste Schritte<br />
Die erforderlichen Schritte zur Erstellung <strong>und</strong> Übertragung der Konfiguration an<br />
den KVM-Switch werden in den folgenden Kapiteln detailliert beschrieben.<br />
Für den schnellen Einstieg lesen Sie hier eine Zusammenfassung der Schritte mit<br />
Verweisen auf die ausführlichen Erläuterungen:<br />
1. Erstellen Sie eine neue Konfiguration (s. Seite 9).<br />
2. Die Kanäle im Arbeitsbereich (rechte Seite) können per <strong>CrossDisplay</strong>-<strong>Switching</strong><br />
umgeschaltet werden.<br />
Verschieben Sie die gewünschten Kanäle in diesen Bereich (s. Seite 14)<br />
3. Nur wenn die Anordnung <strong>und</strong> die Größenverhältnisse der Monitore untereinander<br />
korrekt abgebildet sind, ist eine exakte Umschaltung <strong>und</strong> Mauspositionierung<br />
möglich.<br />
Ordnen Sie die Monitore im Arbeitsbereich so an, wie sie am Arbeitsplatz<br />
positioniert sind (s. Seite 15).<br />
Prüfen <strong>und</strong> ändern Sie ggf. die Größenverhältnisse der Monitore (s. Seite 16).<br />
4. Bei der Berechnung der Mausposition wird ein Bildformat des Monitors von<br />
16:10 zugr<strong>und</strong>e gelegt.<br />
Stellen Sie die Auflösung der Monitore manuell ein, die ein abweichendes<br />
Bildformat besitzen (s. Seite 17).<br />
5. Übertragen Sie die Konfiguration an den KVM-Switch (s. Seite 10).<br />
Software beenden<br />
Die Software ist ausschließlich zur Konfiguration der Anordnung sowie der Größenverhältnisse<br />
der Monitore am TradeSwitch-Arbeitsplatz erforderlich.<br />
Sobald die Konfiguration an den KVM-Switch übertragen ist (s. Seite 10), wird die<br />
Software erst wieder bei einer gewünschten Änderung der Konfiguration benötigt.<br />
So beenden Sie die Software:<br />
1. Klicken Sie in der Menüleiste auf Datei > Beenden.<br />
<strong>CrossDisplay</strong>-<strong>Switching</strong> <strong>Config</strong> <strong>Tool</strong> · 8
Konfigurationen verwalten<br />
Konfigurationen verwalten<br />
Eine mit der Software <strong>CrossDisplay</strong>-<strong>Switching</strong> <strong>Config</strong> <strong>Tool</strong> erstellte Konfiguration enthält<br />
Informationen über die Anordnung sowie die Größenverhältnisse der Monitore<br />
am TradeSwitch-Arbeitsplatz.<br />
Zusätzlich werden der Schaltzustand der <strong>CrossDisplay</strong>-<strong>Switching</strong>-Funktion <strong>und</strong> die<br />
Einstellungen zur Mausgeschwindigkeit in der Konfiguration gespeichert.<br />
HINWEIS: Die Gr<strong>und</strong>einstellung des KVM-Switches kann nur über das Setup-Menü<br />
bzw. den Setup-Modus verändert werden.<br />
Neue Konfiguration erstellen<br />
Nach dem Start der Software wird automatisch eine neue Konfiguration erstellt.<br />
HINWEIS: Sie können mit der Software Konfigurationen für verschiedene Varianten<br />
der KVM-Switches der TradeSwitch-Serie erstellen.<br />
Wählen Sie nach dem Start der Software die von Ihnen verwendete Variante des<br />
KVM-Switches aus.<br />
Auch wenn die Software bereits gestatet ist, können Sie jederzeit eine neue Konfiguration<br />
erstellen.<br />
So erstellen Sie eine neue Konfiguration:<br />
1. Klicken Sie in der Menüleiste auf Datei > Neu oder<br />
auf das -Symbol in der Symbolleiste.<br />
2. Wählen Sie die von Ihnen verwendete Variante des KVM-Switches aus.<br />
3. Klicken Sie auf OK.<br />
9 · <strong>CrossDisplay</strong>-<strong>Switching</strong> <strong>Config</strong> <strong>Tool</strong>
Konfiguration übertragen oder auslesen<br />
Konfigurationen verwalten<br />
Eine mit der Software erstellte Konfiguration übertragen Sie über eine serielle Verbindung<br />
an den KVM-Switch. Die übertragenen Konfigurationseinstellungen werden<br />
vom KVM-Switch sofort angewendet.<br />
Wurde der KVM-Switch bereits konfiguriert, können Sie die Konfiguration über die<br />
serielle Verbindung auslesen.<br />
So übertragen Sie die Konfiguration an den KVM-Switch:<br />
1. Klicken Sie in der Menüleiste auf Aktion > Gerätekonfiguration übertragen oder<br />
auf das -Symbol in der Symbolleiste.<br />
2. Verbinden Sie die Service-Schnittstelle des KVM-Switches mit dem Rechner auf<br />
dem Sie die Software gestartet haben.<br />
3. Klicken Sie im Dialog auf die Schnittstelle, die Sie mit dem KVM-Switch verb<strong>und</strong>en<br />
haben.<br />
HINWEIS: Falls die Schnittstelle nicht angezeigt wird, klicken Sie auf Aktualisieren,<br />
um die Schnittstellen erneut zu identifizieren.<br />
4. Wählen Sie die Bitrate der Service-Schnittstelle (Standard: 115.200)<br />
des KVM-Switches TradeSwitch2-USB bzw. TradeSwitch4-USB .<br />
HINWEIS: Eine Verbindung zum KVM-Switch kann nur hergestellt werden, wenn<br />
der Standard-Modus der Service-Buchse auf Setup Menu eingestellt ist.<br />
Der Switch-Modus (nur TradeSwitch2-USB <strong>und</strong> TradeSwitch4-USB) wird von der Software<br />
nicht unterstützt. Ändern Sie ggf. den aktiven Modus im Setup-Menü des<br />
KVM-Switches.<br />
5. Klicken Sie auf OK.<br />
HINWEIS: Vor der Übertragung wird geprüft, ob die Anzahl der Kanäle der Konfiguration<br />
<strong>und</strong> des KVM-Switches übereinstimmt. Ist dies nicht der Fall, erscheint<br />
eine Meldung. Sie können die Übertragung an dieser Stelle abbrechen oder mit<br />
folgenden Einschränkungen fortsetzen:<br />
Anzahl der Kanäle in der Software kleiner als im KVM-Switch: <br />
Die Konfiguration der in der Software enthaltenen Kanäle wird übertragen.<br />
Die Konfiguration der übrigen Kanäle im KVM-Switch bleibt erhalten.<br />
Anzahl der Kanäle in der Software größer als im KVM-Switch: <br />
Die Konfiguration aller Kanäle des KVM-Switches wird übertragen.<br />
<strong>CrossDisplay</strong>-<strong>Switching</strong> <strong>Config</strong> <strong>Tool</strong> · 10
Konfigurationen verwalten<br />
So lesen Sie die Konfiguration des KVM-Switches aus:<br />
1. Klicken Sie in der Menüleiste auf Aktion > Gerätekonfiguration auslesen oder<br />
auf das -Symbol in der Symbolleiste.<br />
2. Verbinden Sie die Service-Schnittstelle des KVM-Switches mit dem Rechner auf<br />
dem Sie die Software gestartet haben.<br />
3. Klicken Sie im Dialog auf die Schnittstelle, die Sie mit dem KVM-Switch verb<strong>und</strong>en<br />
haben.<br />
HINWEIS: Falls die Schnittstelle nicht angezeigt wird, klicken Sie auf Aktualisieren,<br />
um die Schnittstellen erneut zu identifizieren.<br />
4. Wählen Sie die Bitrate der Service-Schnittstelle (Standard: 115.200)<br />
des KVM-Switches TradeSwitch2-USB bzw. TradeSwitch4-USB .<br />
HINWEIS: Eine Verbindung zum KVM-Switch kann nur hergestellt werden, wenn<br />
der Standard-Modus der Service-Buchse auf Setup Menu eingestellt ist.<br />
Der Switch-Modus (nur TradeSwitch2-USB <strong>und</strong> TradeSwitch4-USB) wird von der Software<br />
nicht unterstützt. Ändern Sie ggf. den aktiven Modus im Setup-Menü des<br />
KVM-Switches.<br />
5. Klicken Sie auf die OK.<br />
Konfiguration speichern oder laden<br />
Eine mit der Software erstellte Konfiguration können Sie auf einem lokalen Datenträger<br />
speichern <strong>und</strong> zu einem späteren Zeitpunkt wieder laden.<br />
So speichern Sie eine erstellte Konfiguration auf einem lokalen Laufwerk:<br />
1. Klicken Sie in der Menüleiste auf Datei > Speichern unter oder<br />
auf das -Symbol in der Symbolleiste.<br />
2. Wählen Sie im Datei-Dialog den gewünschten Speicherort der Datei <strong>und</strong> geben<br />
Sie einen Dateinamen ein.<br />
HINWEIS: Wurde die Konfiguration von einem lokalen Laufwerk geladen oder<br />
während einer Sitzung bereits gespeichert, können Sie zum Speichern den<br />
Menüeintrag Datei > Speichern oder das -Symbol in der Symbolleiste nutzen.<br />
Bei Verwendung dieser Funktion wird die Fassung der Datei auf dem Laufwerk<br />
überschrieben.<br />
3. Klicken Sie auf Öffnen.<br />
11 · <strong>CrossDisplay</strong>-<strong>Switching</strong> <strong>Config</strong> <strong>Tool</strong>
Konfigurationen verwalten<br />
So laden Sie eine bereits erstellte Konfiguration von einem lokalen Laufwerk:<br />
1. Klicken Sie in der Menüleiste auf Datei > Öffnen oder<br />
auf das -Symbol in der Symbolleiste<br />
2. Wählen Sie im Datei-Dialog den Speicherort der Datei <strong>und</strong> markieren Sie<br />
die Datei.<br />
3. Klicken Sie auf Öffnen.<br />
Ansicht des Arbeitsbereichs drucken<br />
Die Anordnung sowie die Größenverhältnisse der Monitore im Arbeitsbereich können<br />
Sie ausdrucken.<br />
So drucken Sie die aktuelle Ansicht des Arbeitsbereichs:<br />
1. Klicken Sie in der Menüleiste auf Datei > Drucken oder<br />
auf das -Symbol in der Symbolleiste.<br />
2. Wählen Sie den Drucker <strong>und</strong> die gewünschten Einstellungen.<br />
3. Klicken Sie auf Drucken.<br />
<strong>CrossDisplay</strong>-<strong>Switching</strong> <strong>Config</strong> <strong>Tool</strong> · 12
Anordnung <strong>und</strong> Größenverhältnisse der Monitore<br />
Anordnung <strong>und</strong> Größenverhältnisse<br />
der Monitore<br />
Auf Seite 1 wurde die Anordnung von drei Monitoren nebeneinander vorgestellt:<br />
<br />
Beispielanordnungen<br />
Neben der Anordnung von Monitoren nebeneinander, werden nahezu alle denkbaren<br />
Kombinationen unterstützt. Auch die Größenverhältnisse der Monitore können<br />
nahezu beliebig variieren. Die folgende Tabelle listet einige Beispiele auf <strong>und</strong><br />
beschreibt die Besonderheiten.<br />
WICHTIG: Innerhalb der Software speichern Sie die Anordnung <strong>und</strong> Größenverhältnisse<br />
der Monitore so, wie es den Gegebenheiten des Arbeitsplatzes entspricht.<br />
<br />
<br />
<br />
<br />
13 · <strong>CrossDisplay</strong>-<strong>Switching</strong> <strong>Config</strong> <strong>Tool</strong><br />
<br />
Neben der bekannten Umschaltung<br />
auf einen links bzw. rechts angrenzenden<br />
Monitor, ist auch die Umschaltung<br />
auf einen oben bzw. unten<br />
angrenzenden Monitor möglich:<br />
Bewegen Sie den Mauszeiger an den<br />
Rand zwischen den Monitoren<br />
1 <strong>und</strong> 3 bzw. 2 <strong>und</strong> 4, um von einem<br />
oberen Monitor auf einen unteren<br />
(oder umgekehrt) zu schalten.<br />
Bei dieser Anordnung der Monitore ist<br />
die genaue vertikale Position des Mauszeigers<br />
bei Erreichen des unteren Randes<br />
von Monitor 1 relevant:<br />
Im ersten Drittel erfolgt die<br />
Umschaltung auf Monitor 2.<br />
Im mittleren Drittel erfolgt die<br />
Umschaltung auf Monitor 3.<br />
Im letzten Drittel erfolgt die<br />
Umschaltung auf Monitor 4.
Kanäle im Arbeitsbereich anordnen<br />
So fügen Sie einen Kanal in den Arbeitsbereich ein:<br />
1. Markieren Sie auf der linken Seite einen Kanal.<br />
2. Klicken Sie auf das Symbol (Pfeil rechts).<br />
Anordnung <strong>und</strong> Größenverhältnisse der Monitore<br />
Im Arbeitsbereich wird für jedes hinzugefügte Modul ein graues Rechteck (2 × 2<br />
Einheiten) mit einem schwarzen Rahmen erstellt <strong>und</strong> auf einer freien Position<br />
platziert.<br />
Das Rechteck symbolisiert den Monitor des am Kanal angeschlossenen Rechners.<br />
Der Name des Kanals wird innerhalb des Rechtecks angezeigt.<br />
So entfernen Sie einen Monitor aus dem Arbeitsbereich:<br />
1. Markieren Sie im Arbeitsbereich auf der rechten Seite das Rechteck, das den zu<br />
entfernenden Monitor eines Kanals symbolisiert.<br />
2. Klicken Sie auf das Symbol (Pfeil links).<br />
Bei dieser Anordnung der Monitore ist<br />
die genaue horizontale Position des Mauszeigers<br />
bei Erreichen des linken bzw.<br />
rechten Randes von Monitor 3 wichtig:<br />
In der oberen Hälfte erfolgt die<br />
Umschaltung auf Monitor 1 bzw. 4.<br />
In der unteren Hälfte erfolgt die<br />
Umschaltung auf Monitor 2 bzw. 5.<br />
TIPP: Die Markierung mehrerer Kanäle ist bei Betätigung der Shift- bzw. Strg-<br />
Taste während der Mausoperation möglich.<br />
TIPP: Verwenden Sie alternativ »Drag and Drop«-Mausoperationen oder das<br />
Kontextmenü des Rechtecks.<br />
TIPP: Die Markierung mehrerer Module ist bei Betätigung der Shift- bzw. Strg-<br />
Taste während der Mausoperation möglich.<br />
TIPP: Verwenden Sie alternativ »Drag and Drop«-Mausoperationen oder das<br />
Kontextmenü des Rechtecks.<br />
In der Liste der Kanäle auf der linken Seite wird für jedes entfernte Rechteck ein<br />
Eintrag erstellt.<br />
<strong>CrossDisplay</strong>-<strong>Switching</strong> <strong>Config</strong> <strong>Tool</strong> · 14
Anordnung <strong>und</strong> Größenverhältnisse der Monitore<br />
So verschieben Sie einen Monitor innerhalb des Arbeitsbereichs:<br />
WICHTIG: Nur wenn die gespeicherte Anordnung der Monitore in der Software<br />
den Gegebenheiten des Arbeitsplatzes entspricht, ist eine exakte Umschaltung<br />
möglich.<br />
HINWEIS: Leere Zwischenräume zwischen Monitoren im Arbeitsbereich werden<br />
während der Umschaltung via <strong>CrossDisplay</strong>-<strong>Switching</strong> übersprungen.<br />
1. Bewegen Sie die Maus über das Rechteck, das den zu verschiebenden Monitor<br />
symbolisiert.<br />
2. Drücken <strong>und</strong> halten Sie die linke Maustaste während Sie das Rechteck an die<br />
gewünschte Position auf dem Arbeitsbereich ziehen.<br />
Ziehen Sie den Rahmen über den rechten oder unteren Rand, falls die Arbeitsfläche<br />
für die gewünschte Positionierung zu klein ist. Die Arbeitsfläche wird so<br />
automatisch vergrößert.<br />
3. Lassen Sie die linke Maustaste los.<br />
HINWEIS: Ist die gewünschte Zielposition bereits (teilweise) belegt, ist das Verschieben<br />
nicht möglich. Das Rechteck wird in diesem Fall an der Ausgangposition<br />
belassen.<br />
15 · <strong>CrossDisplay</strong>-<strong>Switching</strong> <strong>Config</strong> <strong>Tool</strong>
Anordnung <strong>und</strong> Größenverhältnisse der Monitore<br />
Größenverhältnisse der Monitore anpassen<br />
Nur wenn die Größenverhältnisse der Monitore untereinander in der Software korrekt<br />
abgebildet sind, ist eine exakte Umschaltung <strong>und</strong> Mauspositionierung während<br />
der Umschaltung möglich.<br />
WICHTIG: Die Auflösung eines Monitors ist hierfür nicht relevant.<br />
So passen Sie die Größenverhältnisse der Monitore untereinander an:<br />
1. Klicken Sie mit der Maus auf das Rechteck, das den Monitor symbolisiert, dessen<br />
Größe Sie ändern möchten.<br />
An jeder Ecke des Rechtecks <strong>und</strong> in den Mitten zwischen zwei Ecken erscheinen<br />
Anfasser (schwarzen Kästchen).<br />
2. Klicken Sie auf einen Anfasser <strong>und</strong> halten Sie die linke Maustaste, während Sie den<br />
Anfasser auf die gewünschte Zielposition ziehen.<br />
3. Lassen Sie die linke Maustaste los.<br />
HINWEIS: Ist die gewünschte Zielposition bereits (teilweise) belegt, ist das Verschieben<br />
nicht möglich. Das Rechteck wird in diesem Fall an der Ausgangposition<br />
belassen.<br />
4. Wiederholen Sie die Schritte 2. <strong>und</strong> 3. gegebenenfalls mit anderen Anfassern des<br />
Rechtecks.<br />
<strong>CrossDisplay</strong>-<strong>Switching</strong> <strong>Config</strong> <strong>Tool</strong> · 16
Mausgeschwindigkeit anpassen<br />
Mausgeschwindigkeit anpassen<br />
Einstellen der Mausgeschwindigkeit<br />
Bei aktivierter Umschaltung via <strong>CrossDisplay</strong>-<strong>Switching</strong> (CDS) wird die Mausgeschwindigkeit<br />
der via CDS schaltbaren Rechner nicht vom Betriebssystem des angeschlossenen<br />
Rechners, sondern vom KVM-Switch gesteuert.<br />
Bewegt sich der Mauszeiger auf dem Monitor des Rechners zu langsam oder zu<br />
schnell, können Sie dieses Verhalten anpassen.<br />
HINWEIS: Bei aktivierter Umschaltung via <strong>CrossDisplay</strong>-<strong>Switching</strong> wirkt sich die Einstellung<br />
der Mausgeschwindigkeit nur auf Rechner aus, die für die Verwendung<br />
der Umschaltung via CDS konfiguriert sind.<br />
So ändern Sie die Mausgeschwindigkeit:<br />
1. Klicken Sie in der Menüleiste auf Einstellungen > Mausgeschwindigkeit oder<br />
auf das -Symbol in der Symbolleiste.<br />
2. Stellen Sie den Regler auf die gewünschte Stufe der Mausgeschwindigkeit.<br />
3. Klicken Sie auf Übernehmen.<br />
HINWEIS: Im Setup-Menü des KVM-Switches können Sie die Mausgeschwindigkeit<br />
ebenfalls einstellen.<br />
Korrektur der horizontalen <strong>und</strong> vertikalen<br />
Mausgeschwindigkeit<br />
Bei der Berechnung der Mausposition durch den KVM-Switch wird ein Bildformat<br />
des Monitors von 16:10 zugr<strong>und</strong>e gelegt.<br />
Falls sich der Mauszeiger auf dem Monitor in horizontaler <strong>und</strong> vertikaler Richtung<br />
unterschiedlich schnell bewegt, hat der Monitor ein hiervon abweichendes Bildformat.<br />
Stellen Sie in diesem Fall die Auflösung des Monitors in der Software manuell ein.<br />
Das Bildformat des Monitors wird auf Basis Ihrer Eingabe berechnet.<br />
So stellen Sie <strong>CrossDisplay</strong>-Auflösung manuell ein:<br />
1. Klicken Sie im Arbeitsbereich mit der rechten Maustaste auf das Rechteck, das<br />
den betroffenen Monitor symbolisiert.<br />
2. Klicken Sie auf Auflösung einstellen im Kontextmenü.<br />
3. Geben Sie die horizontale sowie vertikale Auflösung des Monitors ein <strong>und</strong><br />
klicken Sie auf Übernehmen.<br />
17 · <strong>CrossDisplay</strong>-<strong>Switching</strong> <strong>Config</strong> <strong>Tool</strong>
Mausgeschwindigkeit anpassen<br />
So aktivieren Sie wieder die automatische Erkennung der Auflösung:<br />
1. Klicken Sie im Arbeitsbereich mit der rechten Maustaste auf das Rechteck, das<br />
den betroffenen Monitor symbolisiert.<br />
2. Klicken Sie auf Auflösung einstellen im Kontextmenü.<br />
3. Geben Sie in die Eingabefelder für die horizontale sowie vertikale Auflösung<br />
eine 0 (Null) ein <strong>und</strong> klicken Sie auf Übernehmen.<br />
<strong>CrossDisplay</strong>-<strong>Switching</strong> <strong>Config</strong> <strong>Tool</strong> · 18
About this manual<br />
This manual has been carefully compiled and examined to the state-of-the-art.<br />
G&D neither explicitly nor implicitly takes guarantee or responsibility for the quality,<br />
efficiency and marketability of the product when used for a certain purpose that<br />
differs from the scope of service covered by this manual.<br />
For damages which directly or indirectly result from the use of this manual as well<br />
as for incidental damages or consequential damages, G&D is liable only in cases of<br />
intent or gross negligence.<br />
Caveat Emptor<br />
G&D will not provide warranty for devices that:<br />
Are not used as intended.<br />
Are repaired or modified by unauthorized personnel.<br />
Show severe external damages that was not reported on the receipt of goods.<br />
Have been damaged by non G&D accessories.<br />
G&D will not be liable for any consequential damages that could occur from using<br />
the products.<br />
Proof of trademark<br />
All product and company names mentioned in this manual, and other documents<br />
you have received alongside your G&D product, are trademarks or registered trademarks<br />
of the holder of rights.<br />
Legal details<br />
© <strong>Guntermann</strong> & <strong>Drunck</strong> <strong>GmbH</strong> 2012. All rights reserved.<br />
Version 1.10 – 09/10/2012<br />
Software: 1.0.000<br />
<strong>Guntermann</strong> & <strong>Drunck</strong> <strong>GmbH</strong><br />
Dortm<strong>und</strong>er Str. 4a<br />
57234 Wilnsdorf<br />
Germany<br />
Phone +49 2739 8901-100<br />
Fax +49 2739 8901-120<br />
http://www.GDsys.de<br />
sales@GDsys.de<br />
i · <strong>CrossDisplay</strong>-<strong>Switching</strong> <strong>Config</strong> <strong>Tool</strong>
Table of contents<br />
Inhaltsverzeichnis<br />
Introduction ..................................................................................................... 1<br />
Supported KVM switches .................................................................................. 1<br />
»<strong>CrossDisplay</strong> <strong>Switching</strong>« .................................................................................. 1<br />
System requirements .......................................................................................... 2<br />
Installation ....................................................................................................... 3<br />
Uninstalling the software ................................................................................. 3<br />
User interface ................................................................................................... 4<br />
List of channels ................................................................................................. 4<br />
Workspace ........................................................................................................ 5<br />
Menu bar and toolbar ........................................................................................ 5<br />
Getting started .................................................................................................. 7<br />
Starting the software .......................................................................................... 7<br />
Setting the software language ............................................................................. 7<br />
Enabling/disabling »<strong>CrossDisplay</strong> <strong>Switching</strong>« .................................................... 7<br />
Creating configurations and transferring them to the KVM switch ....................... 8<br />
Quitting the software ......................................................................................... 8<br />
Administrating configurations .......................................................................... 9<br />
Creating new configurations .............................................................................. 9<br />
Transferring or reading out configurations .......................................................... 9<br />
Loading or saving configurations ..................................................................... 11<br />
Printing the workspace ..................................................................................... 11<br />
Order and ratio of monitors ............................................................................ 12<br />
Exemplary orders ............................................................................................ 12<br />
Arranging channels in the workspace ............................................................... 13<br />
Adjusting the monitor ratio .............................................................................. 14<br />
Adjusting the mouse speed .............................................................................. 15<br />
Setting the mouse speed ................................................................................... 15<br />
Correcting horizontal and vertical mouse speed ................................................ 15<br />
<strong>CrossDisplay</strong>-<strong>Switching</strong> <strong>Config</strong> <strong>Tool</strong> · ii
Introduction<br />
Introduction<br />
With <strong>CrossDisplay</strong> <strong>Switching</strong> (CDS), you can use the mouse cursor to switch between<br />
computers.<br />
With the <strong>CrossDisplay</strong>-<strong>Switching</strong> <strong>Config</strong> <strong>Tool</strong>, you can configure both order and ratio of<br />
any monitors at the TradeSwitch console.<br />
ADVICE: If you use monitors of the same size and place them next to each other at<br />
the console, you can use the function directly after enabling (see page 7).<br />
Supported KVM switches<br />
The following KVM switches of the TradeSwitch series support <strong>CrossDisplay</strong> <strong>Switching</strong>:<br />
TradeSwitch2-USB<br />
TradeSwitch4-USB<br />
TradeSwitch8-USB (from hardware version 2.00 onwards)<br />
»<strong>CrossDisplay</strong> <strong>Switching</strong>«<br />
With <strong>CrossDisplay</strong> <strong>Switching</strong> (CDS), you can use the mouse cursor to switch between<br />
computers.<br />
Moving the cursor to the edge of an active monitor placed next to another monitor,<br />
the KVM switch switches to the computer of the next monitor.<br />
<br />
EXAMPLE: When moving the cursor to the right edge of Monitor 2, the KVM switch<br />
switches to the module connected to Monitor 3.<br />
When moving the cursor to the left edge of Monitor 2, the KVM switch switches to<br />
the module connected to Monitor 1.<br />
When moving the cursor to the outer edges (left edge of Monitor 1 or right edge of<br />
Monitor 3) <strong>CrossDisplay</strong> <strong>Switching</strong> does not take place.<br />
If you hold a mouse key while moving the mouse, switching cannot be carried out.<br />
However, you can still drag and drop objects.<br />
IMPORTANT: In the default settings of the KVM switch, the »<strong>CrossDisplay</strong> <strong>Switching</strong>«<br />
feature is disabled.<br />
1 · <strong>CrossDisplay</strong>-<strong>Switching</strong> <strong>Config</strong> <strong>Tool</strong>
System requirements<br />
Introduction<br />
You can install and operate the software on Windows computers that fulfil the following<br />
system requirements:<br />
Operating system: Windows XP SP3 (32/64 Bit), Windows 7 (32/64 Bit)<br />
Disk space: at least 15 MB<br />
The supplied data cable establishes the communication between software and KVM<br />
switch.<br />
Connecting the cable requires a free RS232 (TradeSwitch2-USB and TradeSwitch4-USB)<br />
or a free USB interface (TradeSwitch8-USB from hardware version 2.00 onwards) at<br />
the computer.<br />
IMPORTANT: When applying the KVM switch variant TradeSwitch8-USB install the<br />
device driver CP210x USB to UART Bridge VCP.<br />
Connected via service cable, the driver provides the service socket of the KVM<br />
switch as virtual serial interface (COM port). To establish a connection, you can<br />
select the virtual interface in the <strong>CrossDisplay</strong>-<strong>Switching</strong> <strong>Config</strong> <strong>Tool</strong>.<br />
To download the driver, visit www.gdsys.de and go to Downloads > Drivers.<br />
<strong>CrossDisplay</strong>-<strong>Switching</strong> <strong>Config</strong> <strong>Tool</strong> · 2
Installation<br />
Installation<br />
How to install the software on compatible Windows computers:<br />
1. Insert the installation CD in the computer’s CD drive.<br />
2. Double-click on Setup.exe.<br />
3. Read the instructions of the setup wizard and click Next.<br />
4. Select if you want to create a Desktop Shortcut and/or a Quick Launch Shortcut.<br />
Tick or untick the required check box and click Next.<br />
5. Enter the target folder on a local drive.<br />
NOTE: Click Browse to open the tree directory of the computer’s drives. Now you<br />
can create and select the target directory.<br />
6. Confirm the defined folder by clicking Next.<br />
7. Define a start menu folder for the shortcut to the software and the uninstall file.<br />
NOTE: If you do not want to create an entry on the start menu, tick the check box<br />
Do not create shortcuts.<br />
8. Start the installation by clicking Install.<br />
9. After the installation is finished, click Finish<br />
NOTE: If the Start configurator check box is ticked, the software starts automatically<br />
after the installation wizard is closed.<br />
Uninstalling the software<br />
How to uninstall the software:<br />
1. On the Windows start menu, open the folder <strong>Guntermann</strong> & <strong>Drunck</strong> <strong>GmbH</strong> ><br />
<strong>CrossDisplay</strong>-<strong>Switching</strong> <strong>Config</strong> <strong>Tool</strong>.<br />
NOTE: If you did not create a shortcut on the Windows start menu, you can uninstall<br />
the software in the Windows Control Panel.<br />
2. Click Uninstall.<br />
3. Follow the instructions of the wizard.<br />
3 · <strong>CrossDisplay</strong>-<strong>Switching</strong> <strong>Config</strong> <strong>Tool</strong>
User interface<br />
User interface<br />
The user interface is divided into two parts. The following paragraphs provide<br />
detailed information about each part.<br />
List of channels<br />
The left column lists all KVM switch channels that are not included in the workspace<br />
(right).<br />
These channels cannot be switched via <strong>CrossDisplay</strong> <strong>Switching</strong>. The mouse speed settings<br />
(see page 15 f.) do not apply for these channels.<br />
Click (right arrow) to move the selected channel to the workspace.<br />
ADVICE: You can also drag and drop the channels by mouse or use the context<br />
menu to move the channels to the workspace.<br />
<strong>CrossDisplay</strong>-<strong>Switching</strong> <strong>Config</strong> <strong>Tool</strong> · 4
User interface<br />
Workspace<br />
The right column (in the following called workspace) shows monitors of channels you<br />
can switch by using <strong>CrossDisplay</strong> <strong>Switching</strong>.<br />
Monitors are displayed as rectangles. The channel name is displayed in the rectangle.<br />
You can use the handles to change the rectangles’ height and width.<br />
As you can see in the screenshot, the handles are small black boxes framing<br />
Channel 1.<br />
Click (left arrow) to remove the selected rectangle from the workspace.<br />
ADVICE: You can also drag and drop the channels by mouse or use the context<br />
menu to remove the channels from the workspace.<br />
NOTE: The maximum size of the workspace is adjusted dynamically if you drag an<br />
element beyond the available workspace.<br />
Menu bar and toolbar<br />
All software functions can be carried out in the menu bar. The following table lists<br />
these functions.<br />
You can also carry out the most important functions in the toolbar. The icons are<br />
shown in the table.<br />
FILE MENU<br />
New Create new configuration<br />
ACTION MENU<br />
Open Load configuration from local drive<br />
Save Save configuration <strong>und</strong>er the known file name<br />
Save as Open dialog to select location and file name<br />
Print Print workspace<br />
Quit Quit software<br />
Get device configuration Use serial data connection to read out the KVM<br />
switch configuration<br />
Set device configuration Use serial data connection to transmit the KVM<br />
switch configuration<br />
5 · <strong>CrossDisplay</strong>-<strong>Switching</strong> <strong>Config</strong> <strong>Tool</strong>
SETTINGS MENU<br />
HELP MENU<br />
<strong>CrossDisplay</strong>-<strong>Switching</strong> on/off Enable/disable »<strong>CrossDisplay</strong>-<strong>Switching</strong>«<br />
Mouse speed Set mouse speed<br />
Language Select language (English or German)<br />
About Show information about the software<br />
User interface<br />
<strong>CrossDisplay</strong>-<strong>Switching</strong> <strong>Config</strong> <strong>Tool</strong> · 6
Getting started<br />
Getting started<br />
This chapter gives you information about how to operate the software.<br />
Starting the software<br />
How to start the installed software:<br />
On the Windows start menu, open the folder <strong>Guntermann</strong> & <strong>Drunck</strong> <strong>GmbH</strong> ><br />
<strong>CrossDisplay</strong>-<strong>Switching</strong> <strong>Config</strong> <strong>Tool</strong> and click <strong>CrossDisplay</strong>-<strong>Switching</strong> <strong>Config</strong> <strong>Tool</strong>.<br />
Double-click the software’s desktop icon.<br />
NOTE: You can use the software to create configurations for various KVM<br />
switches of the TradeSwitch series.<br />
After you start the software, select the KVM switch in use.<br />
Setting the software language<br />
You can set either German or English as software language.<br />
How to select the software language:<br />
1. In the menu bar, click Settings.<br />
2. Move the cursor to Language.<br />
3. Click on German or English.<br />
NOTE: The active language is ticked.<br />
Enabling/disabling »<strong>CrossDisplay</strong> <strong>Switching</strong>«<br />
In the default settings of the KVM switch, <strong>CrossDisplay</strong> <strong>Switching</strong> is disabled. You can<br />
enable or disable the feature in the software.<br />
How to enable »<strong>CrossDisplay</strong> <strong>Switching</strong>«:<br />
1. Tick the check box <strong>CrossDisplay</strong> <strong>Switching</strong> on/off <strong>und</strong>er the list of channels.<br />
How to disable »<strong>CrossDisplay</strong> <strong>Switching</strong>«:<br />
1. Tick the check box <strong>CrossDisplay</strong> <strong>Switching</strong> on/off <strong>und</strong>er the list of channels.<br />
NOTE: You can enable or disable »<strong>CrossDisplay</strong>-<strong>Switching</strong>« on the Setup menu of<br />
the KVM switch.<br />
7 · <strong>CrossDisplay</strong>-<strong>Switching</strong> <strong>Config</strong> <strong>Tool</strong>
Getting started<br />
Creating configurations and transferring them to the<br />
KVM switch<br />
The following chapters describe the required steps to create and transfer configurations<br />
to the KVM switch.<br />
For a better overview, we provide you with a summary of all required steps. You<br />
can follow the links for detailed information:<br />
1. Create a new configuration (see page 9).<br />
2. You can switch between the channels in the workspace (right column) by using<br />
<strong>CrossDisplay</strong> <strong>Switching</strong>.<br />
Move the desired channels to the workspace (see page 13)<br />
3. You can only switch to the correct computer and position the mouse if both the<br />
monitor order and the ratio are adjusted correctly.<br />
Use the same order in the workspace in which the monitors are placed at your<br />
console (see page 13).<br />
Check and, if required, change the monitor ratio (see page 14).<br />
4. The mouse position is based on a monitor aspect ratio of 16:10.<br />
Adjust the resolutions of monitors with other ratios (see page 15).<br />
5. Transfer the configuration to the KVM switch (see page 9).<br />
Quitting the software<br />
The software is only required to define the monitor order and adjust the ratio of the<br />
monitors at the TradeSwitch console.<br />
After the configuration is transferred to the KVM switch (see page 9), you need the<br />
software only if you want to change the configuration.<br />
How to quit the software:<br />
1. In the menu bar, click File > Quit.<br />
<strong>CrossDisplay</strong>-<strong>Switching</strong> <strong>Config</strong> <strong>Tool</strong> · 8
Administrating configurations<br />
Administrating configurations<br />
<strong>Config</strong>urations created with the <strong>CrossDisplay</strong>-<strong>Switching</strong> <strong>Config</strong> <strong>Tool</strong> contain information<br />
about the order and ratio of monitors placed at the TradeSwitch console.<br />
Both the switching status of the <strong>CrossDisplay</strong> <strong>Switching</strong> feature and the mouse speed<br />
settings are saved in the configuration as well.<br />
NOTE: The basic settings of the KVM switch can only be changed in the Setup menu<br />
or the Setup mode.<br />
Creating new configurations<br />
After you start the software, a new configuration is created automatically.<br />
NOTE: You can use the software to create configurations for various KVM<br />
switches of the TradeSwitch series.<br />
After you start the software, select the KVM switch in use.<br />
Even after the software is started, you can create new configurations.<br />
How to create new configurations:<br />
1. In the menu bar, click File > New or<br />
click the icon in the toolbar.<br />
2. Select your KVM switch.<br />
3. Click OK.<br />
Transferring or reading out configurations<br />
You can use a serial connection to transfer configurations to the KVM switch. The<br />
KVM switch applies the configuration settings immediately.<br />
If the KVM switch is already configured, you can use a serial connection to read out<br />
the configuration.<br />
How to transfer configurations to the KMV switch:<br />
1. In the menu bar, click Action > Set device configuration or<br />
click the icon in the toolbar.<br />
2. Connect the service port of the KVM switch with the computer on which you<br />
started the software.<br />
9 · <strong>CrossDisplay</strong>-<strong>Switching</strong> <strong>Config</strong> <strong>Tool</strong>
3. Click on the Port which you connected with the KVM switch.<br />
NOTE: If the port is not listed, click Refresh to re-identify the ports.<br />
Administrating configurations<br />
4. Select the Bitrate (Standard: 115.200) of TradeSwitch2-USB or TradeSwitch4-USB.<br />
NOTE: You can only establish a connection to the KVM switch if the standard<br />
mode of the service port is set to Setup Menu.<br />
The Switch mode (TradeSwitch2-USB and TradeSwitch4-USB only) is not supported<br />
by the software. Change the active mode on the Setup Menu of the KVM switch.<br />
5. Click OK.<br />
NOTE: Before transferring the software checks if the number of channels in the<br />
configuration matches the number of channels in the KVM switch. If the number<br />
of channels do not match a message is displayed. You can cancel transferring or<br />
continue with the following limitations:<br />
Number of channels in the software is smaller than in the KVM switch: <br />
The configuration of all channels listed in the software is transferred.<br />
The configuration of all other channels in the KVM switch remains the same.<br />
Number of channels in the software is bigger than in the KVM switch: <br />
The configuration of all KVM switch channels is transferred.<br />
How to read out the configuration of the KVM switch:<br />
1. In the menu bar, click Action > Get device configuration or<br />
click the icon in the toolbar.<br />
2. Connect the service port of the KVM switch with the computer on which you<br />
started the software.<br />
3. Click on the Port which you connected with the KVM switch.<br />
NOTE: If the port is not listed, click Refresh to re-identify the ports.<br />
4. Select the Bitrate (Standard: 115.200) of TradeSwitch2-USB or TradeSwitch4-USB.<br />
NOTE: You can only establish a connection to the KVM switch if the standard<br />
mode of the service port is set to Setup Menu.<br />
The Switch mode (TradeSwitch2-USB and TradeSwitch4-USB only) is not supported<br />
by the software. Change the active mode on the Setup Menu of the KVM switch.<br />
5. Click OK.<br />
<strong>CrossDisplay</strong>-<strong>Switching</strong> <strong>Config</strong> <strong>Tool</strong> · 10
Administrating configurations<br />
Loading or saving configurations<br />
You can save a configuration that you created with the software on a local drive to<br />
reload them later.<br />
How to save configurations on a local drive:<br />
1. In the menu bar, click File > Save as... or<br />
click the icon in the toolbar.<br />
2. In the file dialog, select the file location and enter the file name.<br />
NOTE: If you load the configuration from a local drive, or if you already saved the<br />
configuration during a session, you can save the configuration by using <br />
File > Save or the icon in the toolbar.<br />
When using this function, the existing file is overwritten.<br />
3. Click Open.<br />
How to load existing configurations on a local drive:<br />
1. In the menu bar, click File > Open or<br />
click the icon in the toolbar.<br />
2. In the file dialog, select the file location and select the file.<br />
3. Click Open.<br />
Printing the workspace<br />
You can print the workspace including the current monitor order and ratio.<br />
How to print the current workspace:<br />
1. In the menu bar, click File > Print or<br />
click the icon in the toolbar.<br />
2. Select the printer and the settings.<br />
3. Click Print.<br />
11 · <strong>CrossDisplay</strong>-<strong>Switching</strong> <strong>Config</strong> <strong>Tool</strong>
Order and ratio of monitors<br />
The figure on page 1 showed you three monitors placed in a row:<br />
<br />
Exemplary orders<br />
Order and ratio of monitors<br />
<br />
In addition to monitors placed next to each other, any combinations are supported.<br />
The monitor ratio can vary as well. The following table shows some examples and<br />
describes special features.<br />
IMPORTANT: In the software you can save the monitor order and ratio according<br />
to how they are placed on the desk.<br />
<br />
<br />
<br />
<br />
In addition to switching to a monitor<br />
placed on the left or the right side of<br />
the active monitor, you can also switch<br />
to monitors placed above or below the<br />
active monitor:<br />
Move the cursor to one of the edges<br />
between monitors 1 and 3 or 2 and 4 to<br />
switch from an upper monitor to a<br />
lower monitor (or vice versa).<br />
If the monitors are placed as shown on<br />
the left, it is important to mind the exact<br />
vertical cursor position when reaching<br />
the lower edge of Monitor 1:<br />
In the first third you can switch to<br />
monitor 2.<br />
In the second third you can switch to<br />
monitor 3.<br />
In the last third you can switch to<br />
monitor 4.<br />
<strong>CrossDisplay</strong>-<strong>Switching</strong> <strong>Config</strong> <strong>Tool</strong> · 12
Order and ratio of monitors<br />
<br />
<br />
<br />
Arranging channels in the workspace<br />
How to add monitors to the workspace:<br />
1. In the left column, select a channel.<br />
2. Click (left arrow).<br />
In the workspace, each added module is displayed as grey rectangle (2 × 2 units)<br />
with a black frame and is placed at an available position.<br />
3. The rectangle symbolizes the monitor of the computer connected to the channel.<br />
The channel name is shown within the rectangle.<br />
How to remove monitors from the workspace:<br />
1. In the right column, select the rectangle of the monitor you want to remove.<br />
2. Click (left arrow).<br />
<br />
<br />
Each removed module monitor is added to the list of channels in the left column.<br />
13 · <strong>CrossDisplay</strong>-<strong>Switching</strong> <strong>Config</strong> <strong>Tool</strong><br />
If the monitors are placed as shown on<br />
the left, it is important to mind the exact<br />
horizontal cursor position when reaching<br />
the left or right edge of Monitor 3:<br />
In the upper half you can switch to<br />
monitors 1 or 4.<br />
In the lower half you can switch to<br />
monitors 2 or 5.<br />
ADVICE: You can select multiple channels by pressing Shift or Ctrl while moving<br />
the mouse.<br />
ADVICE: You can also drag and drop monitors by mouse or use the rectangle’s<br />
context menu.<br />
ADVICE: You can select multiple monitors by pressing Shift or Ctrl while moving<br />
the mouse.<br />
ADVICE: You can also drag and drop monitors by mouse or use the rectangle’s<br />
context menu.
How to move monitors within the workspace:<br />
Order and ratio of monitors<br />
IMPORTANT: Exact switching is only possible if the monitors in the software are<br />
placed in the same order as on your desk.<br />
NOTE: Spaces between the monitors in the workspace are skipped during <strong>CrossDisplay</strong><br />
<strong>Switching</strong>.<br />
1. Move the mouse over the rectangle of the monitor you want to move.<br />
2. Press and hold the left mouse key while dragging the rectangle to the desired position.<br />
Drag the handle beyond the right or left edge if the workspace is too small for the<br />
monitor size you want to adjust. The workspace maximizes automatically.<br />
3. Release the left mouse key.<br />
NOTE: You cannot move the rectangle to spaces already (partly) occupied by other<br />
rectangles. In such cases, the rectangle remains at its original position.<br />
Adjusting the monitor ratio<br />
Both exact switching and mouse positions are only possible if the ratio among monitors<br />
is assigned correctly in the software.<br />
IMPORTANT: The monitor resolution is not important for this step.<br />
How to adjust the ratio among monitors<br />
1. Click on the rectangle of the monitor for which you want to change the ratio.<br />
On each of the rectangle’s corners and in the middle between the two corners you<br />
can see adjustment handles (small black squares).<br />
2. Click one of the handles and hold the left mouse key while dragging the handle to<br />
the desired position.<br />
3. Release the left mouse key.<br />
NOTE: You cannot move the rectangle to spaces already (partly) occupied by other<br />
rectangles. In such cases, the rectangle remains at its original position.<br />
4. Repeat steps 2 and 3 with the other handles.<br />
<strong>CrossDisplay</strong>-<strong>Switching</strong> <strong>Config</strong> <strong>Tool</strong> · 14
Adjusting the mouse speed<br />
Adjusting the mouse speed<br />
Setting the mouse speed<br />
With active <strong>CrossDisplay</strong> <strong>Switching</strong>, the mouse speed is not controlled by the operating<br />
system of the connected computers but by the KVM switch.<br />
If the cursor moves too fast or too slow, you can adjust the speed.<br />
NOTE: With active <strong>CrossDisplay</strong> <strong>Switching</strong>, any mouse speed settings apply only for<br />
computers configured for the use of CDS.<br />
How to change the mouse speed:<br />
1. In the menu bar, click Settings > Mouse speed or<br />
click the icon in the toolbar.<br />
2. Move the controller to the desired value.<br />
3. Click Set.<br />
NOTE: You can also adjust the mouse speed on the Setup menu of the KVM switch.<br />
Correcting horizontal and vertical mouse speed<br />
When calculating the mouse position, the KVM switch takes a monitor ratio of<br />
16:10 as a basis.<br />
If the cursor speed changes between horizontal and vertical mouse movements, the<br />
monitor differs from the assumed ratio.<br />
In this case, you can adjust the monitor resolution manually in the software. The<br />
monitor ratio is calculated on the basis of your entries.<br />
How to adjust the <strong>CrossDisplay</strong> resolution manually:<br />
1. In the workspace, right-click the monitor whose resolution you want to adjust.<br />
2. On the context menu, click Set resolution.<br />
3. Enter the vertical and horizontal resolution and click Set.<br />
How to auto-detect the resolution<br />
1. In the workspace, right-click the monitor whose resolution is to be to autodetected.<br />
2. On the context menu, click Set resolution.<br />
3. Set the horizontal and vertical resolution to 0 (zero) and click Set.<br />
15 · <strong>CrossDisplay</strong>-<strong>Switching</strong> <strong>Config</strong> <strong>Tool</strong>
NOTES
NOTES
NOTES
NOTES
NOTES
Das Handbuch wird fortlaufend aktualisiert <strong>und</strong> im Internet veröffentlicht.<br />
The manual is constantly updated and available on our website.<br />
http://gdsys.de/A9100210<br />
<strong>Guntermann</strong> & <strong>Drunck</strong> <strong>GmbH</strong><br />
Dortm<strong>und</strong>er Str. 4a<br />
57234 Wilnsdorf<br />
Germany<br />
http://www.GDsys.de<br />
sales@GDsys.de


