Bedienungsanleitung - Dream Multimedia
Bedienungsanleitung - Dream Multimedia
Bedienungsanleitung - Dream Multimedia

Erfolgreiche ePaper selbst erstellen
Machen Sie aus Ihren PDF Publikationen ein blätterbares Flipbook mit unserer einzigartigen Google optimierten e-Paper Software.
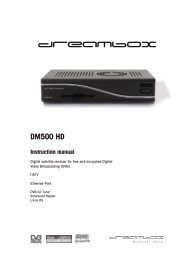
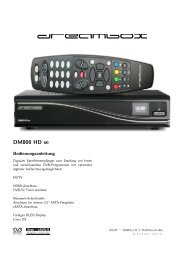
<strong>Dream</strong>box DM 600 PVR<br />
<strong>Bedienungsanleitung</strong><br />
Digitaler Satellitenempfänger zum Empfang von freien<br />
und verschlüsselten DVB-Programmen.<br />
Kommunikations-Schnittstelle<br />
Anschluss für interne Festplatte<br />
Smartcard Leser<br />
Linux OS<br />
B e d i e n u n g s a n l e i t u n g D r e a m b o x D M 7 0 2 5<br />
User Manual<br />
Digital satellite receiver for free and encrypted<br />
Digital Video Broadcasting (DVB).<br />
Communication-Port<br />
Internal hard disk support<br />
Smartcard Reader<br />
Linux OS
B e d i e n u n g s a n l e i t u n g D r e a m b o x D M 6 0 0 PVR deutsch<br />
1. I n h a l t s v e r z e i c h n i s<br />
1. Inhaltsverzeichnis............................................................................................................................. - 2 -<br />
2. Geräteansichten ............................................................................................................................... - 4 -<br />
3. Erklärung Vorderansicht ................................................................................................................... - 5 -<br />
4. Erklärung Rückansicht...................................................................................................................... - 5 -<br />
5. Sicherheitshinweise.......................................................................................................................... - 7 -<br />
6. Betriebspausen ................................................................................................................................ - 8 -<br />
7. Zusätzliche Sicherheitshinweise....................................................................................................... - 8 -<br />
8. Entsorgungshinweise ....................................................................................................................... - 9 -<br />
9. Lieferumfang .................................................................................................................................. - 10 -<br />
10. Inbetriebnahme............................................................................................................................. - 10 -<br />
11. Fernbedienung ............................................................................................................................. - 11 -<br />
12. Wichtige Hinweise zur Bedienung ................................................................................................ - 12 -<br />
13. Tastenerklärung der Fernbedienung ............................................................................................ - 13 -<br />
14. <strong>Dream</strong>box ein- bzw. ausschalten ................................................................................................. - 16 -<br />
15. Sleeptimer .................................................................................................................................... - 17 -<br />
16. OSD Hauptmenü .......................................................................................................................... - 17 -<br />
17. Infobar .......................................................................................................................................... - 19 -<br />
17.1 Infobar – EPG (Electronic Program Guide) .......................................................................... - 20 -<br />
17.2 Infobar – Unterkanäle........................................................................................................... - 22 -<br />
17.3 Infobar – Tonspur................................................................................................................. - 23 -<br />
17.4 Infobar – Erweiterungen....................................................................................................... - 23 -<br />
18. Sprache einstellen........................................................................................................................ - 24 -<br />
19. Zeitzone einstellen........................................................................................................................ - 25 -<br />
19.1 manuelle Zeitkorrektur.......................................................................................................... - 27 -<br />
20. Signalanzeige (Antenne ausrichten, DM 600 PVR-T)................................................................... - 28 -<br />
20.1 5V abschalten (DM 600 PVR-T)........................................................................................... - 29 -<br />
20.2 Automatische Sendersuche (DM 600 PVR-T)...................................................................... - 30 -<br />
20.3 Manuelle Sendersuche (DM 600 PVR-T)............................................................................. - 32 -<br />
21. Automatische Sendersuche (DM 600 PVR-C).............................................................................. - 33 -<br />
21.1 Manuelle Sendersuche (DM 600 PVR-C)............................................................................. - 35 -<br />
22. Satfinder (Spiegel ausrichten, DM 600 PVR-S)............................................................................ - 36 -<br />
23. Satellitenkonfiguration (DM 600 PVR-S) ...................................................................................... - 37 -<br />
23.1 ein einzelner Satellit – direkte Verbindung (DM 600 PVR-S) ............................................... - 38 -<br />
23.2 zwei Satelliten via Toneburst Ansteuerung (DM 600 PVR-S)............................................... - 39 -<br />
23.3 zwei Satelliten via 22 KHz (nur Highband, DM 600 PVR-S)................................................. - 40 -<br />
23.4 zwei Satelliten über DiSEqC A/B (DM 600 PVR-S).............................................................. - 41 -<br />
23.5 vier Satelliten über DiSEqC OPT A/B (DM 600 PVR-S)....................................................... - 42 -<br />
23.6 mehrere Satelliten mit DiSEqC Rotor (DM 600 PVR-S) ....................................................... - 43 -<br />
24. Motor Konfiguration (DM 600 PVR-S) .......................................................................................... - 46 -<br />
25. Beispieltabelle für DiSEqC 1.2 Rotor (DM 600 PVR-S) ................................................................ - 47 -<br />
26. Sendersuche pro Satellit (Automatische Sendersuche, DM 600 PVR-S) ..................................... - 48 -<br />
27. Sendersuche alle Satelliten (Automatische Multisat Sendersuche, DM 600 PVR-S) ................... - 51 -<br />
28. Manuelle Sendersuche (DM 600 PVR-S) ..................................................................................... - 55 -<br />
29. Transponder bearbeiten (DM 600 PVR-S) ................................................................................... - 56 -<br />
30. Serviceverwaltung – neues Bouquet erstellen.............................................................................. - 59 -<br />
30.1 Serviceverwaltung – Services zu einem Bouquet hinzufügen.............................................. - 61 -<br />
30.2 Serviceverwaltung – Bouquets bearbeiten........................................................................... - 63 -<br />
31. Jugendschutz und Setupsperre.................................................................................................... - 65 -<br />
31.1 Jugendschutz aktivieren....................................................................................................... - 66 -<br />
31.2 Jugendschutz deaktivieren................................................................................................... - 68 -<br />
31.3 Setupsperre aktivieren ......................................................................................................... - 69 -<br />
31.4 Setupsperre deaktivieren ..................................................................................................... - 71 -<br />
32. Sender sperren............................................................................................................................. - 72 -<br />
33. Sender entsperren........................................................................................................................ - 73 -<br />
34. Bild und Ton Einstellungen........................................................................................................... - 74 -<br />
35. Tastatur ........................................................................................................................................ - 76 -<br />
- 2 -
B e d i e n u n g s a n l e i t u n g D r e a m b o x D M 6 0 0 PVR deutsch<br />
36. Benutzeroberfläche (OSD) ........................................................................................................... - 77 -<br />
36.1 Skin Einstellung................................................................................................................... - 79 -<br />
36.2 verfügbare Skins .................................................................................................................. - 80 -<br />
36.3 Videotext Position einrichten ................................................................................................ - 81 -<br />
37. Teletext (TuxTxt) .......................................................................................................................... - 83 -<br />
38. Experten Einstellungen................................................................................................................. - 85 -<br />
38.1 Kommunikation/Netzwerk (LAN einrichten, NFS Freigaben)................................................ - 87 -<br />
38.2 Ngrab - Streaming................................................................................................................ - 90 -<br />
38.3 Manuelle Softwareaktualisierung ......................................................................................... - 91 -<br />
38.4 Fernbedienung einrichten..................................................................................................... - 92 -<br />
38.5 Werkseinstellungen.............................................................................................................. - 93 -<br />
39. Festplatte - verwalten ................................................................................................................... - 94 -<br />
39.1 Festplatte – formatieren ....................................................................................................... - 95 -<br />
40. Film aufnehmen (Sofortaufnahme)............................................................................................... - 96 -<br />
40.1 Aufnahme beenden.............................................................................................................. - 97 -<br />
40.2 Aufgenommenen Film ansehen ........................................................................................... - 98 -<br />
40.3 Aufgenommenen Film löschen............................................................................................. - 99 -<br />
40.4 Aufgenommenen Film umbenennen .................................................................................. - 100 -<br />
41. Film aufnehmen (Timeraufnahme via EPG programmieren) ...................................................... - 101 -<br />
41.1 Unterkanäle via EPG programmieren ................................................................................ - 104 -<br />
42. Timeshift Funktion ...................................................................................................................... - 104 -<br />
43. Timer .......................................................................................................................................... - 105 -<br />
44. Information – Streaminformationen ............................................................................................ - 106 -<br />
45. Information – Über...................................................................................................................... - 107 -<br />
46. Fehlerbehebung ......................................................................................................................... - 108 -<br />
47. Setup-TV-Steuerung................................................................................................................... - 109 -<br />
47.1 Programmierablauf............................................................................................................. - 109 -<br />
47.2 TV-Geräteliste .................................................................................................................... - 110 -<br />
48. Technische Daten....................................................................................................................... - 115 -<br />
49. Kontakt & Support Informationen................................................................................................ - 117 -<br />
50. Garantieschein ........................................................................................................................... - 118 -<br />
51. Copyright Hinweise .................................................................................................................... - 119 -<br />
Hinweis: Die <strong>Dream</strong>box DM 600 PVR trägt das CE-Zeichen und erfüllt alle erforderlichen EU-Normen.<br />
Änderungen und Druckfehler vorbehalten.<br />
- 3 -
B e d i e n u n g s a n l e i t u n g D r e a m b o x D M 6 0 0 PVR deutsch<br />
2. Geräteansichten<br />
Vorderansicht<br />
Rückansicht DM 600 PVR mit C- bzw. T-Tuner<br />
B e d<br />
i e n u n g s<br />
a n l e i t u n<br />
g D r e a<br />
S-Video<br />
Ausgang<br />
m b o x D M 5 0<br />
u<br />
B e d i e n u n g s n l e i t u n g D r e a m b o x D M 5 0<br />
Rückansicht DM 600 PVR mit S-Tuner<br />
B e d i e n<br />
g s a n l e i t u n<br />
g<br />
Antennen<br />
Eingang<br />
LNB<br />
Eingang<br />
S-Video<br />
Ausgang<br />
Audio<br />
Ausgang<br />
(analog)<br />
Audio<br />
Ausgang<br />
(analog)<br />
Smartcard Leser Standby LED FB LED Standby<br />
ein/aus<br />
Antennen<br />
Ausgang<br />
Video<br />
Ausgang<br />
LNB<br />
Ausgang<br />
serielle<br />
Schnittstelle<br />
serielle<br />
Schnittstelle<br />
Video<br />
Ausgang<br />
Modem<br />
Schnittstelle<br />
- 4 -<br />
TV Anschluss<br />
Modem<br />
Schnittstelle<br />
Audio<br />
Ausgang<br />
(digital)<br />
TV Anschluss<br />
Audio<br />
Ausgang<br />
(digital)<br />
Netzwerk<br />
Schnittstelle<br />
Netzanschlus<br />
Netzwerk<br />
Schnittstelle<br />
Netzanschlus
B e d i e n u n g s a n l e i t u n g D r e a m b o x D M 6 0 0 PVR deutsch<br />
3. E r k l ä r u n g V o r d e r a n s i c h t<br />
Smartcardleser<br />
Stecken Sie Ihre <strong>Dream</strong>crypt Smartcard, mit dem Chip nach unten und nach vorne gerichtet<br />
den Smartcard-Leseschacht. <strong>Dream</strong>crypt ist ein eingetragenes Warenzeichen von <strong>Dream</strong>-<br />
<strong>Multimedia</strong>.<br />
Standby Led<br />
Die Standby Led leuchtet rot auf, wenn die <strong>Dream</strong>box in Standby geschaltet wurde.<br />
FB Led<br />
Die FB Led (FB = Fernbedienung) leuchtet beim Empfang von Fernbedienungssignalen auf.<br />
Standby an/aus<br />
Mit der Standby-Taste schalten Sie den Standby-Modus Ihrer <strong>Dream</strong>box ein bzw. aus.<br />
4. E r k l ä r u n g R ü c k a n s i c h t<br />
Antennen Eingang (DM 600 PVR-C/T)<br />
Schließen Sie hier das Kabel Ihrer Antenne an.<br />
Antennen Ausgang (DM 600 PVR-C/T)<br />
Hier können Sie optional Ihren Fernseher oder Videorekorder anschließen.<br />
LNB Eingang (DM 600 PVR-S)<br />
Schließen Sie hier das Koaxialkabel Ihrer Satellitenanlage an.<br />
LNB Ausgang (DM 600 PVR-S)<br />
Hier können Sie einen analogen/digitalen Satellitenempfänger anschließen. Sie müssen Ihre<br />
<strong>Dream</strong>box komplett herunterfahren, damit der Satellitenempfänger arbeiten kann.<br />
Modem Schnittstelle<br />
Über die Modem Schnittstelle kann eine Verbindung zum Internet via analoger<br />
Telefonleitung aufgebaut werden.<br />
S-Video Ausgang<br />
Verbinden Sie den S-Video Ausgang der <strong>Dream</strong>box mit einem Gerät mit S-Video Eingang,<br />
z.B. ein Beamer.<br />
- 5 -
B e d i e n u n g s a n l e i t u n g D r e a m b o x D M 6 0 0 PVR deutsch<br />
Video Ausgang (FBAS)<br />
Am Video Ausgang steht das Farb Bild Austast Signal zur Verfügung. Dort können Sie<br />
optional einen Monitor oder TV-Gerät mit entsprechendem Eingang anschließen.<br />
Audio Ausgang analog (Cinch)<br />
Um Ihre <strong>Dream</strong>box mit Ihrem HiFi-Verstärker zu verbinden, benutzen Sie bitte ein<br />
geeignetes Cinch-Kabel und schließen Sie dies an die <strong>Dream</strong>box an AUDIO R/L an und an<br />
einem freien Eingang (z.B. AUX oder CD) an Ihrem HiFi-Verstärker an.<br />
Serielle Schnittstelle (RS232C, Sub-D, 9-pol.)<br />
Die serielle Schnittstelle dient zum Update der Betriebssoftware und der Vorprogrammierung<br />
mittels PC. An dieser Schnittstelle schließen Sie bitte Ihr serielles Nullmodemkabel an.<br />
TV Anschluss (Scart)<br />
Mit einem passenden Scartkabel verbinden Sie hier Ihre <strong>Dream</strong>box mit einem<br />
TV-Gerät, Projektor oder Beamer.<br />
Audio Ausgang digital (Toslink)<br />
Sollte Ihr Verstärker über einen entsprechenden optischen Eingang verfügen, so verbinden<br />
Sie die Buchse DIGITAL AUDIO an der <strong>Dream</strong>box über ein optisches Kabel (Toslink) mit<br />
dem optischen Eingang Ihres Verstärkers. Ebenso steht an diesem Ausgang, falls gesendet,<br />
dass Dolby Digital-Signal (AC3) zur Verfügung.<br />
Netzteil Anschluss<br />
Schließen Sie bitte hier das mitgelieferte Stromkabel an Ihre <strong>Dream</strong>box an. Der<br />
Stromstecker darf nur in die dafür vorgesehene Steckdose 230V / 50Hz gesteckt werden.<br />
Netzwerk Schnittstelle (Ethernet 10/100Mbit, RJ45)<br />
Die Netzwerk-Schnittstelle dient als Kommunikationsschnittstelle mittels HTTP, FTP, NFS,<br />
Telnet und Samba. Ebenso zum Update der Betriebssoftware und der Vorprogrammierung<br />
mittels PC. An dieser Schnittstelle schließen Sie bitte Ihr Netzwerkkabel an.<br />
- 6 -
B e d i e n u n g s a n l e i t u n g D r e a m b o x D M 6 0 0 PVR deutsch<br />
5. Sicherheitshinweise<br />
Bevor Sie Ihre <strong>Dream</strong>box in Betrieb nehmen, sollten Sie zu Ihrem Schutz die<br />
Sicherheitshinweise gut durchlesen. Der Hersteller übernimmt keine Haftung für Schäden,<br />
die durch unsachgemäße Handhabung und durch Nichteinhaltung der<br />
Sicherheitsvorkehrungen entstanden sind.<br />
- Das Gerät muss so aufgestellt werden, dass es ausreichend belüftet wird.<br />
- Der Deckel des Gerätes darf nicht abgedeckt werden und muss ausreichenden<br />
Abstand zu anderen Geräten haben. Die Lüftungsschlitze des Gerätes müssen immer<br />
frei bleiben, um die Wärmeabfuhr aus dem Inneren des Gerätes zu gewährleisten.<br />
- Stellen Sie keine Vasen oder andere mit Flüssigkeit gefüllte Behältnisse auf das<br />
Gerät. Das Gerät darf keinem Tropf- oder Spritzwasser ausgesetzt werden.<br />
- Es dürfen keine brennbaren Gegenstände, wie Kerzen oder Öllampen auf das Gerät<br />
gestellt werden.<br />
- Das Gerät darf nur in gemäßigtem Klima betrieben werden.<br />
- Niemals das Gerät selber öffnen! Es besteht die Gefahr eines Elektroschocks.<br />
Sollte es einmal erforderlich sein das Gerät zu öffnen, wenden Sie sich bitte an<br />
geschultes Personal.<br />
- Stecken Sie niemals irgendwelche fremden Metallgegenstände in die Einschübe<br />
oder Lüftungsschlitze des Gerätes.<br />
ACHTUNG!!!<br />
Umbauten oder Modifikationen des Gerätes führen zum Garantieverlust, wenn<br />
diese nicht von einem Fachhändler durchgeführt werden und schriftlich<br />
bescheinigt werden.<br />
ACHTUNG!!!<br />
Wir empfehlen den Einbau einer Festplatte durch den Fachhändler.<br />
Bei unsachgemäßem Einbau der Festplatte erlischt die Garantieleistung.<br />
- 7 -
B e d i e n u n g s a n l e i t u n g D r e a m b o x D M 6 0 0 PVR deutsch<br />
6. Betriebspausen<br />
- Wird das Gerät längere Zeit nicht betrieben, ziehen Sie bitte das Stromkabel aus der<br />
Steckdose.<br />
- Während eines Gewitters sollte das Gerät ebenfalls vom Strom getrennt werden.<br />
7. Zusätzliche Sicherheitshinweise<br />
- Anschluss an die Außeneinheit (Antenne):<br />
Schalten Sie die <strong>Dream</strong>box aus, bevor Sie das Antennenkabel anschließen oder<br />
entfernen.<br />
- Anschluss an den Fernseher:<br />
Schalten Sie die <strong>Dream</strong>box aus, bevor Sie das Scartkabel an Ihren Fernseher<br />
anschließen.<br />
- Das Gerät ist umgehend vom Strom zu trennen, wenn das Stromkabel oder der<br />
Stromstecker Beschädigungen aufweisen.<br />
- Das Gerät ist umgehend vom Strom zu trennen, wenn es Feuchtigkeit ausgesetzt<br />
wurde oder Feuchtigkeit eingedrungen ist.<br />
- Das Gerät ist umgehend vom Strom zu trennen, wenn starke äußere Beschädigungen<br />
festgestellt werden.<br />
- Setzen Sie Ihre <strong>Dream</strong>box nicht direkter Sonnenbestrahlung, Blitzen oder Regen aus.<br />
- Reinigung:<br />
Ziehen Sie das Stromkabel der <strong>Dream</strong>box aus der Steckdose, bevor Sie Ihre <strong>Dream</strong>box<br />
reinigen. Benutzen Sie einen leicht angefeuchteten Lappen ohne Reinigungsmittel.<br />
- Schließen Sie Ihre <strong>Dream</strong>box nur an Steckdosen an, die hierfür auch geeignet sind<br />
230V/50Hz. Hierbei darf es nicht zu Überlastungen kommen.<br />
- 8 -
B e d i e n u n g s a n l e i t u n g D r e a m b o x D M 6 0 0 PVR deutsch<br />
8. Entsorgungshinweise<br />
Die Verpackung der <strong>Dream</strong>box besteht ausschließlich aus wieder verwertbaren Materialien.<br />
Bitte führen Sie diese entsprechend sortiert dem “Dualen System” zu.<br />
Dieses Produkt darf am Ende seiner Lebensdauer nicht über den normalen Haushaltsabfall<br />
entsorgt werden, sondern muss an einem Sammelpunkt für das Recycling von elektrischen<br />
und elektronischen Geräten abgegeben werden. Das Symbol auf dem Produkt, der<br />
Gebrauchsanleitung oder der Verpackung weist darauf hin.<br />
Die Werkstoffe sind gemäß ihrer Kennzeichnung wiederverwertbar.<br />
Mit der Wiederverwendung, der stofflichen Verwertung oder anderen Formen der<br />
Verwertung von Altgeräten leisten Sie einen wichtigen Beitrag zum Schutze unserer Umwelt.<br />
Bitte erfragen Sie bei der Gemeindeverwaltung die zuständige Entsorgungsstelle.<br />
Achten Sie darauf, dass die leeren Batterien der Fernbedienung sowie Elektronikschrott<br />
nicht in den Hausmüll gelangen, sondern sachgerecht entsorgt werden (Rücknahme durch<br />
den Fachhandel, Sondermüll).<br />
- 9 -
B e d i e n u n g s a n l e i t u n g D r e a m b o x D M 6 0 0 PVR deutsch<br />
9. Lieferumfang<br />
Prüfen Sie die Lieferung auf Vollständigkeit.<br />
Im Lieferumfang sind enthalten:<br />
- 1 <strong>Dream</strong>box DM 600 PVR<br />
- 1 Steckernetzteil<br />
- 1 Netzanschlusskabel<br />
- 1 Fernbedienung<br />
- 2 Batterien (1,5V Micro / AAA / LR6)<br />
- 1 <strong>Bedienungsanleitung</strong> (aktuell im Internet http://www.dream-multimedia-tv.de )<br />
10. Inbetriebnahme<br />
- Legen Sie die beiliegenden Batterien unter Berücksichtigung der Polarität in das<br />
Batteriefach der Fernbedienung ein.<br />
- Bevor Sie die <strong>Dream</strong>box anschließen, lesen Sie bitte zunächst die Sicherheitshinweise<br />
unter Punkt 5. Sicherheitshinweise nach.<br />
- Schließen Sie die Antenne über ein passendes Antennenkabel an den<br />
Antennen-Eingang Ihrer <strong>Dream</strong>box an.<br />
- Verbinden Sie die <strong>Dream</strong>box über ein Scartkabel mit dem TV Anschluss Ihres<br />
Fernsehgerätes.<br />
- Stecken Sie das Stromkabel in die <strong>Dream</strong>box und anschließend das Steckernetzteil in<br />
eine geeignete Steckdose 230V/50Hz.<br />
- Sollten Sie Ihre <strong>Dream</strong>box über eine abschaltbare Steckerleiste abschalten wollen,<br />
setzen Sie die <strong>Dream</strong>box bitte immer vorher erst in den Standby-Modus (Power-Taste<br />
drücken).<br />
- Evtl. sehen Sie gleich nach dem einschalten den Setup-Wizard, d.h. Sie werden nach<br />
Ihrer Sprache gefragt. Dann werden Sie weiter durch die Grundeinstellungen Ihrer<br />
<strong>Dream</strong>box geleitet. Folgen Sie den Anweisungen am Bildschirm.<br />
- Bedenken Sie, dass die <strong>Dream</strong>box werkseitig auf das Videoformat CVBS (FBAS)<br />
eingestellt ist. Um dies zu ändern, schauen Sie bitte unter Punkt 34. Bild und Ton nach.<br />
- 10 -
B e d i e n u n g s a n l e i t u n g D r e a m b o x D M 6 0 0 PVR deutsch<br />
11. Fernbedienung<br />
SHIFT / SETUP-Taste<br />
DREAM-Steuerung-Taste<br />
Zehner-Tastatur<br />
- 11 -<br />
Standby-Taste<br />
TV-Steuerung-Taste<br />
Pfeil-Links-Taste Pfeil-Rechts-Taste<br />
Ton-Aus-Taste<br />
Lautstärke +/- Wippe Bouquet +/- Wippe<br />
Info-Taste<br />
EXIT-Taste<br />
MENU-Taste<br />
Navigations-Tasten OK-Taste<br />
AUDIO-Taste<br />
Options-Tasten<br />
(PVR-Modus)<br />
TV-Taste<br />
(PVR-Modus)<br />
RADIO-Taste<br />
(PVR -Modus)<br />
VIDEO-Taste<br />
HELP-Taste<br />
TEXT–Taste
B e d i e n u n g s a n l e i t u n g D r e a m b o x D M 6 0 0 PVR deutsch<br />
12. Wichtige Hinweise zur Bedienung<br />
Über das OSD (On Screen Display) wird die Bedienung der <strong>Dream</strong>box stark vereinfacht. Alle<br />
möglichen Optionen werden über vier farbige Punkte/Balken (rot, grün, gelb, blau) angezeigt<br />
und können über die Fernbedienung mit den Optionstasten aktiviert werden.<br />
Je nach Menü können die Optionen wechseln und werden in jedem Menü entsprechend<br />
bezeichnet.<br />
Die Optionstasten auf Ihrer Fernbedienung sind mehrfach belegt. Sie erkennen die<br />
Steuerungssymbole unter den vier farbigen Optionstasten, der TV- und der RADIO-Taste.<br />
Im PVR-Modus sind dann diese Symbole für die Steuerung Ihrer digitalen Aufnahme<br />
zuständig. PVR-Modus (engl. Private Video Recording) bedeutet Private Video<br />
Aufzeichnung. Mit der Video-Taste auf Ihrer Fernbedienung aktivieren bzw. deaktivieren Sie<br />
den PVR-Modus. Sie erkennen dies anhand der Infobar. Diese wechselt dann die Anzeige<br />
von den Sendeinformationen zu den Steuerungssymbolen für den PVR-Modus.<br />
Siehe Film aufnehmen (Sofortaufnahme).<br />
Alle Menüs und Kanallisten EXIT bedeutet Ausgang.<br />
können über die EXIT-Taste<br />
wieder verlassen werden.<br />
Die Bedienung der Menüs<br />
erfolgt generell mit den Navigations-Tasten<br />
Um in ein Untermenü zu<br />
gelangen, bestätigen Sie<br />
Navigationstasten auf Ihrer dieses dann mit der<br />
Fernbedienung. OK-Taste.<br />
- 12 -
B e d i e n u n g s a n l e i t u n g D r e a m b o x D M 6 0 0 PVR deutsch<br />
13. Tastenerklärung der Fernbedienung<br />
MENU-Taste<br />
Befinden Sie sich im TV- oder RADIO-Modus, öffnet sich durch Druck auf die MENU-Taste<br />
das OSD Hauptmenü. Dieses Hauptmenü enthält die folgenden Funktionen:<br />
- (1) TV Modus<br />
- (2) Radio Modus<br />
- (3) Datei Modus<br />
- (4) Informationen<br />
- (5) Ausschalten<br />
- (6) Einstellungen<br />
- (7) Spiele<br />
- (8) Timer<br />
Erreichbar sind diese Funktionen durch Benutzen der Navigationstasten nach links oder<br />
rechts. Siehe auch: Wichtige Hinweise zur Bedienung.<br />
Die Ziffern vor den Funktionen sind zum direkten Anwählen der einzelnen Funktion gedacht.<br />
Sie ersparen sich dadurch die Auswahl über die Navigationstasten.<br />
Befinden Sie sich in einer Kanalliste, öffnet sich durch Drücken der MENU-Taste das<br />
Service-Menü. Die angezeigten Optionen sind abhängig davon, in welcher Kanalliste Sie das<br />
Service-Menü aufrufen.<br />
SHIFT / SETUP-Taste<br />
Die SHIFT-Setup-Taste dient zur Vorprogrammierung der Fernbedienung auf ein TV Gerät.<br />
Siehe Setup-TV-Steuerung.<br />
Standby-Taste<br />
Mit der Standby-Taste schalten Sie Ihre <strong>Dream</strong>box ein bzw. aus.<br />
Siehe <strong>Dream</strong>box ein- bzw. ausschalten.<br />
DREAM-Steuerung-Taste<br />
Mit der DREAM-Steuerung-Taste schalten Sie Ihre Fernbedienung in den <strong>Dream</strong>box<br />
Fernbedienungsmodus. Diese leuchtet dann bei jedem Tastendruck kurz auf.<br />
TV-Steuerung-Taste<br />
Mit der TV-Steuerung-Taste schalten Sie Ihre Fernbedienung in den TV<br />
Fernbedienungsmodus, um Ihren einprogrammierten Fernseher bedienen zu können.<br />
Diese leuchtet dann bei jedem Tastendruck kurz auf. Siehe Setup-TV-Steuerung.<br />
- 13 -
B e d i e n u n g s a n l e i t u n g D r e a m b o x D M 6 0 0 PVR deutsch<br />
Zehner-Tastatur<br />
Die Zehner-Tastatur dient zur direkten Eingabe/Auswahl einer Ihnen bekannten<br />
Servicenummer. Die Servicenummer finden Sie links vor dem Servicenamen in der<br />
Kanalliste.<br />
Ebenso dient die Zehner-Tastatur zur Eingabe der Videotextseitenzahl, die Sie eingeben<br />
können, wenn Sie den Videotext aufgerufen haben. Siehe Videotext aufrufen.<br />
Vorausgesetzt, der Sender strahlt Videotextinformationen aus.<br />
In einigen Menüs sehen Sie evtl. Ziffern vor den Menüoptionen oder in der unteren<br />
Statuszeile. In diesem Fall können Sie durch Eingabe/Auswahl der Ziffer die Menüoption<br />
direkt erreichen, ohne dorthin navigieren zu müssen.<br />
Pfeil-Links-Taste Pfeil-Rechts-Taste<br />
Diese Tasten ermöglichen es Ihnen, direkt durch die Wiedergabeliste vor und zurück zu<br />
zappen, ohne die Wiedergabeliste aufzurufen. Sie können somit direkt von einem ehemals<br />
gewählten Programm zum Anderen springen.<br />
Befinden Sie sich in einer Kanalliste, springen Sie mit der Pfeil-Links-Taste an den Anfang<br />
und mit der Pfeil-Rechts-Taste zum Ende der Kanalliste, oder aber, bei gesetztem Marker<br />
zu dessen Position.<br />
Ton-Aus-Taste<br />
Mit der Ton-Aus-Taste schalten Sie den Ton stumm. Es erscheint ein Symbol in der<br />
oberen linken Ecke auf Ihrem Fernsehbildschirm. Ein nochmaliger Druck auf diese Taste<br />
schaltet den Ton wieder ein. Ebenso können Sie den Ton wieder aktivieren, indem Sie die<br />
Lautstärke + Wippe oder Lautstärke - Wippe einmal kurz drücken.<br />
EXIT-Taste<br />
Alle Menüs und Kanallisten können über die EXIT-Taste wieder verlassen werden.<br />
INFO-Taste<br />
Ist kein OSD Menü auf Ihrem Fernsehgerät gewählt (sichtbar), Sie befinden sich im TV- oder<br />
RADIO-Modus, bringt die INFO-Taste die Infobar hervor. Drücken Sie die Taste nochmals,<br />
solange die Infobar erscheint, gelangen Sie in die EPG Informationen des gewählten<br />
Senders, sofern verfügbar.<br />
OK-Taste<br />
Mit der OK-Taste bestätigen Sie Ihre Auswahl in der Menü- und Kanallistennavigation.<br />
Ist kein OSD Menü auf Ihrem Fernsehgerät gewählt (sichtbar), bringt die OK-Taste die<br />
Infobar zum Vorschein.<br />
Navigations-Tasten<br />
Die Bedienung der Menüs erfolgt generell mit den Navigationstasten auf Ihrer<br />
Fernbedienung. Um in ein Untermenü zu gelangen, bestätigen Sie dieses dann mit der OK-<br />
Taste. Siehe auch: Wichtige Hinweise zur Bedienung.<br />
- 14 -
B e d i e n u n g s a n l e i t u n g D r e a m b o x D M 6 0 0 PVR deutsch<br />
Lautstärke +/- Wippe<br />
Mit der Lautstärke +/- Wippe regeln Sie die Lautstärke, + für lauter und - für leiser.<br />
Bouquet +/- Wippe<br />
Mit der Bouquet +/- Wippe springen Sie zwischen den Bouquets vor und zurück.<br />
AUDIO-Taste<br />
Über die AUDIO-Taste wählen Sie die vom Sender angebotenen Tonspuren aus.<br />
Verfügbare Tonspuren werden über den gelben Punkt in der Infobar signalisiert.<br />
VIDEO-Taste<br />
Mit der VIDEO-Taste aktivieren bzw. deaktivieren Sie den PVR-Modus. Die Infobar zeigt<br />
daraufhin die Steuerungssymbole an. Sie können nun eine Direktaufnahme starten, indem<br />
Sie die RADIO-Taste unten auf Ihrer Fernbedienung drücken. Ebenso können Sie die<br />
Ansichten der Kanalliste zwischen einspaltiger, zweispaltiger und dreispaltiger Ansicht<br />
ändern, sofern Sie die Kanalliste aufgerufen haben.<br />
Options-Tasten<br />
Alle möglichen Optionen werden über vier farbige Punkte/Balken (rot, grün, gelb, blau)<br />
angezeigt, und können über die Optionstasten aktiviert werden. Sie dienen ebenso zur<br />
Steuerung des PVR-Modus. Je nach Menü wechseln die Optionen und werden in jedem<br />
Menü entsprechend bezeichnet.<br />
TV-Taste<br />
Mit der TV-Taste gelangen Sie direkt in den TV-Modus.<br />
RADIO-Taste<br />
Mit der RADIO-Taste gelangen Sie in den RADIO-Modus.<br />
TEXT–Taste<br />
Mit der TEXT-Taste gelangen Sie in den Teletext (TuxTxt). Befinden Sie sich in einer<br />
Kanalliste, gelangen Sie mit dieser Taste direkt in den Datei-Modus.<br />
HELP-Taste<br />
Die HELP-Taste bringt das Hilfemenü zum Vorschein.<br />
- 15 -
B e d i e n u n g s a n l e i t u n g D r e a m b o x D M 6 0 0 PVR deutsch<br />
14. <strong>Dream</strong>box ein- bzw. ausschalten<br />
Mit der Standby-Taste schalten Sie Ihre <strong>Dream</strong>box ein bzw. aus.<br />
Um Ihre <strong>Dream</strong>box in den Standby-Modus zu versetzen, drücken Sie bitte einmal kurz die<br />
Standby-Taste auf Ihrer Fernbedienung oder direkt an der <strong>Dream</strong>box.<br />
Halten Sie die Standby-Taste auf der Fernbedienung drei Sekunden lang gedrückt, dann<br />
erscheint das „Gerät ausschalten“ Menü.<br />
- 16 -<br />
Das ist das „Gerät ausschalten Menü“.<br />
Navigieren Sie zur gewünschten Option und<br />
bestätigen Sie diese mit der OK-Taste.<br />
Neu starten:<br />
Die <strong>Dream</strong>box wird neu gestartet.<br />
Standby-Modus:<br />
Schaltet die <strong>Dream</strong>box in den Standby-Modus.<br />
’Sleep-Timer’ setzen:<br />
Eine Erklärung zu dieser Funktion finden Sie<br />
unter 15. Sleeptimer.
B e d i e n u n g s a n l e i t u n g D r e a m b o x D M 6 0 0 PVR deutsch<br />
15. Sleeptimer<br />
Bitte lesen Sie den Abschnitt <strong>Dream</strong>box ein- bzw. ausschalten, um zu erfahren, wie Sie in<br />
dieses Menü gelangen.<br />
16. OSD Hauptmenü<br />
- 17 -<br />
Dies ist das Sleep-Timer Menü.<br />
Setzen Sie hier eine maximale Abschaltzeit von<br />
240 Minuten und setzen Sie einen Haken bei<br />
„Standby“.<br />
Setzen Sie Ihre Wahl mit der grünen<br />
Optionstaste oder der OK-Taste.<br />
Ist kein OSD Menü auf Ihrem Fernsehgerät gewählt (sichtbar), gelangen Sie durch Drücken<br />
der MENU-Taste in das OSD Hauptmenü (On Screen Display).<br />
Über das OSD Hauptmenü gelangen Sie in die einzelnen Untermenüs / Funktionen Ihrer<br />
<strong>Dream</strong>box. Benutzen Sie bitte die Navigationstasten nach links oder rechts, hoch oder<br />
runter, je nach gewählter Ansicht des OSD Hauptmenüs, um die gewünschten Menüs /<br />
Funktionen auszuwählen. Bestätigen Sie dann Ihre Auswahl mit der OK-Taste.<br />
Alternativ können Sie die entsprechende Ziffer auf Ihrer Fernbedienung drücken, um direkt in<br />
die Menüs / Funktionen zu gelangen.<br />
Über dieses Symbol gelangen Sie in den TV-Modus.<br />
Über dieses Symbol gelangen Sie in den RADIO-<br />
Modus.<br />
Über dieses Symbol gelangen Sie in den Datei-<br />
Modus.<br />
Über dieses Symbol gelangen Sie in das INFO-<br />
Menü.<br />
Sie erhalten dort Informationen über den<br />
Sender, die Signalstärke und den Softwarestand<br />
Ihrer <strong>Dream</strong>box.
B e d i e n u n g s a n l e i t u n g D r e a m b o x D M 6 0 0 PVR deutsch<br />
- 18 -<br />
Über dieses Symbol gelangen Sie in das „Gerät<br />
ausschalten Menü“. Wählen Sie dort die Option<br />
„Standby-Modus“. Die <strong>Dream</strong>box schaltet sich ab.<br />
Mit einem Druck auf die Standby-Taste schaltet sie<br />
sich wieder ein.<br />
Über dieses Symbol gelangen Sie in das Menü<br />
Einstellungen. Hier werden alle notwendigen<br />
Einstellungen vorgenommen.<br />
Über dieses Symbol gelangen Sie in das Menü<br />
Spiele. Sinnvoll für Werbepausen.<br />
Über dieses Symbol gelangen Sie in das Timer-<br />
Menü. Alle gesetzten Timer sind hier einzusehen<br />
und können gelöscht und abgeändert werden.<br />
Über den Menüpunkt<br />
(5) Einstellungen -><br />
(3) System -><br />
(4) Benutzeroberfläche -><br />
Hauptmenü als normales Menü anzeigen, aktivieren<br />
Sie die Listenansicht des OSD-Hauptmenüs.<br />
Siehe auch Benutzeroberfläche.
B e d i e n u n g s a n l e i t u n g D r e a m b o x D M 6 0 0 PVR deutsch<br />
17. Infobar<br />
Die Infobar erscheint beim Programmwechsel und zeigt Ihnen die folgenden Informationen<br />
an. Über die OK-Taste auf Ihrer Fernbedienung ist sie jederzeit aufrufbar.<br />
Kanalnummer Kanalname abgelaufene Zeit aktuelle Uhrzeit Dolby Digital<br />
aktuelle Sendung<br />
nächste Sendung<br />
- 19 -<br />
verschlüsselt<br />
Restzeit<br />
EPG verfügbar Kanaloptionen Tonspur Auswahl Videotext / Erweiterungen<br />
verschlüsselt<br />
Seitenverhältnis<br />
Dolby Digital<br />
Seitenverhältnis<br />
wird gelb hervorgehoben, sobald die Sendung verschlüsselt ausgestrahlt<br />
wird.<br />
wird gelb hervorgehoben, sobald die Sendung im 16:9 Format<br />
ausgestrahlt wird. Ansonsten gilt das 4:3 Format.<br />
wird gelb hervorgehoben, sobald die Sendung in Dolby Digital<br />
ausgestrahlt wird.
B e d i e n u n g s a n l e i t u n g D r e a m b o x D M 6 0 0 PVR deutsch<br />
17.1 Infobar - EPG (Electronic Program Guide)<br />
Der rote Punkt links von „EPG“ in der Infobar erscheint, sofern der gewählte Sender EPG<br />
Informationen zur Verfügung stellt.<br />
Achtung: Im PVR-Modus sind die Optionstasten mit den Steuerfunktionen belegt.<br />
- 20 -<br />
Ist kein OSD Menü auf Ihrem Fernsehgerät gewählt<br />
(sichtbar), Sie befinden sich im TV-Modus,<br />
gelangen Sie durch Drücken der OK-Taste in die<br />
Kanalliste.<br />
Drücken Sie die INFO-Taste um in die EPG-<br />
Darstellung-Auswahl zu gelangen, oder Sie drücken<br />
die rote Optionstaste, um direkt in den EPG des<br />
Senders zu gelangen, ohne die Kanalliste vorher<br />
aufzurufen.<br />
Wählen Sie den Menüpunkt „EPG des Senders“ mit<br />
der OK-Taste aus.<br />
Benutzen Sie Navigationstasten, um auf ein<br />
Programmevent zu navigieren. Drücken Sie dann<br />
die OK-Taste, um dieses anzeigen zu lassen.<br />
Mit der EXIT-Taste verlassen Sie den EPG wieder.<br />
In diesem Fenster sind die Optionstasten mit<br />
anderen Funktionen belegt.<br />
Drücken Sie z.B. die grüne Optionstaste, um eine<br />
Umschaltzeit in den Timer zu programmieren.<br />
Drücken Sie z.B. die gelbe Optionstaste, um eine<br />
Ngrab Aufnahme in den Timer zu programmieren.
B e d i e n u n g s a n l e i t u n g D r e a m b o x D M 6 0 0 PVR deutsch<br />
- 21 -<br />
Es erscheint das Menü „Timer bearbeiten “.<br />
Benutzen Sie die Navigationstasten , um die<br />
einzelnen Optionen zu erreichen und die OK-Taste,<br />
um die jeweilige Dropdownliste zu öffnen oder in die<br />
Eingabe des Optionsfeldes zu gelangen.<br />
Ändern Sie die Daten nach Belieben.<br />
Hinter der Dropdownliste Switch verbergen sich<br />
dieselben Optionen, die Sie direkt aus dem EPG mit<br />
den Optionstasten aufrufen können.<br />
Switch steht für Umschaltung.<br />
NGrab steht für Netzwerkaufnahme.<br />
Drücken Sie die grüne Optionstaste zum<br />
Übernehmen der Einstellungen.<br />
Nachdem Sie das Timer-Event übernommen haben,<br />
gelangen Sie zurück zum EPG.<br />
Der gesetzte Timer wird mit einem roten Uhrsymbol<br />
bei Ngrab-Timern und mit einem gelben Uhrsymbol<br />
bei Switch-Timern, im EPG angezeigt.<br />
Drücken Sie die EXIT-Taste , um den EPG zu<br />
verlassen, oder fügen Sie noch weitere Timer-<br />
Events hinzu.
B e d i e n u n g s a n l e i t u n g D r e a m b o x D M 6 0 0 PVR deutsch<br />
Mit den Ziffern 1-6 auf Ihrer<br />
Fernbedienung können Sie wählen, wie<br />
viele Stunden in der Übersicht angezeigt<br />
werden sollen. Der senkrechte rote<br />
Streifen markiert die aktuelle Uhrzeit.<br />
17.2 Infobar - Unterkanäle<br />
- 22 -<br />
Haben Sie bei der EPG-Darstellungs-Auswahl den<br />
Multi-EPG aufgerufen, erscheint dieses Fenster.<br />
Benutzen Sie die Navigationstasten, um auf ein<br />
Programmevent zu navigieren. Das aktuell<br />
gewählte wird grau hervorgehoben. Mit der INFO-<br />
Taste erhalten Sie nähere Informationen zur<br />
Sendung.<br />
Drücken Sie die INFO-Taste nochmals, um zum<br />
Multi-EPG zurückzugelangen.<br />
Mit der OK-Taste schalten Sie aus dem Multi-EPG<br />
heraus direkt zum gewählten Sender.<br />
In diesem Fenster sind die Optionstasten mit<br />
anderen Funktionen belegt, drücken Sie die Hilfe-<br />
Taste zur Erläuterung.<br />
Drücken Sie die EXIT-Taste, um den EPG zu<br />
verlassen.<br />
Der grüne Punkt links von „Unterkanäle“ im Infobar erscheint, sofern der gewählte Sender<br />
Unterkanäle zur Verfügung stellt.<br />
Achtung: Im PVR-Modus sind die Optionstasten mit den Steuerfunktionen belegt.<br />
Den Quickzap-Modus verlassen Sie wieder,<br />
indem Sie dieses Menü erneut aufrufen und<br />
nochmals die grüne Optionstaste drücken<br />
oder aber mit den Navigationstasten<br />
hoch/runter die Kanalliste öffnen und einen<br />
anderen Sender auswählen.<br />
Drücken Sie die grüne Optionstaste im TV- oder<br />
RADIO-Modus, so erscheint das Menü<br />
„Unterkanäle“.<br />
Mit den Navigationstasten hoch/runter steuern<br />
Sie auf einen der Unterkanäle. Drücken Sie dann<br />
die OK-Taste, um diesen auszuwählen.<br />
Mit der Funktion „Quickzap einschalten“ (grüne<br />
Optionstaste) bleiben Sie in diesen<br />
untergeordneten Services und können dann nach<br />
dem einschalten des Quickzap-Modus oder<br />
Auswahl eines Services, mit den<br />
Navigationstasten links/rechts in diesen<br />
untergeordneten Services, hin- und herschalten.<br />
Mit der Funktion „Zu Bouquet hinzufügen“ (gelbe<br />
Optionstaste), fügen Sie den gewählten<br />
untergeordneten Service zu einem von Ihnen<br />
erstellten oder schon vorhandenen Bouquet hinzu.<br />
Siehe Serviceverwaltung.
B e d i e n u n g s a n l e i t u n g D r e a m b o x D M 6 0 0 PVR deutsch<br />
17.3 Infobar - Tonspur<br />
Der gelbe Punkt links von „Tonspur“ in der Infobar erscheint, sofern der gewählte Sender<br />
verschiedene Tonspuren zur Verfügung stellt.<br />
Drücken Sie die gelbe Optionstaste im TV- oder RADIO-Modus, so rufen Sie das Menü<br />
„Audio“ des Senders auf.<br />
Achtung: Im PVR-Modus sind die Optionstasten mit den Steuerfunktionen belegt.<br />
17.4 Infobar - Erweiterungen<br />
- 23 -<br />
Steuern Sie Ihre gewünschte Tonspur mit den<br />
Navigationstasten hoch/runter an und drücken<br />
Sie dann die OK-Taste, um diese auszuwählen.<br />
Der Inhalt dieses Menüs ist abhängig vom<br />
gewählten Sender.<br />
Navigieren Sie auf die Option „Stereo“, benutzen<br />
Sie die Navigationstasten rechts/links, um bei<br />
Zweikanaltonsendungen die entsprechende<br />
Tonspur auszuwählen.<br />
Drücken Sie die OK-Taste, um diese auszuwählen.<br />
Der blaue Punkt links von „Erweiterungen“ im Infobar ist ständig vorhanden.<br />
Drücken Sie die blaue Optionstaste im TV- oder RADIO-Modus, so rufen Sie das Menü<br />
„Erweiterungen“ auf.<br />
Achtung: Im PVR-Modus sind die Optionstasten mit den Steuerfunktionen belegt.<br />
Die Option „Teletext“ ruft den Videotext des Senders<br />
auf.<br />
Siehe Videotext (TuxTxt) aufrufen.<br />
Die Optionen „Start/Stop NGrab recording“ sind<br />
noch in der Entwicklung und werden daher nicht<br />
weiter erklärt.
B e d i e n u n g s a n l e i t u n g D r e a m b o x D M 6 0 0 PVR deutsch<br />
18. Sprache einstellen<br />
Ist kein OSD Menü auf Ihrem Fernsehgerät gewählt (sichtbar), gelangen Sie durch Drücken<br />
der MENU-Taste in das OSD Hauptmenü. Navigieren Sie auf den Menüpunkt<br />
„Einstellungen“.<br />
- 24 -<br />
Navigieren Sie auf den Menüpunkt „System“ und<br />
drücken Sie die OK-Taste.<br />
Das Menü „System“ öffnet sich.<br />
Navigieren Sie auf den Menüpunkt „Sprache“<br />
und drücken Sie die OK-Taste.<br />
Das Menü „Sprache“ öffnet sich.<br />
Wählen Sie Ihre Sprache mit den<br />
Navigationstasten aus, und bestätigen Sie Ihre<br />
Auswahl mit der OK-Taste.<br />
Beenden Sie das Menü mit der EXIT-Taste.
B e d i e n u n g s a n l e i t u n g D r e a m b o x D M 6 0 0 PVR deutsch<br />
19. Zeitzone einstellen<br />
Ist kein OSD Menü auf Ihrem Fernsehgerät gewählt (sichtbar), gelangen Sie durch Drücken<br />
der MENU-Taste in das OSD Hauptmenü. Navigieren Sie auf den Menüpunkt<br />
„Einstellungen“.<br />
- 25 -<br />
Navigieren Sie auf den Menüpunkt „System“ und<br />
drücken Sie die OK-Taste.<br />
Das Menü „System“ erscheint. Drücken Sie die OK-<br />
Taste, um in das Menü „Zeit“ zu gelangen.<br />
Das Menü „Zeit“ erscheint. Sie können hier die<br />
Zeitzone einstellen oder eine Zeitkorrektur manuell<br />
vornehmen.<br />
Drücken Sie die OK-Taste, um in das<br />
Menü „Zeitzonen“ zu gelangen.
B e d i e n u n g s a n l e i t u n g D r e a m b o x D M 6 0 0 PVR deutsch<br />
- 26 -<br />
Das Menü „Zeitzonen“ erscheint. Drücken Sie die<br />
OK-Taste, um in die Auswahlliste für die Zeitzonen<br />
zu gelangen.<br />
Dieses Menü erscheint auch, wenn Sie eine neue<br />
Betriebssoftware aufgespielt haben.<br />
Benutzen Sie die Navigationstasten nach oben<br />
oder unten, um Ihre Zeitzone zu suchen. Drücken<br />
Sie die OK-Taste, um Ihre Auswahl zu bestätigen.<br />
Die Liste schließt sich dann wieder und Ihre<br />
Auswahl wird in der Leiste oben angezeigt.<br />
Navigieren Sie auf den Button „Speichern“ und<br />
drücken Sie die OK-Taste, um Ihre Einstellungen zu<br />
speichern oder Sie drücken die grüne<br />
Optionstaste.<br />
Sie gelangen danach zurück zum Menü „Zeit“.
B e d i e n u n g s a n l e i t u n g D r e a m b o x D M 6 0 0 PVR deutsch<br />
19.1 manuelle Zeitkorrektur<br />
Bitte lesen den Abschnitt Zeitzone einstellen, um zu erfahren, wie Sie in dieses Menü<br />
gelangen.<br />
- 27 -<br />
Navigieren Sie auf den Menüpunkt „Zeitkorrektur“,<br />
um eine manuelle Zeitkorrektur vorzunehmen.<br />
Das Menü für die manuelle Zeitkorrektur erscheint.<br />
Warten Sie einen Augenblick, bis das System sich<br />
die aktuelle Zeit von einem Transponder geholt hat.<br />
Die Transponderzeit und das Transponderdatum<br />
wird dann aktualisiert.<br />
Speichern Sie die neuen Werte mit der grünen<br />
Optionstaste oder drücken Sie die OK-Taste.<br />
Sie gelangen danach zurück zum Menü „Zeit“ und<br />
können alle Menüs mit der EXIT-Taste wieder<br />
verlassen.
B e d i e n u n g s a n l e i t u n g D r e a m b o x D M 6 0 0 PVR deutsch<br />
20. Signalanzeige (Antenne ausrichten, DM 600 PVR-T)<br />
Ist kein OSD Menü auf Ihrem Fernsehgerät gewählt (sichtbar), gelangen Sie durch Drücken<br />
der MENU-Taste in das OSD Hauptmenü. Navigieren Sie auf den Menüpunkt<br />
„Einstellungen“.<br />
- 28 -<br />
Navigieren Sie auf den Menüpunkt „Sendersuche“<br />
und drücken Sie die OK-Taste.<br />
Navigieren Sie auf den Menüpunkt „Signalanzeige“<br />
und drücken Sie die OK-Taste.<br />
Drücken Sie die OK-Taste, um einen Transponder<br />
auszuwählen.<br />
Wählen Sie evtl. vorher die Region in der Sie<br />
wohnen aus.<br />
Stellen Sie ihre Antenne auf und beobachten Sie die<br />
Werte SNR und AGC.<br />
Je höher die Werte ausschlagen, desto besser ist<br />
das empfangene Signal.<br />
Schließen Sie das Fenster mit der EXIT-Taste.
B e d i e n u n g s a n l e i t u n g D r e a m b o x D M 6 0 0 PVR deutsch<br />
20.1 5V abschalten (DM 600 PVR-T)<br />
Ist kein OSD Menü auf Ihrem Fernsehgerät gewählt (sichtbar), gelangen Sie durch Drücken<br />
der MENU-Taste in das OSD Hauptmenü. Navigieren Sie auf den Menüpunkt<br />
„Einstellungen“.<br />
- 29 -<br />
Navigieren Sie auf den Menüpunkt „Sendersuche“<br />
und drücken Sie die OK-Taste.<br />
Navigieren Sie auf den Menüpunkt „5V abschalten“<br />
Setzen Sie einen Haken mit der OK-Taste hinter<br />
diese Option, wenn Sie eine passive Antenne<br />
verwenden.<br />
Haben Sie eine aktive Antenne angeschlossen und<br />
wollen diese ohne Verwendung des Netzteils der<br />
Antenne betreiben, entfernen Sie mit der OK-Taste<br />
den Haken hinter der Option.
B e d i e n u n g s a n l e i t u n g D r e a m b o x D M 6 0 0 PVR deutsch<br />
20.2 Automatische Sendersuche (DM 600 PVR-T)<br />
Ist kein OSD Menü auf Ihrem Fernsehgerät gewählt (sichtbar), gelangen Sie durch Drücken<br />
der MENU-Taste in das OSD Hauptmenü. Navigieren Sie auf den Menüpunkt<br />
„Einstellungen“.<br />
- 30 -<br />
Navigieren Sie auf den Menüpunkt „Sendersuche“<br />
und drücken Sie die OK-Taste.<br />
Navigieren Sie auf den Menüpunkt „Automatische<br />
Sendersuche“ und drücken Sie die OK-Taste.<br />
Navigieren Sie auf die Region in der Sie wohnen<br />
und drücken Sie die OK-Taste, um Ihre Auswahl zu<br />
bestätigen.
B e d i e n u n g s a n l e i t u n g D r e a m b o x D M 6 0 0 PVR deutsch<br />
- 31 -<br />
Ihnen wird nun angezeigt, dass für Ihre Region ein<br />
gültiger Transponder gefunden wurde. Die<br />
Haken in den Checkboxen vor „LOCK“ und „SYNC“<br />
sind vom System eingecheckt worden. Die „SNR“,<br />
„AGC“ und „BER“ - Werte sind im Normalbereich.<br />
SNR:<br />
Signal to Noise Ratio<br />
AGC:<br />
Automatic Gain Control<br />
BER:<br />
Bit Error Rate (sollte immer auf 0 stehen)<br />
Nur Freie:<br />
Es wird nur nach FTA (unverschlüsselten) Sendern<br />
gesucht, wenn Sie einen Haken davor setzen.<br />
Drücken Sie die grüne Optionstaste, um den<br />
Suchlauf zu starten.<br />
Nachdem Sie den Suchlauf gestartet haben, werden<br />
Ihnen der Fortschrittsbalken und die ungefähre<br />
Restzeit für den Suchlauf angezeigt.<br />
Warten Sie bitte bis der Suchlauf abgeschlossen ist.<br />
Sie können den Suchlauf jederzeit durch<br />
mehrmaliges Drücken der EXIT-Taste abbrechen.<br />
Der Suchlauf ist beendet, wenn Sie dieses Menü<br />
erhalten. Alle wichtigen Informationen über den<br />
Suchlauf werden Ihnen angezeigt.<br />
Drücken Sie die OK-Taste, um dieses Menü zu<br />
schließen.
B e d i e n u n g s a n l e i t u n g D r e a m b o x D M 6 0 0 PVR deutsch<br />
20.3 Manuelle Sendersuche (DM 600 PVR-T)<br />
Ist kein OSD Menü auf Ihrem Fernsehgerät gewählt (sichtbar), gelangen Sie durch Drücken<br />
der MENU-Taste in das OSD Hauptmenü. Navigieren Sie auf den Menüpunkt<br />
„Einstellungen“.<br />
- 32 -<br />
Navigieren Sie auf den Menüpunkt „Sendersuche“<br />
und drücken Sie die OK-Taste.<br />
Navigieren Sie auf den Menüpunkt „Manuelle<br />
Sendersuche“ und drücken Sie die OK-Taste.<br />
Tragen Sie die Frequenz mit den<br />
Zifferntasten Ihrer Fernbedienung ein.<br />
Benutzen Sie die Navigationstasten, um in die<br />
einzelnen Optionsfelder zu gelangen.<br />
Drücken Sie die grüne Optionstaste, um den<br />
Suchlauf zu starten.
B e d i e n u n g s a n l e i t u n g D r e a m b o x D M 6 0 0 PVR deutsch<br />
21. Automatische Sendersuche (DM 600 PVR-C)<br />
Ist kein OSD Menü auf Ihrem Fernsehgerät gewählt (sichtbar), gelangen Sie durch Drücken<br />
der MENU-Taste in das OSD Hauptmenü. Navigieren Sie auf den Menüpunkt<br />
„Einstellungen“.<br />
.<br />
- 33 -<br />
Navigieren Sie auf den Menüpunkt „Sendersuche“<br />
und drücken Sie die OK-Taste.<br />
Navigieren Sie auf den Menüpunkt „Automatische<br />
Sendersuche“ und drücken Sie die OK-Taste.<br />
Wählen Sie Ihren Kabelanbieter aus und drücken<br />
Sie die OK-Taste, um Ihre Auswahl zu bestätigen.
B e d i e n u n g s a n l e i t u n g D r e a m b o x D M 6 0 0 PVR deutsch<br />
- 34 -<br />
Ihnen wird nun angezeigt, dass für Ihren<br />
Kabelanbieter ein gültiger Transponder gefunden<br />
wurde. Die Haken in den Checkboxen vor „LOCK“<br />
und „SYNC“ sind vom System eingecheckt worden.<br />
Die „SNR“, „AGC“ und „BER“ - Werte sind im<br />
Normalbereich.<br />
SNR:<br />
Signal to Noise Ratio<br />
AGC:<br />
Automatic Gain Control<br />
BER:<br />
Bit Error Rate (sollte immer auf 0 stehen)<br />
Nur Freie:<br />
Es wird nur nach FTA (unverschlüsselten) Sendern<br />
gesucht, wenn Sie einen Haken davor setzen.<br />
Drücken Sie die grüne Optionstaste, um den<br />
Suchlauf zu starten.<br />
Nachdem Sie den Suchlauf gestartet haben, werden<br />
Ihnen der Fortschrittsbalken und die ungefähre<br />
Restzeit für den Suchlauf angezeigt.<br />
Warten Sie bitte bis der Suchlauf abgeschlossen ist.<br />
Sie können den Suchlauf jederzeit durch<br />
mehrmaliges Drücken der EXIT-Taste abbrechen.<br />
Der Suchlauf ist beendet, wenn Sie dieses Menü<br />
erhalten. Alle wichtigen Informationen über den<br />
Suchlauf werden Ihnen angezeigt.<br />
Drücken Sie die OK-Taste, um dieses Menü zu<br />
schließen.
B e d i e n u n g s a n l e i t u n g D r e a m b o x D M 6 0 0 PVR deutsch<br />
21.1 Manuelle Sendersuche (DM 600 PVR-C)<br />
Ist kein OSD Menü auf Ihrem Fernsehgerät gewählt (sichtbar), gelangen Sie durch Drücken<br />
der MENU-Taste in das OSD Hauptmenü. Navigieren Sie auf den Menüpunkt<br />
„Einstellungen“.<br />
- 35 -<br />
Navigieren Sie auf den Menüpunkt „Sendersuche“<br />
und drücken Sie die OK-Taste.<br />
Navigieren Sie auf den Menüpunkt „Manuelle<br />
Sendersuche“ und drücken Sie die OK-Taste.<br />
Tragen Sie die Transponderfrequenz und die<br />
Symbolrate mit den Zifferntasten Ihrer<br />
Fernbedienung ein.<br />
Benutzen Sie die Navigationstasten, um in die<br />
einzelnen Optionsfelder zu gelangen.<br />
Navigieren Sie auf den „Suchlauf starten“ Button<br />
oder drücken Sie die grüne Optionstaste, um den<br />
Suchlauf zu starten.
B e d i e n u n g s a n l e i t u n g D r e a m b o x D M 6 0 0 PVR deutsch<br />
22. Satfinder (Spiegel ausrichten, DM 600 PVR-S)<br />
Ist kein OSD Menü auf Ihrem Fernsehgerät gewählt (sichtbar), gelangen Sie durch Drücken<br />
der MENU-Taste in das OSD Hauptmenü. Navigieren Sie auf den Menüpunkt<br />
„Einstellungen“.<br />
- 36 -<br />
Navigieren Sie auf den Menüpunkt „Sendersuche“<br />
und drücken Sie die OK-Taste.<br />
Navigieren Sie auf den Menüpunkt „Satfinder“ und<br />
drücken Sie die OK-Taste.<br />
Drücken Sie die OK-Taste, um einen Transponder<br />
auszuwählen.<br />
Wählen Sie evtl. vorher einen Satelliten aus der<br />
oberen Dropdownliste Satellit aus, um zu<br />
bestimmen, auf welchen Satelliten Sie Ihren Spiegel<br />
ausrichten wollen.<br />
Drehen Sie dann Ihren Spiegel vorsichtig nach links<br />
oder rechts und beobachten Sie die Werte SNR und<br />
AGC. Je höher die Werte ausschlagen, desto<br />
besser wird das Signal vom Satelliten empfangen.<br />
Schließen Sie das Fenster mit der EXIT-Taste.
B e d i e n u n g s a n l e i t u n g D r e a m b o x D M 6 0 0 PVR deutsch<br />
23. Satellitenkonfiguration (DM 600 PVR-S)<br />
Ist kein OSD Menü auf Ihrem Fernsehgerät gewählt (sichtbar), gelangen Sie durch Drücken<br />
der MENU-Taste in das OSD Hauptmenü. Navigieren Sie auf den Menüpunkt<br />
„Einstellungen“.<br />
- 37 -<br />
Navigieren Sie auf den Menüpunkt „Sendersuche“<br />
und drücken Sie die OK-Taste.<br />
Das Untermenü „Sendersuche“ öffnet sich.<br />
Navigieren Sie auf den Menüpunkt<br />
„Satellitenkonfiguration“ und drücken Sie die<br />
OK-Taste.
B e d i e n u n g s a n l e i t u n g D r e a m b o x D M 6 0 0 PVR deutsch<br />
23.1 ein einzelner Satellit - direkte Verbindung (DM 600 PVR-S)<br />
Diese Satellitenkonfiguration benötigen Sie, wenn Sie nur eine einzelne Satellitenposition mit<br />
einem Single Universal LNB empfangen möchten. Das Koaxialkabel ist dabei direkt mit dem<br />
LNB und der <strong>Dream</strong>box verbunden. Lesen Sie bitte zuvor den Abschnitt<br />
Satellitenkonfiguration, um zu erfahren, wie Sie in dieses Menü gelangen.<br />
- 38 -<br />
Das Menü „Satellitenkonfiguration“ öffnet sich.<br />
Navigieren Sie auf die obere Dropdownliste und<br />
drücken Sie die OK-Taste.<br />
Es erscheint eine Liste mit allen möglichen<br />
Konfigurationsarten.<br />
Bestätigen Sie die Konfiguration „ein einzelner<br />
Satellit“ mit der OK-Taste.<br />
Navigieren Sie auf die Dropdownliste<br />
„Sat/Position“ und drücken Sie die OK-Taste.<br />
Eine Liste mit allen verfügbaren Satelliten wird<br />
angezeigt.<br />
Wählen Sie Ihren Satelliten mit den<br />
Navigationstasten aus und drücken Sie die<br />
OK-Taste.<br />
Navigieren Sie auf den unteren „OK“ Button und<br />
drücken Sie die OK-Taste.<br />
Die Konfiguration für „ein einzelner Satellit“ ist<br />
abgeschlossen.<br />
Das Menü „Sendersuche“ öffnet sich danach wieder<br />
und Sie können nach den Sendern suchen lassen.<br />
Dazu mehr unter Sendersuche pro Satellit<br />
(Automatische Sendersuche) oder Sendersuche<br />
alle Satelliten (Automatische Multisat<br />
Sendersuche).
B e d i e n u n g s a n l e i t u n g D r e a m b o x D M 6 0 0 PVR deutsch<br />
23.2 zwei Satelliten via Toneburst Ansteuerung (DM 600 PVR-S)<br />
Diese Satellitenkonfiguration benötigen Sie, wenn Sie zwei Satellitenpositionen über jeweils<br />
ein Single Universal LNB für nur einen Teilnehmer, bzw. Endgerät empfangen möchten. Ob<br />
die LNBs an jeweils einem separaten Spiegel oder einem einzigen Spiegel, so genannt<br />
„schielend“ angebracht sind, spielt dabei keine Rolle. Die LNBs werden in diesem Fall an<br />
einem Toneburst Schalter (Switch) angeschlossen. Von diesem Schalter aus geht das<br />
Koaxialkabel an Ihre <strong>Dream</strong>box. Lesen Sie bitte zuvor den Abschnitt<br />
Satellitenkonfiguration, um zu erfahren, wie Sie in dieses Menü gelangen.<br />
- 39 -<br />
Navigieren Sie auf die obere Dropdownliste und<br />
drücken Sie die OK-Taste.<br />
Es erscheint eine Liste mit allen möglichen<br />
Konfigurationsarten.<br />
Bestätigen Sie die Konfiguration „2 Satelliten via<br />
Toneburst“ mit der OK-Taste.<br />
Wählen Sie Ihre Satelliten, wie unter<br />
ein einzelner Satellit - direkte Verbindung<br />
beschrieben, aus.<br />
Vergewissern Sie sich bitte vorher, an welchem<br />
Eingang Sie die LNBs (Satellitenposition)<br />
angeschlossen haben.<br />
Finden Sie in der Sendersuche später keine<br />
Sender, tauschen Sie bitte hier die Satelliten<br />
untereinander aus.<br />
Navigieren Sie auf den unteren „OK“ Button und<br />
drücken Sie die OK-Taste.<br />
Die Konfiguration für „2 Satelliten via Toneburst“ ist<br />
abgeschlossen.<br />
Das Menü „Sendersuche“ öffnet sich danach<br />
wieder, und Sie können nach den Sendern suchen<br />
lassen. Dazu mehr unter Sendersuche pro Satellit<br />
(Automatische Sendersuche) oder Sendersuche<br />
alle Satelliten (Automatic Multi Scan).
B e d i e n u n g s a n l e i t u n g D r e a m b o x D M 6 0 0 PVR deutsch<br />
23.3 2 Satelliten via 22KHz (nur Highband, DM 600 PVR-S)<br />
Diese Satellitenkonfiguration benötigen Sie, wenn Sie zwei Satellitenpositionen über jeweils<br />
ein Single Universal LNB für nur einen Teilnehmer, bzw. Endgerät empfangen möchten. Ob<br />
die LNBs an jeweils einem separaten Spiegel oder einem einzigen Spiegel, so genannt<br />
„schielend“ angebracht sind, spielt dabei keine Rolle. Die LNBs werden in diesem Fall an<br />
einem 22Khz Schalter angeschlossen. Von diesem Schalter aus geht das Koaxialkabel an<br />
Ihre <strong>Dream</strong>box. Lesen Sie bitte zuvor den Abschnitt Satellitenkonfiguration, um zu<br />
erfahren, wie Sie in dieses Menü gelangen.<br />
- 40 -<br />
Navigieren Sie auf die obere Dropdownliste und<br />
drücken Sie die OK-Taste.<br />
Es erscheint eine Liste mit allen möglichen<br />
Konfigurationsarten.<br />
Bestätigen Sie die Konfiguration „2 Satelliten via<br />
22Khz (nur Highband)“ mit der OK-Taste.<br />
Wählen Sie Ihre Satelliten, wie unter<br />
ein einzelner Satellit - direkte Verbindung<br />
beschrieben, aus.<br />
Vergewissern Sie sich bitte vorher, an welchem<br />
Eingang Sie die LNBs (Satellitenposition)<br />
angeschlossen haben.<br />
Finden Sie in der Sendersuche später keine<br />
Sender, tauschen Sie bitte hier die Satelliten<br />
untereinander aus.<br />
Navigieren Sie auf den Button „Speichern“ und<br />
drücken Sie die OK-Taste.<br />
Die Konfiguration für „2 Satelliten via 22Khz (nur<br />
Highband)“ ist nun abgeschlossen.<br />
Das Menü „Sendersuche“ öffnet sich danach<br />
wieder, und Sie können nach den Sendern suchen<br />
lassen.<br />
Dazu mehr unter Sendersuche pro Satellit<br />
(Automatische Sendersuche) oder Sendersuche<br />
alle Satelliten (Automatic Multi Scan).
B e d i e n u n g s a n l e i t u n g D r e a m b o x D M 6 0 0 PVR deutsch<br />
23.4 zwei Satelliten über DiSEqC A/B (DM 600 PVR-S)<br />
Diese Satellitenkonfiguration benötigen Sie, wenn Sie zwei Satellitenpositionen über jeweils<br />
ein Twin Universal oder Quad Universal LNB für vier oder acht und mehr Teilnehmer, bzw.<br />
Endgeräte empfangen möchten. Ob die LNBs an jeweils einem separaten Spiegel oder<br />
einem einzigen Spiegel, so genannt „schielend“ angebracht sind, spielt dabei keine Rolle.<br />
Die LNBs werden in diesem Fall an einem so genannten Multischalter (Multiswitch)<br />
angeschlossen. Von diesem Multischalter gehen dann die einzelnen Koaxialkabel an die<br />
Teilnehmer, bzw. Endgeräte (<strong>Dream</strong>boxen). Lesen Sie bitte zuvor den Abschnitt<br />
Satellitenkonfiguration, um zu erfahren, wie Sie in dieses Menü gelangen.<br />
- 41 -<br />
Navigieren Sie auf die obere Dropdownliste und<br />
drücken Sie die OK-Taste.<br />
Es erscheint eine Liste mit allen möglichen<br />
Konfigurationsarten.<br />
Bestätigen Sie die Konfiguration „2 Satelliten über<br />
DiSEqC A/B“ mit der OK-Taste.<br />
Wählen Sie Ihre Satelliten, wie unter<br />
ein einzelner Satellit - direkte Verbindung<br />
beschrieben, aus.<br />
Vergewissern Sie sich bitte vorher, an welchem<br />
Eingang Sie die LNBs (Satellitenposition)<br />
angeschlossen haben.<br />
Finden Sie in der Sendersuche später keine<br />
Sender, tauschen Sie bitte hier die Satelliten<br />
untereinander aus.<br />
Navigieren Sie auf den unteren „OK“ Button und<br />
drücken Sie die OK-Taste.<br />
Die Konfiguration für „2 Satelliten über DiSEqC A/B“<br />
ist nun abgeschlossen.<br />
Das Menü „Sendersuche“ öffnet sich danach<br />
wieder, und Sie können nach den Sendern suchen<br />
lassen. Dazu mehr unter Sendersuche pro Satellit<br />
(Automatische Sendersuche) oder Sendersuche<br />
alle Satelliten (Automatic Multi Scan).
B e d i e n u n g s a n l e i t u n g D r e a m b o x D M 6 0 0 PVR deutsch<br />
23.5 vier Satelliten über DiSEqC OPT A/B (DM 600 PVR-S)<br />
Diese Satellitenkonfiguration benötigen Sie, wenn Sie vier Satellitenpositionen über jeweils<br />
ein Single Universal oder Twin Universal LNB für vier oder acht und mehr Teilnehmer, bzw.<br />
Endgeräte empfangen möchten. Ob die LNBs an jeweils einem separaten Spiegel oder<br />
einem einzigen Spiegel, so genannt „schielend“ angebracht sind, spielt dabei keine Rolle.<br />
Die LNBs werden in diesem Fall an einem so genannten Multischalter (Multiswitch)<br />
angeschlossen. Von diesem Multischalter gehen dann die einzelnen Koaxialkabel an die<br />
Teilnehmer, bzw. Endgeräte (<strong>Dream</strong>boxen). Lesen Sie bitte zuvor den Abschnitt<br />
Satellitenkonfiguration, um zu erfahren, wie Sie in dieses Menü gelangen.<br />
- 42 -<br />
Navigieren Sie auf die obere Dropdownliste und<br />
drücken Sie die OK-Taste.<br />
Es erscheint eine Liste mit allen möglichen<br />
Konfigurationsarten.<br />
Bestätigen Sie die Konfiguration „4 Satelliten über<br />
DiSEqC OPT A/B“ mit der OK-Taste.<br />
Wählen Sie Ihre Satelliten, wie unter<br />
ein einzelner Satellit - direkte Verbindung<br />
beschrieben, aus.<br />
Vergewissern Sie sich bitte vorher, an welchem<br />
Eingang Sie die LNBs (Satellitenposition)<br />
angeschlossen haben.<br />
Finden Sie in der Sendersuche später keine<br />
Sender, tauschen Sie bitte hier die Satelliten<br />
untereinander aus.<br />
Navigieren Sie auf den unteren „OK“ Button und<br />
drücken Sie die OK-Taste.<br />
Die Konfiguration für „4 Satelliten über DiSEqC A/B“<br />
ist nun abgeschlossen.<br />
Das Menü „Sendersuche“ öffnet sich danach<br />
wieder, und Sie können nach den Sendern suchen<br />
lassen. Dazu mehr unter Sendersuche pro Satellit<br />
(Automatische Sendersuche) oder Sendersuche<br />
alle Satelliten (Automatic Multi Scan).
B e d i e n u n g s a n l e i t u n g D r e a m b o x D M 6 0 0 PVR deutsch<br />
23.6 mehrere Satelliten mit DiSEqC Rotor (DM 600 PVR-S)<br />
Diese Satellitenkonfiguration benötigen Sie, wenn Sie mehrere Satellitenpositionen über<br />
einen DiSEqC 1.2 Rotor oder Stab mit einem Single Universal LNB für einen Teilnehmer,<br />
bzw. Endgerät empfangen möchten. Das LNB wird in diesem Fall direkt über das<br />
Koaxialkabel an den Teilnehmer, bzw. Endgerät (<strong>Dream</strong>box) angeschlossen. Lesen Sie bitte<br />
zuvor den Abschnitt Satellitenkonfiguration, um zu erfahren, wie Sie in dieses Menü<br />
gelangen.<br />
- 43 -<br />
Navigieren Sie auf die obere Dropdownliste und<br />
drücken Sie die OK-Taste.<br />
Es erscheint eine Liste mit allen möglichen<br />
Konfigurationsarten.<br />
Bestätigen Sie die Konfiguration „Mehrere Satelliten<br />
mit DiSEqC Rotor “ mit der OK-Taste.<br />
Navigieren Sie auf die Dropdownliste<br />
„Sat/Position“ und editieren Sie die Liste der zu<br />
empfangenden Satelliten, indem Sie auf jeden<br />
einzelnen Satelliten navigieren und ihn evtl. löschen<br />
oder einen hinzufügen/auswählen. Die Reihenfolge<br />
der Satelliten spielt hier keine Rolle. Die Anzahl der<br />
empfangbaren Satelliten ist abhängig von Ihrem<br />
Rotor oder Stab.<br />
Navigieren Sie auf den unteren „Speichern“ Button<br />
und drücken Sie die OK-Taste. Sie gelangen dann<br />
zurück in das Menü „Sendersuche“.
B e d i e n u n g s a n l e i t u n g D r e a m b o x D M 6 0 0 PVR deutsch<br />
TIPP:<br />
- 44 -<br />
Wenn Sie die Sat/Positionsliste nicht erst abändern<br />
wollen, sich sicher sind, welche Satelliten Sie mit<br />
Ihrem Rotor, Stab oder Multifeedanlage empfangen<br />
können, dann wählen Sie bitte in der oberen<br />
Dropdownliste zuerst „ein einzelner Satellit“ aus.<br />
Bestätigen Sie evtl. die Meldung mit „Ja“, dass Sie<br />
den DiSEqC Typ ändern wollen.<br />
Sie erhalten danach dieses Konfigurationsmenü.<br />
Wählen Sie dann aus der oberen Dropdownliste<br />
den Menüpunkt „Nicht-Standard - benutzerdefinierte<br />
Konfiguration“ und bestätigen Sie Ihre Auswahl mit<br />
der OK-Taste.<br />
Sie sehen, dass nur ein Satellit dort steht. Als<br />
nächstes navigieren Sie bitte auf das LNB 0 und<br />
drücken die OK-Taste.<br />
Wir haben hier vorab schon die Sat/Position auf<br />
Astra 19.2° Ost eingestellt.<br />
Sie gelangen dann in das Untermenü „LNB<br />
Konfiguration“.<br />
Ändern Sie hier bitte erst einmal nichts. Es sei denn,<br />
das Koaxialkabel zum LNB hat zu hohe<br />
Dämpfungswerte, dann können Sie in der Checkbox<br />
vor „Spannung erhöhen“ noch einen Haken setzen.<br />
Dies ist im Normalfall aber nicht nötig.<br />
Drücken Sie bitte die blaue Optionstaste oder<br />
navigieren Sie auf den Button „Nächste Seite“<br />
und drücken die OK-Taste, um zum nächsten<br />
Untermenü zugelangen.
B e d i e n u n g s a n l e i t u n g D r e a m b o x D M 6 0 0 PVR deutsch<br />
- 45 -<br />
Sie sehen, dass der „DiSEqC - Modus“ nicht<br />
eingestellt ist.<br />
Die „Toneburst“ Option lassen Sie bitte so stehen.<br />
Drücken Sie bitte die Ziffer 2 auf Ihrer<br />
Fernbedienung und wählen den „DiSEqC - Modus“<br />
Version 1.2 aus.<br />
Bestätigen Sie dies mit der OK-Taste.<br />
Sie sehen, dass das Menü mit neuen Optionen<br />
erscheint.<br />
Sie brauchen hier soweit nichts weiter zu verändern.<br />
Speichern Sie die Einstellungen mit der grünen<br />
Optionstaste ab.<br />
Sie gelangen danach in das Menü<br />
„Satellitenkonfiguration“ zurück.<br />
Jetzt brauchen Sie nur noch Ihre Satelliten mit der<br />
gelben Optionstaste hinzufügen.<br />
Navigieren Sie auf den unteren „Speichern“ Button<br />
und drücken Sie die OK-Taste. Sie gelangen dann<br />
zurück in das Menü „Sendersuche“.<br />
Wenn Sie das nächste Mal wieder in dieses Menü<br />
gehen, steht in der oberen Dropdownliste „Mehrere<br />
Satelliten mit DiSEqC Rotor“, bitte nicht wundern,<br />
das ist korrekt.
B e d i e n u n g s a n l e i t u n g D r e a m b o x D M 6 0 0 PVR deutsch<br />
24. Motor Konfiguration (DM 600 PVR-S)<br />
Diese Satellitenkonfiguration benötigen Sie, wenn Sie mehrere Satellitenposition mit einem<br />
Single Universal LNB über einen Rotor / Stab empfangen möchten. Das Koaxialkabel ist<br />
dabei direkt mit dem LNB und der <strong>Dream</strong>box verbunden. Lesen Sie bitte zuvor den Abschnitt<br />
Satellitenkonfiguration, um zu erfahren, wie Sie in dieses Menü gelangen.<br />
- 46 -<br />
Navigieren Sie auf den Menüpunkt<br />
„Motorkonfiguration“, und<br />
drücken Sie die OK-Taste.<br />
Dieses Menü ist standardmäßig für einen Stab<br />
Rotor gedacht. Sie tragen hier lediglich die<br />
geographischen Daten Ihres Wohnortes ein.<br />
Unter http://www.heavens-above.com finden Sie<br />
Ihre Koordinaten heraus.<br />
Den Rest übernimmt Ihre <strong>Dream</strong>box mit<br />
eingebautem USALS für Sie, wenn Sie einen<br />
Satelliten anfahren (Sender auswählen).<br />
Nehmen Sie den Haken aus der Checkbox vor<br />
„Benutze gotoXX Funktion“ mit einem Druck auf die<br />
OK-Taste weg, um den DiSEqC 1.2 Rotor, wie z.B.<br />
den SG2100 Rotor, ohne USALS zu konfigurieren.<br />
Sie sehen, dass das Menü mit neuen Optionen<br />
erscheint.
B e d i e n u n g s a n l e i t u n g D r e a m b o x D M 6 0 0 PVR deutsch<br />
O = Ost, W = West (diese Tabelle ist nicht aktuell, sie dient lediglich zur Erklärung)<br />
- 47 -<br />
Nehmen Sie sich die Liste der eingebauten<br />
Satellitentabelle von Ihrem Rotor zur Hand und<br />
speichern Sie jede Satellitenposition, die Sie<br />
empfangen möchten, links in die Liste ein.<br />
z.B.: Nummer 1 im Rotor ist Hotbird 13° Ost<br />
Dann tragen Sie neben „Nummer in Rotor“ eine 1<br />
und neben „Orbital Position“ die 130 ein.<br />
Den Wert neben „Richtung“ lassen Sie so. Der<br />
Satellit steht Richtung Osten. Ändern Sie diesen<br />
Wert, wenn der Satellit im Westen steht.<br />
Zum besseren Verständnis schauen Sie bitte<br />
unter Punkt 25. in die Beispieltabelle für<br />
DiSEqC 1.2 Rotor (SG2100). Diese stammt Navigieren Sie auf den Button „Hinzufügen“ oder<br />
vom Original Handbuch für den SG2100 Rotor.<br />
drdrücken Sie die gelbe Optionstaste.<br />
25. Beispieltabelle für DiSEqC 1.2 Rotor (SG2100)<br />
Hier sehen Sie eine Beispielliste von vier Satelliten.<br />
Achtung: Sie können später nur die hier<br />
eingegebenen Satelliten scannen (nach Sendern<br />
suchen lassen).<br />
Speichern Sie Ihre Einstellungen mit der grünen<br />
Optionstaste oder navigieren Sie auf den Button<br />
„Speichern“ und drücken die OK-Taste.<br />
Das Menü „Sendersuche“ öffnet sich danach<br />
wieder, und Sie können nach den Sendern suchen<br />
lassen. Dazu mehr unter Sendersuche pro Satellit<br />
(Automatische Sendersuche) oder Sendersuche<br />
alle Satelliten (Automatic Multi Scan).
B e d i e n u n g s a n l e i t u n g D r e a m b o x D M 6 0 0 PVR deutsch<br />
26. Sendersuche pro Satellit (Automatische Sendersuche, DM 600 PVR-S)<br />
Ist kein OSD Menü auf Ihrem Fernsehgerät gewählt (sichtbar), gelangen Sie durch Drücken<br />
der MENU-Taste in das OSD Hauptmenü. Navigieren Sie auf den Menüpunkt<br />
„Einstellungen“.<br />
- 48 -<br />
Navigieren Sie auf den Menüpunkt „Sendersuche“<br />
und drücken Sie die OK-Taste.<br />
Navigieren Sie auf den Menüpunkt „Automatische<br />
Sendersuche“ und drücken Sie die OK-Taste.<br />
Diese Option dient primär zur Sendersuche auf<br />
einen Satelliten pro Suchlauf.<br />
Wählen Sie bitte „Automatische ’Multisat’<br />
Sendersuche“, wenn Sie alle eingerichteten<br />
Satelliten auf einmal scannen (absuchen) möchten.<br />
Dazu mehr unter Sendersuche alle Satelliten<br />
(Automatische Multisat Sendersuche).<br />
Navigieren Sie auf einen der beiden Satelliten und<br />
drücken Sie die OK-Taste, um die Dropdownliste<br />
zu schließen.
B e d i e n u n g s a n l e i t u n g D r e a m b o x D M 6 0 0 PVR deutsch<br />
- 49 -<br />
Ihnen wird nun angezeigt, dass auf dem Satelliten<br />
ein gültiger Transponder gefunden wurde. Die<br />
Haken in den Checkboxen vor „LOCK“ und „SYNC“<br />
sind vom System eingecheckt worden. Die „SNR“,<br />
„AGC“ und „BER“ - Werte sind im Normalbereich.<br />
SNR:<br />
Signal to Noise Ratio<br />
AGC:<br />
Automatic Gain Control<br />
BER:<br />
Bit Error Rate (sollte immer auf 0 stehen)<br />
Nur Freie:<br />
Es wird nur nach FTA (unverschlüsselten) Sendern<br />
gesucht, wenn Sie einen Haken davor setzen.<br />
keine zirkulare Polarisation:<br />
Bitte setzen Sie einen Haken davor, es sei denn, sie<br />
scannen einen Satelliten im C-Band. Astra und<br />
Eutelsat strahlen im KU-Band aus.<br />
Drücken Sie die grüne Optionstaste, um den<br />
Suchlauf pro Satellit zu starten.<br />
Nachdem Sie den Suchlauf gestartet haben, werden<br />
Ihnen der Fortschrittsbalken und die ungefähre<br />
Restzeit für den Suchlauf angezeigt.<br />
Warten Sie bitte bis der Suchlauf zu Ende ist.<br />
Sie können den Suchlauf jederzeit durch<br />
mehrmaliges Drücken der EXIT-Taste abbrechen.<br />
Der Suchlauf ist beendet, wenn Sie dieses Menü<br />
erhalten. Alle wichtigen Informationen über den<br />
Suchlauf werden Ihnen angezeigt.<br />
Drücken Sie die OK-Taste, um dieses Menü zu<br />
schließen.
B e d i e n u n g s a n l e i t u n g D r e a m b o x D M 6 0 0 PVR deutsch<br />
- 50 -<br />
Sie werden jetzt vom System gefragt, ob Sie noch<br />
einen weiteren Satelliten absuchen lassen wollen.<br />
Bestätigen Sie diese Frage mit „Ja“, wenn Sie noch<br />
einen Satelliten in der Satellitenkonfiguration<br />
eingerichtet haben.<br />
Drücken Sie die rote Optionstaste, um den<br />
Suchlauf zu beenden.<br />
Sie gelangen danach zurück zum Menü<br />
„Sendersuche“
B e d i e n u n g s a n l e i t u n g D r e a m b o x D M 6 0 0 PVR deutsch<br />
27. Sendersuche alle Satelliten (Automatische Multisat Suche,DM 600 PVR-S)<br />
Ist kein OSD Menü auf Ihrem Fernsehgerät gewählt (sichtbar), gelangen Sie durch Drücken<br />
der MENU-Taste in das OSD Hauptmenü. Navigieren Sie auf den Menüpunkt<br />
„Einstellungen“.<br />
- 51 -<br />
Navigieren Sie auf den Menüpunkt „Sendersuche“<br />
und drücken Sie die OK-Taste.<br />
Navigieren Sie auf den Menüpunkt „Automatische<br />
’Multisat’ Sendersuche “ und drücken Sie die OK-<br />
Taste.<br />
Mit dieser Option können Sie alle eingerichteten<br />
Satelliten auf einmal scannen (absuchen) lassen,<br />
ohne für jeden einzelnen Satelliten die Frage zu<br />
beantworten, ob Sie noch einen weiteren Satelliten<br />
absuchen lassen wollen.<br />
Das Menü Sendersuche für den Multisat Suchlauf<br />
öffnet sich.<br />
Hier setzen Sie mit der OK-Taste die Optionen für<br />
die Multisat Suche.<br />
Die Option „nichts“ bedeutet, dass nach keinem<br />
Sender auf diesem Satelliten gesucht wird.
B e d i e n u n g s a n l e i t u n g D r e a m b o x D M 6 0 0 PVR deutsch<br />
- 52 -<br />
Mit der OK-Taste wechseln Sie zwischen den<br />
Optionen des jeweiligen Satelliten, die in der<br />
Multisat Sendersuche durchgeführt werden sollen.<br />
Hier setzen Sie mit der OK-Taste die Optionen für<br />
die Multisat Sendersuche auf „alles“.<br />
Das bedeutet, dass nach allen Sendern auf<br />
diesem Satelliten gesucht wird.<br />
Mit der OK-Taste wechseln Sie zwischen den<br />
Optionen des jeweiligen Satelliten, die in der<br />
Multisat Sendersuche durchgeführt werden sollen.<br />
Hier setzen Sie mit der OK-Taste die Optionen für<br />
den Multisat Suchlauf auf „nur freie“.<br />
Das bedeutet, dass nur nach FTA (Free to Air),<br />
also nach allen unverschlüsselten Sendern auf<br />
diesem Satelliten gesucht wird.<br />
Mit der OK-Taste wechseln Sie zwischen den<br />
Optionen des jeweiligen Satelliten, die im Multisat<br />
Suchlauf durchgeführt werden sollen.<br />
In der Regel ist es sinnvoll, nach allen Sendern<br />
auf allen Satelliten suchen zu lassen.<br />
Navigieren Sie auf den Button „Suchlauf starten“<br />
oder drücken Sie die grüne Optionstaste, um<br />
den Suchlauf zu starten.
B e d i e n u n g s a n l e i t u n g D r e a m b o x D M 6 0 0 PVR deutsch<br />
- 53 -<br />
Hier sehen Sie das erste Menü für den ersten<br />
Satelliten, der abgesucht wird.<br />
Hier sehen Sie das zweite Menü für den zweiten<br />
Satelliten, der abgesucht wird.<br />
Der Suchlauf ist beendet, wenn Sie dieses Menü<br />
erhalten.<br />
Alle wichtigen Informationen über den Suchlauf<br />
werden Ihnen angezeigt.<br />
Drücken Sie die OK-Taste, um dieses Menü zu<br />
schließen.
B e d i e n u n g s a n l e i t u n g D r e a m b o x D M 6 0 0 PVR deutsch<br />
Sie werden jetzt vom System gefragt, ob Sie noch<br />
einen weiteren Transponder absuchen lassen<br />
wollen.<br />
Drücken Sie die rote Optionstaste, um den<br />
Suchlauf zu beenden.<br />
Sie gelangen danach zurück zum Menü<br />
„Sendersuche“.<br />
- 54 -
B e d i e n u n g s a n l e i t u n g D r e a m b o x D M 6 0 0 PVR deutsch<br />
28. Manuelle Sendersuche (DM 600 PVR-S)<br />
Ist kein OSD Menü auf Ihrem Fernsehgerät gewählt (sichtbar), gelangen Sie durch Drücken<br />
der MENU-Taste in das OSD Hauptmenü. Navigieren Sie auf den Menüpunkt<br />
„Einstellungen“.<br />
- 55 -<br />
Navigieren Sie auf den Menüpunkt „Sendersuche“<br />
und drücken Sie die OK-Taste.<br />
Navigieren Sie auf den Menüpunkt „Manuelle<br />
Sendersuche“ und drücken Sie die OK-Taste.<br />
Wählen Sie als erstes den Satelliten mit der OK-<br />
Taste aus, auf dem Sie nach einem Transponder<br />
suchen lassen möchten.<br />
Benutzen Sie die Navigationstasten, um in die<br />
einzelnen Optionsfelder zu gelangen.<br />
Tragen Sie die Transponderfrequenz mit den<br />
Zifferntasten auf Ihrer Fernbedienung ein.<br />
Benutzen Sie die Navigationstasten nach links<br />
oder rechts, um zwischen horizontaler und vertikaler<br />
Polarisation zu wechseln, ebenso um die FEC zu<br />
ändern.<br />
Tragen Sie die Symbolrate mit den Zifferntasten auf<br />
Ihrer Fernbedienung ein.<br />
Drücken Sie die grüne Optionstaste, um den<br />
Suchlauf zu starten.
B e d i e n u n g s a n l e i t u n g D r e a m b o x D M 6 0 0 PVR deutsch<br />
29. Transponder bearbeiten (DM 600 PVR-S)<br />
Ist kein OSD Menü auf Ihrem Fernsehgerät gewählt (sichtbar), gelangen Sie durch Drücken<br />
der MENU-Taste in das OSD Hauptmenü. Navigieren Sie auf den Menüpunkt<br />
„Einstellungen“.<br />
- 56 -<br />
Navigieren Sie auf den Menüpunkt „Sendersuche“<br />
und drücken Sie die OK-Taste.<br />
Navigieren Sie auf den Menüpunkt „Transponder<br />
Bearbeitung“ und drücken Sie die OK-Taste.<br />
Über dieses Menü können Sie die<br />
Transponder/Satellitenliste bearbeiten, die für den<br />
Sendersuchlauf benötigt wird. Neue<br />
Transponder/Satelliten werden im Internet und in<br />
den Fachmagazinen bekannt gegeben.<br />
Drücken Sie die rote Optionstaste, um einen<br />
Satelliten zu löschen.<br />
Drücken Sie die grüne Optionstaste, um einen<br />
Satelliten anzulegen.<br />
Drücken Sie die OK-Taste, um den Satelliten zu<br />
bearbeiten.
B e d i e n u n g s a n l e i t u n g D r e a m b o x D M 6 0 0 PVR deutsch<br />
Netzwerksuche:<br />
Die Netzwerksuche (NIT verwenden) beinhaltet<br />
Informationen über den Satelliten und die<br />
TV/Radio- Programme. (NIT = Network Information Table)<br />
Erweiterte Netzwerksuche:<br />
Setzen Sie hier einen Haken, um die NIT anderer<br />
Transponder zu scannen.<br />
BAT verwenden:<br />
Bouquet Tabellen der Provider werden ausgewertet,<br />
sofern welche vorhanden.<br />
(BAT = Bouquet Association Table)<br />
Navigieren Sie auf den Button „Speichern“ und<br />
drücken Sie die OK-Taste, oder drücken Sie die<br />
grüne Optionstaste, um die Einstellungen zu<br />
speichern.<br />
Sie gelangen danach zurück zum Menü<br />
„Transponder“.<br />
.<br />
- 57 -<br />
Folgen Sie den Anweisungen in der Statuszeile<br />
dieses Menüs. Benutzen Sie die<br />
Navigationstasten, um die einzelnen Optionen zu<br />
erreichen und die OK-Taste, um die Optionen zu<br />
ändern.<br />
Navigieren Sie auf den Button „Hinzufügen“ und<br />
drücken Sie die OK-Taste.
B e d i e n u n g s a n l e i t u n g D r e a m b o x D M 6 0 0 PVR deutsch<br />
- 58 -<br />
Über dieses Menü können Sie einen Transponder<br />
dem Satelliten hinzufügen.<br />
Tragen Sie die Transponderfrequenz und die<br />
Symbolrate mit den Zifferntasten Ihrer<br />
Fernbedienung ein. Benutzen Sie die<br />
Navigationstasten, um die Optionsfelder zu<br />
erreichen und deren Werte zu ändern.<br />
Navigieren Sie auf den Button „Speichern“ und<br />
drücken Sie die OK-Taste, oder drücken Sie die<br />
grüne Optionstaste, um die Einstellungen zu<br />
speichern.<br />
Nachdem Sie alle Einstellungen an der<br />
Transponder/Satellitenliste vorgenommen haben,<br />
drücken Sie die EXIT-Taste, um das Menü zu<br />
verlassen. Sie werden dann gefragt, ob Sie Ihre<br />
Veränderungen speichern möchten.<br />
Dies ist für den Fall gedacht, dass Sie versehentlich<br />
einen Satelliten aus der Liste gelöscht haben. Ist<br />
dies passiert, drücken Sie die rote Optionstaste.<br />
Ansonsten drücken Sie die grüne Optionstaste,<br />
um Ihre Einstellungen zu speichern.<br />
Sie gelangen danach zurück zum Menü<br />
„Sendersuche“. Starten Sie anschließend den<br />
Sendersuchlauf.
B e d i e n u n g s a n l e i t u n g D r e a m b o x D M 6 0 0 PVR deutsch<br />
30. Serviceverwaltung - neues Bouquet erstellen<br />
Ist kein OSD Menü auf Ihrem Fernsehgerät gewählt (sichtbar), gelangen Sie durch Drücken<br />
der MENU-Taste in das OSD Hauptmenü. Navigieren Sie auf den Menüpunkt<br />
„Einstellungen“.<br />
- 59 -<br />
Das Menü „Einstellungen“ erscheint.<br />
Der Cursorbalken steht schon auf dem Menüpunkt<br />
„Serviceverwaltung“.<br />
Drücken Sie die OK-Taste.<br />
Das Menü „Serviceverwaltung“ erscheint.<br />
Der Cursorbalken steht schon auf dem Menüpunkt<br />
„Neues Bouquet erstellen“.<br />
Drücken Sie die OK-Taste.<br />
Sie werden nun nach dem Typ des Bouquets<br />
gefragt, welches Sie anlegen möchten.<br />
In unserem Beispiel legen wir ein TV Bouquet an.<br />
Drücken Sie die OK-Taste.
B e d i e n u n g s a n l e i t u n g D r e a m b o x D M 6 0 0 PVR deutsch<br />
- 60 -<br />
Mittels der Zifferntasten auf Ihrer Fernbedienung<br />
werden die Buchstaben durch mehrmaliges<br />
Drücken ausgewählt.<br />
Groß- und Kleinschreibung wird mit der gelben<br />
Optionstaste ein- bzw. ausgeschaltet.<br />
Wollen Sie mehrere Zahlen hintereinander<br />
eingeben, drücken Sie zuvor auf die blaue Taste.<br />
Mit der grünen Taste fügen Sie ein Leerzeichen<br />
ein.<br />
Mit der roten Taste löschen Sie ein Zeichen.<br />
Mit den Navigationstasten links/rechts gelangen<br />
Sie zu der dementsprechenden Position in der<br />
Namenseingabe.<br />
Drücken Sie die OK-Taste, um den Eingabemodus<br />
zu verlassen. Sie gelangen danach zurück zum<br />
Menü „Serviceverwaltung“
B e d i e n u n g s a n l e i t u n g D r e a m b o x D M 6 0 0 PVR deutsch<br />
30.1 Serviceverwaltung - Services zu einem Bouquet hinzufügen<br />
Lesen Sie bitte zuvor den Abschnitt Serviceverwaltung - neues Bouquet erstellen, um zu<br />
erfahren, wie Sie in dieses Menü gelangen.<br />
- 61 -<br />
Navigieren Sie auf den Menüpunkt „Services zum<br />
Bouquet hinzufügen“.<br />
Drücken Sie die OK-Taste.<br />
Sie werden nun nach dem Typ des Bouquets<br />
gefragt, in welches Sie einen Sender hinzufügen<br />
möchten.<br />
In unserem Beispiel fügen wir einen Sender in ein<br />
TV Bouquet ein.<br />
Drücken Sie die OK-Taste.<br />
Sie werden nun gefragt, in welchem Bouquet Sie<br />
einen Sender ablegen möchten.<br />
In unserem Beispiel legen wir einen Sender im eben<br />
erstellten Beispielbouquet „unser neues bouquet“<br />
ab.<br />
Drücken Sie die OK-Taste.<br />
Sie können nun entscheiden, ob Sie einen Sender<br />
aus der „Provider“-Liste, der „Sender“-Liste oder aus<br />
der „Neue Sender“-Liste entnehmen.<br />
Hinweis: In der „Neue Sender“-Liste werden alle<br />
Sender abgelegt, die sich vor dem Sendersuchlauf<br />
nicht in der Kanalliste befunden haben.<br />
In unserem Beispiel nehmen wir die Providerliste.<br />
Drücken Sie die OK-Taste.
B e d i e n u n g s a n l e i t u n g D r e a m b o x D M 6 0 0 PVR deutsch<br />
- 62 -<br />
Die Providerliste erscheint nun. Navigieren Sie auf<br />
den Provider ARD.<br />
Drücken Sie die OK-Taste.<br />
Sie sehen nun die Sender des Providers ARD.<br />
Wir markieren den Sender „Phoenix“ mit einem<br />
Druck auf die OK-Taste.<br />
Sie können selbstverständlich mehrere Sender<br />
auswählen. Diese werden dann rot unterlegt.<br />
Drücken Sie die EXIT-Taste, um Ihre Auswahl zu<br />
beenden.<br />
Sie gelangen danach zurück zum Menü<br />
„Serviceverwaltung“.
B e d i e n u n g s a n l e i t u n g D r e a m b o x D M 6 0 0 PVR deutsch<br />
30.2 Serviceverwaltung - Bouquets bearbeiten<br />
Lesen Sie bitte zuvor den Abschnitt Serviceverwaltung - neues Bouquet erstellen, um zu<br />
erfahren, wie Sie in dieses Menü gelangen.<br />
- 63 -<br />
Navigieren Sie auf den Menüpunkt „Bouquets<br />
bearbeiten“.<br />
Drücken Sie die OK-Taste.<br />
Das Menü für die Bearbeitung der Bouquets<br />
erscheint nun.<br />
Sie sehen nun auch die farbigen Hilfe-Buttons.<br />
Diese können Sie über das Experten Einstellungen<br />
Menü ein bzw. ausschalten. Siehe Experten<br />
Einstellungen.<br />
Drücken Sie die OK-Taste, um die TV Bouquets zu<br />
bearbeiten.<br />
Das Menü für die Bearbeitung der TV Bouquets<br />
erscheint.<br />
Navigieren Sie auf das Bouquet „unser neues<br />
bouquet“.<br />
Drücken Sie die OK-Taste.
B e d i e n u n g s a n l e i t u n g D r e a m b o x D M 6 0 0 PVR deutsch<br />
- 64 -<br />
Mit der roten Optionstaste können Sie einen<br />
Sender aus dem Bouquet löschen.<br />
Achtung: Dies geschieht ohne Abfrage, ob Sie dies<br />
wirklich wollen!!!<br />
Mit der grünen Optionstaste können Sie einen<br />
Sender markieren und in dieser Liste rauf und runter<br />
verschieben, um die Reihenfolge der Sender in<br />
diesem Bouquet zu ändern.<br />
Nachdem Sie den Sender an die gewünschte<br />
Position geschoben haben, drücken Sie erneut die<br />
grüne Optionstaste, um den Sender abzulegen.<br />
Mit der gelben Optionstaste können Sie einen Sender umbenennen. Dies geschieht wie bei der<br />
Namenseingabe des neuen Bouquets, siehe Punkt 30. Serviceverwaltung - neues Bouquet<br />
erstellen.<br />
Mit der blauen Optionstaste können Sie einen Marker einfügen. Den Marker können Sie beliebig<br />
benennen. Dies geschieht wie bei der Namenseingabe des neuen Bouquets, siehe Punkt 30.<br />
Serviceverwaltung - neues Bouquet erstellen. Sie können somit Ihre Bouquetliste unterteilen.<br />
Diese hier beschriebene Prozedur bezieht sich auch<br />
auf die Serviceverwaltung eines Radio und Datei Bouquets.
B e d i e n u n g s a n l e i t u n g D r e a m b o x D M 6 0 0 PVR deutsch<br />
31. Jugendschutz und Setupsperre<br />
Ist kein OSD Menü auf Ihrem Fernsehgerät gewählt (sichtbar), gelangen Sie durch Drücken<br />
der MENU-Taste in das OSD Hauptmenü. Navigieren Sie auf den Menüpunkt<br />
„Einstellungen“.<br />
- 65 -<br />
Navigieren Sie auf den Menüpunkt „Jugendschutz“<br />
und drücken Sie die OK-Taste.<br />
In diesem Menü können Sie den Jugendschutz und<br />
die Setupsperre aktivieren, damit kein anderer<br />
unberechtigten Zugriff auf Ihre Einstellungen, die<br />
von Ihnen bestimmten Sender, Videos und Mp3s<br />
hat, oder wenn Sie Ihren Kindern nur selektierte<br />
Sender zur Verfügung stellen wollen.<br />
Die Schutzoptionen werden durch Eingabe einer<br />
vierstelligen, nur Ihnen bekannten PIN<br />
(Zahlenkombination), gesetzt.<br />
Achtung:<br />
Haben Sie die PIN einmal vergessen, können Sie<br />
nur durch Zurücksetzen auf die Werkseinstellungen<br />
die Schutzoptionen aufheben.
B e d i e n u n g s a n l e i t u n g D r e a m b o x D M 6 0 0 PVR deutsch<br />
31.1 Jugendschutz aktivieren<br />
Lesen Sie bitte zuvor den Abschnitt Jugendschutz und Setupsperre, um zu erfahren, wie<br />
Sie in dieses Menü gelangen.<br />
- 66 -<br />
Setzen Sie einen Haken mit der OK-Taste in die<br />
Checkbox vor Jugendschutz.<br />
Das Optionsfeld „PIN ändern“ erscheint,<br />
Navigieren Sie dort hin und drücken Sie die OK-<br />
Taste.<br />
Ebenso können Sie hier entscheiden, ob alle<br />
gesperrten Sender versteckt (nicht in der Kanalliste<br />
angezeigt) werden sollen. Setzen Sie<br />
dementsprechend einen Haken in die Checkbox vor<br />
„Gesperrte Services ausblenden“.<br />
Geben Sie eine vierstellige Zahlenkombination<br />
(PIN) ein.<br />
Achtung:<br />
Die eingegebene PIN muss ungleich 0000 sein,<br />
ansonsten wird der Schutz nicht aktiviert.<br />
Wiederholen Sie die vierstellige Zahlenkombination<br />
(PIN).
B e d i e n u n g s a n l e i t u n g D r e a m b o x D M 6 0 0 PVR deutsch<br />
- 67 -<br />
Sie erhalten danach eine Quittierung vom System,<br />
dass die PIN geändert wurde.<br />
Drücken Sie die OK-Taste.<br />
Haben Sie sich bei der Eingabe vertippt,<br />
bekommen Sie diese Fehlermeldung vom System.<br />
Entscheiden Sie sich, ob Sie die PIN Eingabe<br />
wiederholen wollen, oder nicht. Drücken Sie die<br />
grüne oder die rote Optionstaste.<br />
Navigieren Sie auf den Button „Speichern“ und<br />
drücken Sie die OK-Taste, oder drücken Sie die<br />
grüne Optionstaste, um die Einstellungen zu<br />
speichern.<br />
Sie gelangen danach zurück zum Menü<br />
„Einstellungen“.
B e d i e n u n g s a n l e i t u n g D r e a m b o x D M 6 0 0 PVR deutsch<br />
31.2 Jugendschutz deaktivieren<br />
Lesen Sie bitte zuvor den Abschnitt Jugendschutz und Setupsperre, um zu erfahren, wie<br />
Sie in dieses Menü gelangen.<br />
- 68 -<br />
Der Cursorbalken muss auf der Option<br />
Jugendschutz stehen. Drücken Sie dann die OK-<br />
Taste, um den Jugendschutz zu deaktivieren.<br />
Geben Sie jetzt Ihre PIN ein, um die<br />
Jugendschutzfunktion aufzuheben.<br />
Der Haken vor Jugendschutz ist nun entfernt.<br />
Navigieren Sie auf den Button „Speichern“ und<br />
drücken Sie die OK-Taste, oder drücken Sie die<br />
grüne Optionstaste, um die Einstellungen zu<br />
speichern.<br />
Sie gelangen danach zurück zum Menü<br />
„Einstellungen“.
B e d i e n u n g s a n l e i t u n g D r e a m b o x D M 6 0 0 PVR deutsch<br />
31.3 Setupsperre aktivieren<br />
Lesen Sie bitte zuvor den Abschnitt Jugendschutz und Setupsperre, um zu erfahren, wie<br />
Sie in dieses Menü gelangen.<br />
- 69 -<br />
Setzen Sie einen Haken mit der OK-Taste in die<br />
Checkbox vor Setupsperre.<br />
Das Optionsfeld „PIN ändern“ erscheint.<br />
Navigieren Sie dort hin und drücken Sie die OK-<br />
Taste.<br />
Geben Sie eine vierstellige Zahlenkombination<br />
(PIN) ein.<br />
Achtung:<br />
Die eingegebene PIN muss ungleich 0000 sein,<br />
ansonsten wird der Schutz nicht aktiviert.<br />
Wiederholen Sie die vierstellige Zahlenkombination<br />
(PIN).
B e d i e n u n g s a n l e i t u n g D r e a m b o x D M 6 0 0 PVR deutsch<br />
- 70 -<br />
Sie erhalten danach eine Quittierung vom System,<br />
dass die PIN geändert wurde.<br />
Drücken Sie die OK-Taste.<br />
Haben Sie sich bei der Eingabe vertippt, bekommen<br />
Sie diese Fehlermeldung vom System. Entscheiden<br />
Sie sich, ob Sie die PIN Eingabe wiederholen<br />
wollen, oder nicht. Drücken Sie die grüne oder die<br />
rote Optionstaste.<br />
Sie gelangen danach zurück zum Jugendschutz<br />
Setup.<br />
Navigieren Sie auf den Button „Speichern“ und<br />
drücken Sie die OK-Taste, oder drücken Sie die<br />
grüne Optionstaste, um die Einstellungen zu<br />
speichern.<br />
Sie gelangen danach zurück zum Menü<br />
„Einstellungen“.
B e d i e n u n g s a n l e i t u n g D r e a m b o x D M 6 0 0 PVR deutsch<br />
31.4 Setupsperre deaktivieren<br />
Lesen Sie bitte zuvor den Abschnitt Jugendschutz und Setupsperre, um zu erfahren, wie<br />
Sie in dieses Menü gelangen.<br />
- 71 -<br />
Navigieren Sie auf die Option Setupsperre und<br />
drücken Sie die OK-Taste, um die Setupsperre zu<br />
deaktivieren.<br />
Geben Sie jetzt Ihre PIN ein, um die Setupsperre<br />
aufzuheben.<br />
Der Haken vor Setupsperre ist nun entfernt.<br />
Navigieren Sie auf den Button „Speichern“ und<br />
drücken Sie die OK-Taste, oder drücken Sie die<br />
grüne Optionstaste, um die Einstellungen zu<br />
speichern.<br />
Sie gelangen danach zurück zum Menü<br />
„Einstellungen“.
B e d i e n u n g s a n l e i t u n g D r e a m b o x D M 6 0 0 PVR deutsch<br />
32. Sender sperren<br />
Lesen Sie bitte zuvor den Abschnitt Jugendschutz und Setupsperre, um zu erfahren, wie<br />
Sie den Jugendschutz aktivieren.<br />
- 72 -<br />
Drücken Sie die OK-Taste, um die Kanalliste zu<br />
öffnen.<br />
Es wurde hier schon vorab die rote Optionstaste<br />
gedrückt, um in die Kanalliste für Alle Sender zu<br />
gelangen.<br />
Navigieren Sie auf einen Sender Ihrer Wahl und<br />
drücken Sie die MENU-Taste.<br />
Sie können jeden beliebigen Eintrag in jeder<br />
Kanallistenansicht (Alle Sender, Satelliten,<br />
Provider und Bouquets) über diesen Weg sperren.<br />
Navigieren Sie auf den Menüpunkt „Sperren“,<br />
drücken Sie die OK-Taste, um den ausgewählten<br />
Sender zu sperren.<br />
Sie können über dieses Menü auch den<br />
Jugendschutz deaktivieren. Navigieren Sie dazu auf<br />
den Menüpunkt „Jugendschutz abschalten“ und<br />
drücken Sie die OK-Taste.<br />
Sie werden nach Ihrer PIN<br />
gefragt.<br />
Es erscheint rechts neben dem Sendernamen das<br />
Symbol für die Verriegelung.<br />
Wenn Sie das nächste Mal diesen Sender sehen<br />
möchten, werden Sie nach Ihrer PIN gefragt.
B e d i e n u n g s a n l e i t u n g D r e a m b o x D M 6 0 0 PVR deutsch<br />
33. Sender entsperren<br />
- 73 -<br />
Drücken Sie die OK-Taste, um die Kanalliste zu<br />
öffnen.<br />
Es wurde hier schon vorab die rote Optionstaste<br />
gedrückt, um in die Kanalliste für Alle Sender zu<br />
gelangen.<br />
Navigieren Sie auf einen Sender Ihrer Wahl und<br />
drücken Sie die MENU-Taste.<br />
Sie können jeden beliebigen Eintrag in jeder<br />
Kanallistenansicht (Alle Sender, Satelliten,<br />
Provider und Bouquets) über diesen Weg<br />
entsperren.<br />
Navigieren Sie auf den Menüpunkt „Entsperren“,<br />
drücken Sie die OK-Taste, um den ausgewählten<br />
Sender zu entsperren.<br />
.<br />
Sie werden nach Ihrer PIN<br />
gefragt.<br />
Das Symbol für die Verriegelung rechts neben dem<br />
Sendernamen ist nun weg.
B e d i e n u n g s a n l e i t u n g D r e a m b o x D M 6 0 0 PVR deutsch<br />
34. Bild und Ton<br />
Ist kein OSD Menü auf Ihrem Fernsehgerät gewählt (sichtbar), gelangen Sie durch Drücken<br />
der MENU-Taste in das OSD Hauptmenü. Navigieren Sie auf den Menüpunkt<br />
„Einstellungen“.<br />
- 74 -<br />
Navigieren Sie auf den Menüpunkt „System“ und<br />
drücken Sie die OK-Taste.<br />
Navigieren Sie auf den Menüpunkt „Bild und Ton“<br />
und drücken Sie die OK-Taste.
B e d i e n u n g s a n l e i t u n g D r e a m b o x D M 6 0 0 PVR deutsch<br />
WSS auf 4:3 deaktivieren:<br />
Setzen Sie einen Haken in die Checkbox, um<br />
das Aufzoomen bei einigen 16:9<br />
Fernsehgeräten von 4:3 Sendungen zu<br />
verhindern.<br />
AC3 als Standardausgabe:<br />
Wird eine Sendung empfangen, die eine AC3<br />
Tonspur (z.B. Dolby Digital) enthält, so wird<br />
automatisch auf diese Tonspur umgeschaltet.<br />
Digitale AC3-Signale werden nur auf dem<br />
optischen digitalen Ausgang ausgegeben. Da<br />
die <strong>Dream</strong>box kein Dolby Digital Decoder<br />
enthält, können AC3-Signale nicht auf den<br />
analogen Ausgang ausgegeben werden und<br />
auch nicht in der Lautstärke geregelt werden.<br />
Für die Lautstärkeregelung von AC3-Signalen<br />
benutzen Sie daher bitte Ihren Dolby Digital<br />
Verstärker.<br />
- 75 -<br />
Ändern Sie bei Bedarf mit den Navigationstasten<br />
links/rechts und der OK-Taste die Einstellungen.<br />
Farbformat:<br />
CVBS(FBAS), RGB (Rot, Grün, Blau getrennt),<br />
SVideo (Farb- und Helligkeitssignal getrennt) und<br />
YPbPr (Komponentensignal z.B. für Projektoren).<br />
Bildformat:<br />
4:3 Letterbox (Standard), (16:9 Sendungen<br />
werden auf 4:3 Fernsehern mit schwarzen Balken,<br />
oben und unten, dargestellt)<br />
4:3 Panscan (16:9 Sendungen werden auf 4:3<br />
Fernsehern in der vollen Höhe vergrößert<br />
dargestellt, dadurch werden seitlich (links und<br />
rechts) Teile des Bildes abgeschnitten)<br />
16:9 (für 16:9 Fernseher, auf 4:3 Fernsehern führt<br />
diese Einstellung zu einem in der Höhe verzerrten<br />
Bild)<br />
TV System:<br />
Wählen Sie die Norm aus, die Ihr Fernseher<br />
unterstützt. PAL; PAL + PAL60; Multinorm und<br />
NTSC.<br />
Test:<br />
Drücken Sie die blaue Optionstaste um den<br />
Testbild-Modus zu aktivieren. Drücken Sie dann die<br />
Tasten 1-8, um ein Testbild auszuwählen. Drücken<br />
sie irgendeine andere Taste, um diesen Modus zu<br />
verlassen.<br />
Navigieren Sie auf den Button „Speichern“ und<br />
drücken Sie die OK-Taste, oder drücken Sie die<br />
grüne Optionstaste, um die Einstellungen zu<br />
speichern.<br />
Sie gelangen danach zurück zum Menü „System“.
B e d i e n u n g s a n l e i t u n g D r e a m b o x D M 6 0 0 PVR deutsch<br />
35. Tastatur<br />
Ist kein OSD Menü auf Ihrem Fernsehgerät gewählt (sichtbar), gelangen Sie durch Drücken<br />
der MENU-Taste in das OSD Hauptmenü. Navigieren Sie auf den Menüpunkt<br />
„Einstellungen“.<br />
- 76 -<br />
Navigieren Sie auf den Menüpunkt „System“ und<br />
drücken Sie die OK-Taste.<br />
Navigieren Sie auf den Menüpunkt „Tastatur“ und<br />
drücken Sie die OK-Taste.<br />
Drücken Sie die OK-Taste, um die Dropdownliste<br />
zu öffnen. Wählen Sie zwischen der deutschen und<br />
englischen Tastaturbelegung.<br />
Navigieren Sie auf den Button „Speichern“ und<br />
drücken die OK-Taste, oder drücken Sie die<br />
grüne Optionstaste, um die Einstellungen zu<br />
speichern.
B e d i e n u n g s a n l e i t u n g D r e a m b o x D M 6 0 0 PVR deutsch<br />
36. Benutzeroberfläche<br />
Ist kein OSD Menü auf Ihrem Fernsehgerät gewählt (sichtbar), gelangen Sie durch Drücken<br />
der MENU-Taste in das OSD Hauptmenü. Navigieren Sie auf den Menüpunkt<br />
„Einstellungen“.<br />
- 77 -<br />
Navigieren Sie auf den Menüpunkt „System“ und<br />
drücken Sie die OK-Taste.<br />
Navigieren Sie auf den Menüpunkt<br />
„Benutzeroberfläche“ und drücken die OK-Taste.
B e d i e n u n g s a n l e i t u n g D r e a m b o x D M 6 0 0 PVR deutsch<br />
- 78 -<br />
Mit den Navigationstasten links/rechts können Sie<br />
die Transparenz, die Helligkeit und den Kontrast des<br />
OSD (On Screen Displays) verändern.<br />
Transparenz:<br />
Mit der Transparenz stellen Sie ein, in wie weit das<br />
Fernsehbild durch das OSD durchscheint.<br />
Helligkeit:<br />
Hier stellen Sie die Helligkeit des OSD ein.<br />
Kontrast:<br />
Hier stellen Sie den Kontrast des OSD ein.<br />
Hauptmenü als normales Menü zeigen:<br />
Setzen Sie hiervor einen Haken, um das<br />
OSD-Hauptmenü als Listenansicht zu sehen.<br />
Skin wechseln:<br />
siehe Skin Einstellung<br />
Videotext Position:<br />
siehe Videotext Position einrichten<br />
Navigieren Sie auf den Button „Speichern“ und<br />
drücken Sie die OK-Taste, oder drücken Sie die<br />
grüne Optionstaste, um die Einstellungen zu<br />
speichern.<br />
Sie gelangen danach zurück zum Menü „System“.
B e d i e n u n g s a n l e i t u n g D r e a m b o x D M 6 0 0 PVR deutsch<br />
36.1 Skin Einstellung<br />
Lesen Sie bitte zuvor den Abschnitt Benutzeroberfläche, um zu erfahren, wie Sie in dieses<br />
Menü gelangen.<br />
- 79 -<br />
Die Skinauswahl ist für das Aussehen des OSD (On<br />
Screen Displays) zuständig.<br />
Navigieren Sie auf Ihr Wunsch-Skin und drücken Sie<br />
die OK-Taste, um dies auszuwählen.<br />
Der Standardskin ist Screwed Stone.<br />
Unter verfügbare Skins sehen Sie die komplette<br />
Auswahl.<br />
Um ein Skin vollständig zu aktivieren, muss das<br />
System (Enigma) neu gestartet werden.<br />
Treffen Sie Ihre Wahl und drücken Sie die grüne<br />
Optionstaste für „Ja“,<br />
die rote Optionstaste für „Nein“,<br />
oder benutzen Sie die Navigationstasten, um auf<br />
den entsprechenden Button zu gelangen. Mit der OK-<br />
Taste bestätigen Sie Ihre Auswahl.
B e d i e n u n g s a n l e i t u n g D r e a m b o x D M 6 0 0 PVR deutsch<br />
36.2 verfügbare Skins<br />
Bluenigma BIG<br />
Neutrino-style<br />
Carbon<br />
Simple and Stylish<br />
Der Skin Simple and Stylish 16:9 sieht<br />
genauso aus wie der Simple and Stylish Skin, nur dass<br />
dieser für 16:9 Fernseher optimiert ist.<br />
- 80 -<br />
Silver Metal<br />
Screwed Stone<br />
BlueQT
B e d i e n u n g s a n l e i t u n g D r e a m b o x D M 6 0 0 PVR deutsch<br />
36.3 Videotext Position einrichten<br />
Lesen Sie bitte zuvor den Abschnitt Benutzeroberfläche, um zu erfahren, wie Sie in dieses<br />
Menü gelangen.<br />
Was ist der Teletext? Teletext ist ein Plugin (eingebautes Zusatzprogramm), welches<br />
erlaubt den digitalen Videotext (Teletext) zu decodieren, ähnlich wie ein analoger Videotext-<br />
Decoder in einem Fernseher. Der Unterschied besteht darin, dass TuxTxt erheblich schneller<br />
und einfacher zu bedienen ist.<br />
Dieses Menü dient dazu, die äußeren Ränder des Videotextes einzustellen, wenn z.B. die<br />
Uhrzeit nicht vollständig angezeigt wird, oder der Videotext nicht bildschirmmittig angezeigt<br />
wird.<br />
Achtung:<br />
Falls Sie kein Rechteck am oberen linken und<br />
am unten rechten Bildrand sehen, so befinden<br />
sich diese noch außerhalb des sichtbaren<br />
Bereiches. Drücken Sie die Navigationstasten<br />
entsprechend solange, bis das Rechteck im<br />
sichtbaren Bereich Ihres Fernsehers erscheint.<br />
- 81 -<br />
Drücken Sie die gelbe Optionstaste, um in das<br />
Videotext Positions Setup zu gelangen.<br />
Sie sehen dann diesen blauen halbdurchlässigen<br />
Bildschirm.<br />
Drücken Sie die rote Optionstaste, um den linken<br />
Top-Punkt anzuwählen.<br />
Benutzen Sie die Navigationstasten, um das<br />
Rechteck an den oberen linken Bildrand zu<br />
verschieben.<br />
Drücken Sie dann die grüne Optionstaste, um den<br />
rechten Tief-Punkt anzuwählen.<br />
Benutzen Sie die Navigationstasten, um das<br />
Rechteck an den unteren rechten Bildrand zu<br />
verschieben.<br />
Die Positionen sind nun eingestellt, und Sie<br />
können das Menü mit der OK-Taste wieder<br />
verlassen.
B e d i e n u n g s a n l e i t u n g D r e a m b o x D M 6 0 0 PVR deutsch<br />
- 82 -<br />
Navigieren Sie auf den Button „Speichern“ und<br />
drücken Sie die OK-Taste, oder drücken Sie die<br />
grüne Optionstaste, um die Einstellungen zu<br />
speichern.<br />
Sie gelangen danach zurück zum Menü „System“.
B e d i e n u n g s a n l e i t u n g D r e a m b o x D M 6 0 0 PVR deutsch<br />
37. Teletext (TuxTxt, Videotext)<br />
Was ist TuxTxt? TuxTxt ist ein Plugin (eingebautes Zusatzprogramm), welches erlaubt den<br />
digitalen Videotext zu decodieren, ähnlich wie ein analoger Videotext-Decoder in einem<br />
Fernseher. Der TuxTxt ist erheblich schneller und einfacher zu bedienen.<br />
TuxTxt normale Navigation:<br />
- 83 -<br />
Sie befinden sich im TV - oder RADIO - Modus.<br />
Durch Drücken der TEXT-Taste starten Sie den<br />
Teletext.<br />
Denken Sie daran, nicht jeder Sender stellt<br />
Videotextinformationen zur Verfügung!<br />
Alternativ: Durch Drücken der blauen Optionstaste<br />
rufen Sie das Menü „Erweiterungen“ (Plugins) auf.<br />
Sie erhalten danach dieses Menü.<br />
Drücken Sie die OK-Taste, um den Teletext<br />
aufzurufen.<br />
Befinden Sie sich im TuxTxt auf irgendeiner Texttafel, kommen Sie durch drücken der OK-Taste in<br />
den interaktiven Text-Modus. Sie brauchen jetzt nur noch mit den Navigationstasten auf die<br />
angegebenen Textseitenzahlen navigieren und die OK-Taste drücken, um auf diese Seite zu<br />
gelangen. Sie brauchen also nicht mehr die Seitenzahlen einzutippen. Selbstverständlich können Sie<br />
immer noch die Seitenzahlen eintippen.<br />
Den TuxTxt verlassen Sie mit einem Druck auf die EXIT-Taste.<br />
Durch mehrmaligen Druck auf die Tonstopp-Taste, schalten Sie zwischen TuxTxt ausblenden,<br />
Transparenter Ansicht und TuxTxt wieder einblenden, um.<br />
Durch mehrmaligen Druck auf die Lautstärke + Wippe, schalten Sie zwischen Doppelter Höhe obere<br />
Hälfte, untere Hälfte und voller Höhe, um.<br />
Mit der Lautstärke - Wippe schalten Sie den PiG-Modus (Picture in Graphics) ein bzw. aus.<br />
(gleichzeitige Darstellung nebeneinander, vor allem für 16:9 Fernseher bei 4:3 Sendungen sehr<br />
interessant.
B e d i e n u n g s a n l e i t u n g D r e a m b o x D M 6 0 0 PVR deutsch<br />
TuxTxt Konfigurationsmenü:<br />
Wird die Startseite 100 angezeigt, gelangen Sie durch Drücken der MENU-Taste in das<br />
Konfigurationsmenü des TuxTxtes.<br />
Sie haben nun folgende Möglichkeiten:<br />
Teletext - Auswahl:<br />
Selektieren Sie den Eintrag „Suchen“ und drücken die „OK“-Taste wird nach allen Sendern gesucht<br />
von denen Teletextinformationen eingeholt werden können ohne den Sender zu verlassen den Sie<br />
gerade schauen. Nach diesem Suchlauf können Sie mit den Navigationstasten nach links oder<br />
rechts den Videotext eines anderen Senders auswählen und diesen lesen ohne den Sender wechseln<br />
zu müssen. Drücken Sie dann die OK-Taste, um Ihre Auswahl zu bestätigen und dessen Text<br />
anzuschauen. Diese Option steht nur dann zur Verfügung, wenn auch mehrere Sender auf dem<br />
aktuellen Satelliten-Transponder Videotext anbieten. Ist dies nicht der Fall, kann hier keine Auswahl<br />
erfolgen.<br />
Bildschirmformat:<br />
16:9 im Standard-Modus = ein/aus<br />
Hier wird eingestellt, ob der Fernseher bei Anzeige des Videotextes auf 16:9-Darstellung schalten soll.<br />
Drücken Sie die OK-Taste, um den Wert zu ändern.<br />
16:9 im TextBild-Modus = ein/aus<br />
Hier wird eingestellt, ob der Fernseher im PIG-Modus (aktivierbar durch Lautstärke - Wippe) auf<br />
16:9-Darstellung umschalten soll.<br />
Drücken Sie die OK-Taste, um den Wert zu ändern.<br />
Hinweis:<br />
Bei vielen älteren 4:3 Fernsehern wird das 16:9 Umschaltsignal nicht richtig ausgewertet. Daher kann<br />
ein Einschalten der 16:9 Formate dazu führen, dass der Fernseher vom Video- oder AV-Eingang<br />
wegschaltet, sobald der Videotext aufgerufen wird. (Technisch liegt es daran, dass das<br />
Umschaltsignal (12V am SCART Pin 8) bei 16:9 auf 6 Volt zurückgeschaltet wird, was ältere Geräte<br />
nicht auswerten).<br />
Daher wird bei 4:3 Fernsehern dazu geraten, diese Einstellungen beide auf aus zu lassen.<br />
Helligkeit:<br />
Hier haben Sie die Möglichkeit die Helligkeit des dargestellten Videotextes zu ändern. Drücken Sie die<br />
Navigationstaste nach links wird der Teletext dunkler dargestellt, mit der Navigationstaste nach<br />
rechts stellen Sie heller.<br />
Transparenz:<br />
Hier haben Sie die Möglichkeit die Transparenz des dargestellten Videotextes zu ändern. Drücken Sie<br />
die Navigationstaste nach links wird der Teletext in der Transparenten Darstellung (siehe vorherige<br />
Seite) nicht komplett transparent dargestellt, mit der Navigationstaste nach rechts erreichen Sie eine<br />
höhere Transparenz.<br />
nationaler Zeichensatz:<br />
automatische Erkennung = ein/aus<br />
Drücken Sie die OK-Taste, um den Wert zu ändern.<br />
Haben Sie die automatische Erkennung ausgeschaltet, können Sie mit den Navigationstasten nach<br />
links oder rechts manuell aussuchen.<br />
Weitere Informationen finden Sie unter www.tuxtxt.net<br />
- 84 -
B e d i e n u n g s a n l e i t u n g D r e a m b o x D M 6 0 0 PVR deutsch<br />
38. Experten Einstellungen<br />
Ist kein OSD Menü auf Ihrem Fernsehgerät gewählt (sichtbar), gelangen Sie durch Drücken<br />
der MENU-Taste in das OSD Hauptmenü. Navigieren Sie auf den Menüpunkt<br />
„Einstellungen“.<br />
- 85 -<br />
Navigieren Sie auf den Menüpunkt „Experten“ und<br />
drücken Sie die OK-Taste.<br />
Hilfebuttons in der Senderliste:<br />
Hier schalten Sie die farbigen Hilfebuttons mit der<br />
OK-Taste aus. (Standard ist eingeschaltet)<br />
Sat Position anzeigen:<br />
Setzen Sie einen Haken mit der OK-Taste hinter<br />
diese Option, so wird die Sat Position des aktuell<br />
gewählten Senders in der Infobar angezeigt.<br />
Schnelles Umschalten:<br />
Entfernen Sie den Haken mit der OK-Taste, um das<br />
schnelle Umschalten zu deaktivieren. In diesem Fall<br />
dauert das Umschalten ein paar Nanosekunden<br />
länger.<br />
Keine Bestätigungsmeldungen:<br />
Setzen Sie einen Haken mit der OK-Taste hinter<br />
diese Option, so werden Bestätigungsmeldungen<br />
unterbunden.<br />
Diese Option sollten nur erfahrene Nutzer<br />
verwenden.
B e d i e n u n g s a n l e i t u n g D r e a m b o x D M 6 0 0 PVR deutsch<br />
- 86 -<br />
Keine Fehlermeldungen:<br />
Setzen Sie einen Haken mit der OK-Taste hinter<br />
diese Option, so werden Fehlermeldungen<br />
unterbunden, wie z.B. Sender nicht gefunden.<br />
Infoleiste automatisch anzeigen:<br />
Setzen Sie einen Haken mit der OK-Taste hinter<br />
diese Option, so wird die Infobar bei Beginn einer<br />
neuen Sendung automatisch angezeigt.<br />
Restzeit anzeigen:<br />
Setzen Sie einen Haken mit der OK-Taste hinter<br />
diese Option, so wird die Restzeit des laufenden<br />
Programmes anstelle der Gesamtzeit angezeigt.<br />
Http-Authentifizierung benutzen:<br />
Entfernen Sie den Haken mit der OK-Taste, um die<br />
Abfrage des Benutzernamens und Passwortes bei<br />
Zugriff auf das Web-Interface der <strong>Dream</strong>box zu<br />
deaktivieren.<br />
Serielle Schnittstelle nicht öffnen:<br />
Setzen Sie einen Haken mit der OK-Taste hinter<br />
diese Option, so werden die Debug Ausgaben von<br />
Enigma nicht mehr auf die serielle Schnittstelle<br />
ausgegeben.<br />
Bouquet automatisch wechseln:<br />
Setzen Sie einen Haken mit der OK-Taste hinter<br />
diese Option, so wird automatisch zum nächsten<br />
Bouquet gewechselt, wenn Sie beim zappen an das<br />
Ende der Senderliste in einem Bouquet gelangen.<br />
Videotext caching abschalten:<br />
Setzen Sie einen Haken mit der OK-Taste hinter<br />
diese Option, so wird das automatische speichern der<br />
Videotext Seiten im Hintergrund, deaktiviert.<br />
Zapping History aktivieren:<br />
Setzen Sie einen Haken mit der OK-Taste hinter<br />
diese Option, haben Sie die Möglichkeit, in der<br />
Wiedergabeliste im Datei-Modus durch Auswahl eines<br />
Senders, auf diesen umzuschalten.<br />
Drücken Sie die EXIT-Taste, um dieses Menü zu<br />
verlassen.
B e d i e n u n g s a n l e i t u n g D r e a m b o x D M 6 0 0 PVR deutsch<br />
38.1 Kommunikation/Netzwerk (LAN einrichten, NFS Freigaben)<br />
Lesen Sie bitte zuvor den Abschnitt Experten Einstellungen, um zu erfahren, wie Sie in<br />
dieses Menü gelangen.<br />
- 87 -<br />
Navigieren Sie auf den Menüpunkt<br />
„ Kommunikation/Netzwerk “<br />
und drücken Sie die OK-Taste.
B e d i e n u n g s a n l e i t u n g D r e a m b o x D M 6 0 0 PVR deutsch<br />
Achtung:<br />
Denken Sie daran, sollten Sie einen DHCP-<br />
Server in Ihrem Netzwerk betreiben,<br />
müssen Sie dem DHCP mitteilen, dass dieser<br />
die hier eingestellte IP-Adresse nicht vergeben<br />
darf, da es sonst zu IP-Kollisionen kommen<br />
kann. Wie Sie dies tun, entnehmen Sie bitte<br />
dem Handbuch des Routers oder DHCP-<br />
Servers.<br />
Port:<br />
Geben Sie http://ip-der-box in Ihrem Browser<br />
ein, um auf das Web-Interface der <strong>Dream</strong>box<br />
zu gelangen.<br />
Sie können die Portadresse des Web-<br />
Interfaces aber auch ändern.<br />
Wenn Sie allerdings diese Adresse auf z.B.<br />
Port 81 ändern, müssen Sie bei der<br />
Browsereingabe diese Adresse mit eingeben,<br />
da Port 80 ein Standardport für das Http-<br />
Protokoll ist und somit nicht explizit eingegeben<br />
werden muss.<br />
Also geben Sie dann in Ihrem Browser<br />
folgenden Befehl ein: http://ip-der-box:81<br />
Benutzen Sie die Navigationstasten und die<br />
Zifferntasten, um die Werte einzugeben.<br />
IP:<br />
Geben Sie hier die IP-Adresse ein.<br />
DHCP:<br />
Entfernen Sie den Haken, um die <strong>Dream</strong>box mit<br />
einer statischen IP-Adresse zu konfigurieren. In<br />
diesem Fall gilt also die hier eingetragene IP-Adresse.<br />
Ist der Haken gesetzt, erhält die <strong>Dream</strong>box ihre<br />
IP-Adresse vom DHCP Server.<br />
Netmask:<br />
Geben Sie hier die Subnetzmaske ein.<br />
- 88 -<br />
Type:<br />
LAN (Local Area Network); Verbindung mit dem<br />
lokalen Netzwerk konfigurieren<br />
Nameserver:<br />
Tragen Sie hier die IP-Adresse eines DNS-Servers<br />
in Ihrem LAN oder eines Internet DNS-Servers ein.<br />
Wenn Sie keinen eigenen DNS-Server betreiben,<br />
aber z.B. über einen Router eine Internet-<br />
Verbindung herstellen, so kann dies auch die<br />
IP-Adresse des Routers sein, falls dieser einen DNS-<br />
Service anbietet oder weiterleitet.<br />
Gateway:<br />
Geben Sie hier die IP-Adresse des Rechners oder<br />
Routers in Ihrem LAN ein, der eine Internet-<br />
Verbindung zur Verfügung stellt.<br />
Netzwerk aktivieren:<br />
Setzen Sie hier einen Haken in die Checkbox, um<br />
das Netzwerk zu aktivieren.<br />
Navigieren Sie auf den Button „Speichern“ und<br />
drücken Sie die OK-Taste, oder drücken Sie die<br />
grüne Optionstaste, um die Einstellungen zu<br />
speichern.
B e d i e n u n g s a n l e i t u n g D r e a m b o x D M 6 0 0 PVR deutsch<br />
Setzten Sie einen Haken in die Checkbox vor<br />
Automount, damit bei jedem Start der<br />
<strong>Dream</strong>box diese Freigabe automatisch<br />
gemountet (eingebunden) wird.<br />
Drücken Sie die grüne Optionstaste, um Ihre<br />
Einstellungen zu prüfen. Sie erhalten dann vom<br />
System eine Meldung, ob der Mount erfolgreich<br />
war oder nicht.<br />
Drücken Sie die gelbe Optionstaste, um diese<br />
Einstellungen zu speichern.<br />
Drücken Sie die rote Optionstaste, um die<br />
Freigabe aufzuheben (unmounten).<br />
Navigieren Sie auf den Pfeil nach links oder<br />
rechts, um in die einzelnen Freigaben zu<br />
gelangen.<br />
- 89 -<br />
Haben Sie die blaue Optionstaste im<br />
Kommunikation/Netzwerk-Menü gedrückt, erhalten<br />
Sie den Mount Manager. Hier können Sie bis zu acht<br />
verschiedene Konfigurationen ablegen, um<br />
freigegebene Verzeichnisse von Ihrem PC der<br />
<strong>Dream</strong>box mitzuteilen. Momentan wird nur das NFS-<br />
Sharing unterstützt.<br />
IP:<br />
Hier tragen Sie bitte die IP-Adresse des PCs mit<br />
einem NFS Server ein. Dies kann ein Windows oder<br />
Linux PC sein.<br />
NFS:<br />
Hier gibt es momentan nur die Option NFS.<br />
Dir:<br />
Hier tragen Sie bitte den Freigabenamen vom NFS<br />
Server ein, den Sie auf Ihrem PC konfiguriert<br />
haben.<br />
LocalDir:<br />
Standardmäßig wird hier /mnt vorgegeben. Im<br />
Normalfall brauchen Sie hier nichts zu ändern, es<br />
sei denn, Sie wollen mehr als eine Freigabe<br />
eintragen oder den Mountpoint ändern. Dann ist es<br />
evtl. sinnvoll im /var/mnt Verzeichnis auf der<br />
<strong>Dream</strong>box per Telnet pro NFS Mount ein<br />
Unterverzeichnis zu erstellen, z.B. /var/mnt1 ,<br />
/var/mnt2 usw. …<br />
Options:<br />
Wählen Sie die Option „rw“, um schreib/lese Rechte<br />
auf die Freigabe zu erhalten.<br />
Extra:<br />
Hier können Sie noch den Parameter „tcp“ gefolgt<br />
von einem Komma mit eingeben.
B e d i e n u n g s a n l e i t u n g D r e a m b o x D M 6 0 0 PVR deutsch<br />
38.2 NGrab - Streaming<br />
Lesen Sie bitte zuvor den Abschnitt Experten Einstellungen, um zu erfahren, wie Sie in<br />
dieses Menü gelangen.<br />
In diesem Menü richten Sie die IP-Adresse und die Port-Adresse für Ihren NGrab Server ein.<br />
Dieser kann sich auf einer beliebigen Workstation oder Server im LAN oder WAN befinden.<br />
- 90 -<br />
Navigieren Sie auf den Menüpunkt „NGrab-<br />
Streaming“ und drücken Sie die OK-Taste.<br />
Srv IP:<br />
Geben Sie hier die IP-Adresse des Rechners ein,<br />
auf dem die NGrab Software (Server) installiert ist.<br />
Srv Port:<br />
Geben Sie hier die Port-Adresse der NGrab<br />
Software (Server) ein.<br />
Srv MAC:<br />
Die MAC-Adresse erscheint, wenn Sie den NGrab<br />
Server in Ihrem Netzwerk laufen haben und Sie<br />
die blaue Optionstaste drücken.<br />
Die MAC-Adresse wird für die WOL (Wake On Lan)<br />
Funktion benötigt. D.h. Sie können sich einen<br />
beliebigen Windows Rechner in die Ecke stellen<br />
und dessen APM (Advanced Power Management)<br />
Funktionen voll aktivieren (Maschine geht z.B. nach<br />
30 Minuten in den standby). Starten Sie dann über<br />
die blaue Optionstaste die NGrab Aufnahme oder<br />
via Timer, dann wird der Rechner aufgeweckt und es<br />
wird aufgenommen.<br />
Navigieren Sie auf den Button „Speichern“ und<br />
drücken Sie die OK-Taste, oder drücken Sie die<br />
grüne Optionstaste, um die Einstellungen zu<br />
speichern.<br />
Sie gelangen danach zurück zum Menü „Experten“.
B e d i e n u n g s a n l e i t u n g D r e a m b o x D M 6 0 0 PVR deutsch<br />
38.3 Manuelle Software Aktualisierung<br />
Lesen Sie bitte zuvor den Abschnitt Experten Einstellungen, um zu erfahren, wie Sie in<br />
dieses Menü gelangen.<br />
- 91 -<br />
Navigieren Sie auf den Menüpunkt „Software<br />
Aktualisierung“ und drücken Sie die OK-Taste.<br />
Navigieren Sie auf den Menüpunkt „Manuelles<br />
Update“ und drücken Sie die OK-Taste.<br />
Voraussetzung für eine manuelle Aktualisierung ist:<br />
Sie haben unter Kommunikation/Netzwerk (LAN<br />
einrichten, NFS Freigaben) eine IP-Adresse und<br />
die Subnetzmaske aus Ihrem LAN vergeben.<br />
Folgen Sie den Anweisungen in diesem Menü.<br />
Navigieren Sie auf den Button „OK“ und drücken Sie<br />
die OK-Taste, oder drücken Sie die grüne<br />
Optionstaste, um diese Meldung zu quittieren.<br />
Sie erhalten dann vom System dieses Menü.<br />
Hier steht Ihre Hochgeladene Software als<br />
„Manueller Upload“ zur Auswahl.<br />
Drücken Sie die OK-Taste.<br />
Folgen Sie dann den Anweisungen auf dem<br />
Bildschirm.
B e d i e n u n g s a n l e i t u n g D r e a m b o x D M 6 0 0 PVR deutsch<br />
38.4 Fernbedienung einrichten<br />
Lesen Sie bitte zuvor den Abschnitt Experten Einstellungen, um zu erfahren, wie Sie in<br />
dieses Menü gelangen.<br />
- 92 -<br />
Navigieren Sie auf den Menüpunkt „Fernbedienung“<br />
und drücken Sie die OK-Taste.<br />
Mit den Navigationstasten links/rechts können<br />
Sie die Wiederholrate und die Verzögerungsrate der<br />
Fernbedienung verändern.<br />
Experimentieren Sie mit den Werten, um diese<br />
Ihren Bedürfnissen anzupassen.<br />
Ebenso können Sie noch einstellen, wie schnell der<br />
Cursor bei der Texteingabe zum nächsten Zeichen<br />
springt. Die Angabe erfolgt in Millisekunden.<br />
Tragen Sie den Wert 0 ein, so wird nicht zum<br />
nächsten Zeichen gesprungen.<br />
Geben Sie z.B. einen Wert von 1000 ein, so<br />
bedeutet dies, dass in 1000ms, entspricht 1<br />
Sekunde, zum nächsten Zeichen gesprungen wird.<br />
Navigieren Sie auf den Button „Speichern“ und<br />
drücken Sie die OK-Taste, oder drücken Sie die<br />
grüne Optionstaste, um die Einstellungen zu<br />
speichern.<br />
Sie gelangen danach zurück zum „Experten“ Menü.
B e d i e n u n g s a n l e i t u n g D r e a m b o x D M 6 0 0 PVR deutsch<br />
38.5 Werkseinstellungen<br />
Lesen Sie bitte zuvor den Abschnitt Experten Einstellungen, um zu erfahren, wie Sie in<br />
dieses Menü gelangen.<br />
- 93 -<br />
Navigieren Sie auf den Menüpunkt<br />
„Werkseinstellungen“ und drücken Sie die OK-<br />
Taste, um Ihre <strong>Dream</strong>box in die Werkseinstellungen<br />
zurückzusetzen.<br />
Folgen Sie den Anweisungen und treffen Sie Ihre<br />
Wahl.
B e d i e n u n g s a n l e i t u n g D r e a m b o x D M 6 0 0 PVR deutsch<br />
39. Festplatte - verwalten<br />
Ist kein OSD Menü auf Ihrem Fernsehgerät gewählt (sichtbar), gelangen Sie durch Drücken<br />
der MENU-Taste in das OSD Hauptmenü. Navigieren Sie auf den Menüpunkt<br />
„Einstellungen“.<br />
- 94 -<br />
Navigieren Sie auf den Menüpunkt „System“ und<br />
drücken Sie die OK-Taste.<br />
Navigieren Sie auf den Menüpunkt „Festplatte“ und<br />
drücken Sie die OK-Taste.<br />
Navigieren Sie auf den Menüpunkt „SAMSUNG<br />
SV8004H (master, 78.188 GB)“ und drücken Sie die<br />
OK-Taste.<br />
Haben Sie eine andere Festplatte eingebaut, wird<br />
sich dieser Menüpunkt von Ihrem unterscheiden.
B e d i e n u n g s a n l e i t u n g D r e a m b o x D M 6 0 0 PVR deutsch<br />
39.1 Festplatte – formatieren<br />
Lesen Sie bitte zuvor den Abschnitt Festplatte verwalten, um zu erfahren, wie Sie in dieses<br />
Menü gelangen.<br />
- 95 -<br />
Das Menü für die Festplattenverwaltung öffnet<br />
sich.<br />
Drücken Sie die rote Optionstaste, um die<br />
Festplatte zu formatieren.<br />
Drücken Sie die gelbe Optionstaste, um die<br />
Festplatte überprüfen zu lassen.<br />
Drücken Sie die EXIT-Taste, um dieses Menü zu<br />
verlasssen.<br />
Eine Sicherheitsabfrage erscheint, damit Sie nicht<br />
versehentlich Ihre Daten löschen. Drücken Sie die<br />
OK-Taste, um den Vorgang abzubrechen.<br />
Navigieren Sie auf den Menüpunkt „Ja“ und<br />
drücken Sie die OK-Taste, oder drücken Sie die<br />
grüne Optionstaste, um Ihre Festplatte zu<br />
formatieren.
B e d i e n u n g s a n l e i t u n g D r e a m b o x D M 6 0 0 PVR deutsch<br />
40. Film aufnehmen (Sofortaufnahme)<br />
Bei der <strong>Dream</strong>box DM 600PVR gibt es mehrere Möglichkeiten, einen Film auf ein Medium<br />
aufzuzeichnen. Die Standardlösung ist, auf die eingebaute Festplatte aufzunehmen. Sie<br />
können allerdings auch über das Netzwerk, über einen so genannten NFS Mount oder per<br />
NGrab Server aufzeichnen, ohne eingebaute Festplatte. Wir gehen erstmal davon aus, dass<br />
Sie eine eingebaute Festplatte besitzen. Näheres zur Netzwerkaufnahme via NFS unter<br />
Kommunikation (Netzwerk, LAN einrichten, NFS Freigaben)<br />
Achtung:<br />
Die Infobar verschwindet standardmäßig nach<br />
kurzer Zeit wieder. Drücken Sie einfach die<br />
OK-Taste, um diese wieder sichtbar zu<br />
machen. Es darf natürlich kein OSD Menü<br />
sichtbar sein.<br />
Denken Sie daran, Sie müssen sich im PVR-Modus<br />
befinden, um diese Funktionen nutzen<br />
zu können. Prüfen können Sie dies, indem Sie<br />
die OK-Taste drücken, die Infobar erscheint<br />
dann wieder und sollte die Steuerungssymbole<br />
anzeigen. Sind diese nicht zu sehen, dann<br />
drücken Sie einfach noch einmal die VIDEO-Taste.<br />
Die Infobar muss nicht sichtbar sein, um die<br />
PVR Funktionen auszuführen.<br />
- 96 -<br />
Drücken Sie die VIDEO-Taste, um in den PVR-<br />
Modus zu gelangen. Die Infobar wir dann mit den<br />
Steuerungssymbolen, wie bei einem normalen<br />
Videorekorder, angezeigt.<br />
PVR-Modus: siehe Wichtige Hinweise zur<br />
Bedienung<br />
Auf der Fernbedienung sehen Sie unter den<br />
Optionstasten die Steuerungssymbole für den<br />
PVR-Modus.<br />
Im PVR-Modus sind die Tasten wie folgt belegt:<br />
TV-Taste = Stopp-Funktion<br />
RADIO-Taste = Aufnahme-Funktion<br />
rote Optionstaste = Rückspul-Funktion<br />
grüne Optionstaste = Wiedergabe-Funktion<br />
gelbe Optionstaste = Pause-Funktion<br />
blaue Optionstaste = Vorspul-Funktion<br />
Wählen Sie sich einen TV oder Radio Sender aus der Kanalliste aus. Aktivieren Sie den<br />
PVR-Modus und drücken Sie die RADIO-Taste (Aufnahme Funktion). Die Aufnahme wird<br />
durch einen blinkenden roten Punkt in der Infobar signalisiert. Sie können während der<br />
Aufnahme ein anderes Programm vom selben Transponder (Kanalliste wird vom System<br />
vorgegeben) oder einen schon aufgenommenen Film anschauen.<br />
Die Kanalliste öffnen Sie durch drücken der Navigationstasten hoch oder runter.<br />
Die Aufnahme läuft im Hintergrund weiter.
B e d i e n u n g s a n l e i t u n g D r e a m b o x D M 6 0 0 PVR deutsch<br />
40.1 Aufnahme beenden<br />
- 97 -<br />
Drücken Sie die TV-Taste, um die Aufnahme zu<br />
beenden. Das System fragt nach, ob Sie die<br />
Aufnahme wirklich beenden wollen.<br />
Treffen Sie Ihre Wahl mit den Navigationstasten<br />
und drücken Sie die OK-Taste, oder Sie drücken<br />
die grüne Optionstaste für „Ja“<br />
oder die rote Optionstaste für „Nein“.<br />
Wenn Sie die Aufnahme beendet haben, werden<br />
Sie gefragt, ob Sie sich gleich den aufgenommenen<br />
Film ansehen möchten.<br />
Treffen Sie Ihre Wahl mit den Navigationstasten<br />
und drücken Sie die OK-Taste, oder drücken Sie<br />
die grüne Optionstaste für „Ja“<br />
oder die rote Optionstaste für „Nein“.<br />
Haben Sie sich für „Ja“ entschieden, gelangen Sie<br />
in den Datei - Modus (Aufgenommene Filme). Hier<br />
sehen Sie alle Ihre aufgenommenen Filme.<br />
Benutzen Sie die Navigationstasten, um einen<br />
Film zu markieren, drücken Sie die OK-Taste, um<br />
diesen zu sehen.<br />
Während der Wiedergabe sind die<br />
Steuerungssymbole automatisch in der Infobar zu<br />
sehen.<br />
Drücken Sie die Navigationstasten nach oben oder<br />
unten, um in diese Liste zurückzugelangen,<br />
während Sie sich im Datei - Modus befinden.
B e d i e n u n g s a n l e i t u n g D r e a m b o x D M 6 0 0 PVR deutsch<br />
40.2 Aufgenommenen Film ansehen<br />
Ist kein OSD Menü auf Ihrem Fernsehgerät gewählt (sichtbar), gelangen Sie durch Drücken<br />
der MENU-Taste in das OSD Hauptmenü. Navigieren Sie auf den Menüpunkt „Datei-<br />
Modus“.<br />
Oder Sie drücken die TV-Taste oder Sie benutzen die Navigationstasten nach oben/unten<br />
im TV-Modus, um eine Kanalliste hervorzuholen. Während die Kanalliste sichtbar ist,<br />
drücken Sie die TEXT-Taste, so gelangen Sie ebenfalls in den Datei-Modus.<br />
- 98 -<br />
Benutzen Sie die Navigationstasten, um einen<br />
Film zu markieren, drücken Sie die OK-Taste, um<br />
diesen zu sehen.<br />
Während der Wiedergabe sind die<br />
Steuerungssymbole automatisch in der Infobar zu<br />
sehen.<br />
Drücken Sie die Navigationstaste nach oben oder<br />
unten, um in diese Liste zurückzugelangen.
B e d i e n u n g s a n l e i t u n g D r e a m b o x D M 6 0 0 PVR deutsch<br />
40.3 Aufgenommenen Film löschen<br />
Ist kein OSD Menü auf Ihrem Fernsehgerät gewählt (sichtbar), gelangen Sie durch Drücken<br />
der MENU-Taste in das OSD Hauptmenü. Navigieren Sie auf den Menüpunkt „Datei-<br />
Modus“.<br />
Oder Sie drücken die TV-Taste oder Sie benutzen die Navigationstasten nach oben/unten<br />
im TV-Modus, um eine Kanalliste hervorzuholen. Während die Kanalliste sichtbar ist,<br />
drücken Sie die TEXT-Taste, so gelangen Sie ebenfalls in den Datei-Modus.<br />
- 99 -<br />
Benutzen Sie die Navigationstasten, um einen<br />
Film zu markieren, drücken Sie die MENU-Taste,<br />
um in das Service Menü zu gelangen.<br />
Navigieren Sie auf den Menüpunkt „Löschen“ und<br />
drücken Sie die OK-Taste. Es folgt eine<br />
Sicherheitsabfrage.<br />
Treffen Sie Ihre Wahl mit den Navigationstasten<br />
und drücken Sie die OK-Taste, oder Sie drücken<br />
die grüne Optionstaste für „Ja“<br />
oder die rote Optionstaste für „Nein“.
B e d i e n u n g s a n l e i t u n g D r e a m b o x D M 6 0 0 PVR deutsch<br />
40.4 Aufgenommenen Film umbenennen<br />
Lesen Sie bitte zuvor den Abschnitt Aufgenommenen Film löschen, um zu erfahren, wie<br />
Sie in dieses Menü gelangen.<br />
- 100 -<br />
Navigieren Sie auf den Menüpunkt „Umbenennen“<br />
und drücken Sie die OK-Taste.<br />
Mittels der Zifferntasten auf Ihrer Fernbedienung<br />
werden die Buchstaben durch mehrmaliges<br />
Drücken ausgewählt.<br />
Groß- und Kleinschreibung wird mit der gelben<br />
Optionstaste ein bzw. ausgeschaltet.<br />
Die Lautstärke + Wippe fügt ein Leerschritt ein.<br />
Die Lautstärke - Wippe löscht ein Zeichen.<br />
Mit den Navigationstasten links/rechts gelangen<br />
Sie zu der dementsprechenden Position in der<br />
Namenseingabe.<br />
Drücken Sie die blaue Optionstaste, um zwischen<br />
Zahlen oder Zeicheneingabe zu wechseln.<br />
Drücken Sie die OK-Taste, um den Eingabemodus<br />
zu verlassen.
B e d i e n u n g s a n l e i t u n g D r e a m b o x D M 6 0 0 PVR deutsch<br />
41. Film aufnehmen (Timeraufnahme via EPG programmieren)<br />
Ist kein OSD Menü auf Ihrem Fernsehgerät gewählt<br />
(sichtbar), Sie befinden sich im TV-Modus,<br />
gelangen Sie durch Drücken der TV-Taste in die<br />
Kanalliste.<br />
Drücken Sie die INFO-Taste.<br />
Oder Sie drücken die rote Optionstaste, um in den<br />
EPG des Senders direkt zu gelangen, ohne die<br />
Kanalliste aufzurufen.<br />
Wählen Sie den Menüpunkt „EPG des Senders“ mit<br />
der OK-Taste aus.<br />
In diesem Fenster sind die Optionstasten mit<br />
anderen Funktionen belegt.<br />
Drücken Sie die HELP-Taste, um Informationen<br />
über mögliche Timeroptionen zu bekommen.<br />
- 101 -
B e d i e n u n g s a n l e i t u n g D r e a m b o x D M 6 0 0 PVR deutsch<br />
Achtung:<br />
Für die NGrab Aufnahme ist es notwendig, das<br />
Netzwerk konfiguriert und die NGrab Software<br />
eingerichtet zu haben.<br />
Drücken Sie die EXIT-Taste oder die OK-<br />
Taste, um das Fenster zu schließen.<br />
- 102 -<br />
Mit der grünen Optionstaste fügen Sie die<br />
ausgewählte Sendung als Festplattenaufnahme<br />
der Timerliste hinzu (Standard).<br />
Mit der gelben Optionstaste fügen Sie die<br />
ausgewählte Sendung als NGrab<br />
(Netzwerkaufnahme) der Timerliste hinzu.<br />
Mit der blauen Optionstaste fügen Sie die<br />
ausgewählte Sendung als Programmumschaltung<br />
der Timerliste hinzu.<br />
Mit der roten Optionstaste löschen Sie einen<br />
gesetzten Timer.<br />
Navigieren Sie auf eine Sendung, die Sie<br />
aufnehmen lassen möchten.<br />
Drücken Sie die grüne Optionstaste.<br />
Es erscheint das Menü „Timer bearbeiten“.<br />
Benutzen Sie die Navigationstasten, um die<br />
einzelnen Optionen zu erreichen und die OK-<br />
Taste, um die Dropdownlisten zu öffnen.
B e d i e n u n g s a n l e i t u n g D r e a m b o x D M 6 0 0 PVR deutsch<br />
- 103 -<br />
Hinter der Dropdownliste DVR-Aufnahme<br />
verbergen sich dieselben Optionen, die Sie direkt<br />
aus dem EPG mit den Optionstasten aufrufen.<br />
Switch steht für Umschaltung.<br />
DVR-Aufnahme steht für Festplattenaufnahme.<br />
NGrab steht für Netzwerkaufnahme.<br />
Hinter der Dropdownliste „Nichts“ verbergen sich<br />
die Optionen für das Verhalten bei Timerende.<br />
Standby – Die <strong>Dream</strong>box geht nach Timerende in<br />
den Standby-Modus.<br />
Herunterfahren – Die <strong>Dream</strong>box geht nach<br />
Timerende in den Deep-Standby-Modus.<br />
Drücken Sie die grüne Optionstaste zum<br />
Übernehmen der Einstellungen.<br />
Nachdem Sie das Timer-Event übernommen<br />
haben, gelangen Sie zurück zum EPG.<br />
Der gesetzte Timer wird mit einem roten<br />
Uhrsymbol im EPG angezeigt.<br />
Drücken Sie die EXIT-Taste, um den EPG zu<br />
verlassen, oder fügen Sie noch weitere Timer-<br />
Events hinzu.
B e d i e n u n g s a n l e i t u n g D r e a m b o x D M 6 0 0 PVR deutsch<br />
41.1 Unterkanäle via EPG programmieren<br />
Die Prozedur ist nahezu die gleiche, wie bei der Timeraufnahme via EPG programmieren,<br />
nur dass Sie einen Sender mit Unterkanälen aussuchen, wie z.B. Premiere Direkt. Dann den<br />
EPG mit der roten Optionstaste aufrufen und die grüne Optionstaste drücken, um den<br />
Sender als DVR-Aufnahme in den Timer, zu übernehmen. Das Menü „Timer bearbeiten"<br />
erscheint daraufhin.<br />
42. Timeshift Funktion<br />
- 104 -<br />
Nachdem Sie die grüne Optionstaste gedrückt<br />
haben, gelangen Sie in das Menü Unterkanäle.<br />
Dort wählen Sie die Startzeit des Unterkanals mit<br />
der OK-Taste aus.<br />
Nachdem Sie das Timer-Event übernommen<br />
haben, gelangen Sie zurück zum EPG.<br />
Der gesetzte Timer wird mit einem roten<br />
Uhrsymbol im EPG angezeigt.<br />
Drücken Sie die EXIT-Taste, um den EPG zu<br />
verlassen, oder fügen Sie noch weitere Timer-<br />
Events hinzu.<br />
Starten Sie eine Sofortaufnahme, können Sie während der Aufnahme vor- und<br />
zurückspulen. Voraussetzung dafür ist allerdings, Sie haben mindestens 1 Minute Film<br />
aufgenommen, sonst macht dies keinen Sinn. Drücken Sie die gelbe Optionstaste, um das<br />
Bild anzuhalten (Ton und Bild stoppen). Die Aufnahme läuft im Hintergrund weiter. Drücken<br />
Sie die Taste noch einmal, wird die Sendung an der Stelle fortgesetzt, wo Sie die Pause<br />
Funktion aufgerufen haben. Ihnen entgeht also nichts, wenn Sie mal schnell zum Telefon<br />
müssen. Beenden Sie die Timeshift Funktion, wie bei der Sofortaufnahme beschrieben,<br />
siehe Film aufnehmen (Sofortaufnahme).
43. Timer<br />
B e d i e n u n g s a n l e i t u n g D r e a m b o x D M 6 0 0 PVR deutsch<br />
Ist kein OSD Menü auf Ihrem Fernsehgerät gewählt (sichtbar), gelangen Sie durch Drücken<br />
der MENU-Taste in das OSD Hauptmenü. Navigieren Sie auf den Menüpunkt „Timer“.<br />
- 105 -<br />
Das ist die Timerliste.<br />
Sie erkennen hier ein eingetragenes Timer-Event.<br />
Ein grüner Haken davor bedeutet, dass das Timer-<br />
Event erfolgreich ausgeführt wurde.<br />
Steht ein rotes Kreuz anstelle des grünen Hakens<br />
davor, bedeutet dies, dass das Timer-Event nicht<br />
ausgeführt oder abgebrochen wurde.<br />
Sleep-Timer-Events werden auch in dieser Liste<br />
angezeigt und können so evtl. gelöscht oder<br />
abgeändert werden.<br />
Drücken Sie die blaue Optionstaste zum<br />
Aufräumen der Timer-Events.<br />
Wir empfehlen Ihnen, Timer-Events nur über den<br />
EPG einzufügen. Diese Liste dient lediglich dazu,<br />
die Timer-Events zu verwalten.
B e d i e n u n g s a n l e i t u n g D r e a m b o x D M 6 0 0 PVR deutsch<br />
44. Informationen - Streaminformationen<br />
Ist kein OSD Menü auf Ihrem Fernsehgerät gewählt (sichtbar), gelangen Sie durch Drücken<br />
der MENU-Taste in das OSD Hauptmenü. Navigieren Sie auf den Menüpunkt<br />
„Informationen“.<br />
In diesem Fenster erhalten Sie<br />
detaillierte technische Daten<br />
zum Sender.<br />
- 106 -<br />
Navigieren Sie auf den Menüpunkt<br />
„Streaminformationen“ und drücken Sie die OK-<br />
Taste.<br />
Benutzen Sie dann die Navigationstasten nach<br />
links oder rechts, um zwischen den drei Fenstern<br />
hin und her zu schalten.<br />
Mit der EXIT-Taste schließen Sie das Fenster.<br />
In diesem Fenster erhalten Sie<br />
Informationen über die<br />
unterstützten und verwendeten<br />
Verschlüsselungs-Systeme.<br />
In diesem Fenster erhalten Sie weitere technische Daten zum<br />
gewählten Sender.<br />
Das Bild links zeigt die Daten bei der DM 600 PVR-S, mittig<br />
die DM 600 PVR-T und ganz rechts die DM 600 PVR-C.
B e d i e n u n g s a n l e i t u n g D r e a m b o x D M 6 0 0 PVR deutsch<br />
45. Informationen - Über<br />
Lesen Sie bitte zuvor den Abschnitt Informationen - Streaminformationen, um zu erfahren,<br />
wie Sie in dieses Menü gelangen.<br />
- 107 -<br />
Navigieren Sie auf den Menüpunkt „Über“ und<br />
drücken Sie die OK-Taste.<br />
In diesem Fenster erhalten Sie alle relevanten<br />
Informationen zum System.<br />
Schließen Sie dieses Fenster mit einem Druck auf<br />
die OK-Taste.<br />
Die Information „Tuner:“ ist abhängig vom Typ Ihrer<br />
<strong>Dream</strong>box DM 600 PVR:<br />
DM 600 PVR-S: Satellit<br />
DM 600 PVR-C: Kabel<br />
DM 600 PVR-T: Terrestrisch
B e d i e n u n g s a n l e i t u n g D r e a m b o x D M 6 0 0 PVR deutsch<br />
46. Fehlerbehebung<br />
Fehler<br />
Kein Bild, kein Ton,<br />
LCD leuchtet<br />
Es kommt zu balkenartigen<br />
Bildausfällen<br />
Kein Empfang eines Kanals der<br />
sonst funktioniert hat<br />
Kein Empfang der Kanäle<br />
Sat1, Pro7, Kabel …<br />
Mögliche Ursache<br />
Defekte oder fehlende<br />
Kabelverbindung<br />
Abhilfe<br />
Alle Kabelverbindungen prüfen<br />
Defektes LNB LNB austauschen<br />
Falsche Außeneinheit am<br />
Receiver eingestellt<br />
Einstellungen korrigieren<br />
Antenne falsch ausgerichtet<br />
Starker Regen oder Schnee<br />
Antenne falsch ausgerichtet<br />
Zu kleiner Empfangsspiegel<br />
Ein Hindernis steht zwischen<br />
Spiegel und Satellit (z.B. ein<br />
Baum oder ein Haus)<br />
Antenne verstellt oder defekt<br />
Kanal wird auf einem neuen<br />
Sendeplatz übertragen<br />
Die Übertragung des Kanals<br />
wurde eingestellt<br />
Störungen durch ein<br />
schnurloses DECT-Telefon<br />
Antenne neu ausrichten<br />
Spiegel vom Schnee befreien<br />
Antenne neu ausrichten<br />
Größeren Spiegel installieren<br />
Spiegel mit „freier Sicht“<br />
montieren<br />
Antenne überprüfen<br />
Suchlauf vornehmen<br />
Abstand zwischen der<br />
<strong>Dream</strong>box und der Basisstation<br />
des Telefons vergrößern oder<br />
ein Sat-Koaxkabel mit höherem<br />
Schirmungsmaß verwenden<br />
Keine Aufnahme mehr möglich Festplatte ist voll Nicht mehr benötigte<br />
Aufnahmen löschen<br />
Fernbedienung reagiert nicht Batterien sind falsch eingesetzt Entnehmen Sie die Batterien<br />
und setzen Sie sie mit der<br />
richtigen Polung ein<br />
Batterien sind leer Neue Batterien einsetzen<br />
Falscher<br />
Fernbedienungsmodus<br />
(DREAM-Steuerung, TV-<br />
Steuerung)<br />
Software reagiert nicht<br />
DREAM-Steuerung- bzw.<br />
TV-Steuerung-Taste drücken<br />
Receiver neu starten<br />
<strong>Dream</strong>box reagiert nicht <strong>Dream</strong>box ist blockiert Receiver neu starten
B e d i e n u n g s a n l e i t u n g D r e a m b o x D M 6 0 0 PVR deutsch<br />
47. Setup-TV-Steuerung<br />
Ein vierstelliger TV Geräte Code wird aus der TV-Geräteliste aus TV-Geräteliste ausgewählt<br />
und eingegeben. Die aktuelle TV-Geräteliste erhalten Sie auf unserer Webseite.<br />
SHIFT / SETUP-Taste<br />
Zehner-Tastatur<br />
47.1 Programmierablauf<br />
- Einmaliges kurzes Drücken der TV-Steuerung-Taste.<br />
- SHIFT-Setup-Taste für 3 Sekunden drücken,<br />
die TV-Steuerung-Taste blinkt zweimal.<br />
- Eingabe des TV-Codes über die Zehner-Tastatur auf der Fernbedienung.<br />
Jede eingegebene Zahl wird über ein einmaliges Blinken der TV-Steuerung-Taste<br />
quittiert. Nach Eingabe der vierten Ziffer wird ein gültiger Code durch zweimaliges<br />
blinken der TV-Steuerung-Taste quittiert.<br />
- Die Fernbedienung verlässt nun automatisch den Programmiermodus.<br />
- Wird 10 Sekunden lang kein Code eingegeben, verlässt die Fernbedienung<br />
automatisch den Programmiermodus.<br />
109<br />
TV-Steuerung-Taste
B e d i e n u n g s a n l e i t u n g D r e a m b o x D M 6 0 0 PVR deutsch<br />
47.2 TV-Geräteliste<br />
A.R. Systems 0067 0382<br />
Accent 0067<br />
Admiral 0117 0123 0448 0243 0294<br />
Adyson 0247 0246<br />
Agashi 0246<br />
Agazi 0294<br />
AGB 0546<br />
Agef 0117<br />
Aiko 0246 0039 0067 0401 0065 0463<br />
0102 0391 0221 0294 0247<br />
Aim 0067<br />
Akai 0391 0238 0401 0067 0463 0221<br />
0065 0039 0102 0248 0193<br />
0546 0586 0578 0510 0247<br />
0661 0246 0294<br />
Akiba 0248 0312 0485 0067<br />
Akura 0248 0389 0312 0039 0442 0294<br />
0067<br />
Alba 0248 0265 0039 0448 0400 0385<br />
0401 0067 0246 0277 0193<br />
0517 0066 0698 0609<br />
Alcyon 0106<br />
Allorgan 0236 0324 0247<br />
Allstar 0067<br />
Amplivision 0247 0430 0350 0400<br />
Amstrad 0039 0546 0294 0248 0401 0463<br />
0442 0067<br />
Anglo 0039 0294<br />
Anitech 0039 0106 0294 0067<br />
Ansonic 0400 0132 0039 0067 0404 0193<br />
0353 0441 0289 0277 0042<br />
0458<br />
Apollo 0503<br />
Arc en Ciel 0429 0531 0139 0226 0363 0228<br />
Arcam 0246 0429 0247<br />
Aristona 0067 0586 0042<br />
Arthur Martin 0193 0430<br />
ASA 0135 0376 0100 0134 0117<br />
Asberg 0067 0106<br />
Asora 0039<br />
Asuka 0248 0294 0246 0312 0247<br />
Atlantic 0067 0246 0236 0289 0350<br />
Atori 0039<br />
Auchan 0193 0430<br />
Audiosonic 0067 0139 0247 0400 0367 0294<br />
0248 0458<br />
Audioton 0247 0400 0294<br />
Ausind 0106<br />
Autovox 0117 0236 0267 0106 0379 0247<br />
0277 0366<br />
Awa 0041 0066 0039 0187 0404 0442<br />
0067<br />
Ayomi 0268<br />
Baird 0139 0373 0102 0247 0238<br />
Barco 0410 0193<br />
Basic Line 0248 0039 0404 0067 0597 0193<br />
0312<br />
Bastide 0247<br />
Baur 0333 0225 0542 0067 0221 0391<br />
0379 0535 0040<br />
Bazin 0247<br />
Beko 0400 0067<br />
Beon 0067 0448<br />
Best 0367 0400<br />
Bestar 0067 0400 0404<br />
Binatone 0247<br />
Deitron 0067<br />
Denko 0294<br />
Desmet 0350 0067<br />
Diamant 0067<br />
Digiline 0067<br />
Dixi 0039 0067 0277 0247<br />
110<br />
Black Star 0277<br />
Blacktron 0312<br />
Blackway 0312<br />
Blaupunkt 0221 0225 0230 0243 0357 0358<br />
0348<br />
Blue Sky 0248 0312 0485 0067 0517 0698<br />
Blue Star 0312<br />
Bondstec 0277<br />
Boots 0247<br />
BPL 0312 0067<br />
Brandt 0531 0139 0429 0235 0267 0363<br />
0226 0228 0317 0365<br />
Brinkmann 0448 0067 0549<br />
Brionvega 0067 0117<br />
Britannia 0246 0247<br />
Brother 0294<br />
Bruns 0117<br />
BSR 0193 0324<br />
BTC 0248<br />
Bush 0248 0265 0193 0379 0039 0066<br />
0312 0067 0385 0401 0404<br />
0549 0294 0391 0517 0238<br />
0324 0247 0698<br />
Capsonic 0294<br />
Carad 0640 0067<br />
Carena 0485 0067<br />
Carrefour 0066 0100<br />
Cascade 0039 0067<br />
Cathay 0067<br />
CCE 0067<br />
Centurion 0067<br />
Century 0117 0243 0277 0268<br />
CGE 0104 0114 0336 0106 0277 0193<br />
0448 0400<br />
Cimline 0039 0265 0248<br />
City 0039<br />
Clarivox 0448 0100<br />
Clatronic 0248 0294 0400 0401 0247 0106<br />
0277 0067 0039 0132 0350<br />
0609<br />
Clayton 0415<br />
CMS Hightec 0247<br />
Concorde 0039<br />
Condor 0246 0277 0312 0350 0067 0400<br />
0039 0132 0441 0448<br />
Contec 0246 0039 0187 0041 0066<br />
Continental Edison 0531 0139 0267 0226 0228 0429<br />
0363 0235 0317 0517<br />
Cosmel 0039 0367<br />
Crezar 0243<br />
Crosley 0117 0277 0104 0114 0106 0193<br />
0243<br />
Crown 0039 0400 0106 0067 0389 0609<br />
0448 0238 0517<br />
CS Electronics 0277 0246 0248<br />
CTC 0277<br />
Cybertron 0248<br />
Daewoo 0039 0067 0246 0404 0248 0247<br />
Dainichi 0248 0246<br />
Dansai 0067 0294 0065 0246<br />
Dansette 0442<br />
Dantax 0400<br />
Datsura 0238<br />
Dawa 0067<br />
Daytron 0039 0404 0067<br />
Decca 0102 0546 0067 0247<br />
General Technic 0039<br />
Genexxa 0248 0067 0442<br />
Germanvox 0243<br />
Goldhand 0246<br />
Goldline 0367<br />
GoldStar 0067 0400 0039 0247 0277 0246<br />
0193 0391
B e d i e n u n g s a n l e i t u n g D r e a m b o x D M 6 0 0 PVR deutsch<br />
Domland 0424<br />
Drean 0067<br />
DTS 0039<br />
Dual 0379 0247 0373 0289 0366 0549<br />
0067 0382 0424 0429 0333<br />
Dumont 0117 0134 0132 0243 0247 0100<br />
0102<br />
Dux 0067 0042<br />
Dynatron 0067<br />
Elbe 0465 0268 0289 0400 0193 0067<br />
0248 0221 0441 0640<br />
Elcit 0117 0277 0546 0132 0193<br />
Elekta 0294 0312<br />
Elin 0246 0067 0135 0134 0578 0391<br />
0379 0193 0039<br />
Elite 0248 0067<br />
Elman 0132<br />
Elta 0039 0294<br />
Emerson 0243 0117 0277 0067 0401 0100<br />
0312 0350<br />
Emperor 0312<br />
Erres 0067 0042<br />
Etron 0067 0039 0193<br />
Euro-Feel 0294<br />
Europa 0067<br />
Europhon 0067 0546 0132 0243 0247 0277<br />
0193<br />
Expert 0236 0430 0289 0193<br />
Exquisit 0067 0277<br />
Fenner 0404 0039<br />
Ferguson 0317 0365 0268 0139 0590 0655<br />
Fidelity 0246 0401 0193 0294 0067<br />
Filsai 0247<br />
Finlandia 0238 0376 0389 0578 0391<br />
Finlux 0135 0134 0067 0376 0247 0102<br />
0193 0106 0546 0100 0117<br />
0132 0441 0661 0522<br />
Firstline 0324 0351 0246 0067 0404 0415<br />
0277 0039 0193 0132 0247<br />
0441 0379 0561 0268 0102<br />
0265 0698 0238<br />
Fisher 0134 0247 0066 0238 0400 0585<br />
0117 0187 0391 0193 0333<br />
0379 0102<br />
Flint 0067 0485 0102 0248<br />
FNR 0132<br />
Formenti 0117 0243 0246 0350 0193 0106<br />
Fortress 0123 0117<br />
Fraba 0400 0067<br />
Friac 0039 0067 0132<br />
Frontech 0277 0294 0379 0247 0039<br />
Fujitsu 0236 0102 0132 0247 0193<br />
Fujitsu General 0039<br />
Funai 0294 0324<br />
Galaxi 0132 0067<br />
Galaxis 0400 0448 0067 0132<br />
GBC 0243 0193 0039 0404 0248<br />
GE 0590 0139 0317 0365 0373<br />
Geant Casino 0193 0430<br />
GEC 0102 0193 0391 0235 0546 0067<br />
0247 0379<br />
Geloso 0243 0277 0039 0193 0404<br />
General 0139 0317 0501<br />
IInterfunk 0067 0042 0117 0542 0357 0193<br />
391 0400 0531 0139<br />
Internal 0067<br />
Intervision 0312 0247 0485 0067 0401 0549<br />
400 0424 0517 0248 0132<br />
193 0294 0277<br />
Irradio 039 0067 0248 0277 0106<br />
Isukai 248 0067 0312<br />
ITC 247<br />
ITS 067 0401 0248 0312 0294 0246<br />
ITT 193 0510 0379 0391 0503 0578<br />
597 0376 0238<br />
ITV 294 0067 0277<br />
111<br />
Goodmans 0066 0102 0067 0039 0294 0546<br />
0404 0517 0401 0586 0373<br />
0265 0065 0510 0590 0247<br />
0365<br />
Gorenje 0400<br />
GPM 0248<br />
Gradiente 0067 0083<br />
Graetz 0391<br />
Granada 0067 0430 0256 0389 0042 0102<br />
0138 0238 0247 0106 0066<br />
0546 0503 0365 0590<br />
Grandin 0312 0248 0430 0067 0039 0350<br />
0193 0485 0609 0640<br />
Gronic 0247 0132<br />
Grundig 0225 0221 0517 0100 0106 0235<br />
0267 0067 0586<br />
Halifax 0294 0246 0247<br />
Hampton 0246 0247<br />
Hanimex 0324<br />
Hanseatic 0067 0312 0379 0193 0391 0424<br />
0243 0350 0458 0400 0039<br />
0324 0247 0549<br />
Hantarex 0039 0243 0067 0132<br />
Hantor 0067<br />
Harwood 0039 0442 0067<br />
HCM 0294 0039 0312 0442 0247 0248<br />
0448 0067<br />
Hema 0247 0039<br />
Hemmermann 379<br />
Hifivox 0531 0139 0226 0429<br />
Hikona 0248<br />
HiLine 0294 0067<br />
Hinari 0238 0066 0067 0248 0039 0193<br />
385 0473 0517 0265 0324<br />
Hisawa 0312 0248 0430 0485<br />
Hit 117<br />
Hitachi 0255 0066 0379 0503 0193 0373<br />
0226 0228 0247 0336 0224<br />
0546 0102 0067 0135 0586<br />
0180 0578<br />
Hitsu 039 0485 0248<br />
Hornyphone 0067 0042<br />
Hoshai 0248 0485<br />
Huanyu 0404 0246<br />
Hygashi 0247 0246<br />
Hyper 0039 0246 0247 0277<br />
Hypersonic 0391<br />
Hypson 0067 0294 0247 0312 0485 0430<br />
268<br />
Iberia 067<br />
ICE 294 0247 0067 0401 0248 0246<br />
039<br />
Ices 248 0246<br />
Imperial 0067 0277 0400 0448 0193 0561<br />
104 0114 0106 0379 0226<br />
Indesit 267 0243<br />
Indiana 0067<br />
Ingelen 0517 0640<br />
Inno Hit 0039 0102 0067 0248 0247 0106<br />
546 0277<br />
Innovation 0549<br />
Interactive 0441<br />
Interbuy 0039 0294 0277<br />
Matsui 0265 0039 0385 0041 0102 0066<br />
067 0586 0517 0247 0324<br />
401 0463 0473 0609 0485<br />
379 0546 0065 0193 0238<br />
225 0221 0365<br />
Mediator 0067 0586 0042<br />
Medion 0067 0698 0549<br />
Megas 0640<br />
Melvox 0430<br />
Memorex 0039<br />
Memphis 0367 0102 0039 0415<br />
Mercury 0067 0039<br />
Metz 0117 0225 0243 0221 0397
B e d i e n u n g s a n l e i t u n g D r e a m b o x D M 6 0 0 PVR deutsch<br />
Jea 066<br />
JEC 065<br />
JVC 0683 0083 0066 0401 0248<br />
Kaisui 0248 0312 0067 0246 0485 0247<br />
039<br />
Kamp 0246<br />
Kapsch 0236 0193 0391 0289 0134<br />
Karcher 0067 0400 0312 0132 0640 0294<br />
KB Aristocrat 0193<br />
Kendo 0265 0277 0132 0067 0458 0400<br />
441 0640<br />
Kennedy 0236 0243 0193 0465<br />
Kingsley 0246<br />
Kneissel 0465 0289 0400 0268 0067 0441<br />
640<br />
Kolster 0067<br />
Konka 0248 0401 0067<br />
Kontakt 0517<br />
Korpel 0067<br />
Korting 0117 0400 0350<br />
Kosmos 0067<br />
Kotron 0442 0294<br />
Kraking 0268<br />
Kyoshu 0294 0442<br />
Kyoto 0415 0193<br />
Lemair 0441<br />
Lenco 0039 0134 0193 0067<br />
Lenoir 0039<br />
Lesa 277<br />
Leyco 0294 0102 0067 0324 0609<br />
LG 067 0400 0039 0247 0277 0246<br />
193 0391<br />
Liesenkotter 0067 0357 0358<br />
Lifetec 0039 0294 0549 0067 0404 0248<br />
698<br />
Lloyd’s 0039<br />
Loewe 0542 0067 0117 0400<br />
Logik 0041 0401<br />
Logix 0698<br />
Luma 0236 0067 0193 0289 0441 0404<br />
039<br />
Lumatron 0236 0067 0193 0289 0391 0247<br />
0294<br />
Lux May 0067 0039<br />
Luxor 0224 0267 0510 0522 0379 0391<br />
238 0578 0193 0376<br />
Madison 0067<br />
Magnadyne 0117 0277 0546 0132 0193<br />
Magnafon 0546 0243 0106 0132 0246<br />
Mandor 0294<br />
Manesth 0067 0265 0247 0294 0350 0065<br />
324<br />
Manhattan 0067<br />
Marantz 0067<br />
Marelli 0117<br />
Mark 0067 0247 0246 0404 0039<br />
Masuda 0248<br />
Osume 0187 0102 0066 0248<br />
Otto Versand 0040 0535 0066 0123 0542 0067<br />
0586 0225 0379 0221 0391<br />
0265 0139 0243 0324 0256<br />
0277 0333 0350 0247<br />
Pael 0246<br />
Palladium 0400 0067 0221 0535 0040 0230<br />
0448 0586 0277 0357 0379<br />
0117 0193 0243 0247 0441<br />
0685<br />
Palsonic 0294 0442 0067<br />
Panama 0039 0247 0294 0246 0067 0277<br />
Panasonic 0256 0680 0280 0244 0243 0391<br />
0267 0397 0546 0067 0193<br />
0578<br />
Panavision 0067 0441<br />
Pathe Cinema 0193 0268 0246 0430 0350 0379<br />
Pathe Marconi 0235 0243 0531 0139 0226 0228<br />
0363 0429 0267<br />
112<br />
Micromaxx 0067 0698<br />
Minerva 0517 0225 0100 0106 0221 0267<br />
Minoka 0442 0067 0389<br />
Mitsubishi 0138 0180 0542 0067 0117 0066<br />
267<br />
Mivar 0400 0106 0246<br />
Monaco 0039<br />
Motion 0106<br />
MTC 0400 0379 0542<br />
Multistandard 0132<br />
Multitec 0067 0698<br />
Multitech 0247 0379 0039 0246 0277 0132<br />
400 0067<br />
Murphy 0134 0246 0102 0193<br />
NAD 0391<br />
Naiko 0067<br />
Nakimura 0404 0067<br />
National 0267 0244 0256<br />
NEC 0066 0350 0485 0039 0404 0247<br />
0067<br />
Neckermann 0067 0221 0400 0535 0040 0230<br />
0586 0193 0357 0448 0379<br />
0117 0243 0277 0247 0441<br />
NEI 0067 0367 0401<br />
Nesco 0277<br />
Network 0367<br />
Neufunk 0067 0039 0586 0640<br />
New Tech 0067 0039 0586 0373 0247<br />
New World 0248<br />
Nicamagic 0246<br />
Nikkai 0102 0248 0067 0247 0294 0065<br />
0367 0246 0039 0066<br />
Noblex 0067 0294<br />
Nobliko 0132 0106 0100 0246<br />
Nogamatic 0429 0531 0139 0226<br />
Nokia 0391 0193 0510 0379 0578 0522<br />
0389 0503 0238 0404 0661<br />
0376<br />
Nordmende 0139 0531 0317 0429 0226 0373<br />
0228 0243 0605 0590 0225<br />
0067 0365<br />
Novatronic 0067 0135<br />
Oceanic 0597 0193 0430 0391 0324 0238<br />
Okano 0400 0067 0294 0102<br />
Omega 0294<br />
Onwa 0401 0248 0463<br />
Opera 0067<br />
Orbit 0067<br />
Orion 0265 0324 0350 0385 0041 0067<br />
0039 0351 0132 0473 0586<br />
0685 0294 0442<br />
Orline 0067 0248<br />
Ormond 0415 0698<br />
Osaki 0102 0248 0247 0294 0067 0442<br />
0404<br />
Osio 0067<br />
Oso 0248<br />
Reflex 0067<br />
Revox 0067 0400<br />
Rex 0236 0441 0277 0193 0289<br />
RFT 0117 0400 0458 0102 0294<br />
Roadstar 0039 0294 0248 0448<br />
Robotron 0117<br />
Royal Lux 0400 0442<br />
Saba 0317 0243 0117 0429 0193 0139<br />
0531 0546 0373 0391 0528<br />
0226 0228 0365 0235 0655<br />
0578<br />
Sagem 0485 0640 0312<br />
Saisho 0265 0546 0039 0041 0247 0193<br />
0294<br />
Salora 0224 0379 0193 0389 0391 0546<br />
0578<br />
Sambers 0243 0546 0106 0132<br />
Samsung 0067 0586 0617 0039 0247 0400<br />
0294 0246 0102 0238
B e d i e n u n g s a n l e i t u n g D r e a m b o x D M 6 0 0 PVR deutsch<br />
Pausa 0039<br />
Perdio 0102 0350 0193 0067<br />
Perfekt 0067<br />
Pershin 0430<br />
Philco 0117 0114 0104 0448 0106 0243<br />
0277 0193 0400 0067<br />
Philharmonic 0247<br />
Philips 0586 0067 0042 0353 0221 0117<br />
0373<br />
Phoenix 0067 0117 0350 0400 0415 0246<br />
0193 0102<br />
Phonola 0067 0586 0042 0117 0246<br />
Pioneer 0067 0458 0400 0373 0391 0139<br />
Pionier 0400<br />
Plantron 0067 0294 0039<br />
Playsonic 0247<br />
Poppy 0039<br />
Portland 0404<br />
Prandoni-Prince 0277 0546 0391 0243 0106<br />
Precision 0247<br />
Prima 0039 0294<br />
Prinz 0102 0379 0224<br />
Profex 0039 0193<br />
Proline 0351 0102 0067 0042 0655<br />
Prosonic 0067 0244 0246 0400 0404 0609<br />
0401<br />
Protech 0067 0247 0039 0277 0379 0132<br />
0294 0448 0367 0698<br />
Provision 0067<br />
Pye 0067 0586 0042 0117<br />
Pymi 0039<br />
Quadra Vision 0430<br />
Quasar 0277<br />
Quelle 0067 0040 0041 0531 0139 0542<br />
0379 0221 0391 0066 0247<br />
0277 0104 0114 0357 0336<br />
0100 0134 0135 0187 0225<br />
0230 0243 0294 0698<br />
Questa 0066<br />
R-Line 0067<br />
Radialva 0139 0248 0193 0067<br />
Radiola 0067 0586 0042 0353<br />
Radiomarelli 0117 0546 0277 0067<br />
RadioShack 0067<br />
Radiotone 0039 0067 0458 0400 0609 0448<br />
0294 0442<br />
Rank 0100<br />
RCA 0590 0655 0365<br />
Recor 0067<br />
Rediffusion 0391 0578 0066<br />
Redstar 0067<br />
Starlite 0039 0193 0067 0294<br />
Stenway 0312 0248<br />
Stern 0236 0289 0193<br />
Strato 0067 0294 0039<br />
Sunkai 0324 0385 0351 0485 0248 0265<br />
0067 0517<br />
Sunstar 0401 0067 0039<br />
Sunwood 0067 0039<br />
Superla 0546 0246<br />
Supertech 0039 0067 0246 0586<br />
Supra 0404 0039<br />
Susumu 0365<br />
Sutron 0039<br />
Swissline 0277<br />
Sydney 0246 0247<br />
Sytong 0246<br />
Tandberg 0397 0441 0139 0367 0226 0391<br />
Tandy 0248 0102 0247 0277 0123<br />
Tashiko 0066 0247 0246 0389 0193<br />
Tatung 0102 0546 0247 0067 0041<br />
Teac 0067 0542 0485 0294 0039 0442<br />
0379<br />
TEC 0247 0039 0277 0501 0365 0367<br />
0289<br />
113<br />
Sandra 0246 0247<br />
Sanela 0268<br />
Sansui 0067 0401<br />
Sanyo 0238 0187 0066 0041 0400 0102<br />
0246 0247 0134 0243 0039<br />
0193 0067 0585<br />
Save 0067<br />
SBR 0067 0586 0042<br />
Schaub Lorenz 0379 0578<br />
Schneider 0067 0586 0042 0333 0379 0549<br />
0424 0382 0366 0289 0353<br />
0373 0247 0277 0401 0248<br />
0391 0193 0698<br />
SEG 0247 0294 0039 0277 0066 0132<br />
0193 0067 0246 0698 0517<br />
SEI 0117 0132 0040 0193 0546 0379<br />
0243 0324 0236 0067<br />
Seleco 0236 0289 0193 0441<br />
Sencora 0039<br />
Sentra 0065 0248 0039<br />
Serino 0485 0640<br />
Sharp 1223 0123 0187 0066 0324 0683<br />
0083<br />
Shorai 0324<br />
Siam 0067<br />
Siarem 0193 0117 0132 0243<br />
Siemens 0221 0230 0225 0243 0357 0358<br />
0187 0067<br />
Sierra 0067 0586 0042<br />
Siesta 0400<br />
Silva 0246 0067<br />
Silver 0066 0391<br />
Singer 0117 0132 0277 0430 0465 0039<br />
Sinudyne 0117 0265 0132 0243 0324 0193<br />
0391 0546 0379 0040 0236<br />
0067<br />
Sogera 0350<br />
Solavox 0391 0102 0193 0578<br />
Sonitron 0238 0400 0247<br />
Sonneclair 0067<br />
Sonoko 0067 0039 0294 0312 0247<br />
Sonolor 0238 0597 0193 0430 0535 0040<br />
0578<br />
Sontec 0067 0400 0324<br />
Sony 1535 1040 1681 0535 0040 0041<br />
0030 0066 0132 0681 0104<br />
Sound & Vision 0132 0248 0404<br />
Soundwave 0067 0350 0448<br />
Ssangyong 0039<br />
Standard 0248 0039 0247 0350 0067 0404<br />
Unic Line 0067 0503<br />
United 0067<br />
Universum 0376 0135 0225 0503 0391 0277<br />
0522 0510 0400 0230 0448<br />
0041 0542 0324 0066 0187<br />
0100 0193 0294 0134 0067<br />
0441 0104 0336 0243 0357<br />
0358 0040 0535 0106 0379<br />
0247 0531 0139 0367 0661<br />
0698<br />
Univox 0367 0117 0067 0193 0268<br />
Vestel 0067 0193 0247<br />
Vexa 0039 0067<br />
Videologique 0246 0248 0247<br />
VideoSystem 0067<br />
Videotechnic 0246 0350 0247<br />
Videoton 0193<br />
Vidikron 0132<br />
Viper 0367<br />
Visiola 0246<br />
Vision 0067 0350<br />
Vistar 0236 0391<br />
Vortec 0067<br />
Voxson 0117 0106 0067 0448
B e d i e n u n g s a n l e i t u n g D r e a m b o x D M 6 0 0 PVR deutsch<br />
Tech Line 0067 0698<br />
Technema 0350<br />
Technisat 0685<br />
Tedelex 0247<br />
Teleavia 0139 0531 0317 0226 0429 0235<br />
0363 0520<br />
Telecor 0067 0193 0248 0247 0289 0424<br />
Telefunken 0139 0531 0528 0501 0429 0317<br />
0104 0114 0131 0365 0292<br />
0336 0373 0226 0067 0655<br />
Telefusion 0067<br />
Telegazi 0067 0193 0289 0248 0294<br />
Telemeister 0350 0067<br />
Telesonic 0067<br />
Telestar 0067<br />
Teletech 0039 0277 0367 0067 0698<br />
Teleton 0247 0236 0193 0379 0289 0066<br />
Televideon 0350 0193 0246<br />
Televiso 0430<br />
Temco 0324<br />
Tempest 0039<br />
Tensai 0134 0248 0067 0247 0324 0350<br />
0039 0135 0404 0401 0277<br />
Tenson 0350 0039<br />
Tevion 0549 0067<br />
Texet 0247 0404 0039<br />
Thomson 0317 0429 0139 0531 0363 0501<br />
0365 0226 0228 0235 0267<br />
0373 0067 0520 0590 0655<br />
Thorn 0268 0104 0114 0067 0134 0365<br />
0542 0389 0404 0065<br />
Tokai 0102 0067 0367 0193 0247 0404<br />
0039<br />
Tokyo 0246 0065<br />
Tomashi 0312 0248<br />
Toshiba 0065 0538 0273 0066 0100 0132<br />
0247<br />
Towada 0379 0132 0247<br />
Trans Continens 0247 0067<br />
Trident 0546 0247<br />
Tristar 0248<br />
Triumph 0546 0376 0586 0067 0273<br />
Uher 0106 0067 0236 0350 0333 0404<br />
0448 0400 0289<br />
Ultravox 0117 0132 0404 0277 0246 0193<br />
0243 0067<br />
114<br />
Waltham 0247 0448 0317 0415 0067<br />
Watson 0067 0350 0193 0248 0243 0609<br />
0549 0424 0039 0698<br />
Watt Radio 0243 0132 0379 0193 0246<br />
Wega 0243 0066 0117 0067<br />
Wegavox 0039<br />
Weltblick 0067 0350<br />
White Westinghouse 0350 0246 0067 0367<br />
Winco 0442<br />
Windstar 0312<br />
Xrypton 0067<br />
Yamishi 0312 0485 0248 0067 0247<br />
Yokan 0067<br />
Yoko 0247 0067 0248 0294 0039 0400<br />
0246<br />
Yorx 0248<br />
Zanussi 0236 0247
B e d i e n u n g s a n l e i t u n g D r e a m b o x D M 6 0 0 PVR deutsch<br />
48. Technische Daten<br />
• 250 MHz IBM PowerPC Prozessor (350 MIPS)<br />
• Linux Operating System, Open Source<br />
• <strong>Dream</strong>Crypt CA integriert<br />
• 1 x Smartcard-Leser<br />
• MPEG2 Hardware decoding (DVB kompatibel)<br />
• Anschluss V.24 / RS232<br />
• 100Mbit voll duplex Ethernet Interface<br />
• 2 Status-LED<br />
• 64 MB RAM (Arbeitsspeicher), 32 MB Flash<br />
• unlimitierte Kanalliste für TV/Radio<br />
• Kanalwechsel in weniger als einer Sekunde<br />
• voll automatischer Kanalsuchlauf / Transponder Suchlauf<br />
• Unterstützung von Bouquet-Listen (indirekt unlimitiert)<br />
• EPG-Unterstützung (electronic program guide)<br />
• adaptierbares OSD in vielen Sprachen (Skin-Unterstützung)<br />
• SPDI/F optischer Anschluss AC-3<br />
• 1 x Scart-Anschluss (komplett Sofware-gesteuert)<br />
• Analog Modem<br />
• Plug&Play Tuner<br />
• eingebauter IDE Anschluss<br />
• Festplattenunterstützung für alle üblichen Größen (2,5 Zoll)<br />
• externes 12V Steckernetzteil<br />
• A/V Ausgang (Audio/Video Cinch und S-Video)<br />
• Größe: 196mm x 130mm x 40mm (H x B x T)<br />
Videodekodierung:<br />
Videokompression MPEG-2 und MPEG-1 kompatibel<br />
Videostandard PAL G/ 25 Hz<br />
Bildformat 4:3 / 16:9<br />
Bildmaterial 16:9, automatische Anpassung für 16:9 TV-Geräte (über Scart)<br />
Letterbox Filterung für 4:3 TV-Geräte<br />
Audiokodierung:<br />
Audiokompression MPEG-1 & MPEG-2 Layer I und II<br />
Audio Mode Dual (main/sub), Stereo<br />
Abtastfrequenzen 32 kHz, 44.1 kHz, 48 kHz, 16 kHz, 22.05 kHz, 24 kHz<br />
Ausgang Analog:<br />
Ausgangspegel L/R 0,5 Vss an 600 Ohm<br />
THD > 60 dB (1 kHz)<br />
Übersprechen < -65 dB<br />
Ausgang Digital:<br />
Ausgangspegel 0,5 Vss an 75 Ohm<br />
Abtastfrequenzen 32 kHz, 44.1 kHz, 48 kHz<br />
S/PDIF-Ausgang optisch (AC3)<br />
Ausgang Video:<br />
Ausgangspegel FBAS 1 Vss +/- 0.3 dB an 75 Ohm<br />
TV-Scart:<br />
Ausgang: FBAS,RGB,S-VHS über OSD wählbar<br />
115
B e d i e n u n g s a n l e i t u n g D r e a m b o x D M 6 0 0 PVR deutsch<br />
Serielle Schnittstelle RS 232:<br />
Typ RS232 bi-direktional<br />
Bitrate 115,2 kBit/s max.<br />
Steckverbinder SUB-D-9 Buchse<br />
Funktion: Update der Betriebssoftware u. Vorprogrammierung<br />
Ethernet:<br />
100 Mbit bi-direktionales Interface<br />
Funktion: Update der Betriebssoftware u. Vorprogrammierung<br />
Eingangsspannung:<br />
12V Steckernetzteil 110-230V / 50-60Hz Wechselspannung +/- 15%<br />
Allgemeines:<br />
Umgebungstemperatur +15°C...+35°C<br />
Luftfeuchtigkeit < 80%<br />
Abmessungen (B x T x H): 196 mm x 130 mm x 40 mm<br />
Gewicht: 500g<br />
DM 600 PVR-C/T spezifische Daten:<br />
DVB-C/T Tuner:<br />
Eingangsfrequenzbereich 51 …. 858 MHz<br />
Eingangsimpedanz 75 Ohm<br />
Symbolrate 1 …. 6.9 Mbaud/s<br />
DM 600 PVR-S spezifische Daten:<br />
DVB-S-Tuner:<br />
Eingangsfrequenzbereich 950 - 2150 MHz<br />
Eingangspegelbereich - 65 dBm - 25 dBm<br />
Rauschmaß 12 dB max.<br />
DBS-Tuner Eingang F-Buchse<br />
Eingangsimpedanz 75 Ohm<br />
AFC-Fangbereich +/- 3 MHz<br />
Demodulation Shaped QPSK<br />
Symbolrate 2 - 45 Mbaud/s, SCPC / MCPC<br />
Inner FEC: Rates:1/2, 2/3, 3/4, 5/6, 7/8 (DVB Spezifikation)<br />
Demultiplexing gemäß ISO 13818-1<br />
LNB Stromversorgung:<br />
LNB Strom 500mA max. ; kurzschlussfest<br />
LNB Spannung vertikal < 14V ohne Last, > 11,5V bei 400mA<br />
LNB Spannung horizontal < 20V ohne Last, > 17,3V bei 400mA<br />
LNB Abschaltung im Standby-Mode<br />
Anzahl aktiver Satellitenpositionen:<br />
DiSEqC 1.0/1.1/1.2 SAT POSITION / SAT OPTION<br />
DiSEqC - Rotor-Steuerung<br />
116
B e d i e n u n g s a n l e i t u n g D r e a m b o x D M 6 0 0 PVR deutsch<br />
49. Kontakt & Support Informationen<br />
Hauptfirmensitz & Vertrieb:<br />
<strong>Dream</strong>-<strong>Multimedia</strong><br />
Vertrieb durch Visoduck Discount GmbH<br />
Pierbusch 24-26<br />
44536 Lünen<br />
Deutschland<br />
Händler:<br />
(nur Händler)<br />
Tel.: +49 (0)180 - 3 85 85 90 112 (0,09€/min.)<br />
Fax: +49 (0)180 - 3 85 85 90 777 (0,09€/min.)<br />
Sie erreichen die Händler-Hotline von:<br />
Mo - Fr. 09:00 - 15:00 Uhr<br />
Endkunden:<br />
Tel.: +49 (0)180 - 3 85 85 90 110 (0,09€/min.)<br />
Fax: +49 (0)180 - 3 85 85 90 111 (0,09€/min.)<br />
Sie erreichen die Endkunden-Hotline von:<br />
Mo - Fr. 09:00 - 15:00 Uhr<br />
Vertrieb:<br />
Tel.: +49 (0)180 - 3 85 85 90 770 (0,09€/min.)<br />
Sie erreichen die Vertriebs-Hotline von:<br />
Mo - Fr. 09:00 - 15:00 Uhr<br />
Händleranfragen und Preisinformationen:<br />
E-Mail: info@dream-multimedia-tv.de<br />
Technischer Support:<br />
E-Mail: support@dream-multimedia-tv.de<br />
Webseite:<br />
Weblink: http://www.dream-multimedia-tv.de<br />
Support Forum:<br />
Weblink: http://www.dream-multimedia-tv.de/board<br />
Software Support (aktuell verfügbare Betriebssoftware):<br />
Weblink DM 600 PVR: http://www.dm600pvr.de<br />
117
Bitte komplett ausgefüllt der Ware beifügen und an Ihren Händler ( = Vertragspartner) zurücksenden<br />
Den Schein bitte unbedingt leserlich ausfüllen, um einen reibungs- und fehlerloseren Ablauf zu gewährleisten!<br />
Ohne Rechnungskopie kann keine Service-Abwicklung stattfinden!<br />
Bitte senden Sie nur die defekten Teile (ohne Zubehör) ein! - Festplatte bitte eingebaut lassen!<br />
Kunden-Nr.: Retourdatum:<br />
Name /Firma Vorname:<br />
Ansprechpartner: Telefon:<br />
Straße: Fax:<br />
Land/PLZ/Ort: E-Mail:<br />
Zurückgesandtes Gerät: DM Seriennr.:<br />
(Typenbezeichnung)<br />
Ausstattung (z.B. HDD): Soft-Ver.:<br />
Kontaktdaten:<br />
Ansprechpartner:<br />
Kommunikation per…/am… :<br />
Fehler- / Auftragsbeschreibung (bitte ausführlich und gut leserlich schreiben):<br />
Eine Ausführung des Auftrages kann nur mit genauer Fehlerbeschreibung ausgeführt werden - mit<br />
der Meldung "defekt" kann die Technik den Auftrag nicht bearbeiten und muss das Gerät zurücksenden!<br />
Rücksendegrund:<br />
Ort, Datum, Unterschrift<br />
DREAMBOX - Service Begleitschein<br />
Garantiereparatur Sonstige:<br />
Kostenpflichtige Reparatur<br />
Mit meiner Unterschrift erkläre ich, dass Reparaturen bis zu einem Wert von € 30,- ohne Rücksprache durchgeführt<br />
werden dürfen. Ohne Unterschrift kann keine Auftragsdurchführung stattfinden.<br />
BEMERKUNG: BITTE DIE BOX IN PLASTIKTÜTE ODER FOLIE VERPACKEN. DANN MÖGLICHST IN<br />
ORIGINALVERPACKUNG, NOTFALLS IN FESTEM, GEPOLSTERTEM KARTON VERSCHICKEN - DAMIT BEIM<br />
TRANSPORT KEINE KRATZER UND ABRIEBSTELLEN ENTSTEHEN. DANKE!
B e d i e n u n g s a n l e i t u n g D r e a m b o x D M 6 0 0 PVR deutsch<br />
51. Copyright Hinweise<br />
© <strong>Dream</strong>-<strong>Multimedia</strong> 2006. Alle Rechte vorbehalten.<br />
Das vorliegende Produkt-Paket enthält Dateien, die unter verschiedenen<br />
Lizenzen verbreitet werden, insbesondere unter einer Open Source Lizenz,<br />
der GNU General Public License. Einzelheiten zu dieser Lizenz finden Sie auf den nächsten<br />
drei Seiten. Weitere Hinweise zum Source Code und den Patches für die GPL Software<br />
Elemente finden Sie unter folgender Adresse im Internet:<br />
http://www.dream-multimedia-tv.de/deutsch/downloads.php<br />
118
<strong>Dream</strong>box DM 600 PVR<br />
<strong>Bedienungsanleitung</strong><br />
Digitaler Satellitenempfänger zum Empfang von freien<br />
und verschlüsselten DVB-Programmen.<br />
Kommunikations-Schnittstelle<br />
Anschluss für interne Festplatte<br />
Smartcard Leser<br />
Linux OS<br />
B e d i e n u n g s a n l e i t u n g D r e a m b o x D M 7 0 2 5<br />
User Manual<br />
Digital satellite receiver for free and encrypted<br />
Digital Video Broadcasting (DVB).<br />
Communication-Port<br />
Internal hard disk support<br />
Smartcard Reader<br />
Linux OS
U s e r M a n u a l D r e a m b o x D M 6 0 0 PVR english<br />
1. T a b l e o f c o n t e n t s<br />
1. Table of contents.............................................................................................................................. - 2 -<br />
2. Views................................................................................................................................................ - 4 -<br />
3. Explanation front panel..................................................................................................................... - 5 -<br />
4. Explanation rear panel...................................................................................................................... - 5 -<br />
5. Safety instructions ............................................................................................................................ - 7 -<br />
6. Shut down ........................................................................................................................................ - 8 -<br />
7. Additional safety instructions ............................................................................................................ - 8 -<br />
8. Disposal instructions......................................................................................................................... - 9 -<br />
9. Packaging contents ........................................................................................................................ - 10 -<br />
10. Installation .................................................................................................................................... - 10 -<br />
11. Remote control ............................................................................................................................. - 11 -<br />
12. Important notes about operation................................................................................................... - 12 -<br />
13. Remote control buttons ................................................................................................................ - 13 -<br />
14. Turning your <strong>Dream</strong>box on and off............................................................................................... - 16 -<br />
15. Sleeptimer .................................................................................................................................... - 17 -<br />
16. Main OSD Menu........................................................................................................................... - 17 -<br />
17. Infobar .......................................................................................................................................... - 19 -<br />
17.1 Infobar – EPG ...................................................................................................................... - 20 -<br />
17.2 Infobar – Sub Services......................................................................................................... - 22 -<br />
17.3 Infobar – Audio tracks .......................................................................................................... - 23 -<br />
17.4 Infobar – Plugins .................................................................................................................. - 24 -<br />
18. Setting OSD language.................................................................................................................. - 24 -<br />
19. Setting the time zone.................................................................................................................... - 25 -<br />
19.1 Manual time correction......................................................................................................... - 27 -<br />
20. Signal strength (Adjusting your antenna, DM 600 PVR-T) ........................................................... - 28 -<br />
20.1 Disable 5V (DM 600 PVR-T) ................................................................................................ - 29 -<br />
20.2 Automatic transponder scan (DM 600 PVR-T) ..................................................................... - 30 -<br />
20.3 Manual transponder scan (DM 600 PVR-T) ......................................................................... - 32 -<br />
21. Automatic transponder scan (DM 600 PVR-C)............................................................................. - 33 -<br />
21.1 Manual transponder scan (DM 600 PVR-C)......................................................................... - 35 -<br />
22. Satfinder (Adjusting your dish, DM 600 PVR-S) ........................................................................... - 36 -<br />
23. Satellite configuration ................................................................................................................... - 37 -<br />
23.1 one single satellite – direct connection................................................................................. - 38 -<br />
23.2 2 satellites via Toneburst...................................................................................................... - 39 -<br />
23.3 2 satellites via 22kHz (Highband only) ................................................................................. - 40 -<br />
23.4 2 satellites via DiSEqC A/B .................................................................................................. - 41 -<br />
23.5 4 satellites via DiSEqC OPT A/B.......................................................................................... - 42 -<br />
23.6 Many satellites via DiSEqC Rotor ........................................................................................ - 43 -<br />
24. Motor setup .................................................................................................................................. - 46 -<br />
25. Example table for the DiSEqC 1.2 Rotor (SG21000).................................................................... - 47 -<br />
26. Automatic transponder scan (DM 600 PVR-S) ............................................................................. - 48 -<br />
27. Automatic multisat scan (DM 600 PVR-S).................................................................................... - 51 -<br />
28. Manual transponder scan (DM 600 PVR-S) ................................................................................. - 55 -<br />
29. Edit a transponder (DM 600 PVR-S) ............................................................................................ - 56 -<br />
30. Service organizing – Adding a new Bouquet ................................................................................ - 59 -<br />
30.1 Service organizing – Adding services to an existing Bouquet .............................................. - 61 -<br />
30.2 Service organizing – Editing a Bouquet ............................................................................... - 63 -<br />
31. Parental lock and Setup lock ........................................................................................................ - 65 -<br />
31.1 Activating the parental lock .................................................................................................. - 66 -<br />
31.2 Deactivating the parental lock .............................................................................................. - 68 -<br />
31.3 Activating the setup lock....................................................................................................... - 69 -<br />
31.4 Deactivating the setup lock .................................................................................................. - 71 -<br />
32. Locking a service.......................................................................................................................... - 72 -<br />
33. Unlocking a service ...................................................................................................................... - 73 -<br />
34. Audio/Video settings..................................................................................................................... - 74 -<br />
35. Keyboard ...................................................................................................................................... - 76 -<br />
- 2 -
U s e r M a n u a l D r e a m b o x D M 6 0 0 PVR english<br />
36. OSD settings ................................................................................................................................ - 77 -<br />
36.1 Skin Setup........................................................................................................................... - 79 -<br />
36.2 Available Skins..................................................................................................................... - 80 -<br />
36.3 Setting the teletext (TuxText) position.................................................................................. - 81 -<br />
37. Teletext (TuxText) ........................................................................................................................ - 83 -<br />
38. Expert setup ................................................................................................................................. - 85 -<br />
38.1 Communications setup (Setting up LAN, NFS shares) ........................................................ - 87 -<br />
38.2 Ngrab – Streaming setup ..................................................................................................... - 90 -<br />
38.3 Manual software update....................................................................................................... - 91 -<br />
38.4 Remote control setup ........................................................................................................... - 92 -<br />
38.5 Reset to factory defaults....................................................................................................... - 93 -<br />
39. Hard disk Management ................................................................................................................ - 94 -<br />
39.1 Hard disk formatting ............................................................................................................. - 95 -<br />
40. Instant recording........................................................................................................................... - 96 -<br />
40.1 Stop recording...................................................................................................................... - 97 -<br />
40.2 Watch a recording ................................................................................................................ - 98 -<br />
40.3 Delete a recording................................................................................................................ - 99 -<br />
40.4 Rename a recording........................................................................................................... - 100 -<br />
41. Recording by timer and EPG...................................................................................................... - 101 -<br />
41.1 Setting Sub Service timers using the EPG......................................................................... - 104 -<br />
42. Tmeshift...................................................................................................................................... - 104 -<br />
43. Timer .......................................................................................................................................... - 105 -<br />
44. Information – Streaminformation ................................................................................................ - 106 -<br />
45. Information – About .................................................................................................................... - 107 -<br />
46. Troubleshooting.......................................................................................................................... - 108 -<br />
47. TV-Mode setup........................................................................................................................... - 109 -<br />
47.1 Programming the remote control........................................................................................ - 109 -<br />
47.2 Device list........................................................................................................................... - 110 -<br />
48. Technical data ............................................................................................................................ - 115 -<br />
49. Contact & support information .................................................................................................... - 117 -<br />
50. Service Slip ................................................................................................................................ - 118 -<br />
51. Copyright notes .......................................................................................................................... - 119 -<br />
52. GNU General Public License...................................................................................................... - 120 -<br />
Note: The <strong>Dream</strong>box DM 600 PVR carries the CE-sign and fulfills all requirements form the EU.<br />
Subject to change without prior notification.<br />
- 3 -
U s e r M a n u a l D r e a m b o x D M 6 0 0 PVR english<br />
2. V i e w s<br />
Front panel<br />
Rear panel DM 600 PVR-C/T<br />
S-Video<br />
output<br />
Antenna<br />
input<br />
Rear panel DM 600 PVR-S<br />
S-Video<br />
output<br />
LNB<br />
input<br />
Audio<br />
output<br />
(analog)<br />
Smartcard Reader Standby LED RC LED Standby<br />
On / off<br />
Antenna<br />
output<br />
LNB<br />
output<br />
Audio<br />
output<br />
(analog)<br />
Video<br />
output<br />
Video<br />
output<br />
Serial<br />
interface<br />
Serial<br />
interface<br />
- 4 -<br />
Modem<br />
port<br />
Modem<br />
port<br />
TV Scart<br />
TV Scart<br />
Audio<br />
output<br />
(digital)<br />
Audio<br />
output<br />
(digital)<br />
Network interface<br />
Power supply<br />
connector<br />
Network interface<br />
Power supply<br />
connector
U s e r M a n u a l D r e a m b o x D M 6 0 0 PVR english<br />
3. E x p l a n a t i o n f r o n t p a n e l<br />
Smartcard Reader<br />
Insert your <strong>Dream</strong>crypt Smartcard with the golden chip facing down and forward into the<br />
Smartcard reader. <strong>Dream</strong>crypt is a registered trademark of <strong>Dream</strong>-<strong>Multimedia</strong>.<br />
Standby LED<br />
The Standby LED lights up red if the <strong>Dream</strong>box is in standby mode. It lights up green if the<br />
<strong>Dream</strong>box is powered on.<br />
Remote Control (RC) Led<br />
The remote control LED lights up every time the <strong>Dream</strong>box receives a signal from the remote<br />
control.<br />
Standby on/off<br />
The Standby on/off button toggles between standby mode and powered on mode.<br />
4. E x p l a n a t i o n r e a r p a n e l<br />
Antenna input (DM 600 PVR-C/T)<br />
Connect your antenna cable here.<br />
Antenna output (DM 600 PVR-C/T)<br />
You can optionally connect your TV or VCR here.<br />
LNB input (DM 600 PVR-S)<br />
Connect the coaxial cable from your LNB here.<br />
LNB output (DM 600 PVR-S)<br />
You can connect an analogue/digital receiver here. Remember to shutdown your <strong>Dream</strong>box<br />
completely in order for the receiver to work.<br />
Modem port<br />
You can connect your <strong>Dream</strong>box to your ISP via the Modem Socket using a phone line.<br />
S-Video out<br />
Connect the S-Video out of your <strong>Dream</strong>box to the S-Video in of your desired device, e.g. a<br />
Beamer.<br />
- 5 -
U s e r M a n u a l D r e a m b o x D M 6 0 0 PVR english<br />
Video output (FBAS)<br />
You can optionally connect your <strong>Dream</strong>box to a TV using a RCA/Chinch cable. (Composite)<br />
Audio output - analog (Cinch)<br />
Connect your <strong>Dream</strong>box with a RCA/Cinch cable to your HiFi-Amplifier (e.g. AUX In or Tape<br />
In ports).<br />
Serial interface (RS232C, Sub-D, 9-pin)<br />
The Serial Port is used to update the operating system. Please connect a serial null modem<br />
cable here.<br />
TV Scart<br />
Connect your TV or beamer to your <strong>Dream</strong>box using a Scart cable.<br />
Audio output - digital (Toslink)<br />
You can connect your <strong>Dream</strong>box with an optical (Toslink) cable to your HiFi-Amplifier or<br />
DSP. The AC3 signal is also available at this port in case the selected channel transmits<br />
Dolby Digital signals.<br />
Power supply connector<br />
Plug the power cable of the power supply that came with your <strong>Dream</strong>box into power outlet.<br />
Connect your power supply to your <strong>Dream</strong>box. You must not connect the power plug of the<br />
power supply to anything other than a socket that supplies 230V/50Hz.<br />
Network interface (Ethernet 10/100Mbit, RJ45)<br />
The Communication Port is an Ethernet port. It is used to communicate with your <strong>Dream</strong>box<br />
via HTTP, FTP, NFS, Telnet and Samba. This port is also used to update the operating<br />
system of your <strong>Dream</strong>box. Please use a regular patch cable to connect your <strong>Dream</strong>box to<br />
your LAN.<br />
- 6 -
U s e r M a n u a l D r e a m b o x D M 6 0 0 PVR english<br />
5. S a f e t y I n s t r u c t i o n s<br />
Please read the safety instructions completely and carefully, before using the<br />
<strong>Dream</strong>box. The Manufacturer takes no responsibility for incorrect handling of the<br />
<strong>Dream</strong>box.<br />
- Allow enough space around the <strong>Dream</strong>box for sufficient ventilation.<br />
- Do not cover the <strong>Dream</strong>box’s ventilation openings with items such as newspapers,<br />
tablecloths, curtains etc.<br />
- Do not expose the <strong>Dream</strong>box to dripping or splashing liquids.<br />
- Do not place open flame sources, such as lit candles, on the <strong>Dream</strong>box.<br />
- Do not place any containers with liquid, such as vases, on the <strong>Dream</strong>box.<br />
- Do not connect or modify cables while the <strong>Dream</strong>box is connected to the power.<br />
- Do not remove the cover. Risk of electric shock!<br />
- Do not put any metal things into the slots or ventilation openings.<br />
- Please note that the only way to isolate the <strong>Dream</strong>box completely from the main power<br />
supply is to unplug the main power cable!<br />
WARNING!<br />
Modifications and changes to the <strong>Dream</strong>box lead to loss of warranty.<br />
We recommend the installation of a hard disk by your local dealer.<br />
Unskilled installation of a hard disk leads to loss of warranty.<br />
ATTENTION!<br />
We recommend the installation of a hard disk by your local dealer.<br />
Unskilled installation of a hard disk leads to loss of warranty.<br />
- 7 -
U s e r M a n u a l D r e a m b o x D M 6 0 0 PVR english<br />
6. S h u t D o w n<br />
- In case your <strong>Dream</strong>box is in use for a longer period of time disconnect the power plug<br />
from the power outlet.<br />
- During thunder storm the unit should also be physically disconnected from the power<br />
outlet.<br />
7. A d d i t i o n a l s a f e t y i n s t r u c t i o n s<br />
- (Dis-)Connecting to a LNB:<br />
Turn the <strong>Dream</strong>box off before you connect or disconnect a cable coming from a LNB.<br />
- Connecting to a TV:<br />
Before connecting or disconnecting your <strong>Dream</strong>box to a TV please turn it off.<br />
- In case you notice any damage to the power cord or power plug immediately disconnect<br />
the unit from the power outlet.<br />
- In case the unit was exposed to humidity immediately disconnect the unit from the power<br />
outlet.<br />
- In case you notice any serious damage to the outer shell of the unit immediately<br />
disconnect the unit from the power outlet.<br />
- Do not expose the <strong>Dream</strong>box to direct sunlight, lightning or rain.<br />
- Grounding:<br />
The LNB cable must be grounded.<br />
The grounding system must match SABS 061.<br />
- Cleaning:<br />
Disconnect the mains power cord before cleaning the cover. Use a slightly damp cloth<br />
without cleaning agents<br />
- Connect the <strong>Dream</strong>box only to suitable sockets. Do not allow overloads to occur.<br />
- 8 -
U s e r M a n u a l D r e a m b o x D M 6 0 0 PVR english<br />
8. D i s p o s a l i n s t r u c t i o n s<br />
The packaging of the <strong>Dream</strong>box only consists of reusable materials. Please recycle if<br />
possible.<br />
This symbol on the product or on its packaging indicates that this product must not be<br />
disposed of with your other household waste. Instead, it is your responsibility to dispose of<br />
your waste equipment by handing it over to a designated collection point for the recycling of<br />
waste electrical and electronic equipment. The separate collection and recycling of your<br />
waste equipment at the time of disposal will help to conserve natural resources and ensure<br />
that it is recycled in a manner that protects human health and the environment.<br />
For more information about where you can drop off your waste equipment for recycling,<br />
please contact your local city office, your household waste disposal service or the shop<br />
where you purchased the product.<br />
Please note that empty batteries and electric waste is not to be put into the regular garbage.<br />
- 9 -
U s e r M a n u a l D r e a m b o x D M 6 0 0 PVR english<br />
9. P a c k a g i n g c o n t e n t s<br />
Please check the completeness of the box.<br />
Included in box:<br />
- 1 <strong>Dream</strong>box DM 600 PVR<br />
- 1 Power supply<br />
- 1 Power cord<br />
- 1 Remote control<br />
- 2 Batteries (1,5V Micro / AAA / LR6)<br />
- 1 User manual (latest release via Internet http://www.dream-multimedia-tv.de )<br />
10. I n s t a l l a t i o n<br />
- Insert 2 AAA (1,5V) batteries, taking care to observe the + and - markings indicated<br />
inside, into the remote control.<br />
- Before using the <strong>Dream</strong>box, please read the safety instructions.<br />
- Connect the LNB or antenna with a coaxial cable to LNB or Antenna In at your<br />
<strong>Dream</strong>box.<br />
- Connect the <strong>Dream</strong>box with a Scart cable to your television screen.<br />
- Plug in the power cable into a 230V/50Hz power socket.<br />
- If you are using a switchable power socket please shutdown your <strong>Dream</strong>box into<br />
deep standby before switching off the power socket.<br />
- If you switch on your <strong>Dream</strong>box for the first time, you will see the setup wizard.<br />
The setup wizard will guide you through the first time installation. You will be asked<br />
for your TV standard, the regional settings and your language. Please choose and<br />
follow the instructions on the screen.<br />
- Please note that the video format meets the factory setting CVBS (FBAS).<br />
- 10 -
U s e r M a n u a l D r e a m b o x D M 6 0 0 PVR english<br />
11. R e m o t e C o n t r o l<br />
SHIFT / SETUP-Button<br />
DREAM-Mode-Button<br />
Numeric-Keypad<br />
- 11 -<br />
Power-Button<br />
TV-Mode-Button<br />
Arrow-Left-Button Arrow-Right-Button<br />
Mute-Button<br />
Volume +/- Buttons Bouquet +/- Buttons<br />
INFO-Button<br />
EXIT-Button<br />
MENU-Button<br />
Navigation-Buttons OK-Button<br />
AUDIO-Button<br />
Options-Buttons<br />
(PVR-Mode)<br />
TV-Button<br />
(PVR-Mode)<br />
RADIO-Button<br />
(PVR-Mode)<br />
VIDEO-Button<br />
HELP-Button<br />
TEXT–Button
U s e r M a n u a l D r e a m b o x D M 6 0 0 PVR english<br />
12. Important notes about operation<br />
All functions of the <strong>Dream</strong>box can be controlled via OSD-Menu (On-Screen-Display). This<br />
makes the handling of the <strong>Dream</strong>box very easy for you. All options are indicated by four<br />
colored dots or beams (red, green, yellow, blue) in the OSD-Menu and can be started with<br />
the Option-Buttons on the Remote Control.<br />
Depending on the chosen Menu, these options do change.<br />
The Options-Buttons of your remote control have multiple functions. You will notice control<br />
symbols below the four colored Options-Buttons, the TV- and the RADIO-Button. In PVR-<br />
Mode these buttons are used to control the digital recording according to their symbols.<br />
Pressing the VIDEO-Button on your remote control will activate the PVR-Mode. The Infobar<br />
will also indicate this. It changes from showing the channel information to showing the control<br />
symbols for the PVR-Mode. (also see Instant recording)<br />
All Menus and Service<br />
lists are closed with<br />
the EXIT-Button.<br />
In general the menus are<br />
controlled using the<br />
Navigation-Buttons<br />
To get into a submenu<br />
you have to press the<br />
Navigation-Buttons on<br />
your remote control.<br />
OK-Button.<br />
- 12 -
U s e r M a n u a l D r e a m b o x D M 6 0 0 PVR english<br />
13. Remote Control Buttons<br />
MENU-Button<br />
If you are in TV- or RADIO-Mode, pressing this button will bring up the OSD main menu. The<br />
OSD main menu has the following options:<br />
- (1) TV Mode<br />
- (2) Radio Mode<br />
- (3) File Mode<br />
- (4) Information<br />
- (5) Shutdown<br />
- (6) Setup<br />
- (7) Games<br />
- (8) Timer<br />
You can switch to the needed option by pressing the Navigation-Buttons left or right. Also<br />
see: Important notes about operation.<br />
The numbers in front of each option can be used to directly access the needed function by<br />
pressing the according number on the Numeric Keypad of your Remote control.<br />
If you are in the service list, pressing the MENU-Button brings up the service menu. The<br />
shown options may vary depending on the service list you selected.<br />
SHIFT / SETUP-Button<br />
The SHIFT/ SETUP-Button is used to preprogram the remote control to operate a TV.<br />
See chapter TV-Mode setup.<br />
Power-Button<br />
The Power-Button switches your <strong>Dream</strong>box on and off.<br />
See chapter Turning your <strong>Dream</strong>box on and off.<br />
DREAM-Mode-Button<br />
The DREAM-Mode-Button switches your remote control into <strong>Dream</strong>box control mode. It will<br />
shortly light up once your press the button.<br />
TV-Mode-Button<br />
The TV-Mode-Button switches your remote control into TV control mode to control your<br />
preprogrammed TV. It will shortly light up once your press the button.<br />
See chapter TV-Mode setup.<br />
- 13 -
U s e r M a n u a l D r e a m b o x D M 6 0 0 PVR english<br />
Numeric-Keypad<br />
Enter a service number to directly access the option by using the Numeric Keypad. The<br />
service numbers are on the left side of the service list.<br />
The Numeric Keypad can also be used to enter the teletext page number when you are in<br />
TV-Control-Mode and if your TV is teletext capable. The TV station has to submit teletext<br />
information; otherwise this feature cannot be used.<br />
Arrow-Left-Button Arrow-Right-Button<br />
The Arrow-Left and Arrow-Right-Button enable you to jump back and forth between the<br />
last 20 channels you have watched.<br />
Mute-Button<br />
Pressing the MUTE-Button mutes the Volume. A crossed speaker symbol will appear on the<br />
TV screen. Pressing it again or pressing one of the Volume +/- Buttons brings back the<br />
audio.<br />
EXIT-Button<br />
You can leave all menus and service lists by pressing the EXIT-Button.<br />
INFO-Button<br />
If no OSD menu is visible on the screen and you are in TV or RADIO-Mode, pressing the<br />
INFO-Button will reveal the EPG information of the chose channel if it is available.<br />
OK-Button<br />
By pressing the OK-Button you confirm a selection in the menu or service list navigation.<br />
If no OSD menu is present on your screen, the infobar is shown once you press the OK-<br />
Button.<br />
Navigation-Buttons<br />
In general the menus are controlled using the Navigation-Buttons on your remote control.<br />
To get into a submenu you have to press the OK-Button.<br />
- 14 -
U s e r M a n u a l D r e a m b o x D M 6 0 0 PVR english<br />
Volume +/- Buttons<br />
The Volume +/- Buttons control the volume of the audio. Pressing + will make turn it up and<br />
pressing - will turn it down.<br />
Bouquet +/- Buttons<br />
Pressing the Bouquet +/- Buttons will jump back and forth between the bouquets.<br />
AUDIO-Button<br />
By pressing the AUDIO-Button you can choose the different audio tracks offered by the<br />
station.<br />
VIDEO-Button<br />
Pressing the VIDEO-Button activates the PVR-Mode. The Infobar will show the control<br />
symbols. You can instantly start recording by pressing the Radio-Button on your remote<br />
control. You can also toggle between single-, double- and trible-column-view in the service<br />
list.<br />
Options-Buttons<br />
All possible options are shown by the four colored dots/blocks (red, green, yellow, blue) and<br />
can be activated by the Options-Buttons. In PVR-Mode these buttons are used to control<br />
the digital recording.<br />
Depending on the menu you currently are in the options will change and will be named<br />
differently.<br />
TV-Button<br />
Pressing the TV-Button activates the TV-Mode.<br />
RADIO-Button<br />
Pressing the RADIO-Button activates the RADIO-Mode.<br />
TEXT-Button<br />
The TEXT-Button activates the Teletext (TuxTxt). If you are in the stations list, pressing this<br />
button will directly take you to the FILE-Mode.<br />
HELP-Button<br />
Pressing the HELP-Button activates the Help menu.<br />
- 15 -
U s e r M a n u a l D r e a m b o x D M 6 0 0 PVR english<br />
14. Turning your <strong>Dream</strong>box on and off<br />
Use the Standby-Button to turn your <strong>Dream</strong>box on and off.<br />
To put your <strong>Dream</strong>box into Standby-Mode either press the Standby-Button on your remote<br />
control or on your <strong>Dream</strong>box.<br />
Holding down the Standby-Button on your remote control for three seconds will show the<br />
Shutdown / Standby menu.<br />
- 16 -<br />
This is the Shutdown / Standby menu.<br />
Navigate to the desired option and<br />
confirm by pressing the OK-Button.<br />
Reboot now:<br />
Your <strong>Dream</strong>box will be rebooted.<br />
Goto standby:<br />
Your <strong>Dream</strong>box goes into standby mode.<br />
Set sleeptimer:<br />
You can find an explanation in the section<br />
Sleeptimer.
U s e r M a n u a l D r e a m b o x D M 6 0 0 PVR english<br />
15. Sleeptimer<br />
Press the Power-Button for at least 3 seconds, select "set sleeptimer" to access this menu.<br />
16. Main OSD menu<br />
.<br />
- 17 -<br />
This is he sleeptimer menu.<br />
Define a maximum duration of 240 minutes.<br />
Define if the <strong>Dream</strong>box should shutdown or<br />
should go into standby mode by setting a<br />
check into one of the checkboxes beside<br />
shutdown and standby using the OK-Button.<br />
Either press the green Options-Button or the<br />
OK-Button to accept the setting.<br />
If no OSD menu is shown on your screen you can access the main OSD menu by pressing<br />
the Menu-Button on your remote control.<br />
Through the main OSD menu you can access the submenus and functions of your<br />
<strong>Dream</strong>box. Please use the Navigation-Buttons left and right or up and down, depending<br />
on you main OSD menu’s view, to access the desired functions and submenus. Use the OK-<br />
Button to activate your selection.<br />
As an alternative you can directly access the submenu or function by pressing the<br />
corresponding number in your remote control’s Numeric Keypad.<br />
Selecting this symbol activates the TV mode.<br />
Selecting this symbol activates the Radio mode.<br />
Selecting this symbol activates the file mode.<br />
Selecting this symbol takes you to the Info menu.<br />
The Info menu supplies you with additional<br />
information about the station, signal strength and<br />
software version of you <strong>Dream</strong>box.
U s e r M a n u a l D r e a m b o x D M 6 0 0 PVR english<br />
- 18 -<br />
Selecting this symbol takes you to the shutdown<br />
menu. Selecting the option ‚Shutdown now’ will turn<br />
you <strong>Dream</strong>box off. Pressing the Power-Button on<br />
your remote control will turn your <strong>Dream</strong>box on<br />
again.<br />
Selecting this symbol takes you to the setup menu.<br />
You can change all your <strong>Dream</strong>box’s settings in the<br />
setup menu.<br />
Selecting this symbol takes you to the games.<br />
Selecting this symbol takes you to the Timer menu.<br />
All set timers can be viewed, changed and deleted<br />
here.<br />
Through the menu options<br />
(5) Setup -><br />
(3) System -><br />
(6) OSD Settings -><br />
You can choose to view the main OSD menu as a<br />
regular menu.<br />
See section OSD Settings.
U s e r M a n u a l D r e a m b o x D M 6 0 0 PVR english<br />
17. Infobar<br />
The Infobar appears and disappears by pressing the OK-Button once, if no OSD menu is<br />
shown on your screen. The Infobar shows all necessary Information about the selected<br />
service.<br />
Channel number Channel name Elapsed time Current time Dolby Digital<br />
Current show<br />
Next show<br />
- 19 -<br />
Encrypted<br />
Remainig time<br />
EPG avialable Sub services Audio tracks Teletext / Plugins<br />
Encrypted<br />
Aspect ratio<br />
Dolby Digital<br />
Aspect ratio<br />
Is highlighted yellow as soon as a show is broadcasted encrypted.<br />
Is highlighted yellow as soon as a show is broadcasted in 16:9 aspect<br />
ratio.<br />
Is highlighted yellow as soon as a show is broadcasted in Dolby Digital.
U s e r M a n u a l D r e a m b o x D M 6 0 0 PVR english<br />
17.1 Infobar - EPG (Electronic Program Guide)<br />
The red dot in the Infobar appears if the selected station transmits EPG information.<br />
Attention: In PVR-Mode these buttons are used to control the digital recording.<br />
- 20 -<br />
If no OSD menu is visible on your screen and you<br />
are in TV mode press the TV-Button to access the<br />
service list.<br />
Press the Info-Button to get to the selection of the<br />
EPG style.<br />
Or you can press the red Options-Button to<br />
directly access the EPG of the station without<br />
having to go through the service list.<br />
Select „Channel EPG“ and press the OK-Button to<br />
activate it.<br />
Use the Navigation-Buttons to navigate to the<br />
desired event and press the OK-Button to view<br />
additional information.<br />
Pressing the EXIT-Button will quit the EPG.<br />
The Options-Buttons are mapped differently in this<br />
view, press the Help-Button to see an explanation.
U s e r M a n u a l D r e a m b o x D M 6 0 0 PVR english<br />
- 21 -<br />
Pressing the green Options-Button will show the<br />
“Timer Edit” menu. Use the Navigation-Buttons to<br />
reach the desired option and use the OK-Button to<br />
open up the drop down menus.<br />
Change the setting to fit your needs.<br />
The drop down menu „Switch“ offers the same<br />
options that you can directly access from the EPG<br />
using the colored Options-Buttons.<br />
„Switch“ will switch to the desired service.<br />
„NGrab“ will record via LAN.<br />
Press the green Options-Button to save your<br />
settings.<br />
After saving you timer event you will be taken back<br />
to the EPG.<br />
The set timers will be symbolized with a red clock<br />
symbol for NGrab Timers and a yellow clock symbol<br />
for Switch Timers.
U s e r M a n u a l D r e a m b o x D M 6 0 0 PVR english<br />
Press the numbers 1-6 to adjust the number of<br />
hours shown on the screen. The red line marks<br />
the current time.<br />
17.2 Infobar – Sub services<br />
- 22 -<br />
If you selected Multi-EPG when you were asked for<br />
the EPG style you will see this view.<br />
Use the Navigation-Buttons to navigate to the<br />
desired event. The current selection is highlighted<br />
gray. Pressing the Info-Button once will show<br />
additional information. Pressing the Info-Button<br />
again will return you to the Multi-EPG screen.<br />
Pressing the OK-Button in Multi-EPG mode will<br />
directly switch to the selected service.<br />
The Options-Buttons are mapped differently in this<br />
view, press the Help-Button to see an explanation.<br />
Pressing the EXIT-Button will quit the EPG.<br />
The green dot in the Infobar appears if the selected station transmits sub services.<br />
Attention: In PVR-Mode these buttons are used to control the digital recording.<br />
You can quit the Quickzap-Mode by either reentering<br />
this menu and pressing the green<br />
Options-Button again or by accessing the<br />
service list and selecting a new service by<br />
pressing the Navigation-Button up or<br />
down.<br />
Pressing the green Options-Button in TV or Radio<br />
mode will reveal the sub services menu.<br />
Use the Navigation-Buttons up and down to move<br />
to one of the sub services. Press the OK-Button to<br />
select.<br />
If you chose the option “Enable quickzap” (green<br />
Options-Button), you will stay in the sub services<br />
and can jump between the sub services by pressing<br />
the Navigation-Buttons left and right.<br />
The option „Add to Bouquet“ (yellow Options-<br />
Button) will add the selected service to a newly<br />
created or already existing Bouquet of your choice.<br />
See section Managing Services.
U s e r M a n u a l D r e a m b o x D M 6 0 0 PVR english<br />
17.3 Infobar – Audio tracks<br />
The yellow dot in the Infobar appears if the selected station transmits multiple Audio tracks.<br />
Pressing the yellow Options-Button in TV or Radio mode will reveal the audio menu of the<br />
service.<br />
Attention: In PVR-Mode these buttons are used to control the digital recording.<br />
17.4 Infobar - Plugins<br />
The blue dot in the info bar is always visible.<br />
.<br />
- 23 -<br />
Use the Navigation-Buttons up and down to move<br />
to desired audio track. Press the OK-Button to<br />
select.<br />
The contents of this menu will vary from service to<br />
service.<br />
Move to the option “Stereo”. Use the Navigation-<br />
Buttons left or right to choose the different audio<br />
modes, Left-Mono, Stereo, Right-Mono. Press the<br />
OK-Button to select.<br />
Pressing the blue Options-Button in TV or Radio mode will reveal the Plugins menu.<br />
Attention: In PVR-Mode these buttons are used to control the digital recording.<br />
The option Teletext - Software Decoder“ will open<br />
the service’s teletext.<br />
See section Teletext (TuxText).<br />
The options „Start/Stop NGrab recording“ are still in<br />
development and therefore will not be explained in<br />
detail.
U s e r M a n u a l D r e a m b o x D M 6 0 0 PVR english<br />
18. Setting OSD language<br />
If no OSD menu is visible on your screen, press the Menu-Button to open the main OSD<br />
menu. Navigate to the option “Setup” and press the OK-Button to select.<br />
.<br />
- 24 -<br />
Navigate to the option “System Settings” and press<br />
the OK-Button.<br />
The “System Settings” menu will open up.<br />
Navigate to the option “OSD Language” and press<br />
the OK-Button.<br />
The “OSD Language” menu will open up.<br />
Select your desired and language with the<br />
Navigation-Buttons up and down. Press the OK-<br />
Button to activate.<br />
The Exit-Button will quit this menu.
U s e r M a n u a l D r e a m b o x D M 6 0 0 PVR english<br />
19. Setting the time zone<br />
If no OSD menu is visible on your screen, press the Menu-Button to open the main OSD<br />
menu. Navigate to the option “Setup” and press the OK-Button to select.<br />
- 25 -<br />
Navigate to the option “System Settings” and press<br />
the OK-Button.<br />
The “System Settings” menu will open up.<br />
Navigate to the option “Time” and press the OK-<br />
Button.<br />
The “Time Settings” menu will open up.<br />
You can either set your time zone or manually<br />
adjust the time of you <strong>Dream</strong>box in this menu.<br />
Navigate to the option “Time Zone Setup” and press<br />
the OK-Button.
U s e r M a n u a l D r e a m b o x D M 6 0 0 PVR english<br />
.<br />
- 26 -<br />
The “Time Zone Setup” menu will open up.<br />
Press the OK-Button to get open the list of time<br />
zones.<br />
Select your desired and time zone with the<br />
Navigation-Buttons up and down. Press the OK-<br />
Button to activate.<br />
The time zone list will disappear and you current<br />
selection is shown as seen in the picture above.<br />
Navigate to the option “save” and press the OK-<br />
Button to save your settings. Optionally you can<br />
press the green Options-Button to save.<br />
You are taken back to the “Time” menu.
U s e r M a n u a l D r e a m b o x D M 6 0 0 PVR english<br />
19.1 Manual time correction<br />
Please read the section Setting the time zone to learn how to get into this menu.<br />
- 27 -<br />
Navigate to the option “Time Correction” and press<br />
the OK-Button.<br />
When entering this menu, please wait a second.<br />
The <strong>Dream</strong>box tries to receive the current time. The<br />
Transponder Time and Date will be automatically<br />
updated. If this fails, enter the new time and date<br />
manually.<br />
Navigate to the option “set” and press the OK-<br />
Button to save your settings. Optionally you can<br />
press the green Options-Button to save.<br />
You are taken back to the “Time Settings” menu.<br />
Pressing the Exit-Button will leave this menu.
U s e r M a n u a l D r e a m b o x D M 6 0 0 PVR english<br />
20. Signal strength (Adjusting your antenna, DM 600 PVR-T)<br />
If no OSD menu is visible on your screen, press the Menu-Button to open the main OSD<br />
menu. Navigate to the option “Setup” and press the OK-Button to select.<br />
- 28 -<br />
Navigate to the option “Service Searching” and<br />
press the OK-Button.<br />
Navigate to the option “Signalfind” and press the<br />
OK-Button.<br />
Press the OK-Button to select a transponder.<br />
Choose the region where you live in from the drop<br />
down menu „Region“ and press the OK-Button.<br />
Move your antenna around a bit and keep an eye on<br />
the SNR and SGC values. The higher they are the<br />
better the reception is.<br />
Pressing the Exit-Button will leave this menu.
U s e r M a n u a l D r e a m b o x D M 6 0 0 PVR english<br />
20.1 Disable 5V (DM 600 PVR-T)<br />
If no OSD menu is visible on your screen, press the Menu-Button to open the main OSD<br />
menu. Navigate to the option “Setup” and press the OK-Button to select.<br />
- 29 -<br />
Navigate to the option “Service Searching” and<br />
press the OK-Button.<br />
Navigate to the option “Disable 5V”.<br />
Press the OK-Button to set a check behind this<br />
option if you use a passive antenna.<br />
If you connected an active antenna and want to use<br />
it without its power supply, press the OK-Button to<br />
remove the check behind this option.
U s e r M a n u a l D r e a m b o x D M 6 0 0 PVR english<br />
20.2 Automatic transponder scan (DM 600 PVR-T)<br />
If no OSD menu is visible on your screen, press the Menu-Button to open the main OSD<br />
menu. Navigate to the option “Setup” and press the OK-Button to select.<br />
- 30 -<br />
Navigate to the option “Service Searching” and<br />
press the OK-Button.<br />
Navigate to the option “Automatic Transponder<br />
Scan” and press the OK-Button.<br />
Select the region you live in the drop down menu<br />
and press the OK-Button.
U s e r M a n u a l D r e a m b o x D M 6 0 0 PVR english<br />
- 31 -<br />
You now should see that a valid transponder has<br />
been found and the checkboxes in front of “LOCK”<br />
and “SYNC” should be checked.<br />
SNR:<br />
Signal to Noise Ratio<br />
AGC:<br />
Automatic Gain Control<br />
BER:<br />
Bit Error Rate (should be equals 0 if possible)<br />
only Free:<br />
If you check the checkbox in front of the “only Free”<br />
option, your <strong>Dream</strong>box will search on for FTA (nonencrypted)<br />
services.<br />
Press the green Options-Button to start searching.<br />
After you started searching you will see the progress<br />
bar and the estimated remaining time.<br />
Please wait until your <strong>Dream</strong>box finished searching<br />
for services.<br />
You can always abort the searching by pressing the<br />
Exit-Button several times.<br />
Once your <strong>Dream</strong>box is done searching you will see<br />
this menu on the right. A brief summary of the<br />
search is shown.<br />
Press the OK-Button to close this menu.
U s e r M a n u a l D r e a m b o x D M 6 0 0 PVR english<br />
20.3 Manual Transponder scan (DM 600 PVR-T)<br />
If no OSD menu is visible on your screen, press the Menu-Button to open the main OSD<br />
menu. Navigate to the option “Setup” and press the OK-Button to select.<br />
- 32 -<br />
Navigate to the option “Service Searching” and<br />
press the OK-Button.<br />
Navigate to the option “Manual Transponder Scan”<br />
and press the OK-Button.<br />
Enter the desired frequency with the Numeric<br />
Keypad on your remote control.<br />
Use the Navigation-Buttons to reach the individual<br />
options.<br />
Press the green Options-Button to start the scan.
U s e r M a n u a l D r e a m b o x D M 6 0 0 PVR english<br />
21. Automatic transponder scan (DM 600 PVR-C)<br />
If no OSD menu is visible on your screen, press the Menu-Button to open the main OSD<br />
menu. Navigate to the option “Setup” and press the OK-Button to select.<br />
- 33 -<br />
Navigate to the option “Service Searching” and<br />
press the OK-Button.<br />
Navigate to the option “Automatic Transponder<br />
Scan” and press the OK-Button.<br />
Select your cable provider in the drop down menu<br />
and press the OK-Button.
U s e r M a n u a l D r e a m b o x D M 6 0 0 PVR english<br />
- 34 -<br />
You now should see that a valid transponder has<br />
been found and the checkboxes in front of “LOCK”<br />
and “SYNC” should be checked.<br />
SNR:<br />
Signal to Noise Ratio<br />
AGC:<br />
Automatic Gain Control<br />
BER:<br />
Bit Error Rate (should be equals 0 if possible)<br />
Only free:<br />
If you check the checkbox in front of the “Only free”<br />
option, your <strong>Dream</strong>box will search on for FTA (nonencrypted)<br />
services.<br />
Press the green Options-Button to start searching.<br />
After you started searching you will see the progress<br />
bar and the estimated remaining time.<br />
Please wait until your <strong>Dream</strong>box finished searching<br />
for services.<br />
You can always abort the searching by pressing the<br />
Exit-Button several times.<br />
Once your <strong>Dream</strong>box is done searching you will see<br />
this menu on the right. A brief summary of the<br />
search is shown.<br />
Press the OK-Button to close this menu.
U s e r M a n u a l D r e a m b o x D M 6 0 0 PVR english<br />
21.1 Manual transponder scan (DM 600 PVR-C)<br />
If no OSD menu is visible on your screen, press the Menu-Button to open the main OSD<br />
menu. Navigate to the option “Setup” and press the OK-Button to select.<br />
- 35 -<br />
Navigate to the option “Service Searching” and<br />
press the OK-Button.<br />
Navigate to the option “Manual Transponder Scan”<br />
and press the OK-Button.<br />
Enter the desired frequency with the Numeric<br />
Keypad on your remote control.<br />
Use the Navigation-Buttons to reach the individual<br />
options.<br />
Press the green Options-Button to start the scan.
U s e r M a n u a l D r e a m b o x D M 6 0 0 PVR english<br />
22. Satfinder (Adjusting your dish, DM 600 PVR-S)<br />
If no OSD menu is visible on your screen, press the Menu-Button to open the main OSD<br />
menu. Navigate to the option “Setup” and press the OK-Button to select.<br />
- 36 -<br />
Navigate to the option “Service Searching” and<br />
press the OK-Button.<br />
Navigate to the option “Satfind” and press the OK-<br />
Button.<br />
Select the satellite and transponder in the drop down<br />
menu and press the OK-Button.<br />
Adjust the dish towards the desired satellite until you<br />
have a high value on the signal strength AGC and<br />
on the signal quality SNR indicator. The BER should<br />
always indicate a value of zero if the satellite is<br />
locked and synced.<br />
.
U s e r M a n u a l D r e a m b o x D M 6 0 0 PVR english<br />
23. Satellite configuration<br />
If no OSD menu is visible on your screen, press the Menu-Button to open the main OSD<br />
menu. Navigate to the option “Setup” and press the OK-Button to select.<br />
- 37 -<br />
Navigate to the option “Service Searching” and<br />
press the OK-Button.<br />
Navigate to the option “Satellite Configuration” and<br />
press the OK-Button.
U s e r M a n u a l D r e a m b o x D M 6 0 0 PVR english<br />
23.1 one single satellite – direct connection<br />
Use this type of configuration if you want to receive a single satellite with a Single Universal<br />
LNB. The coax cable is directly connected from you <strong>Dream</strong>box to the LNB. Please read the<br />
section Satellite configuration to learn how to get into this menu.<br />
- 38 -<br />
The “Satellite Configuration” menu will open up.<br />
Choose the upper drop down menu and press the<br />
OK-Button.<br />
A list of all possible configurations will show up.<br />
Select the “one single satellite” option and press the<br />
OK-Button.<br />
Choose the drop down menu „Sat/Position“ and<br />
press the OK-Button.<br />
A list of all available satellites will show up.<br />
Choose your desired satellite and press the<br />
OK-Button.<br />
Choose “save” and press the OK-Button.<br />
The configuration for “single satellite” is now done.<br />
The menu “Transponder scan” will show up. See<br />
sections Automatic transponder scan or<br />
Automatic multisat transponder scan for details.
U s e r M a n u a l D r e a m b o x D M 6 0 0 PVR english<br />
23.2 2 satellites via Toneburst<br />
Use this type of configuration if you want to receive two satellites from one LNB each. It does<br />
not matter if you use one or two dishes to achieve this. Connect the two coax cables form the<br />
two LNBs to a so-called Toneburst switch and connect the coax cable from the Toneburst<br />
switch to your <strong>Dream</strong>box. Please read the section Satellite configuration to learn how to<br />
get into this menu.<br />
- 39 -<br />
Choose the upper drop down menu and press the<br />
OK-Button.<br />
A list of all possible configurations will show up.<br />
Select the “2 satellites via Toneburst” option and<br />
press the OK-Button.<br />
Select your desired satellites as described in the<br />
one single satellite – direct connection section.<br />
Make sure you know which satellite is connected to<br />
which input on the Toneburst switch.<br />
If you do not find any services in the transponder<br />
scan later, exchange the two satellites in this list and<br />
try again.<br />
Choose “save” and press the OK-Button.<br />
The configuration for “2 satellites via Toneburst” is<br />
now done.<br />
The menu “Transponder scan” will show up. See<br />
sections Automatic transponder scan or<br />
Automatic multisat transponder scan for details.
U s e r M a n u a l D r e a m b o x D M 6 0 0 PVR english<br />
23.3 2 satellites via 22KHz (Highband only)<br />
Use this type of configuration if you want to receive two satellites from one LNB each. It does<br />
not matter if you use one or two dishes to achieve this. Connect the two coax cables form the<br />
two LNBs to a so-called 22kHz switch and connect the coax cable from the Toneburst switch<br />
to your <strong>Dream</strong>box. Please read the section Satellite configuration to learn how to get into<br />
this menu.<br />
- 40 -<br />
Choose the upper drop down menu and press the<br />
OK-Button.<br />
A list of all possible configurations will show up.<br />
Select the “2 satellites via 22kHz (Highband only)”<br />
option and press the OK-Button.<br />
Select your desired satellites as described in the<br />
one single satellite – direct connection section.<br />
Make sure you know which satellite is connected to<br />
which input on the 22kHz switch.<br />
If you do not find any services in the transponder<br />
scan later, exchange the two satellites in this list and<br />
try again.<br />
Choose “save” and press the OK-Button.<br />
The configuration for “2 satellites via 22kHz<br />
(Highband only)” is now done.<br />
The menu “Transponder scan” will show up. See<br />
sections Automatic transponder scan or<br />
Automatic multisat transponder scan for details.
U s e r M a n u a l D r e a m b o x D M 6 0 0 PVR english<br />
23.4 2 satellites via DiSEqC A/B<br />
Use this type of configuration if you want to receive two satellites from one Twin Universal or<br />
Quad Universal LNB. It does not matter if you use one or two dishes to achieve this. In this<br />
case the LNBs are connected to a so-called Multiswitch from which the signal is via coax<br />
cabled to the satellite receivers in your household. Please read the section Satellite<br />
configuration to learn how to get into this menu.<br />
- 41 -<br />
Choose the upper drop down menu and press the<br />
OK-Button.<br />
A list of all possible configurations will show up.<br />
Select the “2 satellites via DiSEqC A/B” option and<br />
press the OK-Button.<br />
Select your desired satellites as described in the<br />
one single satellite – direct connection section.<br />
Make sure you know which satellite is connected to<br />
which input.<br />
If you do not find any services in the transponder<br />
scan later, exchange the two satellites in this list and<br />
try again.<br />
Choose “save” and press the OK-Button.<br />
The configuration for “2 satellites via DiSEqC A/B” is<br />
now done.<br />
The menu “Transponder scan” will show up. See<br />
sections Automatic transponder scan or<br />
Automatic multisat transponder scan for details.
U s e r M a n u a l D r e a m b o x D M 6 0 0 PVR english<br />
23.5 4 satellites via DiSEqC OPT A/B<br />
Use this type of configuration if you want to receive four satellites from one Twin Universal or<br />
Quad Universal LNB. It does not matter if you use one or two dishes to achieve this. In this<br />
case the LNBs are connected to a so-called Multiswitch from which the signal is via coax<br />
cabled to the satellite receivers in your household. Please read the section Satellite<br />
configuration to learn how to get into this menu.<br />
.<br />
- 42 -<br />
Choose the upper drop down menu and press the<br />
OK-Button.<br />
A list of all possible configurations will show up.<br />
Select the “4 satellites via DiSEqC OPT A/B” option<br />
and press the OK-Button.<br />
Select your desired satellites as described in the<br />
one single satellite – direct connection section.<br />
Make sure you know which satellite is connected to<br />
which input.<br />
If you do not find any services in the transponder<br />
scan later, exchange the two satellites in this list and<br />
try again.<br />
Choose “save” and press the OK-Button.<br />
The configuration for “4 satellites via DiSEqC OPT<br />
A/B” is now done.<br />
The menu “Transponder scan” will show up. See<br />
sections Automatic transponder scan or<br />
Automatic multisat transponder scan for details.
U s e r M a n u a l D r e a m b o x D M 6 0 0 PVR english<br />
23.6 Many satellites via DiSEqC Rotor<br />
Use this type of configuration if you want to receive many satellites with a DiSEqC 1.2 Rotor<br />
or Stab from a Single Universal LNB. The coax cable is directly connected from you<br />
<strong>Dream</strong>box to the LNB. Please read the section Satellite configuration to learn how to get<br />
into this menu.<br />
- 43 -<br />
Choose the upper drop down menu and press the<br />
OK-Button.<br />
A list of all possible configurations will show up.<br />
Select the “Many satellites via DiSEqC Rotor” option<br />
and press the OK-Button.<br />
Edit the list of the satellites you can and want to<br />
receive. The order does not matter in this case. The<br />
number of satellites you can receive varies<br />
depending on your Rotor or Stab.<br />
Press the green Options-Button to save your<br />
settings. You will be taken back to the service<br />
searching menu.
U s e r M a n u a l D r e a m b o x D M 6 0 0 PVR english<br />
Hint:<br />
.<br />
- 44 -<br />
If you do not want to change the satellite position list<br />
before hand, just select the option “Single satellite –<br />
direct connection” and choose “Yes” in case you are<br />
prompted the message on the left.<br />
You will now see the configuration menu depicted<br />
on the right.<br />
Choose “Non standard – user defined configuration”<br />
in the upper drop down menu. Press the OK-<br />
Button.<br />
For now you will only see one satellite in the list.<br />
Please select LNB 0 and press the OK-Button.<br />
Astra 19.2° Ost is preset for your convenience.<br />
The sub menu “LNB configuration” will show up.<br />
Please change nothing here for now. Except in<br />
cause your coax cable to the LNB has a too high<br />
damping value you can check the checkbox in front<br />
of “Higher voltage”. Usually this is not necessary..<br />
Now please press the blue Options-Button to get<br />
to the next sub menu.
U s e r M a n u a l D r e a m b o x D M 6 0 0 PVR english<br />
W<br />
- 45 -<br />
As you can see, the „DiSEqC - Mode“ is not set yet.<br />
Please leave the “Toneburst” mode as it is.<br />
Press the number “2” on your Numeric Keypad and<br />
select the “DiSEqC – Mode” Version 1.2.<br />
To save the settings press the OK-Button.<br />
The menu will change and reveal additional options<br />
now.<br />
There is no need to change anything here.<br />
Press the green Options-Button to save the<br />
settings.<br />
You are taken back to the “Satellite configuration”<br />
menu.<br />
You can now use the yellow Options-Button to<br />
add more satellites.<br />
Once you are done press the green Options-<br />
Button to save your settings.<br />
You are now taken back to the “Transponder scan”<br />
menu.
U s e r M a n u a l D r e a m b o x D M 6 0 0 PVR english<br />
24. Motor Setup<br />
Use this type of configuration if you want to receive many satellites with a Rotor or Stab from<br />
a Single Universal LNB. The coax cable is directly connected from you <strong>Dream</strong>box to the<br />
LNB. Please read the section Satellite configuration to learn how to get into this menu.<br />
- 46 -<br />
Choose the drop down menu „Motor Setup“ and<br />
press the OK-Button.<br />
Refer to the Rotors Manual for correct values<br />
degrees/second.<br />
Visit the Website http://www.heavens-above.com to<br />
figure out your geographical location. Enter the<br />
values for Longitude and Latitude and press the<br />
green Option-Button to save you settings.<br />
Remove the check from the checkbox in front of<br />
“Use gotoXX function” to use a DiSEqC 1.2 Rotor<br />
like the SG2100 Rotor without USALS support.<br />
As you can see on the left, a new menu with new<br />
options will appear.
U s e r M a n u a l D r e a m b o x D M 6 0 0 PVR english<br />
For a better understanding please take a look<br />
at the Example table for the DiSEqC 1.2<br />
Rotor (SG2100). It is borrowed fomr the<br />
original manual.<br />
25. Example table for the DiSEqC 1.2 Rotor (SG2100)<br />
O = East, W = West (this table is not up to date, it is only for explanation)<br />
.<br />
- 47 -<br />
Take the list of preset satellite positions of your<br />
rotor, which can usually be found in the rotor’s<br />
manual and add each satellite that you want to<br />
receive in the list in the left.<br />
i.e.: Number 1 in the rotor is Hotbird 13° Ost<br />
You will have to enter a 1 in the “Number in rotor”<br />
field and a 130 in the “Orbital position” field.<br />
Press the yellow Options-Button to add the<br />
satellite to your list.<br />
An example table of 4 satellites is depicted on the<br />
left.<br />
Attention: You can later on only scan for services<br />
on satellites that you have entered in this list.<br />
Press the green Options-Button to save your<br />
settings.<br />
The menu “Transponder scan” will show up. See<br />
sections Automatic transponder scan or<br />
Automatic multisat transponder scan for details.
U s e r M a n u a l D r e a m b o x D M 6 0 0 PVR english<br />
26. Automatic transponder scan (DM 600 PVR-S)<br />
If no OSD menu is visible on your screen, press the Menu-Button to open the main OSD<br />
menu. Navigate to the option “Setup” and press the OK-Button to select.<br />
- 48 -<br />
Navigate to the option “Service Searching” and<br />
press the OK-Button.<br />
Navigate to the option “Automatic Transponder<br />
Scan” and press the OK-Button.<br />
This option is primarily used for only scanning a<br />
single satellite in your list.<br />
Please select the option “Automatic Multisat Scan” if<br />
you want to scan for services on all set satellites at<br />
once. See section Automatic Multisat Scan for<br />
details.<br />
Select one of the two satellites in the drop down<br />
menu and press the OK-Button.
U s e r M a n u a l D r e a m b o x D M 6 0 0 PVR english<br />
- 49 -<br />
You now should see that a valid transponder has<br />
been found and the checkboxes in front of “LOCK”<br />
and “SYNC” should be checked.<br />
SNR:<br />
Signal to Noise Ratio<br />
AGC:<br />
Automatic Gain Control<br />
BER:<br />
Bit Error Rate (should be equals 0 if possible)<br />
only Free:<br />
If you check the checkbox in front of the “only Free”<br />
option, your <strong>Dream</strong>box will search on for FTA (nonencrypted)<br />
services.<br />
No circular polarization:<br />
If you scan anything other than a C-Band satellite<br />
please check the checkbox.<br />
Press the green Options-Button to start searching.<br />
After you started searching you will see the progress<br />
bar and the estimated remaining time.<br />
Please wait until your <strong>Dream</strong>box finished searching<br />
for services.<br />
You can always abort the searching by pressing the<br />
Exit-Button several times.<br />
Once your <strong>Dream</strong>box is done searching you will see<br />
this menu on the right. A brief summary of the<br />
search is shown.<br />
Press the OK-Button to close this menu.
U s e r M a n u a l D r e a m b o x D M 6 0 0 PVR english<br />
- 50 -<br />
You will now be prompted if you want to scan another<br />
satellite. Press the green Options-Button if that is<br />
the case and you have setup another satellite in the<br />
satellite list.<br />
Press the red Options-Button to end the scan.<br />
You are taken back to the “Service searching” menu.
U s e r M a n u a l D r e a m b o x D M 6 0 0 PVR english<br />
27. Automatic multisat scan (DM 600 PVR-S)<br />
If no OSD menu is visible on your screen, press the Menu-Button to open the main OSD<br />
menu. Navigate to the option “Setup” and press the OK-Button to select.<br />
- 51 -<br />
Navigate to the option “Service Searching” and<br />
press the OK-Button.<br />
Navigate to the option “Automatic Multisat Scan”<br />
and press the OK-Button.<br />
This option will scan all satellites in your satellite list<br />
without asking you if you want to scan any other<br />
satellites.<br />
The transponder scan menu for a multisat scan will<br />
pop up.<br />
Pressing the OK-Button will change the scan option<br />
of the selected satellite.<br />
The options “nothing” means that the satellite is not<br />
scanned for any transponders.
U s e r M a n u a l D r e a m b o x D M 6 0 0 PVR english<br />
.<br />
- 52 -<br />
Pressing the OK-Button will toggle between the<br />
available scan options.<br />
Setting the multisat scan option to “all” will scan<br />
for all available services no matter if they are free<br />
or encrypted.<br />
Pressing the OK-Button will toggle between the<br />
available scan options.<br />
Setting the multisat scan option to “only free” will<br />
scan for all available services that are not<br />
encrypted.<br />
Pressing the OK-Button will toggle between the<br />
available scan options.<br />
Usually the “all” option is the best choice.<br />
Press the green Options-Button to start the<br />
scan.
U s e r M a n u a l D r e a m b o x D M 6 0 0 PVR english<br />
- 53 -<br />
The menu for the first scanned satellite is depicted<br />
on the left.<br />
The menu for the second scanned satellite is<br />
depicted on the left.<br />
Once your <strong>Dream</strong>box is done searching you will<br />
see this menu on the right. A brief summary of the<br />
search is shown.<br />
Press the OK-Button to close this menu.
U s e r M a n u a l D r e a m b o x D M 6 0 0 PVR english<br />
- 54 -<br />
The System will now ask you, if you want to scan<br />
any other transponders.<br />
Press the red Options-Button to quit the<br />
transponder scan.<br />
You are taken back to the “Service searching” menu.
U s e r M a n u a l D r e a m b o x D M 6 0 0 PVR english<br />
28. Manual transponder scan (DM 600 PVR-S)<br />
If no OSD menu is visible on your screen, press the Menu-Button to open the main OSD<br />
menu. Navigate to the option “Setup” and press the OK-Button to select.<br />
- 55 -<br />
Navigate to the option “Service Searching” and<br />
press the OK-Button.<br />
Navigate to the option “Manual Transponder Scan”<br />
and press the OK-Button.<br />
First choose the satellite you want to scan on with<br />
the OK-Button.<br />
Enter the transponder frequency with the Numeric<br />
Keypad on your remote control.<br />
Use the Navigation-Buttons left and right to<br />
switch between horizontal and vertical polarization<br />
and to change the FEC.<br />
Enter the symbol rate with the Numeric Keypad on<br />
your remote control.<br />
Press the green Options-Button to start the scan.
U s e r M a n u a l D r e a m b o x D M 6 0 0 PVR english<br />
29. Edit a transponder (DM 600 PVR-S)<br />
If no OSD menu is visible on your screen, press the Menu-Button to open the main OSD<br />
menu. Navigate to the option “Setup” and press the OK-Button to select.<br />
- 56 -<br />
Navigate to the option “Service Searching” and<br />
press the OK-Button.<br />
Navigate to the option “Transponder Edit” and press<br />
the OK-Button.<br />
This menu will let you edit the satellite and<br />
transponder lists that are used for the service scan.<br />
New transponders and satellites are usually<br />
announced in the Internet or in magazines.<br />
Press the red Options-Button to delete a satellite.<br />
Press the green Options-Button to add a satellite.<br />
Press the OK-Button to edit a satellite entry.
U s e r M a n u a l D r e a m b o x D M 6 0 0 PVR english<br />
Network search:<br />
The NIT holds the Information about the Satellites<br />
and the TV/Radio- Programs.<br />
(NIT = Network Information Table)<br />
Extended network search:<br />
Set a check to scan the NIT from other Transponders.<br />
Use BAT:<br />
Bouquet Tables of the Provider will be used, if<br />
available.<br />
(BAT = Bouquet Association Table)<br />
Press the green Options-Button to save your settings.<br />
You are taken back to the “Transponder” menu.<br />
.<br />
- 57 -<br />
Follow the instructions in this menu. Press the<br />
Navigation-Buttons to reach the desired option<br />
and use the OK-Button to change them.<br />
Navigate to the option “add” and press the OK-<br />
Button.
U s e r M a n u a l D r e a m b o x D M 6 0 0 PVR english<br />
- 58 -<br />
Through this menu you can a transponder to a<br />
satellite.<br />
Using the Numeric Keypad of your remote control<br />
enter the transponder frequency and symbol rate.<br />
Press the green Options-Button to save your<br />
settings.<br />
After you have made your changes to the<br />
transponder and satellite list, press the Exit-Button<br />
to leave the menu. You will be prompted if you want<br />
to save your changes.<br />
Press the green Options-Button to save your<br />
changes.<br />
Press the red Options-Button to discard your<br />
changes.<br />
You are taken back to the “Transponder scan”<br />
menu. Start the transponder scan to find services on<br />
newly added satellites or transponders.
U s e r M a n u a l D r e a m b o x D M 6 0 0 PVR english<br />
30. Service organizing – Adding a new Bouquet<br />
If no OSD menu is visible on your screen, press the Menu-Button to open the main OSD<br />
menu. Navigate to the option “Setup” and press the OK-Button to select.<br />
- 59 -<br />
Navigate to the option “Service Organizing” and<br />
press the OK-Button.<br />
Navigate to the option “Create new bouquet” and<br />
press the OK-Button.<br />
You are asked for the type of Bouquet you want to<br />
add.<br />
In our example we add a TV Bouquet.<br />
Press the OK-Button.
U s e r M a n u a l D r e a m b o x D M 6 0 0 PVR english<br />
- 60 -<br />
Using the Numeric Keypad on your remote control<br />
and pressing the numbers several times will let you<br />
choose the desired letters and numbers.<br />
Pressing the yellow Options-Button will toggle<br />
between capital and small letters.<br />
Pressing the blue Options-Button toggles between<br />
numeric and regular mode.<br />
Pressing the green Options-Button adds a space.<br />
Pressing the red Options-Button will act as a<br />
backspace.<br />
Pressing the OK-Button will take you back to the<br />
“Service organizing” screen.
U s e r M a n u a l D r e a m b o x D M 6 0 0 PVR english<br />
30.1 Service organizing – Adding services to an existing Bouquet<br />
Please read the section Service organizing – Adding a new Bouquet to learn how to get<br />
into this menu.<br />
- 61 -<br />
Navigate to the option “Add services to bouquet”<br />
and press the OK-Button.<br />
You are asked for the type of Bouquet you want to<br />
add.<br />
In our example we add a TV Bouquet.<br />
Press the OK-Button.<br />
You are asked in which Bouquet to place the<br />
service.<br />
We will use our freshly created “my new bouquet” in<br />
this example.<br />
Press the OK-Button.<br />
You can now choose whether to take a service from<br />
the provider list or service list or the new services<br />
list.<br />
Note: All services that were not found in your<br />
services list when you did an automatic transponder<br />
scan will be saved in the new services list.<br />
We will use the provider list in our example.<br />
Press the OK-Button.
U s e r M a n u a l D r e a m b o x D M 6 0 0 PVR english<br />
- 62 -<br />
The provider list will show up. In our example we<br />
will choose the provider “ARD”.<br />
Press the OK-Button.<br />
You now see the services that are provided by<br />
“ARD”.<br />
In our example we mark the service “Phoenix” by<br />
pressing the OK-Button.<br />
You can choose more than one service by<br />
selecting them and pressing the OK-Button. They<br />
will be highlighted in red text if selected.<br />
Pressing the Exit-Button will quit your selection.<br />
You are taken back to the “Service organizing”<br />
menu.
U s e r M a n u a l D r e a m b o x D M 6 0 0 PVR english<br />
30.2 Service organizing – Editing a Bouquet<br />
Please read the section Service organizing – Adding a new Bouquet to learn how to get<br />
into this menu.<br />
- 63 -<br />
Navigate to the option “Edit bouquets” and press the<br />
OK-Button.<br />
In our example we will edit a TV Bouquet.<br />
Press the OK-Button to edit the TV Bouquets.<br />
In our example we will edit our freshly created “my<br />
own bouquet” Bouquet.<br />
Select it and press the OK-Button.
U s e r M a n u a l D r e a m b o x D M 6 0 0 PVR english<br />
- 64 -<br />
Pressing the red Options-Button will delete the<br />
service from the Bouquet.<br />
Attention: This will happen without question if you<br />
really want to do it!<br />
Pressing the green Options-Button will pick up the<br />
selected service and enable you to move its position<br />
in the Bouquet. Pressing the green Options-Button<br />
again will release the service.<br />
Pressing the yellow Options-Buttons will let you<br />
rename the selected service. See section Service<br />
organizing – Adding a new Bouquet for details.<br />
Pressing the blue Options-Button will add a marker than you can name whatever you want it to be<br />
named. See section Service organizing – Adding a new Bouquet for details. This allows you to<br />
divide your Bouquet list into several sections.<br />
The above describes procedures also apply for Radio and File Bouquets.
U s e r M a n u a l D r e a m b o x D M 6 0 0 PVR english<br />
31. Parental lock and Setup lock<br />
If no OSD menu is visible on your screen, press the Menu-Button to open the main OSD<br />
menu. Navigate to the option “Setup” and press the OK-Button to select.<br />
- 65 -<br />
Navigate to the option “Parental lock” and press the<br />
OK-Button.<br />
You can activate the parental and setup lock in this<br />
menu. It prevents anyone else from having<br />
unauthorized access to certain services, videos and<br />
MP3s. It also offers the possibility to only make<br />
certain services available to your kids.<br />
These protection mechanisms are controlled by a<br />
four digit PIN that only is know to you.<br />
Attention:<br />
If you loose your PIN you will have to reset your<br />
<strong>Dream</strong>box to the factory defaults in order to<br />
deactivate any locks.
U s e r M a n u a l D r e a m b o x D M 6 0 0 PVR english<br />
31.1 Activating the parental lock<br />
Please read the section Parental lock and Setup lock to learn how to get into this menu.<br />
- 66 -<br />
Check the checkbox in front of “Parental lock” by<br />
pressing the OK-Button.<br />
The Option “Change PIN” will appear.<br />
Navigate to the option “Change PIN” and press the<br />
OK-Button.<br />
You also choose to hide all locked services form the<br />
service list by checking the checkbox in front of the<br />
“Hide locked services” option.<br />
Enter a four digit PIN with the Numeric Keypad on<br />
your remote control.<br />
Attention:<br />
Entering “0000” as your PIN will deactivate any<br />
locks. Please choose a PIN that differs from “0000”.<br />
Re-enter you PIN to make sure you entered the right<br />
one.
U s e r M a n u a l D r e a m b o x D M 6 0 0 PVR english<br />
- 67 -<br />
If everything went right you will be prompted that<br />
your PIN has been changed.<br />
Press the OK-Button.<br />
If the PIN you entered twice are not the same you<br />
will be prompted this error message.<br />
Pressing the green Options-Button will let you reenter<br />
your PIN and try again.<br />
Pressing the red Options-Button will abort.<br />
Press the green Options-Button to save your<br />
settings.<br />
You will be taken back to the “Setup” menu.
U s e r M a n u a l D r e a m b o x D M 6 0 0 PVR english<br />
31.2 Deactivating the parental lock<br />
Please read the section Parental lock and Setup lock to learn how to get into this menu.<br />
- 68 -<br />
Uncheck the checkbox in front of “Parental lock” by<br />
pressing the OK-Button. You will be prompted for<br />
your current PIN.<br />
Enter your PIN to deactivate the parental lock.<br />
The check in front of “Parental lock” is now gone.<br />
Press the green Options-Button to save your<br />
settings.<br />
You will be taken back to the “Setup” menu.
U s e r M a n u a l D r e a m b o x D M 6 0 0 PVR english<br />
31.3 Activating the setup lock<br />
Please read the section Parental lock and Setup lock to learn how to get into this menu.<br />
- 69 -<br />
Check the checkbox in front of “Setup lock” by<br />
pressing the OK-Button.<br />
The Option “Change PIN” will appear.<br />
Navigate to the option “Change PIN” and press the<br />
OK-Button.<br />
Enter a four digit PIN with the Numeric Keypad on<br />
your remote control.<br />
Attention:<br />
Entering “0000” as your PIN will deactivate any<br />
locks. Please choose a PIN that differs from “0000”.<br />
Re-enter you PIN to make sure you entered the right<br />
one.
U s e r M a n u a l D r e a m b o x D M 6 0 0 PVR english<br />
- 70 -<br />
If everything went right you will be prompted that<br />
your PIN has been changed.<br />
Press the OK-Button.<br />
If the PIN you entered twice are not the same you<br />
will be prompted this error message.<br />
Pressing the green Options-Button will let you reenter<br />
your PIN and try again.<br />
Pressing the red Options-Button will abort.<br />
Press the green Options-Button to save your<br />
settings.<br />
You will be taken back to the “Setup” menu.
U s e r M a n u a l D r e a m b o x D M 6 0 0 PVR english<br />
31.4 Deactivating the setup lock<br />
Please read the section Parental lock and Setup lock to learn how to get into this menu.<br />
- 71 -<br />
Uncheck the checkbox in front of “Setup lock” by<br />
pressing the OK-Button. You will be prompted for<br />
your current PIN.<br />
Enter your PIN to deactivate the setup lock.<br />
The check in front of “Setup lock” is now gone.<br />
Press the green Options-Button to save your<br />
settings.<br />
You will be taken back to the “Setup” menu.
U s e r M a n u a l D r e a m b o x D M 6 0 0 PVR english<br />
32. Locking a service<br />
Please read the section Parental lock and Setup lock to learn how activate the parental<br />
lock.<br />
- 72 -<br />
Press the OK-Button to open the service list.<br />
Navigate to the service you want to lock and press<br />
the Menu-Button.<br />
You can lock any entry of your choice in the service<br />
list. (All services, Satellites, Providers and<br />
Bouquets)<br />
Navigate to the option “Lock” and press the OK-<br />
Button to lock a service.<br />
You can also deactivate the parental lock in this<br />
menu. Navigate to the option “Parental lock” and<br />
press the OK-Button.<br />
You will prompted for<br />
your PIN.<br />
Once you have locked a service you will see the<br />
locked symbol next to its name in the service list.<br />
You will be prompted for your PIN every time you<br />
want to access the service from now on.
U s e r M a n u a l D r e a m b o x D M 6 0 0 PVR english<br />
33. Unlocking a service<br />
.<br />
.<br />
- 73 -<br />
Press the OK-Button to open the service list.<br />
Navigate to the service you want to unlock and<br />
press the Menu-Button.<br />
You can unlock any entry of your choice in the<br />
service list. (All services, Satellites, Providers and<br />
Bouquets)<br />
Navigate to the option “Unlock” and press the OK-<br />
Button to unlock a service.<br />
You will prompted for<br />
your PIN.<br />
Once you have unlocked a service you will he<br />
locked symbol next to its name in the service list will<br />
disappear.
U s e r M a n u a l D r e a m b o x D M 6 0 0 PVR english<br />
34. Audio/Video settings<br />
If no OSD menu is visible on your screen, press the Menu-Button to open the main OSD<br />
menu. Navigate to the option “Setup” and press the OK-Button to select.<br />
- 74 -<br />
Navigate to the option “System” and press the OK-<br />
Button.<br />
Navigate to the option “A/V settings” and press the<br />
OK-Button.
U s e r M a n u a l D r e a m b o x D M 6 0 0 PVR english<br />
Disable WSS on 4:3:<br />
Check the checkbox to disable zooming on<br />
some 16:9 TV’s during 4:3 transmissions.<br />
AC3 default output:<br />
If a program is transmitted with an AC3 audio<br />
track (e.g. Dolby Digital), the <strong>Dream</strong>box<br />
switches automatically to this audio track. The<br />
AC3 signal will only be available at the<br />
optical socket. The <strong>Dream</strong>box has no built-in<br />
Dolby Digital Decoder, AC3 signals are not<br />
available on the analog socket, therefor<br />
you need an external Dolby Digital Amplifier to<br />
adjust the volume.<br />
- 75 -<br />
Use the Navigation-Buttons left and right and the<br />
OK-Button to change the values.<br />
Color format:<br />
CVBS(FBAS), RGB (Red, Green, Blue separated),<br />
SVideo (Color- and Brightness signal separated) and<br />
YPbPr (Component signal e.g. for Projectors).<br />
Aspect ratio:<br />
4:3 Letterbox (Standard), (16:9 programs will be<br />
displayed on 4:3 TV’s with black beams at top and<br />
bottom)<br />
4:3 Panscan (16:9 programs will be zoomed to full<br />
high on 4:3 TV’s, parts of the picture on the left and<br />
right side will cut off)<br />
16:9 (programs transmitted in 16:9 will be displayed<br />
automatically in 16:9, on 4:3 TV’s the picture will be<br />
reduced in height)<br />
TV System:<br />
Choose the standard that your TV supports.<br />
PAL; PAL + PAL60; Multinorm and NTSC.<br />
Test:<br />
Press the blue Options-Button to activate the test<br />
screen mode. Press the number 1-8 on the Numeric<br />
Keypad to select a test screen. Press any other key<br />
to quit the test screen mode.<br />
Press the green Options-Button to save your<br />
settings.<br />
You will be taken back to the “System” menu.
U s e r M a n u a l D r e a m b o x D M 6 0 0 PVR english<br />
35. Keyboard<br />
If no OSD menu is visible on your screen, press the Menu-Button to open the main OSD<br />
menu. Navigate to the option “Setup” and press the OK-Button to select.<br />
- 76 -<br />
Navigate to the option “System Settings” and press<br />
the OK-Button.<br />
Navigate to the option “Keyboard Setup” and press<br />
the OK-Button.<br />
Press the OK-Button to open the drop down menu<br />
and select your desired keyboard layout.<br />
Press the green Options-Button to save your<br />
settings.
U s e r M a n u a l D r e a m b o x D M 6 0 0 PVR english<br />
36. OSD settings<br />
If no OSD menu is visible on your screen, press the Menu-Button to open the main OSD<br />
menu. Navigate to the option “Setup” and press the OK-Button to select.<br />
- 77 -<br />
Navigate to the option “System Settings” and press<br />
the OK-Button.<br />
Navigate to the option “OSD settings” and press the<br />
OK-Button.
U s e r M a n u a l D r e a m b o x D M 6 0 0 PVR english<br />
- 78 -<br />
Using the Navigation-Buttons left and right you can<br />
change the transparency, brightness and contrast<br />
settings of the OSD (On Screen Display).<br />
Alpha:<br />
The “Alpha” option controls how strong you will see<br />
the TV picture through the OSD menu.<br />
Brightness:<br />
Changes the brightness of the OSD menu.<br />
Contrast:<br />
Changes the contrast of the OSD menu.<br />
Show main menu as list box:<br />
Check the checkbox if you want to view the main OSD<br />
menu like all other menus, as a list box.<br />
Change skin:<br />
See section Skin Setup<br />
TuxText Position:<br />
See section Setting the Teletext position<br />
Press the green Options-Button to save your<br />
settings.<br />
You will be taken back to the “System” menu.
U s e r M a n u a l D r e a m b o x D M 6 0 0 PVR english<br />
36.1 Skin Setup<br />
Please read the section OSD settings to learn how to get into this menu.<br />
- 79 -<br />
A skin changes the appearance of the OSD.<br />
Choose the skin to your liking and press the OK-<br />
Button to select it.<br />
The standard skin is Screwed Stone.<br />
See section Available skins for a complete list of<br />
available skins.<br />
To completely activate a skin Enigma has to be<br />
restarted.<br />
Make your choice and press the green Options-<br />
Button to activate the skin.<br />
Press the red Options-Button to discard any<br />
changes.
U s e r M a n u a l D r e a m b o x D M 6 0 0 PVR english<br />
36.2 Available Skins<br />
Bluenigma BIG<br />
Neutrino-style<br />
Carbon<br />
Simple and Stylish<br />
The skin Simple and Stylish 16:9 looks just<br />
like the Simple and Stylish skin. It is only<br />
optimized for a 16:9 TV screen.<br />
- 80 -<br />
Silver Metal<br />
Screwed Stone<br />
BlueQT
U s e r M a n u a l D r e a m b o x D M 6 0 0 PVR english<br />
36.3 Setting the teletext (TuxText) position<br />
Please read the section OSD settings to learn how to get into this menu.<br />
What is TuxText? TuxText is a Plugin (additional Software), which allows the <strong>Dream</strong>box to<br />
decode the digital Teletext. TuxText is faster and easier to use than the regular teletext that<br />
is build in to your TV screen.<br />
This menu is used to adjust the position of the TuxText. Maybe the clock does not appear or<br />
the text pages are not shown in the middle of the screen.<br />
Attention:<br />
If you don’t see any rectangle, then they are<br />
out of range. Please adjust the rectangle<br />
towards the middle of the screen..<br />
- 81 -<br />
Press the yellow Options-Button to enter the<br />
TuxText position setup.<br />
You see the blue screen as depicted on the left.<br />
Press the red Options-Button to select the upper<br />
left corner.<br />
Use the Navigation-Buttons to move the rectangle<br />
in the upper left corner.<br />
Press the green Options-Button to select the lower<br />
right corner.<br />
Use the Navigation-Buttons to move the rectangle<br />
in the lower right corner.<br />
Once the positions are set press the OK-Button to<br />
save the settings.
U s e r M a n u a l D r e a m b o x D M 6 0 0 PVR english<br />
- 82 -<br />
Press the green Options-Button to save your<br />
settings.<br />
You will be taken back to the “System” menu.
U s e r M a n u a l D r e a m b o x D M 6 0 0 PVR english<br />
37. Teletext (TuxText)<br />
What is TuxText? TuxText is a Plugin (additional Software), which allows the <strong>Dream</strong>box to<br />
decode the digital Teletext. TuxText is faster and easier to use than the regular teletext that<br />
is build in to your TV screen.<br />
TuxText navigation:<br />
- 83 -<br />
You are in the TV or Radio mode.<br />
Press the TEXT-Button to activate the Teletext.<br />
Keep in mind that not every station submits teletext!<br />
Alternative: Press the blue Options-Button to enter<br />
the Plugins menu.<br />
You will see the menu depicted on the left.<br />
Navigate to the option “Teletext” and press the OK-<br />
Button.<br />
Press the OK-Button to enter the interactive mode. Use the Navigation-Buttons to select a text page<br />
and press the OK-Button to call this site. You don’t need to type in a Text page number in this mode,<br />
but it is still possible.<br />
Press the EXIT-Button to exit.<br />
Press the Mute-Button a couple of times to toggle between alpha-mode, invisible-mode and full<br />
mode. The alpha-mode shows the picture from the running program through the Text pages. The<br />
invisible-mode shows the complete picture from the running program without exiting the TuxText. The<br />
full-mode brings back the text page.<br />
Press the Volume-up-Button to toggle between double high from the upper half, double high from the<br />
lower half and full view Text page.<br />
Press the Volume-down-Button to activate or deactivate the PIG-Mode (Picture in Graphics). Same<br />
view from Text page and Program picture. (best results are show on 16:9 TV’s during 4:3<br />
transmission).
U s e r M a n u a l D r e a m b o x D M 6 0 0 PVR english<br />
TuxText configuration menu:<br />
If teletext page 100 is shown you can press the MENU-Button to enter the configuration menu of the<br />
TuxText.<br />
You have the following options:<br />
Teletext - Selection:<br />
Use the Navigation-Button left or right to choose another teletext provider from the current<br />
transponder and press the OK-Button to view.<br />
This option is only available if there is more than one station on the current provider that transmit<br />
teletext.<br />
Aspect ratio:<br />
16:9 im Standard-Modus = ein/aus (16:9 during Standard-Mode = enable/disable)<br />
Enabling this shows the TuxText in 16:9 Aspect Ratio. Press the OK-Button to enable or disable this<br />
option. The default setting is disabled.<br />
16:9 im TextBild-Modus = ein/aus (16:9 during TextPicture-Mode = enable/disable)<br />
Enabling this, switches the TV to 16:9 Aspect Ratio if the PIG-Mode is activated with the Volumedown-Button.<br />
Press the OK-Button to enable or disable this option. The default setting is disabled.<br />
Note:<br />
On some older 4:3 TV’s these Modes may not work. If enabled, it could happen, that your TV switches<br />
away from the VCR or A/V socket. The reason is a technical problem. The Switch signal on the Scart<br />
connector is at PIN 8 using 12 Volts. Using a 16:9 Aspect Ratio switches the PIN 8 to 6 Volts, which<br />
some older 4:3 TV’s can not handle. If you are using a 4:3 TV, we suggest not to enable these modes.<br />
Brightness:<br />
Here you can adjust the brightness of your Teletext. Press the Navigation-Buttons left or right to<br />
adjust the brightness.<br />
Alpha:<br />
Here you can adjust the alpha value of your Teletext. Press the Navigation-Buttons left or right to<br />
adjust the alpha value.<br />
National codepage:<br />
automatische Erkennung = ein/aus (automatic detection = enable/disable)<br />
The national codepage detection is used to display the teletextpages with the right letters for your<br />
location. Press the OK-Button to enable or disable this option. The default setting is enabled. If<br />
disabled, use the Navigation-Buttons left or right, to choose your codepage.<br />
Additional information can be found at www.tuxtxt.net<br />
- 84 -
U s e r M a n u a l D r e a m b o x D M 6 0 0 PVR english<br />
38. Expert setup<br />
If no OSD menu is visible on your screen, press the Menu-Button to open the main OSD<br />
menu. Navigate to the option “Setup” and press the OK-Button to select.<br />
- 85 -<br />
Navigate to the option “Expert Setup” and press the<br />
OK-Button.<br />
Serviceselector help buttons:<br />
Press the OK-Button to turn the colored help<br />
buttons off. The default setting is enabled.<br />
Show Sat position:<br />
Putting a check behind this option by pressing the<br />
OK-Button will show the sat position of the current<br />
station in the Infobar.<br />
Enable Fast zapping:<br />
Pressing the OK-Button will remove the check<br />
behind this option. Switching stations will be a few<br />
nano seconds slower.<br />
Skip confirmations:<br />
Press the OK-Button to put a check behind this<br />
option. No more confirmation windows will be<br />
shown. Be careful with this option. The System does<br />
not ask anymore, if you would like to see the<br />
recorded movie after stopping recording nor if you<br />
would like to really delete a movie. The default<br />
setting is disabled.
U s e r M a n u a l D r e a m b o x D M 6 0 0 PVR english<br />
- 86 -<br />
Hide error windows:<br />
If enabled no more error messages, i.e.: service not<br />
found, will be shown.<br />
Automatically show Infobar:<br />
If enabled the Infobar will be shown every time a new<br />
show starts.<br />
Show remaining Time:<br />
If enabled the remaining time rather than the total time<br />
of the running show will be displayed in the Infobar.<br />
Use http authentification:<br />
If disabled you will no more need a username and<br />
password to access the web interface of your<br />
<strong>Dream</strong>box.<br />
Do not open serial interface:<br />
If enabled no more debug messages will be send from<br />
Enigma to the serial interface.<br />
Auto bouquet change:<br />
If enabled your <strong>Dream</strong>box will automatically jump to<br />
the next Bouquet once you have reached the last<br />
entry in a Bouquet.<br />
Disable teletext caching:<br />
If enabled no more background caching of teletext<br />
pages will happen.<br />
Enable Zapping History:<br />
If enabled you are able to switch to a different service<br />
type in the file mode.<br />
Press the Exit-Button to quit this menu.
U s e r M a n u a l D r e a m b o x D M 6 0 0 PVR english<br />
38.1 Communication setup (Setting up LAN, NFS shares)<br />
Please read the section Expert setup to learn how to get into this menu.<br />
- 87 -<br />
Navigate to the option “Communication setup” and<br />
press the OK-Button.
U s e r M a n u a l D r e a m b o x D M 6 0 0 PVR english<br />
Attention:<br />
If you are using a DHCP server in your LAN,<br />
configure the DHCP server so it does not<br />
assign the IP address used by the <strong>Dream</strong>box.<br />
Otherwise an IP address collision is possible.<br />
Refer to the DHCP server’s manual about how<br />
to configure a DHCP address pool.<br />
Port:<br />
Enter a port number of your choice to configure<br />
the HTTP port for the <strong>Dream</strong>box’s web<br />
interface.The default port is 80.<br />
If the default port is set you can simply enter<br />
http://ip-of-your-box into the address bar of you<br />
browser to access the web interface. Otherwise<br />
you have to enter http://ip-of-yourbox:portnumber<br />
- 88 -<br />
Use the Navigation-Buttons and the Numeric<br />
Keypad to enter or change the values.<br />
IP:<br />
Enter the IP address here.<br />
DHCP:<br />
If enabled your <strong>Dream</strong>box will get its IP from a DHCP<br />
server. Disable this option to set a static IP address.<br />
Netmask:<br />
Enter the subnet mask (Usually 255.255.255.0).<br />
Type:<br />
LAN (Local Area Network); Connection to the home<br />
Network. The default setting is LAN.<br />
WAN/PPPoE (Wide Area Network) / (Point-to-Point<br />
Protocol over Ethernet); Direct Connection to the<br />
Internet, (e.g. DSL Modem directly connected to the<br />
<strong>Dream</strong>box). Please proceed to next passage for<br />
WAN settings<br />
Nameserver:<br />
Enter the DNS-Server’s IP address here. DNS is used<br />
to translate a Domain name to an IP address.<br />
Normally, if the Type is set to LAN, there is no need<br />
for a DNS entry. If the <strong>Dream</strong>box is connected to the<br />
Internet over a router, enter the router’s IP address<br />
Here.<br />
Gateway:<br />
Enter the router’s IP address here, if the <strong>Dream</strong>box<br />
is connected to the Internet over a router.<br />
Activate network:<br />
Setting a check enables the network. The default<br />
setting is disabled.<br />
Press the green Options-Button to save your<br />
settings.
U s e r M a n u a l D r e a m b o x D M 6 0 0 PVR english<br />
Checking the checkbox in front of the option<br />
“Automount” will automatically mount the<br />
selected NFS share at the next boot of your<br />
<strong>Dream</strong>box.<br />
Press the green Options-Button to test the<br />
mount. You will get a system message if it was<br />
successful or not.<br />
Press the yellow Options-Button to save you<br />
settings.<br />
Press the red Options-Button to unmount the<br />
selected NFS share.<br />
Navigate between the 8 possible shares by<br />
using the Navigation-Buttons left or right.<br />
- 89 -<br />
Pressing the blue Options-Button in the<br />
“Communication setup” menu will take you to the<br />
“Mount Manager” menu. You can setup up to eight<br />
different configurations to connect your <strong>Dream</strong>box to<br />
shared folders on your PC. Right now only NFS<br />
sharing is supported.<br />
IP:<br />
IP address of the NFS server you want to access.<br />
NFS:<br />
Right now only the option NFS is available. Once<br />
more share types are supported you can select the<br />
type in this drop down menu.<br />
Dir:<br />
Enter the name of the NFS share on the NFS server<br />
that you want to access.<br />
LocalDir:<br />
The default setting is /mnt and does not need to be<br />
changed unless you want to add more than one<br />
share. Adding more than one share requires you to<br />
create several sub directories via telnet on your<br />
<strong>Dream</strong>box. The suggestion is to create /varmnt1 to<br />
/var/mnt8<br />
Options:<br />
Either choose the option “rw” to have read and write<br />
access or choose the option “ro” to have read-only<br />
access to the NFS share.<br />
Extra:<br />
You can add additional mount parameters here. You<br />
have to know what you are doing otherwise leave this<br />
setting alone.
U s e r M a n u a l D r e a m b o x D M 6 0 0 PVR english<br />
38.2 NGrab - Streaming Setup<br />
Please read the section Expert setup to learn how to get into this menu.<br />
In this menu you can set the IP address and port number of the NGrab server. The server<br />
can be running on any workstation or server in the LAN or WAN.<br />
- 90 -<br />
Navigate to the option “NGrab-Streaming” and press<br />
the OK-Button.<br />
Srv IP:<br />
Enter the IP address of the server or workstation<br />
running the NGrab software.<br />
Srv Port:<br />
Enter the port number of the server or workstation<br />
running the NGrab software.<br />
Srv MAC:<br />
The MAC address of the NGrab server will show once<br />
you have it running and press the blue Options-<br />
Button.<br />
The MAC address is needed for the WOL (Wake On<br />
LAN) function of the server. The server needs to fully<br />
support APM (Advanced Power Management) and<br />
WOL to use this function.<br />
Press the green Options-Button to save your<br />
settings.<br />
You will be taken to the “Expert setup” menu.
U s e r M a n u a l D r e a m b o x D M 6 0 0 PVR english<br />
38.3 Manual software update<br />
Please read the section Expert setup to learn how to get into this menu.<br />
- 91 -<br />
Navigate to the option “Software update” and press<br />
the OK-Button.<br />
Navigate to the option “Manual update” and press<br />
the OK-Button.<br />
Requirements for the manual update:<br />
You have set an IP address and subnet mask in the<br />
“Communication setup” menu.<br />
Follow the instructions on your screen.<br />
Press the green Options-Button to start the<br />
update.<br />
Follow the instructions on your screen.
U s e r M a n u a l D r e a m b o x D M 6 0 0 PVR english<br />
38.4 Remote control setup<br />
Please read the section Expert setup to learn how to get into this menu.<br />
- 92 -<br />
Navigate to the option “Remote control” and press<br />
the OK-Button.<br />
This Menu is used to customize the remote control<br />
for your needs.<br />
Use the Navigation-Buttons left or right to adjust<br />
the Repeat Rate and the Repeat Delay.<br />
Press the green Options-Button to save your<br />
settings.<br />
You will be taken back to the “Expert” menu.
U s e r M a n u a l D r e a m b o x D M 6 0 0 PVR english<br />
38.5 Reset to factory defaults<br />
Please read the section Expert setup to learn how to get into this menu.<br />
- 93 -<br />
Navigate to the option “Remote control” and press<br />
the OK-Button.<br />
Follow the instructions on the screen and pick your<br />
choice.
U s e r M a n u a l D r e a m b o x D M 6 0 0 PVR english<br />
39. Hard disk Management<br />
If no OSD menu is visible on your screen, press the Menu-Button to open the main OSD<br />
menu. Navigate to the option “Setup” and press the OK-Button to select.<br />
- 94 -<br />
Navigate to the option “System” and press the OK-<br />
Button.<br />
Navigate to the option “Hard disk” and press the<br />
OK-Button.<br />
Navigate to the option “Samsung SV8004H<br />
(master 78.188 GB)” and press the OK-Button.<br />
If you have installed another hard disk this option will<br />
differ from the one depicted.
U s e r M a n u a l D r e a m b o x D M 6 0 0 PVR english<br />
39.1 Hard disk formatting<br />
Please read the section Hard disk Management to learn how to get into this menu.<br />
- 95 -<br />
The Hard disk Management dialog will open up.<br />
Press the red Options-Button to format the Hard<br />
disk.<br />
Press the yellow Options-Button to run a Hard<br />
disk check.<br />
Press the Exit-Button to quit.<br />
You will be asked if you really want to format the<br />
Hard disk. Press the red Options-Button to abort.<br />
Press the green Options-Button to start<br />
formatting the Hard disk.
U s e r M a n u a l D r e a m b o x D M 6 0 0 PVR english<br />
40. Instant recording<br />
The <strong>Dream</strong>box DM 600PVR offers you several methods to record a film. The standard<br />
solution is recording onto a built-in hard disk. Additionally you can record via Ethernet using<br />
a so called NFS mount or a NGrab server, if you have no hard disk installed in your<br />
<strong>Dream</strong>box. Right now we assume that you have installed a hard disk in your <strong>Dream</strong>box.<br />
Attention:<br />
The Infobar will disappear after a short period to<br />
time. Press the OK-Button to reveal it again.<br />
Keep in mind that you have to be in the PVR-Mode to use In PVR-Mode the Options-Buttons are mapped<br />
these options. You can check this by pressing the OK-Button. as described below:<br />
The Infobar will reveal and should show the depicted Red Options-Button = Rewind<br />
control symbols. If they are not shown you simply have Green Options-Button = Play<br />
to press the VIDEO-Button once again.<br />
Yellow Options-Button = Pause<br />
Blue Options-Button = Forward<br />
TV-Button = Stop<br />
The Infobar does not have to be visible to use the<br />
PVR-Mode.<br />
Select a TV or Radio station from the service list. Activate the PVR Mode by pressing the<br />
Radio-Button (Record). The recording is indicated by a flashing symbol in the Infobar.<br />
During recording you can watch another recording or another channel.<br />
Pressing the Up/Down-Buttons on your remote control activates the service list.<br />
The recording will continue in the background.<br />
- 96 -<br />
Press the VIDEO-Button to access the PVR mode.<br />
During replay you can see the control symbols in<br />
the Infobar.<br />
You can see the control symbols for the PVR-<br />
Mode on you remote control below the Options-<br />
Buttons.
U s e r M a n u a l D r e a m b o x D M 6 0 0 PVR english<br />
40.1 Stop recording<br />
- 97 -<br />
Press the TV-Button again and you will be asked if<br />
you want to stop the recording.<br />
Use the Navigation-Buttons up and down to select.<br />
Press the OK-Button to activate. Otherwise you can<br />
press the green Options-Button for “Yes”.<br />
or the red Options-Button for ”No”.<br />
After you quit the recording you will be asked if you<br />
want to view the recorded film.<br />
Use the Navigation-Buttons up and down to select.<br />
Press the OK-Button to activate. Otherwise you can<br />
press the green Options-Button for “Yes”.<br />
or the red Options-Button for ”No”.<br />
If you have selected “Yes” you will be taken to the<br />
File-Mode (Recorded films). Here you can see a list<br />
of all your recordings.<br />
Use the Navigation-Buttons up and down to select.<br />
Press the OK-Button to watch a recording.<br />
During replay you can see the control symbols in the<br />
Infobar.<br />
Press the Navigation-Buttons up and down or the<br />
Video-Button to get back to the list of recordings.
U s e r M a n u a l D r e a m b o x D M 6 0 0 PVR english<br />
40.2 Watch a recording<br />
If no OSD menu is visible on your screen, press the Menu-Button to open the main OSD<br />
menu. Navigate to the option “File Mode” and press the OK-Button to.<br />
Alternatively you can press the TV-Button or use the Up/Down-Buttons while in TV-Mode<br />
to open up the service list. While the service list shows, press the Text-Button to get into the<br />
File-Mode as well.<br />
- 98 -<br />
Use the Navigation-Buttons up and down to select.<br />
Press the OK-Button to watch a recording.<br />
During replay you can see the control symbols in the<br />
Infobar.<br />
Press the Navigation-Buttons up and down or the<br />
Video-Button to get back to the list of recordings.
U s e r M a n u a l D r e a m b o x D M 6 0 0 PVR english<br />
40.3 Delete a recording<br />
If no OSD menu is visible on your screen, press the Menu-Button to open the main OSD<br />
menu. Navigate to the option “File Mode” and press the OK-Button to.<br />
Alternatively you can press the TV-Button or use the Up/Down-Buttons while in TV-Mode<br />
to open up the service list. While the service list shows, press the Text-Button to get into the<br />
File-Mode as well.<br />
- 99 -<br />
Use the Navigation-Buttons up and down to select.<br />
Press the Menu-Button to access the “Service<br />
menu”.<br />
Use the Navigation-Buttons up and down to select<br />
“Delete” and press the OK-Button.<br />
You will be asked if you want to delete the recording.<br />
Choose “Yes” and you will be taken back to the<br />
selection of recordings.
U s e r M a n u a l D r e a m b o x D M 6 0 0 PVR english<br />
40.4 Rename a recording<br />
Please read the section Delete a recording to learn how to get into this menu.<br />
- 100 -<br />
Navigate to the option “Rename” and press the<br />
OK-Button.<br />
By repeatedly pressing the buttons of the Numeric-<br />
Keypad you can select the letters.<br />
The yellow Options-Button toggles between capital<br />
and small letters.<br />
The Volume + Button adds a blank.<br />
The Volume – Button deletes the selected letter.<br />
Use the Left/Right-Buttons to get to the desired<br />
position.<br />
Press the blue Options-Button to toggle between<br />
numeric and letter character set.<br />
Press the OK-Button to save and quit.
U s e r M a n u a l D r e a m b o x D M 6 0 0 PVR english<br />
41. Recording by timer and EPG<br />
- 101 -<br />
If no OSD menu is visible on your screen, press the<br />
TV-Button to open the service list.<br />
Press the INFO-Button.<br />
Alternatively you can press the red Options-Button<br />
to directly access the station’s EPG.<br />
Select “Channel EPG” and press the OK-Button.<br />
In this dialog the Options-Buttons are mapped<br />
differently!<br />
Press the Help-Button to get additional information<br />
about possible timer options.
U s e r M a n u a l D r e a m b o x D M 6 0 0 PVR english<br />
Achtung:<br />
Für die NGrab Aufnahme ist es notwendig, das<br />
Netzwerk konfiguriert und die NGrab Software<br />
eingerichtet zu haben.<br />
Drücken Sie die EXIT-Taste oder die OK-<br />
Taste, um das Fenster zu schließen.<br />
- 102 -<br />
Press the green Options-Button to add the selected<br />
show as hard disk recording to the timer list.<br />
Press the yellow Options-Button to add the<br />
selected show as NGrab recording to the timer list.<br />
Press the blue Options-Button to add the<br />
selected show as switch only timer to the timer list.<br />
Press the red Options-Button to delete the<br />
selected timer.<br />
Select a show that you would like to record.<br />
Press the green Options-Button.<br />
The “Timer edit” menu will open up.<br />
Use the Navigation-Buttons to access the options<br />
and press the OK-Button to open up any drop-downmenus.
U s e r M a n u a l D r e a m b o x D M 6 0 0 PVR english<br />
- 103 -<br />
The DVR-Recording menu gives you the same<br />
options that were described above by pressing the<br />
Options-Buttons.<br />
Switch – Switch only timer<br />
DVR-Recording – Record to hard disk<br />
NGrab – NGrab Ethernet recording<br />
The “nothing” drop-down-menu gives you the<br />
ability to choose what should happen after the<br />
recording finished.<br />
Standby – Your <strong>Dream</strong>box will go into Standby<br />
mode after the recording finished.<br />
Shutdown – Your <strong>Dream</strong>box will go into Deep-<br />
Standby mode after the recording finished.<br />
Press the green Options-Button to save the<br />
settings.<br />
After you have set a timer you will be taken back to<br />
the EPG view.<br />
The timer is indicated by the clock symbol in the<br />
EPG.<br />
Press the Exit-Button to leave the EPG.
U s e r M a n u a l D r e a m b o x D M 6 0 0 PVR english<br />
41.1 Setting Sub Service timers using the EPG<br />
The process is exactly the same as in the chapter before. The difference however is that you<br />
choose a service that offers sub services and press the red Options-Button to access the<br />
EPG. Afterwards press the green Options-Button to add it as a DVR-Recording. The “Timer<br />
edit” menu will open up.<br />
42. Timeshift<br />
- 104 -<br />
The Sub Service menu will open up. Select the<br />
Sub Service that you want to record and press the<br />
OK-Button.<br />
After you have set a timer you will be taken back to<br />
the EPG view.<br />
The timer is indicated by the clock symbol in the<br />
EPG.<br />
Press the Exit-Button to leave the EPG.<br />
Once you started an instant recording you can fast-forward and rewind while recording as<br />
long as you have already recorded at least 1 minute long.<br />
Press the yellow Options-Button to pause the screen (video and audio will pause). The<br />
recording will continue in the background. Press the yellow Options-Button again to<br />
resume watching.<br />
This way you won’t have to miss anything ever again if you quickly have to catch a phone<br />
call.<br />
The Timeshift-Mode can be exited by pressing the TV-Button.
43. Timer<br />
U s e r M a n u a l D r e a m b o x D M 6 0 0 PVR english<br />
If no OSD menu is visible on your screen, press the Menu-Button to open the main OSD<br />
menu. Navigate to the option “Timer” and press the OK-Button to select.<br />
- 105 -<br />
This is the timer list.<br />
You can see a timer event that has been entered as<br />
an example.<br />
A green checkmark in front of the timer event means<br />
that is has been successfully executed.<br />
A red cross in front of the timer event means that is<br />
has been aborted or not executed at all.<br />
Sleeptimer events are also shown in this list and can<br />
be edited or deleted here.<br />
Press the blue Options-Button to clean up the timer<br />
list.<br />
We suggest only adding timer event through the<br />
EPG. This timer list is mainly meant for management<br />
purposes.
U s e r M a n u a l D r e a m b o x D M 6 0 0 PVR english<br />
44. Information - Streaminformation<br />
If no OSD menu is visible on your screen, press the Menu-Button to open the main OSD<br />
menu. Navigate to the option “Information” and press the OK-Button to select.<br />
This window shows detailed<br />
technical data about the<br />
current service.<br />
- 106 -<br />
Navigate to the option “Stream information” and<br />
press the OK-Button.<br />
Use the Navigation-Buttons left and right to<br />
switch between the three windows.<br />
Pressing the Exit-Button will close this window.<br />
This window shows information<br />
about the used and/or<br />
supported encryption types.<br />
This window shows the additional technical data of the<br />
current service.The left picture shows the DM 600 PVR-<br />
S, the middle one the DM 600 PVR-T<br />
and the right one the DM 600 PVR-C
U s e r M a n u a l D r e a m b o x D M 6 0 0 PVR english<br />
45. Information - About<br />
Please read the section Information – Streaminformation to learn how to get into this<br />
menu.<br />
- 107 -<br />
Navigate to the option “About…” and press the OK-<br />
Button.<br />
This window summarizes all relevant information<br />
about the system.<br />
Press the green Options-Button to close the<br />
window.<br />
The Information „Tuner:“ depends on the type of your<br />
<strong>Dream</strong>box DM 600 PVR:<br />
DM 600 PVR-S: Satellite<br />
DM 600 PVR-C: Cable<br />
DM 600 PVR-T: Terrestrial
U s e r M a n u a l D r e a m b o x D M 6 0 0 PVR english<br />
46. Troubleshooting<br />
Problem<br />
No audio, no video, LCD lit<br />
Beamlike blackouts in the video<br />
No reception on a channel that<br />
was working before<br />
No reception of the channels:<br />
Sat1, Pro7, Kabel …<br />
You cannot record anything<br />
anymore<br />
Remote control is not working<br />
Possible cause<br />
Solution<br />
Faulty wiring Check wiring and connections<br />
Faulty LNB<br />
Exchange LNB<br />
Wrong Tuner setting Review settings<br />
Dish aligned incorrectly<br />
Heavy rain or snow<br />
Dish aligned incorrectly<br />
Dish is too small<br />
An obstacle between dish and<br />
satellite (e.g. house or tree)<br />
Dish aligned incorrectly or<br />
faulty<br />
Realign dish<br />
Remove snow from dish<br />
Realign dish<br />
Install larger dish<br />
Reposition dish so it has a<br />
clear “view” towards the<br />
satellite<br />
Check dish<br />
Channel is transmitted in a new Start service scan<br />
slot<br />
The transmission of the<br />
channel was terminated<br />
Interference from a wireless Increase distance between the<br />
DECT phone<br />
phone’s base station and the<br />
<strong>Dream</strong>box or buy a coaxial<br />
cable with a higher shielding<br />
value<br />
Hard disk is full Delete no longer needed<br />
recordings<br />
Batteries are inserted<br />
Remove batteries and check<br />
incorrectly<br />
polarity<br />
Batteries are empty Insert new batteries<br />
Wrong remote control mode<br />
(<strong>Dream</strong>-Mode, TV-Mode)<br />
Software is not reacting<br />
Press <strong>Dream</strong>-Mode or TV-<br />
Mode button<br />
Reboot <strong>Dream</strong>box<br />
<strong>Dream</strong>box does not react <strong>Dream</strong>box is locked up Reboot <strong>Dream</strong>box
U s e r M a n u a l D r e a m b o x D M 6 0 0 PVR english<br />
47. TV-Mode setup<br />
A four digit device code is selected from the device list and entered into the remote control.<br />
The most recent device list can be found on our website.<br />
SHIFT / SETUP-Button<br />
Numeric-Keypad<br />
47.1 Programming the remote control<br />
- Press the TV-Mode-Button once.<br />
- Press the SHIFT/Setup-Button for 3 seconds,<br />
the TV-Mode-Button will flash twice.<br />
- Use the Numeric-Keypad to enter the four digit device code into the remote control.<br />
The TV-Mode-Button will flash once for every digit you enter. Once you have entered all<br />
four digit the TV-Mode-Button will flash twice.<br />
- The remote control exits the programming mode automatically.<br />
- If no code is entered within 10 seconds the remote control will exit the programming<br />
mode automatically.<br />
- 109 -<br />
TV-Mode-Button
U s e r M a n u a l D r e a m b o x D M 6 0 0 PVR english<br />
47.2 Device list<br />
A.R. Systems 0067 0382<br />
Accent 0067<br />
Admiral 0117 0123 0448 0243 0294<br />
Adyson 0247 0246<br />
Agashi 0246<br />
Agazi 0294<br />
AGB 0546<br />
Agef 0117<br />
Aiko 0246 0039 0067 0401 0065 0463<br />
0102 0391 0221 0294 0247<br />
Aim 0067<br />
Akai 0391 0238 0401 0067 0463 0221<br />
0065 0039 0102 0248 0193<br />
0546 0586 0578 0510 0247<br />
0661 0246 0294<br />
Akiba 0248 0312 0485 0067<br />
Akura 0248 0389 0312 0039 0442 0294<br />
0067<br />
Alba 0248 0265 0039 0448 0400 0385<br />
0401 0067 0246 0277 0193<br />
0517 0066 0698 0609<br />
Alcyon 0106<br />
Allorgan 0236 0324 0247<br />
Allstar 0067<br />
Amplivision 0247 0430 0350 0400<br />
Amstrad 0039 0546 0294 0248 0401 0463<br />
0442 0067<br />
Anglo 0039 0294<br />
Anitech 0039 0106 0294 0067<br />
Ansonic 0400 0132 0039 0067 0404 0193<br />
0353 0441 0289 0277 0042<br />
0458<br />
Apollo 0503<br />
Arc en Ciel 0429 0531 0139 0226 0363 0228<br />
Arcam 0246 0429 0247<br />
Aristona 0067 0586 0042<br />
Arthur Martin 0193 0430<br />
ASA 0135 0376 0100 0134 0117<br />
Asberg 0067 0106<br />
Asora 0039<br />
Asuka 0248 0294 0246 0312 0247<br />
Atlantic 0067 0246 0236 0289 0350<br />
Atori 0039<br />
Auchan 0193 0430<br />
Audiosonic 0067 0139 0247 0400 0367 0294<br />
0248 0458<br />
Audioton 0247 0400 0294<br />
Ausind 0106<br />
Autovox 0117 0236 0267 0106 0379 0247<br />
0277 0366<br />
Awa 0041 0066 0039 0187 0404 0442<br />
0067<br />
Ayomi 0268<br />
Baird 0139 0373 0102 0247 0238<br />
Barco 0410 0193<br />
Basic Line 0248 0039 0404 0067 0597 0193<br />
0312<br />
Bastide 0247<br />
Baur 0333 0225 0542 0067 0221 0391<br />
0379 0535 0040<br />
Bazin 0247<br />
Beko 0400 0067<br />
Beon 0067 0448<br />
Best 0367 0400<br />
Bestar 0067 0400 0404<br />
Binatone 0247<br />
Deitron 0067<br />
Denko 0294<br />
Desmet 0350 0067<br />
Diamant 0067<br />
Digiline 0067<br />
Dixi 0039 0067 0277 0247<br />
- 110 -<br />
Black Star 0277<br />
Blacktron 0312<br />
Blackway 0312<br />
Blaupunkt 0221 0225 0230 0243 0357 0358<br />
0348<br />
Blue Sky 0248 0312 0485 0067 0517 0698<br />
Blue Star 0312<br />
Bondstec 0277<br />
Boots 0247<br />
BPL 0312 0067<br />
Brandt 0531 0139 0429 0235 0267 0363<br />
0226 0228 0317 0365<br />
Brinkmann 0448 0067 0549<br />
Brionvega 0067 0117<br />
Britannia 0246 0247<br />
Brother 0294<br />
Bruns 0117<br />
BSR 0193 0324<br />
BTC 0248<br />
Bush 0248 0265 0193 0379 0039 0066<br />
0312 0067 0385 0401 0404<br />
0549 0294 0391 0517 0238<br />
0324 0247 0698<br />
Capsonic 0294<br />
Carad 0640 0067<br />
Carena 0485 0067<br />
Carrefour 0066 0100<br />
Cascade 0039 0067<br />
Cathay 0067<br />
CCE 0067<br />
Centurion 0067<br />
Century 0117 0243 0277 0268<br />
CGE 0104 0114 0336 0106 0277 0193<br />
0448 0400<br />
Cimline 0039 0265 0248<br />
City 0039<br />
Clarivox 0448 0100<br />
Clatronic 0248 0294 0400 0401 0247 0106<br />
0277 0067 0039 0132 0350<br />
0609<br />
Clayton 0415<br />
CMS Hightec 0247<br />
Concorde 0039<br />
Condor 0246 0277 0312 0350 0067 0400<br />
0039 0132 0441 0448<br />
Contec 0246 0039 0187 0041 0066<br />
Continental Edison 0531 0139 0267 0226 0228 0429<br />
0363 0235 0317 0517<br />
Cosmel 0039 0367<br />
Crezar 0243<br />
Crosley 0117 0277 0104 0114 0106 0193<br />
0243<br />
Crown 0039 0400 0106 0067 0389 0609<br />
0448 0238 0517<br />
CS Electronics 0277 0246 0248<br />
CTC 0277<br />
Cybertron 0248<br />
Daewoo 0039 0067 0246 0404 0248 0247<br />
Dainichi 0248 0246<br />
Dansai 0067 0294 0065 0246<br />
Dansette 0442<br />
Dantax 0400<br />
Datsura 0238<br />
Dawa 0067<br />
Daytron 0039 0404 0067<br />
Decca 0102 0546 0067 0247<br />
General Technic 0039<br />
Genexxa 0248 0067 0442<br />
Germanvox 0243<br />
Goldhand 0246<br />
Goldline 0367<br />
GoldStar 0067 0400 0039 0247 0277 0246<br />
0193 0391
U s e r M a n u a l D r e a m b o x D M 6 0 0 PVR english<br />
Domland 0424<br />
Drean 0067<br />
DTS 0039<br />
Dual 0379 0247 0373 0289 0366 0549<br />
0067 0382 0424 0429 0333<br />
Dumont 0117 0134 0132 0243 0247 0100<br />
0102<br />
Dux 0067 0042<br />
Dynatron 0067<br />
Elbe 0465 0268 0289 0400 0193 0067<br />
0248 0221 0441 0640<br />
Elcit 0117 0277 0546 0132 0193<br />
Elekta 0294 0312<br />
Elin 0246 0067 0135 0134 0578 0391<br />
0379 0193 0039<br />
Elite 0248 0067<br />
Elman 0132<br />
Elta 0039 0294<br />
Emerson 0243 0117 0277 0067 0401 0100<br />
0312 0350<br />
Emperor 0312<br />
Erres 0067 0042<br />
Etron 0067 0039 0193<br />
Euro-Feel 0294<br />
Europa 0067<br />
Europhon 0067 0546 0132 0243 0247 0277<br />
0193<br />
Expert 0236 0430 0289 0193<br />
Exquisit 0067 0277<br />
Fenner 0404 0039<br />
Ferguson 0317 0365 0268 0139 0590 0655<br />
Fidelity 0246 0401 0193 0294 0067<br />
Filsai 0247<br />
Finlandia 0238 0376 0389 0578 0391<br />
Finlux 0135 0134 0067 0376 0247 0102<br />
0193 0106 0546 0100 0117<br />
0132 0441 0661 0522<br />
Firstline 0324 0351 0246 0067 0404 0415<br />
0277 0039 0193 0132 0247<br />
0441 0379 0561 0268 0102<br />
0265 0698 0238<br />
Fisher 0134 0247 0066 0238 0400 0585<br />
0117 0187 0391 0193 0333<br />
0379 0102<br />
Flint 0067 0485 0102 0248<br />
FNR 0132<br />
Formenti 0117 0243 0246 0350 0193 0106<br />
Fortress 0123 0117<br />
Fraba 0400 0067<br />
Friac 0039 0067 0132<br />
Frontech 0277 0294 0379 0247 0039<br />
Fujitsu 0236 0102 0132 0247 0193<br />
Fujitsu General 0039<br />
Funai 0294 0324<br />
Galaxi 0132 0067<br />
Galaxis 0400 0448 0067 0132<br />
GBC 0243 0193 0039 0404 0248<br />
GE 0590 0139 0317 0365 0373<br />
Geant Casino 0193 0430<br />
GEC 0102 0193 0391 0235 0546 0067<br />
0247 0379<br />
Geloso 0243 0277 0039 0193 0404<br />
General 0139 0317 0501<br />
IInterfunk 0067 0042 0117 0542 0357 0193<br />
391 0400 0531 0139<br />
Internal 0067<br />
Intervision 0312 0247 0485 0067 0401 0549<br />
400 0424 0517 0248 0132<br />
193 0294 0277<br />
Irradio 039 0067 0248 0277 0106<br />
Isukai 248 0067 0312<br />
ITC 247<br />
ITS 067 0401 0248 0312 0294 0246<br />
ITT 193 0510 0379 0391 0503 0578<br />
597 0376 0238<br />
ITV 294 0067 0277<br />
- 111 -<br />
Goodmans 0066 0102 0067 0039 0294 0546<br />
0404 0517 0401 0586 0373<br />
0265 0065 0510 0590 0247<br />
0365<br />
Gorenje 0400<br />
GPM 0248<br />
Gradiente 0067 0083<br />
Graetz 0391<br />
Granada 0067 0430 0256 0389 0042 0102<br />
0138 0238 0247 0106 0066<br />
0546 0503 0365 0590<br />
Grandin 0312 0248 0430 0067 0039 0350<br />
0193 0485 0609 0640<br />
Gronic 0247 0132<br />
Grundig 0225 0221 0517 0100 0106 0235<br />
0267 0067 0586<br />
Halifax 0294 0246 0247<br />
Hampton 0246 0247<br />
Hanimex 0324<br />
Hanseatic 0067 0312 0379 0193 0391 0424<br />
0243 0350 0458 0400 0039<br />
0324 0247 0549<br />
Hantarex 0039 0243 0067 0132<br />
Hantor 0067<br />
Harwood 0039 0442 0067<br />
HCM 0294 0039 0312 0442 0247 0248<br />
0448 0067<br />
Hema 0247 0039<br />
Hemmermann 379<br />
Hifivox 0531 0139 0226 0429<br />
Hikona 0248<br />
HiLine 0294 0067<br />
Hinari 0238 0066 0067 0248 0039 0193<br />
385 0473 0517 0265 0324<br />
Hisawa 0312 0248 0430 0485<br />
Hit 117<br />
Hitachi 0255 0066 0379 0503 0193 0373<br />
0226 0228 0247 0336 0224<br />
0546 0102 0067 0135 0586<br />
0180 0578<br />
Hitsu 039 0485 0248<br />
Hornyphone 0067 0042<br />
Hoshai 0248 0485<br />
Huanyu 0404 0246<br />
Hygashi 0247 0246<br />
Hyper 0039 0246 0247 0277<br />
Hypersonic 0391<br />
Hypson 0067 0294 0247 0312 0485 0430<br />
268<br />
Iberia 067<br />
ICE 294 0247 0067 0401 0248 0246<br />
039<br />
Ices 248 0246<br />
Imperial 0067 0277 0400 0448 0193 0561<br />
104 0114 0106 0379 0226<br />
Indesit 267 0243<br />
Indiana 0067<br />
Ingelen 0517 0640<br />
Inno Hit 0039 0102 0067 0248 0247 0106<br />
546 0277<br />
Innovation 0549<br />
Interactive 0441<br />
Interbuy 0039 0294 0277<br />
Matsui 0265 0039 0385 0041 0102 0066<br />
067 0586 0517 0247 0324<br />
401 0463 0473 0609 0485<br />
379 0546 0065 0193 0238<br />
225 0221 0365<br />
Mediator 0067 0586 0042<br />
Medion 0067 0698 0549<br />
Megas 0640<br />
Melvox 0430<br />
Memorex 0039<br />
Memphis 0367 0102 0039 0415<br />
Mercury 0067 0039<br />
Metz 0117 0225 0243 0221 0397
U s e r M a n u a l D r e a m b o x D M 6 0 0 PVR english<br />
Jea 066<br />
JEC 065<br />
JVC 0683 0083 0066 0401 0248<br />
Kaisui 0248 0312 0067 0246 0485 0247<br />
039<br />
Kamp 0246<br />
Kapsch 0236 0193 0391 0289 0134<br />
Karcher 0067 0400 0312 0132 0640 0294<br />
KB Aristocrat 0193<br />
Kendo 0265 0277 0132 0067 0458 0400<br />
441 0640<br />
Kennedy 0236 0243 0193 0465<br />
Kingsley 0246<br />
Kneissel 0465 0289 0400 0268 0067 0441<br />
640<br />
Kolster 0067<br />
Konka 0248 0401 0067<br />
Kontakt 0517<br />
Korpel 0067<br />
Korting 0117 0400 0350<br />
Kosmos 0067<br />
Kotron 0442 0294<br />
Kraking 0268<br />
Kyoshu 0294 0442<br />
Kyoto 0415 0193<br />
Lemair 0441<br />
Lenco 0039 0134 0193 0067<br />
Lenoir 0039<br />
Lesa 277<br />
Leyco 0294 0102 0067 0324 0609<br />
LG 067 0400 0039 0247 0277 0246<br />
193 0391<br />
Liesenkotter 0067 0357 0358<br />
Lifetec 0039 0294 0549 0067 0404 0248<br />
698<br />
Lloyd’s 0039<br />
Loewe 0542 0067 0117 0400<br />
Logik 0041 0401<br />
Logix 0698<br />
Luma 0236 0067 0193 0289 0441 0404<br />
039<br />
Lumatron 0236 0067 0193 0289 0391 0247<br />
0294<br />
Lux May 0067 0039<br />
Luxor 0224 0267 0510 0522 0379 0391<br />
238 0578 0193 0376<br />
Madison 0067<br />
Magnadyne 0117 0277 0546 0132 0193<br />
Magnafon 0546 0243 0106 0132 0246<br />
Mandor 0294<br />
Manesth 0067 0265 0247 0294 0350 0065<br />
324<br />
Manhattan 0067<br />
Marantz 0067<br />
Marelli 0117<br />
Mark 0067 0247 0246 0404 0039<br />
Masuda 0248<br />
Osume 0187 0102 0066 0248<br />
Otto Versand 0040 0535 0066 0123 0542 0067<br />
0586 0225 0379 0221 0391<br />
0265 0139 0243 0324 0256<br />
0277 0333 0350 0247<br />
Pael 0246<br />
Palladium 0400 0067 0221 0535 0040 0230<br />
0448 0586 0277 0357 0379<br />
0117 0193 0243 0247 0441<br />
0685<br />
Palsonic 0294 0442 0067<br />
Panama 0039 0247 0294 0246 0067 0277<br />
Panasonic 0256 0680 0280 0244 0243 0391<br />
0267 0397 0546 0067 0193<br />
0578<br />
Panavision 0067 0441<br />
Pathe Cinema 0193 0268 0246 0430 0350 0379<br />
Pathe Marconi 0235 0243 0531 0139 0226 0228<br />
0363 0429 0267<br />
- 112 -<br />
Micromaxx 0067 0698<br />
Minerva 0517 0225 0100 0106 0221 0267<br />
Minoka 0442 0067 0389<br />
Mitsubishi 0138 0180 0542 0067 0117 0066<br />
267<br />
Mivar 0400 0106 0246<br />
Monaco 0039<br />
Motion 0106<br />
MTC 0400 0379 0542<br />
Multistandard 0132<br />
Multitec 0067 0698<br />
Multitech 0247 0379 0039 0246 0277 0132<br />
400 0067<br />
Murphy 0134 0246 0102 0193<br />
NAD 0391<br />
Naiko 0067<br />
Nakimura 0404 0067<br />
National 0267 0244 0256<br />
NEC 0066 0350 0485 0039 0404 0247<br />
0067<br />
Neckermann 0067 0221 0400 0535 0040 0230<br />
0586 0193 0357 0448 0379<br />
0117 0243 0277 0247 0441<br />
NEI 0067 0367 0401<br />
Nesco 0277<br />
Network 0367<br />
Neufunk 0067 0039 0586 0640<br />
New Tech 0067 0039 0586 0373 0247<br />
New World 0248<br />
Nicamagic 0246<br />
Nikkai 0102 0248 0067 0247 0294 0065<br />
0367 0246 0039 0066<br />
Noblex 0067 0294<br />
Nobliko 0132 0106 0100 0246<br />
Nogamatic 0429 0531 0139 0226<br />
Nokia 0391 0193 0510 0379 0578 0522<br />
0389 0503 0238 0404 0661<br />
0376<br />
Nordmende 0139 0531 0317 0429 0226 0373<br />
0228 0243 0605 0590 0225<br />
0067 0365<br />
Novatronic 0067 0135<br />
Oceanic 0597 0193 0430 0391 0324 0238<br />
Okano 0400 0067 0294 0102<br />
Omega 0294<br />
Onwa 0401 0248 0463<br />
Opera 0067<br />
Orbit 0067<br />
Orion 0265 0324 0350 0385 0041 0067<br />
0039 0351 0132 0473 0586<br />
0685 0294 0442<br />
Orline 0067 0248<br />
Ormond 0415 0698<br />
Osaki 0102 0248 0247 0294 0067 0442<br />
0404<br />
Osio 0067<br />
Oso 0248<br />
Reflex 0067<br />
Revox 0067 0400<br />
Rex 0236 0441 0277 0193 0289<br />
RFT 0117 0400 0458 0102 0294<br />
Roadstar 0039 0294 0248 0448<br />
Robotron 0117<br />
Royal Lux 0400 0442<br />
Saba 0317 0243 0117 0429 0193 0139<br />
0531 0546 0373 0391 0528<br />
0226 0228 0365 0235 0655<br />
0578<br />
Sagem 0485 0640 0312<br />
Saisho 0265 0546 0039 0041 0247 0193<br />
0294<br />
Salora 0224 0379 0193 0389 0391 0546<br />
0578<br />
Sambers 0243 0546 0106 0132<br />
Samsung 0067 0586 0617 0039 0247 0400<br />
0294 0246 0102 0238
U s e r M a n u a l D r e a m b o x D M 6 0 0 PVR english<br />
Pausa 0039<br />
Perdio 0102 0350 0193 0067<br />
Perfekt 0067<br />
Pershin 0430<br />
Philco 0117 0114 0104 0448 0106 0243<br />
0277 0193 0400 0067<br />
Philharmonic 0247<br />
Philips 0586 0067 0042 0353 0221 0117<br />
0373<br />
Phoenix 0067 0117 0350 0400 0415 0246<br />
0193 0102<br />
Phonola 0067 0586 0042 0117 0246<br />
Pioneer 0067 0458 0400 0373 0391 0139<br />
Pionier 0400<br />
Plantron 0067 0294 0039<br />
Playsonic 0247<br />
Poppy 0039<br />
Portland 0404<br />
Prandoni-Prince 0277 0546 0391 0243 0106<br />
Precision 0247<br />
Prima 0039 0294<br />
Prinz 0102 0379 0224<br />
Profex 0039 0193<br />
Proline 0351 0102 0067 0042 0655<br />
Prosonic 0067 0244 0246 0400 0404 0609<br />
0401<br />
Protech 0067 0247 0039 0277 0379 0132<br />
0294 0448 0367 0698<br />
Provision 0067<br />
Pye 0067 0586 0042 0117<br />
Pymi 0039<br />
Quadra Vision 0430<br />
Quasar 0277<br />
Quelle 0067 0040 0041 0531 0139 0542<br />
0379 0221 0391 0066 0247<br />
0277 0104 0114 0357 0336<br />
0100 0134 0135 0187 0225<br />
0230 0243 0294 0698<br />
Questa 0066<br />
R-Line 0067<br />
Radialva 0139 0248 0193 0067<br />
Radiola 0067 0586 0042 0353<br />
Radiomarelli 0117 0546 0277 0067<br />
RadioShack 0067<br />
Radiotone 0039 0067 0458 0400 0609 0448<br />
0294 0442<br />
Rank 0100<br />
RCA 0590 0655 0365<br />
Recor 0067<br />
Rediffusion 0391 0578 0066<br />
Redstar 0067<br />
Starlite 0039 0193 0067 0294<br />
Stenway 0312 0248<br />
Stern 0236 0289 0193<br />
Strato 0067 0294 0039<br />
Sunkai 0324 0385 0351 0485 0248 0265<br />
0067 0517<br />
Sunstar 0401 0067 0039<br />
Sunwood 0067 0039<br />
Superla 0546 0246<br />
Supertech 0039 0067 0246 0586<br />
Supra 0404 0039<br />
Susumu 0365<br />
Sutron 0039<br />
Swissline 0277<br />
Sydney 0246 0247<br />
Sytong 0246<br />
Tandberg 0397 0441 0139 0367 0226 0391<br />
Tandy 0248 0102 0247 0277 0123<br />
Tashiko 0066 0247 0246 0389 0193<br />
Tatung 0102 0546 0247 0067 0041<br />
Teac 0067 0542 0485 0294 0039 0442<br />
0379<br />
TEC 0247 0039 0277 0501 0365 0367<br />
0289<br />
- 113 -<br />
Sandra 0246 0247<br />
Sanela 0268<br />
Sansui 0067 0401<br />
Sanyo 0238 0187 0066 0041 0400 0102<br />
0246 0247 0134 0243 0039<br />
0193 0067 0585<br />
Save 0067<br />
SBR 0067 0586 0042<br />
Schaub Lorenz 0379 0578<br />
Schneider 0067 0586 0042 0333 0379 0549<br />
0424 0382 0366 0289 0353<br />
0373 0247 0277 0401 0248<br />
0391 0193 0698<br />
SEG 0247 0294 0039 0277 0066 0132<br />
0193 0067 0246 0698 0517<br />
SEI 0117 0132 0040 0193 0546 0379<br />
0243 0324 0236 0067<br />
Seleco 0236 0289 0193 0441<br />
Sencora 0039<br />
Sentra 0065 0248 0039<br />
Serino 0485 0640<br />
Sharp 1223 0123 0187 0066 0324 0683<br />
0083<br />
Shorai 0324<br />
Siam 0067<br />
Siarem 0193 0117 0132 0243<br />
Siemens 0221 0230 0225 0243 0357 0358<br />
0187 0067<br />
Sierra 0067 0586 0042<br />
Siesta 0400<br />
Silva 0246 0067<br />
Silver 0066 0391<br />
Singer 0117 0132 0277 0430 0465 0039<br />
Sinudyne 0117 0265 0132 0243 0324 0193<br />
0391 0546 0379 0040 0236<br />
0067<br />
Sogera 0350<br />
Solavox 0391 0102 0193 0578<br />
Sonitron 0238 0400 0247<br />
Sonneclair 0067<br />
Sonoko 0067 0039 0294 0312 0247<br />
Sonolor 0238 0597 0193 0430 0535 0040<br />
0578<br />
Sontec 0067 0400 0324<br />
Sony 1535 1040 1681 0535 0040 0041<br />
0030 0066 0132 0681 0104<br />
Sound & Vision 0132 0248 0404<br />
Soundwave 0067 0350 0448<br />
Ssangyong 0039<br />
Standard 0248 0039 0247 0350 0067 0404<br />
Unic Line 0067 0503<br />
United 0067<br />
Universum 0376 0135 0225 0503 0391 0277<br />
0522 0510 0400 0230 0448<br />
0041 0542 0324 0066 0187<br />
0100 0193 0294 0134 0067<br />
0441 0104 0336 0243 0357<br />
0358 0040 0535 0106 0379<br />
0247 0531 0139 0367 0661<br />
0698<br />
Univox 0367 0117 0067 0193 0268<br />
Vestel 0067 0193 0247<br />
Vexa 0039 0067<br />
Videologique 0246 0248 0247<br />
VideoSystem 0067<br />
Videotechnic 0246 0350 0247<br />
Videoton 0193<br />
Vidikron 0132<br />
Viper 0367<br />
Visiola 0246<br />
Vision 0067 0350<br />
Vistar 0236 0391<br />
Vortec 0067<br />
Voxson 0117 0106 0067 0448
U s e r M a n u a l D r e a m b o x D M 6 0 0 PVR english<br />
Tech Line 0067 0698<br />
Technema 0350<br />
Technisat 0685<br />
Tedelex 0247<br />
Teleavia 0139 0531 0317 0226 0429 0235<br />
0363 0520<br />
Telecor 0067 0193 0248 0247 0289 0424<br />
Telefunken 0139 0531 0528 0501 0429 0317<br />
0104 0114 0131 0365 0292<br />
0336 0373 0226 0067 0655<br />
Telefusion 0067<br />
Telegazi 0067 0193 0289 0248 0294<br />
Telemeister 0350 0067<br />
Telesonic 0067<br />
Telestar 0067<br />
Teletech 0039 0277 0367 0067 0698<br />
Teleton 0247 0236 0193 0379 0289 0066<br />
Televideon 0350 0193 0246<br />
Televiso 0430<br />
Temco 0324<br />
Tempest 0039<br />
Tensai 0134 0248 0067 0247 0324 0350<br />
0039 0135 0404 0401 0277<br />
Tenson 0350 0039<br />
Tevion 0549 0067<br />
Texet 0247 0404 0039<br />
Thomson 0317 0429 0139 0531 0363 0501<br />
0365 0226 0228 0235 0267<br />
0373 0067 0520 0590 0655<br />
Thorn 0268 0104 0114 0067 0134 0365<br />
0542 0389 0404 0065<br />
Tokai 0102 0067 0367 0193 0247 0404<br />
0039<br />
Tokyo 0246 0065<br />
Tomashi 0312 0248<br />
Toshiba 0065 0538 0273 0066 0100 0132<br />
0247<br />
Towada 0379 0132 0247<br />
Trans Continens 0247 0067<br />
Trident 0546 0247<br />
Tristar 0248<br />
Triumph 0546 0376 0586 0067 0273<br />
Uher 0106 0067 0236 0350 0333 0404<br />
0448 0400 0289<br />
Ultravox 0117 0132 0404 0277 0246 0193<br />
0243 0067<br />
- 114 -<br />
Waltham 0247 0448 0317 0415 0067<br />
Watson 0067 0350 0193 0248 0243 0609<br />
0549 0424 0039 0698<br />
Watt Radio 0243 0132 0379 0193 0246<br />
Wega 0243 0066 0117 0067<br />
Wegavox 0039<br />
Weltblick 0067 0350<br />
White Westinghouse 0350 0246 0067 0367<br />
Winco 0442<br />
Windstar 0312<br />
Xrypton 0067<br />
Yamishi 0312 0485 0248 0067 0247<br />
Yokan 0067<br />
Yoko 0247 0067 0248 0294 0039 0400<br />
0246<br />
Yorx 0248<br />
Zanussi 0236 0247
U s e r M a n u a l D r e a m b o x D M 6 0 0 PVR english<br />
48. Technical data<br />
• 250 MHz IBM PowerPC Processor (350 MIPS)<br />
• Linux Operating System, Open Source<br />
• <strong>Dream</strong>Crypt CA integrated<br />
• 1 x Smartcard-Reader<br />
• MPEG2 Hardware decoding (DVB compliant)<br />
• V.24 / RS232 connector<br />
• 100Mbit voll duplex Ethernet Interface<br />
• 2 Status-LED<br />
• 64 MB RAM (userspace), 32 MB Flash<br />
• Unlimited service list for TV/Radio<br />
• Switching services in less than a second<br />
• Fully automated service seraching / transponder scan<br />
• Bouquet list support<br />
• EPG-Support (electronic program guide)<br />
• Multi language OSD with skin support<br />
• SPDI/F optical connector AC-3<br />
• 1 x Scart-Connector (completely software controlled)<br />
• Analog Modem<br />
• Plug & Play Tuner<br />
• integrated IDE connector<br />
• HDD support for all regular sizes (2,5 Inch)<br />
• external 12V power converter<br />
• A/V Output (Audio/Video Cinch and S-Video)<br />
• Size: 196mm x 130mm x 40mm (H x B x T)<br />
Video decoder:<br />
Video Compression MPEG-2 and MPEG-1 compatible<br />
Video Standard PAL G/ 25 Hz<br />
Video Formats 4:3 / 16:9<br />
Footage 16:9, automatic assimilation for 16:9 TV-Device (over Scart)<br />
Letterbox percolating for 4:3 TV-Device<br />
Audio decoder:<br />
Audio compression MPEG-1 & MPEG-2 Layer I and II<br />
Audio Mode Dual (main/sub), Stereo<br />
Frequency: 32 kHz, 44.1 kHz, 48 kHz, 16 kHz, 22.05 kHz, 24 kHz<br />
Output analog:<br />
Output Level L/R 0,5 Vss on 600 Ohm<br />
THD > 60 dB (1 kHz)<br />
Crosstalk < -65 dB<br />
Output digital:<br />
Output Level 0,5 Vss on 75 Ohm<br />
Sampled Data Filtering 32 kHz, 44.1 kHz, 48 kHz<br />
S/PDIF-Output optical (AC3)<br />
Output Video:<br />
Output Level FBAS 1 Vss +/- 0.3 dB on 75 Ohm<br />
TV-Scart:<br />
Output: FBAS,RGB,S-VHS over OSD selectable<br />
- 115 -
U s e r M a n u a l D r e a m b o x D M 6 0 0 PVR english<br />
Serial Interface RS 232:<br />
Typ RS232 bidirectional<br />
Bitrate 115,2 kBit/s max.<br />
Plug Connector SUB-D-9<br />
Function Update of Firmware and Preprogramming<br />
Ethernet:<br />
100 Mbit compatible, bi-directional interface Function<br />
Update of Firmware and Preprogramming<br />
Input voltage:<br />
12V power converter 110-230V / 50-60Hz AC +/- 15%<br />
Physical specification:<br />
Ambient Temperature +15°C...+35°C<br />
Humidity < 80%<br />
Size (B x T x H): 196 mm x 130 mm x 40 mm<br />
Weight: 500g<br />
DM 600 PVR-C/T specific data:<br />
DVB-C/T Tuner:<br />
Frequency Range 51 …. 858 MHz<br />
Input Impedance 75 Ohm<br />
Symbolrate 1 …. 6.9 Mbaud/s<br />
DM 600 PVR-S specific data:<br />
DVB-S-Tuner:<br />
Frequency Range 950 - 2150 MHz<br />
Signal Level - 65 dBm - 25 dBm<br />
Signal-to-Noise Level 12 dB max.<br />
DBS-Tuner Input Connector F-Type female<br />
Input Impedance 75 Ohm<br />
AFC +/- 3 MHz<br />
Demodulation Shaped QPSK<br />
Symbolrate 2 - 45 Mbaud/s, SCPC / MCPC<br />
Inner FEC: Rates:1/2, 2/3, 3/4, 5/6, 7/8 (DVB specification)<br />
Demultiplexing according to ISO 13818-1<br />
LNB power supply:<br />
LNB Strom 500mA max. ; kurzschlussfest<br />
LNB Spannung vertikal < 14V ohne Last, > 11,5V bei 400mA<br />
LNB Spannung horizontal < 20V ohne Last, > 17,3V bei 400mA<br />
LNB Abschaltung im Standby-Mode<br />
Count of active satellite positions:<br />
DiSEqC 1.0/1.1/1.2 SAT POSITION / SAT OPTION<br />
DiSEqC - Positioner-Control<br />
- 116 -
U s e r M a n u a l D r e a m b o x D M 6 0 0 PVR english<br />
49. Contact & support information<br />
Headquarter & Distribution:<br />
<strong>Dream</strong>-<strong>Multimedia</strong><br />
Sales and distribution through Visoduck Discount GmbH<br />
Pierbusch 24-26<br />
44536 Lünen<br />
Germany<br />
Dealer’s Hotline:<br />
(Dealers only)<br />
Tel.: +49 (0)180 - 3 85 85 90 112 (0,09€/min.)<br />
Fax: +49 (0)180 - 3 85 85 90 777 (0,09€/min.)<br />
You can reach the dealer’s hotline from :<br />
Mo - Fr. 09:00 am - 03:00 pm<br />
Technical Hotline:<br />
Tel.: +49 (0)180 - 3 85 85 90 110 (0,09€/min.)<br />
Fax: +49 (0)180 - 3 85 85 90 111 (0,09€/min.)<br />
You can reach the technical hotline from:<br />
Mo - Fr. 09:00 am - 03:00 pm<br />
Sales:<br />
Tel.: +49 (0)180 - 3 85 85 90 770 (0,09€/min.)<br />
You can reach the sales hotline from:<br />
Mo - Fr. 09:00 am - 03:00 pm<br />
Dealers & Pricing:<br />
E-Mail: info@dream-multimedia-tv.de<br />
Technical Support:<br />
E-Mail: support@dream-multimedia-tv.de<br />
Website:<br />
Weblink: http://www.dream-multimedia-tv.de<br />
Support Forum:<br />
Weblink: http://www.dream-multimedia-tv.de/board<br />
Software Support (actual images):<br />
Weblink DM 600 PVR: http://www.dm600pvr.de<br />
- 117 -
Please fill out this from completely and return it to your dealer (= contractor)<br />
Please write legible to ensure a quick and problem-free progess!<br />
If you do not attach a copy of your invoice no service will take place!<br />
Please only send the defective parts without any accessories! - Leave the HDD installed!<br />
Customer number: Returndate:<br />
Last name / Company: First name:<br />
Contact person: Phone:<br />
Street: Fax:<br />
Country/Zip/City: E-Mail:<br />
Returned device: DM Serial:<br />
(Type)<br />
Equipment (e.g. HDD): Soft-Ver.:<br />
Contact data:<br />
Contact person:<br />
Communication via…/at… :<br />
Defect- / Jobdescription (Please write legible and detailed):<br />
The job can only be completed if you add a detailed description of the defect.<br />
A simple "defective" does not work and the device will be returned to you! So please be thorough!<br />
Reason for return:<br />
Place, date, signature<br />
DREAMBOX - Service Slip<br />
Repair within warranty Other:<br />
Repair with cost<br />
With my signature I agree that repairs up to 30€ will be done without consulting me. Without your signature the job will<br />
and can not be done!<br />
NOTE: PLEASE PUT THE DREAMBOX INTO A PLASTIC BAG OR WRAP IT IN PLASTIC FOIL. THEN PUT IT INTO<br />
IT'S ORIGINAL PACKAGIN IF POSSIBLE. OTHERWISE INTO A STURDY BOX. THIS PREVENTS SCRATCHES<br />
FROM THE TRANSPORT PROCESS. THANK YOU!
U s e r M a n u a l D r e a m b o x D M 6 0 0 PVR english<br />
51. Copyright Notes<br />
© <strong>Dream</strong>-<strong>Multimedia</strong> 2006. All rights reserved.<br />
This product contains files that are distributed under different licenses, especially an Open<br />
Source License, the GNU General Public License. You can find details about this<br />
License on the next three pages. Additional notes about the source code and patches under<br />
The GPL license can be found on the internet under this link:<br />
http://www.dream-multimedia-tv.de/deutsch/downloads.php<br />
- 118 -
52. GNU GENERAL PUBLIC LICENSE<br />
Version 2, June 1991<br />
Copyright (C) 1989, 1991 Free Software Foundation, Inc.<br />
51 Franklin Street, Fifth Floor, Boston, MA 02110-1301, USA<br />
Everyone is permitted to copy and distribute verbatim copies<br />
of this license document, but changing it is not allowed.<br />
Preamble<br />
The licenses for most software are designed to take away your freedom to share and change it. By contrast, the GNU<br />
General Public License is intended to guarantee your freedom to share and change free software--to make sure the<br />
software is free for all its users. This General Public License applies to most of the Free Software Foundation's software<br />
and to any other program whose authors commit to using it. (Some other Free Software Foundation software is covered by<br />
the GNU Lesser General Public License instead.) You can apply it to your programs, too.<br />
When we speak of free software, we are referring to freedom, not price. Our General Public Licenses are designed to<br />
make sure that you have the freedom to distribute copies of free software (and charge for this service if you wish), that you<br />
receive source code or can get it if you want it, that you can change the software or use pieces of it in new free programs;<br />
and that you know you can do these things.<br />
To protect your rights, we need to make restrictions that forbid anyone to deny you these rights or to ask you to surrender<br />
the rights. These restrictions translate to certain responsibilities for you if you distribute copies of the software, or if you<br />
modify it.<br />
For example, if you distribute copies of such a program, whether gratis or for a fee, you must give the recipients all the<br />
rights that you have. You must make sure that they, too, receive or can get the source code. And you must show them<br />
these terms so they know their rights.<br />
We protect your rights with two steps: (1) copyright the software, and (2) offer you this license which gives you legal<br />
permission to copy, distribute and/or modify the software.<br />
Also, for each author's protection and ours, we want to make certain that everyone understands that there is no warranty<br />
for this free software. If the software is modified by someone else and passed on, we want its recipients to know that what<br />
they have is not the original, so that any problems introduced by others will not reflect on the original authors' reputations.<br />
Finally, any free program is threatened constantly by software patents. We wish to avoid the danger that redistributors of a<br />
free program will individually obtain patent licenses, in effect making the program proprietary. To prevent this, we have<br />
made it clear that any patent must be licensed for everyone's free use or not licensed at all.<br />
The precise terms and conditions for copying, distribution and modification follow.<br />
TERMS AND CONDITIONS FOR COPYING, DISTRIBUTION AND MODIFICATION<br />
0. This License applies to any program or other work which contains a notice placed by the copyright holder saying it may<br />
be distributed under the terms of this General Public License. The "Program", below, refers to any such program or work,<br />
and a "work based on the Program" means either the Program or any derivative work under copyright law: that is to say, a<br />
work containing the Program or a portion of it, either verbatim or with modifications and/or translated into another<br />
language. (Hereinafter, translation is included without limitation in the term "modification".) Each licensee is addressed as<br />
"you".<br />
Activities other than copying, distribution and modification are not covered by this License; they are outside its scope. The<br />
act of running the Program is not restricted, and the output from the Program is covered only if its contents constitute a<br />
work based on the Program (independent of having been made by running the Program). Whether that is true depends on<br />
what the Program does.<br />
1. You may copy and distribute verbatim copies of the Program's source code as you receive it, in any medium, provided<br />
that you conspicuously and appropriately publish on each copy an appropriate copyright notice and disclaimer of warranty;<br />
keep intact all the notices that refer to this License and to the absence of any warranty; and give any other recipients of the<br />
Program a copy of this License along with the Program.<br />
You may charge a fee for the physical act of transferring a copy, and you may at your option offer warranty protection in<br />
exchange for a fee.<br />
- 119 -
2. You may modify your copy or copies of the Program or any portion of it, thus forming a work based on the Program, and<br />
copy and distribute such modifications or work under the terms of Section 1 above, provided that you also meet all of these<br />
conditions:<br />
a) You must cause the modified files to carry prominent notices stating that you changed the files and the date of<br />
any change.<br />
b) You must cause any work that you distribute or publish, that in whole or in part contains or is derived from the<br />
Program or any part thereof, to be licensed as a whole at no charge to all third parties under the terms of this<br />
License.<br />
c) If the modified program normally reads commands interactively when run, you must cause it, when started<br />
running for such interactive use in the most ordinary way, to print or display an announcement including an<br />
appropriate copyright notice and a notice that there is no warranty (or else, saying that you provide a warranty) and<br />
that users may redistribute the program under these conditions, and telling the user how to view a copy of this<br />
License. (Exception: if the Program itself is interactive but does not normally print such an announcement, your<br />
work based on the Program is not required to print an announcement.)<br />
These requirements apply to the modified work as a whole. If identifiable sections of that work are not derived from the<br />
Program, and can be reasonably considered independent and separate works in themselves, then this License, and its<br />
terms, do not apply to those sections when you distribute them as separate works. But when you distribute the same<br />
sections as part of a whole which is a work based on the Program, the distribution of the whole must be on the terms of<br />
this License, whose permissions for other licensees extend to the entire whole, and thus to each and every part regardless<br />
of who wrote it.<br />
Thus, it is not the intent of this section to claim rights or contest your rights to work written entirely by you; rather, the intent<br />
is to exercise the right to control the distribution of derivative or collective works based on the Program.<br />
In addition, mere aggregation of another work not based on the Program with the Program (or with a work based on the<br />
Program) on a volume of a storage or distribution medium does not bring the other work under the scope of this License.<br />
3. You may copy and distribute the Program (or a work based on it, under Section 2) in object code or executable form<br />
under the terms of Sections 1 and 2 above provided that you also do one of the following:<br />
a) Accompany it with the complete corresponding machine-readable source code, which must be distributed under<br />
the terms of Sections 1 and 2 above on a medium customarily used for software interchange; or,<br />
b) Accompany it with a written offer, valid for at least three years, to give any third party, for a charge no more than<br />
your cost of physically performing source distribution, a complete machine-readable copy of the corresponding<br />
source code, to be distributed under the terms of Sections 1 and 2 above on a medium customarily used for<br />
software interchange; or,<br />
c) Accompany it with the information you received as to the offer to distribute corresponding source code. (This<br />
alternative is allowed only for non commercial distribution and only if you received the program in object code or<br />
executable form with such an offer, in accord with Subsection b above.)<br />
The source code for a work means the preferred form of the work for making modifications to it. For an executable work,<br />
complete source code means all the source code for all modules it contains, plus any associated interface definition files,<br />
plus the scripts used to control compilation and installation of the executable. However, as a special exception, the source<br />
code distributed need not include anything that is normally distributed (in either source or binary form) with the major<br />
components (compiler, kernel, and so on) of the operating system on which the executable runs, unless that component<br />
itself accompanies the executable.<br />
If distribution of executable or object code is made by offering access to copy from a designated place, then offering<br />
equivalent access to copy the source code from the same place counts as distribution of the source code, even though<br />
third parties are not compelled to copy the source along with the object code.<br />
4. You may not copy, modify, sublicense, or distribute the Program except as expressly provided under this License. Any<br />
attempt otherwise to copy, modify, sublicense or distribute the Program is void, and will automatically terminate your rights<br />
under this License. However, parties who have received copies, or rights, from you under this License will not have their<br />
licenses terminated so long as such parties remain in full compliance.<br />
5. You are not required to accept this License, since you have not signed it. However, nothing else grants you permission<br />
to modify or distribute the Program or its derivative works. These actions are prohibited by law if you do not accept this<br />
License. Therefore, by modifying or distributing the Program (or any work based on the Program), you indicate your<br />
acceptance of this License to do so, and all its terms and conditions for copying, distributing or modifying the Program or<br />
works based on it.<br />
- 120 -
6. Each time you redistribute the Program (or any work based on the Program), the recipient automatically receives a<br />
license from the original licensor to copy, distribute or modify the Program subject to these terms and conditions. You may<br />
not impose any further restrictions on the recipients' exercise of the rights granted herein. You are not responsible for<br />
enforcing compliance by third parties to this License.<br />
7. If, as a consequence of a court judgment or allegation of patent infringement or for any other reason (not limited to<br />
patent issues), conditions are imposed on you (whether by court order, agreement or otherwise) that contradict the<br />
conditions of this License, they do not excuse you from the conditions of this License. If you cannot distribute so as to<br />
satisfy simultaneously your obligations under this License and any other pertinent obligations, then as a consequence you<br />
may not distribute the Program at all. For example, if a patent license would not permit royalty-free redistribution of the<br />
Program by all those who receive copies directly or indirectly through you, then the only way you could satisfy both it and<br />
this License would be to refrain entirely from distribution of the Program.<br />
If any portion of this section is held invalid or unenforceable under any particular circumstance, the balance of the section<br />
is intended to apply and the section as a whole is intended to apply in other circumstances.<br />
It is not the purpose of this section to induce you to infringe any patents or other property right claims or to contest validity<br />
of any such claims; this section has the sole purpose of protecting the integrity of the free software distribution system,<br />
which is implemented by public license practices. Many people have made generous contributions to the wide range of<br />
software distributed through that system in reliance on consistent application of that system; it is up to the author/donor to<br />
decide if he or she is willing to distribute software through any other system and a licensee cannot impose that choice.<br />
This section is intended to make thoroughly clear what is believed to be a consequence of the rest of this License.<br />
8. If the distribution and/or use of the Program is restricted in certain countries either by patents or by copyrighted<br />
interfaces, the original copyright holder who places the Program under this License may add an explicit geographical<br />
distribution limitation excluding those countries, so that distribution is permitted only in or among countries not thus<br />
excluded. In such case, this License incorporates the limitation as if written in the body of this License.<br />
9. The Free Software Foundation may publish revised and/or new versions of the General Public License from time to<br />
time. Such new versions will be similar in spirit to the present version, but may differ in detail to address new problems or<br />
concerns.<br />
Each version is given a distinguishing version number. If the Program specifies a version number of this License which<br />
applies to it and "any later version", you have the option of following the terms and conditions either of that version or of<br />
any later version published by the Free Software Foundation. If the Program does not specify a version number of this<br />
License, you may choose any version ever published by the Free Software Foundation.<br />
10. If you wish to incorporate parts of the Program into other free programs whose distribution conditions are different,<br />
write to the author to ask for permission. For software which is copyrighted by the Free Software Foundation, write to the<br />
Free Software Foundation; we sometimes make exceptions for this. Our decision will be guided by the two goals of<br />
preserving the free status of all derivatives of our free software and of promoting the sharing and reuse of software<br />
generally.<br />
NO WARRANTY<br />
11. BECAUSE THE PROGRAM IS LICENSED FREE OF CHARGE, THERE IS NO WARRANTY FOR THE PROGRAM,<br />
TO THE EXTENT PERMITTED BY APPLICABLE LAW. EXCEPT WHEN OTHERWISE STATED IN WRITING THE<br />
COPYRIGHT HOLDERS AND/OR OTHER PARTIES PROVIDE THE PROGRAM "AS IS" WITHOUT WARRANTY OF<br />
ANY KIND, EITHER EXPRESSED OR IMPLIED, INCLUDING, BUT NOT LIMITED TO, THE IMPLIED WARRANTIES OF<br />
MERCHANTABILITY AND FITNESS FOR A PARTICULAR PURPOSE. THE ENTIRE RISK AS TO THE QUALITY AND<br />
PERFORMANCE OF THE PROGRAM IS WITH YOU. SHOULD THE PROGRAM PROVE DEFECTIVE, YOU ASSUME<br />
THE COST OF ALL NECESSARY SERVICING, REPAIR OR CORRECTION.<br />
12. IN NO EVENT UNLESS REQUIRED BY APPLICABLE LAW OR AGREED TO IN WRITING WILL ANY COPYRIGHT<br />
HOLDER, OR ANY OTHER PARTY WHO MAY MODIFY AND/OR REDISTRIBUTE THE PROGRAM AS PERMITTED<br />
ABOVE, BE LIABLE TO YOU FOR DAMAGES, INCLUDING ANY GENERAL, SPECIAL, INCIDENTAL OR<br />
CONSEQUENTIAL DAMAGES ARISING OUT OF THE USE OR INABILITY TO USE THE PROGRAM (INCLUDING BUT<br />
NOT LIMITED TO LOSS OF DATA OR DATA BEING RENDERED INACCURATE OR LOSSES SUSTAINED BY YOU OR<br />
THIRD PARTIES OR A FAILURE OF THE PROGRAM TO OPERATE WITH ANY OTHER PROGRAMS), EVEN IF SUCH<br />
HOLDER OR OTHER PARTY HAS BEEN ADVISED OF THE POSSIBILITY OF SUCH DAMAGES.<br />
END OF TERMS AND CONDITIONS<br />
- 121 -