ekey home integra Bedienungsanleitung Steuereinheit ... - Gueller.ch
ekey home integra Bedienungsanleitung Steuereinheit ... - Gueller.ch
ekey home integra Bedienungsanleitung Steuereinheit ... - Gueller.ch
Sie wollen auch ein ePaper? Erhöhen Sie die Reichweite Ihrer Titel.
YUMPU macht aus Druck-PDFs automatisch weboptimierte ePaper, die Google liebt.
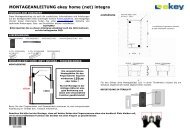
7.4 FINGER SCANNER MOUNTING<br />
The <strong>ekey</strong> ® TOCA<strong>home</strong> <strong>integra</strong> finger scanner can be installed in two different ways.<br />
Installation with mounting pins:<br />
When mounting the scanner into a door it is necessary to mill an adequate space (refer<br />
to the figure on page 46). Allow easy seating of the scanner while the RJ-45 cable is<br />
connected to the scanner. This is a<strong>ch</strong>ieved by drilling an extra not<strong>ch</strong> for the cable with<br />
the RJ-45 tip. This extra not<strong>ch</strong> has to be inside the door (not visible from outside) in the<br />
bottom of the opening where the scanner will be seated.The cable has to be laid inside<br />
the door and extend through the door all the way out to the control panel.<br />
Now connect the <strong>integra</strong> scanner with the cable and place it inside the not<strong>ch</strong>. The two<br />
pins of the <strong>integra</strong> scanner have to rea<strong>ch</strong> the designated holes, in order to be tightened<br />
with the provided screws. While tightening the screws, please press the <strong>integra</strong> scanner<br />
lightly against the door blade, in order to guarantee a fixed hold of the <strong>integra</strong> scanner.<br />
Mount the provided design element only after you have finished installing the whole<br />
system.<br />
Installation without mounting pins:<br />
In order to install the scanner without mounting pins (e.g. in a door frame) the pins have<br />
to be cut off the case.<br />
Make an opening in the frame (refer to the figure on page 46) and drill two holes for the<br />
mounting screws (approx. 2mm diameter). Pull the cable from the cut for the finger<br />
scanner up to the mounting position of the control panel. Please take care that the end<br />
of the cable with the RJ45 plug is on the mounting position for the scanner. Now insert<br />
the RJ45 plug into the <strong>integra</strong> scanner and place it to the designated cut. Once properly<br />
seated, screw the scanner onto the wall with the provided screws. Please pay attention<br />
while tightening the screws not to overtighten them, as the housing could then be<br />
damaged Mount the provided design element only after you have finished to install the<br />
whole system.<br />
Please leave about 10cm room<br />
on both sides of the <strong>integra</strong><br />
scanner to guarantee a proper<br />
use of the device with any<br />
finger (refers to both mounting<br />
possibilities).<br />
48


