INSTRUCTIONS FOR USE - Merit Medical
INSTRUCTIONS FOR USE - Merit Medical
INSTRUCTIONS FOR USE - Merit Medical
- No tags were found...

Create successful ePaper yourself
Turn your PDF publications into a flip-book with our unique Google optimized e-Paper software.
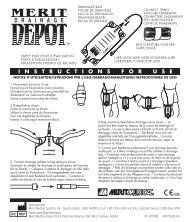
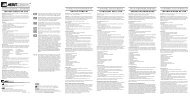
4. Attach the Squirt to the hemostasis valve asshown in Figure 4. Prime the hemostasis valve byplacing a gloved thumb over the rotating adapterlocated on the hemostasis valve while activatingthe Squirt. This will force saline out of the backend cap. Close the back end cap by twisting it ina clockwise direction. (See Figure 5) Continue toactivate the Squirt to debubble the distal segmentof the hemostasis valve.5. Remove the 0.035" placing guide wire.WARNING: A guide wire should never beadvanced or removed if resistance is present. Ifthe guide wire is advanced against resistance, itcould potentially create vessel trauma and/orwire damage. The cause of the resistance shouldbe determined under fluoroscopy. Take any necessaryactions to correct the problem.Figure 46. Continue to activate the Squirt. This will ensurethat a liquid meniscus is at the distal segment ofthe hemostasis valve. Attach the rotating adapterof the hemostasis valve to the luer lock connectoron the Fountain Infusion Catheter, making surethat a liquid-to-liquid connection is established.(See Figure 6)7. While holding the hemostasis valve in a levelposition, loosen the back end cap on the hemostasisvalve.Figure 58. Place the Occluding Wire through the hemostasisvalve and position the Occluding Wire intothe Fountain Infusion Catheter. Snap the proximalend of the Occluding Wire into the cap of thehemostasis valve. (See Figure 7).NOTE: To remove theOccluding Wire, loosenthe back end cap of thehemostasis valve. Pressdown on the proximalend cap to un-snap fromthe hemostasis valve.Figure 6Figure 7E4