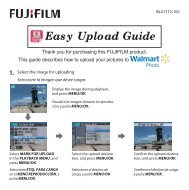
Making a FinePix CD Album - Fujifilm
Making a FinePix CD Album - Fujifilm
Making a FinePix CD Album - Fujifilm

You also want an ePaper? Increase the reach of your titles
YUMPU automatically turns print PDFs into web optimized ePapers that Google loves.
<strong>FinePix</strong>Viewer<br />
User’s Guide for Macintosh<br />
This User’s Guide contains the instructions for using the <strong>FinePix</strong>Viewer.<br />
Read this manual carefully before using this program.
IMPORTANT<br />
Be sure to read this page before using the Software Set.<br />
Notes on the Software and User’s Guide<br />
(1) Unauthorized transfer or duplication of all or any part of the enclosed<br />
software or User’s Guide is forbidden.<br />
(2) The enclosed software and User’s Guide can be used with only one device.<br />
(3) We accept no liability whatsoever for any loss or injury incurred by the<br />
owner or any third party while using a device with the enclosed software or<br />
User’s Guide.<br />
(4) Every effort has been made to ensure that the product is flawless. If any<br />
defect is found that is due to a fault on the part of the manufacturer, the<br />
product will be replaced free of charge, at our discretion. No responsibility is<br />
accepted for defects not caused by the manufacturer.<br />
(5) The contents of the enclosed software and User’s Guide are subject to<br />
change without notice.<br />
(6) Fuji Photo Film Co. Ltd accepts no liability whatsoever for any loss incurred<br />
as a result of errors contained in this manual.<br />
Do not attempt to play the <strong>CD</strong>-ROM enclosed with this<br />
product on an audio <strong>CD</strong> player.<br />
Doing so could damage your hearing or could damage<br />
your speakers or headphones.<br />
• xD-Picture Card is a trademark of Fuji Photo Film Co., Ltd.<br />
• Macintosh, Power Macintosh, iMac, PowerBook, iBook and Mac OS are trademarks of<br />
Apple Computer, Inc. registered in the U.S. and other countries.<br />
• Adobe Acrobat ® Reader ® is a trademark of Adobe Systems Incorporated of the U.S.<br />
• SmartMedia is a trademark of Toshiba Corporation.<br />
• Other company or product names are trademarks or registered trademarks of the<br />
respective companies.<br />
2
Introduction<br />
This User’s Guide describes how to use the <strong>FinePix</strong>Viewer.<br />
In this Guide, it is assumed that the reader has a basic grasp of how to use a personal<br />
computer (PC). For information on how to use your PC, refer to the manuals supplied<br />
with the PC.<br />
3
Contents<br />
IMPORTANT ......................................................................2<br />
Introduction ......................................................................3<br />
Contents ............................................................................4<br />
About the Software ..........................................................7<br />
<strong>FinePix</strong>Viewer Supports the Following File Formats: ..................7<br />
<strong>FinePix</strong>Viewer File Format Compatibility Table...........................7<br />
Window Components – Display Areas ........................................9<br />
Window Components – Buttons ...............................................10<br />
Switching Thumbnails .............................................................12<br />
Changing Area Sizes...............................................................12<br />
Using <strong>FinePix</strong>Viewer.......................................................13<br />
Saving Images on Your Computer............................................13<br />
Deleting Images......................................................................16<br />
Using the Folder Tree ....................................................17<br />
Selecting Folders ...................................................................18<br />
Sample Procedure – Checking the Images on the Camera .......19<br />
Moving and Copying Folders and Images ................................20<br />
Using the Thumbnail Display Area ................................21<br />
Thumbnail Types ....................................................................21<br />
Switching Thumbnail Display Modes .......................................21<br />
Select a Thumbnail ................................................................22<br />
Viewing Slide Shows .....................................................24<br />
Starting a Slide Show .............................................................24<br />
Operations During a Slide Show ..............................................24<br />
Slide Show Settings ...............................................................25<br />
Printing ..........................................................................26<br />
Print ......................................................................................26<br />
Index Print .............................................................................27<br />
Ordering Prints ..............................................................29<br />
Opening and Working with Windows ........................................29<br />
Sample Print Order Procedure ................................................30<br />
4
Using the Image Window ...............................................41<br />
Opening the Image Window ....................................................42<br />
Working With Still Images .......................................................43<br />
Playing Back Movies and Sound .............................................50<br />
Saving a Movie Under Another Name ......................................51<br />
Editing Movies ........................................................................53<br />
Using the Picture Playback Application Registration Area .....54<br />
Registering an Application ......................................................55<br />
Switching between Applications ..............................................55<br />
Using the Playback Pane ...............................................56<br />
Displaying and Hiding the Playback Pane ................................56<br />
Viewing Image Information .....................................................57<br />
Batch Operations and Settings ......................................58<br />
Overview of Batch Operations .................................................58<br />
Settings for Format Conversion and Saving .............................60<br />
Automatic Rename .................................................................62<br />
Batch Resize .........................................................................62<br />
Batch Rotation .......................................................................63<br />
Batch Format Conversion .......................................................63<br />
Information Batch Edit ............................................................64<br />
Automatic Save Settings .........................................................65<br />
Customizing Windows ............................................................66<br />
<strong>Making</strong> a <strong>FinePix</strong> <strong>CD</strong> <strong>Album</strong> ..........................................67<br />
<strong>Making</strong> Video <strong>CD</strong>s ..................................................................68<br />
Using RAW FILE CONVERTER LE...................................74<br />
Using <strong>FinePix</strong>Viewer to Attach Images to E-Mail............75<br />
Supported E-Mail Software .....................................................75<br />
Check the Following : .............................................................75<br />
Attaching Images ...................................................................76<br />
Setting the File Size for Attached Images ................................77<br />
Using the <strong>FinePix</strong> Internet Service ................................78<br />
User Registration ...................................................................79<br />
Using the Service ...................................................................81<br />
To Delete the Software ..................................................82<br />
5
Troubleshooting ............................................................83<br />
Menus ............................................................................92<br />
Using the [File] Menu ..............................................................92<br />
Using the [Edit] Menu..............................................................93<br />
Using the [View] Menu.............................................................93<br />
Using the [Go] Menu ...............................................................93<br />
Using the [Bookmarks] Menu ..................................................94<br />
Using the [Settings] Menu........................................................94<br />
Using the [Tools] Menu............................................................94<br />
Using the [Help] Menu.............................................................94<br />
Using the [Contextual] Menus .................................................95<br />
Grossary ........................................................................96<br />
Symbols Used in This Guide<br />
The symbols listed below are used throughout this guide.<br />
q Indicates a camera operation must be performed. Refer to the Owner’s<br />
Manual for your camera.<br />
NOTE<br />
Indicates important precautions to follow when using the software.<br />
✽ Indicates important information.<br />
☞ Indicates notes or additional information.<br />
TIP Indicates useful tips.<br />
6
About the Software<br />
<strong>FinePix</strong>Viewer Supports the Following File Formats:<br />
Display/<br />
Playback<br />
Save ✽<br />
Still<br />
images<br />
Movies<br />
Sound<br />
Still<br />
images<br />
Movies<br />
Exif-JPEG, Exif-TIFF(RGB), Exif-TIFF(YC), JPEG (JFIF<br />
baseline only), BMP, PICT, TIFF(RGB), TIFF(16bit) or<br />
C<strong>CD</strong>-RAW (FUJIFILM proprietary format)<br />
AVI (Motion JPEG), MOV (QuickTime movie), MPEG1<br />
WAV, MP3, AIFF<br />
Exif-JPEG, Exif-TIFF(RGB) or PICT<br />
QuickTime movies<br />
✽ The conversion source file must meet the following conditions:<br />
• AVI (movies shot on FUJIFILM cameras)<br />
<strong>FinePix</strong>Viewer File Format Compatibility Table<br />
The table below provides details of the C<strong>CD</strong>-RAW and 16-bit TIFF image<br />
compatibility in <strong>FinePix</strong>Viewer.<br />
u: Supported ✕: Not supported<br />
Function<br />
ImageMixer V<strong>CD</strong>2<br />
Uploads<br />
Ordering prints<br />
Print<br />
Index print<br />
Batch resize<br />
Batch rotation<br />
Batch format conversion<br />
Automatic rename<br />
Playback (open)<br />
Thumbnail list display<br />
Image information display<br />
Playback pane<br />
Slide shows<br />
Format<br />
7<br />
C<strong>CD</strong>-RAW 16-bit Tiff<br />
✕ ✕<br />
✕ ✕<br />
✕ ✕<br />
✕ u<br />
u u<br />
✕ u<br />
✕ u<br />
✕ u<br />
u u<br />
✕ u<br />
u u<br />
u u<br />
u u<br />
u u
Notes on playing back AVI-format movie files on a computer<br />
• Before playing back a video file on your computer, copy and save the video file from the<br />
media (xD-Picture Card, SmartMedia or Microdrive) to your computer’s hard disk. Then play<br />
back the saved file.<br />
• Video files contain large amounts of data. Depending on the performance of your computer,<br />
the video may not play back smoothly because your computer cannot process the images<br />
quickly enough. (The video can still be played back normally on the camera’s L<strong>CD</strong> monitor<br />
or on a TV screen connected to the camera.)<br />
• If video files do not play back smoothly, you may be able to get better results by using the<br />
batch format conversion feature in <strong>FinePix</strong>Viewer to convert the video files.<br />
● Guide to computer performance<br />
Image size 640 × 480 pixels 320 × 240 pixels 160 × 120 pixels<br />
Frame rate 30 fps 15 fps 30 fps 15 fps 10 fps 10 fps<br />
867 MHz 366 MHz<br />
Macintosh<br />
G4<br />
G3<br />
233 MHz G3 or better<br />
or better or better<br />
8
A<br />
B<br />
C<br />
D<br />
E<br />
Window Components – Display Areas<br />
E<br />
Name<br />
Folder tree display area<br />
Thumbnail display area<br />
Playback Pane<br />
Internet Service display<br />
area<br />
Playback application<br />
display area<br />
A B C D<br />
CLICK<br />
Function<br />
The folders on the recording media loaded in the computer<br />
or camera are displayed in the folder tree display area.<br />
Shows reduced versions of the images in the selected<br />
folder. The reduced images are referred to as thumbnails.<br />
Shows a larger version of the image along with a<br />
range of information about the image.<br />
Shows the <strong>FinePix</strong> Internet Service menu.<br />
Allows you to register and switch between the<br />
application programs used to play back images.<br />
The images in the folder selected in the folder tree display area A are displayed<br />
in the thumbnail display area B .<br />
9
Window Components – Buttons<br />
Show/Hide Folder Tree button<br />
Switches between showing and hiding the folder tree<br />
display.<br />
Show/Hide Playback Pane button<br />
Switches between showing and hiding the playback pane.<br />
Name Function<br />
Back button<br />
Forward button<br />
Stop button<br />
Selects folders by moving back<br />
through the folder selection log.<br />
Selects folders by moving forward<br />
through the folder selection log.<br />
Cancels thumbnail display.<br />
10<br />
Related Topics<br />
Using the Folder Tree<br />
Using the Thumbnail<br />
Display Area
Name Function<br />
Refresh button<br />
Print button<br />
Print Order<br />
button<br />
Batch Rotation<br />
button<br />
Batch Copy<br />
Slide Show<br />
button<br />
Updates the display.<br />
Prints the selected thumbnail.<br />
Launches the DPOF application.<br />
Rotates the selected thumbnail.<br />
Name Function<br />
ImageMixer V<strong>CD</strong>2<br />
for <strong>FinePix</strong><br />
RAW FILE<br />
CONVERTER LE<br />
CR button<br />
Copies multiple images<br />
at once.<br />
Starts a slide show.<br />
Create a video <strong>CD</strong> or <strong>CD</strong><br />
album.<br />
Converts C<strong>CD</strong>-RAW files<br />
to Exif-TIFF format.<br />
For printing on a printer<br />
that supports Exif 2.2<br />
("Exif Print"), this option<br />
specifies whether to<br />
cancel automatic<br />
compensation.<br />
11<br />
Related Topics<br />
Thumbnails<br />
Ordering Prints<br />
Batch Operations<br />
and Settings<br />
Related Topics<br />
Batch Operations and<br />
Settings<br />
Viewing Slide Shows<br />
<strong>Making</strong> a <strong>FinePix</strong> <strong>CD</strong><br />
<strong>Album</strong><br />
Using RAW FILE<br />
CONVERTER LE
Switching Thumbnails / Changing Area Sizes<br />
Switching Thumbnails Related Item: Using the Thumbnail Display Area<br />
Details<br />
Selecting “Details” displays information such as the image size<br />
and the photography date and time.<br />
Large Thumbnail Medium Thumbnail Small Thumbnail<br />
Changing Area Sizes Related Item: Window Components – Display Areas<br />
You can change the size of an area by dragging the area frame.<br />
12
Using <strong>FinePix</strong>Viewer<br />
Saving Images on Your Computer / Deleting Images<br />
Saving Images on Your Computer<br />
This section gives a brief overview of how to use <strong>FinePix</strong>Viewer. Refer to these<br />
instructions while you are using <strong>FinePix</strong>Viewer.<br />
q1<br />
Connect the camera to your computer in<br />
DSC mode.<br />
2 <strong>FinePix</strong>Viewer starts up. When the Automatic Save dialog box<br />
appears, click the [OK] button.<br />
Mac OS 9.2.2<br />
Mac OS X 10.2 – 10.3<br />
3 After the Automatic Save has been checked, the Automatic<br />
Disconnect dialog box appears. Click the [OK] button and<br />
disconnect the camera.<br />
13<br />
See “Viewing Images” in<br />
the camera Owner’s<br />
Manual.
4 Check that the files are downloaded from the camera to your<br />
computer and that a folder with the photography date is<br />
created.<br />
Open the folder as shown below. For information on the<br />
folder to which the images were saved, see "Automatic Save<br />
Settings".<br />
TIP<br />
To open a folder, click on the arrow “ ” to the left of the folder.<br />
1<br />
2<br />
3<br />
2 indicates the folder in which<br />
<strong>FinePix</strong>Viewer is installed.<br />
5 Double-click a still-image thumbnail to open an image window.<br />
See “Using the Image Window” for details.<br />
Marquee tool:<br />
Allows you to specify an area to be cropped on the screen.<br />
Type tool:<br />
Allows you to type in text on the screen.<br />
14<br />
Crop<br />
Print Image size:<br />
Allows you to change the image size.<br />
Rotate right (CW)<br />
Rotate left (CCW)<br />
Hand tool:<br />
Use this to scroll the<br />
screen display.<br />
Zoom Out tool:<br />
Use this to shrink the<br />
screen display.<br />
Zoom In tool:<br />
Use this to enlarge<br />
the screen display.
6 You can use functions such as “Rotate” and “Type Tool” to<br />
modify your image.<br />
7 Click the [Save As...] button.<br />
8 Enter a file name and click the [Save] button.<br />
NOTE<br />
If you repeatedly save an image in the Exif-JPEG format the image quality deteriorates.<br />
We recommend that you save the original file using the following procedure:<br />
• First make a copy of the original file.<br />
• Save the file under a different name or in a different location.<br />
• Save the file in a format that does not lower the image quality (Exif-TIFF or PICT).<br />
9 Close the image window.<br />
15
Deleting Images<br />
1 Select the images to be deleted.<br />
2 Click “Delete” in the File menu.<br />
3 Click the [OK] button in the confirmation window to delete the<br />
selected images.<br />
16
Using the Folder Tree<br />
Selecting Folders / Sample Procedure – Checking the<br />
Images on the Camera / Moving and Copying Folders<br />
and Images<br />
●Selecting a folder from the folder tree display area and checking the thumbnail<br />
display is a convenient way to search for an image.<br />
●The thumbnail display also provides a way to check the results when you move<br />
or copy images.<br />
The folders on the recording media loaded in the computer or camera are<br />
displayed in the folder tree display area.<br />
The images in a folder selected in the folder tree display area are displayed in the<br />
thumbnail display area.<br />
CLICK<br />
17
Selecting Folders<br />
When you select a folder, the folder name is highlighted and the images in that<br />
folder are displayed in the thumbnail display area.<br />
✽ The folder structure may vary depending on the type of computer you are using.<br />
Mac OS 9.2.2<br />
To open or close a folder, click the arrow “ ” to the left of the folder.<br />
Open/Close a folder<br />
Mac OS X 10.2 – 10.3<br />
Displayed at the top<br />
of the window<br />
To open or close a folder, click the arrow “ ” to the left of the folder.<br />
18<br />
Unselected<br />
CLICK<br />
Select ➔ The images in<br />
this folder are<br />
displayed.
Sample Procedure – Checking the Images on the Camera<br />
When you open folders in the sequence shown below, the images on the camera<br />
appear in the thumbnail display area.<br />
Mac OS 9.2.2<br />
1<br />
2<br />
3<br />
Mac OS X 10.2 – 10.3<br />
1<br />
2<br />
3<br />
19
Moving and Copying Folders and Images<br />
You can use drag and drop to move and copy folders and images.<br />
Move<br />
Copy<br />
Aim Operation<br />
Stop a move or<br />
copy<br />
Drag and drop the folder or image in the folder tree display area.<br />
Drag and drop the folder or image in the folder tree display area<br />
while holding down the [option] key.<br />
Drop the folder or image in the thumbnail display area.<br />
When you drop the folder or image (release the mouse button) , the operation ends.<br />
Folder tree display area Thumbnail display area<br />
20
Using the Thumbnail Display Area<br />
Thumbnail Types / Switching Thumbnail Display<br />
Modes / Select a Thumbnail<br />
The thumbnail display area shows a list of reduced versions of the images in a<br />
folder. The reduced images are referred to as thumbnails.<br />
Related Topics<br />
• Using the Folder Tree<br />
• Using the Image Window<br />
Thumbnail Types<br />
The type of thumbnail shown differs depending on the file format.<br />
Still Image Sound Still Image with Sound Movie<br />
A damaged file or a format not supported<br />
by <strong>FinePix</strong>Viewer.<br />
Switching Thumbnail Display Modes<br />
Selecting “Details” displays information such as the image<br />
size and the photography date and time.<br />
21
Select a Thumbnail<br />
This section describes how <strong>FinePix</strong>Viewer operates when you select a thumbnail.<br />
Refer to the operation examples provided here.<br />
• When you click a thumbnail, only that thumbnail is selected.<br />
• To select multiple images, drag the mouse so that the images are enclosed.<br />
• To select additional thumbnails, hold down the [shift] key as you click the images.<br />
• Click in the background to deselect all the selected images.<br />
Operation examples<br />
Before After<br />
1 Click (to select 1 image only).<br />
Unselected Selected<br />
CLICK<br />
CLICK<br />
2 Click while holding down the [shift] key (to select another image).<br />
CLICK<br />
22
Before After<br />
3 Click while holding down the [shift] key (to select another image).<br />
CLICK<br />
4 Click while holding down the [shift] key (to deselect just one image).<br />
CLICK<br />
5 Click in the background (to deselect all the selected images).<br />
6 Drag the mouse over the images (to select multiple images).<br />
CLICK<br />
23
Viewing Slide Shows<br />
Starting a Slide Show / Operations During a Slide Show /<br />
Slide Show Settings<br />
You can use a slide show to check successive images in full-screen display mode.<br />
Starting a Slide Show<br />
CLICK<br />
Playback Method<br />
Click the [Slide Show] button to start the slide show.<br />
Operations During a Slide Show<br />
Playback Method<br />
Operation<br />
Frame advance [➔] key or space key.<br />
Frame rewind [ ] key<br />
Exit slide show<br />
Continue slide show<br />
Delete this file<br />
24<br />
Operation<br />
Play back all the frames in a folder. Start without selecting any thumbnails.<br />
Begin playback from a specified frame. Select just 1 thumbnail and then begin.<br />
Play back only the selected frames. Select 2 or more thumbnails and then begin.<br />
End [command] + [.] (period) key<br />
Show dialog box Mouse click or [return] key<br />
➔<br />
Ends the slide show.<br />
Restarts the slide show from the<br />
current frame.<br />
Deletes the file being played<br />
back.
Slide Show Settings<br />
Click “Slide Show” in the “File” menu.<br />
Playback<br />
Automatically<br />
Playback<br />
interval<br />
Playback<br />
repeatedly<br />
Playback<br />
Cancel<br />
Changes frames at the specified interval.<br />
Frames are not changed automatically.<br />
Sets the interval at which frames are changed. This setting is valid<br />
when the “Playback Automatically” checkbox is ticked.<br />
Restarts playback from the first frame once the last frame is reached.<br />
All the frames are played back just once.<br />
Ends the slide show settings.<br />
Returns the setting to their original values.<br />
25
Printing<br />
Print / Index Print<br />
Print<br />
1 Double-click a still-image thumbnail to open an image window.<br />
2 Click the [Print] button.<br />
3 Tick the checkboxes for the required print option settings.<br />
4 Click the [Preview] button to check how the image will be printed.<br />
When you are happy with the image, click the Close button.<br />
5 Click the [Print] button to print the image.<br />
Tick this checkbox to<br />
print the image in the<br />
center of the page.<br />
Ensures that the<br />
image is not cropped<br />
during printing.<br />
✽<br />
<br />
Prints with the minimum margins.<br />
✽ To set details such as the paper size and printing orientation, select “Page Setup” in the “File” menu.<br />
For more information, refer to your printer’s operation manual.<br />
26<br />
r<br />
t<br />
Select<br />
“<strong>FinePix</strong>Viewer”.<br />
Tick this checkbox to<br />
print the photography<br />
date.
Index Print<br />
Index prints allow you to print multiple frames on a single print.<br />
Related Topics<br />
• Using the Thumbnail Display Area<br />
• Information Batch Edit<br />
1 In the thumbnail display area, select the images to be<br />
included in the index.<br />
2 Select “Index Print” in the “File” menu.<br />
27<br />
CLICK
3 When you have finished the settings, click the [OK] button.<br />
See “Information Batch Edit” for information on the comment<br />
in the Detailed Settings.<br />
28<br />
Specifies the number<br />
of frames on each<br />
print. In this example,<br />
4 × 4 (=16 frames) is<br />
specified.<br />
You can imprint information<br />
below the images.<br />
See “Information Batch Edit” for<br />
information on comments.<br />
You can check the information before<br />
printing.
Ordering Prints<br />
Opening and Working with Windows / Sample Print<br />
Order Procedure<br />
Opening and Working with Windows<br />
Click the [Print Order] button.<br />
Click “New Index” in the<br />
“Order” menu to open a<br />
new index window.<br />
Print Order Window<br />
Index Window Image window<br />
Specify Index Printing<br />
Cancel Index Print Settings<br />
Set Print Order<br />
Cancel Print Order<br />
Specify the Number of Prints<br />
Save and Close<br />
29<br />
Select a media.<br />
Opening Windows<br />
Working With Windows<br />
Select a media and click the [OK] button.<br />
Double-click a thumbnail to<br />
open an image window.<br />
Specify theTrimming Settings<br />
Specify the Rotation Settings<br />
Specify the Description
Sample Print Order Procedure<br />
Load the media you intend to give to the store into your computer. Once you have<br />
loaded the media, try the actual procedure below.<br />
1 Click the [Print Order] button.<br />
2 Select the media to be given to the store.<br />
30
Set Print Order<br />
3 You can drag the thumbnails for the still images you want to<br />
print from <strong>FinePix</strong>Viewer and drop them in the print order<br />
window.<br />
Print Order Window <strong>FinePix</strong>Viewer<br />
Files You Can Register<br />
File format Exif-JPEG, Exif-TIFF, JPEG<br />
Image size<br />
Cancel Print Order<br />
640 pixels (width) or more by 480 pixels (height) or more<br />
4 Select the thumbnail and click “Cancel Print Order” in the<br />
“Order” menu.<br />
31
Specify the Number of Prints<br />
5 Select a thumbnail and change the “Number of prints” setting.<br />
Specify the Trimming Settings<br />
6 Double-click the thumbnail to open the image window.<br />
Print Order Window Image Window<br />
7 Click the [Marquee Tool] button.<br />
Maximum number of prints: 999<br />
You can enter a number directly<br />
32<br />
+1<br />
-1
8 Begin by dragging the mouse slightly. This creates a frame at<br />
the minimum size (640 × 480 pixels). The image cannot be<br />
trimmed any smaller than this frame.<br />
9 Adjust the size and position of the frame. When you have<br />
completed the settings, close the image window.<br />
Aim<br />
Image Window<br />
33<br />
640<br />
Operation<br />
Change the size. Click and drag the handles.<br />
Change the position. Click inside the frame and drag the image.<br />
Remove the frame. Click outside the frame.<br />
480
0 Click the [OK] button in the Warning dialog box. A frame<br />
appears around the thumbnail and are able to be checked the<br />
trimming settings.<br />
Specify the Rotation Settings<br />
!1 Double-click the thumbnail to open the image window.<br />
Print Order Window Image Window<br />
34
!2 Click the [Rotation Setting] button and select the “Rotation<br />
Angle”. When you have completed the settings, click the [OK]<br />
button to close the image window.<br />
✽ The image is rotated during printing. You cannot check the rotation on screen.<br />
If the proportions (height and width) of the print paper differ from those of the<br />
image data, part of the image may be cropped or white margins may appear on<br />
the print.<br />
!3 Click the [OK] button in the Warning dialog box. An icon<br />
appears on the thumbnail to confirm that rotation has been<br />
specified for the image.<br />
35
Specify the Description<br />
!4 Double-click a thumbnail to open an image window.<br />
Print Order Window Image Window<br />
!5 Click the [Description Setting] button and specify the<br />
description settings. Put a tick in the “Date” checkbox and<br />
select “MM/DD/YYYY” in “Format”.<br />
Date<br />
The date is not printed.<br />
The date is printed in the specified format.<br />
Format<br />
36<br />
Example with a photography date of<br />
February 14, 2003<br />
YYYY.MM.DD 2003.02.14<br />
MM/DD/YYYY 02/14/2003<br />
DD.MM.YYYY 14.02.2003
!6 Put a tick in the “Frame Number/Filename” and<br />
“Comment/Title” checkboxes and enter a title (e.g. Red<br />
Flower). When you have completed the settings, click the<br />
[OK] button to close the image window.<br />
Frame Number /<br />
Filename<br />
Comment / Title<br />
Not printed.<br />
The frame number or filename is printed. You can<br />
enter up to 12 characters.<br />
Not printed<br />
The comment or title is printed. You can enter up to<br />
12 characters.<br />
!7 Click the [OK] button in the Warning dialog box. An icon<br />
appears on the thumbnail to confirm that description settings<br />
have been specified for the image.<br />
37
Specify Index Printing<br />
!8 In the Print Order window, select “New Index” in the “Order” menu.<br />
Print Order Window Index Window<br />
!9 Register the still images to be included in the index print.<br />
Drag the still image thumbnails from <strong>FinePix</strong>Viewer and drop<br />
them in the index window. When you have finished<br />
registering images, close the Index window.<br />
Index Window FinePIx Viewer<br />
Files You Can Register<br />
File format<br />
Image size<br />
Exif-JPEG, Exif-TIFF, JPEG<br />
640 pixels (width) or more by 480 pixels (height) or more<br />
38
@0 The thumbnail images are displayed so that you can check<br />
the index settings.<br />
Print Order Window Index Window<br />
@1 Use this procedure to cancel a print specification. Select the<br />
thumbnail and click “Cancel Print Order” in the “Order” menu.<br />
Index Window<br />
DOUBLE CLICK<br />
Cancel Index Print Settings<br />
39<br />
The index can be revised.
Save and Close<br />
@2 Click the [Save] button.<br />
@3 Check the order details and then click the [OK] button.<br />
@4 Eject the media using the correct procedure.<br />
40
Using the Image Window<br />
Opening the Image Window / Working With Still Images<br />
(Save As, Print, Marquee Tool, Crop, Type Tool, Image<br />
Size, Rotate Left / Rotate Right) / Playing Back Movies<br />
and Sound / Saving a Movie Under Another Name /<br />
Editing Movies<br />
Double-clicking a still image thumbnail opens an image window. The default image<br />
viewer is <strong>FinePix</strong>Viewer, but you can use a different application to display images.<br />
This description assumes that you are using the default application <strong>FinePix</strong>Viewer.<br />
Related Topics<br />
• Using the Thumbnail Display Area<br />
• Using the Picture Playback Application Registration Area<br />
41
Opening the Image Window<br />
When you double-click a still image thumbnail, an image window similar to the one<br />
shown below appears.<br />
Filename Display scale<br />
Information about the displayed still image is shown along the bottom of<br />
the window. The information shown varies depending on the file format.<br />
Increases the display scale.<br />
Decreases the display scale.<br />
Scrolls the window.<br />
Click and hold a point in the image and drag it around<br />
42
Working With Still Images<br />
Save As<br />
Open an image window first, then start necessary operation.<br />
Specify the save location 1, the filename (Save as) 2 and the<br />
file type (Format) 3. Then click the [Save] button.<br />
1<br />
2<br />
3<br />
Still Image File Type Features/Typical Uses<br />
Exif-JPEG<br />
Exif-TIFF<br />
PICT<br />
Smaller file sizes / On the Internet<br />
Saved with its Exif data /<br />
To retain image quality and information<br />
Standard Macintosh image file format /<br />
For viewing on other Macintoshes<br />
If you repeatedly save an image in the Exif-JPEG format the image quality<br />
deteriorates. We recommend that you save the original file using the following<br />
procedure:<br />
• First make a copy of the original file.<br />
• Save the file under a different name or in a different location.<br />
• Save the file in a format that does not lower the image quality (Exif-TIFF or<br />
PICT).<br />
43<br />
Quality<br />
Deteriorates when<br />
the image is saved.<br />
Does not<br />
deteriorate when<br />
the image is saved.
Print<br />
Prints the displayed image.<br />
Open an image window first, then start necessary operation.<br />
1 Specify the print options.<br />
2 Use the [Preview] to check how the image will look when printed.<br />
3 Click the [Print] button.<br />
1<br />
44<br />
2<br />
3
Sample Settings<br />
“Center Image” / “Date Imprinting” setting<br />
Center Image Setting<br />
“Adjust to paper size” setting<br />
Setting<br />
45<br />
Date Imprinting Setting<br />
Print Preview
Marquee Tool: Specifies an area to be cropped.<br />
This tool can also be used to specify an area to<br />
be copied. (This allows you to paste part of an<br />
image into another document.)<br />
Crop: Cuts out the specified area.<br />
Open an image window first, then start necessary operation.<br />
1 Use the Marquee Tool to specify desired area.<br />
2 Click the [Crop] button to crop or select “Copy” from “Edit”<br />
menu for paste.<br />
Click “Copy” in the “Edit” menu and paste the cropped<br />
image in another document.<br />
• Move the selected area around by clicking and dragging a point inside the<br />
selected area.<br />
• Cancel the last operation performed by clicking “Undo” in the “Edit” menu. This is<br />
useful when you crop an image incorrectly.<br />
Once an edited image is saved, the original image cannot be recovered.<br />
To avoid this, use the “Save As” command to ensure that the original file remains untouched.<br />
46<br />
Click the [Crop] button.
Type Tool<br />
Allows you to superimpose text onto your images.<br />
Open an image window first, then start necessary operation.<br />
• Move the superimposed text around by clicking a point inside the selected area<br />
and dragging it around.<br />
• Cancel the last operation performed by clicking “Undo” in the “Edit” menu. This is<br />
useful when the selected area is accidentally deleted.<br />
Once an edited image is saved, the original image cannot be recovered.<br />
To avoid this, use the “Save As” command to ensure that the original file remains untouched.<br />
47<br />
Double-click inside<br />
the selected area to<br />
edit the text again.
Image Size<br />
Allows you to change the size of your image.<br />
Open an image window first, then start necessary operation.<br />
Arbitrary<br />
Image Size<br />
640 × 480 (VGA)<br />
320 × 240 (QVGA)<br />
%<br />
Unit<br />
Pixels<br />
Pixels<br />
• You can cancel the last operation performed by clicking “Undo” in the “Edit”<br />
menu. This is useful when you change the size of the image incorrectly.<br />
Once an edited image is saved, the original image cannot be recovered.<br />
To avoid this, use the “Save As” command to ensure that the original file remains untouched.<br />
48<br />
Linked so as to maintain the<br />
aspect ratio.<br />
Width<br />
% specification<br />
160 ~ 6144<br />
640<br />
320<br />
Height<br />
% specification<br />
120 ~ 6144<br />
480<br />
240
Rotate Left / Rotate Right<br />
Rotate the image.<br />
Open an image window first, then start necessary operation.<br />
• Cancel the last operation performed by clicking “Undo” in the “Edit” menu. This is<br />
useful when the image is mistakenly rotated.<br />
Once an edited image is saved, the original image cannot be recovered.<br />
To avoid this, use the “Save As” command to ensure that the original file remains untouched.<br />
49
Playing Back Movies and Sound<br />
1 Double-click the thumbnail to open the file.<br />
Movie Sound Still image with sound<br />
2 Use the playback bar below the window to play back the<br />
movie or sound.<br />
Volume control<br />
Playback / Pause button<br />
Playback progress button<br />
Frame advance button<br />
50<br />
Adjusts the volume.<br />
Starts or pauses playback.<br />
Shows the playback progress. Play<br />
back any part of the file by dragging<br />
this button to the desired position.<br />
Plays back one frame at a time.
1<br />
2<br />
Saving a Movie Under Another Name<br />
Click “Save As” in the “File” menu.<br />
Specify the save location 1, the filename (Save as) 2 and the file<br />
type (Format) 3, and then click the [Save] button.<br />
You can only save movies in the AVI format (movies shot on a FUJIFILM camera).<br />
See “File Types”.<br />
51<br />
3<br />
CLICK
File Types<br />
Still<br />
Image<br />
Movie<br />
Exif-JPEG<br />
Exif-TIFF<br />
PICT<br />
File Types Features<br />
QuickTime Movie (Normal)<br />
QuickTime Movie (for E-mail)<br />
52<br />
Saves the currently displayed<br />
frame as a still image.<br />
Saves the file in a standard<br />
Macintosh file format.<br />
Image quality is lower, but file<br />
sizes are smaller.
Editing Movies<br />
<strong>FinePix</strong>Viewer comes with basic editing functions that allow you to edit out<br />
unwanted sections of a movie and save only the parts you want to keep.<br />
1 Change the “Movie playback application” in the “Playback<br />
application registration area” to “ImageMixer MovieEditor”.<br />
2 Double-click a movie thumbnail.<br />
3 “Movie Editor” starts up.<br />
When you position the mouse pointer over features such as<br />
buttons, a brief explanation of the feature appears at the<br />
bottom of the window.<br />
Slider<br />
Click and move left or right.<br />
Use the slider bar to select<br />
a position on the slider bar<br />
that sets the starting point<br />
for the required section.<br />
Brief explanation displayed<br />
here.<br />
NOTE<br />
Movies can only be trimmed in 1-second increments.<br />
Hold down the “control” key as you click.<br />
53<br />
Use the slider bar to<br />
select a position on the<br />
slider bar that sets the<br />
ending point for the<br />
required section.<br />
When you have finished<br />
editing, click here to return<br />
to the Save window.
Using the Picture Playback Application Registration Area<br />
Registering an Application / Switching between<br />
Applications<br />
Double-clicking a thumbnail plays back the image file.<br />
By default, the image is opened in <strong>FinePix</strong>Viewer, but other applications can be<br />
used too.<br />
Related Topics<br />
• Using the Thumbnail Display Area<br />
54
Registering an Application<br />
A B C<br />
Drag and drop the application you want to use (or the “alias”).<br />
• You can register multiple applications.<br />
Switching between Applications<br />
• Hold down the [control] key as you click the mouse to view a list.<br />
• Hold down the mouse button to view a list. Click the application you want to use.<br />
55<br />
A<br />
Still image (picture) playback<br />
application<br />
B Movie playback application<br />
C Sound playback application
Using the Playback Pane<br />
Displaying and Hiding the Playback Pane / Viewing<br />
Image Information<br />
The playback pane shows a range of information about an image and a view of the<br />
image that is larger than the thumbnail. This pane is useful for checking and<br />
comparing information such as the photography conditions.<br />
Displaying and Hiding the Playback Pane<br />
Displayed<br />
Hidden<br />
56<br />
Click to hide the pane.<br />
Click to display the pane.
Viewing Image Information<br />
Switches the<br />
image display<br />
mode.<br />
Advances the frame.<br />
These tabs show different information.<br />
The number of tabs differs depending on the file format.<br />
Some of the information displayed here can be edited.<br />
See “Information Batch Edit” for information on editing the information.<br />
57
Batch Operations and Settings<br />
Overview of Batch Operations / Settings for Format<br />
Conversion and Saving / Automatic Rename / Batch Resize /<br />
Batch Rotation / Batch Format Conversion / Information<br />
Batch Edit / Automatic Save Settings / Customizing Windows<br />
Select thumbnail or folder first, then starts necessary operation.<br />
Overview of Batch Operations<br />
The software operates as described below according to the settings. Batch<br />
operations are extremely convenient as they allow you to automatically process<br />
large numbers of files by setting up the software beforehand.<br />
Name Operation<br />
Automatic Rename<br />
Batch Resize<br />
Automatic Save<br />
Batch Rotation<br />
Batch Format Conversion<br />
Renames files.<br />
Resizes images (image dimensions).<br />
Copies data to a specified folder. The data can be<br />
renamed and resized at the same time.<br />
Rotates images.<br />
Changes file formats.<br />
58
The illustrations below give a general overview of batch operations.<br />
DSCF00001<br />
DSCF00002<br />
DSCF00003<br />
2002_0506_0707<br />
2002_0506_0708<br />
2002_0506_0709<br />
Related Topics<br />
• Menus<br />
Original data<br />
Settings<br />
Rename Resize Rotation Format Conversion<br />
Common processing<br />
Processed data<br />
59
Settings for Format Conversion and Saving<br />
● “Format Conversion” settings<br />
Put a tick in the checkbox to convert the files to another format and then select<br />
the file type.<br />
NOTE<br />
Only AVI (Motion JPEG) format movies shot on a FUJIFILM camera can be converted<br />
or saved.<br />
Still Image File Type<br />
Exif-JPEG<br />
Exif-TIFF<br />
PICT<br />
Features / Typical Uses<br />
Smaller file sizes / On the Internet<br />
Saved with its Exif data / To retain<br />
the original image quality and<br />
information<br />
Movie File Types<br />
QuickTime Movie (Normal)<br />
QuickTime Movie (for E-mail)<br />
Standard Macintosh image file format<br />
/ For viewing on other Macintoshes<br />
60<br />
Quality<br />
Deteriorates when the<br />
image is saved.<br />
Does not deteriorate<br />
when the image is<br />
saved.<br />
Features<br />
Saves the file in a standard<br />
Macintosh file format.<br />
Image quality is lower, but file sizes<br />
are smaller.
● “Way of Saving” Settings<br />
Specify the save destination for the converted files.<br />
Once you specify the destination and click the [OK] button, the file format is converted.<br />
The same settings are used for subsequent file format conversions.<br />
If you tick this checkbox, a folder is created in which all the images are saved. If there is<br />
already a folder with that name, the images are saved in that folder.<br />
Naming folders<br />
Date The file’s date is used as the folder name.<br />
The Same Name<br />
Arbitrary Enter the name yourself.<br />
61<br />
Click the [Browse] button to change the<br />
save destination.<br />
The name of the folder containing the original file is used as<br />
the folder name.<br />
If you tick this checkbox and there is already a file with the same name, that file is<br />
overwritten without any warning being displayed.<br />
You are advised to leave this checkbox blank unless you have a particular reason.<br />
Available options in the overwrite warning dialog box<br />
Overwrite Deletes the file in the save destination and saves the data as a new file.<br />
Cancel Cancels batch processing.<br />
Skip Leaves the file in the save destination and proceeds to the next step.<br />
Rename Allows renaming the file.<br />
Example where “Overwrite” applies only to file A and the other files are skipped.<br />
Save to<br />
File A<br />
File B<br />
File C<br />
File A<br />
File B<br />
File C<br />
Save to<br />
File A<br />
File B<br />
File C<br />
If you tick this checkbox, all the original files are deleted. You are advised to leave this<br />
checkbox blank unless you have a reason.
Automatic Rename<br />
Related Topics<br />
• Settings for Format Conversion and Saving<br />
1 Click “Automatic Rename” in the “File” menu.<br />
2 Set the “User Settings” and the “Pattern” (refer to the<br />
modification example).<br />
Up to 7 characters can be entered in the “User definition”<br />
field.<br />
3 Specify the “Format Conversion” and “Way of Saving”<br />
settings and then click the [OK] button.<br />
Batch Resize<br />
Related Topics<br />
• Image Size<br />
• Settings for Format Conversion and Saving<br />
1 Click “Batch Resize” in the “File” menu.<br />
2 Set the image size.<br />
3 Specify the “Format Conversion” and “Way of Saving”<br />
settings and then click the [OK] button.<br />
62
Batch Rotation<br />
Related Topics<br />
• Settings for Format Conversion and Saving<br />
1 Click “Batch Rotation” in the “File” menu.<br />
2 Set the rotation angle.<br />
3 Specify the “Format Conversion” and “Way of Saving”<br />
settings and then click the [OK] button.<br />
Batch Format Conversion<br />
Related Topics<br />
• Settings for Format Conversion and Saving<br />
1 Click “Batch Format Conversion” in the “File” menu.<br />
2 Specify the “Format Conversion” and “Way of Saving”<br />
settings and then click the [OK] button.<br />
63
Information Batch Edit<br />
Related Topics<br />
• Using the Thumbnail Display Area<br />
• Using the Playback Pane<br />
Use this procedure to edit some of the Exif information included with Exif-JPEG<br />
and Exif-TIFF.<br />
1 Click “Information Batch Edit” in the “File” menu.<br />
2 Put a tick in the checkboxes for the items you want to edit<br />
and then edit those items.<br />
3 Click the [OK] button.<br />
64
Automatic Save Settings<br />
Use this procedure to change the settings used when images from the camera are<br />
automatically saved to your computer.<br />
Related Topics<br />
• Automatic Rename<br />
• Batch Resize<br />
• Settings for Format Conversion and Saving<br />
1 Click “Automatic Save Settings” in the “Settings” menu.<br />
2 Specify the “Rename” and “Resize” settings.<br />
3 Specify the “Format conversion” and “Way of Saving”<br />
settings and then click the [OK] button.<br />
65
Customizing Windows<br />
1 Click “View Options” in the “View” menu.<br />
2 Select your preferred “Thumbnail Frame” and “Background”<br />
and then click the [OK] button.<br />
66
<strong>Making</strong> a <strong>FinePix</strong> <strong>CD</strong> <strong>Album</strong><br />
Using <strong>FinePix</strong>Viewer and “ImageMixer V<strong>CD</strong>2 for <strong>FinePix</strong>” (IMxV<strong>CD</strong>2), you can<br />
create albums made up of important photos and movies and then record the<br />
albums on a <strong>CD</strong>-R disk. This is a very convenient way of showing your photos and<br />
movies to people who don’t have <strong>FinePix</strong>Viewer or who don’t even have a<br />
computer.<br />
Video <strong>CD</strong> Web album<br />
Video <strong>CD</strong><br />
<strong>CD</strong> <strong>Album</strong><br />
NOTE<br />
Explanation<br />
Lets you view Video <strong>CD</strong>s<br />
and Web albums on the<br />
same disk.<br />
Creates Web albums<br />
Best for storing photos and<br />
movies you have shot.<br />
Consumer DVD<br />
players<br />
67<br />
Play<br />
PCs<br />
FUJICOLOR<br />
Digital Camera<br />
Print<br />
K K K<br />
× K K<br />
K: Can be used. ×: Cannot be used.<br />
• You will need a separate <strong>CD</strong>-R drive or <strong>CD</strong>-RW drive to create <strong>FinePix</strong> <strong>CD</strong> <strong>Album</strong>s.<br />
• You cannot write data directly to a <strong>CD</strong> on a Macintosh. Toast 5 Titanium or Toast 6<br />
Titanium from Roxio, Inc. is required.<br />
• Video <strong>CD</strong>s cannot be viewed on the consumer games machines currently being sold.<br />
In addition, some DVD players do not have a Video <strong>CD</strong> playback function or may not<br />
be able to recognize <strong>CD</strong>-R disks.
<strong>Making</strong> Video <strong>CD</strong>s<br />
NOTE<br />
This section briefly describes the procedure generally used for creating video <strong>CD</strong>s.<br />
For more detailed information, refer to the Help provided in the ImageMixer V<strong>CD</strong>2 for<br />
<strong>FinePix</strong> application.<br />
1 Launch <strong>FinePix</strong>Viewer.<br />
2 Click the folder containing<br />
the images you want to<br />
record onto the <strong>CD</strong> and then<br />
click the [Launch IMxV<strong>CD</strong>2]<br />
button.<br />
3 The “ImageMixer V<strong>CD</strong>2”<br />
startup screen appears.<br />
4 To create a video <strong>CD</strong>, click the [Video <strong>CD</strong>] button.<br />
5 To add another folder, select the folder to be added from the<br />
"Select folder" area and then click the "Add" button.<br />
Navigation bar<br />
Folder selection area<br />
Once this bar is full, no more files can be added.<br />
68<br />
Help button<br />
Help window<br />
Add button<br />
Option button
Navigation bar<br />
Add button<br />
Help window<br />
Help button<br />
6 Once registration ends, click the "Next" button and set the<br />
Video <strong>CD</strong> design.<br />
TIP<br />
Shows which task is currently being performed.<br />
Click this button to add a folder from the folder list. The<br />
added folder is displayed as a Slideshow button.<br />
When you move the mouse pointer over a feature such<br />
as a button, a description of the feature appears in this<br />
Help window.<br />
Click this button to display the ImageMixer V<strong>CD</strong>2 for<br />
<strong>FinePix</strong> Help.<br />
You can switch between settings panels by clicking in the Menu/Layout window.<br />
1 Click the "Menu" tab to display the "Menu" panel and set the style for the menu<br />
screens displayed during playback.<br />
Menu tab<br />
Shows the registered<br />
folders.<br />
69<br />
Use this to select<br />
the background<br />
design.<br />
Allows you to<br />
select a still image<br />
file as the<br />
background.<br />
Allows you to set the background music (BGM)<br />
for the menu window. Only WAVE or MP3 files<br />
can be set.
2 Click "Buttons" to display the "Buttons" tab and set the buttons.<br />
Buttons tub<br />
Button<br />
3 Click the menu title to display the "Text" tab and set the title. Then click the folder<br />
title to display the "Text" tab and set the folder title.<br />
Text tab<br />
Menu name<br />
Folder name<br />
4 When the settings are completed, click the "Apply" button.<br />
70<br />
Sets the button style.<br />
Apply button<br />
Sets the menu titles,<br />
folder titles, styles,<br />
sizes and font colors.
7 Set the details of the registered folders.<br />
1 Double-click the desired folder to display the folder content.<br />
2 Set the BGM and the sequence in which the Menu window thumbnails or the<br />
slideshow images are played back.<br />
If you select a frame<br />
and then select the<br />
“Set as thumbnail”<br />
checkbox, that<br />
image is used as the<br />
folder thumbnail.<br />
8 Click the "Check Playback" button in the navigation bar.<br />
Selected number<br />
Sets the slideshow sequence. You can<br />
arrange the slideshow images in any<br />
order by dragging and dropping the image<br />
files to the desired position.<br />
71<br />
You can set 1 tune<br />
as the background<br />
music for each folder.<br />
To repeat the tune,<br />
select the “Loop”<br />
checkbox.<br />
Only WAVE or MP3<br />
files can be set.<br />
If you select a frame and then select the<br />
“Do not use” checkbox, that image will not<br />
be used on the Video <strong>CD</strong>. This provides an<br />
easy way to exclude unwanted photos.<br />
These correspond to the selection numbers on<br />
the remote control for the player used to play<br />
back the Video <strong>CD</strong>. Clicking button “1” in the<br />
“Controller” panel initiates a slideshow of the<br />
folder currently shown with selection number 1<br />
in the Menu window.
9 Click the [Write to Disc] button in the navigation bar and then<br />
specify the <strong>CD</strong> album settings.<br />
Enter the <strong>CD</strong> album title. The<br />
title can contain up to 15 halfpitch<br />
characters.<br />
Enter a comment for the <strong>CD</strong><br />
album. The comment can<br />
contain up to 138 half-pitch<br />
characters.<br />
Select the <strong>CD</strong> album design.<br />
When you click to select a<br />
template thumbnail, that<br />
design is applied to the index<br />
screen page.<br />
0 When you have finished checking the settings, you are ready<br />
to actually burn the <strong>CD</strong>.<br />
Enter the disk name for the created Video <strong>CD</strong><br />
image. The disk name can consist of up to 30<br />
half-pitch uppercase characters made up of<br />
numbers (0 to 9), letters (A to Z) and<br />
underscores (_).<br />
72<br />
If you tick this checkbox,<br />
instructions will be<br />
displayed during playback.<br />
Click here to specify the folder in which the<br />
Video <strong>CD</strong> image will be stored.
!1 When you have completed the <strong>CD</strong> album settings, click the<br />
[Write] button.<br />
NOTE<br />
To burn the <strong>CD</strong>, you will need Toast 5 Titanium or Toast 6 Titanium from Roxio, Inc.<br />
Refer to the instructions provided with Roxio Toast 5 Titanium or Toast 6 Titanium for<br />
more information on writing data to the <strong>CD</strong>.<br />
73
Using RAW FILE CONVERTER LE<br />
C<strong>CD</strong>-RAW files shot on the Digital Camera are files that contain image data shot<br />
on the digital camera and saved without first undergoing signal processing.<br />
Consequently, the content of C<strong>CD</strong>-RAW files cannot be viewed by ordinary<br />
application programs.<br />
1 Copy the C<strong>CD</strong>-RAW files to your hard disk.<br />
2 Select the C<strong>CD</strong>-RAW files to be converted in <strong>FinePix</strong>Viewer.<br />
C<strong>CD</strong>-RAW files are indicated by the “ ” or “ ” icon.<br />
3 Click the [RAW FILE CONVERTER LE] button with the mouse.<br />
4 RAW FILE CONVERTER LE starts up.<br />
5 When you press the “Convert All” button, an Exif-TIFF (RGB)<br />
image data file is created in the same folder as the C<strong>CD</strong>-RAW<br />
data.<br />
TIP<br />
2<br />
The Exif-TIFF (RGB) image file is created using the name of the original C<strong>CD</strong>-RAW file<br />
with “_1” added and the file extension changed to “.TIF”. However, if a file with that<br />
name already exists, the number following the underscore is automatically incremented.<br />
Eg) DSCF0003.RAF / DSCF0003_1.TIF<br />
74<br />
3
Using <strong>FinePix</strong>Viewer to Attach Images to E-Mail<br />
Supported E-mail Software / Check the following: /<br />
Attaching Images / Setting the File Size for Attached Images<br />
<strong>FinePix</strong>Viewer provides a simple procedure for attaching images to an e-mail<br />
message.<br />
Supported E-Mail Software<br />
The e-mail software programs listed below can only be used if they are selected as<br />
your default e-mail software.<br />
Mac OS 9.2.2<br />
Outlook Express<br />
Mac OS X 10.2 – 10.3<br />
Mail<br />
NOTE<br />
Contact your ISP (Internet Service Provider) for information on setting up your e-mail<br />
software.<br />
Check the Following :<br />
Check that your e-mail software is registered correctly.<br />
Mac OS 9.2.2<br />
1 Click “Control Panels” /<br />
“Internet” and then click the<br />
“E-mail” tab.<br />
2 Check that “Outlook<br />
Express” is shown in<br />
“Default E-mail Application”.<br />
Mac OS X 10.2 – 10.3<br />
1 Click “System Preferences...” in the Apple menu.<br />
2 Click “Internet” and then click “Mail”.<br />
3 Check that “Mail” is selected as the “Default e-mail software”.<br />
75
Attaching Images<br />
1 Open the folder in which <strong>FinePix</strong>Viewer was installed and<br />
double-click the “<strong>FinePix</strong>Viewer” icon to launch the program.<br />
2 Click the folder containing the images you want to attach.<br />
3 Click the thumbnails for the images to select them.<br />
✽ Up to 10 images can be sent with one e-mail message.<br />
4 With the images selected, click “Mail Sending” in the “File”<br />
menu.<br />
✽ You can send a total of up to 1 MB of image data at one time.<br />
If the total exceeds 1 MB, a warning message appears when you click “Mail<br />
Sending”. If this occurs, reduce the number or size of the images until the<br />
message no longer appears.<br />
TIP<br />
Use the Batch Format Conversion function to convert the file format for movies.<br />
CLICK<br />
76
5 The Outlook mail transmission window opens and the images<br />
are automatically attached to your e-mail message. Type in<br />
the address, title and your message and then send the<br />
message in the usual way.<br />
NOTE<br />
Do not exit <strong>FinePix</strong>Viewer until mail transmission is complete, as this will prevent the email<br />
with the images attached from being sent.<br />
Setting the File Size for Attached Images<br />
When <strong>FinePix</strong>Viewer attaches an image file to an e-mail message, it adjusts the<br />
size of the image file in accordance with the “Mail Transmission Settings”.<br />
✽ When an image is resized, the original image is not affected.<br />
1 Click “Mail Transmission Settings” in the “Settings” menu.<br />
2 Place a tick in the “Resize” checkbox and specify the number<br />
of pixels (height and width) for resized images.<br />
TIP<br />
If you do not want to resize the image, deselect the “Resize” checkbox.<br />
77
Using the <strong>FinePix</strong> Internet Service<br />
Using <strong>FinePix</strong>Viewer also allows you to access the <strong>FinePix</strong> Internet Service via the<br />
Internet.<br />
✽ A working Internet connection is required.<br />
✽ A <strong>FinePix</strong> Internet Service fees do not include your Internet service provider (ISP) connection fees<br />
or any phone charges incurred in dialing your ISP’s access point.<br />
The figure below gives a general overview of the procedure.<br />
NOTE<br />
Your user ID and password are very important. Make sure you do not forget them.<br />
First-time users<br />
To the user registration window<br />
1 User Registration<br />
2 Using the Service<br />
Access the services via the Internet menu. You can also use the “Obtaining the Latest<br />
Version of <strong>FinePix</strong>Viewer”.<br />
Obtain the latest service information.<br />
78<br />
Registered users<br />
The Internet menu is updated.
User Registration<br />
To use the <strong>FinePix</strong> Internet services, users must first register.<br />
✽ Users can be registered for free.<br />
1 Launch <strong>FinePix</strong>Viewer.<br />
2 Click the [Register Now] button.<br />
3 The “User’s Registration for Internet Services” dialog box<br />
opens. As shown below, select “Register Here”, then select<br />
the country or region where you are living and click the [OK]<br />
button.<br />
☞If you are not already connected to the Internet, connect now.<br />
(A dial-up dialog box may be displayed.)<br />
✽ If you have completed the user registration, select “Already Registered” (E.g.<br />
When you want to re-install <strong>FinePix</strong>Viewer after completing user registration).<br />
✽ If the country or area where you are living does not appear in the pull-down list,<br />
select “OTHERS”.<br />
79
4 When the browser starts up, proceed as directed by the<br />
on-screen instructions.<br />
5 Enter the required information in the user registration page.<br />
a<br />
b<br />
c<br />
d<br />
a Enter a familiar name (such as your nickname) between 3 and 25 characters<br />
long as your user ID.<br />
b Enter a password of your choice using letters and/or numbers.<br />
Then enter the password again for confirmation.<br />
c Enter your name.<br />
d Enter your e-mail address.<br />
Enter the remaining required information.<br />
✽ After you register, a confirmation e-mail message is sent to you. Be sure to enter<br />
a valid e-mail address at which you can receive the message.<br />
✽ The actual user registration page may differ slightly in appearance from the<br />
sample shown here.<br />
6 When you have entered all the required information, click the<br />
[Registration] button at the bottom of the page.<br />
Once you complete the registration, a confirmation e-mail is sent. Wait a few<br />
moments until the message is sent.<br />
80
Using the Service<br />
1 Click the [Update menu] button in <strong>FinePix</strong>Viewer.<br />
2 The “Input of User ID” dialog box<br />
appears. Enter the user ID and<br />
password set during user<br />
registration and then click the [OK]<br />
button to update the Internet menu.<br />
TIP<br />
☞ If you are not already connected to the Internet,<br />
the software automatically attempts to connect<br />
(for dial-up connections).<br />
• If you tick the “Click here to save your password” checkbox, you will not need to enter your<br />
password next time.You may need your user ID and password. Make sure you do not<br />
forget them.<br />
• As well as the Internet menu being updated, related information pages may also be<br />
opened. Because these pages may contain good news or useful information, you should<br />
update the Internet menu frequently.<br />
3 Click the menu button for the service you want to use.<br />
TIP<br />
☞ If you are not already connected to the Internet, the software automatically attempts to<br />
connect (for dial-up connections).<br />
☞ Operation after you click the menu button differs depending on the button you click.<br />
For instance, you may jump to your service provider’s web site or an upload dialog<br />
box may open.<br />
✽ The actual Internet menu may differ slightly in appearance from the sample shown<br />
here.<br />
Move the mouse cursor over an Internet menu button to view information about the service.<br />
4 When you have finished using the Internet services,<br />
disconnect from the Internet (for dial-up connections).<br />
NOTE<br />
The connection speed will vary significantly depending on the quality of your phone line and<br />
the amount of traffic on the server to which you are connected.<br />
81
To Delete the Software<br />
Only perform this operation when you no longer require the installed software or when<br />
the software was not installed correctly.<br />
Mac OS 9.2.2<br />
Uninstalling Exif Launcher, <strong>FinePix</strong>Viewer and DP Editor<br />
1 After you have quit Exif Launcher in “Exif Launcher Settings”<br />
in the <strong>FinePix</strong>Viewer “Settings” menu, move the Exif<br />
Launcher file from the “Startup Items” folder in the System<br />
folder to the Trash. Then click “Empty Trash” in the “Special”<br />
menu.<br />
2 After you have exited <strong>FinePix</strong>Viewer and DP Editor and then<br />
drag the installed <strong>FinePix</strong>Viewer folder to the Trash. Then<br />
click “Empty Trash” in the “Special” menu.<br />
Mac OS X 10.2 – 10.3<br />
Uninstalling <strong>FinePix</strong>Viewer<br />
Quit <strong>FinePix</strong>Viewer and DP Editor. Then drag the installed <strong>FinePix</strong>Viewer folder to<br />
the Trash and click “Empty Trash” from the “Special” menu.<br />
82
Troubleshooting<br />
If the software does not operate correctly check that you are using the correct<br />
hardware and software.<br />
If the problem persists even though you are using the correct hardware and<br />
software, refer to the table below and then see the reference page listed for your<br />
problem.<br />
Problem<br />
with<br />
Connection •<br />
Image Viewing<br />
Internet<br />
Other<br />
Problem<br />
When I connected the camera to my Macintosh, the “Required software not found”<br />
message or “Required driver cannot be used” message appears.<br />
When I connected the USB cable, Mac OS displayed the “Initialize disk?” message.<br />
The camera and Macintosh are connected but no removable disk icon is displayed.<br />
A warning message appears when I disconnect the USB cable from the camera.<br />
I can’t log in to the “<strong>FinePix</strong> Internet Service”.<br />
I can’t sign on as a “<strong>FinePix</strong> Internet Service” user.<br />
I can’t update the Internet menu properly. (The buttons do not line up correctly.)<br />
The “The tool could not be executed” message appears.<br />
My camera will no longer play back image files.<br />
I want to stop the <strong>FinePix</strong>Viewer from launching automatically.<br />
Troubleshooting Connection and Image Viewing Problems<br />
● When I connected the camera to my Macintosh, the “Required<br />
software not found” message or “Required driver cannot be used”<br />
message appears.<br />
Possible cause Solution<br />
Is the software installed? Install the software on your Macintosh.<br />
83
● When I connected the USB cable, Mac OS displayed the “Initialize<br />
disk?” message.<br />
Possible cause Solution<br />
Is the media formatted? Disconnect the USB cable from the camera, insert<br />
the media into the camera and format the media.<br />
For more information , refer to the Owner’s Manual<br />
for your camera.<br />
Mac OS 9.2.2 only Enable File Exchange.<br />
Is File Exchange enabled?<br />
● The camera and Macintosh are connected but no removable disk icon<br />
is displayed.<br />
Possible cause Solution<br />
Is the camera switched on?<br />
Switch the camera on. For more information on<br />
“Viewing Images”, refer to the camera’s Owner’s<br />
Manual.<br />
Is the media loaded in the camera? Load a media into the camera. For more<br />
information, refer to the Owner’s Manual for<br />
your camera.<br />
Is “DSC” selected as the USB setting Disconnect the camera briefly and change the<br />
on the camera?<br />
USB setting to “DSC”. For more information on<br />
“Viewing Images”, refer to the camera’s Owner’s<br />
Manual.<br />
Is the special USB cable connected to Check that one end of the special USB cable is<br />
the camera and to the computer? connected to the camera and the other end is<br />
connected to the Macintosh.<br />
Are you using a compatible operating Use Mac OS 9.2.2 or Mac OS X (version<br />
system?<br />
10.2–10.3). Note that the driver software does<br />
not run correctly in the Mac OS X Classic<br />
environment.<br />
● A warning message appears when I disconnect the USB cable from<br />
the camera.<br />
Possible cause Solution<br />
Did you remove the camera while the<br />
camera was still mounted as a disk<br />
drive?<br />
84<br />
Disconnecting the camera while it is still<br />
mounted can corrupt the data on the media or<br />
damage the media itself. Drag the drive icon to<br />
the Trash before you disconnected the camera.
Troubleshooting Internet Problems<br />
● I can’t log in to the “<strong>FinePix</strong> Internet Service”.<br />
Possible cause Solution<br />
Are you able to connect to the<br />
Internet?<br />
Is the <strong>FinePix</strong> Internet Service<br />
undergoing maintenance?<br />
Have you completed the user<br />
registration process?<br />
● I can’t sign on as a “<strong>FinePix</strong> Internet Service” user.<br />
Possible cause Solution<br />
Have you already signed on under the<br />
same e-mail address?<br />
Check your Macintosh hardware and software<br />
setup.<br />
Log in after the maintenance is completed.<br />
85<br />
Click the <strong>FinePix</strong>Viewer [Register Now] (Mac<br />
OS 9.2.2) / [user’s registration] (Mac OS X<br />
10.2–10.3) button and sign on as a “Using the<br />
<strong>FinePix</strong> Internet Service” user.<br />
You cannot sign on twice with the same user ID<br />
or e-mail address.<br />
● I can’t update the Internet menu properly. (The buttons do not line up<br />
correctly.)<br />
Solution<br />
The menu data is corrupted. Use the procedure below to update the menu:<br />
1 Quit <strong>FinePix</strong>Viewer.<br />
2 Delete the menu data in the following locations:<br />
Mac OS 9.2.2<br />
The “<strong>FinePix</strong>InternetFiles” folder inside “Preferences” in the<br />
System Folder.<br />
Mac OS X 10.2 – 10.3 “<strong>FinePix</strong>InternetFile” folder in “Users” / “(user name)” /<br />
“Library” / “Preferences”.<br />
3 Launch <strong>FinePix</strong>Viewer and click “Menu Update” in the “View” menu.
Troubleshooting Other Problems<br />
● The “The tool could not be executed” message appears.<br />
Mac OS 9.2.2<br />
Possible cause Solution<br />
Do you have enough system memory<br />
installed?<br />
86<br />
1 Quit any other applications that are running.<br />
2 Open the “Control Panels” / “Memory” and<br />
increase the amount of virtual memory<br />
allocated. Then restart your Macintosh.<br />
● My camera will no longer play back image files.<br />
Possible cause Solution<br />
Did you rename any files or folders Change the file or folder names in the “DCIM”<br />
inside the “DCIM” folder?<br />
folder back to the original names.<br />
Did you replace an image file inside the<br />
“DCIM” folder?<br />
Do not replace image files in the “DCIM” folder.<br />
● I want to stop the <strong>FinePix</strong>Viewer from launching automatically.<br />
Solution<br />
You can use either of the three methods below to prevent <strong>FinePix</strong>Viewer from launching<br />
automatically.<br />
• Change the Exif Launcher settings<br />
1 Select “Exif Launcher Settings” in the <strong>FinePix</strong>Viewer “Settings” menu and click “Do not run Exif<br />
Launcher at restart.”<br />
2 Restart your computer.<br />
✽ To restore the original settings, use the same procedure and tick the “Launch Exif Launcher at<br />
restart”. Then restart your Macintosh.<br />
• Remove Exif Launcher<br />
1 Select “Exif Launcher Settings” in the <strong>FinePix</strong>Viewer “Settings” menu and tick “Quit Exif<br />
Launcher immediately”.<br />
2 Move “Exif Launcher” from the “Startup Items” folder in the System folder to the Trash.<br />
3 Select “Empty Trash” in the “Special” menu.<br />
✽ To restore Exif Launcher, re-install the software.<br />
• Change the ImageCapture settings.<br />
(OS X 10.2 or later)<br />
1 Double-click the ImageCapture icon.<br />
2 Select “Preferences...” from the “Image Capture” menu.<br />
3 Change the “When a camera is connected, open:” to “No application” and then click the Close<br />
button.<br />
✽ To restore the original settings, set “When a camera is connected, open:” to “FPVBridge”.
for <strong>FinePix</strong>Viewer<br />
<strong>FinePix</strong>Viewer Troubleshooting<br />
Error message Cause Solution<br />
Folder not found.<br />
“Filename” not found.<br />
This file format cannot<br />
be used.<br />
The file with the same<br />
name as “filename”<br />
already exists.<br />
Overwrite?<br />
The folder with the<br />
same name as<br />
“filename (folder<br />
name)” already exists.<br />
Disk or folder is writeprotected.<br />
Insufficient disk<br />
capacity. Process<br />
aborted.<br />
You were working with a<br />
folder on a removable disk<br />
and the disk has been<br />
removed.<br />
The folder you were working<br />
with has been deleted or<br />
moved.<br />
You were working with a file<br />
on a removable disk and the<br />
disk has been removed.<br />
A file with a format not<br />
supported by <strong>FinePix</strong>Viewer<br />
was accessed.<br />
The folder on which you<br />
dropped the file already<br />
contains another file with the<br />
same name.<br />
The folder on which you<br />
dropped the file (folder)<br />
already contains a folder with<br />
the same name.<br />
The folder or disk to which<br />
you attempted to write the file<br />
is write-protected.<br />
Some digital camera models<br />
do not have a Write function.<br />
There is not enough<br />
available disk space.<br />
87<br />
Re-insert the disk.<br />
Use the [Refresh] menu.<br />
Re-insert the disk.<br />
Use a file format supported<br />
by <strong>FinePix</strong>Viewer.<br />
To avoid overwriting the<br />
existing file, rename the file<br />
being dropped or rename the<br />
file in the target folder.<br />
Rename the file (folder) being<br />
dropped or rename the folder<br />
in the target folder.<br />
Remove the write-protection<br />
from the disk or folder.<br />
Specify another writable disk<br />
as the save destination for<br />
the image data. Alternatively,<br />
copy the image data in the<br />
camera to another writable<br />
disk and then process the<br />
copied data.<br />
Switch to a new disk, or<br />
create space by deleting<br />
some unneeded files on the<br />
disk.
Error message Cause Solution<br />
Cannot move “file<br />
(folder) name”. Copy?<br />
“Filename” is in use.<br />
Files won’t be played<br />
back on a camera.<br />
OK?<br />
It is recommended that<br />
you process the files<br />
after saving them to a<br />
hard disk.<br />
File is locked.<br />
“Filename” is broken or<br />
not in the usable<br />
format.<br />
Window cannot be<br />
opened any more.<br />
The file or the folder<br />
with the same name<br />
already exists.<br />
Image size is smaller<br />
than the specified size.<br />
Image size will be out<br />
of range.<br />
The file (folder) you<br />
attempted to move is on a<br />
write-protected disk.<br />
The file you attempted to<br />
move is being used by<br />
another application.<br />
The selected file is being<br />
used by another application.<br />
A file with the same file name<br />
or file number already exists<br />
in the write destination.<br />
An attempt was made to<br />
modify a write-protected file.<br />
The attempt to read the file<br />
failed.<br />
No more than 20 windows<br />
can be opened.<br />
A file (folder) exists with the<br />
filename you entered.<br />
This image size cannot be<br />
saved in the Exif format.<br />
The image cannot be resized<br />
as specified.<br />
88<br />
Remove the write-protection<br />
from the disk.<br />
Quit the application that is<br />
using the file.<br />
Quit the application that is<br />
using the file.<br />
Change the name or number<br />
of the file being written.<br />
Use the [Get Info] command<br />
to uncheck the [Locked]<br />
check box.<br />
This file is not supported by<br />
<strong>FinePix</strong>Viewer and cannot be<br />
used.<br />
To open the images in a<br />
window, select no more than<br />
20 images.<br />
To avoid duplicating an<br />
existing file (folder) name,<br />
use a different file name.<br />
Save the image as a PICT<br />
file.<br />
Specify a target size for the<br />
resized image that is between<br />
160 × 120 and 6144 × 6144.
Error message Cause Solution<br />
Automatic rename<br />
failed. Process<br />
aborted.<br />
Part of “filename” will<br />
be cropped because<br />
the image is larger than<br />
the printer output size.<br />
Registered application<br />
not found.<br />
Could not execute the<br />
registered application.<br />
Could not create a<br />
temporary file. Process<br />
aborted.<br />
Could not execute the<br />
order application.<br />
Printer not found.<br />
Mail Transmission<br />
failed.<br />
Too many files were selected<br />
and file name duplication<br />
could not be prevented.<br />
The image in the file being<br />
printed is bigger than the<br />
paper size.<br />
The registered application<br />
has been deleted or moved.<br />
The application is damaged.<br />
Insufficient memory.<br />
A temporary file could not be<br />
created when an Exif-TIFF-<br />
YC file was opened as there<br />
was insufficient disk space.<br />
The print order application<br />
program cannot be found or<br />
is damaged.<br />
No printer is selected.<br />
No e-mailer application<br />
found.<br />
No registered e-mailer<br />
application.<br />
89<br />
Reduce the number of files<br />
processed by the Automatic<br />
Rename function.<br />
Print using the [Adjust to<br />
paper size] option.<br />
Re-register the application.<br />
Re-install the application or<br />
register another application.<br />
Quit any other applications<br />
that are running.<br />
Increase the amount of space<br />
available on the disk on which<br />
<strong>FinePix</strong>Viewer is installed.<br />
Reinstall <strong>FinePix</strong>Viewer.<br />
Select the printer in the<br />
Chooser.<br />
Install Outlook Express.<br />
Open the [Internet] control<br />
panel and register Outlook<br />
as the [Default<br />
E-mail Application].
Troubleshooting with Print Order<br />
Error message Cause Solution<br />
Insert an order media.<br />
Existing DPOF file<br />
cannot be used.<br />
Existing DPOF file<br />
contains an error.<br />
These orders will be<br />
ignored.<br />
“Filename” not found.<br />
“Filename” is broken or<br />
not in the usable<br />
format.<br />
Window cannot be<br />
opened any more.<br />
Order media is write<br />
protected.<br />
Insufficient order media<br />
capacity.<br />
Cannot create an order<br />
folder.<br />
The number of orders<br />
is full. Cannot order<br />
any more.<br />
The order media is not<br />
inserted in the drive.<br />
The media is not formatted.<br />
The existing DPOF file<br />
contains an error.<br />
The settings in the existing<br />
DPOF file contain an error.<br />
You were working with a file<br />
on a removable disk and the<br />
disk has been removed.<br />
The file being used has been<br />
deleted or moved.<br />
The file is corrupted or is in a<br />
format that is not supported.<br />
Alternatively, the image size<br />
is smaller than 640 × 480.<br />
You attempted to open more<br />
than 20 windows.<br />
The media is write protected.<br />
Some digital camera models<br />
do not have a Write function.<br />
There is not enough space<br />
available on the media.<br />
The DCIM folder on the order<br />
media already contains a<br />
folder numbered 999.<br />
There are too many<br />
registered standard prints<br />
and index prints.<br />
90<br />
Load the media into the drive.<br />
Format the media in the<br />
camera.<br />
Create a new DPOF file.<br />
The erroneous settings are<br />
ignored.<br />
Re-insert the disk.<br />
Cancel the print order for the<br />
file.<br />
Use a file format (Exif-JPEG,<br />
Exif-TIFF or JPEG) and an<br />
image size no smaller than<br />
640 × 480.<br />
To open the Image windows<br />
and the Index windows,<br />
select no more than 20<br />
thumbnails and index.<br />
Remove the write protection<br />
from the media.<br />
When creating a print order<br />
file on the media, use the<br />
Image Memory Card Reader<br />
SM-R2 or DPC-R1 and the<br />
PC Card Adapter PC-AD3 or<br />
DPC-AD.<br />
Use a media with sufficient<br />
free space as the order<br />
media.<br />
Use a new media.<br />
Register using a new media.
Other Problems<br />
Error message Cause Solution<br />
Not enough memory.<br />
Process aborted.<br />
I/O error occurred.<br />
Process aborted.<br />
There was not enough<br />
memory.<br />
Fault in the drive unit or disk.<br />
91<br />
Select the <strong>FinePix</strong>Viewer<br />
program file and use the [Get<br />
Info] command to increase<br />
the “Preferred Size” setting in<br />
the memory requirements.<br />
Check for problems in the<br />
drive unit, or use an error-free<br />
disk.
Menus<br />
File / Edit / View / Go / Bookmarks / Settings / Tools /<br />
Help / Contextual Menus<br />
Using the [File] Menu<br />
Open<br />
Save As<br />
Close<br />
Delete<br />
Name<br />
New Folder<br />
Delete Folder<br />
Slide Show<br />
Mail Sending<br />
Automatic Save<br />
Automatic Rename<br />
Batch Resize<br />
Batch Rotation<br />
Batch Format<br />
Conversion<br />
Information Batch<br />
Edit<br />
Page Setup<br />
Print<br />
Index Print<br />
Preceding operation<br />
Select a thumbnail.<br />
Opens a file.<br />
Opens a file.<br />
Select a thumbnail.<br />
Select a folder.<br />
Select a folder.<br />
Select a thumbnail<br />
or folder.<br />
Select a thumbnail.<br />
Select a folder.<br />
Select a thumbnail.<br />
Select a thumbnail.<br />
Select a thumbnail.<br />
Select a thumbnail.<br />
Select a thumbnail.<br />
––––––––––––––––<br />
Select a thumbnail.<br />
Select a thumbnail.<br />
92<br />
Opens a file.<br />
Function<br />
Saves the open file.<br />
Closes the open window.<br />
Deletes the selected file.<br />
Creates a folder inside the selected<br />
folder.<br />
Deletes the selected folder.<br />
Successive images are shown in<br />
full-screen display mode.<br />
Creates a new e-mail message with<br />
the image attached.<br />
Copies images to your computer.<br />
Renames the files using the specified format.<br />
Batch converts image sizes using<br />
the specified format.<br />
Batch rotates images using the<br />
specified format.<br />
Converts the image format (file<br />
format) using the specified format.<br />
Batch edits information such as the<br />
copyright and photography date and<br />
time.<br />
Sets the page.<br />
Prints the image.<br />
Prints multiple frames on the same<br />
print.
Using the [Edit] Menu<br />
Undo<br />
Cut<br />
Copy<br />
Paste<br />
Name<br />
Select All<br />
Name<br />
Name<br />
Preceding operation<br />
––––––––––––––<br />
––––––––––––––<br />
Select part of an image (use<br />
the marquee tool in the<br />
playback window).<br />
––––––––––––––<br />
Select a folder.<br />
Open the playback window.<br />
Using the [View] Menu<br />
Stop<br />
Refresh<br />
Display Mode<br />
Arrange<br />
View Options<br />
Menu Update<br />
Using the [Go] Menu<br />
Back<br />
Forward<br />
Name<br />
Print Order<br />
Exit<br />
Folder selection history<br />
Preceding operation<br />
––––––––––––––––<br />
––––––––––––––––<br />
Cancels thumbnail display.<br />
Effect<br />
93<br />
Function<br />
Function<br />
Cancels the last operation performed.<br />
––––––––––––––<br />
Copies an image (can be pasted<br />
into another document).<br />
––––––––––––––<br />
Selects all the thumbnails.<br />
Selects the entire image.<br />
Updates the folder display area or thumbnail display area.<br />
Changes the thumbnail display mode.<br />
Rearranges the thumbnails.<br />
Changes the thumbnail frame and thumbnail display area background.<br />
Updates the Internet menu.<br />
Returns to the previous folder.<br />
Proceeds to the next folder.<br />
Moves to the indicated folder.<br />
Function<br />
Creates an order form to be given to<br />
a print service.<br />
Exits <strong>FinePix</strong>Viewer.
Using the [Bookmarks] Menu<br />
This is similar to the [Favorites] function in a browser.<br />
Name<br />
Add to Bookmarks<br />
Organize Bookmarks<br />
List bookmarks<br />
Using the [Settings] Menu<br />
Name<br />
Mail Transmission Settings<br />
Automatic Save Settings<br />
Exif Launcher Setting<br />
Using the [Tools] Menu<br />
Name<br />
Transfer folder to<br />
ImageMixer V<strong>CD</strong>2<br />
Using the [Help] Menu<br />
Name<br />
How to Use <strong>FinePix</strong>Viewer<br />
Quick Start Guide /<br />
Online FAQ<br />
Software Update<br />
94<br />
Function<br />
Opens the Mail Transmission Settings dialog box.<br />
Opens the Automatic Save Settings dialog box.<br />
Opens the Exif Launcher Setting dialog box.<br />
Function<br />
Create a video <strong>CD</strong> or <strong>CD</strong> album.<br />
Displays PDF files.<br />
Function<br />
Registers the currently selected folder as a bookmark.<br />
Arranges your bookmarks.<br />
Displays your bookmarks.<br />
Function<br />
Displays an introduction to the basic functions of the<br />
software and links to the online Q&A page.<br />
Connects to the Internet and updates the software.
Using the [Contextual] Menus<br />
Click while holding down the [control] key to display the menu.<br />
Open<br />
Delete<br />
Name<br />
Mail Sending<br />
Automatic Rename<br />
Batch Resize<br />
Batch Rotation<br />
Batch Format Conversion<br />
Information Batch Edit<br />
Print<br />
Index Print<br />
95<br />
Function<br />
Opens the playback window.<br />
Deletes an item.<br />
Creates a new e-mail message with an image in the<br />
specified format attached.<br />
Renames files using the specified format.<br />
Batch converts image sizes using the specified format.<br />
Batch rotates images using the specified format.<br />
Converts images in the specified format.<br />
Batch edits information such as the copyright and<br />
photography date and time.<br />
Prints an image.<br />
Prints multiple frames on the same print.
Grossary<br />
AVI<br />
Acronym for Audio Video Interleaved. An movie format.<br />
DPOF<br />
A format used for recording information specifying the images to be printed on a media.<br />
Exif<br />
A full-color image format for digital still cameras. This format is compatible with TIFF<br />
and JPEG and is supported by most image processing software. This format stipulates<br />
the recording method for thumbnail images and camera information.<br />
JPEG<br />
The standardization of still image compression technology, or the standard itself. JPEG<br />
allows effective image compression. However, because some of the original image data<br />
is lost during compression, the image generated from the expanded data is not<br />
precisely the same as the original image, though the degree of variance differs<br />
depending on the compression ratio. Compression ratios vary from 10:1 to 100:1.<br />
Mac OS<br />
The basic system software (operating system) used on Apple Macintosh computers.<br />
PICT<br />
Standard format for image data on Macintosh computers.<br />
Application software<br />
Software used for a specific purpose, such as word processing, spreadsheets or<br />
graphics.<br />
Install<br />
The process of setting up software on a PC. In most cases, software installation<br />
comprises the copying of the software from floppy disks or <strong>CD</strong>-ROM to the hard disk in<br />
a PC.<br />
Thumbnail<br />
A small copy of an image.<br />
Automatic Rename<br />
Renames files automatically. In <strong>FinePix</strong>Viewer, you can rename multiple images at the<br />
same time using filenames based on the photography date and time.<br />
Dialog box<br />
A window used for specifying settings.<br />
Drive<br />
A peripheral device used by PCs to store files.<br />
Drag<br />
The action of moving the mouse with the mouse button held down.<br />
96
Drag and drop<br />
The process of clicking the mouse on an icon or thumbnail, holding the mouse button<br />
down as the mouse is moved to another location, and then releasing the mouse button<br />
to "drop" the icon or thumbnail. This procedure can be used to move or copy files.<br />
Cropping (Trimming)<br />
The action of cutting off unwanted portions of an image.<br />
Pixel<br />
Equivalent to picture element or dot. The minimum unit used in computer graphics.<br />
File number<br />
The final 4 digits used in the filenames for images shot on DCF-compliant digital<br />
cameras. DCF is a standard image format for digital cameras. This format allows image<br />
files to be exchanged easily among DCF-compliant cameras and printers.<br />
Folder tree<br />
An hierarchical structure for folders containing files.<br />
Preview<br />
An image displayed as it will be printed.<br />
Removable disk<br />
Media that can be removed, including floppy disks, MO disks and Zip cartridges.<br />
Important Information and Helpful Hints for Internet Users<br />
■ Charges<br />
The charges for using the Internet include the following:<br />
Call charges<br />
Connection<br />
charges<br />
The fees paid for using the phone line; paid to your telephone company.<br />
The fees paid for server connection and data storage (e-mail and<br />
web pages); paid to your Internet service provider (ISP).<br />
✽ If the charges vary depending on the call or connection time, you should use your<br />
PC’s automatic disconnect function to avoid wasted connection time.<br />
✽ The FUJIFILM <strong>FinePix</strong> Internet Service includes both free and fee-based services.<br />
✽ If you use online shopping or other services, you will be invoiced for the product or<br />
service in addition to the call and connection charges.<br />
■ Viruses<br />
A virus infecting your PC can result in the loss of important data or the sending of<br />
unwanted e-mail messages to the people stored in your address book. Do not open<br />
downloaded files or files received as e-mail attachments unless you are certain of their<br />
content.<br />
97
http://home.fujifilm.com/products/digital/index.html<br />
FGS-406101