DUSPOL
DUSPOL
DUSPOL

You also want an ePaper? Increase the reach of your titles
YUMPU automatically turns print PDFs into web optimized ePapers that Google loves.
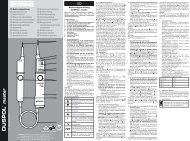
<strong>DUSPOL</strong> ® analog plus<br />
T.-Nr. 757185.00/ 01-2008<br />
D Bedienungsanleitung<br />
Operating manual<br />
F Mode d‘emploi<br />
E Manuel de instrucciones<br />
Инструкция за експлоатация<br />
Návod k použití zkoušečky<br />
Brugsanvisning<br />
Käyttöohje<br />
Οδηγίες χρήσεως<br />
H Használati utasítás<br />
I Istruzioni per l’uso<br />
Naudojimosi instrukcija<br />
N Bruksanvisning<br />
Gebruiksaanwijzing<br />
Instrukcja obsługi<br />
Manual de utilizare<br />
Инструкция по эксплуатации<br />
индикатора напряжения<br />
S Bruksanvisning<br />
Kullanma Talimati<br />
Priručnik za upotrebu<br />
750V DC<br />
V 690V AC<br />
690<br />
BENNING Elektrotechnik & Elektronik GmbH & Co.KG<br />
Münsterstraße 135 - 137 • D - 46397 Bocholt<br />
Telefon ++49 (0) 2871 - 93 - 0 • Fax ++49 (0) 2871 - 93 - 429<br />
www.benning.de • E-Mail: duspol@benning.de<br />
<br />
<br />
<br />
<br />
<br />
<br />
<br />
<br />
<br />
geprüft und zugelassen<br />
<br />
Operating manual<br />
<strong>DUSPOL</strong> ® analog plus<br />
Before using the voltage tester <strong>DUSPOL</strong> ® analog<br />
plus: Please read the operating manual carefully<br />
and always observe the safety instructions!<br />
List of contents:<br />
1. Safety instructions<br />
2. Functional description of the voltage tester<br />
3. Functional test of the voltage tester<br />
4. How to test AC voltages<br />
4.1 How to test the phase at AC voltage<br />
5. How to test DC voltages<br />
5.1 How to test the polarity at DC voltage<br />
6. How to test the phase sequence of a threephase<br />
mains<br />
7. Technical data<br />
8. General maintenance<br />
9. Environmental notice<br />
1. Safety instructions:<br />
- Hold the voltage tester only by the insulated<br />
handles and and do not touch the contact<br />
electrodes (probe tips) !<br />
- Immediately before use: Check the voltage tester<br />
for correct operation! (see chapter 3). The voltage<br />
tester must not be used if one or several display<br />
functions fail or if the voltage tester is not ready to<br />
operate (IEC 61243-3)!<br />
- The voltage tester must be used only within the<br />
nominal voltage range of 12 V up to 690 V AC/<br />
750 V DC!<br />
- The voltage tester complies with protection class<br />
IP 64 and therefore can also be used under wet<br />
conditions (designed for outdoor use).<br />
- For testing, firmly grasp the voltage tester by the<br />
handles and .<br />
- Never connect the voltage tester to voltage up<br />
to 500 V for longer than 30 seconds and 10 s to<br />
voltage up to 690 V/ 750 V (maximum permissible<br />
operating time, permissible up to 500 V ED = 30 s;<br />
up to 750 V ED = 10 s)!<br />
- The voltage tester only operates correctly<br />
within the temperature range of -10 °C up to<br />
+55 °C at relative air humidity of 20 % up to 96 %.<br />
- Do not dismantle the voltage tester!<br />
- Please protect the housing of the voltage tester<br />
against contamination and damages!<br />
- Please store the voltage tester under dry<br />
conditions.<br />
- To prevent injuries and discharge of the battery,<br />
provide the contact electrodes (probe tips) with<br />
the enclosed cover after using the voltage tester!<br />
Attention:<br />
After maximum load (i.e. after a measurement of 30<br />
seconds at AC 690 V respectively 10 s at AC 690 V/<br />
DC 750 V), the voltage tester must not be used for a<br />
duration of 240 seconds!<br />
The voltage tester is marked with international<br />
electric symbols and symbols for indication<br />
and operation with the following meaning:<br />
symbol<br />
meaning<br />
Device or equipment for working under<br />
voltage<br />
Push button<br />
, AC Alternating current, alternating voltage<br />
, DC Direct current, direct voltage<br />
Direct and alternating current (DC and<br />
AC)<br />
Push button (manually actuated);<br />
indicates that respective indications<br />
only occur when both push buttons are<br />
actuated<br />
Phase-sequence clockwise<br />
Phase-sequence indication; the phase<br />
sequence can only be indicated at 50<br />
or 60 Hz and in a earthed mains<br />
Symbol for phase and phase-sequence<br />
indication (phase-sequence clockwise)<br />
2. Functional description<br />
The <strong>DUSPOL</strong> ® analog plus is a two-pole voltage<br />
tester according to IEC 61243-3 with visual display <br />
and without an own power supply The voltage tester<br />
is designed for DC and AC voltage tests within the<br />
voltage range of 12 V up to 690 V AC/ 750 V DC. It<br />
can be used to perform polarity tests in DC and phase<br />
tests in AC. The voltage tester indicates the phasesequence<br />
provided that the neutral is earthed.<br />
The voltage tester consists of the test probes L1<br />
and L2 and a connecting cable . The test probe<br />
L1 is equipped with a display . Both test probes<br />
are provided with push buttons . Without pressing<br />
both push buttons, the following voltage steps (AC or<br />
DC) can be indicated: 24 V+; 24 V-; 50 V; 120 V 230 V;<br />
400 V; 500 V; 690 V.<br />
By pressing both push buttons, the voltage tester<br />
switches to a lower internal resistance (suppression<br />
of inductive and capacitive voltages). Thus, also<br />
the indication of 12 V+ and 12 V– is activated.<br />
Furthermore, a vibrating motor (motor with a flyweight)<br />
is put under voltage. From approximately 200 V this<br />
motor is set in rotation. With the voltage increasing,<br />
the motor’s speed and vibration increases as well so<br />
that additionally by means of the handle of test probe<br />
L2 B the voltage value can be estimated roughly (e.g.<br />
230 V/ 400 V). The duration of the test with a lower<br />
internal resistance of the device (load test) depends<br />
on the value of the voltage to be measured. To prevent<br />
excessive warming of the voltage tester, it is equipped<br />
with a thermal protection (reverse control). With this<br />
reverse control, the speed of the vibrating motor<br />
decreases as well. The moving coil system 8 which<br />
displays voltages between 230 V and AC 690 V/<br />
DC 750 V will also be activated through pressing the<br />
pushbutton. The duration of the test with moving coil<br />
depends on the level of the voltage to be measured.<br />
The moving coil circuit has no thermal protection!<br />
The display field<br />
The display system consists of high-contrast lightemitting<br />
diodes (LED) indicating DC and AC<br />
voltages in steps of 12 V; 24 V; 50 V, 120 V, 230 V;<br />
400 V; 500 V and 690 V (permanent indicating<br />
system). A plunger indication indicates the voltage<br />
values between 230 V and 690 V AC/ 750 V DC<br />
according to the scales for direct and alternating<br />
voltage (DC and AC). The AC scale is at the left of the<br />
level indicator, the DC scale is at the right of the level<br />
indicator. The indicated voltages are nominal voltages.<br />
With DC voltage, the LEDs also indicate the polarity<br />
for 12 V and 24 V (see chapter 5). The 12 V LED and<br />
the load test can only be activated by pressing both<br />
push buttons.<br />
LC display<br />
The LC display serves for the phase test with<br />
alternating current (AC) and indicates the phasesequence<br />
of a three-phase mains.<br />
3. Functional check<br />
- The voltage tester must be used only within the<br />
nominal voltage range of 12 V up to 690 V AC/<br />
750 V DC!<br />
- Never connect the voltage tester to voltage up<br />
to 500 V for longer than 30 seconds and 10 s to<br />
voltage up to 690 V/ 750 V (maximum permissible<br />
operating time, permissible up to 500 V ED = 30 s;<br />
up to 750 V ED = 10 s)!<br />
- Check the voltage tester for correct function<br />
immediately before use!<br />
- Test all functions by means of known voltage<br />
sources.<br />
• For DC voltage tests use e.g. a car battery.<br />
• For AC voltage tests use e.g. a 230 V socket.<br />
Do not use the voltage tester unless all functions are<br />
operating correctly!<br />
Check the function of the LC display by single-pole<br />
connection of the contact electrode of the test probe<br />
L1 to an external conductor (phase).<br />
4. How to test AC voltages<br />
- The voltage tester must be used only within the<br />
nominal voltage range of 12 V up to AC 690 V!<br />
- Never connect the voltage tester to voltage up<br />
to 500 V for longer than 30 seconds and 10 s to<br />
voltage up to 690 V/ 750 V (maximum permissible<br />
operating time, permissible up to 500 V ED = 30 s;<br />
up to 750 V ED = 10 s)!<br />
- Firmly grasp the insulated handles and of<br />
the test probes L1 and L2.<br />
- Place the contact electrodes of the test probes<br />
L1 and L2 against the relevant points of the<br />
unit under test.<br />
- For AC voltages from 24 V onwards and when<br />
pressing both push buttons 3 (load test) from<br />
12 V onwards, the LEDs “plus” and “minus” <br />
and light up. All LEDs light until the step value<br />
of the applied voltage is reached. Furthermore,<br />
voltages between 230 V and AC 690 V are<br />
indicated continuously by means of the plunger<br />
measuring system if both push buttons are<br />
actuated. When pressing both push buttons 3<br />
and from an applied voltage of approx. 200 V<br />
onwards, a vibrating motor is put in rotation inside<br />
the test probe L2 B. With the voltage increasing,<br />
the speed of this motor is increasing as well.<br />
Please make sure that you touch the voltage tester at<br />
the insulated handles of test probes L1 and L2<br />
only! Do not cover the display and do not touch the<br />
contact electrodes!<br />
4.1 How to test the phase at AC voltage<br />
- The voltage tester must be used only within the<br />
nominal voltage range of 12 V up to AC 690 V!<br />
- The phase test is possible in the earthed mains<br />
from 230 V onwards!<br />
- Firmly grasp the handle of test probe L1 .<br />
- Place the contact electrode of test probe L1<br />
against the relevant point of the unit under test.<br />
- Never connect the voltage tester to voltage up<br />
to 500 V for longer than 30 seconds and 10 s to<br />
voltage up to 690 V/ 750 V (maximum permissible<br />
operating time, permissible up to 500 V ED = 30 s;<br />
up to 750 V ED = 10 s)!<br />
- If the “R” symbol appears on the LC display ,<br />
the tester is in contact with the live phase of an<br />
AC voltage on this point of the unit under test.<br />
Never touch the contact electrode of test probe L2<br />
during the single-pole test (phase test)!<br />
Note:<br />
The reading of the LC display might be impaired<br />
due to unfavorable light conditions, protective clothing<br />
or in insulated locations.<br />
Attention:<br />
The absence of voltage can be detected by means of<br />
a bipolar test only.<br />
5. How to test DC voltages<br />
- The voltage tester must be used only within the<br />
nominal voltage range of 12 V up to DC 750 V!<br />
- Never connect the voltage tester to voltage up<br />
to 500 V for longer than 30 seconds and 10 s to<br />
voltage up to 690 V/ 750 V (maximum permissible<br />
operating time, permissible up to 500 V ED = 30 s;<br />
up to 750 V ED = 10 s)!<br />
- Firmly grasp the insulated handles and of<br />
the test probes L1 and L2.<br />
- Place the contact electrodes of the test probes<br />
L1 and L2 against the relevant points of the<br />
unit under test.<br />
- For DC voltages from 24 V onwards and when<br />
pressing both push buttons 3 (load test) from<br />
12 V onwards, the LEDs “plus” and “minus” and<br />
light up. All LEDs light until the step value of the<br />
applied voltage is reached. Furthermore, voltages<br />
between 230 V and DC 750 V are indicated<br />
continuously by means of the plunger measuring<br />
system if both push buttons are actuated. When<br />
pressing both push buttons 3 and from an applied<br />
voltage of approx. 200 V onwards, a vibrating<br />
motor is put in rotation inside the test probe L2<br />
B. With the voltage increasing, the speed of this<br />
motor is increasing as well.<br />
Please make sure that you touch the voltage tester at<br />
the insulated handles of test probes L1 and L2<br />
only! Do not cover the display and do not touch the<br />
contact electrodes!<br />
5.1 How to test the polarity at DC voltage<br />
- The voltage tester must be used only within the<br />
nominal voltage range of 12 V up to DC 750 V!<br />
- Never connect the voltage tester to voltage up<br />
to 500 V for longer than 30 seconds and 10 s to<br />
voltage up to 690 V/ 750 V (maximum permissible<br />
operating time, permissible up to 500 V ED = 30 s;<br />
up to 750 V ED = 10 s)!<br />
- Firmly grasp the insulated handles and of<br />
the test probes L1 and L2.<br />
- Place the contact electrodes of the test probes<br />
L1 and L2 against the relevant points of the<br />
unit under test.<br />
- If LED lights up, the “positive pole” of the unit<br />
under test is at test probe .<br />
- If LED lights up, the “negative pole” of the unit<br />
under test is at test probe .<br />
Please make sure that you touch the voltage tester at<br />
the insulated handles of test probes L1 and L2<br />
only! Do not cover the display and do not touch the<br />
contact electrodes!<br />
6. How to test the phase sequence of a threephase<br />
mains<br />
- The voltage tester must be used only within the<br />
nominal voltage range of 12 V up to AC 690 V!<br />
- The phase-sequence test is possible from 230 V<br />
AC voltage (phase against phase) onwards in a<br />
earthed three-phase mains.<br />
- Firmly grasp the insulated handles and of<br />
the test probes L1 and L2.<br />
- Place the contact electrodes of the test probes<br />
L1 and L2 against the relevant points of the<br />
unit under test.<br />
- The LEDs or the plunger measuring system have<br />
to indicate phase voltage.<br />
- Never connect the voltage tester to voltage up<br />
to 500 V for longer than 30 seconds and 10 s to<br />
voltage up to 690 V/ 750 V (maximum permissible<br />
operating time, permissible up to 500 V ED = 30 s;<br />
up to 750 V ED = 10 s)!<br />
- When contacting the two contact electrodes<br />
with two phases of a three-phase mains<br />
connected in clockwise rotation, the LC display<br />
indicates the “R” symbol. If for two phases the<br />
rotation is anti-clockwise, no symbol appears on<br />
the LC display .<br />
The phase-sequence test always requires a countertest!<br />
If the LC display indicates clockwise rotation<br />
for two phases of a three-phase mains, those two<br />
phases must be contacted again with reversed contact<br />
electrodes during the counter-test. There must<br />
be no symbol indicated on the LC display during<br />
the counter-test. If in both cases the LC display <br />
indicates the “R” symbol, the earthing is too weak!<br />
Note:<br />
The reading of the LC display might be impaired<br />
due to unfavorable light conditions, protective clothing<br />
or in insulated locations.<br />
7. Technical data:<br />
- Guideline for two-pole voltage testers: IEC 61243-3,<br />
voltage class B (AC 1000 V/ DC 1500 V)<br />
- Over voltage category: CAT IV 500 V,<br />
CAT III 690 V<br />
- Protection class: IP 64, IEC 60529 (DIN 40050),<br />
also for outdoor use!<br />
IP 64 means: Protection against access to<br />
dangerous parts and protection against solid<br />
impurities, dustproof, (6 - first index). Splash proof,<br />
(4 - second index). Can also be used in case of<br />
precipitation.<br />
- Nominal voltage range (voltage class A): 12 V to<br />
690 V AC/ 750 V DC<br />
- Internal resistance, measuring circuit: 220 kΩ<br />
- Internal resistance, load circuit – both push<br />
buttons actuated!: approx. 3,5 kΩ... (25 kΩ)<br />
- Current consumption, measuring circuit:<br />
max. I n<br />
3.5 mA (690 V AC/ 750 V DC)<br />
- Current consumption, load circuit – both push<br />
buttons actuated!: approx. 0,25 A (690 V AC/<br />
750 V DC)<br />
- Polarity indication: LED +; LED -<br />
(indicating handle = positive polarity)<br />
- Indicating steps LED: 12 V+*, 12 V-*, 24 V+, 24 V-,<br />
50 V, 120 V, 230 V, 400 V, 500 V, 690 V (*: only<br />
with both push buttons actuated)<br />
- continuous indication by means of level indicator:<br />
230 V - 690 V AC/ 750 V DC<br />
- max. indicating errors:<br />
U n<br />
± 15 %, ELV U n<br />
– 15%<br />
- Nominal frequency range f: 0 up to 60 Hz,<br />
Phase and phase sequence indication 50/60 Hz<br />
- Phase and phase-sequence indication: ≥ U n<br />
230 V<br />
- Vibrating motor, starting: ≥ U n<br />
230 V<br />
- max. permissible operating time ED:<br />
permissible up to 500 V ED = 30 s<br />
permissible up to 750 V ED = 10 s<br />
240 s pause<br />
- Weight: approx. 190 g<br />
- Connecting cable length: approx. 900 mm<br />
- Operating and storing temperature range: -10 °C<br />
up to +55 °C (climate category N)<br />
- Relative air humidity: 20 % up to 96 % (climate<br />
category N)<br />
- Reverse control times (thermal protection for<br />
vibrating motor):<br />
voltage<br />
time<br />
230 V 30 s<br />
400 V 9 s<br />
750 V 2 s<br />
When voltage from 500 V up to maximum 750 V<br />
maximum operating time = 10 s.<br />
8. General maintenance<br />
Clean the exterior of the housing with a clean dry<br />
cloth (exception: special cleansing cloths). Do not use<br />
solvents and/ or abrasives to clean the voltage tester.<br />
9. Environmental notice<br />
At the end of the product’s useful life, please<br />
dispose of it at appropriate collection points<br />
provided in your country.