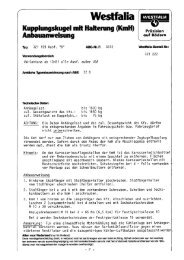
Montage- und Betriebsanleitung Kupplungskugel mit ... - Westfalia
Montage- und Betriebsanleitung Kupplungskugel mit ... - Westfalia
Montage- und Betriebsanleitung Kupplungskugel mit ... - Westfalia

You also want an ePaper? Increase the reach of your titles
YUMPU automatically turns print PDFs into web optimized ePapers that Google loves.
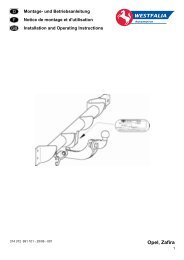
Installation Instructions for AUDI A3:<br />
Proceed as follows:<br />
1. Remove the rear bumper covering. To do this, first loosen<br />
the bolts in the right and left wheel arches (3 each). Then<br />
unscrew the bolts at the left and right in the cargo opening<br />
of the luggage boot and remove the cover secured with<br />
Velcro strips. Unscrew the bolts (6 pieces) located below this<br />
and remove the mounting plate. Then take off the bumper<br />
covering toward the rear.<br />
2. Remove the rear aluminium bumper. To do this, loosen<br />
the two hexagon nuts on the right and left. The hexagon nuts<br />
and the aluminium bumper are no longer required. Important!<br />
The studs remaining on the vehicle are not mounting<br />
points for the CBB!<br />
3. Remove the cloth adhesive tape from the two longitudinal<br />
members of the vehicle at the outer left and right in the area<br />
of the oblong holes at „b“. If present, remove the clips in front<br />
of the front mounting points from the longitudinal members.<br />
(Drawing II shows only the right side). Treat the exposed,<br />
bare metal surfaces with a corrosion protection agent (zinc<br />
primer etc.).<br />
4. Mount the electrical socket and the connection cable on<br />
the CBB as described in the installation instructions for the<br />
electrical accessories kit.<br />
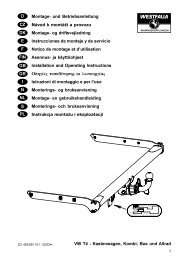
5. Push the side pieces of the CBB [1] half way into the<br />
longitudinal members of the vehicle from behind. When<br />
doing so, guide the connection cable through the opening<br />
in the rear apron. Insert the gaskets at the left and right into<br />
the longitudinal members and push in the CBB until the holes<br />
at „b“ align with the oblong holes on the vehicle.<br />
6. Secure the CBB at the left and right at "a" using the<br />
hexagons bolts [3] and washers [4]. Tighten all four bolts with<br />
a tightening torque of 55 Nm + 5 Nm.<br />
7. Shorten the clips removed in step 3 and insert them in their<br />
holes again.<br />
20<br />
8. Mount the rear bumper cover. Adapt the contour of the<br />
bumper cover to the vehicle contour. Lay the mounting plate<br />
on the bumper cover and retighten the six bolts again. Mount<br />
the six bolts in the wheel arches. Press the cover with the<br />
Velcro closures on firmly and mount the bolts on the right and<br />
left.<br />
9. Mount the entire electrical accessories kit using the<br />
installation instructions for the electrical accessories kit.<br />
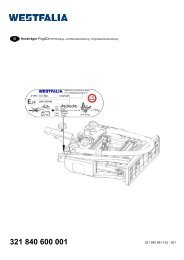
To mount and remove the removable ball fitting, please<br />
observe the enclosed operating instructions.<br />
Subject to change.