- Page 1 and 2:
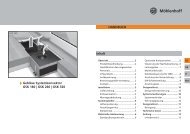
HANDBUCH Querstromgebläse-Systemko
- Page 3 and 4:
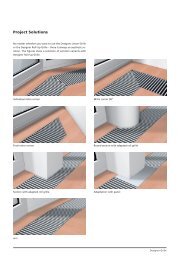
Produktübersicht Optionale Kompone
- Page 5 and 6:
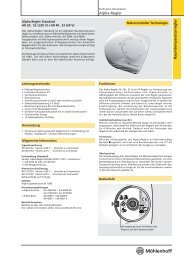
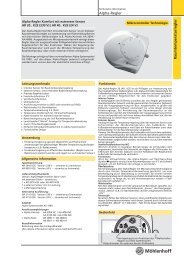
Produktinformationen Bestimmungsgem
- Page 7 and 8:
Voraussetzungen Fachkenntnisse Die
- Page 9 and 10:
Montage Montagevorbereitung 1. Entf
- Page 11 and 12:
Montage Systemerweiterungen Systemv
- Page 13 and 14:
Anschlussvarianten 4. 1. 1. Wassera
- Page 15 and 16:
Montage Elektrischer Anschluss Möh
- Page 17 and 18:
Montage Elektrischer Anschluss - An
- Page 19 and 20:
Montage Anschlussplan 4-Leiter im P
- Page 21 and 22:
Montage Parallelbetrieb mehrerer QS
- Page 23 and 24:
Montage Entfernen Sie die Montageab
- Page 25 and 26:
Montage 3. Legen Sie den Designroll
- Page 27 and 28:
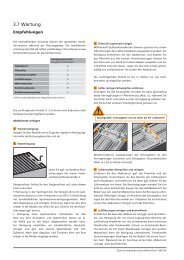
Instandhaltung Wartung/Reinigung Re
- Page 29 and 30:
Instandhaltung 7. Reinigen der Kond
- Page 31 and 32:
HINWEIS REINIGUNGSMITTEL: Verwenden
- Page 33 and 34:
Instandhaltung 4. Schottclip erneut
- Page 35 and 36:
MANUAL Transversal flow fan system
- Page 37 and 38:
Product overview Optional component
- Page 39 and 40:
Product information Intended use M
- Page 41 and 42:
Preconditions Expert knowledge The
- Page 43 and 44:
Installation Installation preparati
- Page 45 and 46:
Installation System extensions Syst
- Page 47 and 48:
Connection variants 4. 1. 1. Water
- Page 49 and 50:
Installation Electric connection As
- Page 51 and 52:
Installation Electric connection -
- Page 53 and 54:
! Supply line 230 V AC 50 - 50 Hz I
- Page 55 and 56:
Installation Parallel operation of
- Page 57 and 58:
Installation Remove the protective
- Page 59 and 60:
Installation 3. Insert the decorati
- Page 61 and 62:
Maintenance Maintenance/cleaning ES
- Page 63 and 64:
Maintenance 7. Cleaning the condens
- Page 65 and 66:
NOTE ON CLEANING AGENTS: Use commer
- Page 67 and 68:
Maintenance 4. Re-insertion of bulk
- Page 69 and 70:
РУКОВОДСТВО Систем
- Page 71 and 72:
Обзор изделия Опци
- Page 73 and 74:
Информация о проду
- Page 75 and 76:
Условия Специальны
- Page 77 and 78:
Монтаж Подготовка
- Page 79 and 80:
Монтаж Расширение
- Page 81 and 82:
Варианты подключен
- Page 83 and 84:
Монтаж Электрическ
- Page 85 and 86:
Монтаж Электрическ
- Page 87 and 88:
! Монтаж Схема пара
- Page 89 and 90:
Montage Параллельное п
- Page 91 and 92:
Монтаж Окончательн
- Page 93 and 94:
Монтаж 3. Установит
- Page 95 and 96:
Ремонт Техническое
- Page 97 and 98:
Ремонт 7. Очистка ва
- Page 99 and 100:
ПРИМЕЧАНИЕ ПО ЧИСТ
- Page 101 and 102:
Ремонт 4. Установка
- Page 103 and 104:
MANUALE Convettore di sistema a ven
- Page 105 and 106:
Panoramica sul prodotto Componenti
- Page 107 and 108:
Informazioni sul prodotto Uso corre
- Page 109 and 110:
Presupposti Conoscenze tecniche Le
- Page 111 and 112:
Montaggio Preparazione del montaggi
- Page 113 and 114:
Montaggio Integrazioni al sistema C
- Page 115 and 116:
Varianti di collegamento 4. 1. 1. C
- Page 117 and 118:
Montaggio Collegamento elettrico I
- Page 119 and 120: Montaggio Collegamento elettrico -
- Page 121 and 122: ! Montaggio Piano dei collegamenti
- Page 123 and 124: Montaggio Esercizio in parallelo di
- Page 125 and 126: Montaggio Rimuovere definitivamente
- Page 127 and 128: Montaggio 3. Disporre la griglia di
- Page 129 and 130: Cura Manutenzione/pulizia ESK WSK G
- Page 131 and 132: Cura 7. Pulizia della conca per la
- Page 133 and 134: NOTA SUI DETERGENTI: Utilizzare i d
- Page 135 and 136: Cura 4. Inserire nuovamente il ferm
- Page 137 and 138: MANUAL Tværstrømsventilator-syste
- Page 139 and 140: Produktoversigt Tilvalg af komponen
- Page 141 and 142: Produktinformationer Bestemmelsesm
- Page 143 and 144: Forudsætninger Faglig viden El-ins
- Page 145 and 146: Montering Monteringsforberedelse 1.
- Page 147 and 148: Montering Systemudvidelser systemfo
- Page 149 and 150: Tilslutningsvarianter 4. 1. 1. Vand
- Page 151 and 152: Montering El-tilslutning Möhlenhof
- Page 153 and 154: Montering Elektrisk styring - styri
- Page 155 and 156: ! Montering Tilslutningsskema 4-led
- Page 157 and 158: Montering Paralleldrift af flere QS
- Page 159 and 160: Montering Monteringsafskærmningen
- Page 161 and 162: Montering 3. Læg designrulleristen
- Page 163 and 164: Service Vedligeholdelse/rengøring
- Page 165 and 166: Service 7. Rengør kondensatbeholde
- Page 167 and 168: HENVISNING RENGØRINGSMIDDEL: Brug
- Page 169: Service 4. Ny isætning af skotclip