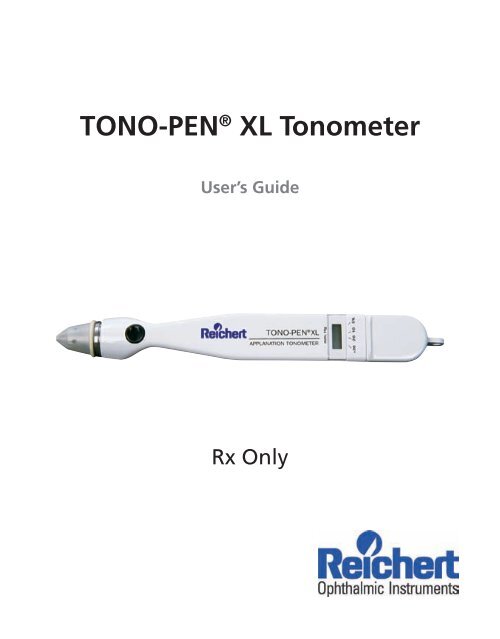
TONO-PEN XL Tonometer
TONO-PEN® XL Tonometer - Optical Marketplace
TONO-PEN® XL Tonometer - Optical Marketplace
- No tags were found...

Create successful ePaper yourself
Turn your PDF publications into a flip-book with our unique Google optimized e-Paper software.
<strong>TONO</strong>-<strong>PEN</strong> ® <strong>XL</strong> <strong>Tonometer</strong>User’s GuideRx Only
Reichert, Inc.3362 Walden Ave.Depew, NY 14043USAwww.reichert.comAuthorized Representative for EC Regulatory MattersReichert GmbHHubertusstrasse 2D-82229 SeefeldGermanyTel: +49 8152 99 3530Fax: +49-8152-99 35 311This device complies with Medical Device Directive 93/42/EECThe following are registered trademarks of Reichert, Inc.Reichert ®<strong>TONO</strong>-<strong>PEN</strong> ®OCU-FILM ®The following is a trademark of Reichert, Inc.OCU-CELThe information contained in this document was accurate at time of publication. Reichert, Inc.reserves the right to make changes in the product described in this manual without notice andwithout incorporating those changes in any products already sold.© Reichert, Inc. 2006Page
Table of ContentsIntroduction 4Warnings and Cautions 6Setup 8Calibration 11Taking a Measurement 13Interpreting the LCD 16Maintenance & Storage 17Troubleshooting 19Guidance and manufacturer’s declaration 20Warranty 23Page
IntroductionOverviewThe Reichert <strong>TONO</strong>-<strong>PEN</strong> <strong>XL</strong> is a precision electronic tonometer which measuresintraocular pressure (IOP). The body of the instrument is specially designed to fitcomfortably in the user’s hand, facilitating fast and accurate measurements. Thestainless steel probe on the <strong>TONO</strong>-<strong>PEN</strong> <strong>XL</strong> contains a solid state strain gaugewhich converts intraocular pressure (IOP) to an electrical signal. The probe tipmust be covered by a protective membrane. Reichert OCU-FILM® Tip Coversare recommended. Utilizing a sophisticated “single chip” microprocessor andelectronics housed in the body of the instrument, the waveform produced by eachtouch to the anesthetized corneal surface is analyzed and stored for a statisticalcomparison process. Each single valid IOP reading is digitally displayed on the liquidcrystal display (LCD). When four valid readings are obtained, the mean IOP and thestandard deviation for those readings (an indication of reliability) are shown on theLCD.Intended UseThe <strong>TONO</strong>-<strong>PEN</strong> <strong>XL</strong> is intended for measuring IOP as a screening/monitoring tool forGlaucoma or when increased IOP is suspected.ComponentsThe <strong>TONO</strong>-<strong>PEN</strong> <strong>XL</strong> unit (see Figure 1) is provided in a storage case, complete with:••••••Ocu-Cel <strong>XL</strong> BatteriesOCU-FILM® Tip CoversStylus Blade for battery replacementDesiccant to keep the instrument and components dry (not shown in Figure 1)Instruction ManualInstructional DVD (not shown in Figure 1)Page
IntroductionInstruction ManualOCU-FILMTip CoversOcu-Cel <strong>XL</strong>Batteries<strong>TONO</strong>-<strong>PEN</strong> <strong>XL</strong> <strong>Tonometer</strong>Stylus BladeFigure 1 <strong>TONO</strong>-<strong>PEN</strong> <strong>XL</strong> Components (in Storage Case)Page
Warnings and CautionsWARNING: AN INSTRUCTION THAT DRAWS ATTENTION TO RISK OF INJURY OR DEATHWARNING: THE <strong>TONO</strong>-<strong>PEN</strong> <strong>XL</strong> SHOULD BE USED IN STRICT ACCORDANCE WITH THEINSTRUCTIONS OUTLINED IN THIS USER’S GUIDE. THE SAFETY OF THE PATIENT AND THEPERFORMANCE OF THE INSTRUMENT CAN NOT BE GUARANTEED IF USED IN A MANNERNOT SPECIFIED BY REICHERT, INC.WARNING: THE BATTERY SHOULD ONLY BE REPLACED WITH THE BATTERY SPECIFIED INTHIS MANUAL (OCU-CEL <strong>XL</strong> Battery). USE OF ANOTHER BATTERY MAY CAUSE FIRE ORAN EXPLOSION.WARNING: DO NOT PLACE A SHORTING DEVICE BETWEEN THE BATTERY TERMINALS,OR ALLOW THE BATTERY TO BECOME WET. DO NOT DISASSEMBLE OR DISPOSE OF THEBATTERY IN A FIRE. MISUSE OR IMPROPER DISPOSAL OF THIS BATTERY MAY CAUSE ITTO BECOME VERY HOT, IGNITE OR EXPLODE. DAMAGE TO THIS UNIT AND/OR SERIOUSPERSONAL INJURY MAY RESULT.WARNING: DO NOT EXPOSE THE BATTERIES TO TEMPERATURES ABOVE 140º F. DO NOTDISASSEMBLE THE BATTERIES. DO NOT CARRY BATTERIES LOOSE IN A POCKET ORELSEWHERE. DAMAGE TO THIS UNIT AND/OR SERIOUS PERSONAL INJURY MAY RESULT.WARNING: IN ORDER TO ENSURE THAT CORRECT OPERATION OF THE INSTRUMENT ISMAINTAINED, AND TO GUARANTEE THE SAFETY AND RELIABILITY OF THE INSTRUMENT,ANY REPAIR OR SERVICE MUST BE PERFORMED BY REICHERT, INC. OR AN AUTHORIZEDSERVICE AGENT OF REICHERT, INC.WARNING: APPROPRIATE CLINICAL PERSONNEL ONLY SHOULD USE THIS DEVICE IN ORDERTO AVOID THE RISK OF DAMAGING A PATIENT’S EYE. BE SURE NOT TO APPLY TOO MUCHFORCE TO THE PROBE TIP AS THIS MAY CAUSE EYE INJURY. A QUICK, GENTLE TAPPINGTECHNIQUE IS SUFFICIENT TO ACHIEVE MEASUREMENTS.WARNING: OCU-FILM CONTAINS NATURAL RUBBER LATEX WHICH MAY CAUSE ALLERGICREACTIONS. QUESTION PATIENTS ABOUT ALLERGIES TO LATEX BEFORE EXAMINING THEMWITH THE <strong>TONO</strong>-<strong>PEN</strong> <strong>XL</strong>.WARNING: DO NOT RECHARGE THE BATTERIES. THE BATTERY IS NOT DESIGNED TOBE CHARGED BY ANY OTHER ELECTRICAL SOURCE. CHARGING COULD GENERATE GASAND INTERNAL SHORT-CIRCUITING, LEADING TO DISTORTION, LEAKAGE, OVERHEATING,EXPLOSION OR FIRE.WARNING: NEVER SWALLOW. ALWAYS KEEP THE BATTERY OUT OF REACH OF INFANTS ANDYOUNG CHILDREN TO PREVENT IT FROM BEING SWALLOWED. IF SWALLOWED, CONSULTA PHYSICIAN IMMEDIATELY.WARNING: IF LEAKAGE IS SUSPECTED OR YOU DETECT A STRONG ODOR, KEEP THEBATTERY AWAY FROM FIRE, BECAUSE THE LEAKED LIQUID COULD CATCH ON FIRE.Page
Warnings and CautionsWARNING: NEVER ALLOW LIQUID LEAKING FROM THE BATTERY TO GET IN YOUR EYES ORMOUTH. BECAUSE THIS LIQUID COULD CAUSE SERIOUS PERSONAL INJURY, IF IT DOESCOME IN CONTACT WITH YOUR EYES, FLUSH THEM IMMEDIATELY WITH PLENTY OF WATERAND CONSULT A PHYSICIAN. LIKEWISE, IF THE LIQUID GETS IN YOUR MOUTH, RINSEIMMEDIATELY WITH PLENTY OF WATER AND CONSULT A PHYSICIAN.CAUTION: AN INSTRUCTION THAT DRAWS ATTENTION TO THE RISK OF DAMAGE TO THEPRODUCT.CAUTION: DO NOT USE ANY SOLVENTS OR STRONG CLEANING SOLUTIONS ON ANY PARTOF THIS INSTRUMENT OR DAMAGE TO THE UNIT MAY OCCUR.CAUTION: THE TIP OF THE <strong>TONO</strong>-<strong>PEN</strong> <strong>XL</strong> IS A SENSITIVE ELECTRONIC COMPONENT. BECAREFUL NOT TO BUMP OR JAR THE UNIT AS THIS MAY DAMAGE THE TIP AND EFFECTOPERATION.CAUTION: DO NOT IMMERSE PROBE IN FLUIDS. THIS WILL CAUSE DAMAGE TO THEELECTRONICS AND VOID THE WARRANTY.CAUTION: DO NOT STERILIZE THE PROBE. THIS WILL CAUSE DAMAGE TO THE ELECTRONICSAND VOID THE WARRANTY.CAUTION: Check to be sure that the batteries are installed correctly.Incorrect installation could cause severe damage to the electronics andvoid the Warranty.CAUTION: USE OR STORAGE OF THE <strong>TONO</strong>-<strong>PEN</strong> <strong>XL</strong> UNIT WITHOUT AN OCU-FILM TIP COVERCAN CAUSE SEVERE DAMAGE TO THE INSTRUMENT AND VOID THE WARRANTY.CAUTION: REMOVAL OF THE ATTACHMENT SCREW WILL VOID THE WARRANTY.CAUTION: MEDICAL ELECTRICAL EQUIPMENT NEEDS SPECIAL PRECAUTIONS REGARDINGEMC AND NEEDS TO BE INSTALLED AND PUT INTO SERVICE ACCORDING TO THE EMCINFORMATION PROVIDED IN THIS GUIDE.CAUTION: ELECTROMAGNETIC INTERFERENCE FROM OTHER DEVICES MAY AFFECT THISINSTRUMENT. IF INTERFERENCE IS PRESENT, TURN OFF OTHER ELECTRONIC DEVICES, ORREMOVE THEM FROM THE IMMEDIATE AREA WHILE OPERATING THIS INSTRUMENT.CAUTION: PORTABLE AND MOBILE RF COMMUNICATIONS EQUIPMENT CAN AFFECT MEDICALELECTRICAL EQUIPMENT.CAUTION: THE <strong>TONO</strong>-<strong>PEN</strong> <strong>XL</strong> SHOULD NOT BE USED ADJACENT TO OR STACKED WITHOTHER EQUIPMENT. IF ADJACENT OR STACKED USE IS NECESSARY, THE <strong>TONO</strong>-<strong>PEN</strong><strong>XL</strong> SHOULD BE OBSERVED TO VERIFY NORMAL OPERATION IN THE CONFIGURATION INWHICH IT WILL BE USED.Page
SetupSet Up InstructionsTo set up the <strong>TONO</strong>-<strong>PEN</strong> <strong>XL</strong> for operation, follow the instructions listed below:1..3.4.5.6..8.9.Remove all protective packaging materials. Remove and discard thedesiccant.Carefully remove the tonometer and accessories from the case.Check for missing items.Visually check the instrument and accessories for damage.Remove the Ocu-Film Tip Cover shipped with the <strong>TONO</strong>-<strong>PEN</strong>.Notify Reichert Customer Service immediately if any components are missingor damaged.Install the batteries in the battery compartment (see page 9).Perform the Calibration Procedure (see page 11).Slide a new Ocu-Film Tip Cover over the <strong>TONO</strong>-<strong>PEN</strong> <strong>XL</strong> unit’s stainless steelprobe until the Ocu-Film ridge is seated in the groove (see Figure 2). TheOcu-Film Tip Cover should fit over the probe tip (see Figure 3), without beingtoo tight. Proper fit makes contact with the transducer surface (probe post),but still has pleats along the side of the transducer head assembly.Probe PostGrooveProbe Tip Operator’s Button LCDFigure 2 <strong>TONO</strong>-<strong>PEN</strong> <strong>XL</strong> Top and Side ViewsBattery CompartmentPage
SetupOcu-Film Tip Cover - CorrectOcu-Film Tip Cover - Too LooseOcu-Film Tip Cover - Too TightFigure 3 Ocu-Film Tip Cover PlacementBattery InstallationThe <strong>TONO</strong>-<strong>PEN</strong> <strong>XL</strong> is supplied with four Ocu-Cel <strong>XL</strong> 3.0 volt lithium manganesedioxide batteries that need to be installed in the <strong>TONO</strong>-<strong>PEN</strong> <strong>XL</strong>. It is recommendedthat Reichert Ocu-Cel <strong>XL</strong> Batteries be used when the batteries need replacement.Note: The <strong>TONO</strong>-<strong>PEN</strong> <strong>XL</strong> unit will not function properly with mercury batteries.Installation Procedure1. Locate the battery compartment (see Figure 4). Open the batterycompartment by gently inserting the stylus blade (see Figure 4) in the endslot. After insertion, slowly push the stylus forward and pry the cover up toremove.. Using the other end of the stylus, insert the tip into the holes on the undersideof the body mold. Insert the tip perpendicular into the battery removal holeson the bottom of the base housing to push the batteries out (see Figure 4).3. Insert two batteries as shown in Figure 4 (also diagrammed on the floor of thebattery compartment).4. Replace the battery cover.CAUTIONCheck to be sure that the batteries are installed correctly.Incorrect installation could cause severe damage to theelectronics and void the Warranty.Page
Setup-++ -Figure 4 Replacing BatteriesPage 10
CalibrationCalibration ProcedureThe Tono Pen <strong>XL</strong> unit is internally calibrated, thus the instrument calibration shouldbe checked only before the first use each day or in the event of unanticipatedreadings. Calibration must be routinely and successfully performed once daily priorto instrument use. Calibration should also be performed whenever it is indicated bythe LCD display, when batteries are replaced, or after an unsuccessful calibration. Itis not necessary to check calibration prior to each use:1..3.4.5.6..Point the transducer end of the <strong>TONO</strong>-<strong>PEN</strong> straight down towards the floor(see Figure 5a).Depress the Operator’s Button two times rapidly. The time between the firstand second button press must be between 0.5 and 1.5 seconds. The <strong>TONO</strong>-<strong>PEN</strong> will “beep” and display [CAL].Wait approximately 15 seconds for the <strong>TONO</strong>-<strong>PEN</strong> to “beep”. The display willchange from [CAL] to [UP].Immediately (within 1 second) invert the <strong>TONO</strong>-<strong>PEN</strong> smoothly, pointing thetransducer end straight up (see Figure 5b).A properly functioning <strong>TONO</strong>-<strong>PEN</strong> will display [Good] followed by a “beep”.Repeat this Calibration Procedure if [bAd] is displayed.After Good is displayed, depress the Operator’s Button one time and the<strong>TONO</strong>-<strong>PEN</strong> will display [8.8.8.8], followed by a single row of dashes, [- - - -],and then by a double row of dashes [====] followed by a “beep” tone, indicatingthe instrument is ready to measure IOP (Depressing the activation buttona second time will interrupt this process and send the unit to calibrationmode).Figure 5aFigure 5bPage 11
CalibrationUnsuccessful CalibrationIf several consecutive attempts at checking the calibration are unsuccessful:Loosen or remove the Ocu-Film Tip Cover from the <strong>TONO</strong>-<strong>PEN</strong> <strong>XL</strong> probe tip andrepeat the calibration check.If still unsuccessful:Spray the probe tip with compressed gas, and repeat the calibration check.If still unsuccessful:Replace the batteries and repeat the calibration check.Note: If [CAL] appears followed by a row of four dashes [- - - -], the unit did not go intocalibration mode. To correct this, depress the button quicker two times or slower twotimes (see step 2 of calibration procedure).Note: Do not take measurements with the instrument if two consecutive [good] calibrationchecks cannot be obtained. The instrument will not take a measurement when the priorcalibration check was [bAd].Note: If the <strong>TONO</strong>-<strong>PEN</strong> <strong>XL</strong> fails to yield a [Good] calibration, call Reichert TechnicalService.Page 12
Taking a MeasurementInstrument PreparationPrior to using the <strong>TONO</strong>-<strong>PEN</strong> <strong>XL</strong> for IOP measurement prepare the instrumentaccording to the instructions below:1..3.4.5.6.Allow the instrument to thermally stabilize at room temperature (72-82° F, 22- 28° C) for approximately 30 minutes prior to use.Remove the Ocu-Film Tip Cover from the probe. Visually inspect thetonometer’s probe tip for cracks, chips or other irregularities. If irregularitiesare present, contact Reichert. Do not use the instrument.If the probe tip passes a visual inspection, proceed.To help prevent build-up of debris around the probe post, spray the probe tipwith compressed gas before the first use of the day.Cover the <strong>TONO</strong>-<strong>PEN</strong> <strong>XL</strong> probe tip with a new Ocu-Film Tip Cover. ReichertOcu-Film Tip Covers are:• Individually wrapped and non-sterile sanitized• For Single Use onlyPerform daily routine calibration (See page 11)Note: Calibration should only be performed on the <strong>TONO</strong>-<strong>PEN</strong> once daily, unless otherwiseindicated by the instrument. The <strong>TONO</strong>-<strong>PEN</strong> does not require calibration after everypatient examination.CAUTIONDo not use the instrument without an Ocu-Film Tip Cover. Use without an Ocu-FilmTip Cover will damage the instrument and void the Warranty.Performing IOP MeasurementsAfter the <strong>TONO</strong>-<strong>PEN</strong> <strong>XL</strong> has been prepared for operation, the patient must beprepared and then IOP measurements can be performed.CAUTIONOcu-Film contains natural rubber LATEX which may cause allergic reactions.Question patients about allergies to Latex before examining them with the <strong>TONO</strong>-<strong>PEN</strong> <strong>XL</strong>.To prepare a patient for an IOP measurement:1. Instill a drop of topical anesthetic onto the eye to be examined.. Position the patient, seated or supine, in front of a fixation target; or have thepatient fixate on a point of reference (i.e. ear, nose, distant object) to minimizeeye movement.Note: The <strong>TONO</strong>-<strong>PEN</strong> <strong>XL</strong> unit will function in any stable position.Page 13
Taking a MeasurementTo perform an IOP measurement:1. Instruct the patient to look straight ahead at the fixation target with his/hereyes fully open.. Hold the <strong>TONO</strong>-<strong>PEN</strong> <strong>XL</strong> unit as you would a pencil.3. Position yourself to facilitate viewing of the probe tip and patient’s corneawhere contact will be made. For normal corneas, central corneal contact isrecommended.4. Brace the heel of your hand on the patient’s cheek for stability while holdingthe <strong>TONO</strong>-<strong>PEN</strong> <strong>XL</strong> unit perpendicular to and within 1/2 inch of the patient’scornea. (See Figure 6 for correct positioning.)CorrectIncorrect5.6..8.9.Figure 6 Corneal ApplanationTo initiate an IOP measurement, depress the Operator’s Button once, andonly once.Initially you will see a brief display of [8.8.8.8]. This is a self-test of the LCD(Liquid Crystal Display). If any of the LCD segments are not displayed, the<strong>TONO</strong>-<strong>PEN</strong> requires service.If a momentary display of [CAL] is seen, followed immediately by a single rowof dashes [- - - -], it indicates that the <strong>TONO</strong>-<strong>PEN</strong> requires calibration beforeit will measure.If a double row of dashes [====] is seen and a “beep” tone is heard, itindicates that the <strong>TONO</strong>-<strong>PEN</strong> is ready to measure IOP. Proceed withapplanation within 15 seconds.Note: After acquiring the double row of dashes [====], if more than 15seconds elapses prior to applanation, the <strong>TONO</strong>-<strong>PEN</strong> will not measure. Thesoftware will have initiated a battery-saving function, indicated initially by thedisplay of a single row of dashes [- - - -], then followed in sequence by a blankdisplay [ ]. A new IOP measurement can be initiated by depressing theoperator’s button once.Page 14
Taking a MeasurementNote: Anytime the operator’s button is depressed twice within 1.5 seconds, (whichmay be caused by operator’s inadvertent pressure on the button) the software willinterpret this as a demand for calibration. Then a sustained display of [CAL] will beseen which initiates the calibration sequence. The calibration sequence must besuccessfully completed before further measurements can be accomplished.10.11.1.Once activated, after [====] is displayed and a “beep” tone is heard, touch the<strong>TONO</strong>-<strong>PEN</strong> <strong>XL</strong> unit to the cornea lightly and briefly, then withdraw. Repeatseveral times. The corneal surface needs only to be momentarily contacted;indentation is not required and may lead to inaccurate readings.A chirp will sound and a digital IOP measurement will be displayed each timea valid reading is obtained. The single horizontal bar at the bottom of theLCD, indicating statistical reliability, will not be displayed with each single IOPmeasurement.After four (4) valid readings are obtained, a final beep will sound and theaveraged measurement will appear on the LCD along with the single bardenoting statistical reliability.Note: If a single row of dashes [- - - -] appears on the LCD after the final beep, aninsufficient number of valid readings was collected. If this occurs, repeat thepatient examination procedure, starting at step 1.13.To take another measurement, reactivate the <strong>TONO</strong>-<strong>PEN</strong> <strong>XL</strong> unit by pressingand releasing the activation switch as described in step 5.Note: If not reactivated within 25 seconds, the <strong>TONO</strong>-<strong>PEN</strong> <strong>XL</strong> unit will automaticallyturn off and the LCD will clear, placing the device in sleep mode, to conservebattery life. If this occurs, activate the Tono Pen <strong>XL</strong> by pressing the Operator’sButton once.14.15.Replace the Ocu-Film Tip Cover before using the <strong>TONO</strong>-<strong>PEN</strong> <strong>XL</strong> unit onanother patient and before storage.Note: Failure to replace the Ocu-Film Tip Cover between patients may resultin unreliable readings of IOP by allowing debris to enter the transducerassembly.Note: A reused Ocu-Film Tip Cover may leak. This may cause damage to the straingauge and void the Warranty.Page 15
Interpreting the LCDThe number display represents IOP in millimeters of mercury (mmHg.) A number witha single horizontal bar displayed at the bottom of the LCD is an average of the validmeasurements. A number without the single bar is a single measurement of IOP.(See Figure 7).The display of one of four horizontal barslocated along the lower border of the LCDblock indicates the statistical reliability of theaveraged measurement. For example, if the 5%bar is displayed, the standard deviation of thevalid measurements is 5% or less of the numbershown.If the reliability measure is 20% or > 20%, arepeat measurement is recommended.A single row of dashes [- - - -] indicates that theinstrument is activated.Two rows of dashes [====] followed by a “beep”indicates that the instrument is ready to takemeasurements.“CAL” indicates that the instrument is in theprocess of calibration check or the instrumentneeds to undergo calibration check procedure.If “CAL” is displayed following a long beep and“- - - -”, the latter is the case. A “Good” calibrationcheck must be obtained.Figure 7 LCD(Single Measurement)“Lob” indicates the need to replace both batteries priorto using the instrument.“UP” indicates that the instrument is being calibrated and the probe tip should beturned from pointing down to pointing up.“Good” indicates the calibration check procedure was successful. After two “Good”calibration checks, the <strong>TONO</strong>-<strong>PEN</strong> <strong>XL</strong> unit is ready for use in patient examinations.“bAd” indicates the calibration check procedure was unsuccessful and must berepeated.Page 16
Maintenance & StorageInstrument Storage1. Cover the probe tip with an Ocu-Film Tip Cover for protection.. If the <strong>TONO</strong>-<strong>PEN</strong> <strong>XL</strong> unit is not to be used until a subsequent day, theinstrument and accessories should be replaced in the storage case provided.3. If the <strong>TONO</strong>-<strong>PEN</strong> <strong>XL</strong> unit is not to be used for an extended period of time,remove the batteries from the instrument.Maintenance ProceduresMaintenance that should be performed on the <strong>TONO</strong>-<strong>PEN</strong> <strong>XL</strong> consists of activitiessuch as protecting the probe tip, keeping surfaces free of dust and dirt and storing ina dry and cool place so as not to adversely affect electronic parts, and replacing thebatteries.Keep the probe tip protected with an Ocu-Film Tip Cover when in use or in storage.Avoid any contact with the probe tip when not protected by an Ocu-Film Tip Cover.The probe post must be cleaned only with optical quality compressed gas before thefirst use each day, before instrument storage, in the event of unanticipated readingsor if a “Good” calibration check cannot be obtained. To clean the probe post:1..3.4.Remove the Ocu-Film Tip Cover.Spray the compressed gas onto the probe tip for approximately 2 seconds.Wait 3 minutes to allow the instrument to thermally stabilize.Cover the <strong>TONO</strong>-<strong>PEN</strong> <strong>XL</strong> unit’s probe tip with a new Ocu-Film Tip Cover.<strong>TONO</strong>-<strong>PEN</strong> <strong>XL</strong> BodyAvoid any shock or excessive vibration which will damage the unit. Clean with a nonabrasive,dry cloth.CAUTIONDO NOT IMMERSE <strong>TONO</strong>-<strong>PEN</strong> <strong>XL</strong> BODY IN FLUIDS. THIS WILL CAUSE DAMAGE TOTHE ELECTRONICS AND VOID THE WARRANTY.Battery ReplacementThe batteries need replacing when multiple beeps sound and “Lob” appears on theLCD upon depressing the activation switch. Occasionally, a noticeable slowing in thecalibration check process or in activating the instrument for taking measurementsmay suggest that the batteries need replacing. Always replace both batteries. Do notmix used and new batteries in the instrument. Reichert OCU-CEL <strong>XL</strong> batteries arerecommended.Note: The instrument will not function properly when mercury batteries are used.Page 17
Maintenance & StorageReplace the batteries using the procedure described on page 9. If the instrument isnot to be operated for an extended period of time, remove both batteries. This willavoid possible damage to the instrument due to battery leakageAttachment ScrewThe attachment screw, located on the underside of the instrument, is used to protectthe sensitive electronics against intrusion and should be removed only by themanufacturer.Note: Removal of the Attachment Screw will void the warranty.SpecificationsDimensions 1/4” X 1” X 7/8”WeightRange of Measurement59.4g (2.1 oz.)5 - 80 mmHgPower Source 3V Lithium Manganese Dioxide Batteries (QTY 2)SymbolsATTENTION, SEE INSTRUCTIONS FOR USECATALOG NUMBERSNSERIAL NUMBERDATE OF MANUFACTURELOT NUMBERWASTE OF ELECTRICAL AND ELECTRONIC EQUIPMENTSYMBOLS FOR OCU-FILM ONLYDO NOT REUSE. SINGLE USEPage 18USE BY
TroubleshootingOverviewThis section provides a guide for troubleshooting some basic <strong>TONO</strong>-<strong>PEN</strong> <strong>XL</strong>operational problems. If a problem persists after using this guide contact Reicherttechnical service.Table 6-1: <strong>TONO</strong>-<strong>PEN</strong> <strong>XL</strong> Troubleshooting GuideSymptom Probable Cause Correction“Lob” Batteries are displayed Low Batteries Replace batteriesNoticeable slowing in thecalibration check process, inactivating instrumentBatteries are lowCompressed air cleaning haslowered the temperature of theinstrumentReplace batteriesAllow <strong>TONO</strong>-<strong>PEN</strong> <strong>XL</strong> unit to warmto room temperatureMultiple inaccurate readings Improper technique Review “Taking a Measurement”section or watch Instructional DVDNo beeps and/or no dashes uponactivationUnable to obtain “Good’ calibrationcheckOld or improperlyapplied Ocu-Film Tip CoverBatteries are lowNeed to check calibrationDebris around probe postMechanical or electronic damageActivation switch not depressedlong enoughIncorrect battery installationBatteries are lowMechanical or electronic damageImproper techniqueDirty transducerReplace Ocu-Film Tip CoverReplace batteriesPerform calibration checkprocedure (see page 11)Clean with compressed gas (seepage 17 for procedure)Arrange for repair through ReichertTechnical ServiceDepress activationswitch longerCheck batteriesReplace batteriesArrange repair through ReichertTechnical ServiceReview page 11 or watchInstructional DVDClean with compressed gas (seepage 17 for procedure)Page 19
Guidance & Manufacturer’s DeclarationGuidance and manufacturer’s declaration – electromagnetic immunity - PartIThe <strong>TONO</strong>-<strong>PEN</strong> is intended for use in the electromagnetic environment specified below. The customer or the userof the <strong>TONO</strong>-<strong>PEN</strong>® <strong>XL</strong> should assure that it is used in such an environment.Immunity testEN 60601test levelCompliance levelElectromagneticenvironment -guidanceElectrostatic discharge(ESD)EN 61000-4-2±6 kV contact±8 kV air±6 kV contact±8 kV airFloors should be wood,concrete, or ceramic tile.If floors are covered withsynthetic material, therelative humidity shouldbe at least 30 %.Power frequency (50/60Hz) magnetic fieldEN 61000-4-83 A/m 3 A/mPower frequencymagnetic fields shouldbe at levels characteristicof a typical location ina typical commercial orhospital environment.Guidance and manufacturer’s declaration – electromagnetic emissionsThe <strong>TONO</strong>-<strong>PEN</strong> is intended for use in the electromagnetic environment specified below. The customer or the userof the <strong>TONO</strong>-<strong>PEN</strong>® <strong>XL</strong> should assure that it is used in such an environment.EmissionsRF emissionsCISPR 11RF emissionsCISPR 11Harmonic emissionsEN 61000-3-2Voltage fluctuationsEN 61000-3-3ComplianceGroup 1Class BN/AN/AElectromagnetic environment -guidanceThe <strong>TONO</strong>-<strong>PEN</strong>® <strong>XL</strong> uses RF energy only for itsinternal function. Therefore, its RF emissions are verylow and are not likely to cause any interference innearby electronic equipment.The <strong>TONO</strong>-<strong>PEN</strong>® <strong>XL</strong> is suitable for use in allestablishments, including domestic establishmentsand those directly connected to the public low-voltagepower supply network that supplies buildings fordomestic purpose.Page 20
Guidance & Manufacturer’s DeclarationRecommended separation distances between portable and mobile RFcommunications equipment and the <strong>TONO</strong>-<strong>PEN</strong>The <strong>TONO</strong>-<strong>PEN</strong>® <strong>XL</strong> is intended for use in the electromagnetic environment in which radiated RF disturbancesare controlled. The customer or the user of the <strong>TONO</strong>-<strong>PEN</strong>® <strong>XL</strong> can help prevent electromagnetic interferenceby maintaining a minimum distance between portable and mobile RF communications equipment (transmitters)and the <strong>TONO</strong>-<strong>PEN</strong> as recommended below, according to the maximum output power of the communicationsequipment.Rated maximum power oftransmitterWSeparation distance according to frequency of transmitter (meters)150 kHz to80 MHzd = 1.2 √P80 MHz to800 MHzd = 1.2 √P800 MHz to2.5 GHzd = 2.3 √P0.01 0.12 0.12 0.230.1 0.38 0.38 0.731 1.2 1.2 2.310 3.8 3.8 7.3100 12 12 23For transmitters rated at a maximum output power not listed above, the recommended separation distance d inmeters (m) can be estimated using the equation applicable to the frequency of the transmitter, where P is themaximum output power rating of the transmitter in watts (W) according to the transmitter manufacturer.NOTE 1 At 80 MHz and 800 MHz, the separation distance for the higher frequency range applies.NOTE 2 These guidelines may not apply in all situations. Electromagnetic propagation is affected by absorptionand reflection from structures, objects and people.Page 21
Guidance & Manufacturer’s DeclarationGuidance and manufacturer’s declaration – electromagnetic immunity - Part IIThe <strong>TONO</strong>-<strong>PEN</strong>® <strong>XL</strong> is intended for use in the electromagnetic environment specified below. The customer or theuser of the <strong>TONO</strong>-<strong>PEN</strong> should assure that it is used in such an environment.Immunity testEN 60601test levelCompliancelevelElectromagnetic environment - guidancePortable and mobile RF communications equipmentshould be used no closer to any part of the <strong>TONO</strong>-<strong>PEN</strong>, including cables, than the recommendedseparation distance calculated from the equationapplicable to the frequency of the transmitter.Recommended separation distanceConducted RFEN 61000-4-63 Vrms150 kHz to80 MHzN/Ad = 1.2 √PRadiated RFEN 61000-4-33 V/m80 MHz to2.5 GHz3 V/md = 1.2 √P 80 MHz to 800 MHzd = 2.3 √P 800 MHz to 2.5 GHzwhere P is the maximum output power rating of the transmitter in watts (W) according to the transmittermanufacturer and d is the recommended separation distance in meters (m). Field strengths from fixed RFtransmitters, as determined by an electromagnetic site surveys, should be less than the compliance level in eachfrequency range.Interference may occur in the vicinity of equipment marked with the following symbol:NOTE 1 At 80 MHz and 800 MHz, the higher frequency range applies.NOTE 2 These guidelines may not apply in all situations. Electromagnetic propagation is affected by absorptionand reflection from structures, objects and peopleFor transmitter Field strengths from fixed transmitters, such as base stations for radio (cellular/cordless)telephones and land mobile radios, amateur radio, AM and FM radio broadcast and TV broadcast cannot bepredicted theoretically with accuracy. To assess the electromagnetic environment due to fixed RF transmitters,an electromagnetic site survey should be considered. If the measured field strength in the location in which the<strong>TONO</strong>-<strong>PEN</strong> is used exceeds the applicable RF compliance level above, the <strong>TONO</strong>-<strong>PEN</strong>® <strong>XL</strong> should be observedto verify normal operation. If abnormal performance is observed, additional measures may be necessary, such asre-orienting or relocating the <strong>TONO</strong>-<strong>PEN</strong>® <strong>XL</strong>.Over the frequency range 150 kHz to 80 MHz, field strengths should be less than 3 V/m.Page 22
WarrantyThis product is warranted by Reichert, Inc. against defective material and workmanship under normaluse for a period of one year from the date of invoice to the original purchaser. (An authorized dealershall not be considered an original purchaser.) Under this warranty, Reichert’s sole obligation is torepair or replace the defective part or product at Reichert’s discretion.This warranty applies to new products and does not apply to a product that has been tampered with,altered in any way, misused, damaged by accident or negligence, or which has had the serial numberremoved, altered or effaced. Nor shall this warranty be extended to a product installed or operated ina manner not in accordance with the applicable Reichert instruction manual, nor to a product whichhas been sold, serviced, installed or repaired other than by a Reichert factory, Technical ServiceCenter, or authorized Reichert Dealer.Lamps, bulbs, charts, cards and other expendable items are not covered by this warranty.All claims under this warranty must be in writing and directed to the Reichert factory, Technical ServiceCenter, or authorized instrument dealer making the original sale and must be accompanied by acopy of the purchaser’s invoice.This warranty is in lieu of all other warranties implied or expressed. All implied warranties of merchantabilityor fitness for a particular use are hereby disclaimed. No representative or other personis authorized to make any other obligations for Reichert. Reichert shall not be liable for any special,incidental, or consequent damages for any negligence, breach of warranty, strict liability or any otherdamages resulting from or relating to design, manufacture, sale, use or handling of the product.PATENT WARRANTYIf notified promptly in writing of any action brought against the purchaser based on a claim thatthe instrument infringes a U.S. Patent, Reichert will defend such action at its expense and will paycosts and damages awarded in any such action, provided that Reichert shall have sole control of thedefense of any such action with information and assistance (at Reichert’s expense) for such defense,and of all negotiation for the settlement and compromise thereof.PRODUCT CHANGESReichert reserves the right to make changes in design or to make additions to or improvements in itsproducts without obligation to add such to products previously manufactured.Customer Service1-800-<strong>TONO</strong>-<strong>PEN</strong>www.tono-pen.comTechnical Support1-888-849-8955Fax: 716-686-4545Page 23
Reichert, Inc.3362 Walden Ave.Depew, NY 14043USAwww.reichert.com68E3441 REV C